 🌹🥀🌹🥀🌹🥀🌹🥀🌹🥀🌹
Saludos gente bella y maravillosa de hive espero todos la estén pasando bien, el día de hoy regreso a esta comunidad que me ha abierto las puertas y en la que me he sentido a gusto y como pez en el agua, pues aquí puedo desarrollar un poco las artes manuales que tanto disfruto, una comunidad donde la creatividad está a la orden del día.
Greetings beautiful and wonderful people of hive I hope everyone is having a good time, today I return to this community that has opened its doors to me and in which I have felt at ease and like a fish in water, because here I can develop a little manual arts that I enjoy so much, a community where creativity is the order of the day.
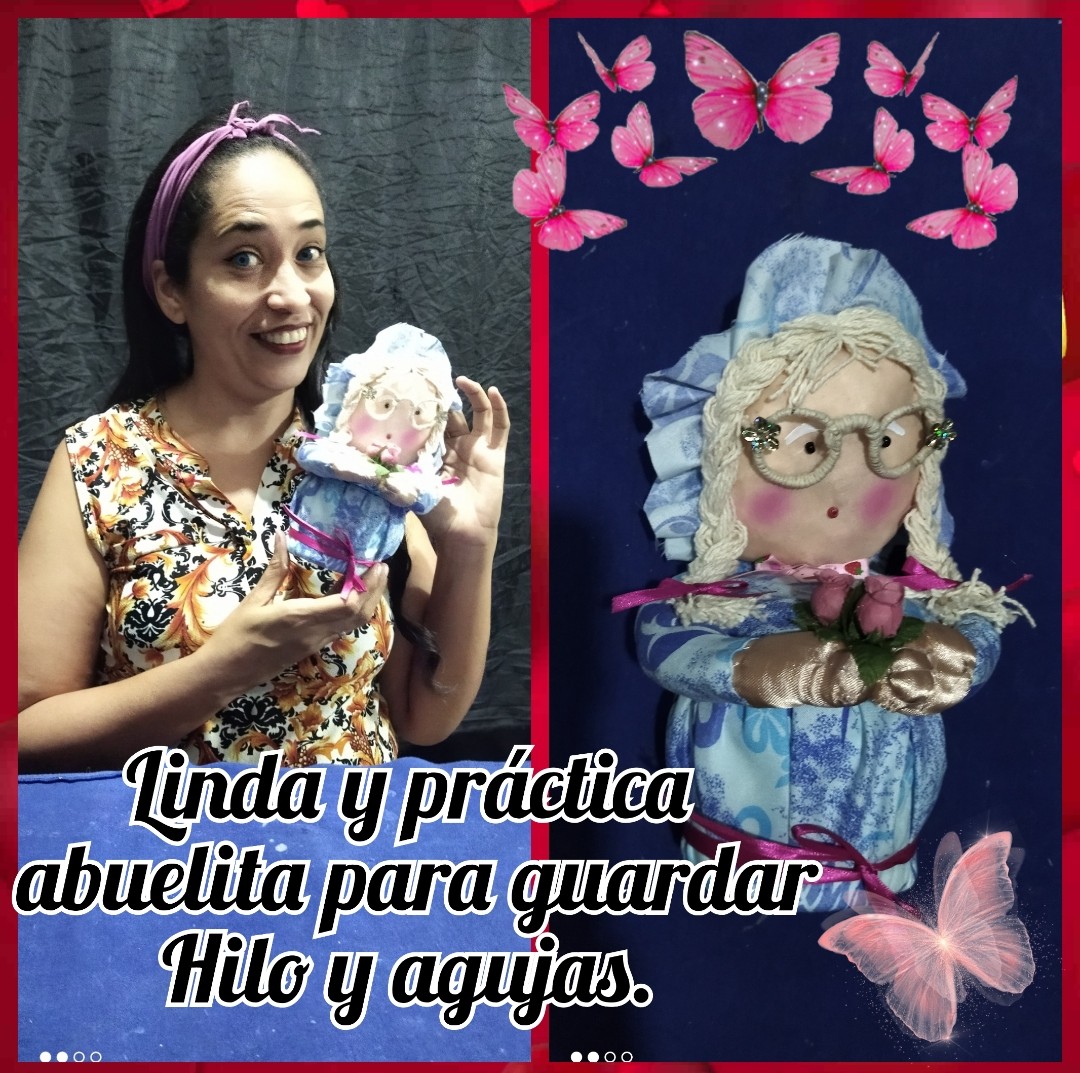
Hoy les traje un tutorial de la elaboración de un hermoso porta hilo y agujas, con una temática de abuelita, que me quedó bellísimo eso sin contar lo tierno que se ve, y lo relajante que fue, así que sin más mi hermosas abejitas aquí les dejo el paso a paso de la elaboración, lo hice de manera muy explicativa y sencilla, así que sin más manos a la obra.
Today I brought you a tutorial of the elaboration of a beautiful needle and thread holder, with a granny theme, that was beautiful, not to mention how tender it looks, and how relaxing it was, so without further ado my beautiful little bees here I leave you the step by step of the elaboration, I did it in a very explanatory and simple way, so without further ado, let's get to work.
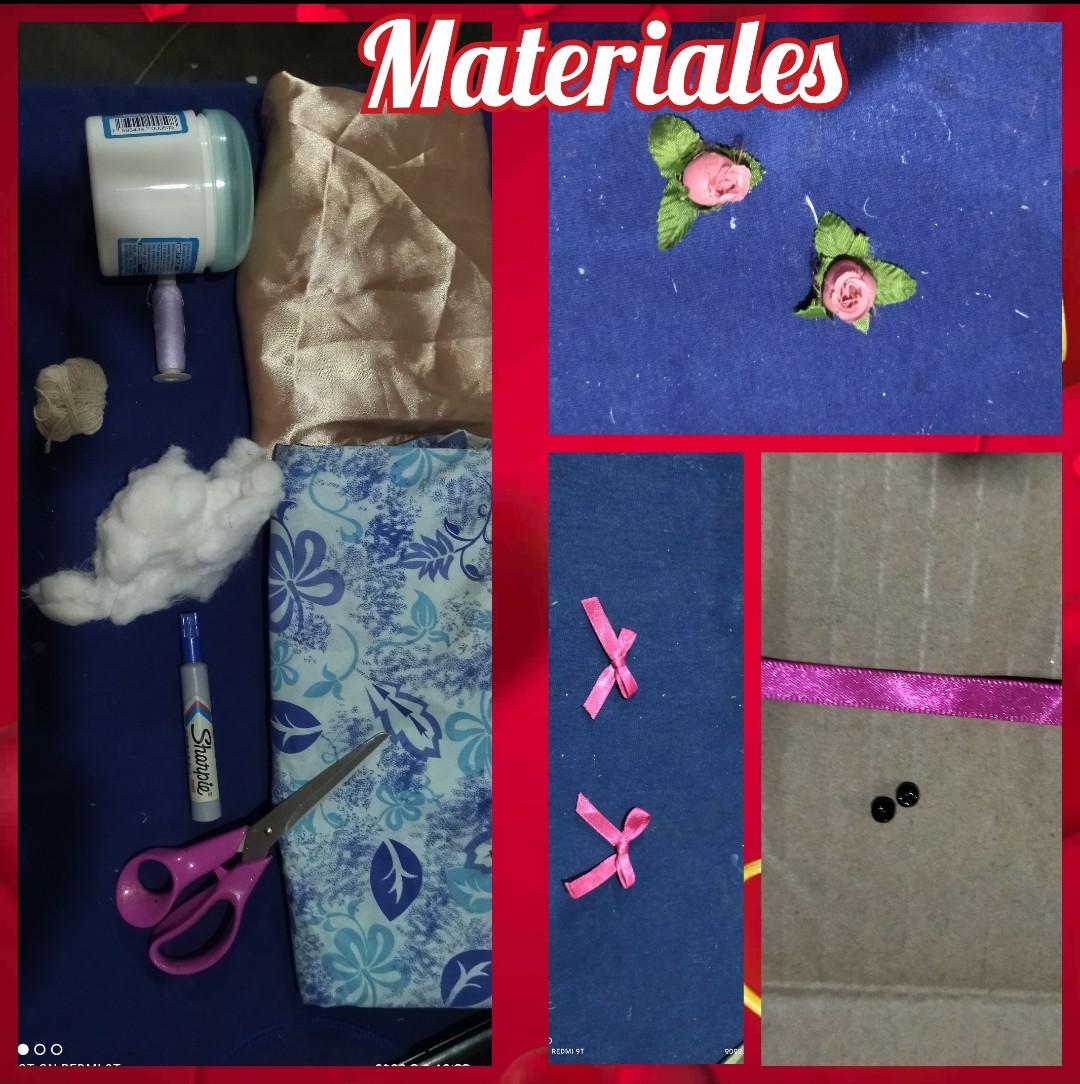
MATERIALES//MATERIALS.
🌹🥀🌹🥀🌹🥀🌹🥀🌹🥀🌹
🌹Tela color piel y tela de cualquier estampado.//Leather-colored fabric and fabric of any pattern.
🌹Relleno.//Filling.
🌹Tijera.//Scissors.
🌹 Aguja e hilo.//Needle and thread.
🌹 Silicón frío.//Cold silicone.
🌹 Mostacilla roja y negra.//Red and black mustard.
🌹Hilo pabilo.//Pabilo thread.
🌹 Marcador.//Marker.
🌹 Flores.//Flowers.
🌹 Lazos de cinta delgada.//Thin ribbon ties.
🌹Un embase plástico.//A plastic container.
🌹 Pintura blanca.//White paint.
🌹 Alambre.//Wire.
 🌹🥀🌹🥀🌹🥀🌹🥀🌹🥀🌹
PASO A PASO // STEP BY STEP
🌹🥀🌹🥀🌹🥀🌹🥀🌹🥀🌹
PASO 1// STEP 1
🌹🥀🌹🥀🌹🥀🌹🥀🌹🥀🌹
🌹🥀🌹🥀🌹🥀🌹🥀🌹🥀🌹
PASO A PASO // STEP BY STEP
🌹🥀🌹🥀🌹🥀🌹🥀🌹🥀🌹
PASO 1// STEP 1
🌹🥀🌹🥀🌹🥀🌹🥀🌹🥀🌹
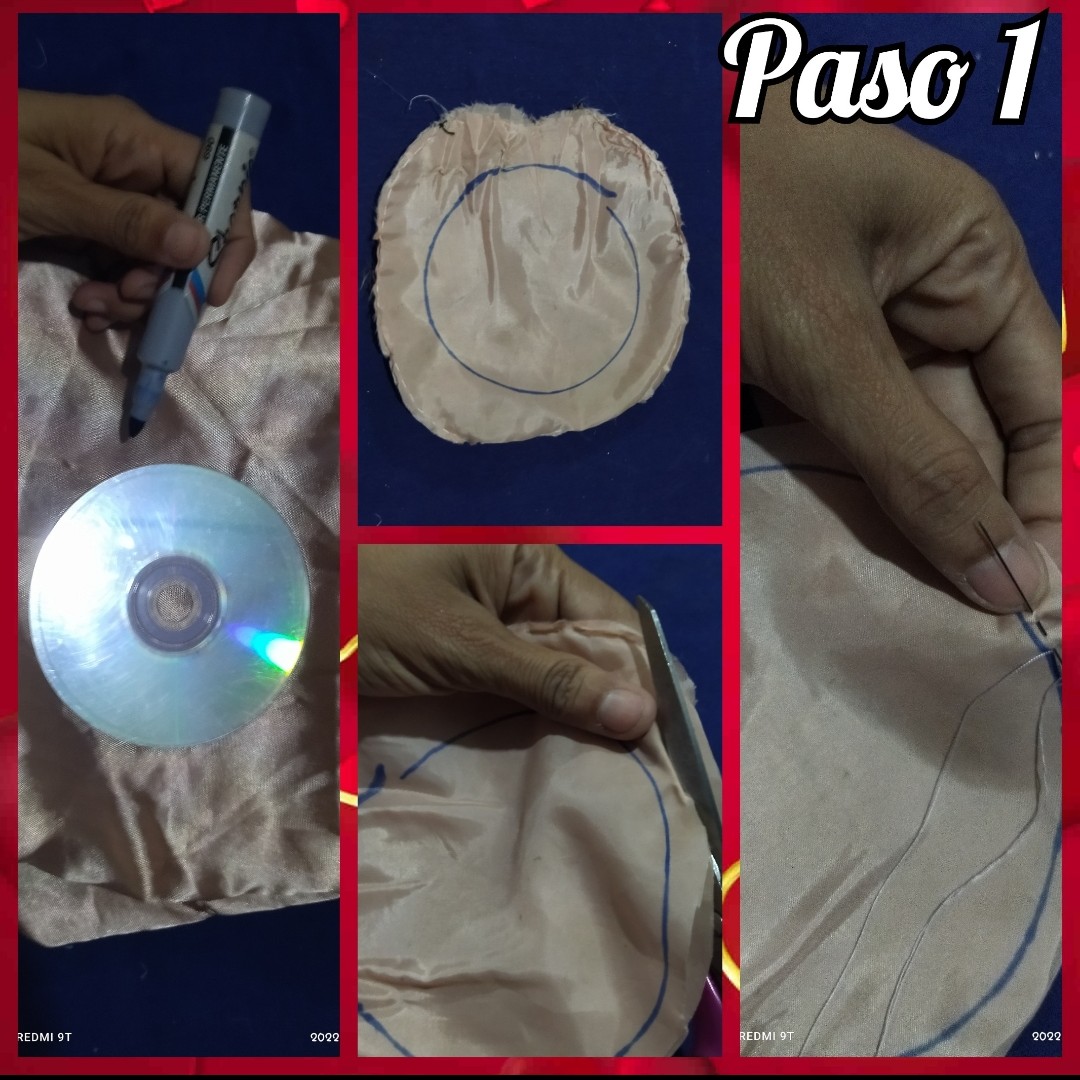
Primero tomamos la tela color piel y con ayuda de un cd viejo y el marcador, dibujamos lo que será el rostro de la abuelita Cruz, debemos dejar una pequeña distancia por si la tela se hilacha en sus orillas, pero si la tela no tiene problema cortamos por dónde se marcó inicialmente, recuerden son dos piezas que vamos a cortar.
First we take the skin colored fabric and with the help of an old CD and the marker, we draw what will be the face of Grandma Cruz, we must leave a small distance in case the fabric is spun on its edges, but if the fabric has no problem we cut where it was initially marked, remember there are two pieces that we are going to cut.
El tamaño del rostro es decir del círculo depende del tamaño del embase que tengamos.
The size of the face, i.e. the circle, depends on the size of the container we have.
 🌹🥀🌹🥀🌹🥀🌹🥀🌹🥀🌹
PASO 2 // STEP 2
🌹🥀🌹🥀🌹🥀🌹🥀🌹🥀🌹
🌹🥀🌹🥀🌹🥀🌹🥀🌹🥀🌹
PASO 2 // STEP 2
🌹🥀🌹🥀🌹🥀🌹🥀🌹🥀🌹
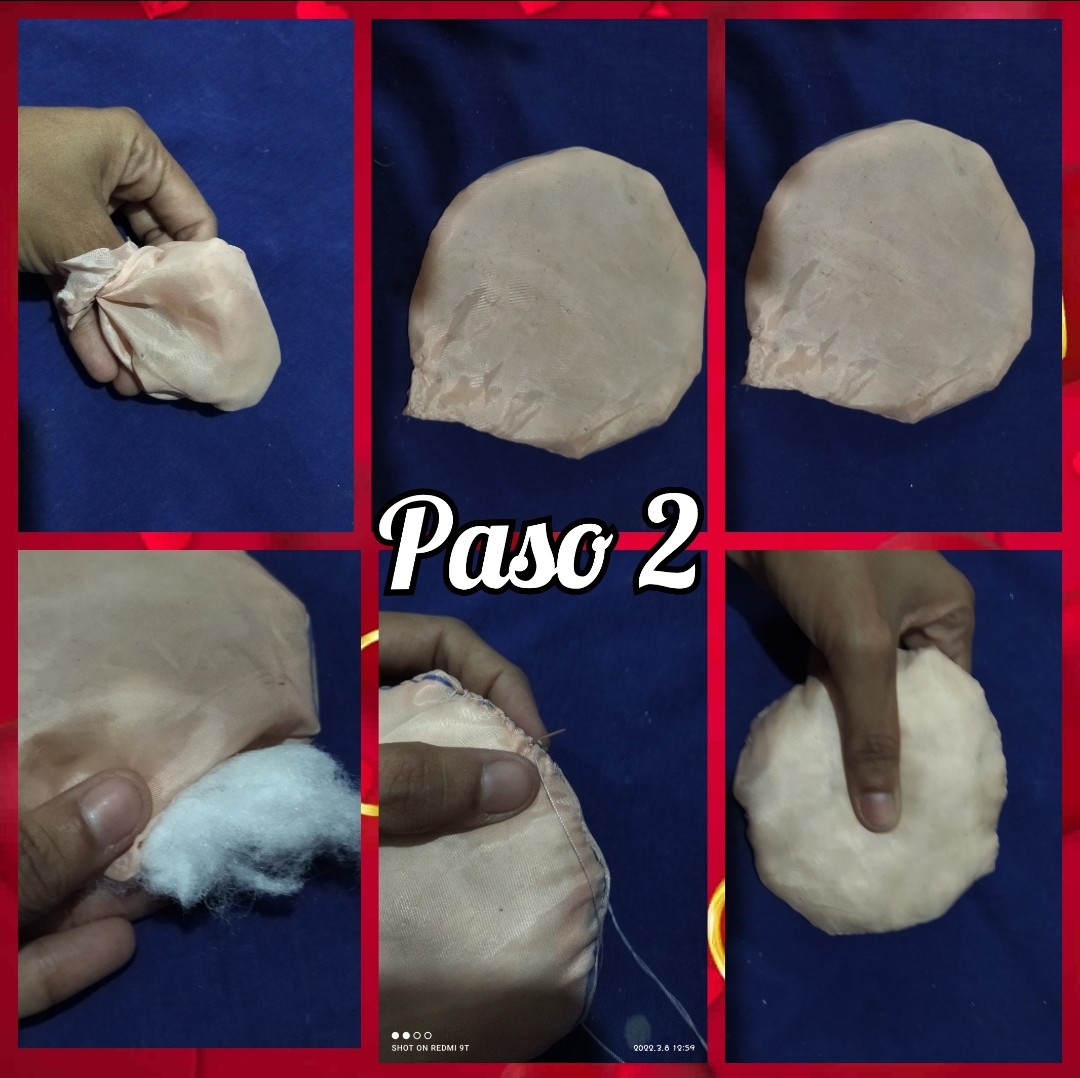
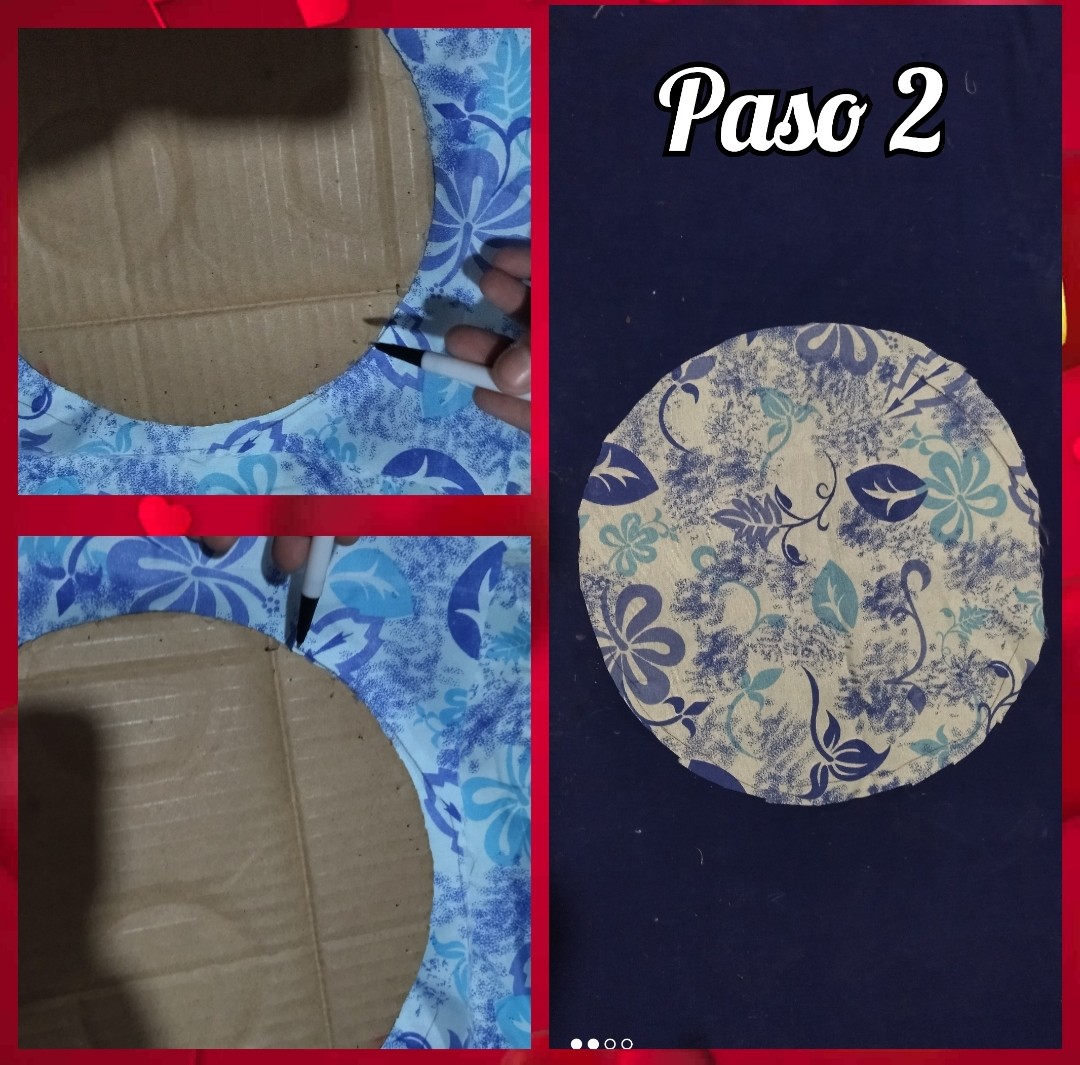
Con la aguja e hilo cocimos por toda la orilla procurando que nos quede la forma redonda de la carita, al terminar de coser le dejamos un espacio abierto, por el que vamos a voltear la pieza.
With the needle and thread we sew all around the edge trying to get the round shape of the face, when we finish sewing we leave an open space, where we are going to turn the piece.
Una vez volteada vamos a tomar el relleno y comenzamos a meterlo por el agujero, procurando que quede bien compacto para que no le queden grumos que nos valla a dañar el trabajo, recuerden que es el rostro y debe quedar bien lindo, cuando terminemos de rellenar cerramos el agujero con una pequeña costura.
Once turned over we will take the filling and begin to put it through the hole, making sure it is well compacted so that there are no lumps that will damage the work, remember that it is the face and should be very nice, when we finish filling we close the hole with a small seam.
 🌹🥀🌹🥀🌹🥀🌹🥀🌹🥀🌹
Luego en la otra tela que tenemos marcamos un círculo grande lo suficientemente grande que cubra nuestro envase al igual que la tapa, por lo que sacaremos tres piezas del mismo tamaño, que vamos a utilizar más adelante.
Then on the other fabric we have we mark a large circle big enough to cover our container as well as the lid, so we will get three pieces of the same size, which we will use later.
 🌹🥀🌹🥀🌹🥀🌹🥀🌹🥀🌹
PASO 3 // STEP 3
🌹🥀🌹🥀🌹🥀🌹🥀🌹🥀🌹
🌹🥀🌹🥀🌹🥀🌹🥀🌹🥀🌹
PASO 3 // STEP 3
🌹🥀🌹🥀🌹🥀🌹🥀🌹🥀🌹
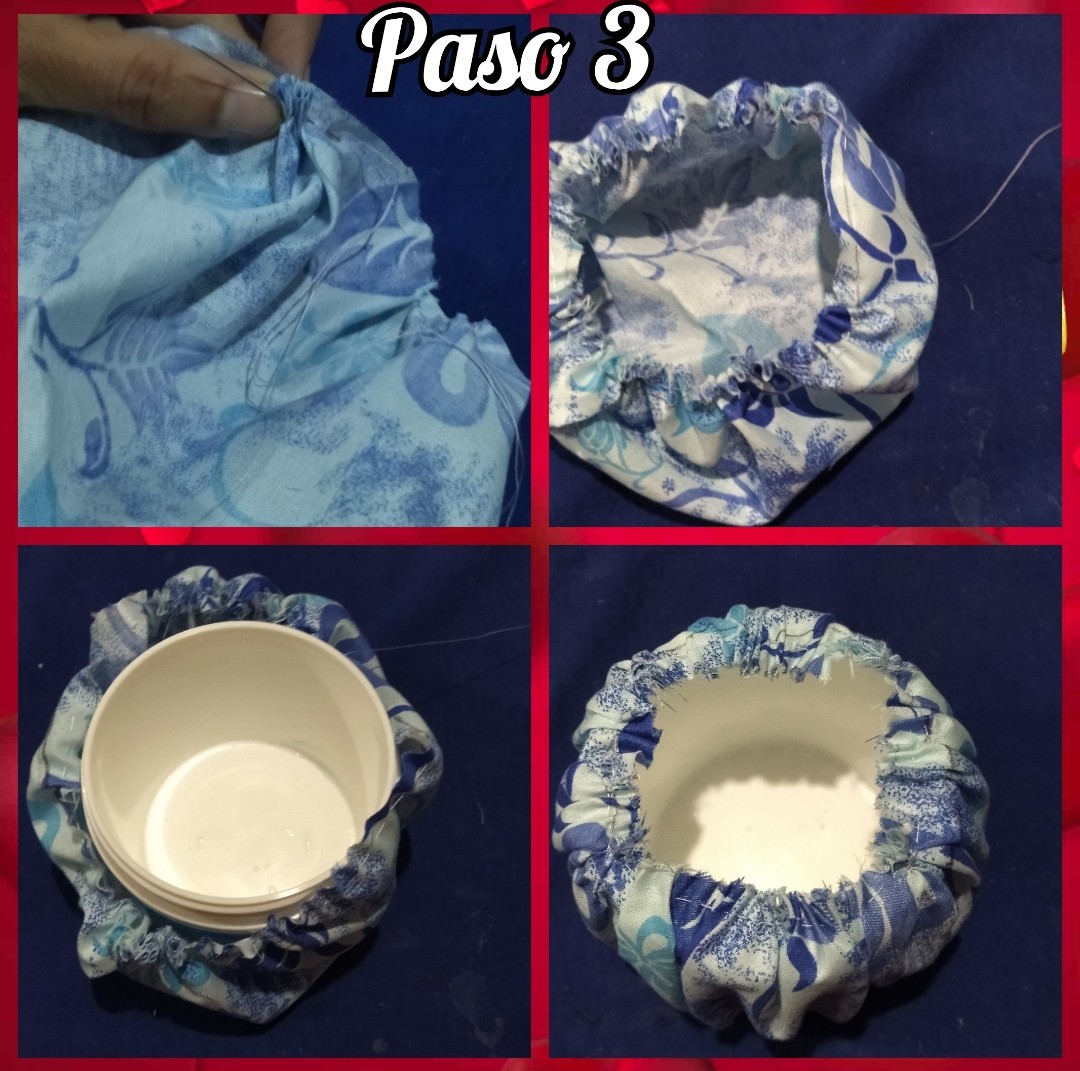
Luego tomamos aguja e hilo y cocimos la orilla y lo que queda es arrucharlo, cuando terminamos de hacerlo metemos el envase y ajustamos bien, luego aseguramos con una costura bien pequeña.
Then we take needle and thread and we sew the edge and what is left is to ruffle it, when we finish doing it we put the container in and adjust it well, then we secure it with a very small seam.
 🌹🥀🌹🥀🌹🥀🌹🥀🌹🥀🌹
PASO 4 // STEP 4
🌹🥀🌹🥀🌹🥀🌹🥀🌹🥀🌹
🌹🥀🌹🥀🌹🥀🌹🥀🌹🥀🌹
PASO 4 // STEP 4
🌹🥀🌹🥀🌹🥀🌹🥀🌹🥀🌹
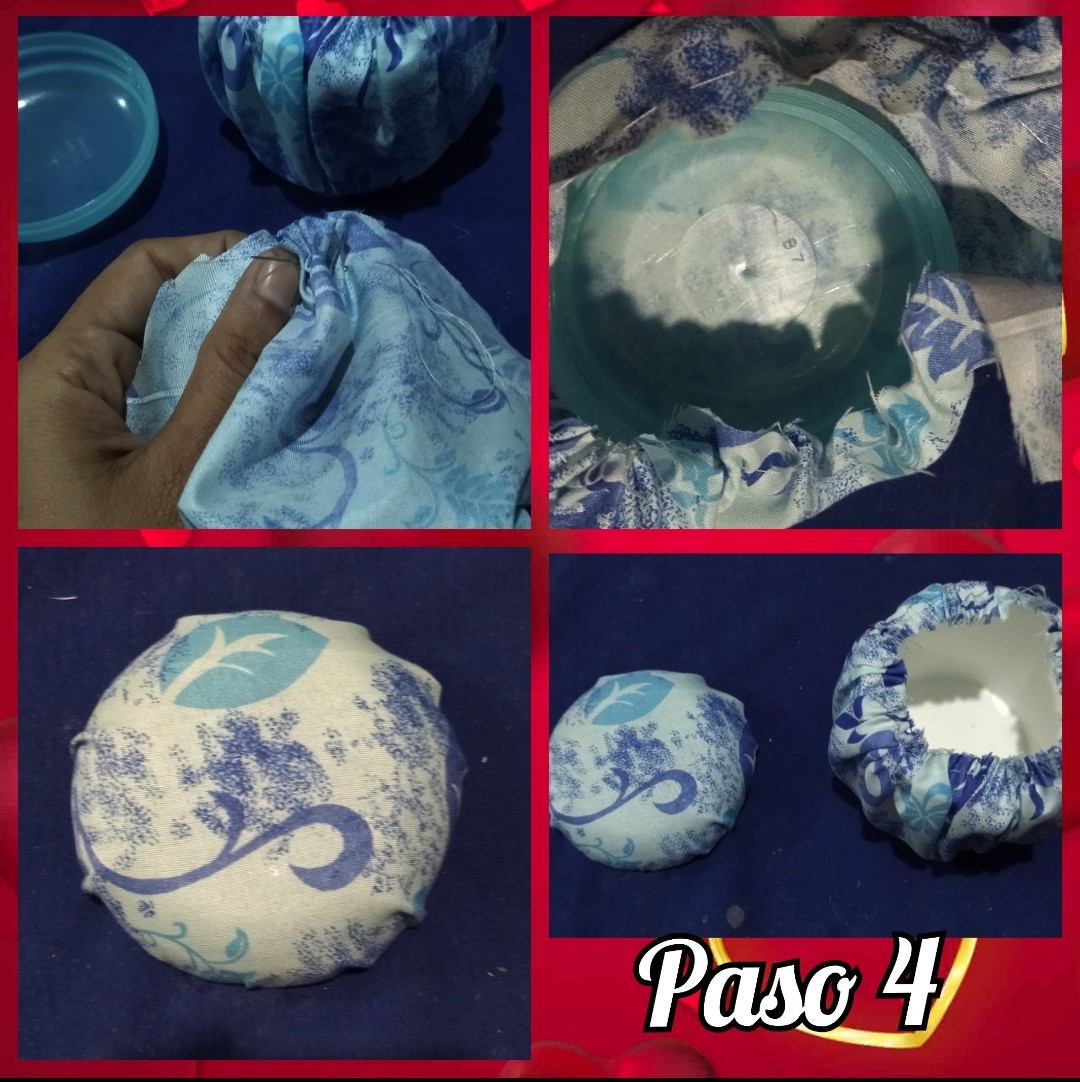
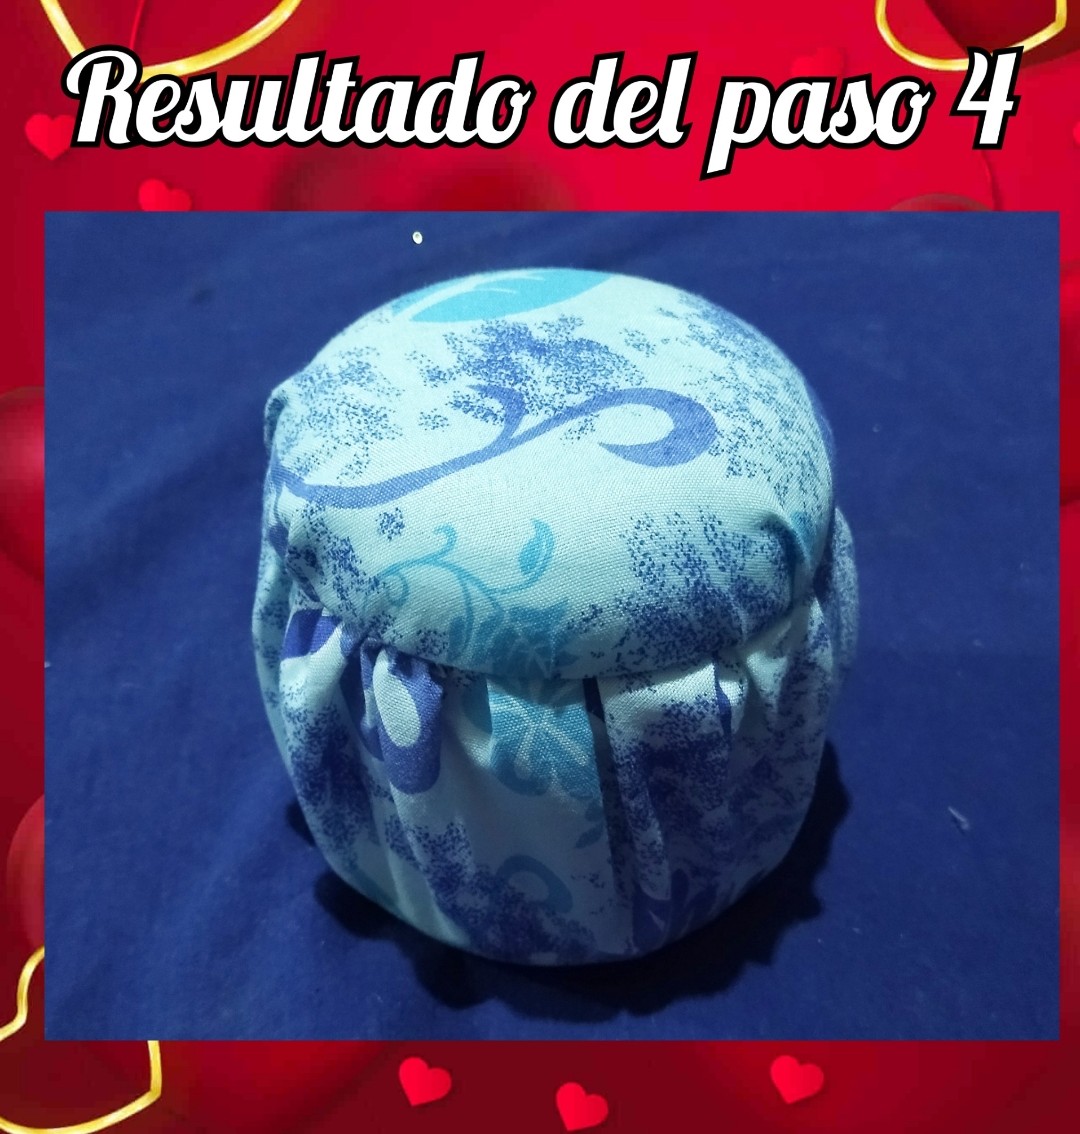
Aquí en este paso hice exactamente lo último del paso anterior, le hice una costura por toda la orilla a la tela, introducimos la tapa luego lo ajustamos.
Here in this step I did exactly the last of the previous step, I made a seam all around the edge of the fabric, we introduce the cover and then we adjust it.
 🌹🥀🌹🥀🌹🥀🌹🥀🌹🥀🌹
 🌹🥀🌹🥀🌹🥀🌹🥀🌹🥀🌹
PASO 5 // STEP 5
🌹🥀🌹🥀🌹🥀🌹🥀🌹🥀🌹
🌹🥀🌹🥀🌹🥀🌹🥀🌹🥀🌹
PASO 5 // STEP 5
🌹🥀🌹🥀🌹🥀🌹🥀🌹🥀🌹
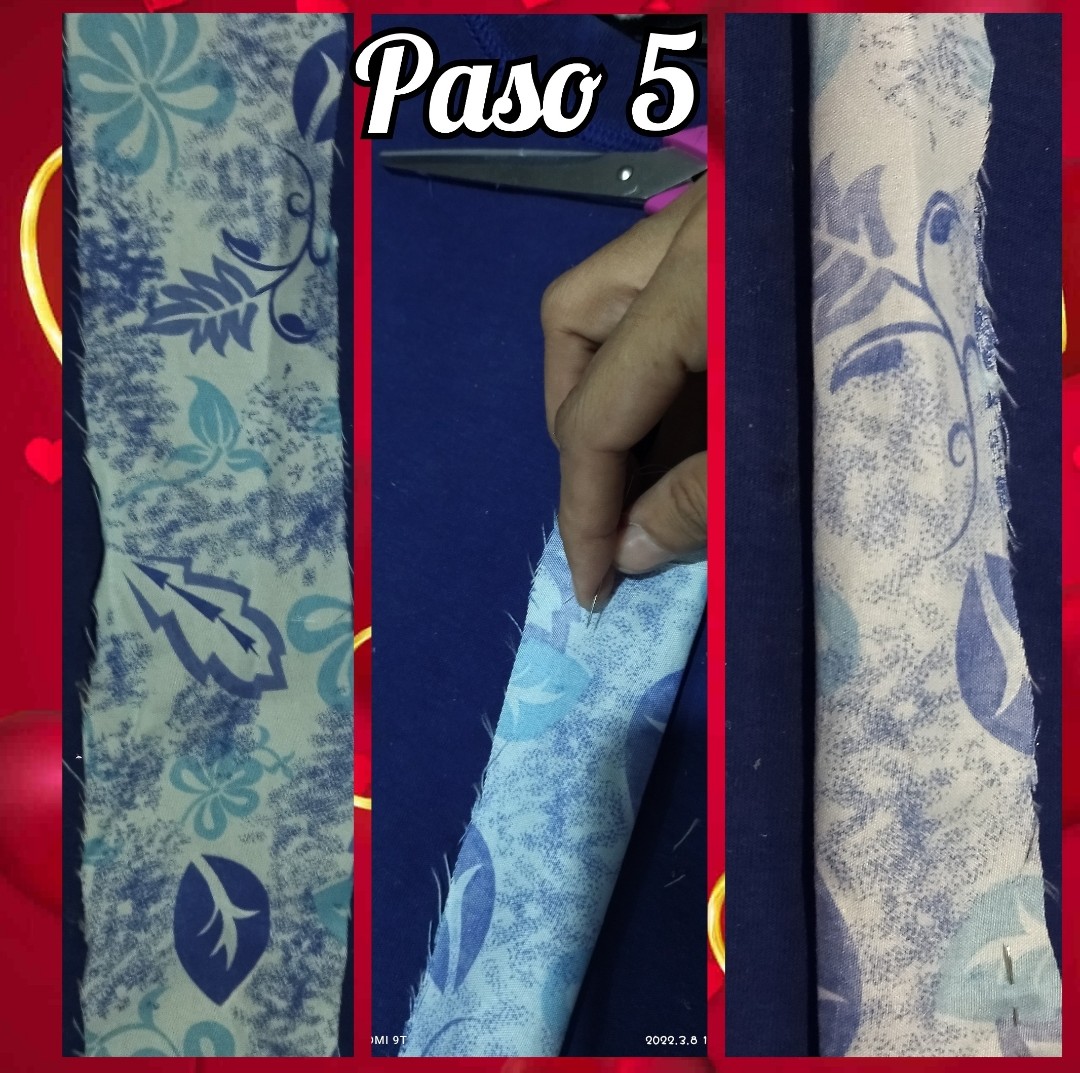
Tomamos una tira de aproximadamente unos 10 cm de ancho y el largo lo sacamos midiendo al rededor del embase que utilizamos, lo recortamos y cocemos por toda la orilla sin cerrar los extremos, al terminar le damos vuelta.
We take a strip of approximately 10 cm wide and the length we take it by measuring around the container we use, we cut it and cook along the edge without closing the ends, when we finish we turn it over.
 🌹🥀🌹🥀🌹🥀🌹🥀🌹🥀🌹
PASO 6 // STEP 6
🌹🥀🌹🥀🌹🥀🌹🥀🌹🥀🌹
🌹🥀🌹🥀🌹🥀🌹🥀🌹🥀🌹
PASO 6 // STEP 6
🌹🥀🌹🥀🌹🥀🌹🥀🌹🥀🌹
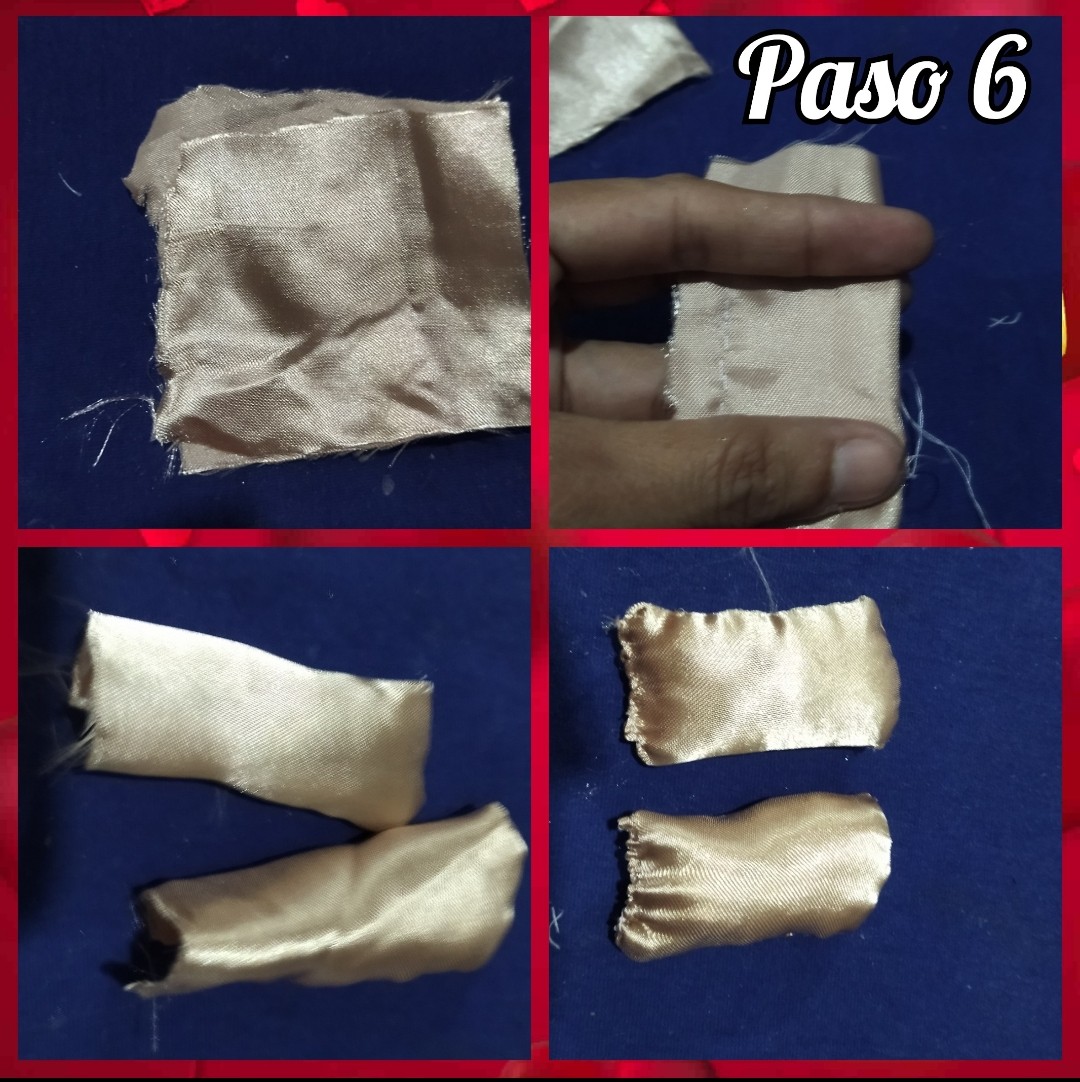
Después tomamos dos cuadritos de tela color piel de aproximadamente unos 7 cm de largo y 7 de ancho cocemos igualmente por la orilla pero vamos a procurar darle la forma redonda en la punta ya que esto lo vamos a utilizar como las manitos de abuelita Cruz.
Then we take two squares of skin-colored fabric of approximately 7 cm long and 7 cm wide, we bake the same on the edge but we will try to give it a round shape at the tip since we are going to use it as the little hands of Grandma Cruz.
Al terminar de coser volteamos y rellenamos con algodón de relleno y sellamos.
At the end of sewing we turn over and stuff with cotton stuffing and seal.
 🌹🥀🌹🥀🌹🥀🌹🥀🌹🥀🌹
PASO 7 // STEP 7
🌹🥀🌹🥀🌹🥀🌹🥀🌹🥀🌹
🌹🥀🌹🥀🌹🥀🌹🥀🌹🥀🌹
PASO 7 // STEP 7
🌹🥀🌹🥀🌹🥀🌹🥀🌹🥀🌹
Tomamos la tira que cocimos previamente y rellenamos con algodón, eso sí dejando un espacio donde meteremos el cuadrito de color piel para formar de esta manera los brazos y manos de la abuelita.
We take the strip that we previously cooked and fill it with cotton, leaving a space where we will put the skin-colored square to form the arms and hands of the grandmother.
 🌹🥀🌹🥀🌹🥀🌹🥀🌹🥀🌹
PASO 8 // STEP 8
🌹🥀🌹🥀🌹🥀🌹🥀🌹🥀🌹
🌹🥀🌹🥀🌹🥀🌹🥀🌹🥀🌹
PASO 8 // STEP 8
🌹🥀🌹🥀🌹🥀🌹🥀🌹🥀🌹
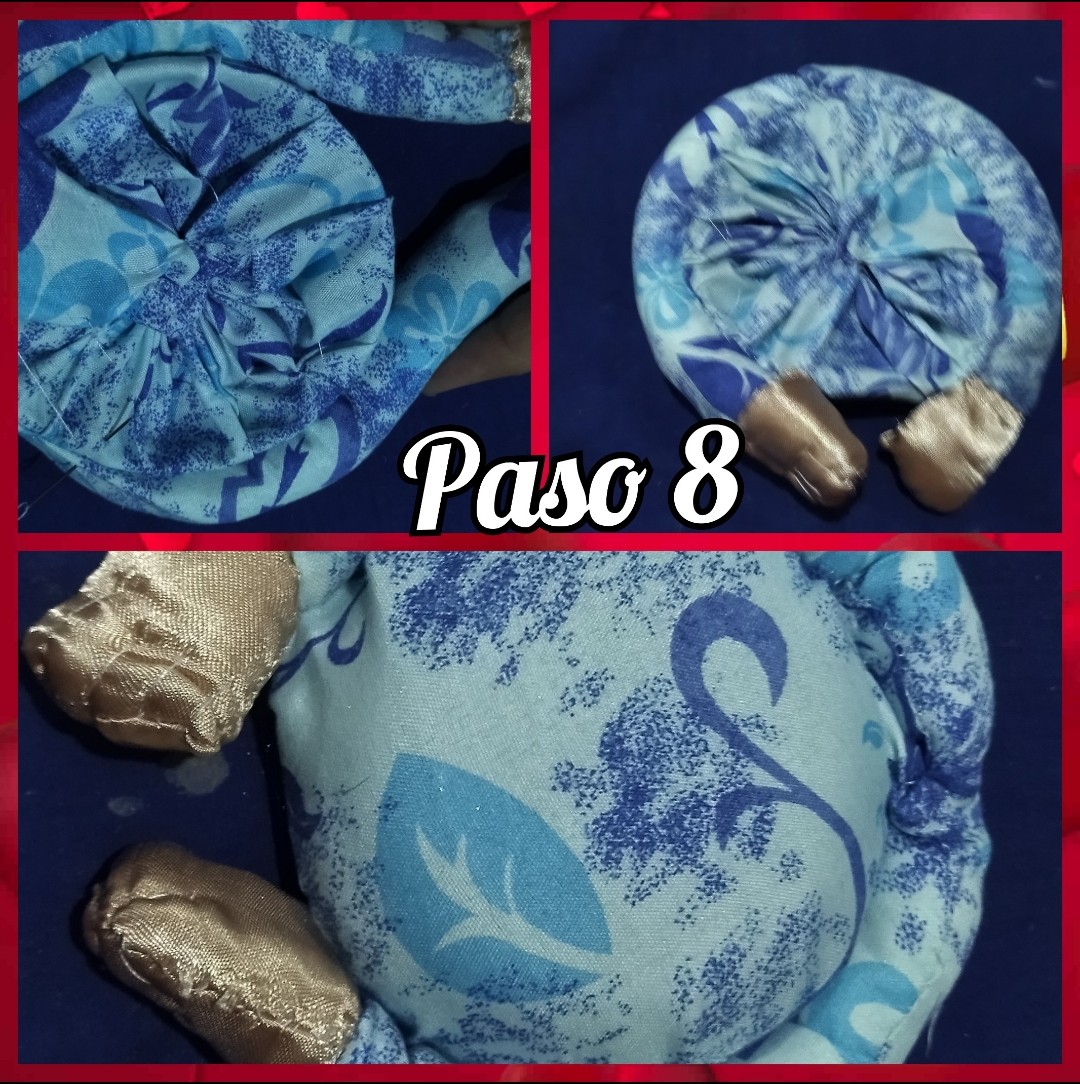
Una vez formado los brazos de la abuela con sus manitos, la vamos a pegar de la tapa, algunos lo hacen con el silicón pero a mí no me gusta mucho pues en algunas ocasiones pueden manchar y afectar el trabajo, en cambio a mi me gusta trabajar con aguja e hilo, de esta manera se trabaja mejor y más limpio.
Once the grandmother's arms are formed with her little hands, we are going to glue it to the lid, some people do it with silicone but I don't like it very much because sometimes it can stain and affect the work, instead I like to work with needle and thread, this way it works better and cleaner.
 🌹🥀🌹🥀🌹🥀🌹🥀🌹🥀🌹
PASO 9 // STEP 9
🌹🥀🌹🥀🌹🥀🌹🥀🌹🥀🌹
🌹🥀🌹🥀🌹🥀🌹🥀🌹🥀🌹
PASO 9 // STEP 9
🌹🥀🌹🥀🌹🥀🌹🥀🌹🥀🌹
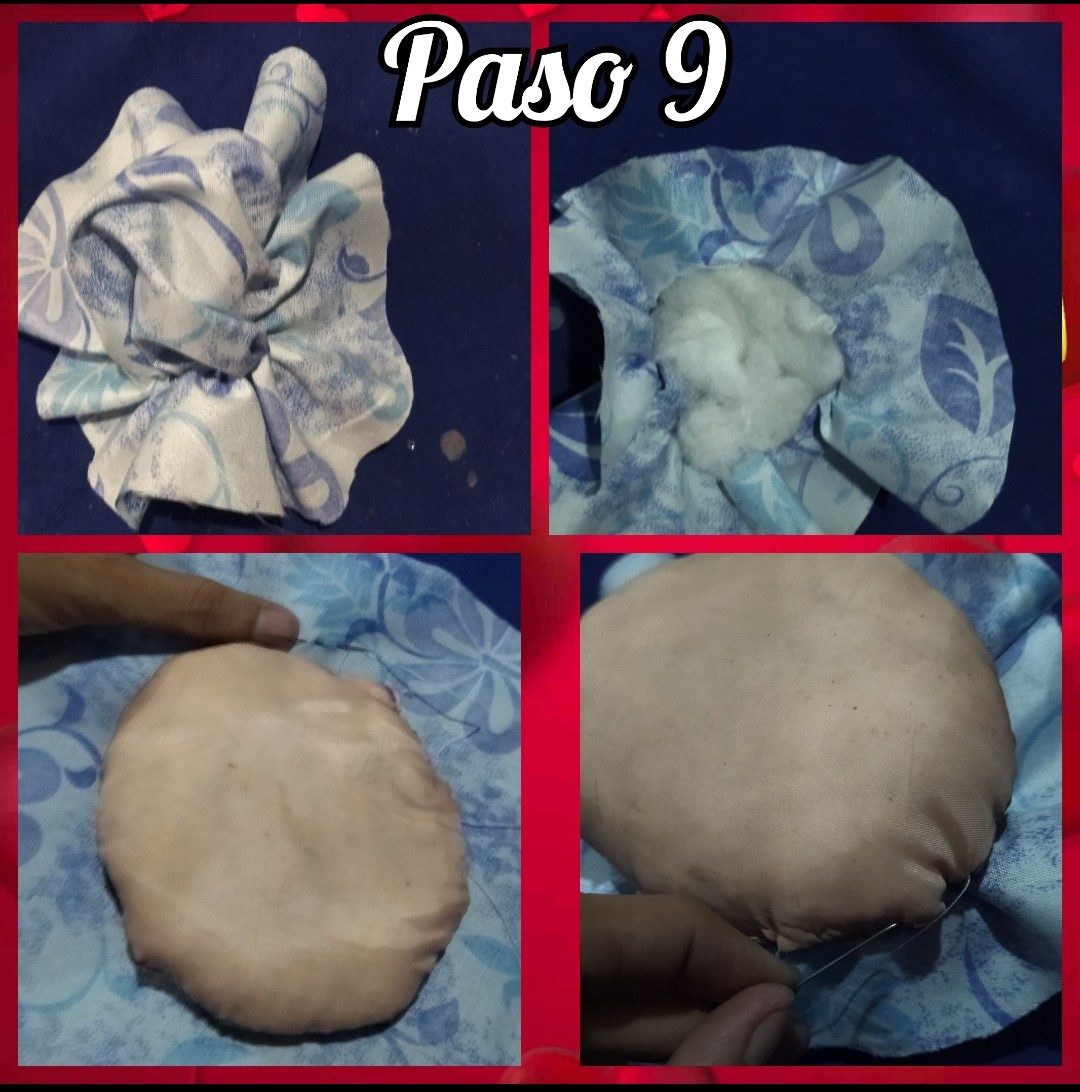
Vamos a tomar uno de los tres círculos de tela que sacamos en el paso número 2, pero a este le vamos a realizar la costura en el centro, debemos formar un pequeño círculo el cuál vamos a rellenar con un poco de algodón de relleno y luego ya si le vamos a ir pegando la carita de la tela que viene a ser el sombrero de la abuelita.
We are going to take one of the three circles of fabric that we took out in step number 2, but we are going to make the seam in the center, we must form a small circle which we are going to fill with a little cotton stuffing and then we are going to glue the face of the fabric which is going to be the grandmother's hat.
 🌹🥀🌹🥀🌹🥀🌹🥀🌹🥀🌹
PASO 10 // STEP 10
🌹🥀🌹🥀🌹🥀🌹🥀🌹🥀🌹
🌹🥀🌹🥀🌹🥀🌹🥀🌹🥀🌹
PASO 10 // STEP 10
🌹🥀🌹🥀🌹🥀🌹🥀🌹🥀🌹
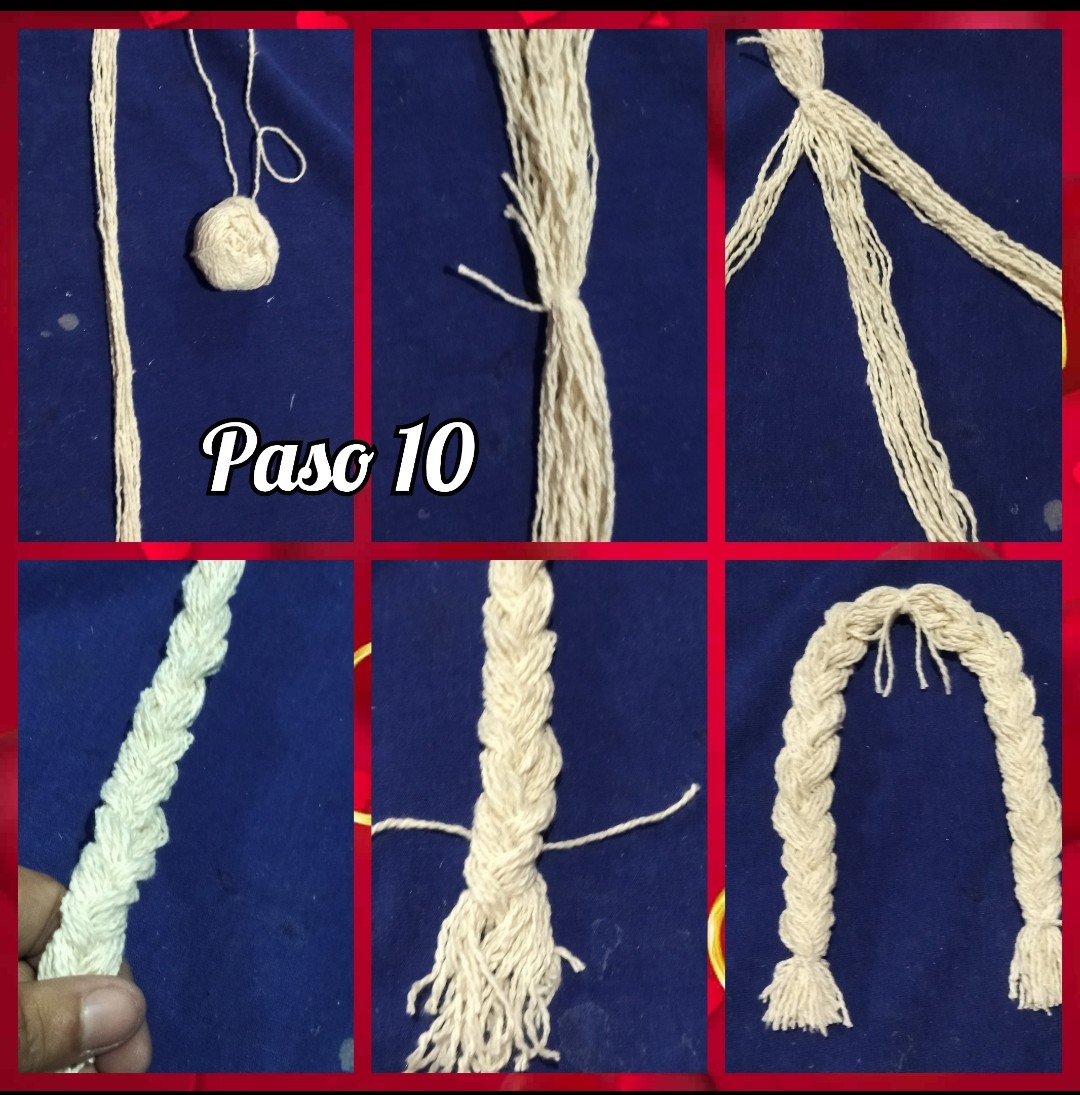
En este paso vamos a tomar el hilo pabilo y medimos en el rostro de la abuelita el largo que vamos a hacer los moñitos,una vez medidos vamos a ir colocando muchas hileras hasta formar un grupo grueso, el cuál vamos a dividir en dos y amarramos al centro.
In this step we are going to take the wick thread and measure on the grandmother's face the length that we are going to make the little bows, once measured we are going to place many rows until we form a thick group, which we are going to divide in two and tie in the center.
Cuando ya está amarrado, tomamos la tijera y cortamos las puntas, luego tejemos de ambos lado, de esta forma estamos elaborando el cabello de la abuelita Cruz.
When it is already tied, we take the scissors and cut the ends, then we weave on both sides, in this way we are making the hair of Grandma Cruz.
 🌹🥀🌹🥀🌹🥀🌹🥀🌹🥀🌹
PASO 11// STEP 11
🌹🥀🌹🥀🌹🥀🌹🥀🌹🥀🌹
🌹🥀🌹🥀🌹🥀🌹🥀🌹🥀🌹
PASO 11// STEP 11
🌹🥀🌹🥀🌹🥀🌹🥀🌹🥀🌹
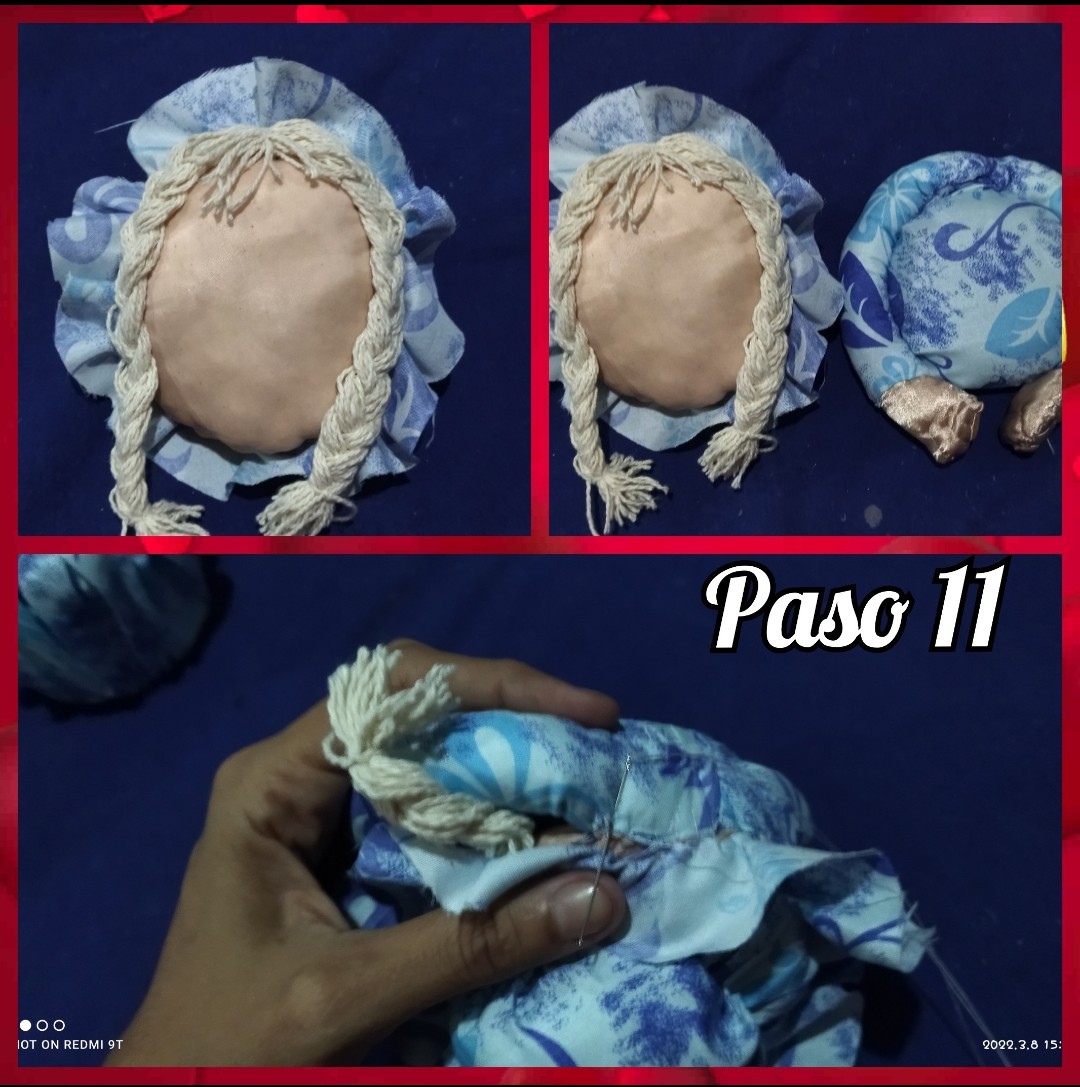
Sobre ponemos el cabello en el rostro de la abuelita y lo vamos a ir pegando poco a poco, asegurandonos que quede bien fijado. En este paso se puede utilizar Silicón yo igualmente utilice aguja e hilo para pegarlo.
We put the hair on the grandmother's face and we are going to glue it little by little, making sure that it is well fixed. In this step you can use Silicone, I also used needle and thread to glue it.
 🌹🥀🌹🥀🌹🥀🌹🥀🌹🥀🌹
 🌹🥀🌹🥀🌹🥀🌹🥀🌹🥀🌹
PASO 12 // STEP 12
🌹🥀🌹🥀🌹🥀🌹🥀🌹🥀🌹
🌹🥀🌹🥀🌹🥀🌹🥀🌹🥀🌹
PASO 12 // STEP 12
🌹🥀🌹🥀🌹🥀🌹🥀🌹🥀🌹
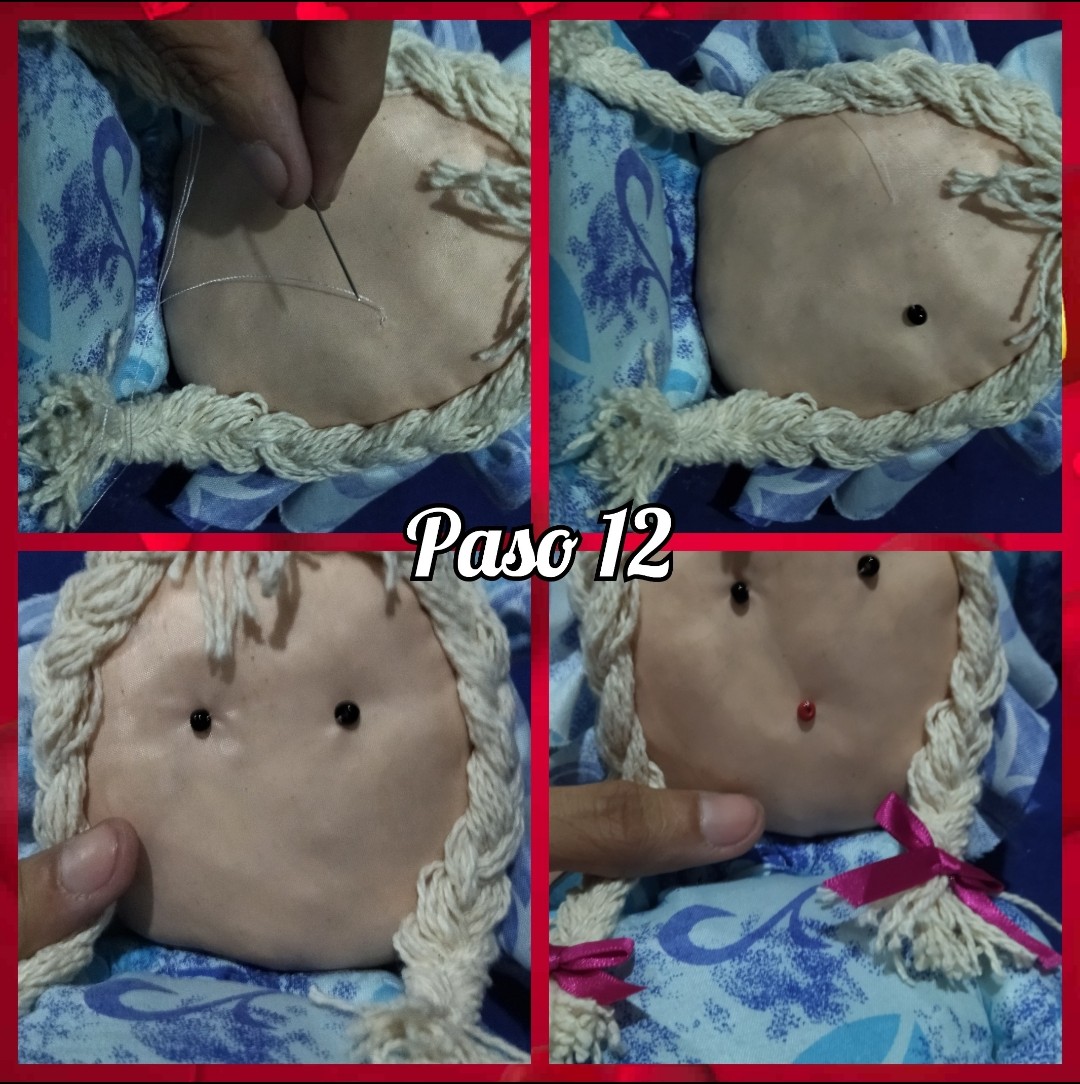
Aquí vamos a comenzar a darle forma al rostro de la muñeca, por lo que vamos a tomar las mostacillas negras y la colocaremos como si fuesen los ojitos de la muñeca, y luego tomamos la mostacilla roja y la colocamos como la boca de la abuelita, es bien fácil realizar este paso.
Here we are going to start shaping the doll's face, so we are going to take the black beads and place them as if they were the doll's eyes, and then we take the red beads and place them as the grandmother's mouth, it is very easy to do this step.
 🌹🥀🌹🥀🌹🥀🌹🥀🌹🥀🌹
PASO 13 // STEP 13
🌹🥀🌹🥀🌹🥀🌹🥀🌹🥀🌹
🌹🥀🌹🥀🌹🥀🌹🥀🌹🥀🌹
PASO 13 // STEP 13
🌹🥀🌹🥀🌹🥀🌹🥀🌹🥀🌹
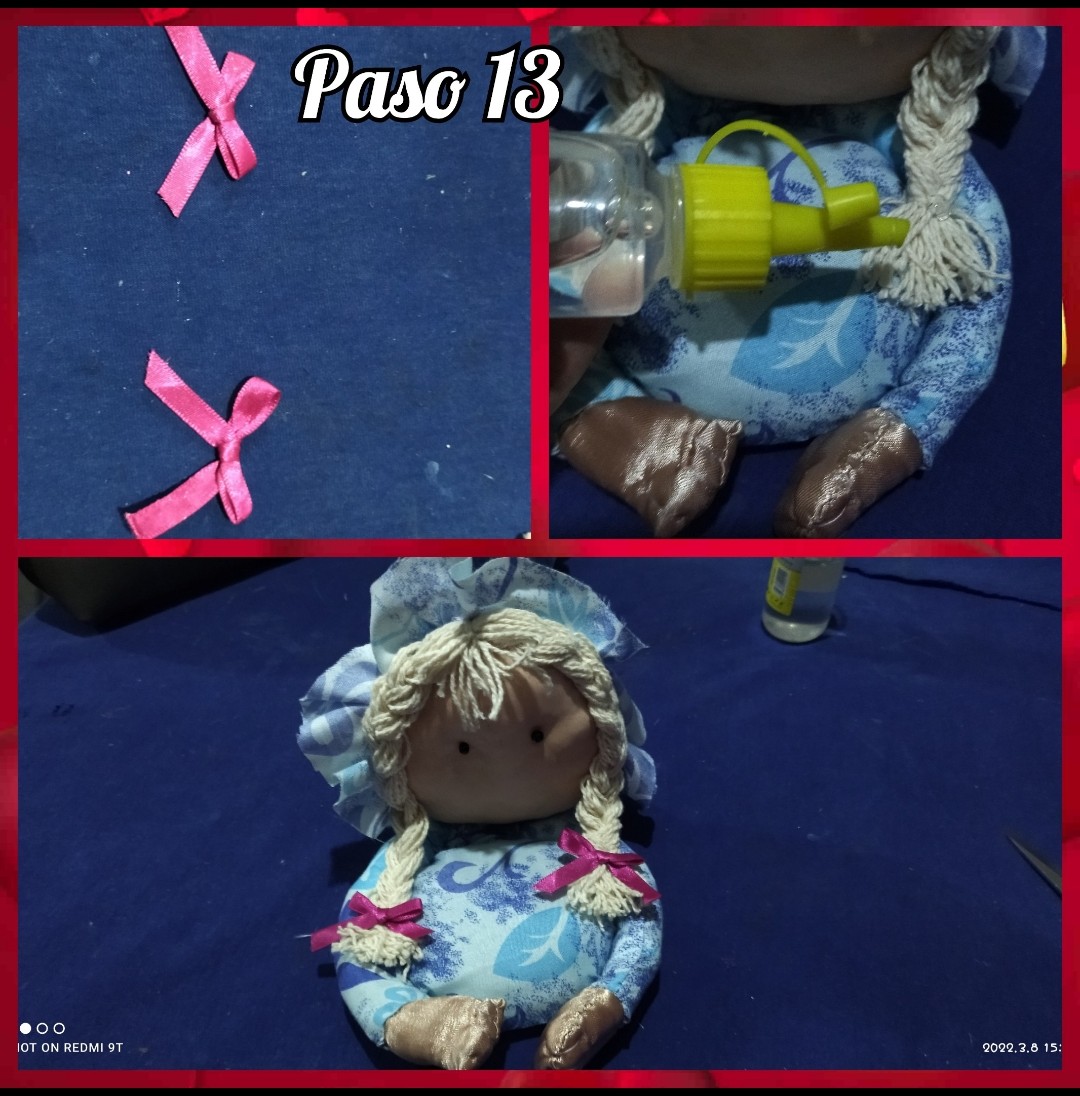
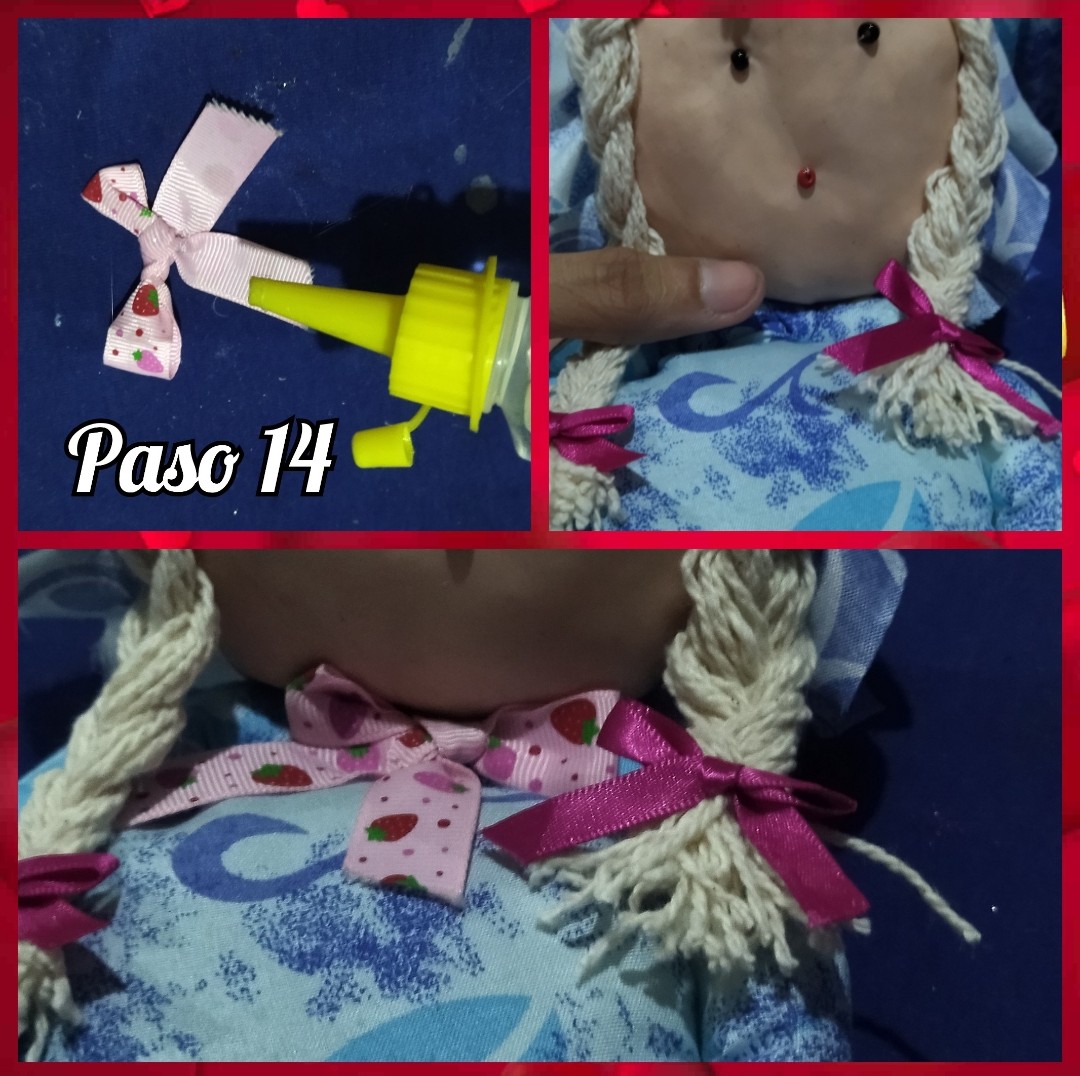
Cómo ya tenemos unos lacitos que hicimos previamente, vamos a colocarlos en los extremos de los moños, así que coloque un poquito de silicón y pegamos los lazos.
Since we already have some bows that we made previously, we are going to place them at the ends of the bows, so we put a little bit of silicone and glue the ribbons.
 🌹🥀🌹🥀🌹🥀🌹🥀🌹🥀🌹
PASO 14 // STEP 14
🌹🥀🌹🥀🌹🥀🌹🥀🌹🥀🌹
🌹🥀🌹🥀🌹🥀🌹🥀🌹🥀🌹
PASO 14 // STEP 14
🌹🥀🌹🥀🌹🥀🌹🥀🌹🥀🌹
Cómo me gusta cuidar todos los detalles, tome otro lacito y con un poco de silicón frío lo pegué en el cuello de la muñeca, de esta manera vamos dándole forma al trabajo.
As I like to take care of all the details, I took another bow and with some cold silicone I glued it on the neck of the doll, in this way we are giving shape to the work.
 🌹🥀🌹🥀🌹🥀🌹🥀🌹🥀🌹
PASO 15 // STEP 15
🌹🥀🌹🥀🌹🥀🌹🥀🌹🥀🌹
🌹🥀🌹🥀🌹🥀🌹🥀🌹🥀🌹
PASO 15 // STEP 15
🌹🥀🌹🥀🌹🥀🌹🥀🌹🥀🌹
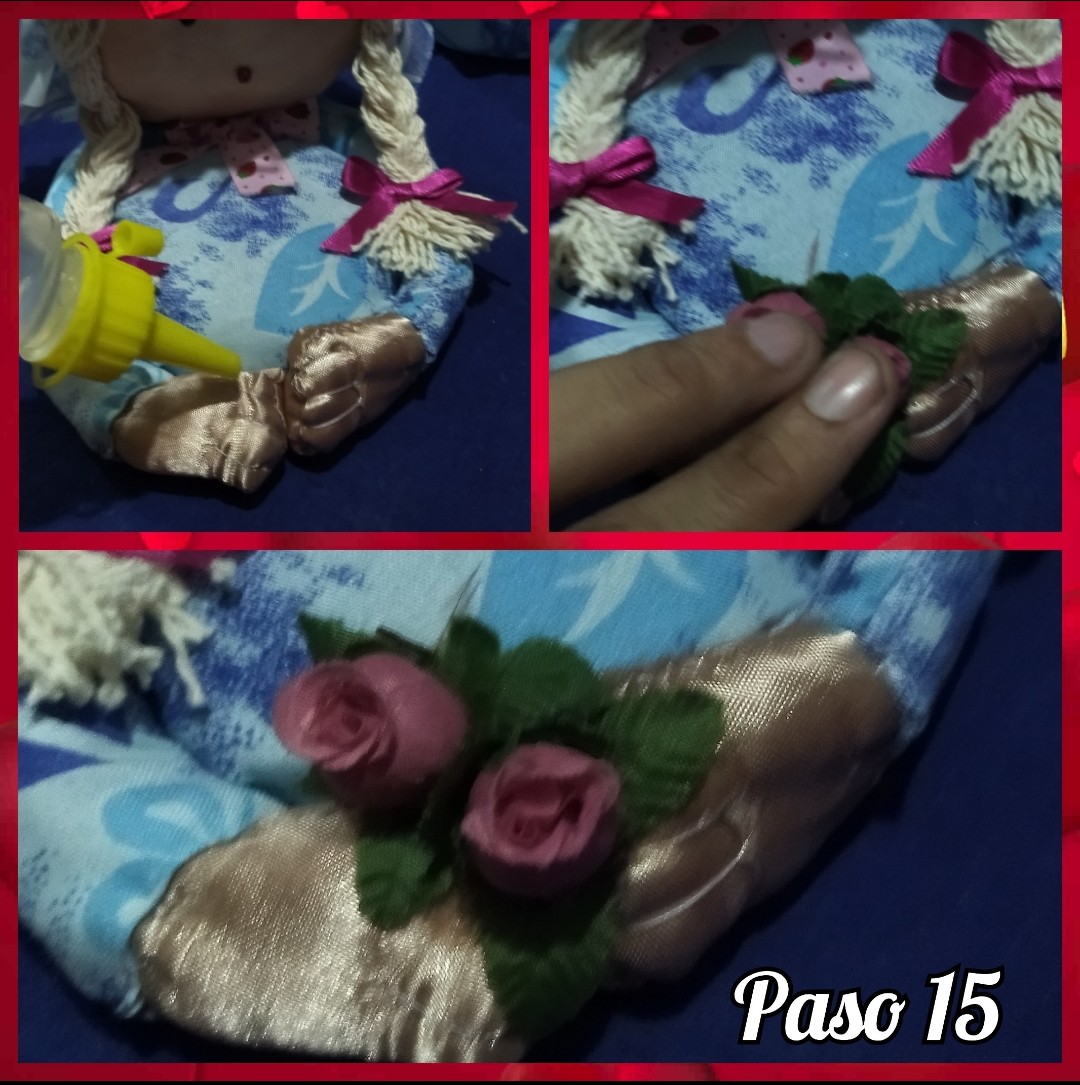
En las manitos de la abuela le aplique un poco de silicón frío y pegamos dos flores, esto le dará un toque bien lindo a nuestro trabajo, ahora bien si no tenemos flores podemos colocarle lo que consideremos un elemento decorativo siempre que sea bonito y llamativo.
In the hands of the grandmother I applied a little cold silicone and glued two flowers, this will give a nice touch to our work, now if we do not have flowers we can place what we consider a decorative element as long as it is nice and flashy.
 🌹🥀🌹🥀🌹🥀🌹🥀🌹🥀🌹
PASO 16 // STEP 16
🌹🥀🌹🥀🌹🥀🌹🥀🌹🥀🌹
🌹🥀🌹🥀🌹🥀🌹🥀🌹🥀🌹
PASO 16 // STEP 16
🌹🥀🌹🥀🌹🥀🌹🥀🌹🥀🌹
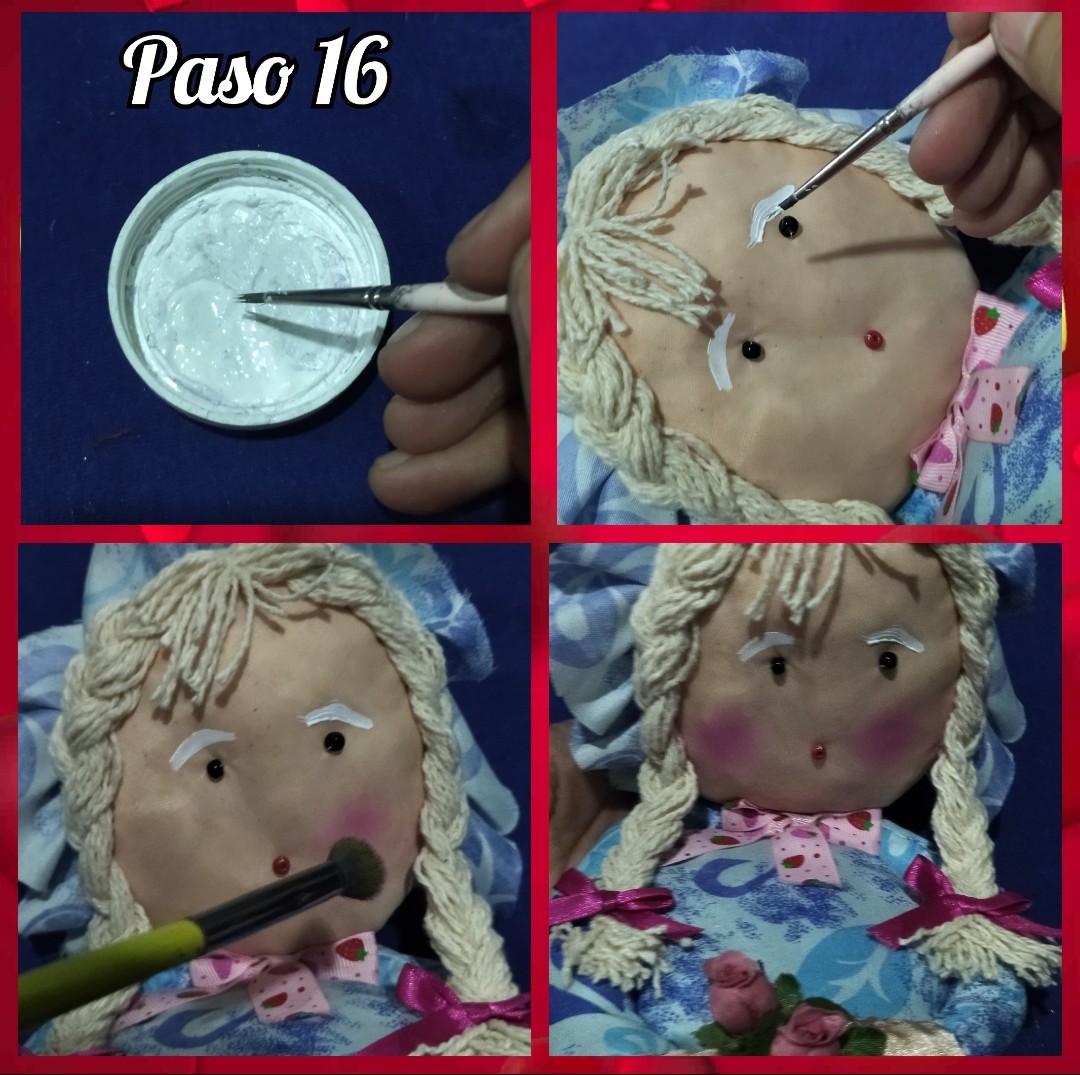
Luego tome un poco de pintura blanca y le dibujamos las cejas a la abuela, eso sí vamos a procurar hacerlas un poco gruesas aunque no tanto claro está, solo necesitamos que sean visibles.
Then take some white paint and draw the eyebrows to the grandmother, we will try to make them a little thick but not so thick of course, we just need them to be visible.
 🌹🥀🌹🥀🌹🥀🌹🥀🌹🥀🌹
PASO 17 // STEP 17
🌹🥀🌹🥀🌹🥀🌹🥀🌹🥀🌹
🌹🥀🌹🥀🌹🥀🌹🥀🌹🥀🌹
PASO 17 // STEP 17
🌹🥀🌹🥀🌹🥀🌹🥀🌹🥀🌹
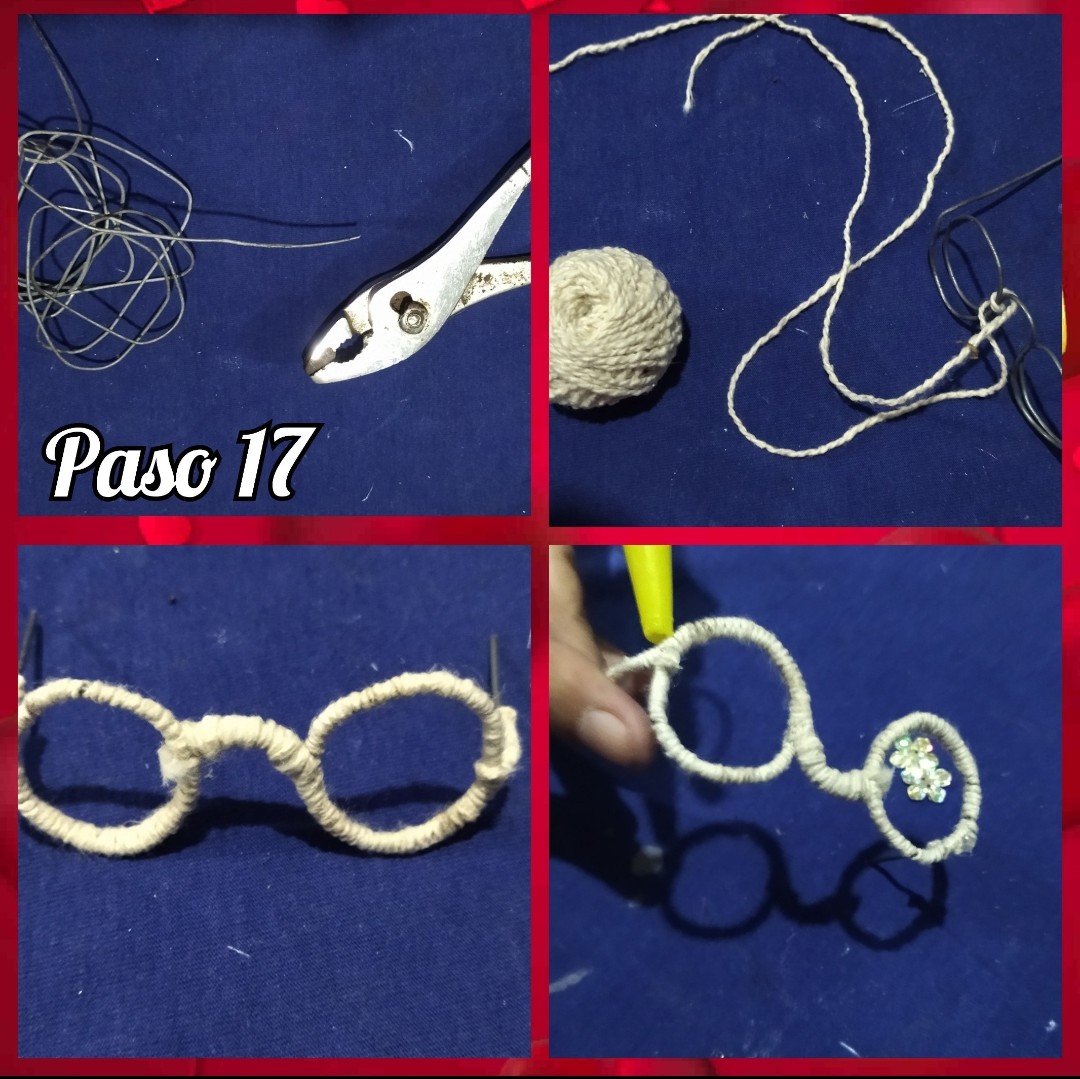
Cómo toda abuelita necesita sus anteojos para poder ver, abuelita Cruz no podía ser la excepción, así que con un trocito de alambre lo doblamos y formamos los anteojos y finalmente los forre con hilo pabilo, fue un poco tedioso cubrir totalmente los lentes pero valió la pena porque quedaron muy lindos.
As every grandma needs her glasses to be able to see, grandma Cruz could not be the exception, so with a small piece of wire we bent it and formed the glasses and finally lined them with wick thread, it was a little tedious to cover the glasses completely but it was worth it because they were very nice.
 🌹🥀🌹🥀🌹🥀🌹🥀🌹🥀🌹
PASO 18 // STEP 18
🌹🥀🌹🥀🌹🥀🌹🥀🌹🥀🌹
🌹🥀🌹🥀🌹🥀🌹🥀🌹🥀🌹
PASO 18 // STEP 18
🌹🥀🌹🥀🌹🥀🌹🥀🌹🥀🌹
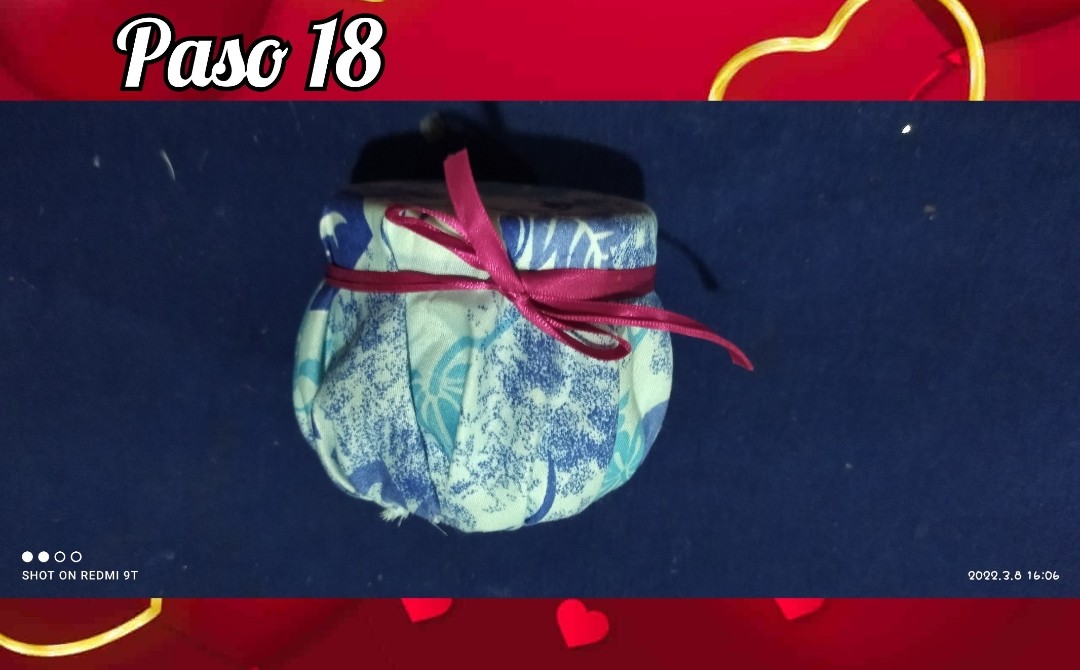
Tome un pedacito de cinta delgada y la coloque en la parte de abajo, en la base para decorar la base.
Take a small piece of thin ribbon and place it at the bottom, at the base to decorate the base.
 🌹🥀🌹🥀🌹🥀🌹🥀🌹🥀🌹
PASO 19 // STEP 19
🌹🥀🌹🥀🌹🥀🌹🥀🌹🥀🌹
🌹🥀🌹🥀🌹🥀🌹🥀🌹🥀🌹
PASO 19 // STEP 19
🌹🥀🌹🥀🌹🥀🌹🥀🌹🥀🌹
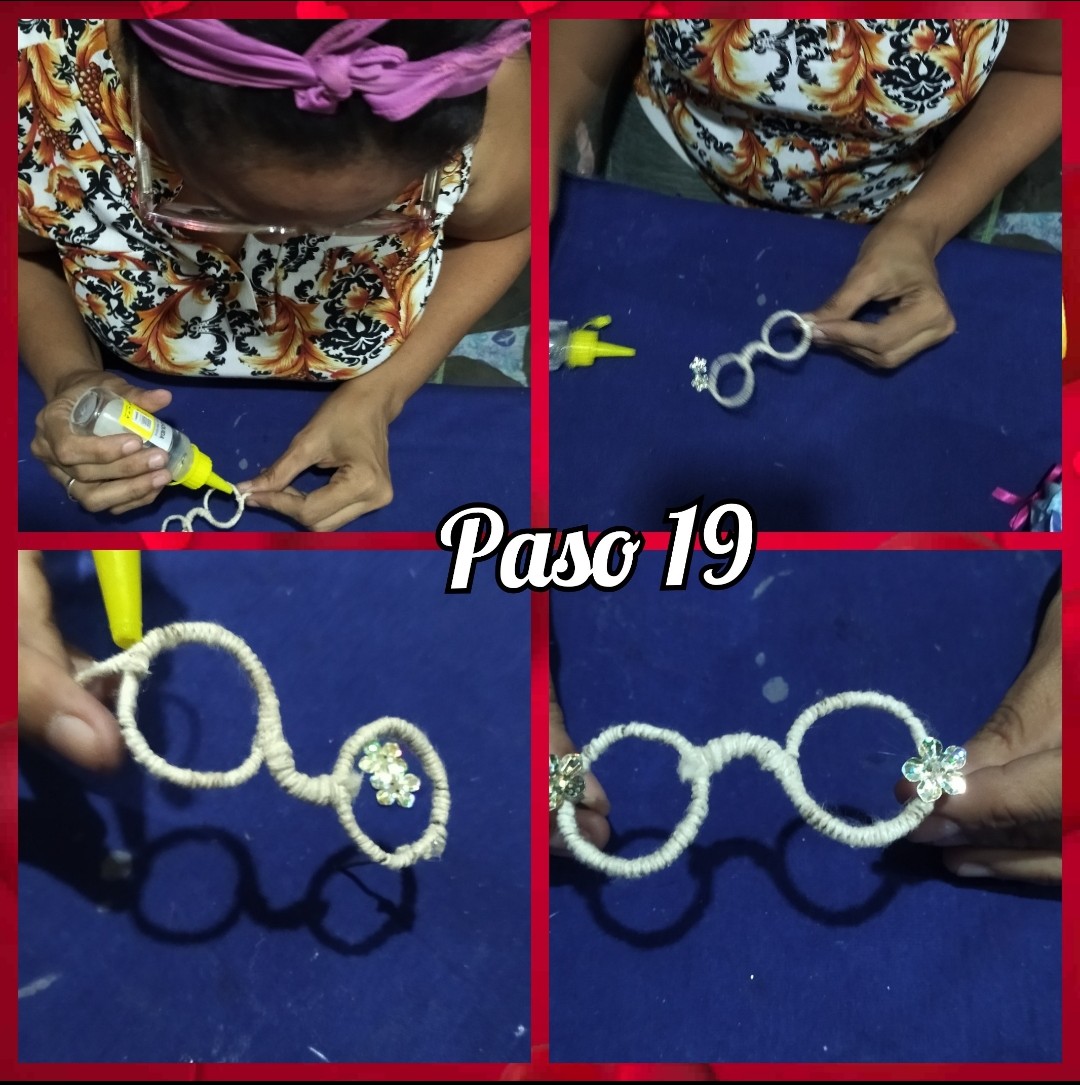
Cuando ya estamos a punto de terminar el trabajo sentí que a los lentes les hacía falta algo por lo que tome dos florecitas y con el silicón frío las pegué una de cada lado, dándole un toque muy divertido.
When we are about to finish the work I felt that the glasses were missing something, so I took two little flowers and with cold silicone I glued them one on each side, giving them a very funny touch.
 🌹🥀🌹🥀🌹🥀🌹🥀🌹🥀🌹
PASO 20 // STEP 20
🌹🥀🌹🥀🌹🥀🌹🥀🌹🥀🌹
🌹🥀🌹🥀🌹🥀🌹🥀🌹🥀🌹
PASO 20 // STEP 20
🌹🥀🌹🥀🌹🥀🌹🥀🌹🥀🌹
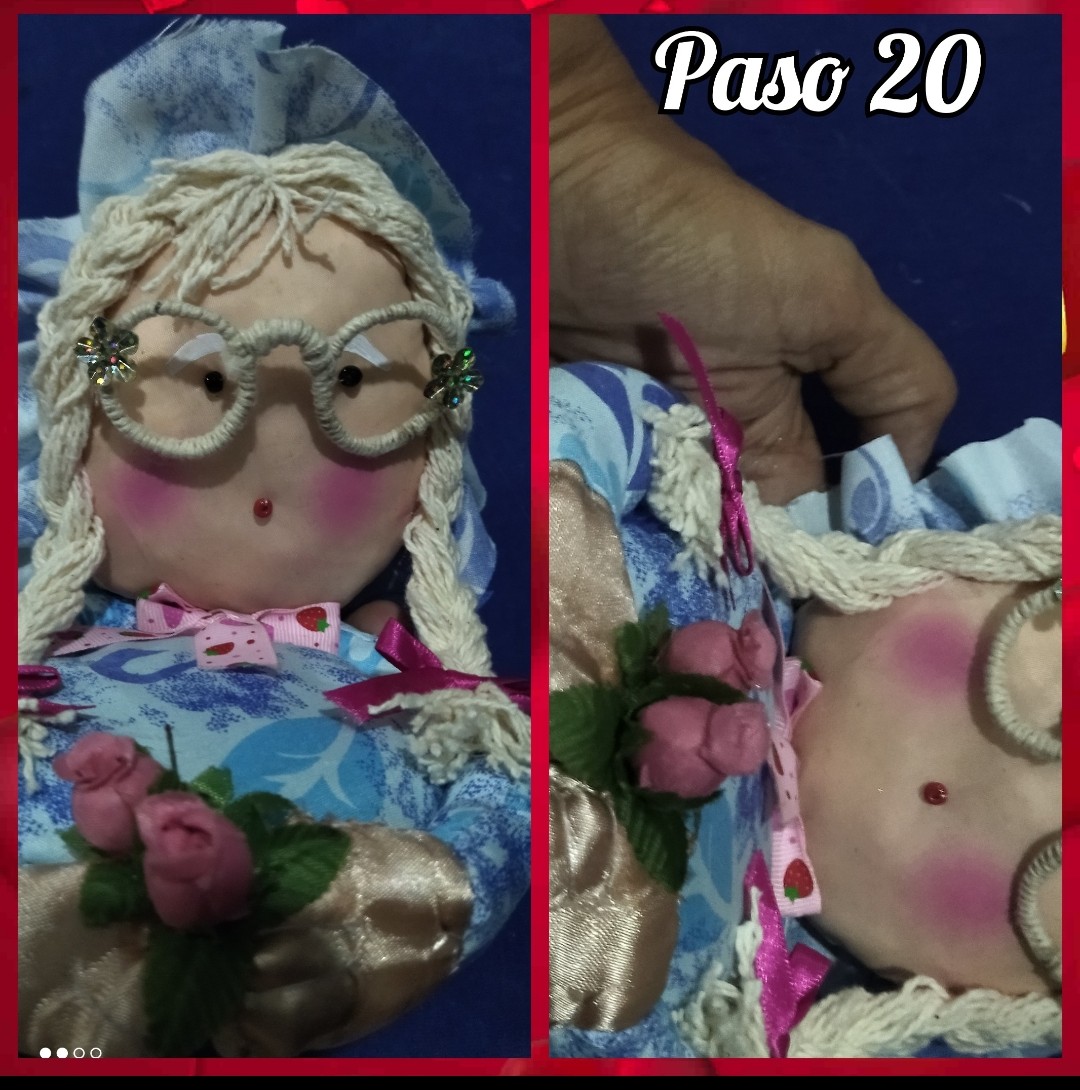
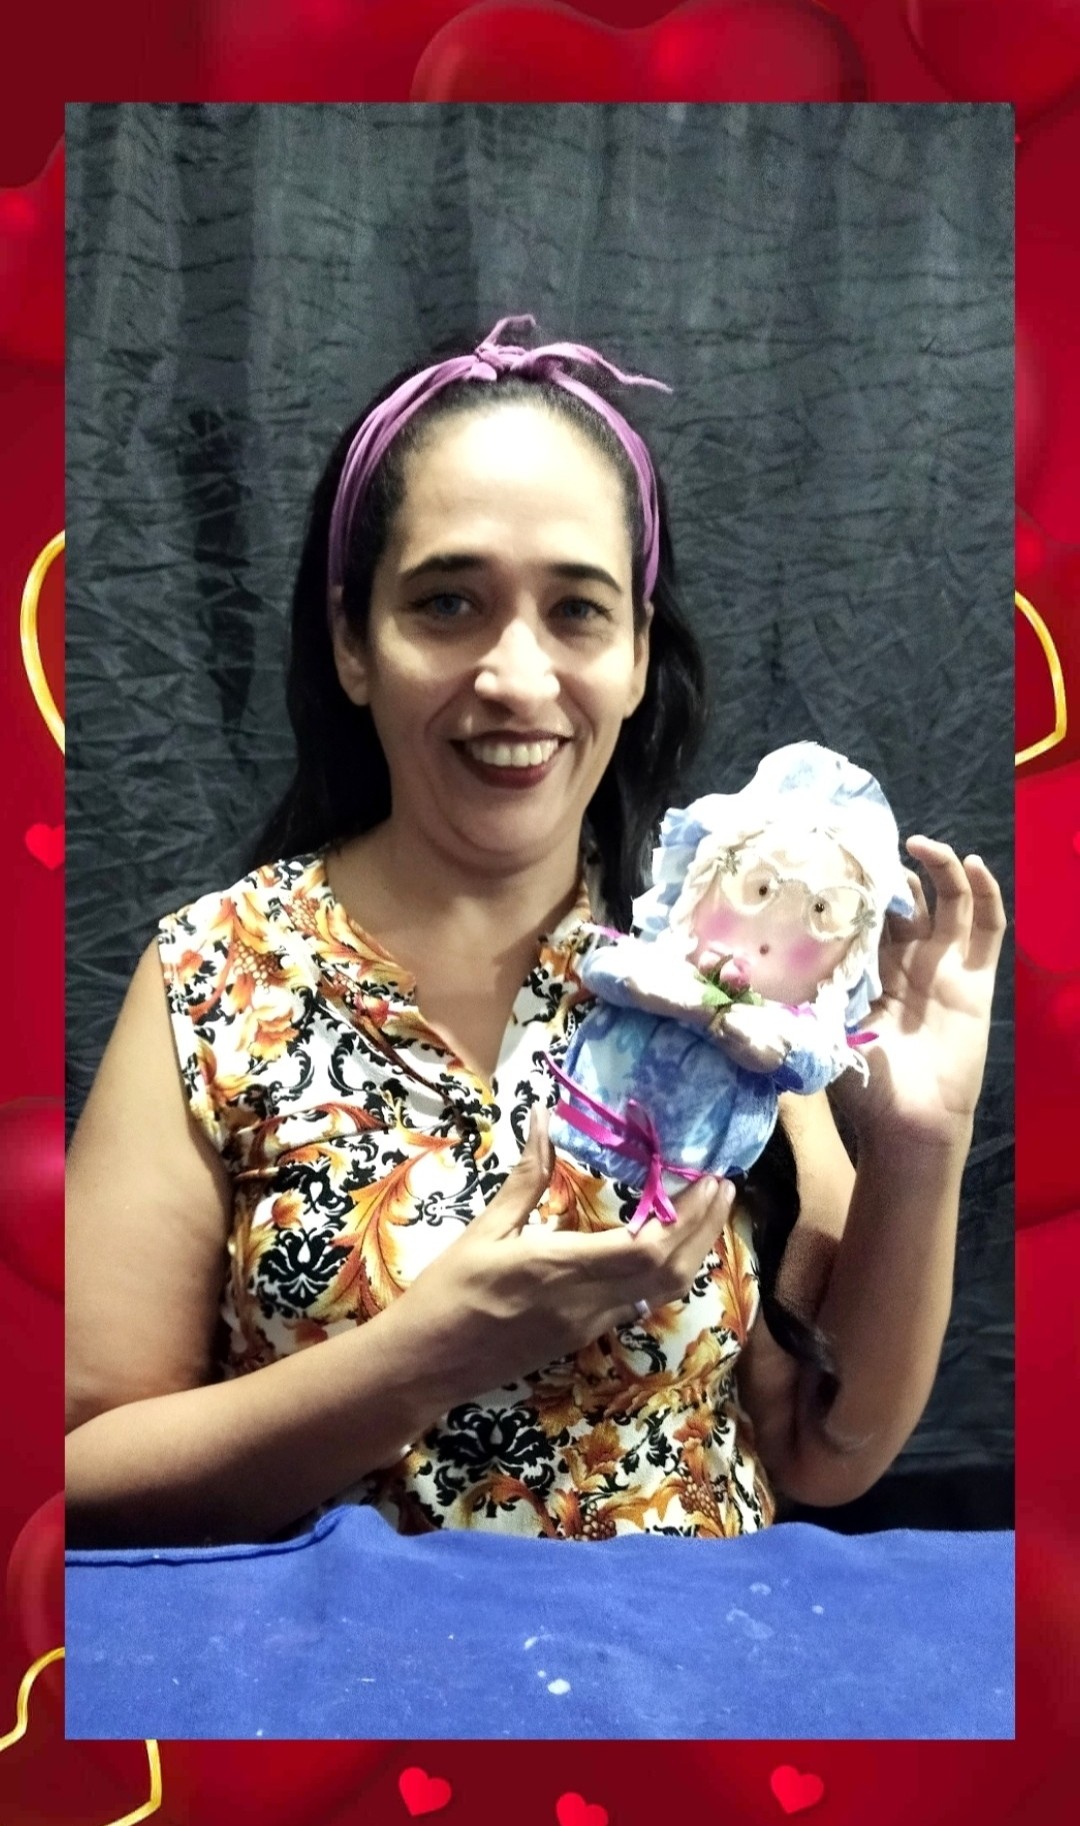
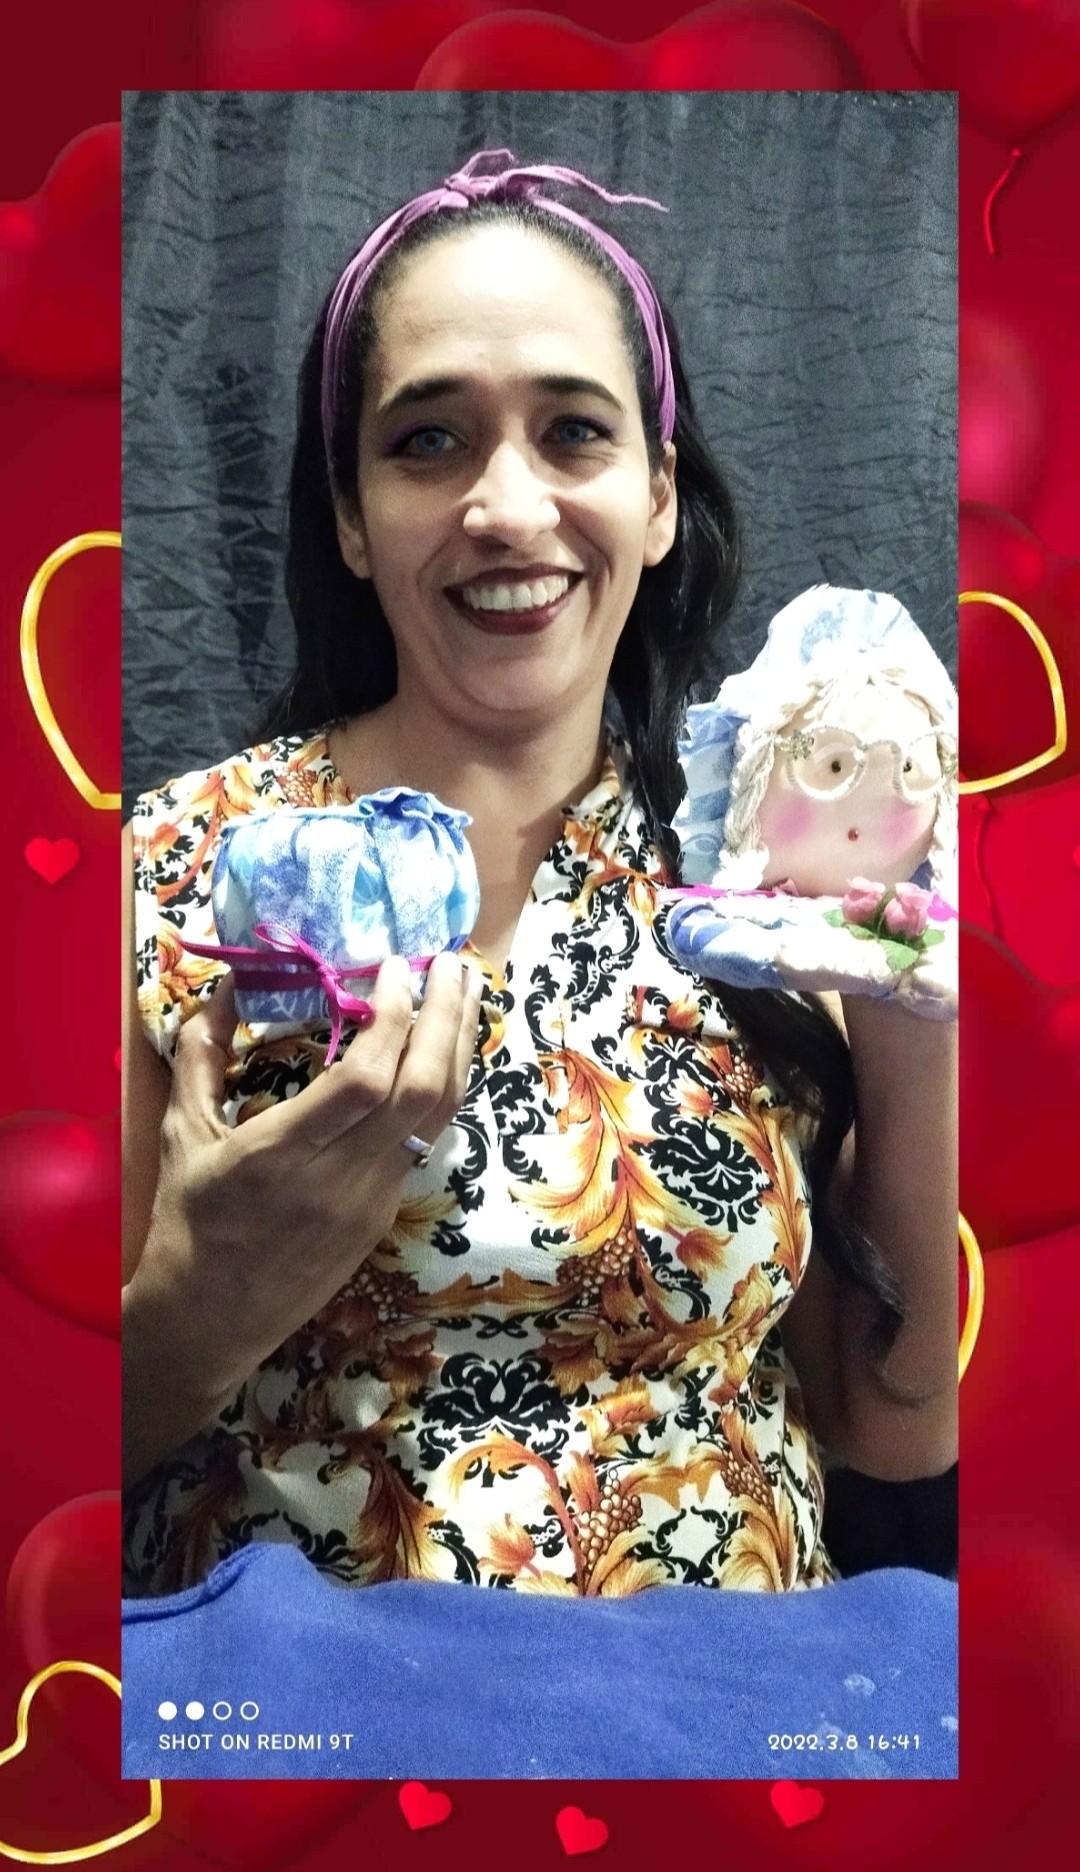
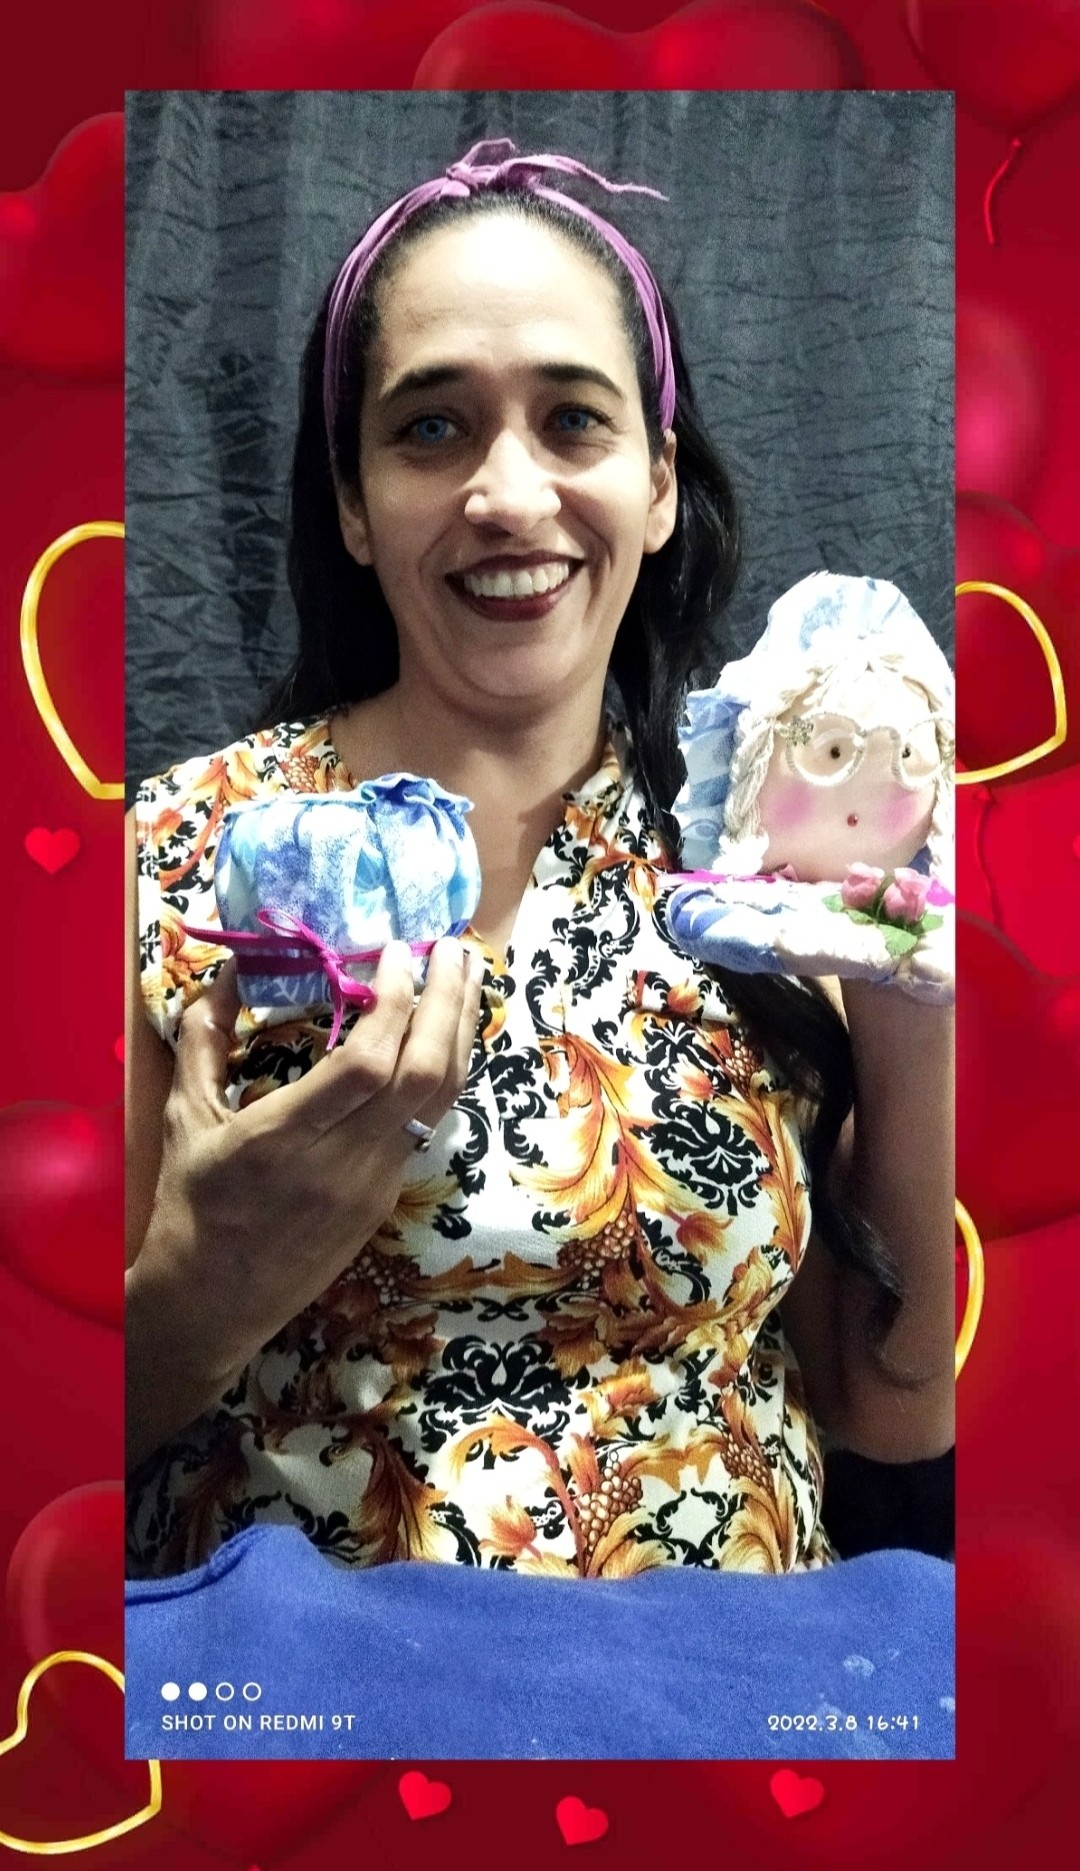
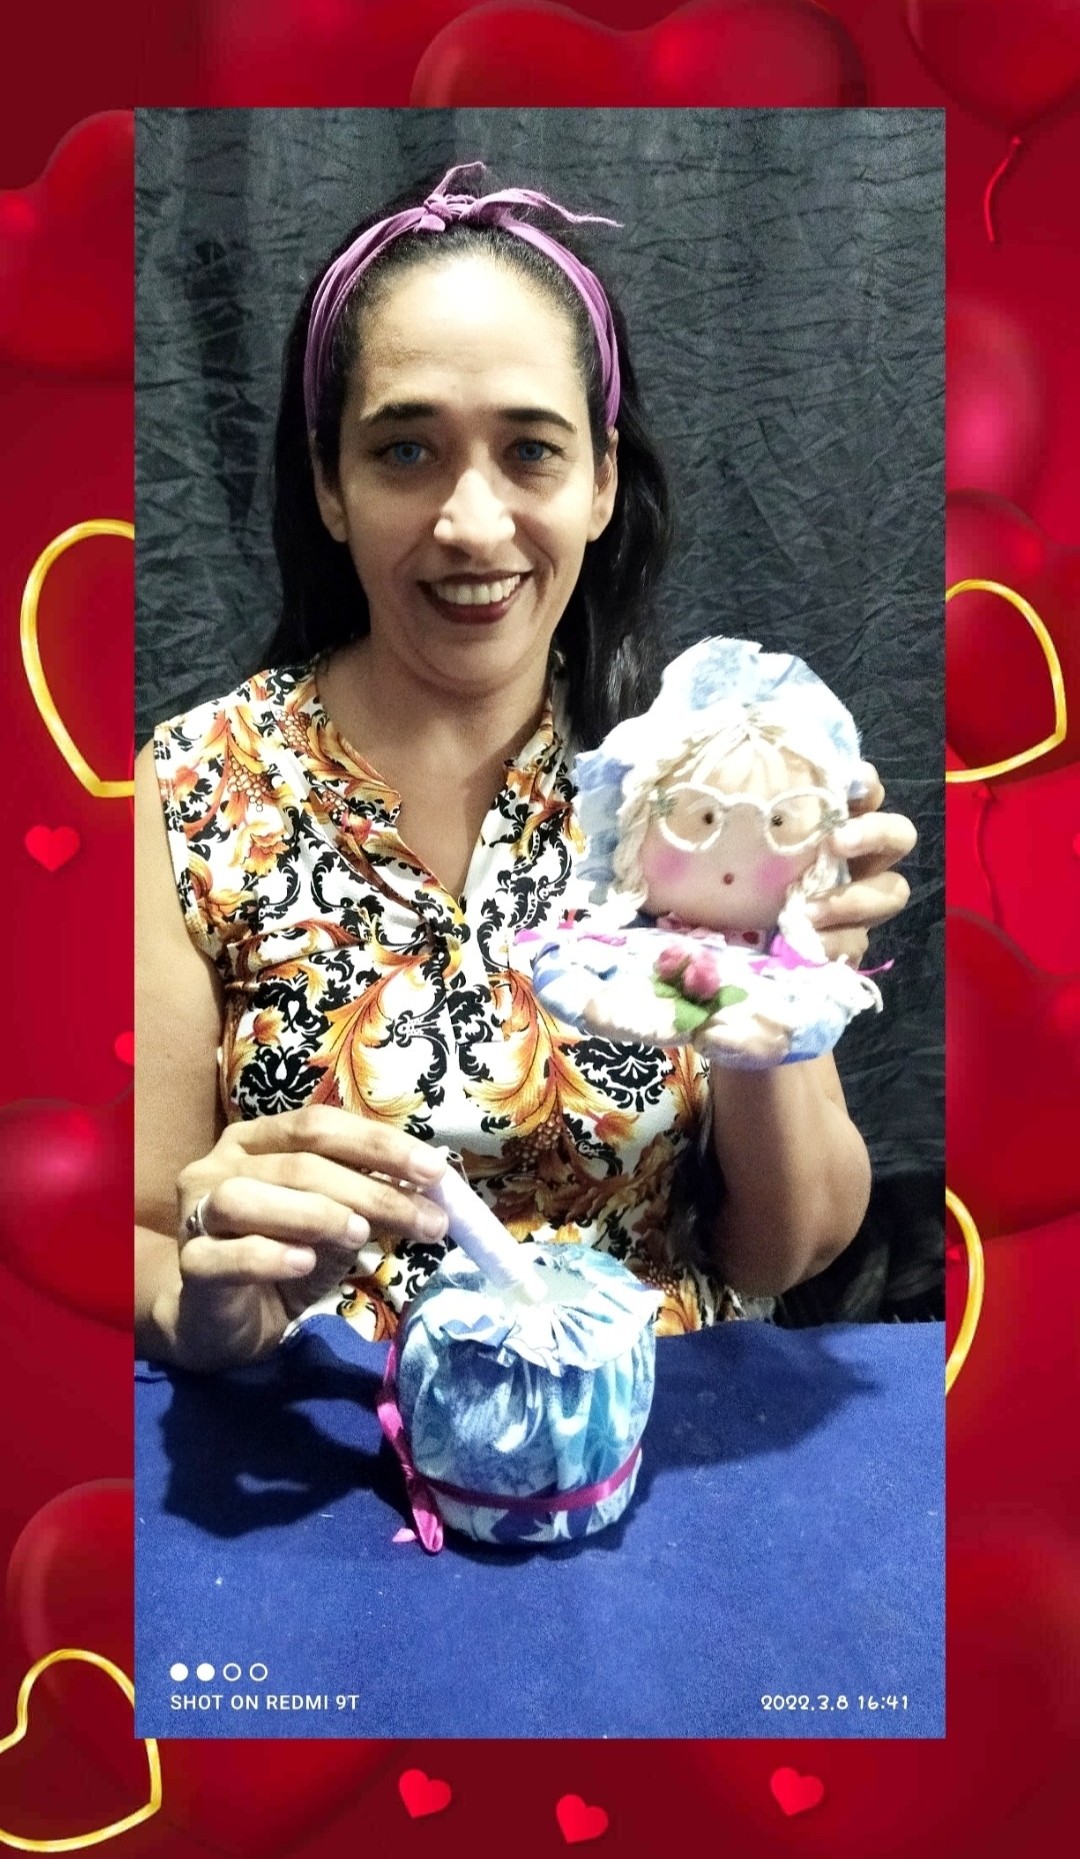
Finalmente hemos concluido, solo resta montar la tapa sobre la base y listo tenemos un hermoso pero práctico lugar dónde podremos guardar los hilos y agujas, aunque también se le puede dar otro uso.
Finally we have concluded, it only remains to mount the lid on the base and ready we have a beautiful but practical place where we can store the threads and needles, although it can also be given another use.
 🌹🥀🌹🥀🌹🥀🌹🥀🌹🥀🌹
FOTOS FINALES//FINAL PHOTOS
🌹🥀🌹🥀🌹🥀🌹🥀🌹🥀🌹
🌹🥀🌹🥀🌹🥀🌹🥀🌹🥀🌹
FOTOS FINALES//FINAL PHOTOS
🌹🥀🌹🥀🌹🥀🌹🥀🌹🥀🌹
 🌹🥀🌹🥀🌹🥀🌹🥀🌹🥀🌹
 🌹🥀🌹🥀🌹🥀🌹🥀🌹🥀🌹
 🌹🥀🌹🥀🌹🥀🌹🥀🌹🥀🌹
 🌹🥀🌹🥀🌹🥀🌹🥀🌹🥀🌹
 🌹🥀🌹🥀🌹🥀🌹🥀🌹🥀🌹
 🌹🥀🌹🥀🌹🥀🌹🥀🌹🥀🌹
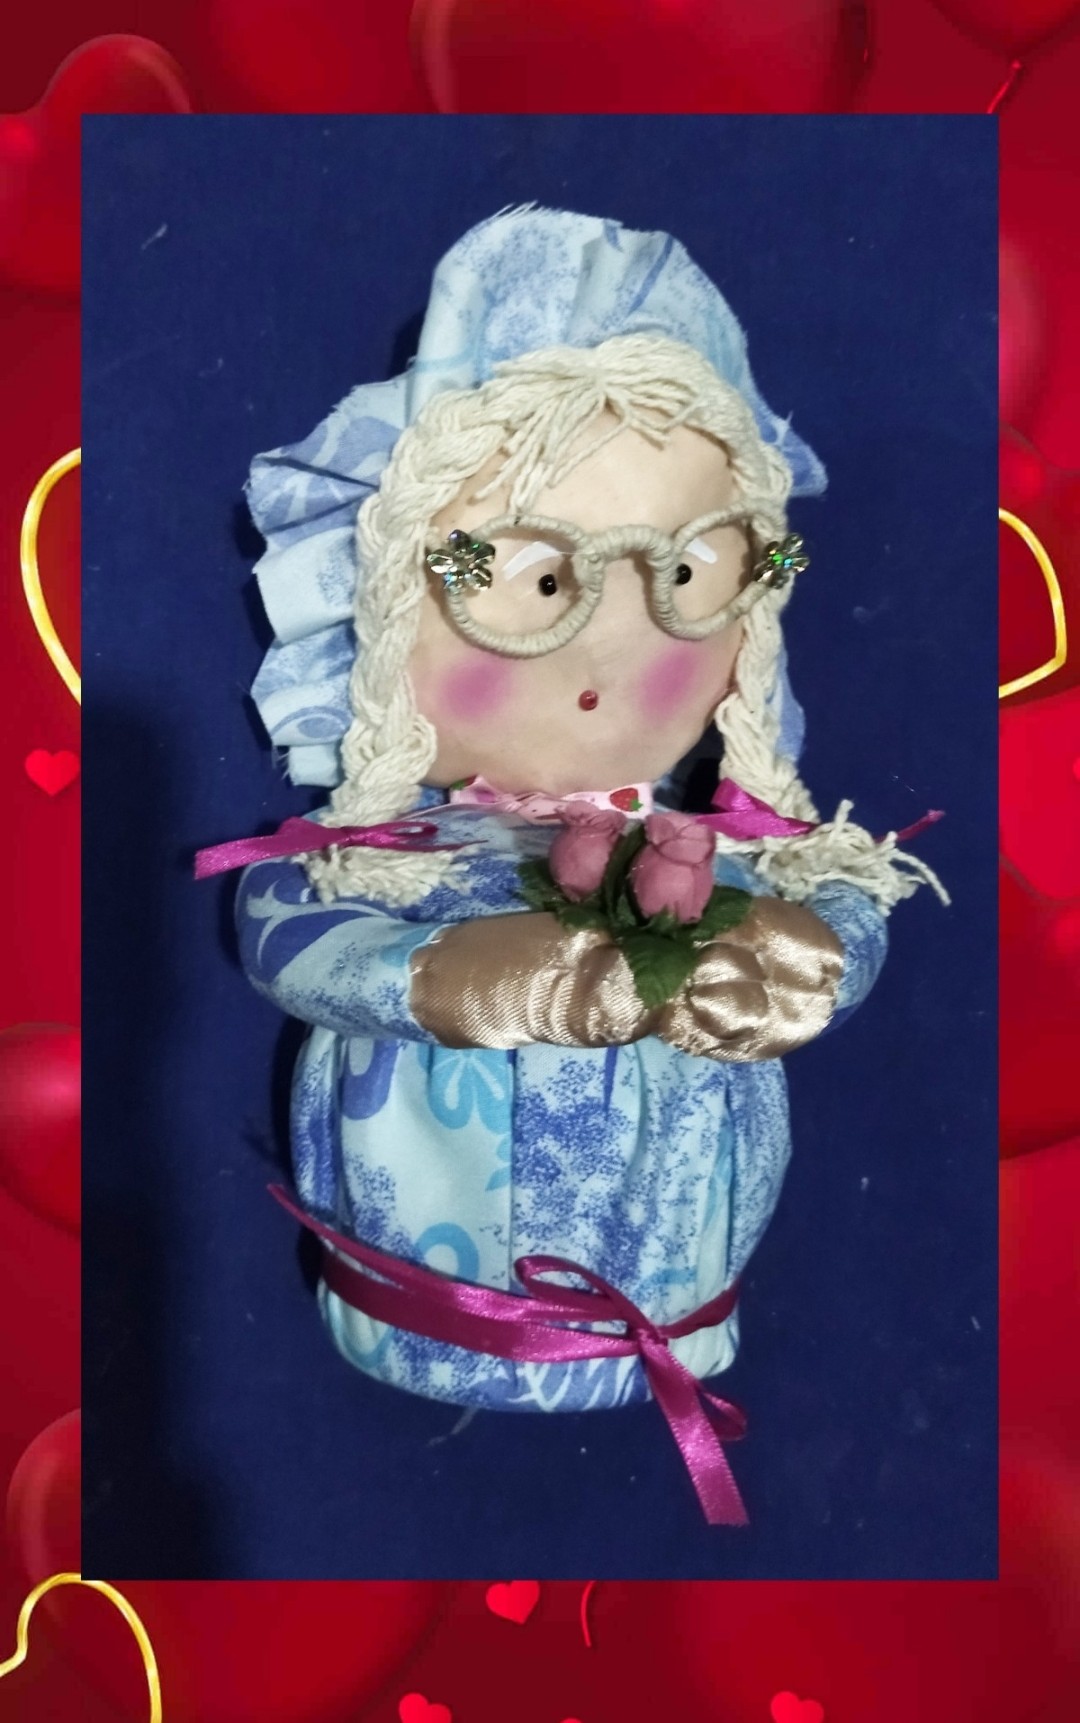
Bueno mis hermosas abejitas espero que les halla gustado el proyecto que les traje el día de hoy, un bonito y decorativo lugar donde guardar los hilos y agujas, que seguramente sera la envidia de muchos, espero puedan poner en práctica este tutorial, les puedo asegurar que se van a divertir muchísimo al tiempo que estaremos dandole un nuevo uso a un envase que ya habíamos desechados y que seguramente iba a contribuir con el deterioro del medio ambiente.
Well my beautiful little bees I hope you liked the project I brought you today, a nice and decorative place to store threads and needles, which will surely be the envy of many, I hope you can put into practice this tutorial, I can assure you that you will have a lot of fun while we will be giving a new use to a container that we had already discarded and that surely would contribute to the deterioration of the environment.
Ven no solo vamos a elaborar un lindo detalle, sino que contribuimos con el medio ambiente, así que si les gusto mi post los invito a votar y a rebloguear, y claro déjame tus comentarios para saber que te pareció.
See not only we are going to elaborate a nice detail, but we contribute to the environment, so if you liked my post I invite you to vote and reblog, and of course leave me your comments to know what you thought.
🌹 Todas las fotos fueron tomadas con mi teléfono Xiaomi readmi 9T y sin de mi propiedad, utilice el traductor Deepl y el programa polish para la edición de las fotos.
🌹 All photos were taken with my Xiaomi readmi 9T phone and without my property, use Deepl translator and polish program for photo editing.
🌹🥀🌹🥀🌹🥀🌹🥀🌹🥀🌹
 🌹🥀🌹🥀🌹🥀🌹🥀🌹🥀🌹
Que linda esa abuelita felicitaciones!!
Muchas gracias ☺️
Amiga me gustó la idea, a parte de linda muy útil.
Gracias por compartir. 😊
Muchas gracias me alegra que te gustará, y a ponerlo en práctica.😃
Te quedó preciosa 😍😉😊😃👍🏼☺️🤗😍
Muy bello tu trabajo te felicito
Muchas gracias amiga créame que lo hice con mucho cariño pues me recordó a mi abuelita por eso le puse su nombre, saludos gracias por visitar mi blog y apoyarme.
Congratulations @mayifiestas! You have completed the following achievement on the Hive blockchain and have been rewarded with new badge(s):
Your next target is to reach 2000 comments.
You can view your badges on your board and compare yourself to others in the Ranking
If you no longer want to receive notifications, reply to this comment with the word
STOPTo support your work, I also upvoted your post!
Check out the last post from @hivebuzz:
Support the HiveBuzz project. Vote for our proposal!
Thank you for sharing this amazing post on HIVE!
Your content got selected by our fellow curator @rezoanulvibes & you just received a little thank you via an upvote from our non-profit curation initiative!
You will be featured in one of our recurring curation compilations and on our pinterest boards! Both are aiming to offer you a stage to widen your audience within and outside of the DIY scene of hive.
Join the official DIYHub community on HIVE and show us more of your amazing work and feel free to connect with us and other DIYers via our discord server: https://discord.gg/mY5uCfQ !
If you want to support our goal to motivate other DIY/art/music/homesteading/... creators just delegate to us and earn 100% of your curation rewards!
Stay creative & hive on!
Muchas gracias por el apoyo agradecida de todo corazón 🙏
Simplemente hermosa amiga, que belleza de trabajo y gracias por compartirlo. Éxitos y que sigan los trabajos creativos, un fuerte abrazo.
Muchísimas gracias amiga por tan lindo comentario, gracias a demás por tomarse el tiempo de pasar por mi blog agradecida.🙏🌹
Que linda mi amiga esa viejita costurera☺👍 muy buena la idea para guardar y organizar las agujas.