
Decorate your living room with few materials Homemade paintings

Existen objetos, fotografías, o simplemente algún detalle que te hace recordar algo especial o pensar en tu hogar. Eso me pasa con estos cuadros, ellos tienen su historia que compartiré con ustedes como parte de este tutorial.
Cuando recién me casé, mi casita estaba toda vacía y quería hacerle algún detalle que la hiciera ver bonita, pero que tuviera pocos materiales, ya que en Venezuela contaba con muy pocos recursos, pero el límite solo está en nuestra mente cuando queremos ser creativos.
There are objects, photographs, or simply some detail that makes you remember something special or think of your home. That's what happens to me with these pictures, they have a story that I will share with you as part of this tutorial.
When I just got married, my little house was all empty and I wanted to make some detail that would make it look nice, but with few materials, because in Venezuela I had very few resources, but the limit is only in our mind when we want to be creative.

Para aquel tiempo tome hojas de reciclajes y las pinte de negro y vi en internet un diseño de mosaico que traen las cerámicas que colocan en las paredes de las casas y me encantó. Los otros dos cuadros fluyeron de la creatividad a partir de figuras geométricas.
Por motivos personales tuve que mudarme en distintas ocasiones y aquellos cuadros de papel fueron conmigo a cada casa como mi marca personal. Por decirlo así, aquellos cuadros me hacían sentir la estabilidad que no tenía en el momento.
At that time I took recycled sheets of paper and painted them black and I saw on the internet a mosaic design that the ceramics that are placed on the walls of the houses bring and I loved it. The other two paintings flowed from the creativity of geometric figures.
For personal reasons I had to move several times and those paper paintings went with me to each house as my personal mark. So to speak, those paintings made me feel the stability that I didn't have at the time.
Estando ahora en Colombia quise replicar aquellos cuadros que se quedaron en Venezuela ya en muy mal estado. Quería sentir un poquito de hogar y disfrutar haciéndolos, ya que guardan un recuerdo por así decirlo.
Ahora sí, comencemos con el tutorial de estos lindos cuadros, super sencillos y accesibles al bolsillo, pues posiblemente tengas todos los materiales en casa.
Being now in Colombia I wanted to replicate those paintings that were left in Venezuela in very bad condition. I wanted to feel a little bit of home and enjoy making them, since they keep a memory so to speak.
Now, let's start with the tutorial of these beautiful paintings, super simple and affordable, because you probably have all the materials at home.
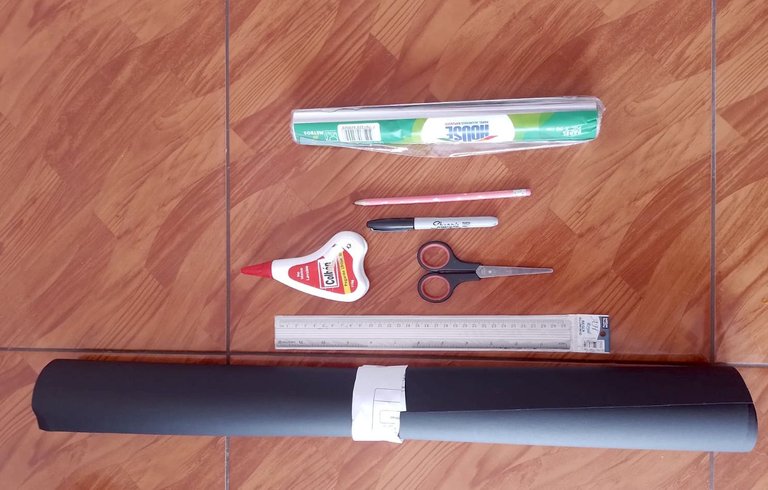
Materiales:
- Cartulina negra
- Papel aluminio
- Regla
- Tijera
- Pega
- Marcador
- Lápiz
Materials:
- Black cardboard
- Aluminum foil
- Ruler
- Scissors
- Glue
- marker
- Pencil
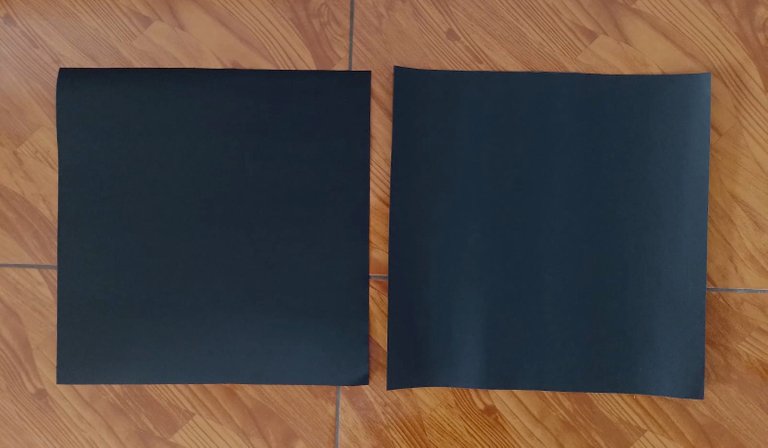
Paso 1:
Cortamos el pliego de cartulina, creando 3 cuadros de 35 cm. Tú lo puedes hacer del tamaño que desees, pero este tamaño me pareció apropiado.
Step 1:
We cut the cardboard sheet, creating 3 squares of 35 cm. You can make it any size you want, but this size seemed appropriate.
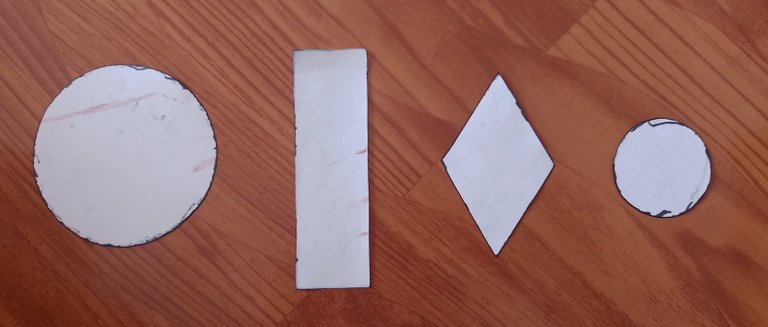
Paso 2:
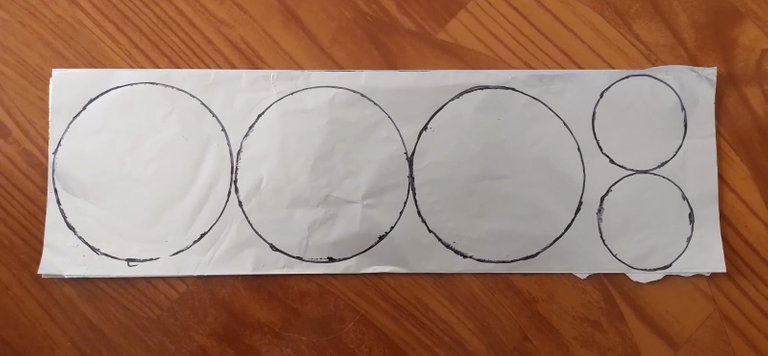
Elabora moldes en papel o cartulina de las figuras geométricas que quieras utilizar, en mi caso hice un círculo, un rectángulo, un rombo y un círculo más pequeño que el anterior. Estos nos facilitarán el trabajo para recortar el papel aluminio.
Step 2:
Make molds in paper or cardboard of the geometric figures you want to use, in my case I made a circle, a rectangle, a rhombus and a circle smaller than the previous one. These will make it easier to cut out the aluminum foil.
Cuadro N.º 1:
Tomamos el fondo negro que cortamos antes para hacer nuestro cuadro.
En el papel aluminio, utilizando un marcador, trazamos la figura de los círculos, el grande y el pequeño, para hacer varios de estos.
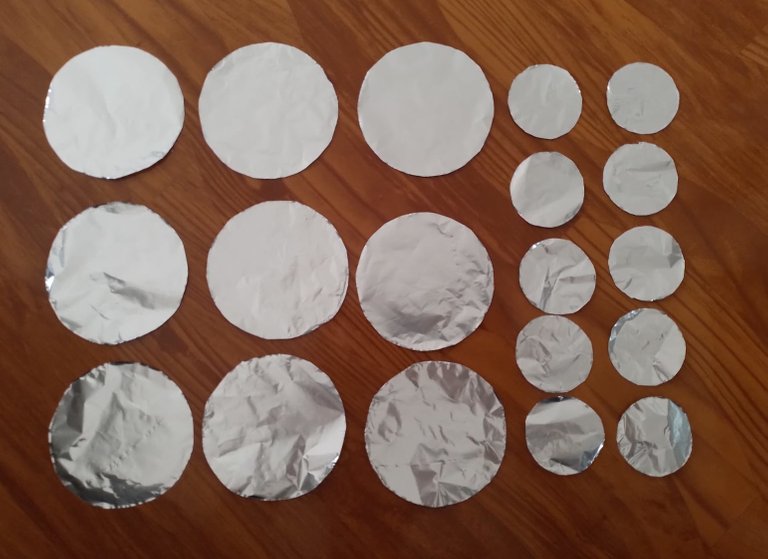
Sugerencia: como el papel aluminio es un material muy delicado y no queremos que se arrugue tanto, recomiendo hacer varios dobleces al papel de acuerdo a la proporción de la figura geométrica, para que cuando recortemos salgan varias piezas a la vez y nos ahorremos tiempo y trabajo. Solo quedará luego despegar poco a poco las piezas. Esta sugerencia aplica para los otros cuadros.
Frame No. 1:
We take the black background that we cut before to make our picture.
On the aluminum foil, using a marker, we trace the figure of the circles, the big one and the small one, to make several of these.
Tip: as aluminum foil is a very delicate material and we do not want it to wrinkle so much, I recommend making several folds to the paper according to the proportion of the geometric figure, so that when we cut out several pieces at once and we save time and work. All that remains is to peel off the pieces little by little. This suggestion applies to the other pictures.
 |  |
|---|
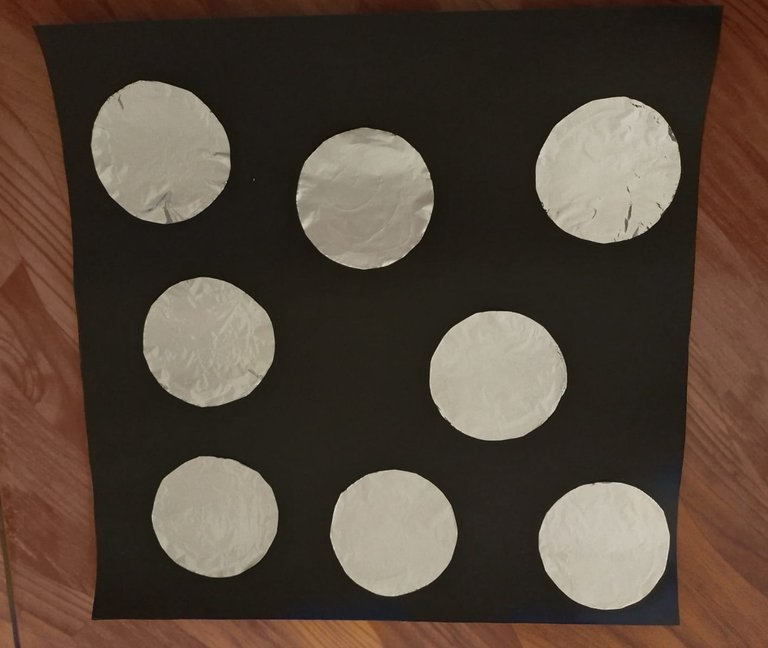
Al tener todas las piezas sueltas comenzamos a ordenar los círculos sobre la cartulina a nuestro gusto. Primero los círculos grandes y luego los pequeños.
Los fijamos con pega y listo, ya tendríamos nuestro primer cuadro.
Once we have all the pieces loose, we begin to arrange the circles on the cardboard as we like. First the big circles and then the small ones.
We fix them with glue and that's it, we would have our first picture.
 |  |
|---|
Cuadro N.º 2:
Para el segundo cuadro haremos una flor que se expanda y que incluso queden algunos pétalos sobresalientes del cuadro para darle una ilusión bonita.
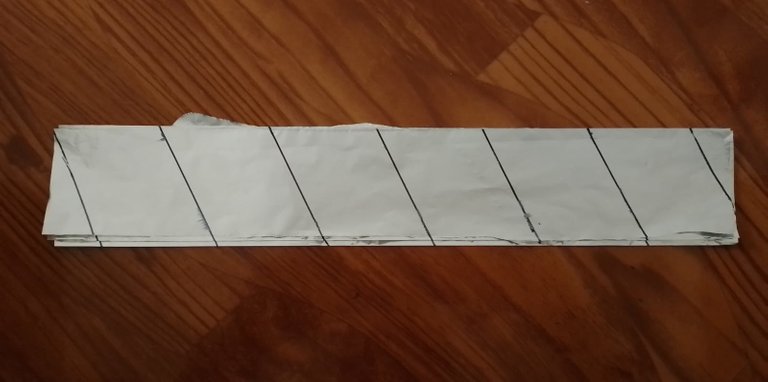
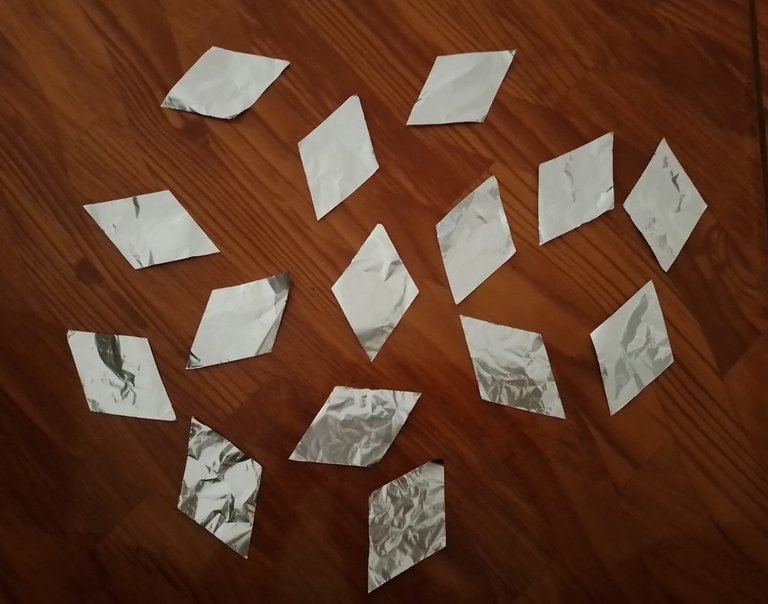
Doblamos varias veces el papel aluminio según la proporción del rombo y con el molde marcamos para recortar.
Al tener todas las piezas sueltas buscamos el segundo cuadro negro que habíamos recortado anteriormente.
Frame No. 2:
For the second frame we will make a flower that expands and even have some petals protruding from the frame to give it a nice illusion.
We fold the aluminum foil several times according to the proportion of the rhombus and with the mold we mark to cut out.
Once we have all the pieces loose, we look for the second black square that we had previously cut out.
 |  |
|---|
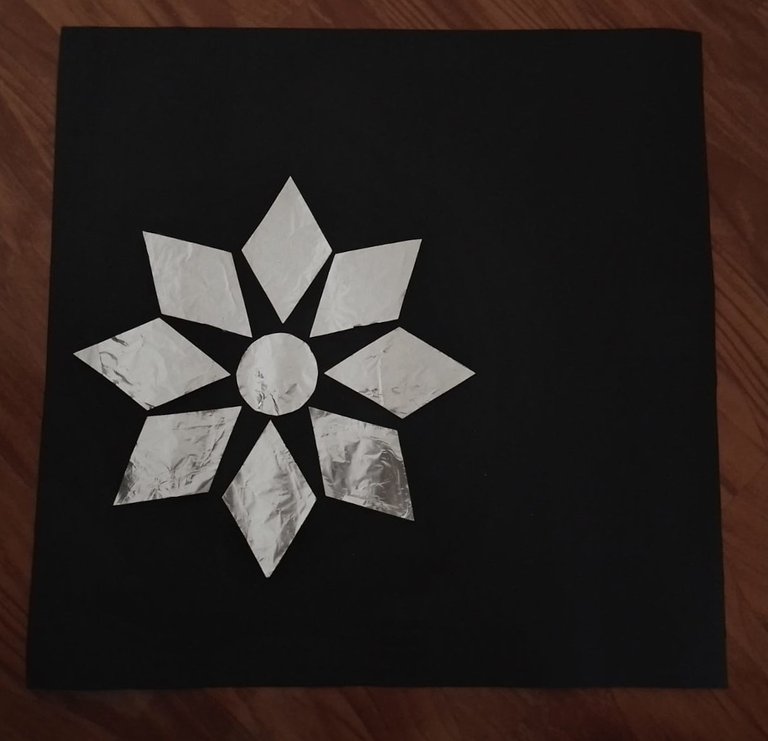
Utilizamos un círculo pequeño que nos haya quedado del cuadro anterior para hacer el centro de la flor.
Comenzamos a pegar cada uno de los pétalos al rededor del círculo y así sucesivamente entre las divisiones de los pétalos.
Tú decides la distancia en que colocarás los pétalos. Y así tan fácil ya tendríamos listo nuestro segundo cuadro.
We use a small circle that we have left from the previous picture to make the center of the flower.
Start gluing each of the petals around the circle and so on between the petal divisions.
You decide the distance you will place the petals. And just like that we would have our second picture ready.
 |  |
|---|
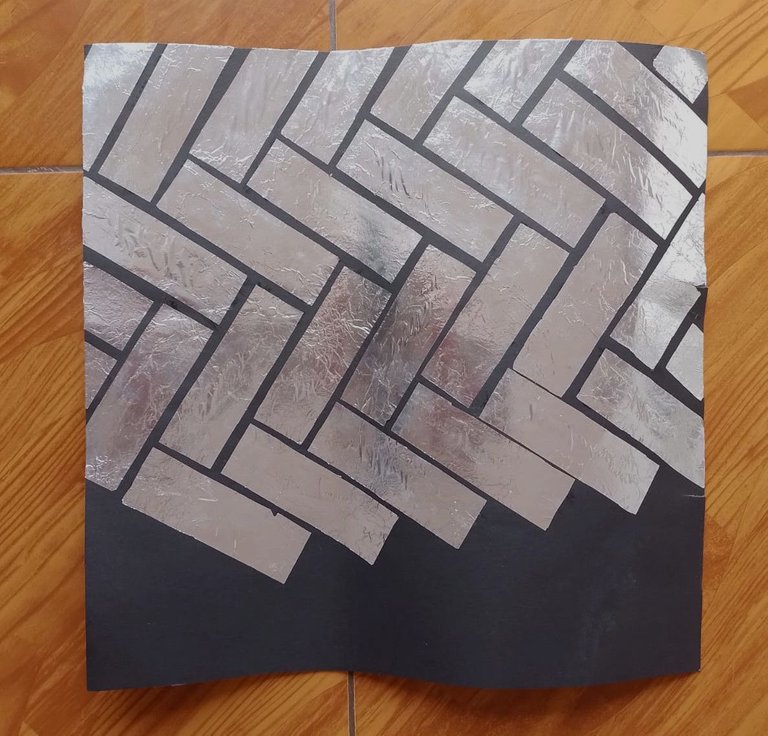
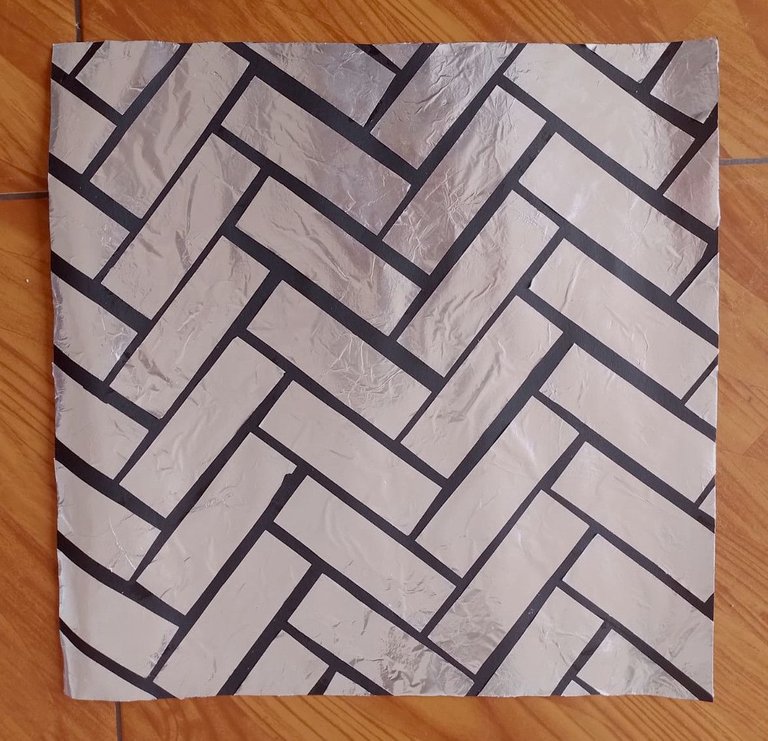
Cuadro N.º 3:
Este parece ser el más difícil de todos, pero no lo es si prestamos mucha atención a su forma.
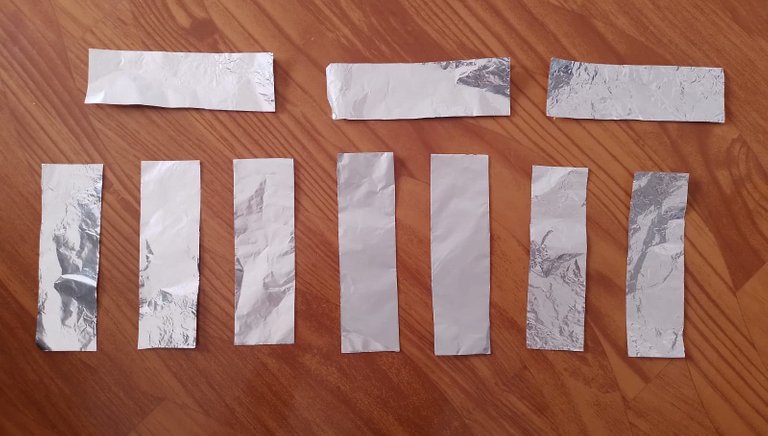
Cortamos todas las piezas en el papel aluminio y soltamos todas las piezas.
Nota: recuerda siempre utilizar el papel aluminio por el lado más brillante.
Frame No. 3:
This seems to be the most difficult of all, but it is not if we pay close attention to its shape.
We cut all the pieces in the aluminum foil and release all the pieces.
Note: always remember to use the aluminum foil on the shiny side.
 |  |  |
|---|
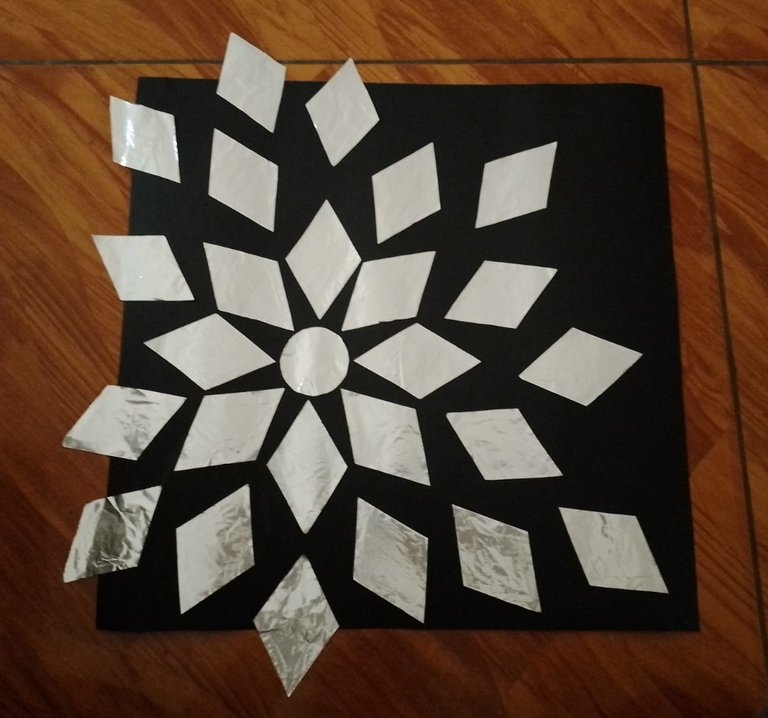
Presta mucha atención al diseño para que vayas pegando cada una de las piezas hasta terminarlo.
No hay problema si muchas piezas te quedan por fuera del cuadro, después puedes recortarlas con la Tijera.
Pay close attention to the design so that you can glue each of the pieces until you finish it.
There is no problem if many pieces are outside the frame, you can cut them out with the scissors.
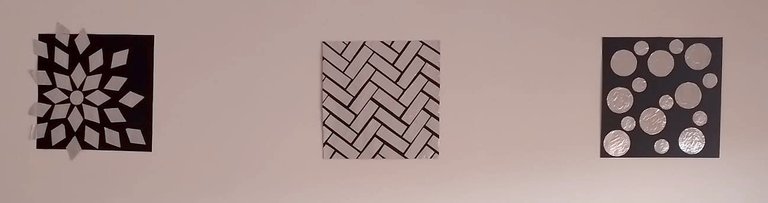
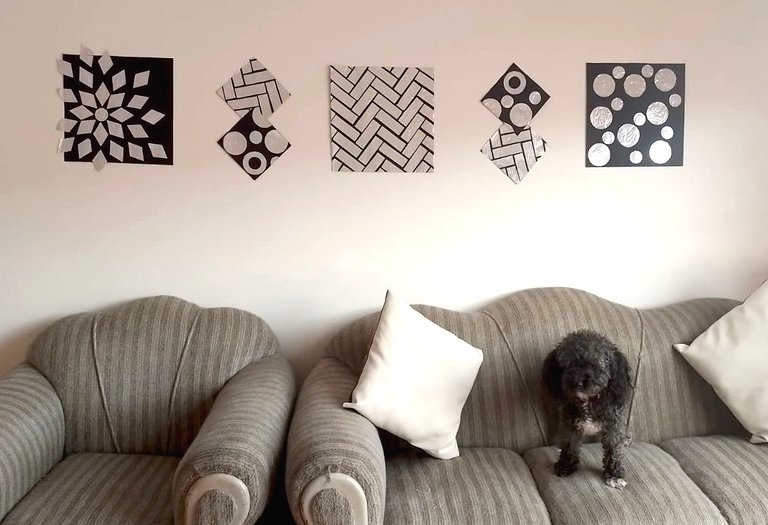
Con esto ya tendríamos nuestros tres cuadros para decorar nuestra sala y que la pared no se vea tan vacía.
Como en mi casa la pared es muy amplia, en esta ocasión quise agregar un toque adicional. Repetí los mismos pasos, pero ahora en unos cuadros más pequeños, y los pegue en forma de rombo o diamante para cubrir el espacio.
With this we would already have our three pictures to decorate our living room and that the wall does not look so empty.
As the wall in my house is very wide, this time I wanted to add an extra touch. I repeated the same steps, but now on smaller pictures, and glued them in a diamond shape to cover the space.
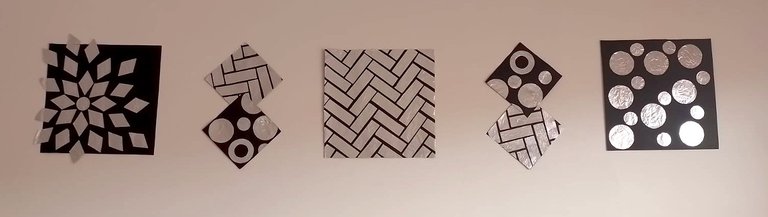
Me parece que estos cuadros son super sencillos de hacer, y los materiales se pueden conseguir fácilmente. Además, el color plateado del aluminio hace que se vean muy elegantes.
Estos cuadros son una buena opción para embellecer tu casa sin tener que invertir tanto dinero comparado cuadros cuando los puedes hacer tu mismo.
I find these frames super simple to make, and the materials are readily available. Also, the silver color of the aluminum makes them look very elegant.
These frames are a good option to beautify your home without having to invest so much money when you can make them yourself.
Espero que te hayan gustado y que me compartas tu opinión.
I hope you liked them and that you share your opinion with me.
Separador de Pixabay cortesía de rebeccaread.
Banner elaborado en Canva.
Editado en Canva, PowerPoint.
All photos are my property, taken from Samsung Galaxy A03 phone.
Pixabay divider courtesy of rebeccaread.
Banner made in Canva.
Edited in Canva, PowerPoint.
Hermosa se ve tu sala, me encantó el perrito.
Gracias...me alegra que te gustara... saludos.
Linda creatividad, te felicito.
Muchas gracias... Saludos.
Congratulations @mitag2398! You have completed the following achievement on the Hive blockchain and have been rewarded with new badge(s):
Your next target is to reach 1500 upvotes.
You can view your badges on your board and compare yourself to others in the Ranking
If you no longer want to receive notifications, reply to this comment with the word
STOPCheck out the last post from @hivebuzz:
Support the HiveBuzz project. Vote for our proposal!
Super creativo, me gustó muchísimo. Saludos para el peludo jejeje!
Muchas gracias... con gusto jeje