Hola! Saludos para todos, mis deseos porque se encuentren muy bien, a pesar del lluvioso tiempo que según el Instituto Nacional de Meteorología es en casi todo el país; pero bueno también la lluvia es necesaria para nuestras plantas, animales, refrescar el ambiente y para las hermosas flores a las cuales muy pronto la comunidad rendirá tributo en la feria de las flores, les digo que muchas de mis orquídeas participarán en ese evento porque están en todo su esplendor, bellísimas.
Cómo les dije ayer de nuevo realizaré a diario mis manualidades; como les comente. La moda esta de nuevo tomando auge y los accesorios se están viendo en el mercado con diseños de diferentes tendencias desde lo clásico a lo atrevido realizados con materiales que no creíamos posibles. A las chicas de hoy les gusta vestirse combinadas para verse adecuadas de acuerdo con las diferentes ocasiones usan bonitos y elegantes estilos.
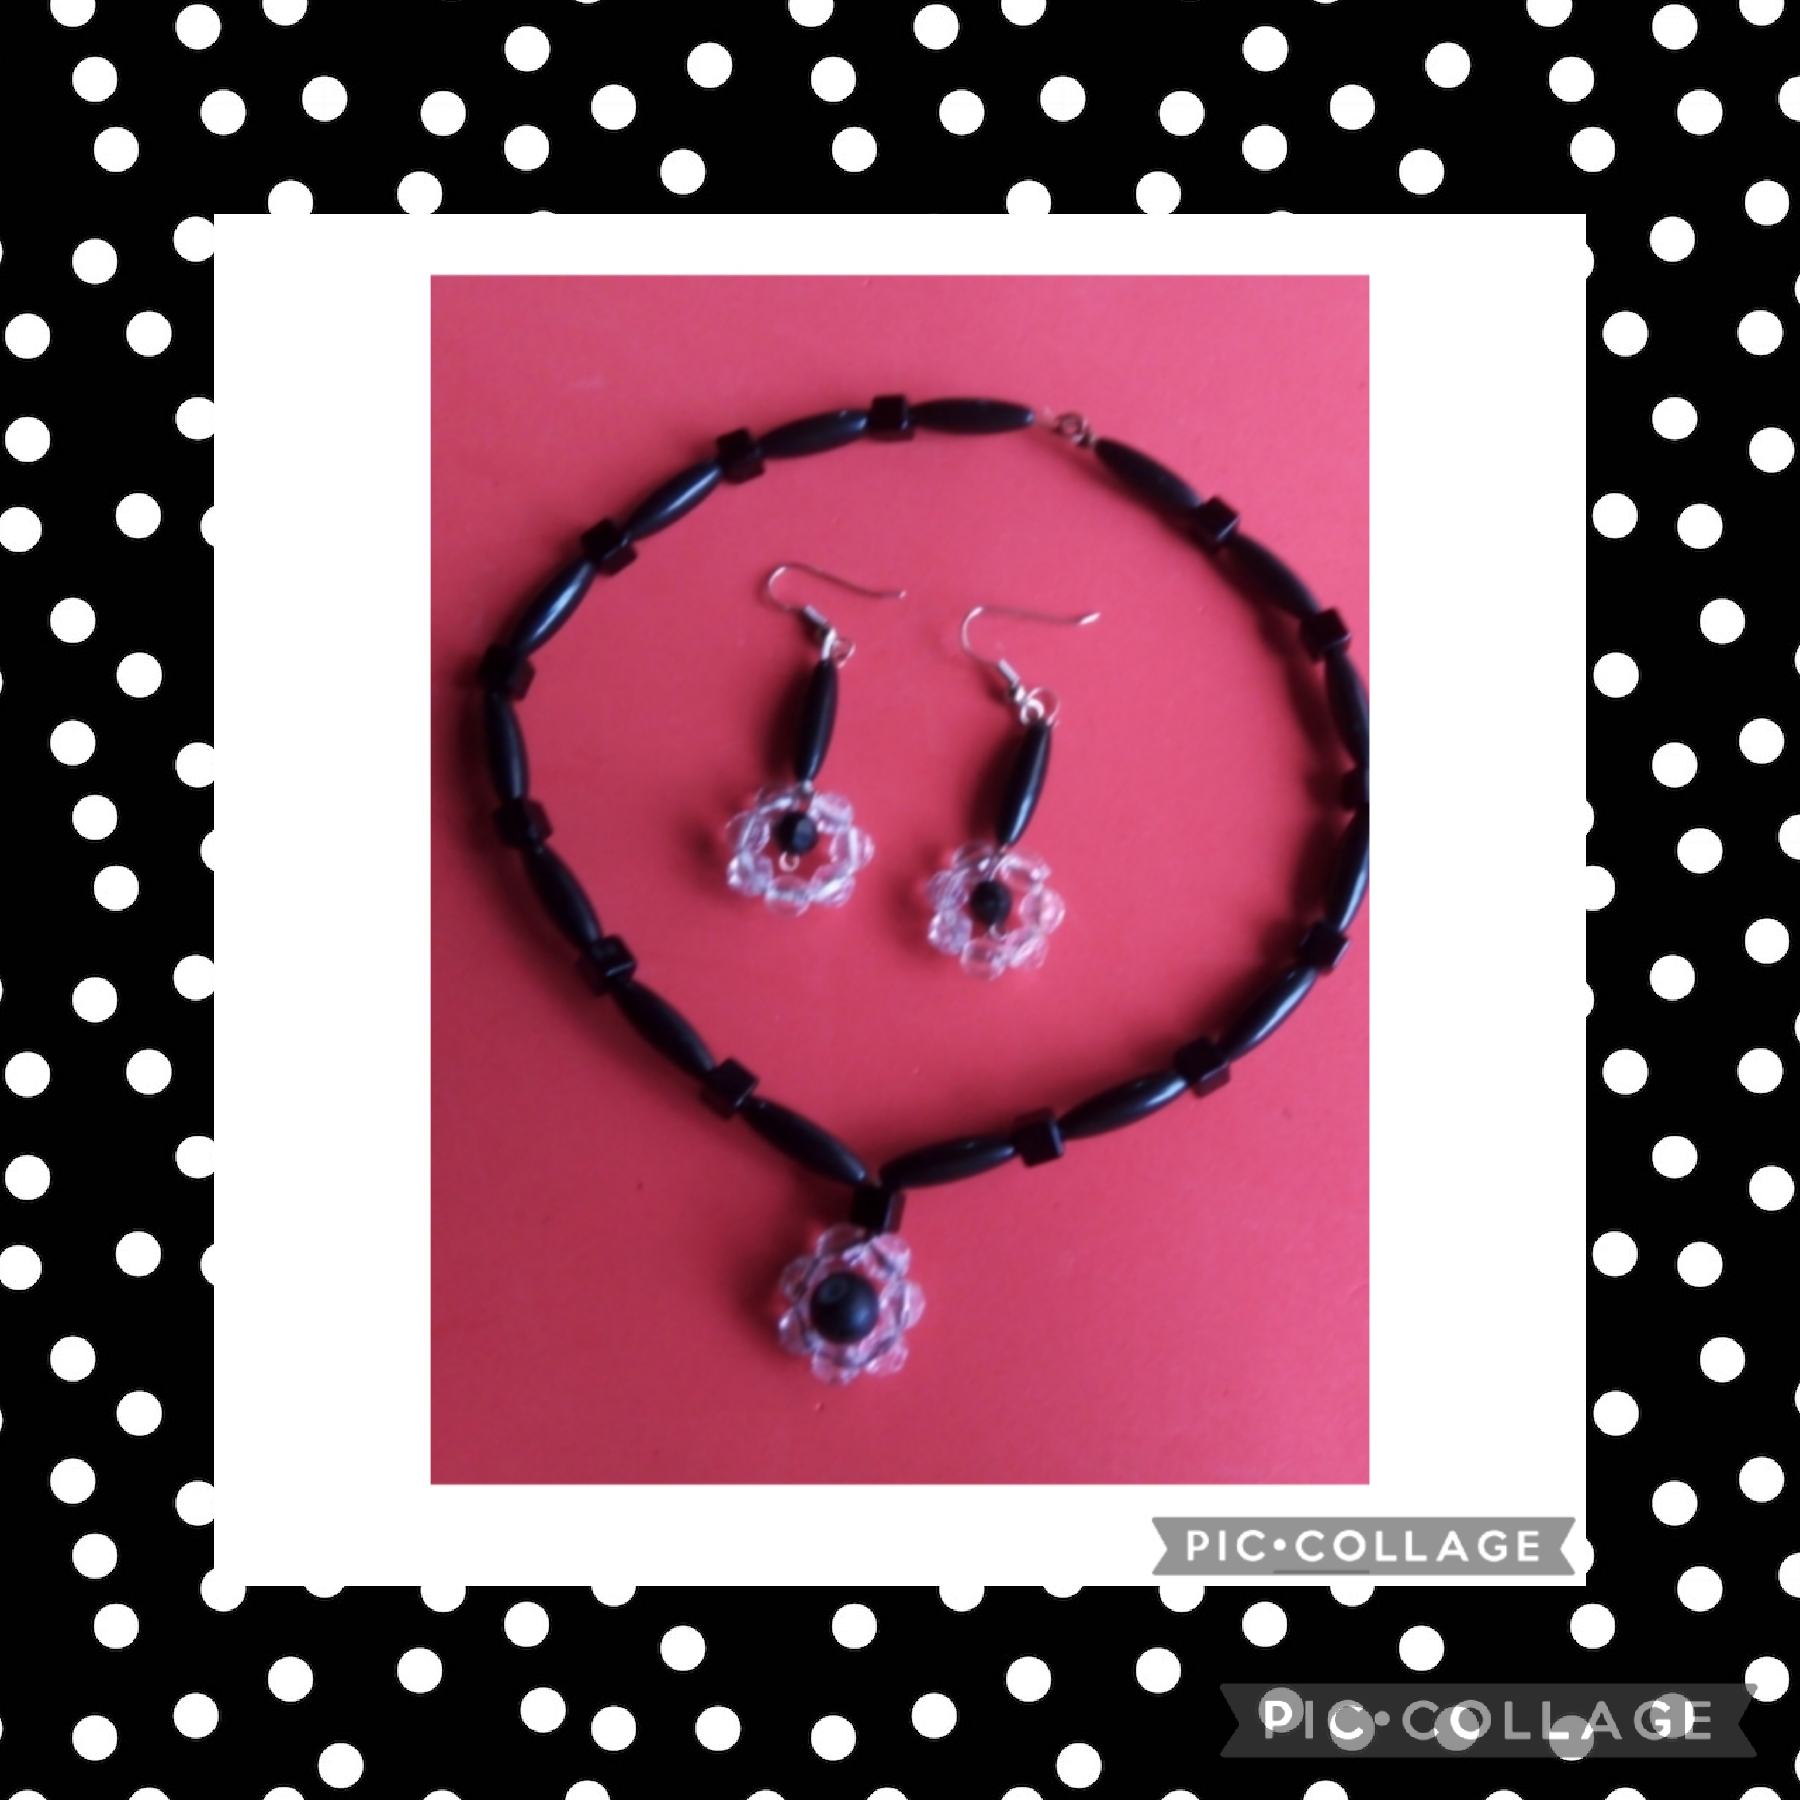
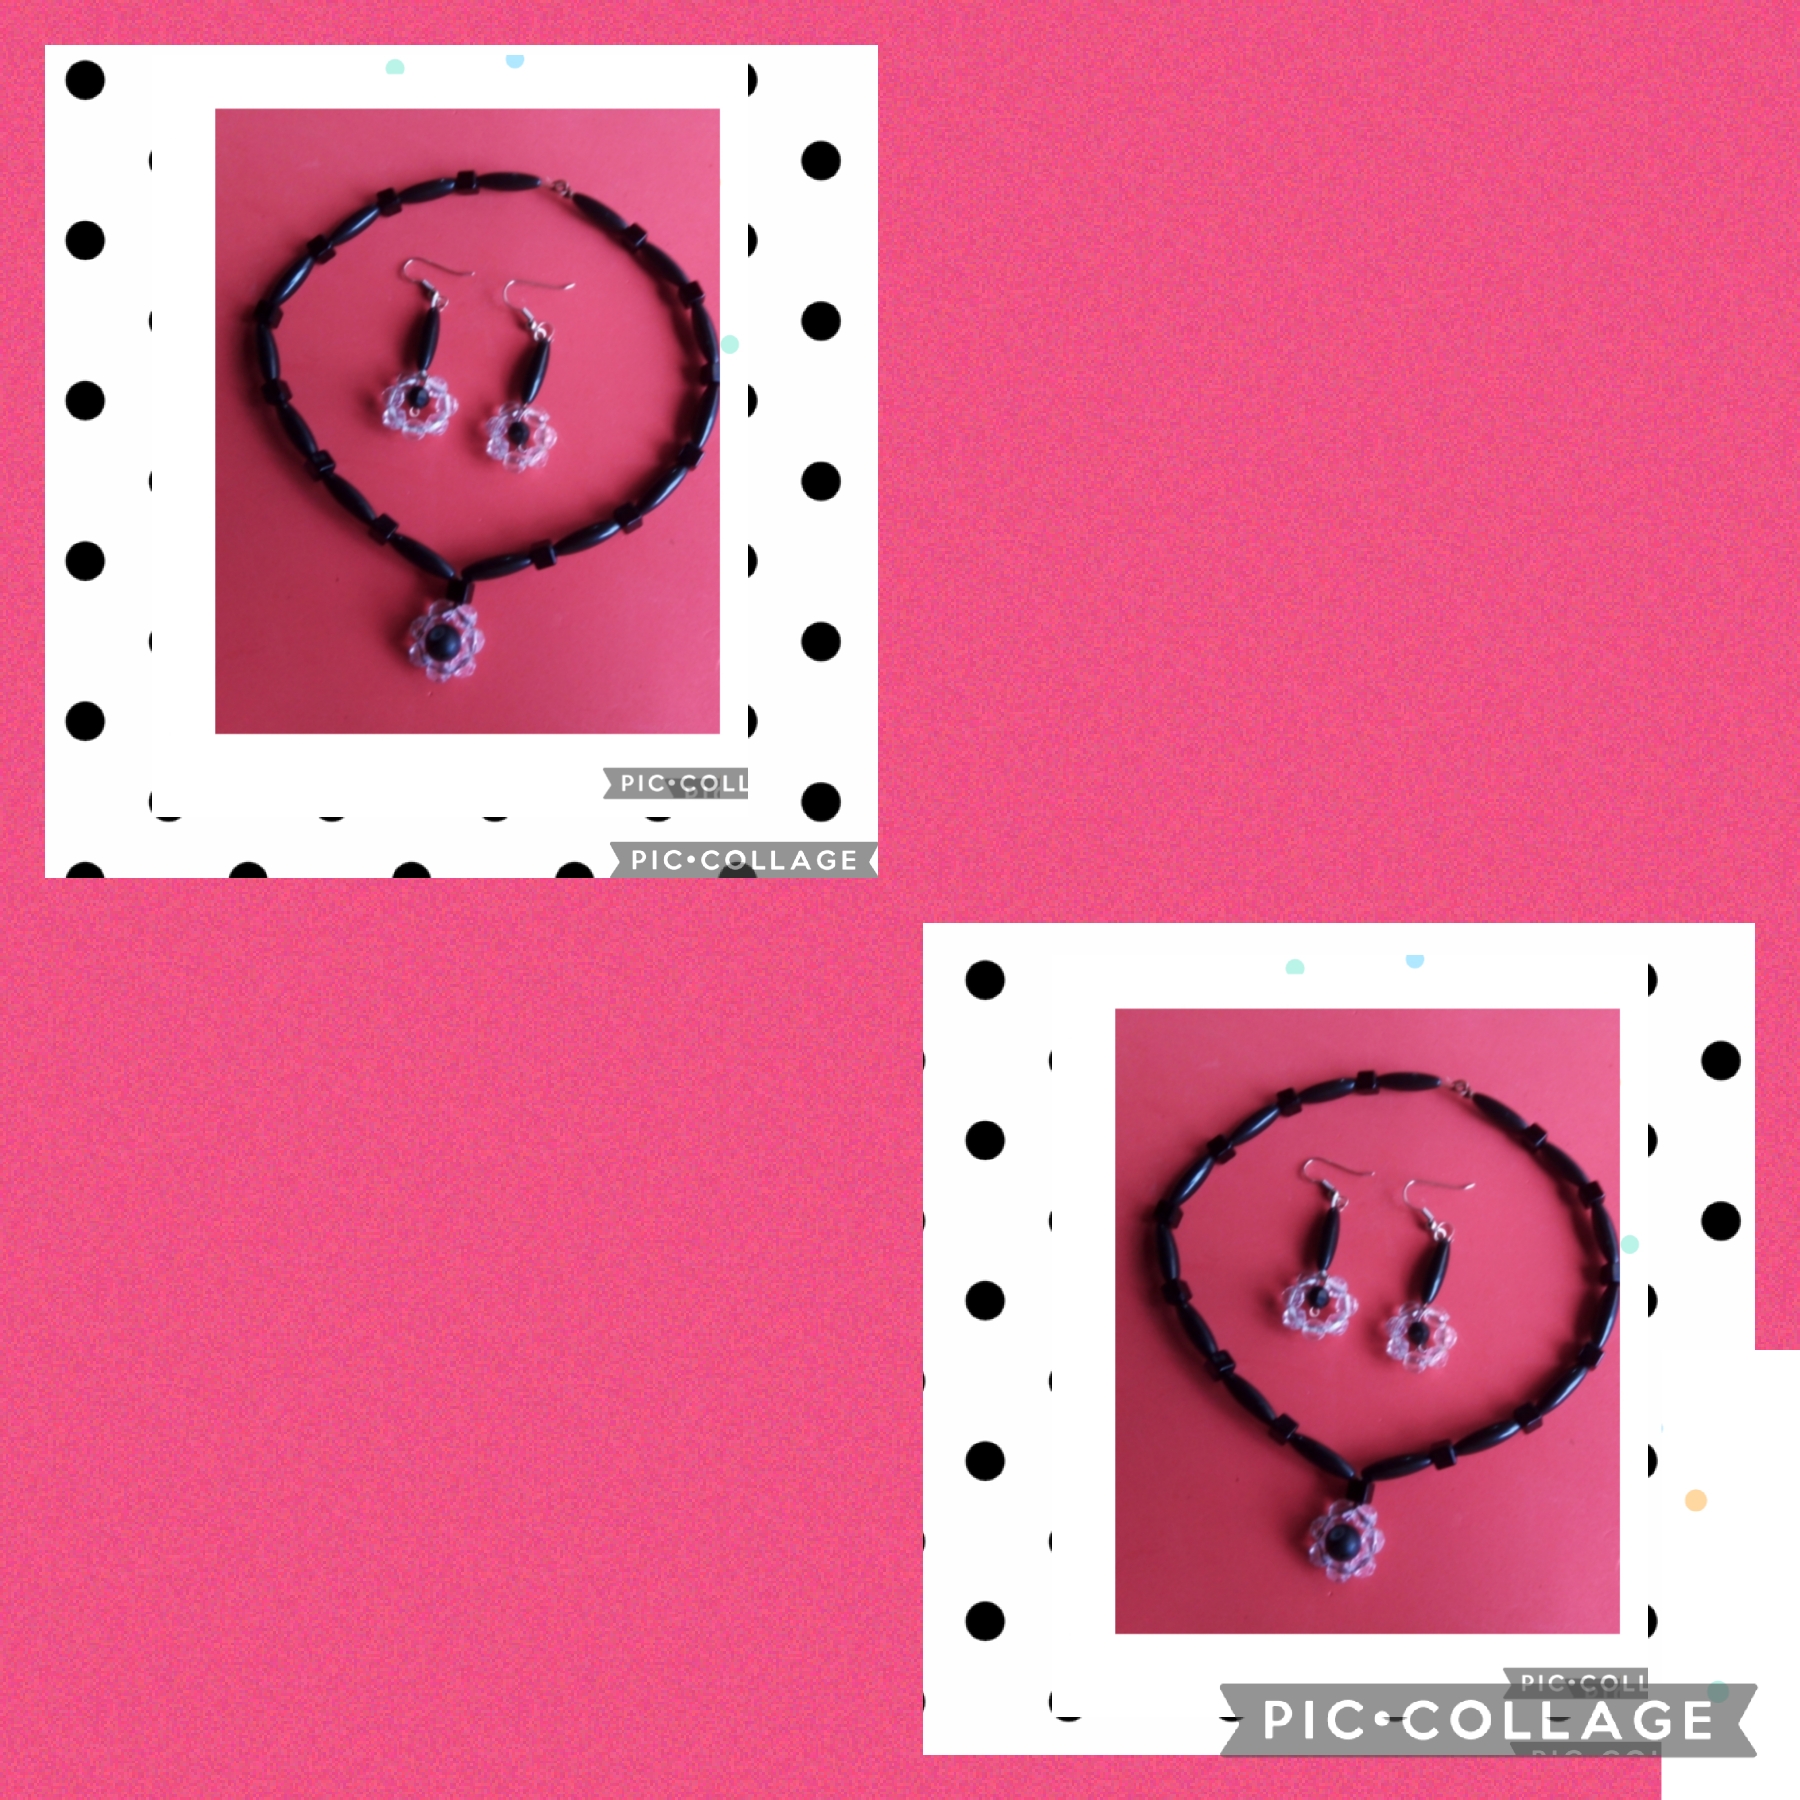
Hoy les compartiré un hermoso juego de bisutería que denominé Brillo de Fantasía pues combine el color negro con cuentas de tono neutro o transparente para así darle una apariencia más sofisticada y podrán usarla las jóvenes y las no tan jóvenes también.
Aquí les dejo el paso a paso de cómo lo hice,:
Hello! Greetings to all, my wishes for you to be very well, despite the rainy weather that according to the National Institute of Meteorology is in almost the entire country; but well rain is also necessary for our plants, animals, to refresh the environment and for the beautiful flowers to which the community will soon pay tribute at the flower fair, I tell you that many of my orchids will participate in that event because they are in all its splendor, beautiful.
As I told you yesterday, I will do my crafts daily again; as I told you. Fashion is booming again and accessories are being seen on the market with designs of different trends from the classic to the daring made with materials that we did not think possible. Today's girls like to dress in matching outfits to look suitable according to different occasions and wear cute and elegant styles.
Today I am going to share with you a beautiful set of jewelry that I called Fantasy Glitter because it combines the color black with neutral or transparent tone beads to give it a more sophisticated appearance and can be used by young and not so young as well.
Here is the step by step of how I did it:
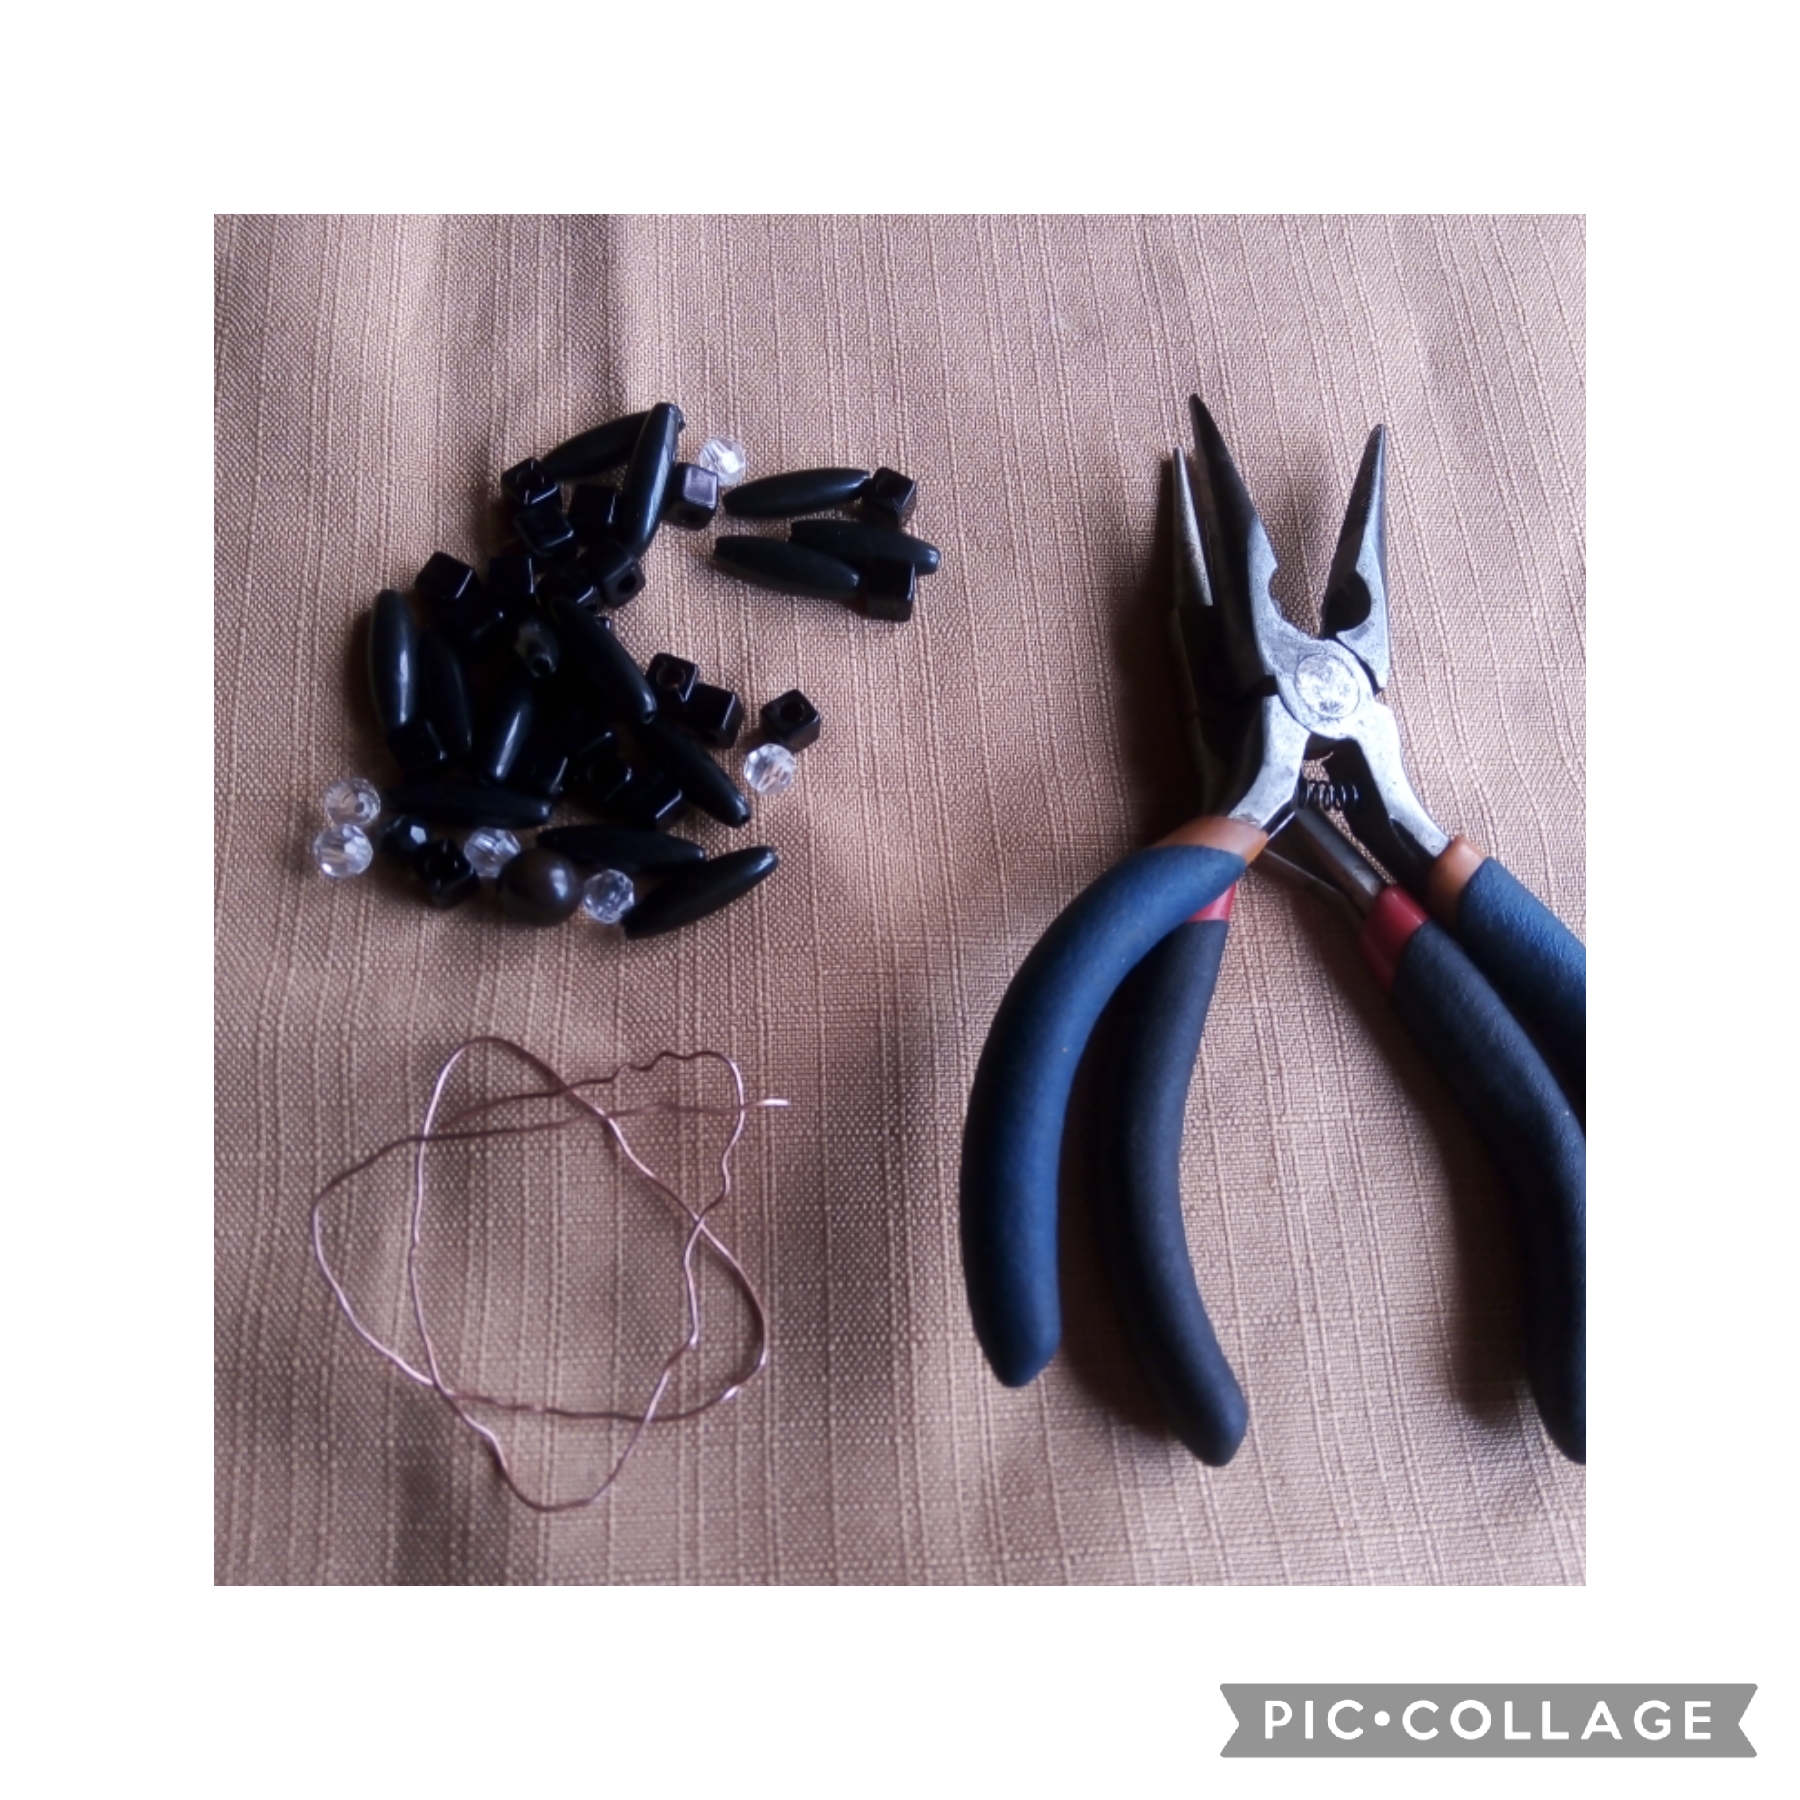
Los materiales que usé para elaborarlos fueron los siguientes:
Diecisiete cuentas negras de forma alargadas.
Catorce cuentas negras en forma de cubo.
Veintiuna piedra tafetada transparente.
Dos anzuelos para aretes.
Sesenta centímetros de alambre de cobre.
Tres piedras tafetadas de color negro.
Una pinza redonda.
Una pinza alicate.
The materials I used to make them were the following:
Seventeen elongated black beads.
Fourteen black cube-shaped beads.
Twenty one transparent taffeta stone.
Two hooks for earrings.
Sixty centimeters of copper wire.
Three black taffeta stones.
A round clamp.
A pliers clamp.
Para su elaboración usé estos sencillos y pocos pasos que a continuación detallo:
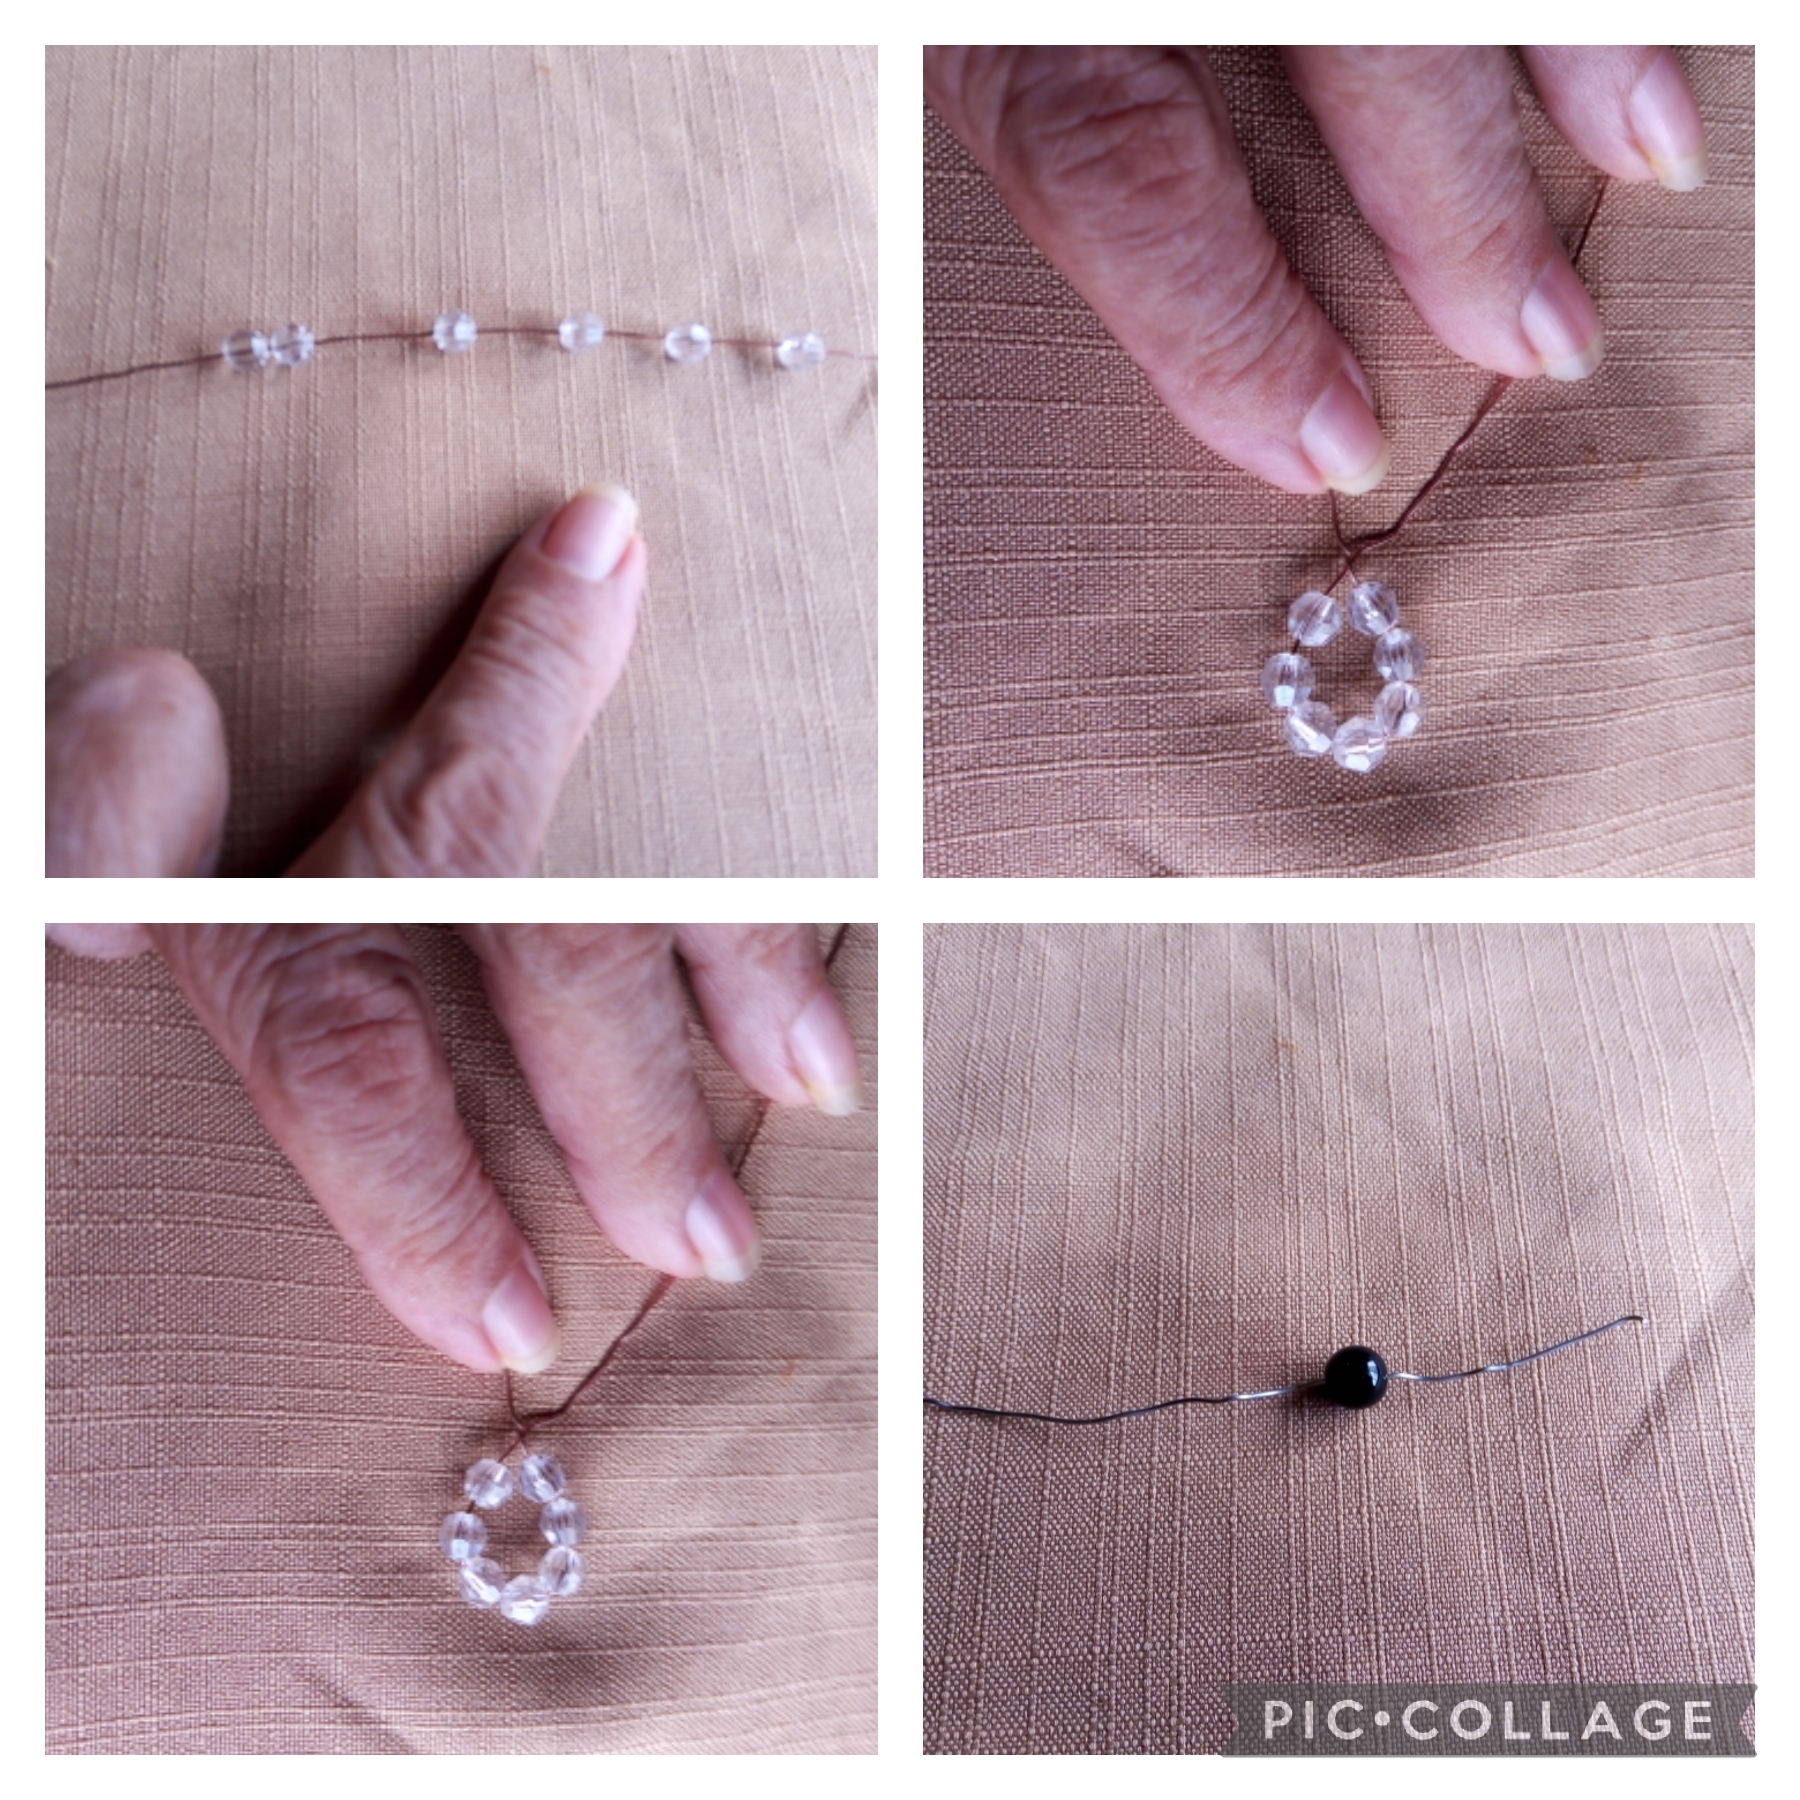
PRIMER PASO:
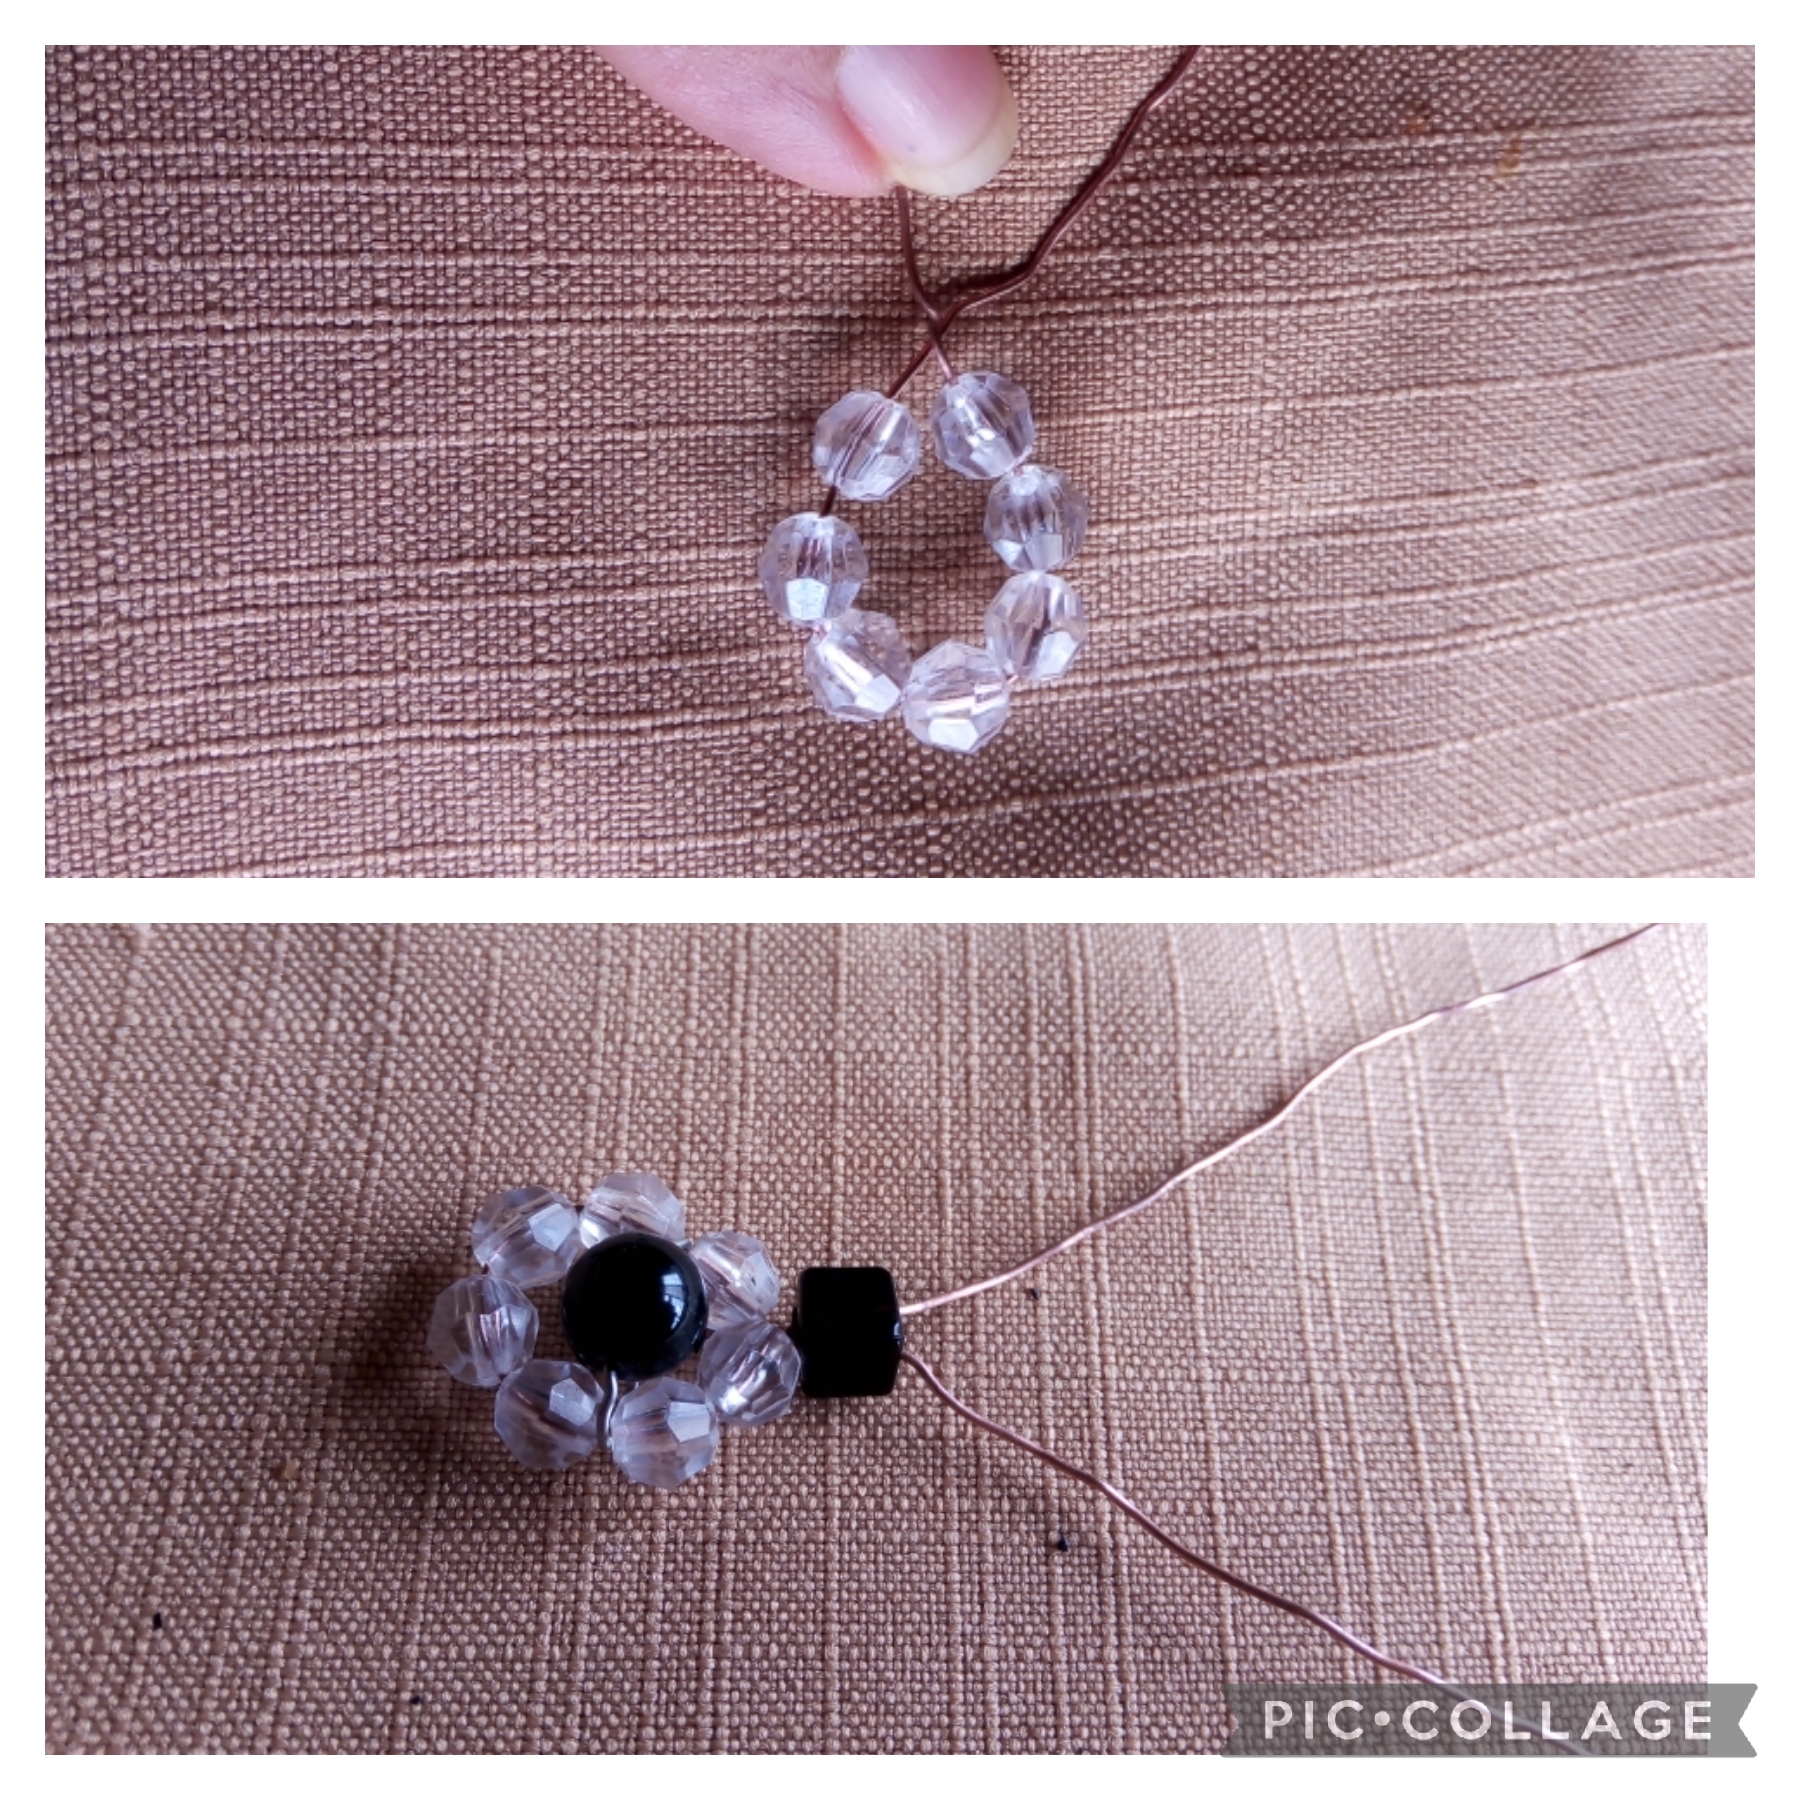
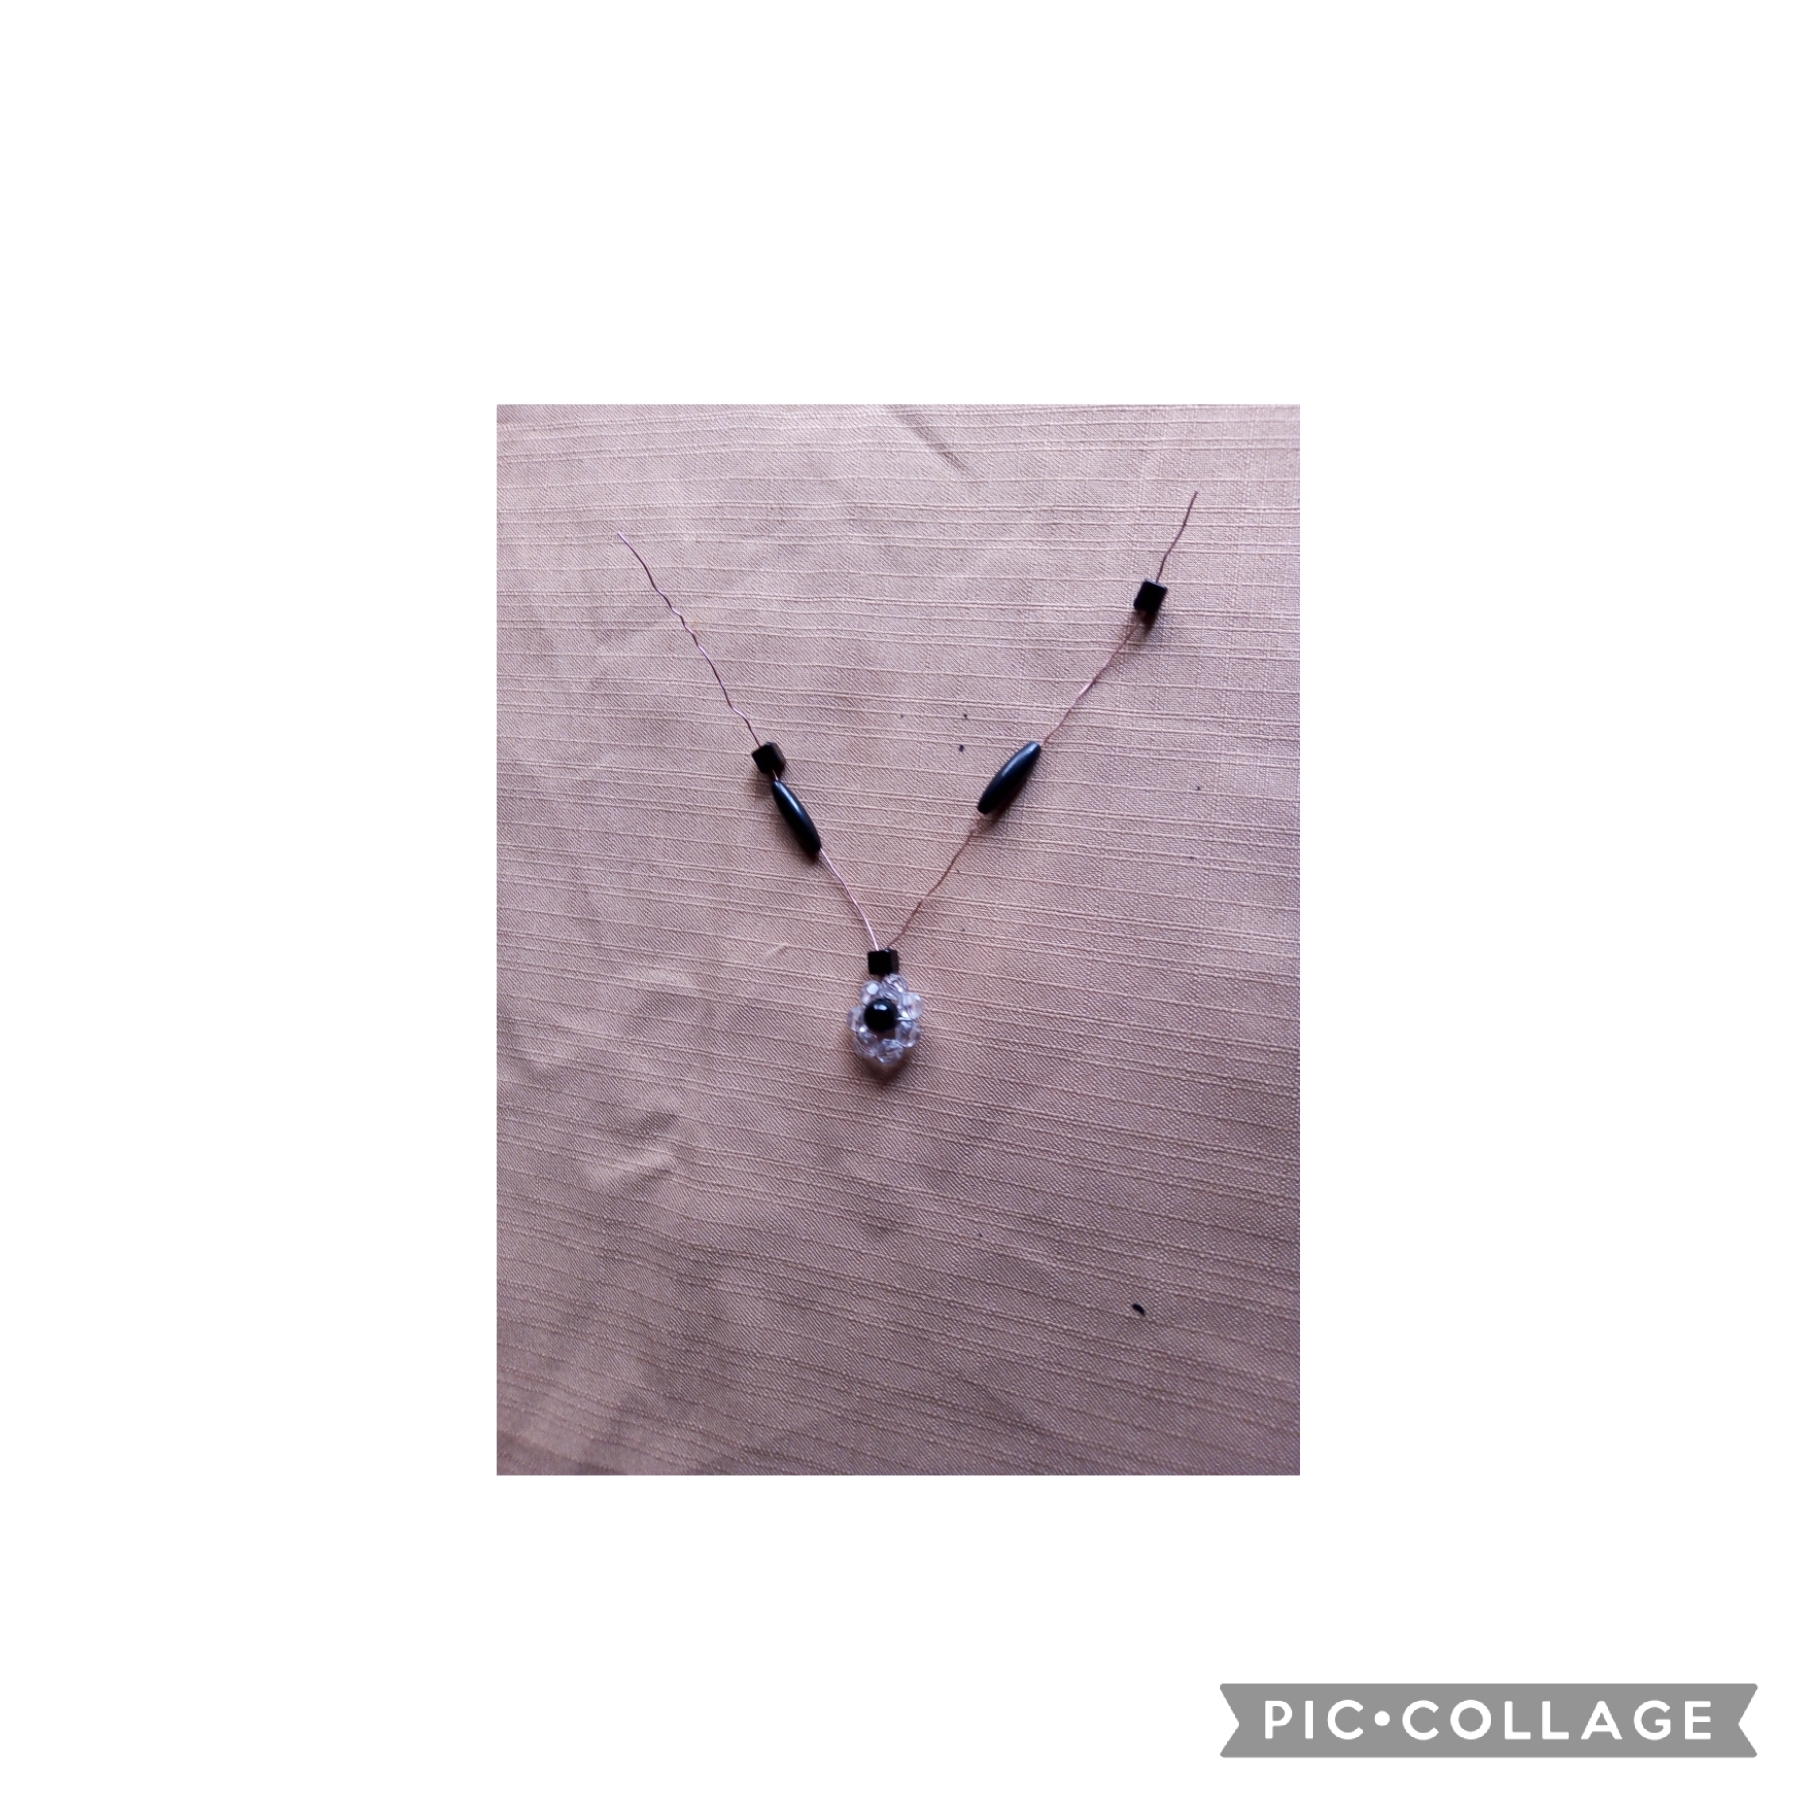
Para realizar este primer paso, corté cincuenta centímetros de alambre de cobre introduje siete piedras tafetadas transparentes a la mitad del alambre, junté para formar un anillo y torcí tres veces para asegurar el aro, luego tomé una piedra tafetada negra que introduje en un pedacito de alambre de tres centímetros y coloqué en el centro del aro para darle forma de flor (así como en las fotos)
For its elaboration I used these simple and few steps that I detail below:
FIRST STEP:
To perform this first step, I cut two feet of copper wire, inserted seven clear faceted stones into the middle of the wire, joined to form a ring and twisted three times to secure the ring, then took a black faceted stone which I inserted into a small piece of wire of three centimeters and I placed in the center of the hoop to give it the shape of a flower (just like in the photos)
SEGUNDO PASO:
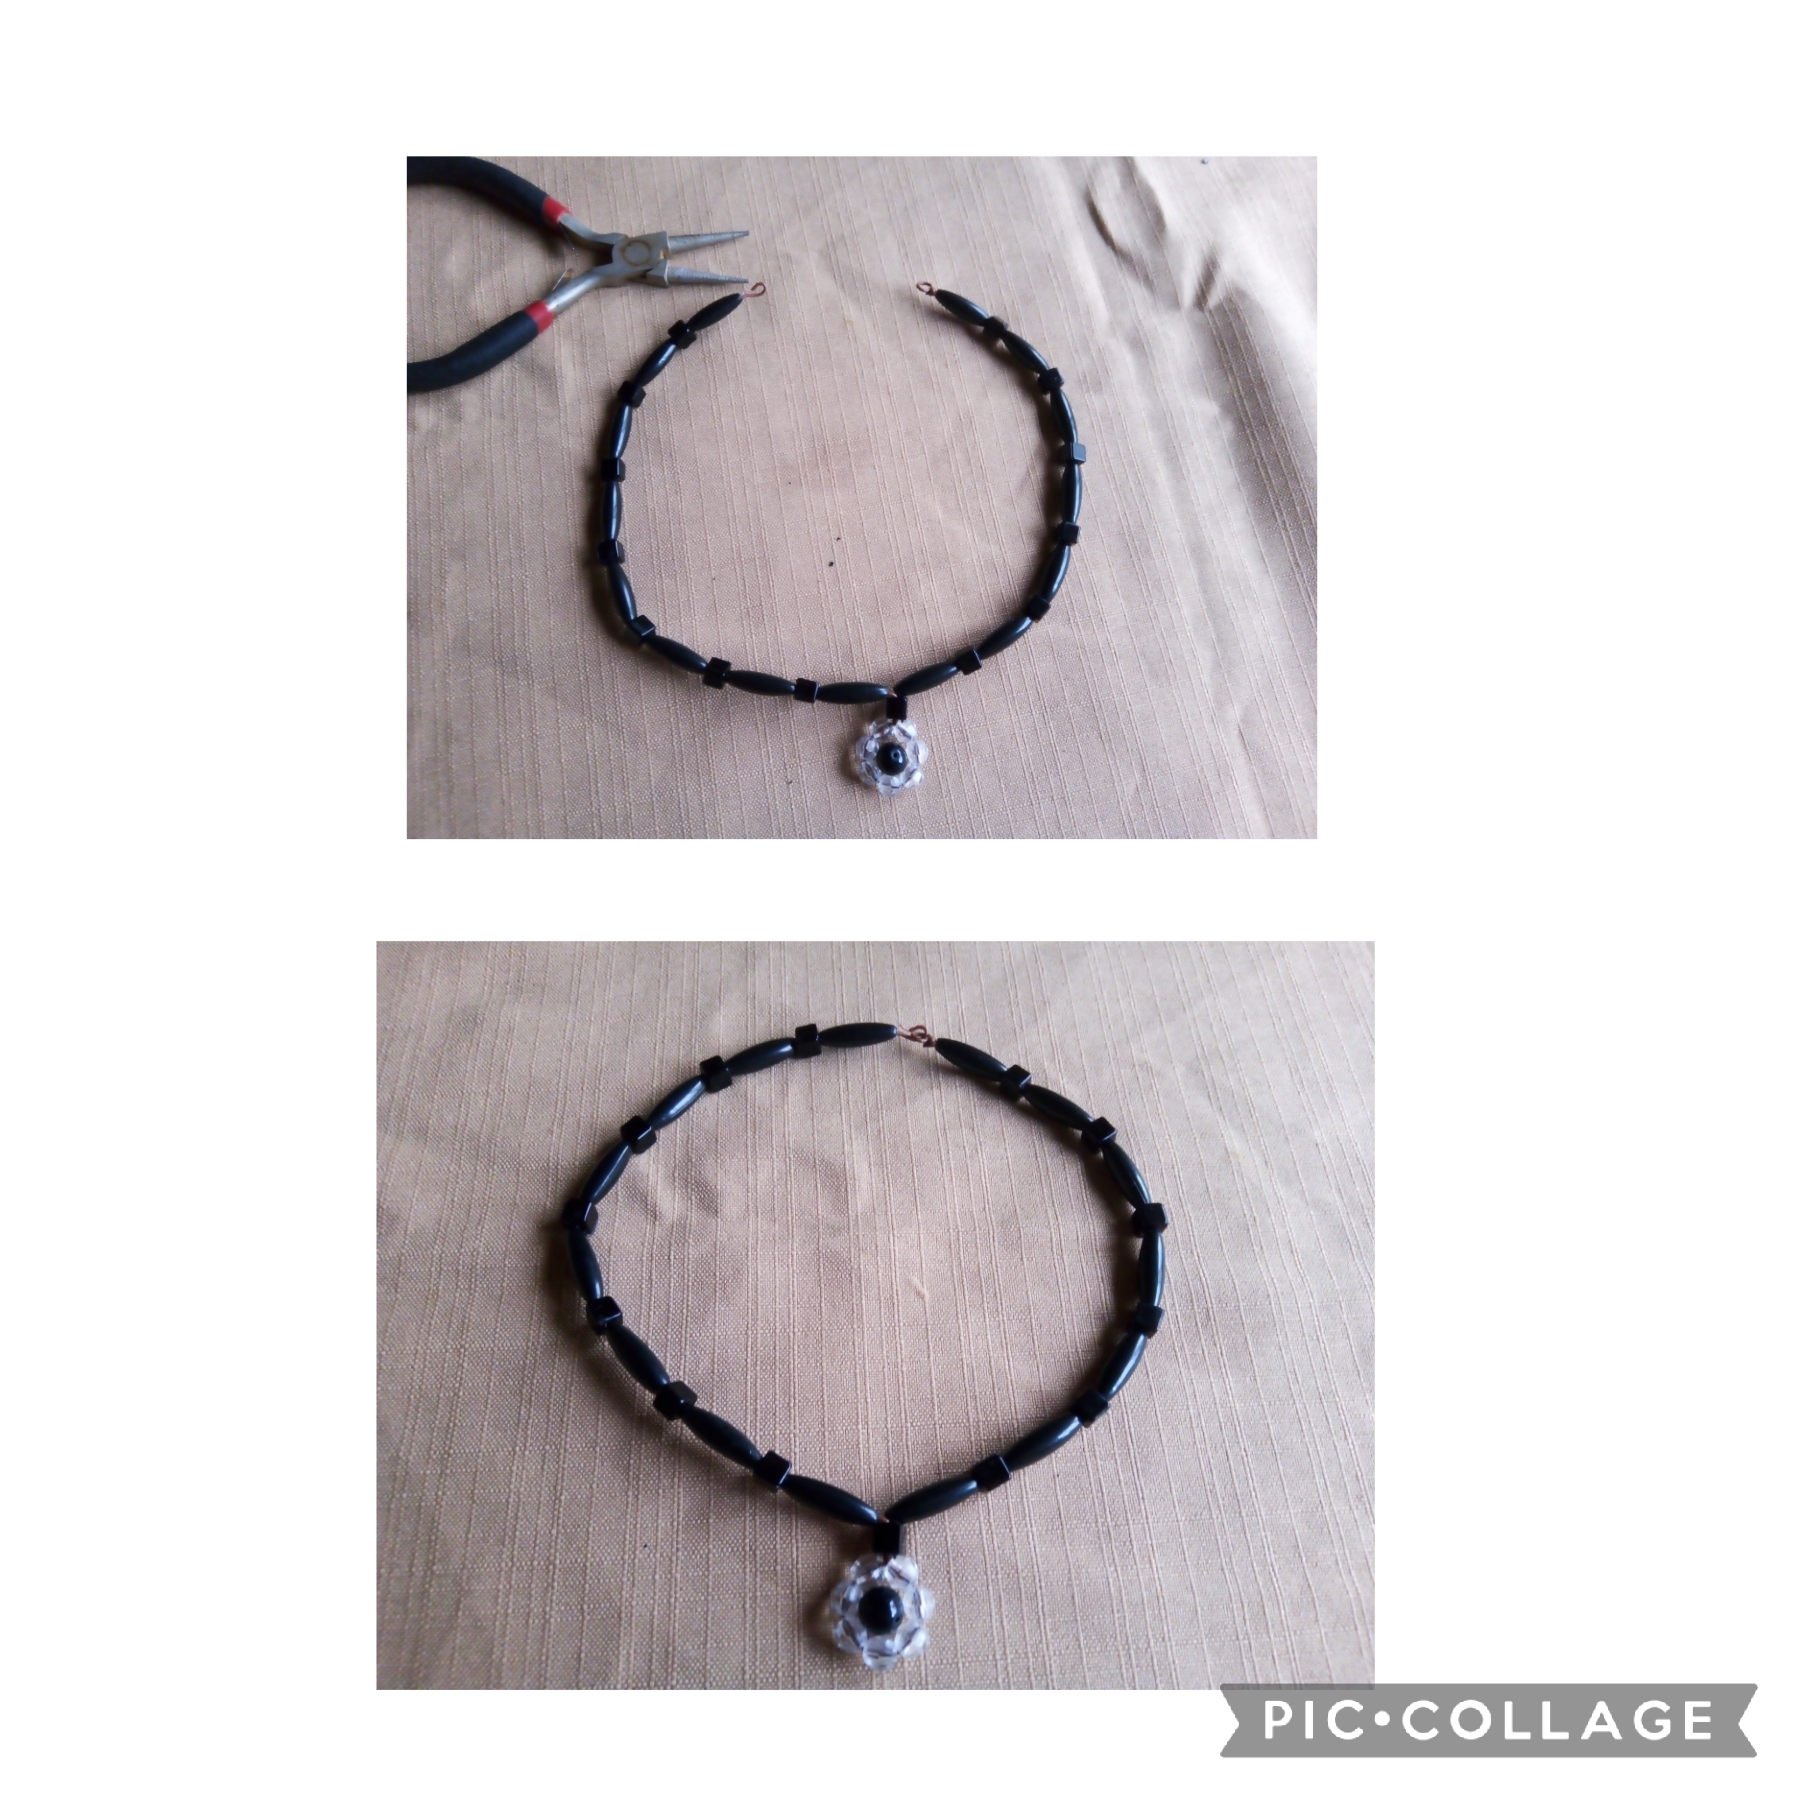
Después de elaborar el primer paso con la ejecución de la flor tomo una piedra cuadrada y la introduzco por los dos alambres, luego los abro y coloco una piedra alargada negra en cada lado del alambre para luego introducir una cuadrada también en cada lado, esta secuencia la elaboró hasta tener siete piedras alargadas y seis cuadradas de cada lado del alambre como se ve en las fotos.
SECOND STEP:
After making the first step with the execution of the flower, I take a square stone and insert it through the two wires, then I open them and place a black elongated stone on each side of the wire and then insert a square stone on each side as well, this sequence He elaborated it until he had seven elongated stones and six square ones on each side of the wire as seen in the photos.
TERCER PASO:
Una vez que coloqué todas las cuentas en el alambre con la pinza redonda hice una argolla y un terminal en forma gancho para el cierre. Ver fotos.
THIRD STEP:
Once I placed all the beads on the wire with the round pliers, I made a ring and a hook-shaped terminal for the closure. To see photos.

CUARTO PASO:
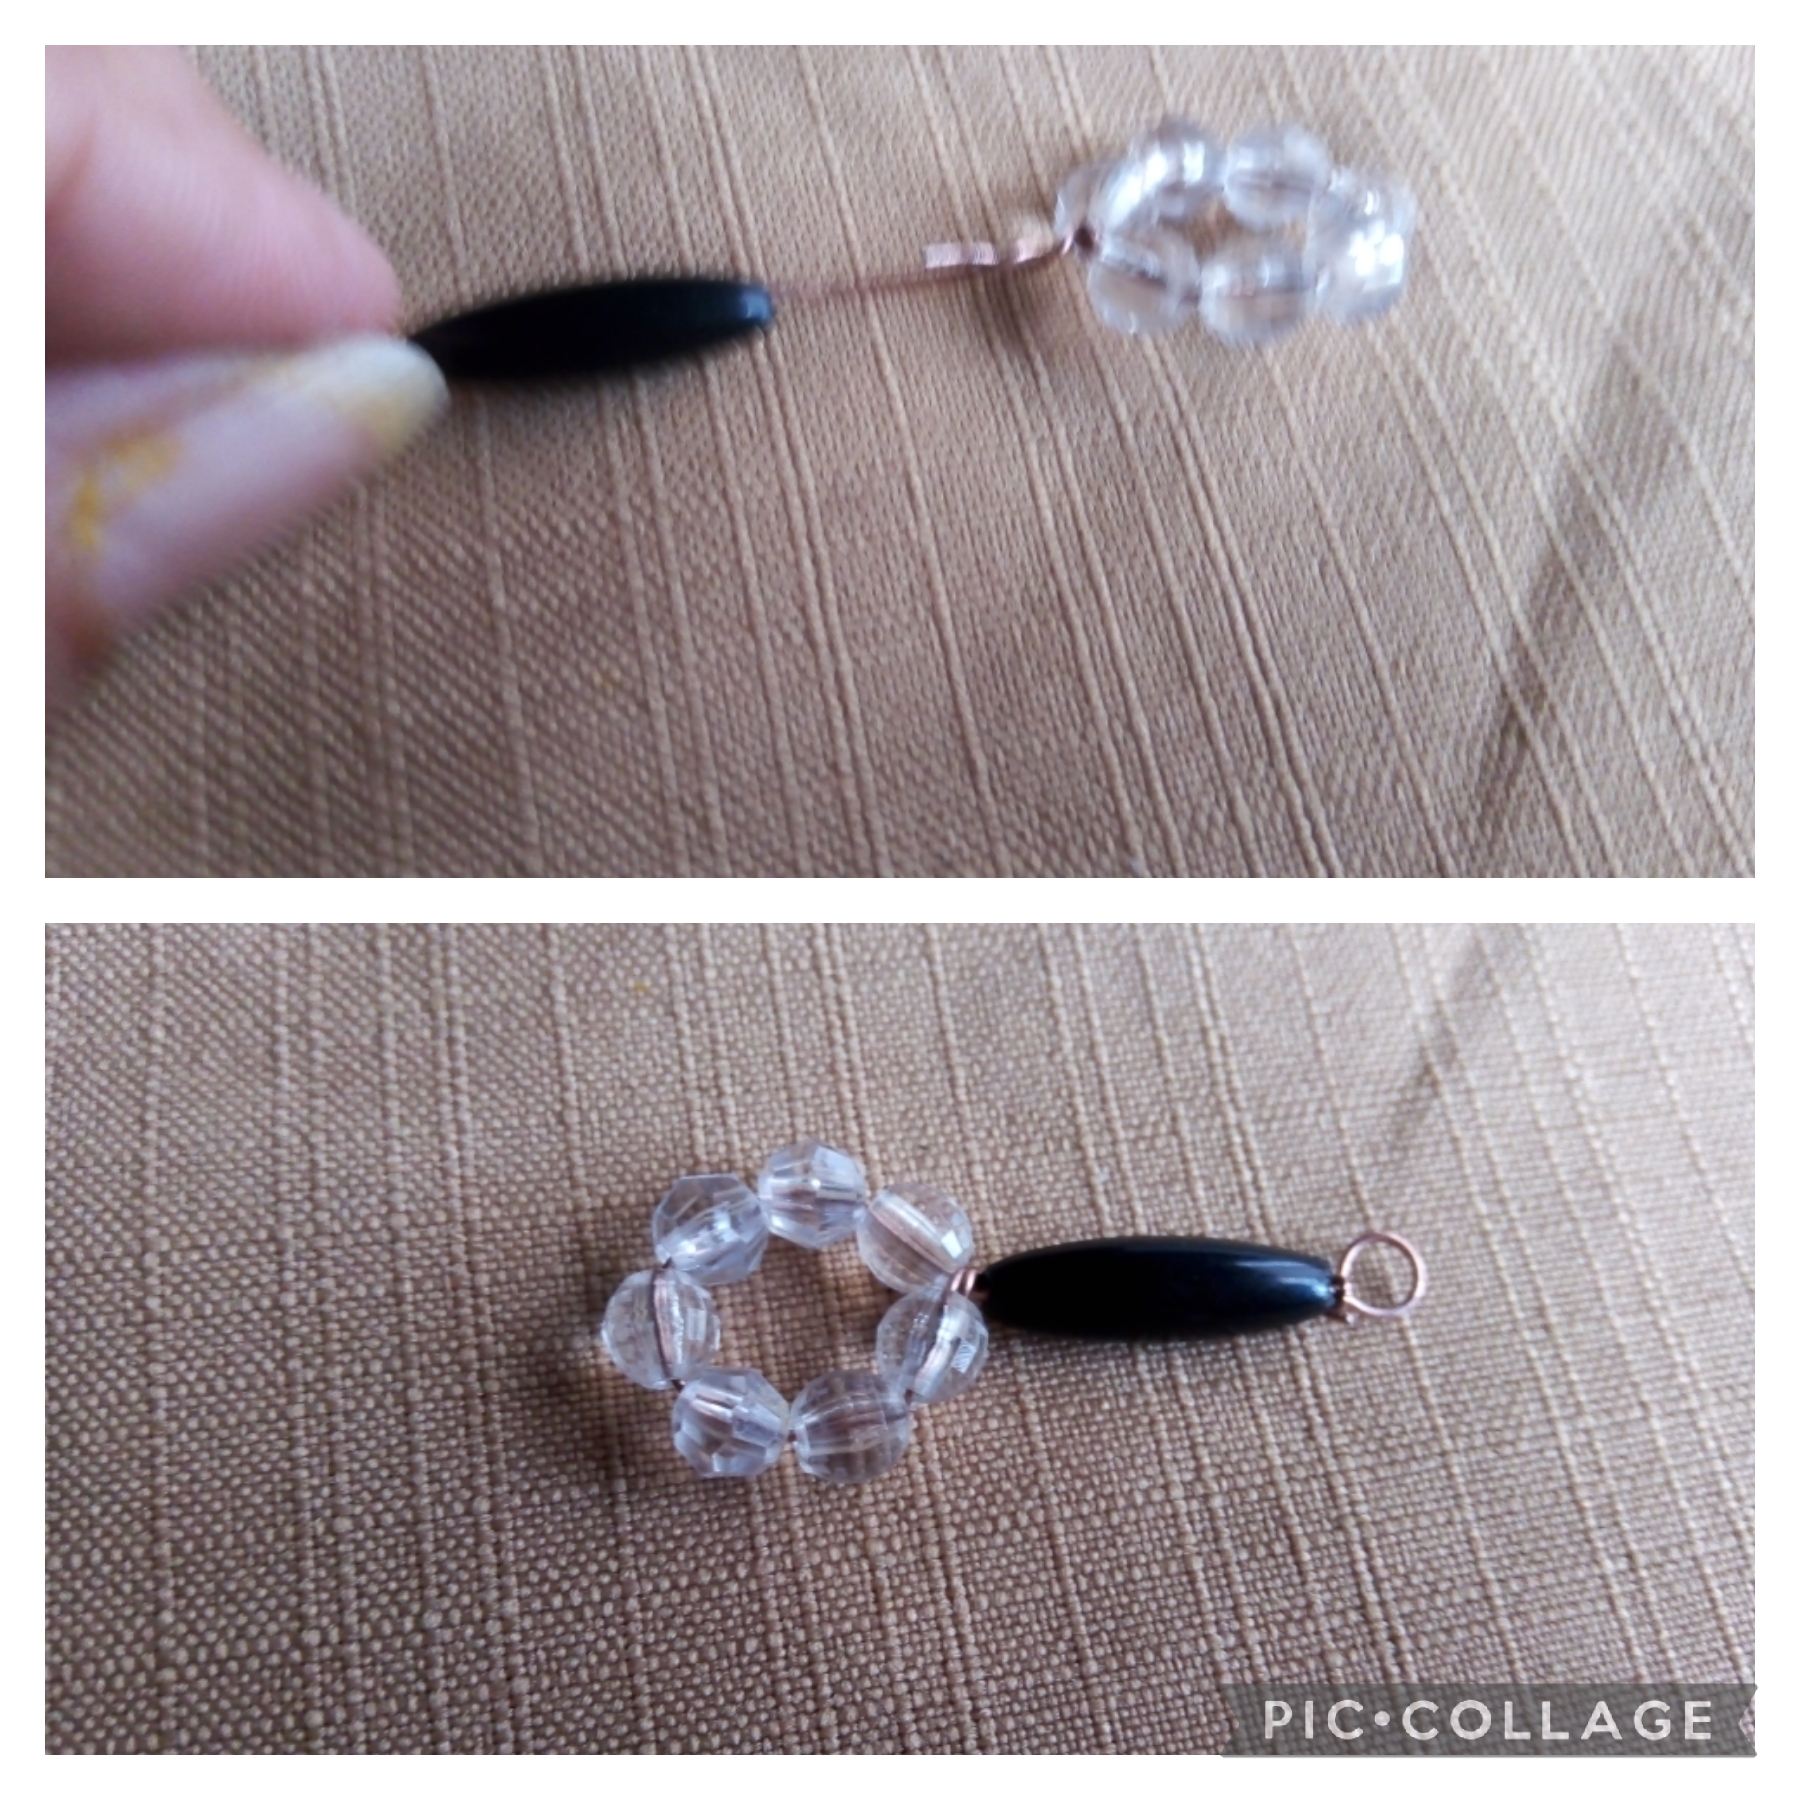
Ahora vamos a elaborar los aretes: para realizarlos corto dos trozos de alambre de ocho centímetros cada uno, para el primero tomo uno de los trozos del alambre e introduzco siete piedras tafetadas transparentes y elaboró un anillo usando el mismo paso igual que el utilice para hacer la flor del collar, después introduje una pieza alargada de color negro y con la pinza redonda hice una argolla dónde introduje un anzuelo y así quedó listo el arete, de la misma forma realice el otro arete y así quedaron, como en las fotos.
FOURTH STEP:
Now we are going to make the earrings: to make them I cut two pieces of wire of eight centimeters each, for the first I take one of the pieces of wire and insert seven transparent taffeta stones and make a ring using the same step as the one used to make the flower of the necklace, then I inserted an elongated piece of black color and with the round clamp I made a ring where I inserted a hook and thus the earring was ready, in the same way I made the other earring and thus they were, as in the photos.
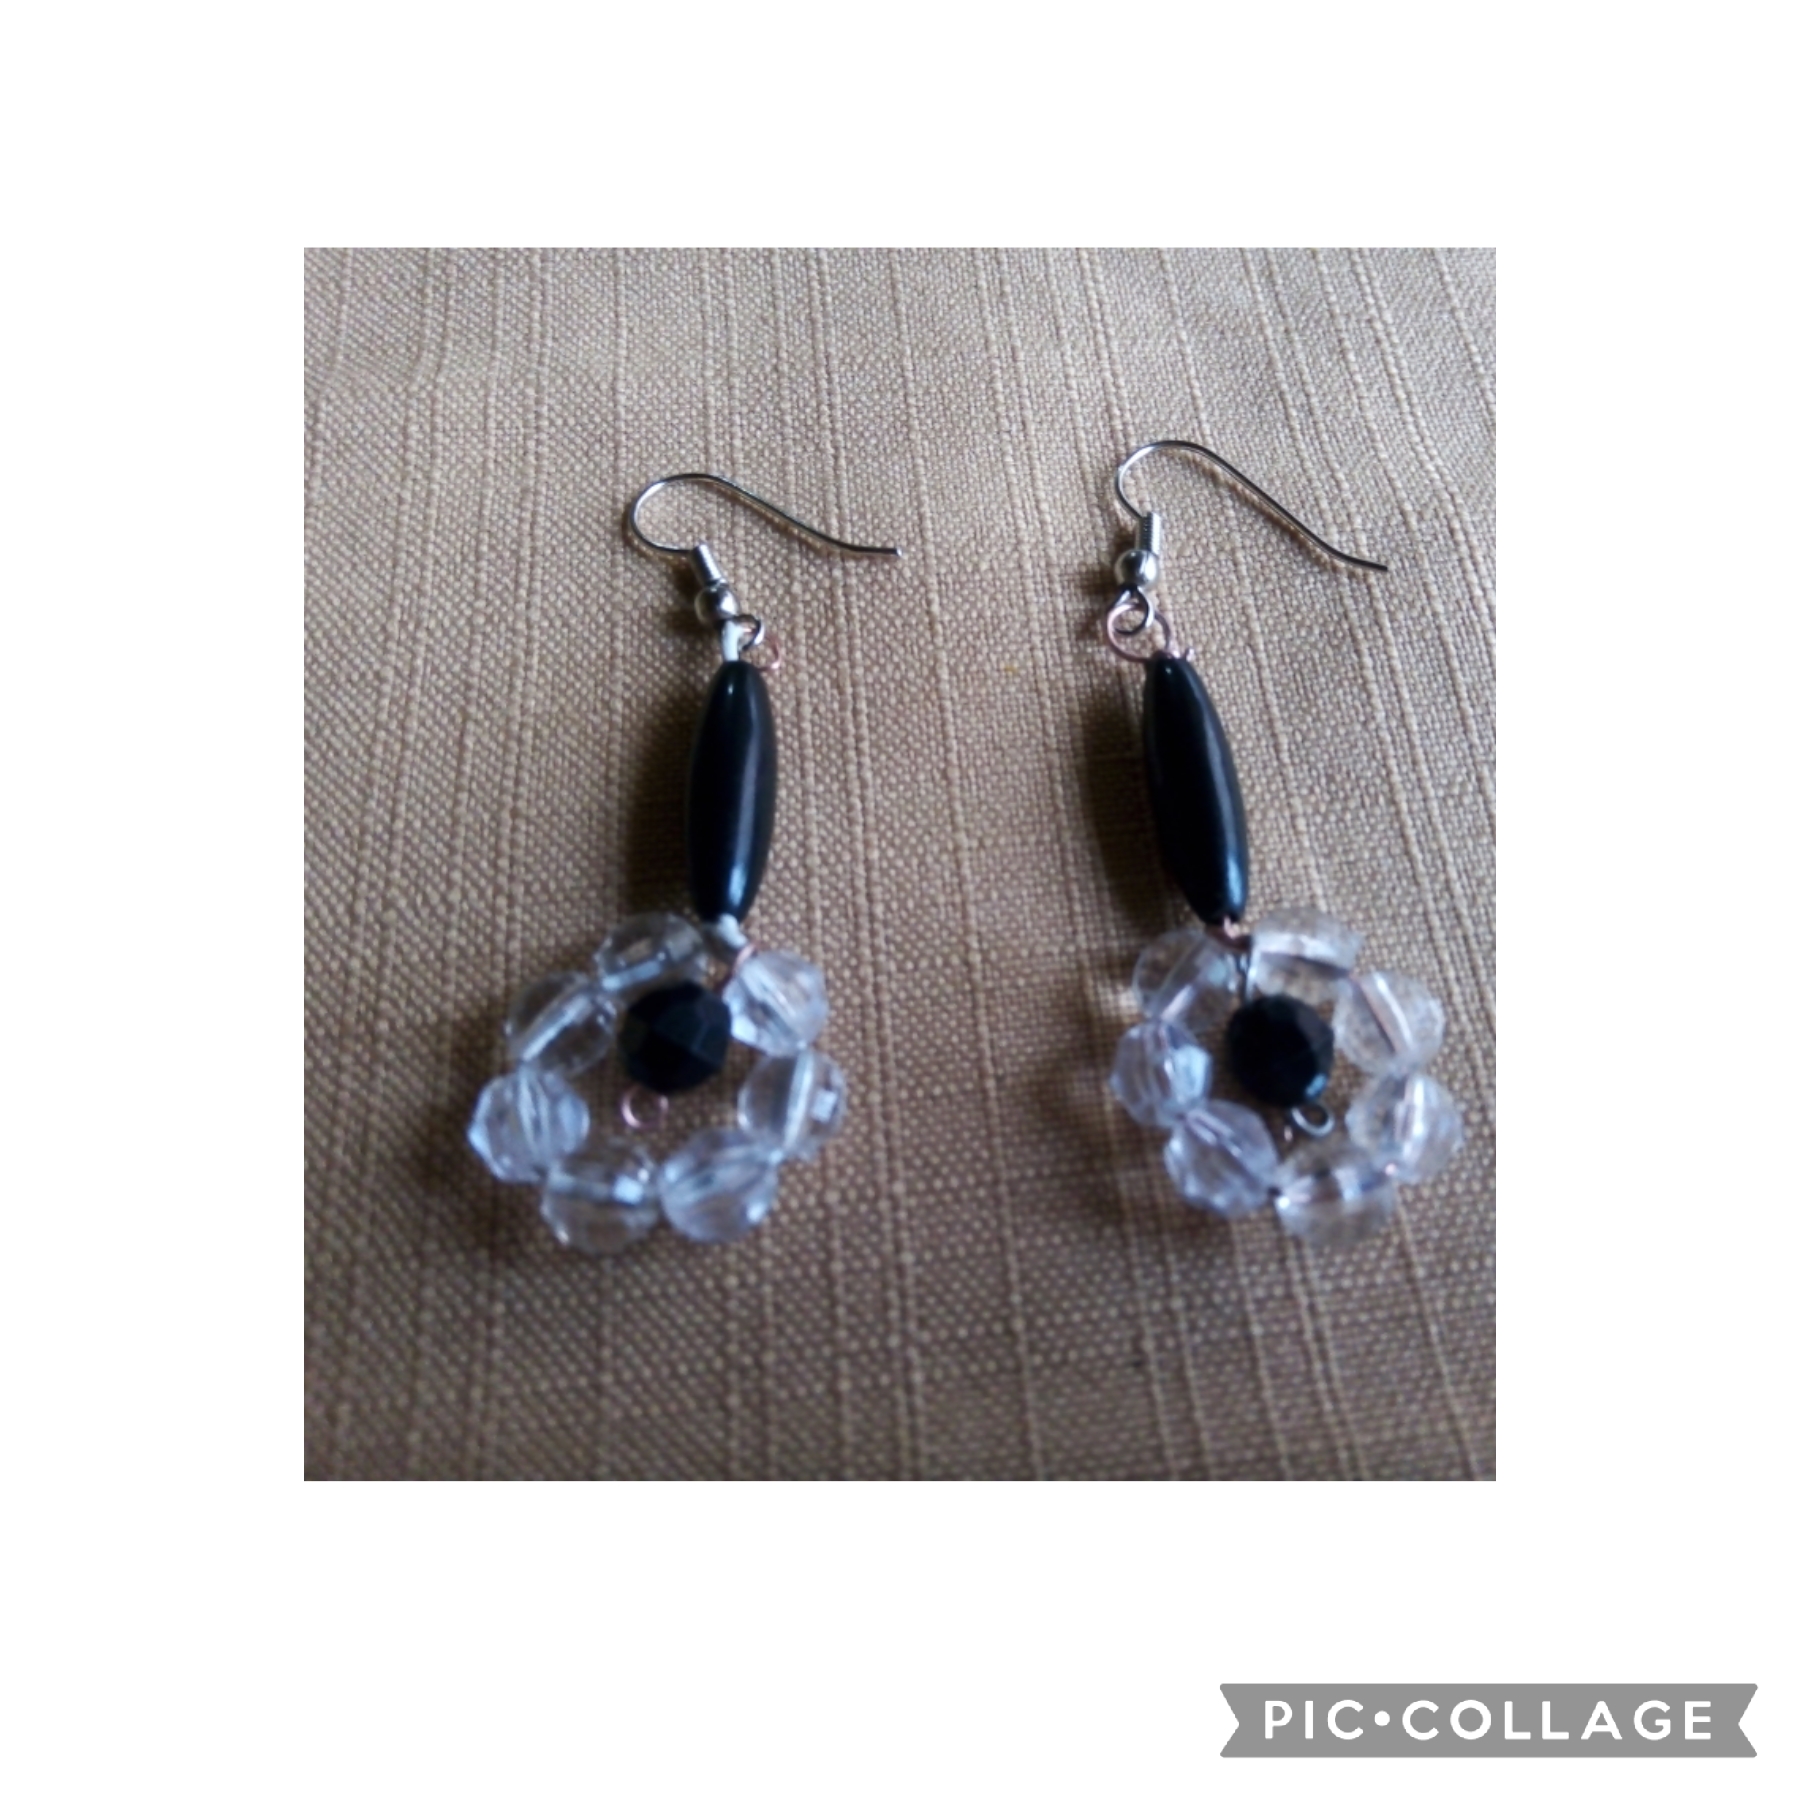
Artistas Creativos este es el resultado final de mi manualidad de hoy, como siempre espero que les agrade y aprovechen la idea, para salir del apuro en cualquier ocasión que necesiten hacer un presente. Gracias a todos los que leen y ven mis publicaciones, nos vemos en la próxima manualidad.
Creative Artists this is the final result of my craft today, as always I hope you like it and take advantage of the idea, to get out of trouble any time you need to make a present. Thanks to everyone who reads and views my posts, see you in the next craft
Las imágenes de este tutorial son de mi propiedad las fotos las tomé con mi celular Motorola E6 y las edite con una aplicación gratis del mismo.
Para traducir texto usé geogle traduuctor.
The images in this tutorial are my property, the photos were taken with my Motorola E6 cell phone and I edited them with a free application of the same.
To translate text I used geogle translator.

Muy bello trabajo amiga...es muy fino y sería ideal para dar de regalo. Gracias por compartir...saludos!
🎆🎇🎉🎊🌧️💐✨🌾🌱🌹🌙🌿🍃🥀⚡🌺☘️🍀🌈🌷⭐🪴🌵🌸🌟💮🌴🌳💫☀️💮☔🌲🌳🌍🌌🌠☄️🏵️🐝🌻🌼🍄🐞🦋💙☕💜🍍🎆🎇🎉🎊
Me encantan tus comentarios amiga, algún día elaboraré uno para ti, saludos.
Muchas gracias bella...un abrazo y bendiciones.
🎆🎇🎉🎊🌧️💐✨🌾🌱🌹🌙🌿🍃🥀⚡🌺☘️🍀🌈🌷⭐🪴🌵🌸🌟💮🌴🌳💫☀️💮☔🌲🌳🌍🌌🌠☄️🏵️🐝🌻🌼🍄🐞🦋💙☕💜🍍🎆🎇🎉🎊
Thank you for sharing this amazing post on HIVE!
Your content got selected by our fellow curator @rezoanulvibes & you just received a little thank you via an upvote from our non-profit curation initiative!
You will be featured in one of our recurring curation compilations and on our pinterest boards! Both are aiming to offer you a stage to widen your audience within and outside of the DIY scene of hive.
Join the official DIYHub community on HIVE and show us more of your amazing work and feel free to connect with us and other DIYers via our discord server: https://discord.gg/mY5uCfQ !
If you want to support our goal to motivate other DIY/art/music/homesteading/... creators just delegate to us and earn 100% of your curation rewards!
Stay creative & hive on!