Hola, holaaa! Mis queridos vecinos hivedianos; ya se que están contentos y felices, fin de semana para una semana larga, viernes concilio decía mi abuela; y es que esa gente tenían cada expresión que después de tanto tiempo de andar conociendo y reviviendo tradiciones de un lado a otro entiendo tantas cosas ; que cuando termine de escribir mi libro autobiográfico lo publicaré en Hivers para compartir esas experiencias interesantes de la vida cotidiana que han nutrido a nuestros antepasados y que vale la pena revivir.
Mi manualidad creativa de hoy tiene algo que ver con la Entomología, pues cuando llegue a mis labores diarias ya me esperaban las jefas porque como ellas son las que disponen entonces yo soy la alumna, pero me encanta porque así aprendo a compartir lo que les gusta. Bueno hoy querían hacer maceteros para ubicar cactus y suculentas que serán parte de los detalles para obsequiar el día de las madres; cuando trajeron las suculentas una de ellas traía una conchuela o vaquita, pero yo la llamo mariquita y creo que en muchas partes así la llaman; ellas son unos insectos por eso hablé de entomologia es la rama que los estudia; en la actualidad tienen mucha importancia en la ecología por sus hábitos alimenticios ya que son depredadoras de pulgones, cochinillas y ácaros que se encuentran en las plantas por eso se le llaman controladoras biológicas de plagas.
Para no hacer el cuento más largo al ver la mariquita decidí hacer los maceteros en forma de Mariquita, así que pueden seguir leyendo para que vean como reciclando latas de pasta de tomate las hice:
Hello, hello! My dear hivedian neighbors; I know they are content and happy, weekend for a long week, Friday council my grandmother used to say; and it is that those people had every expression that after so much time of knowing and reliving traditions from one place to another I understand so many things; that when I finish writing my autobiographical book I will publish it in Hivers to share those interesting experiences of daily life that have nurtured our ancestors and that are worth reliving.
My creative craft today has something to do with Entomology, because when I get to my daily tasks the bosses are already waiting for me because since they are the ones who have them, then I am the student, but I love it because that way I learn to share what they like .Well, today they wanted to make pots to place cacti and succulents that will be part of the details to give away on Mother's Day; when they brought the succulents, one of them brought a conchuela or vaquita, but I call it a ladybug and I think that in many places they call it that; they are insects that is why I spoke of entomology, it is the branch that studies them; At present, they are very important in ecology due to their eating habits, since they are predators of
aphids, mealybugs and mites that are found on plants that is why they are called biological pest controllers.
To cut a long story short when I saw the ladybug I decided to make the planters in the shape of a Ladybug, so you can continue reading so you can see how I made them by recycling cans of tomato paste.
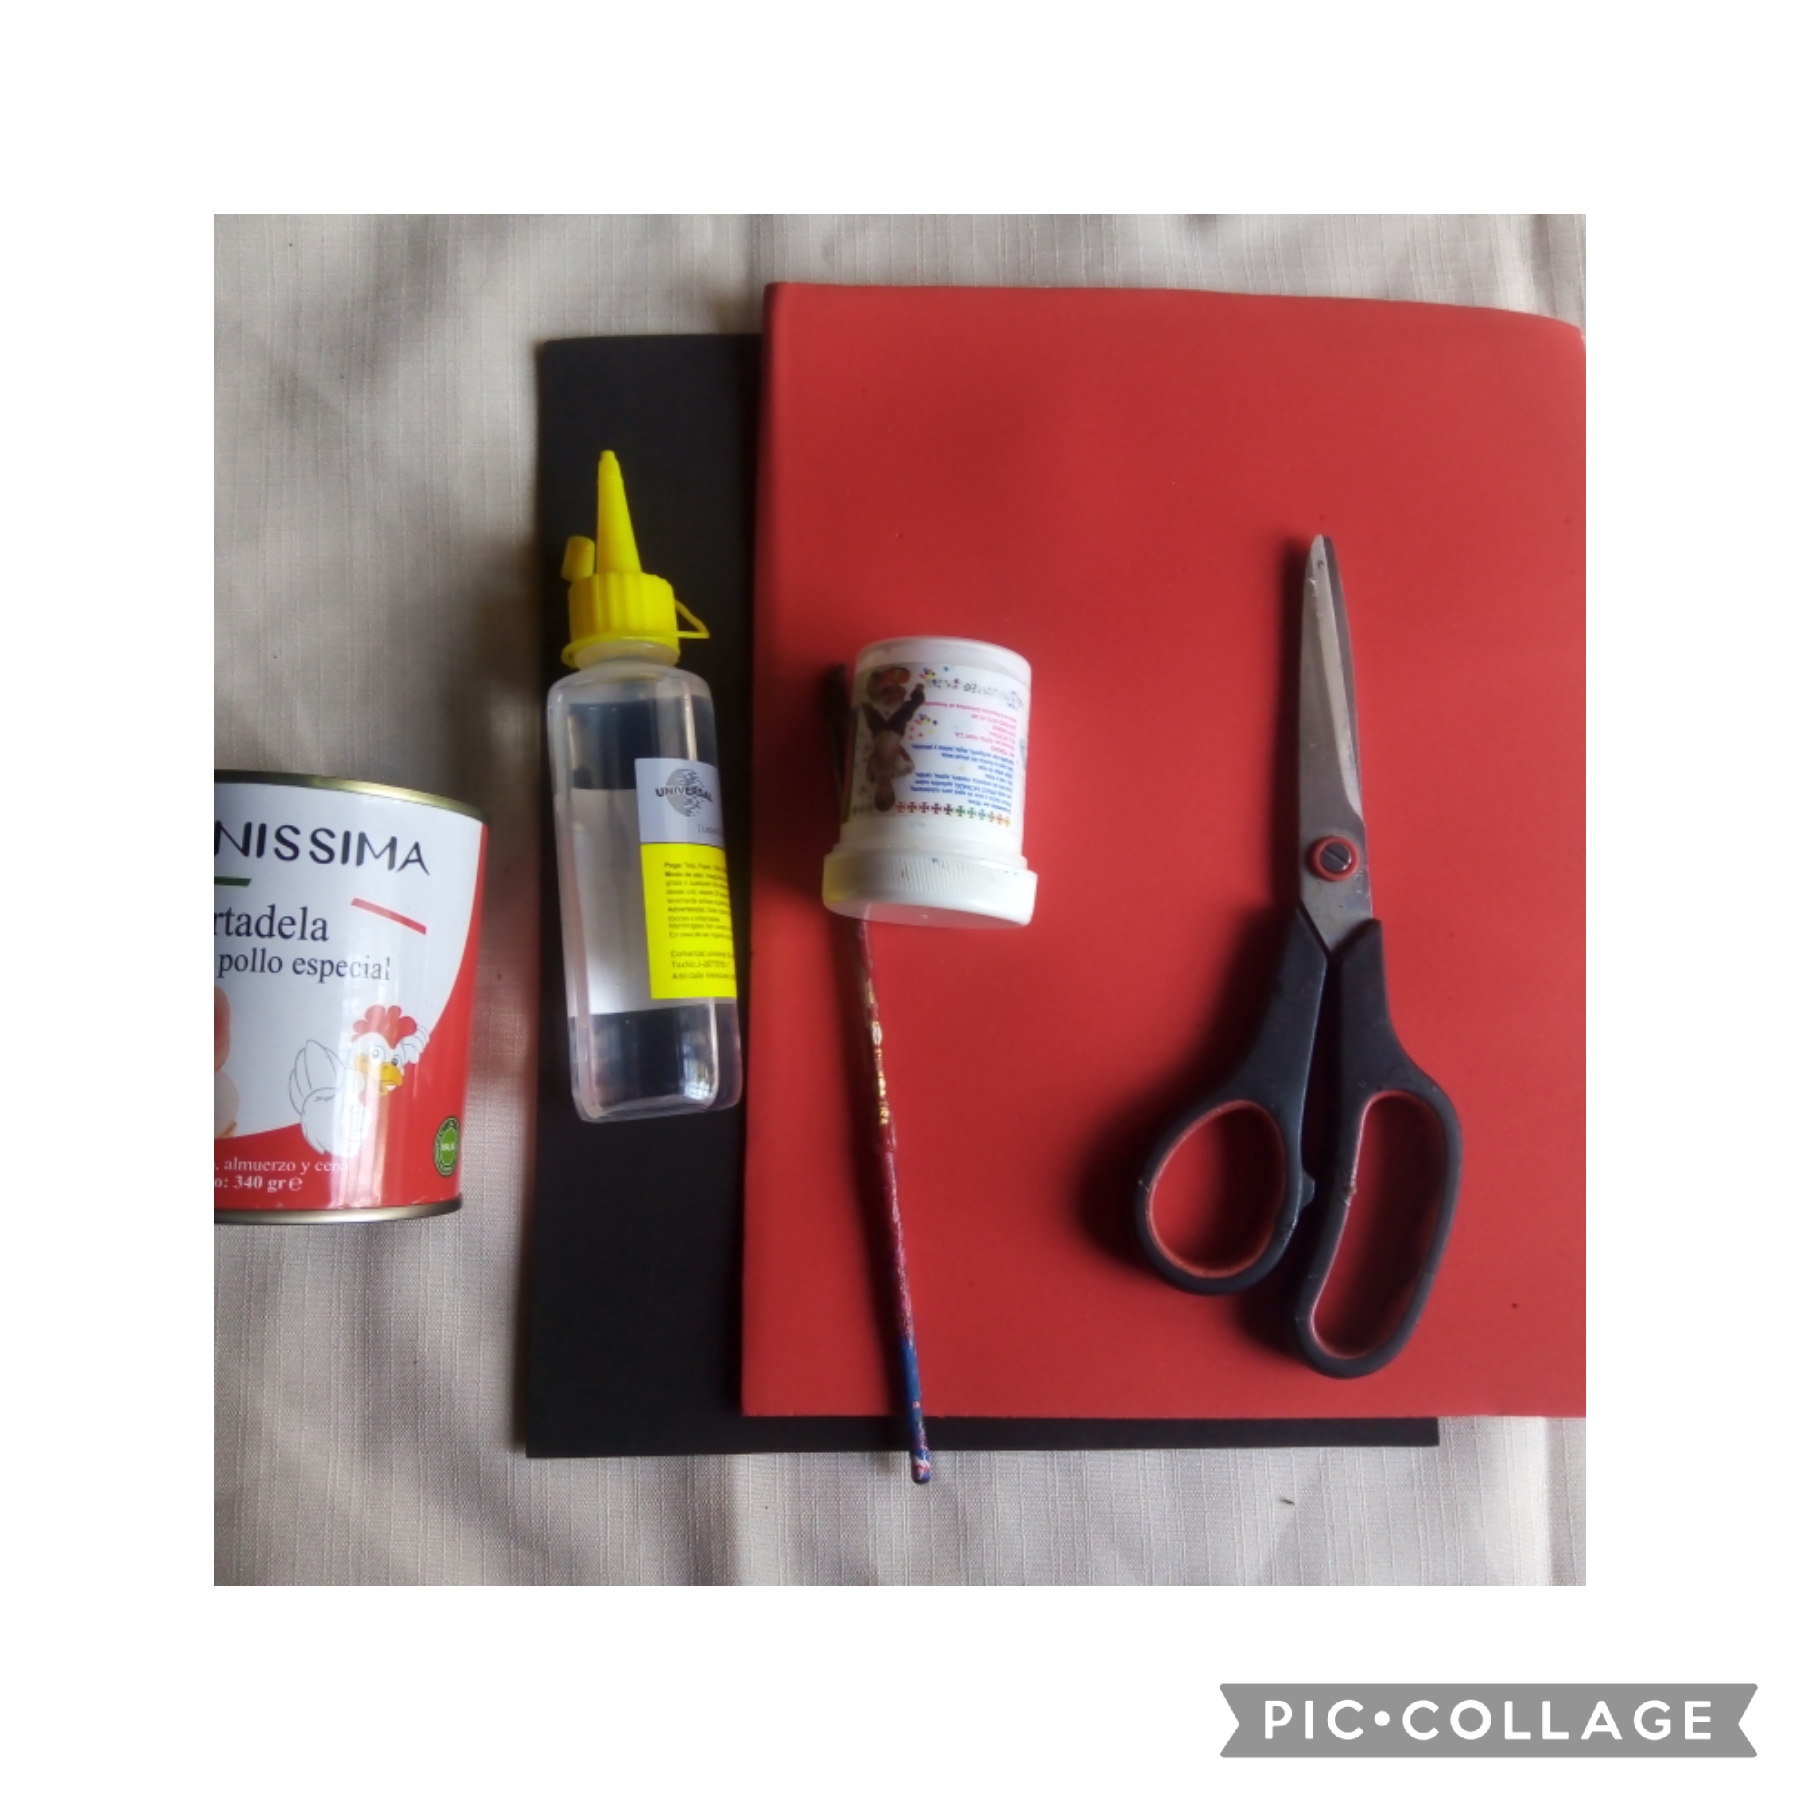
Materiales que usé:
Una lata de pasta de tomate como material de provecho.
Foamis: rojo, negro brillante, blanco.
Pintura al frío blanca.
Pintura al frío negra.
Tijeras .
Silicón frío.
Cartulina decorada con sol y estrellas.
Lacito dorado.
Pitillo.
Materials I used:
A can of tomato paste as profit material.
Foamis: red, shiny black, white.
White cold paint.
Black cold paint.
Pair of scissors .
Cold sylicon.
Cardboard decorated with sun and stars.
Golden bow.
Cigarette.
Para su elaboración:
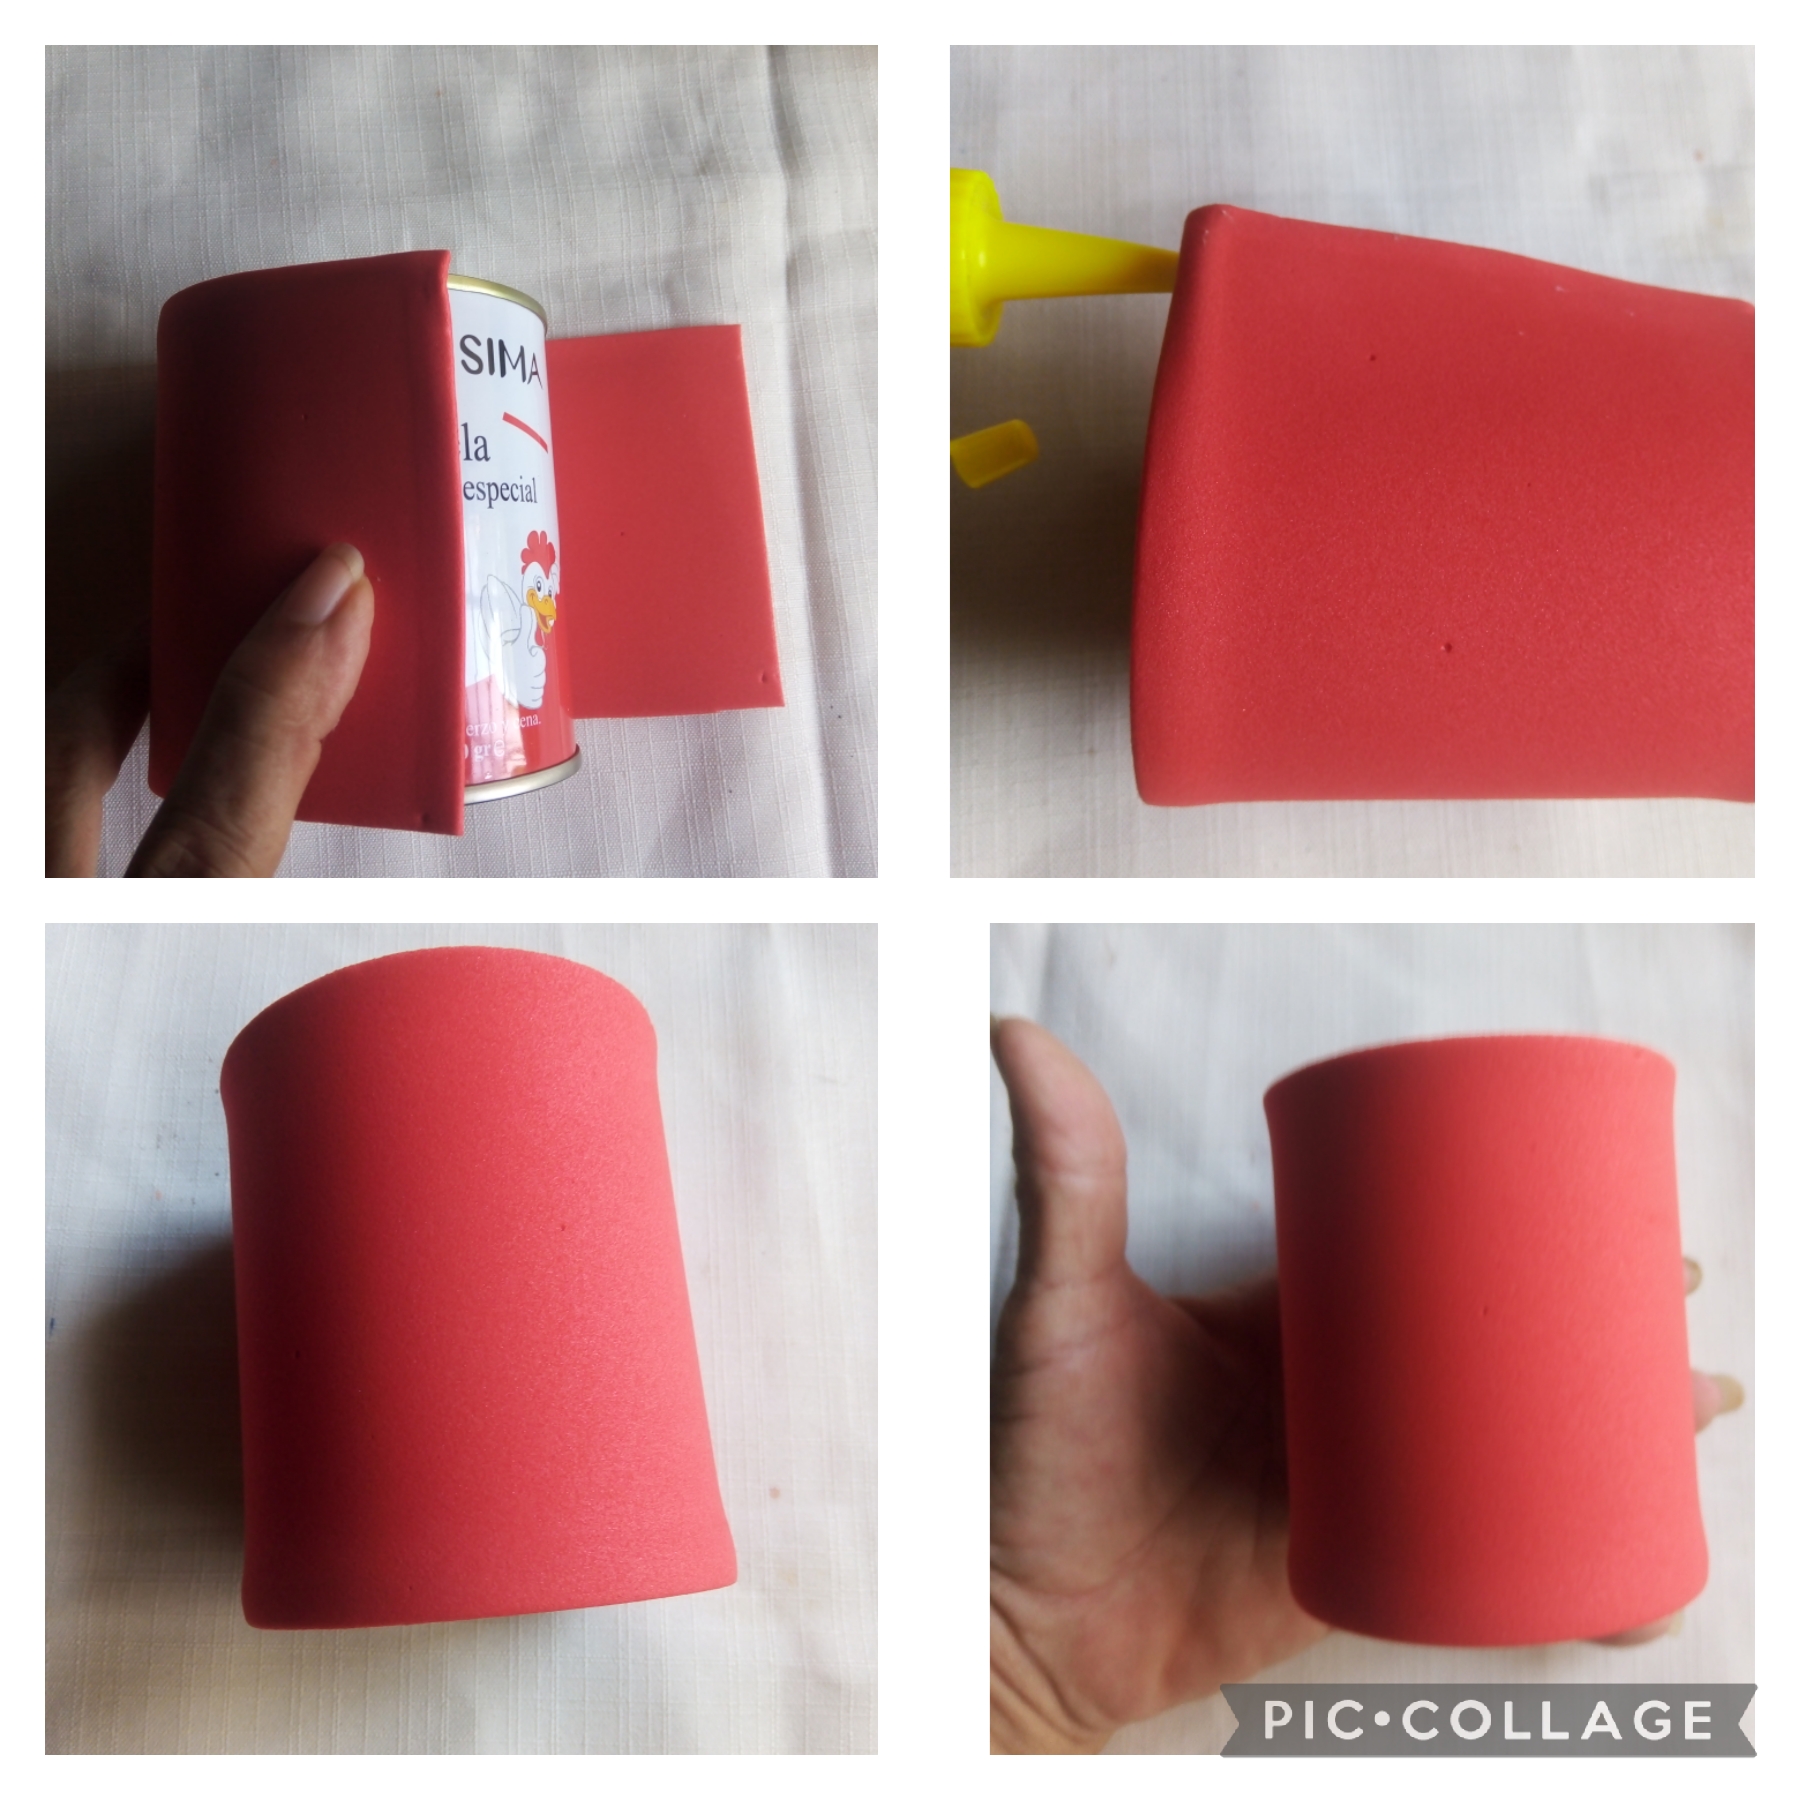
PRIMER PASO:
Empecé picando un rectángulo de foamis rojo del tamaño de la lata y con el silicón al frío la forre.
For its elaboration:
FIRST STEP:
I started by chopping a rectangle of red foamis the size of the can and with the cold silicone I lined it.
SEGUNDO PASO;
En este segundo paso utilizando el foamis negro brillante con un molde realizado anteriormente uso las tijeras y cortó.
SECOND STEP;
In this second step, using the shiny black foamis with a previously made mold, I used the scissors and cut
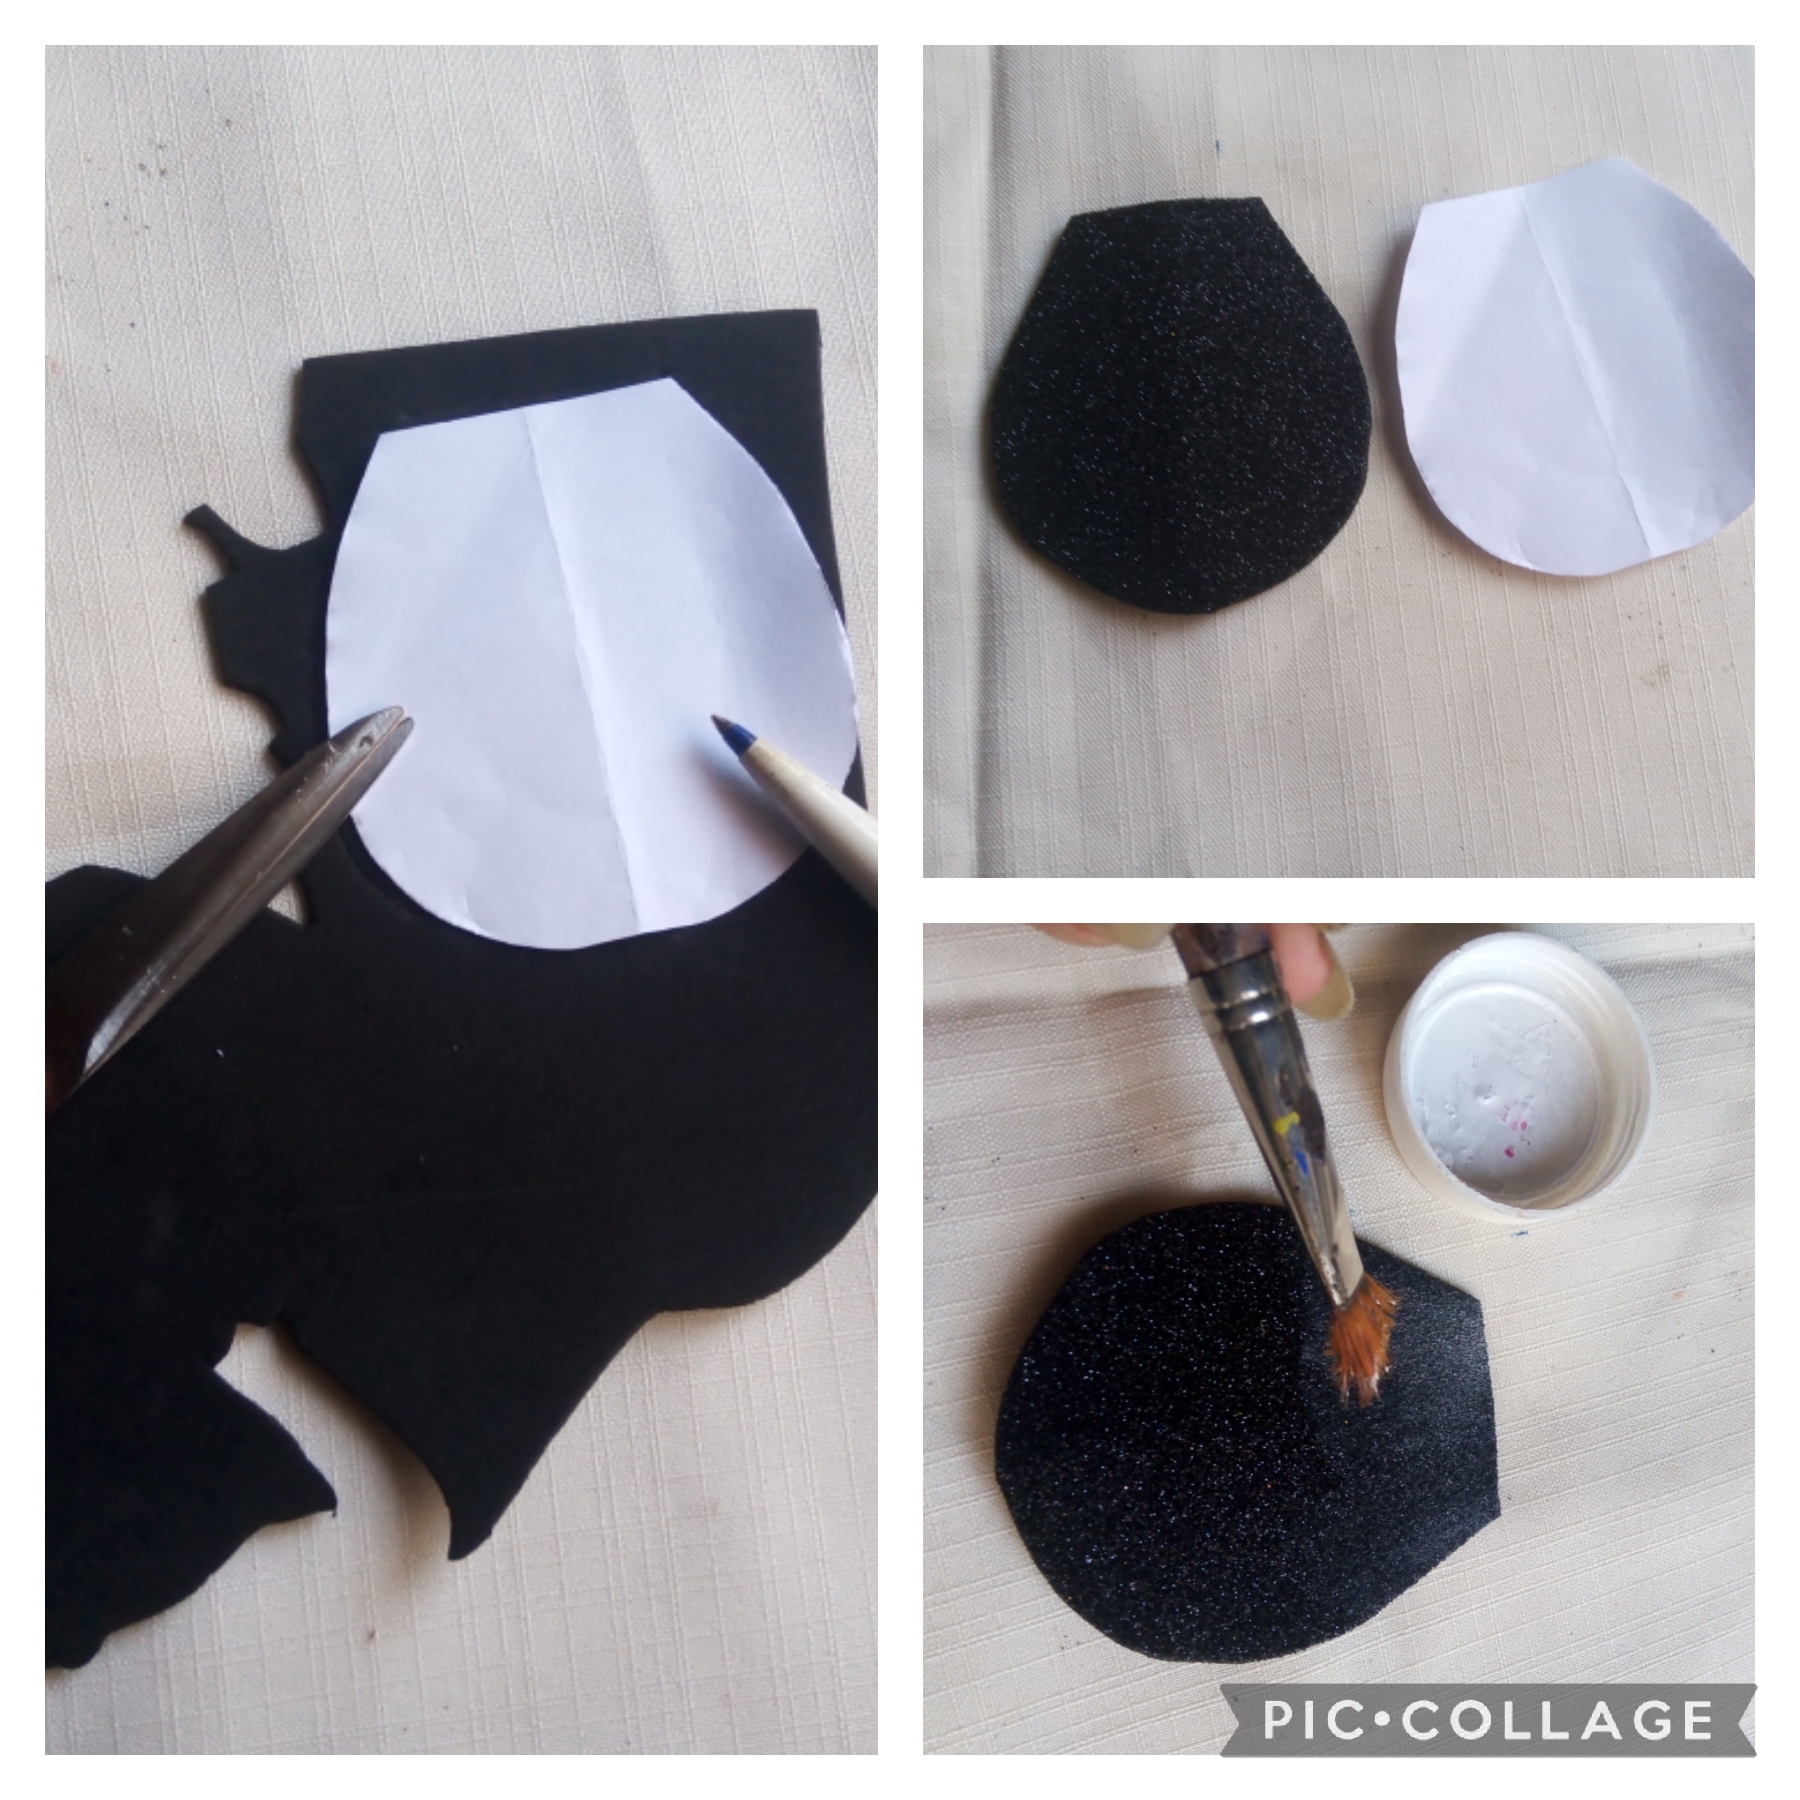
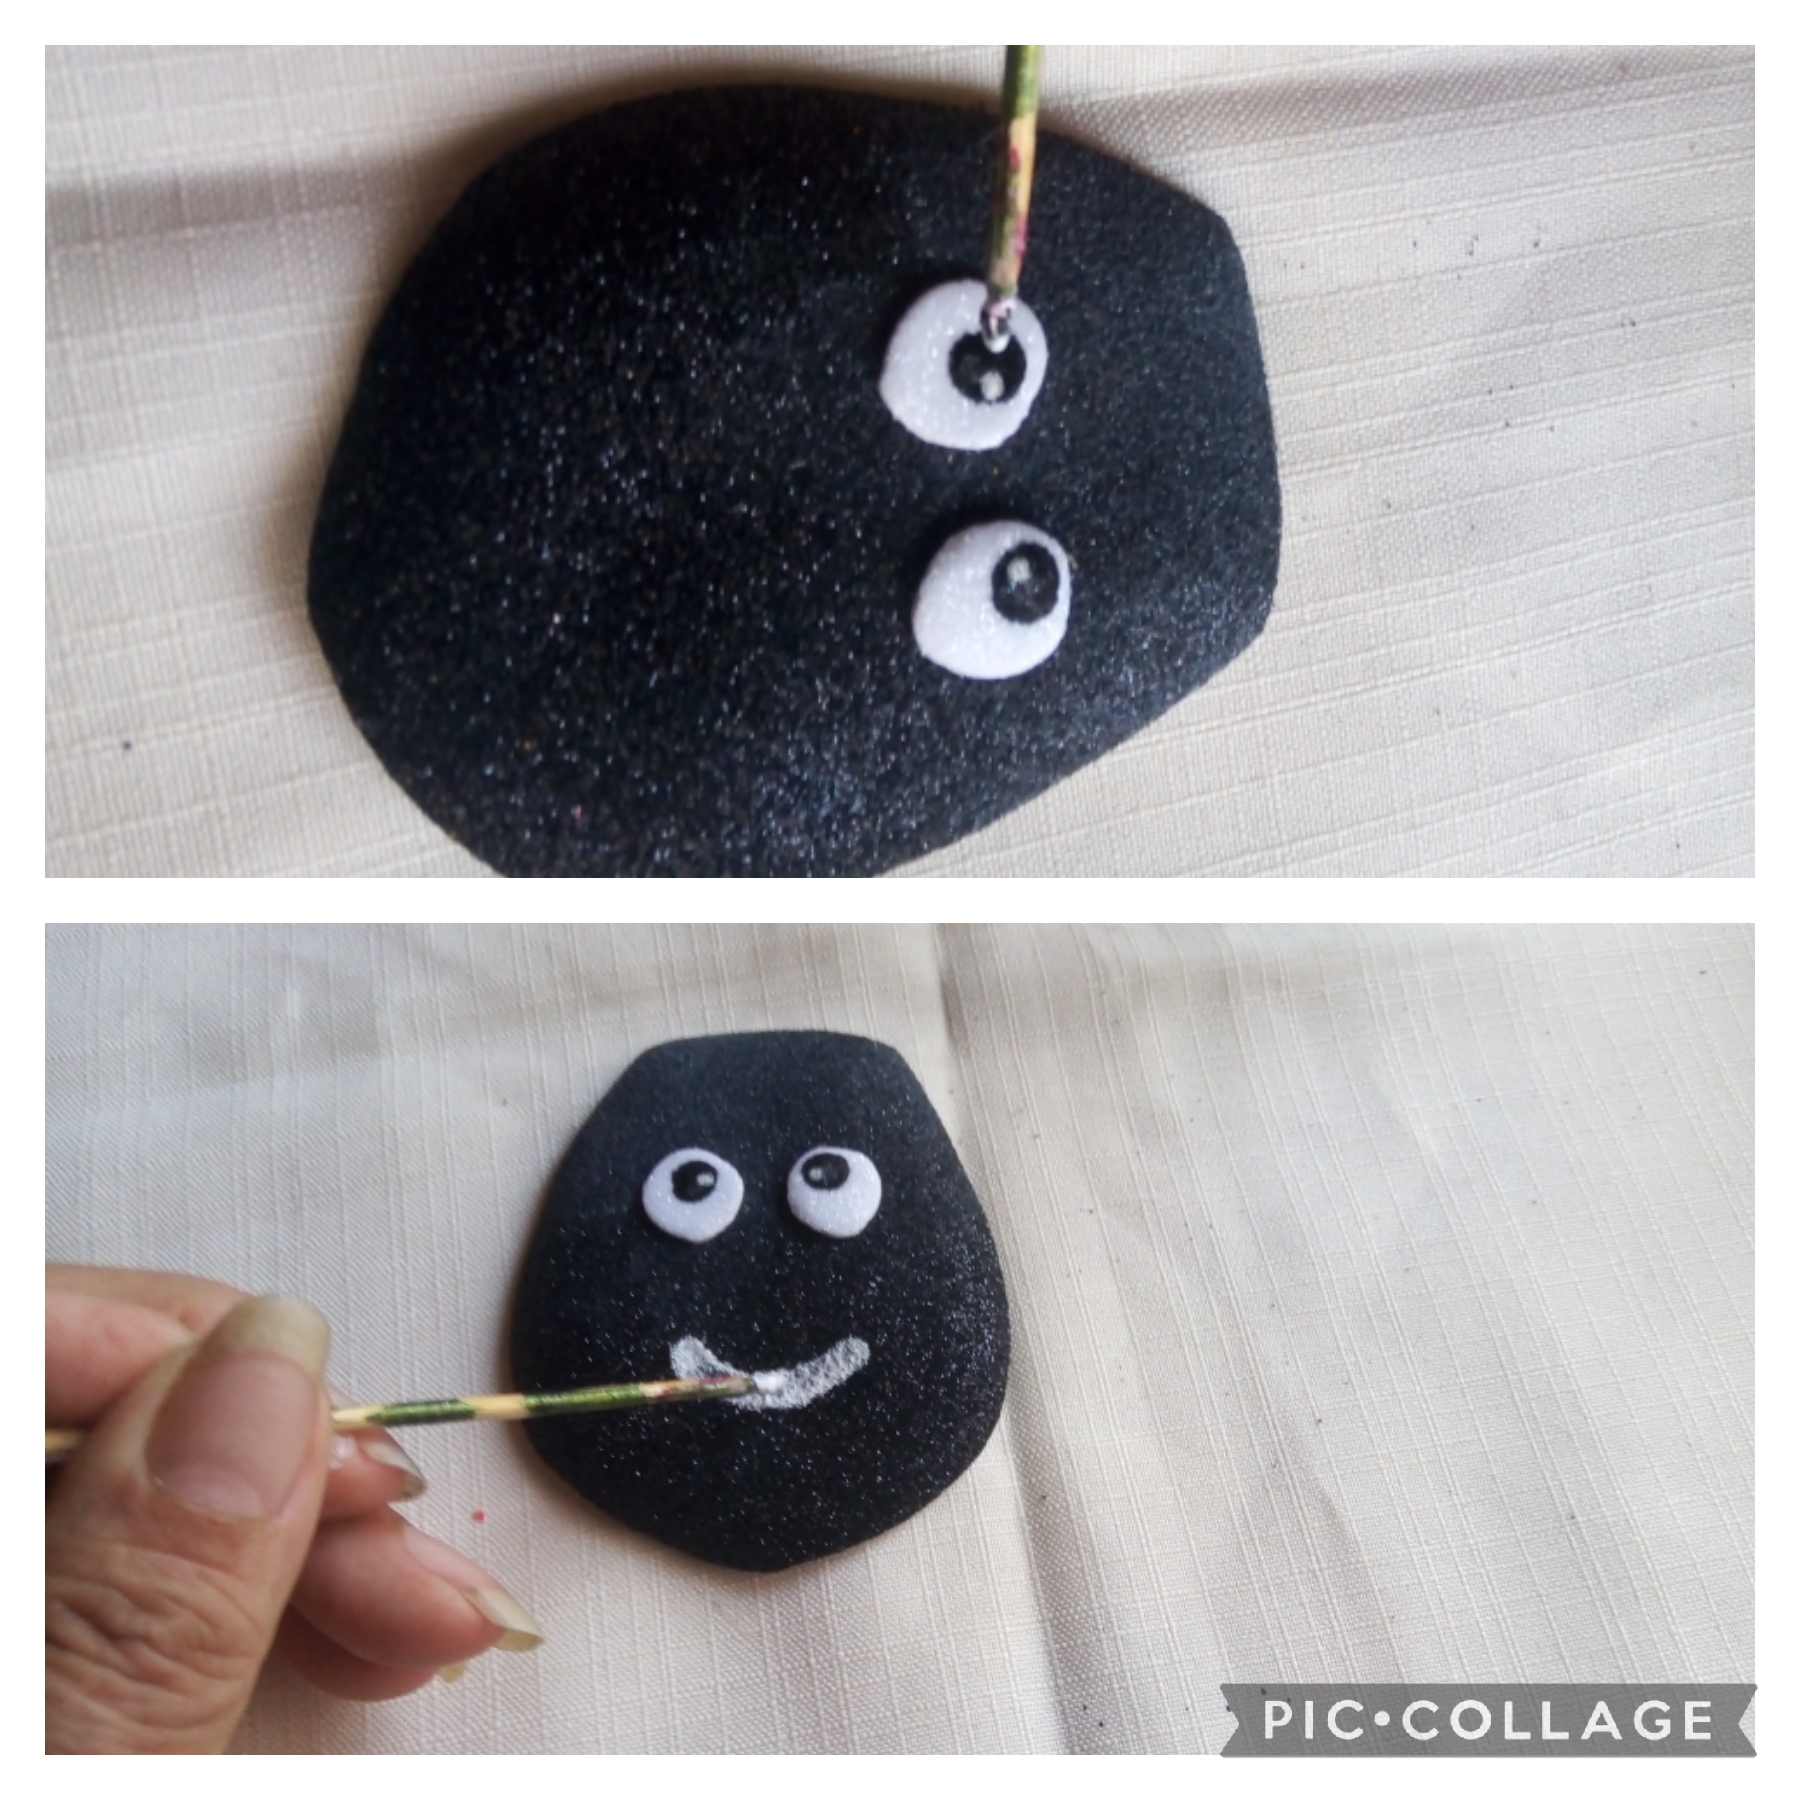
Para el TERCER PASO: uso el foamis blanco y hago la forma de los ojos, luego con pintura al frío negra pongo dos puntos en el centro y con blanca dos puntitos pequeños para la luz, también con pintura blanca pinto la boca y así terminé el rostro.
For the THIRD STEP: I use the white foamis and make the shape of the eyes, then with black cold paint I put two dots in the center and with white two small dots for the light, I also paint the mouth with white paint and that's how I finished the face.
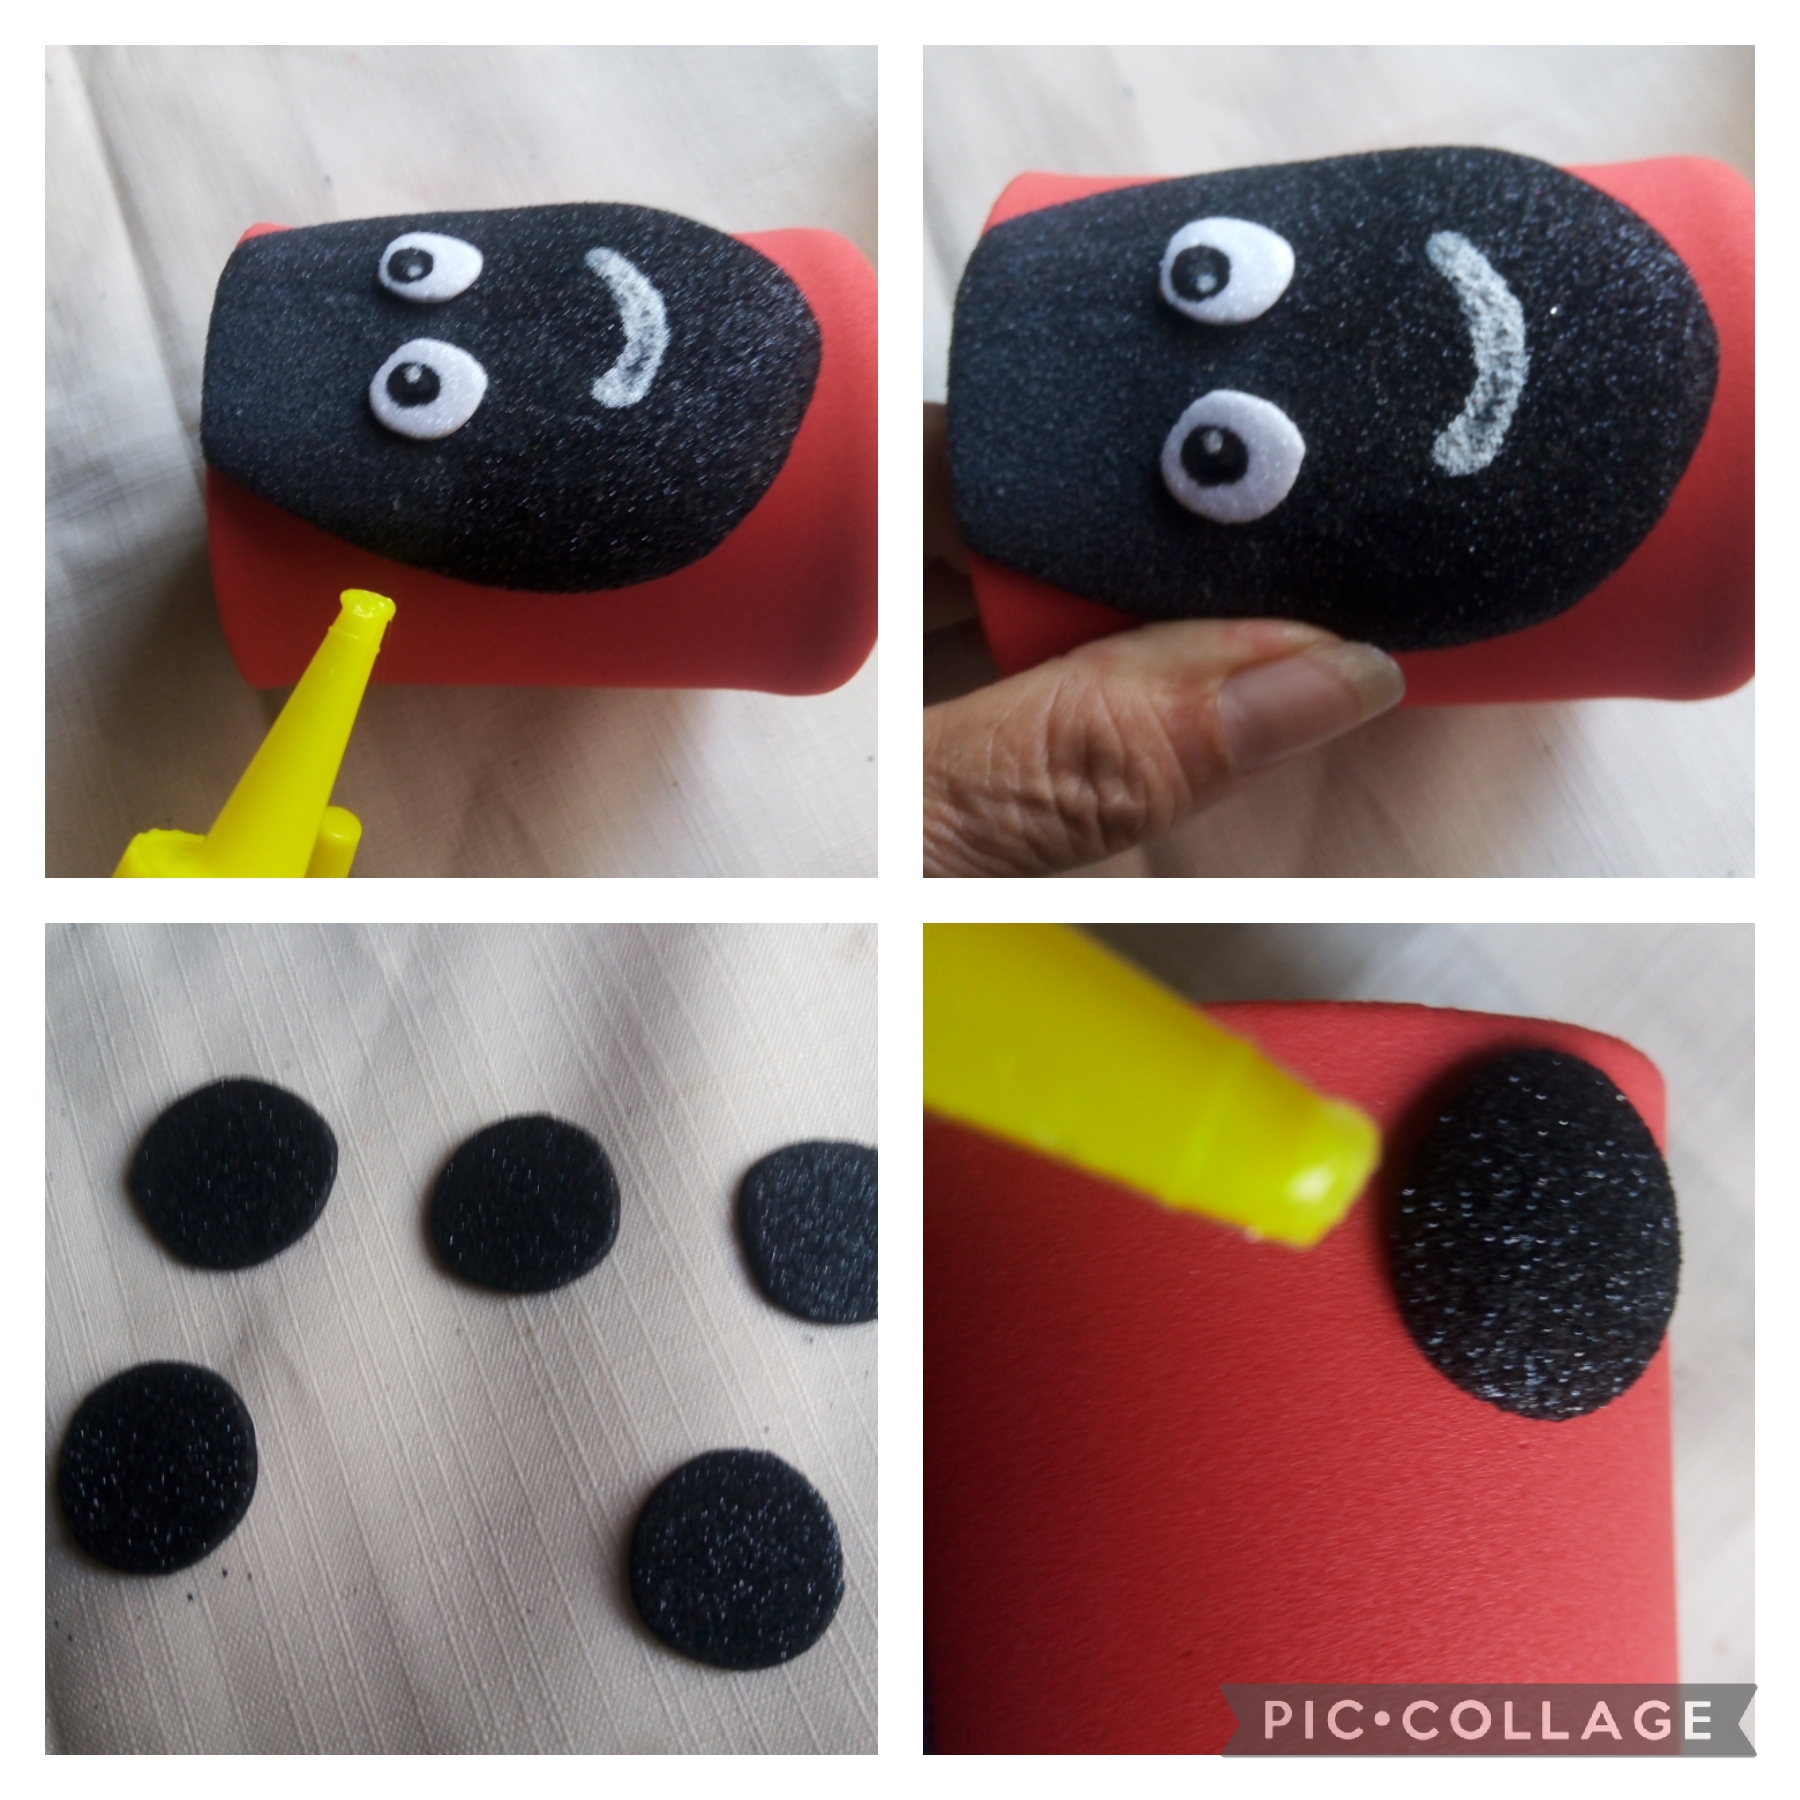
CUARTO PASO:
En este paso pegó el rostro ya listo al cuerpo formado por la lata ya forrada ; con foamis negro brillante corto círculos negros termoformo con la plancha y luego pegó al cuerpo como se ve en la foto.
FOURTH STEP:
In this step he glued the already ready face to the body formed by the already lined can; With shiny black foamis I cut black thermoformed circles with the iron and then glued to the body as seen in the photo.
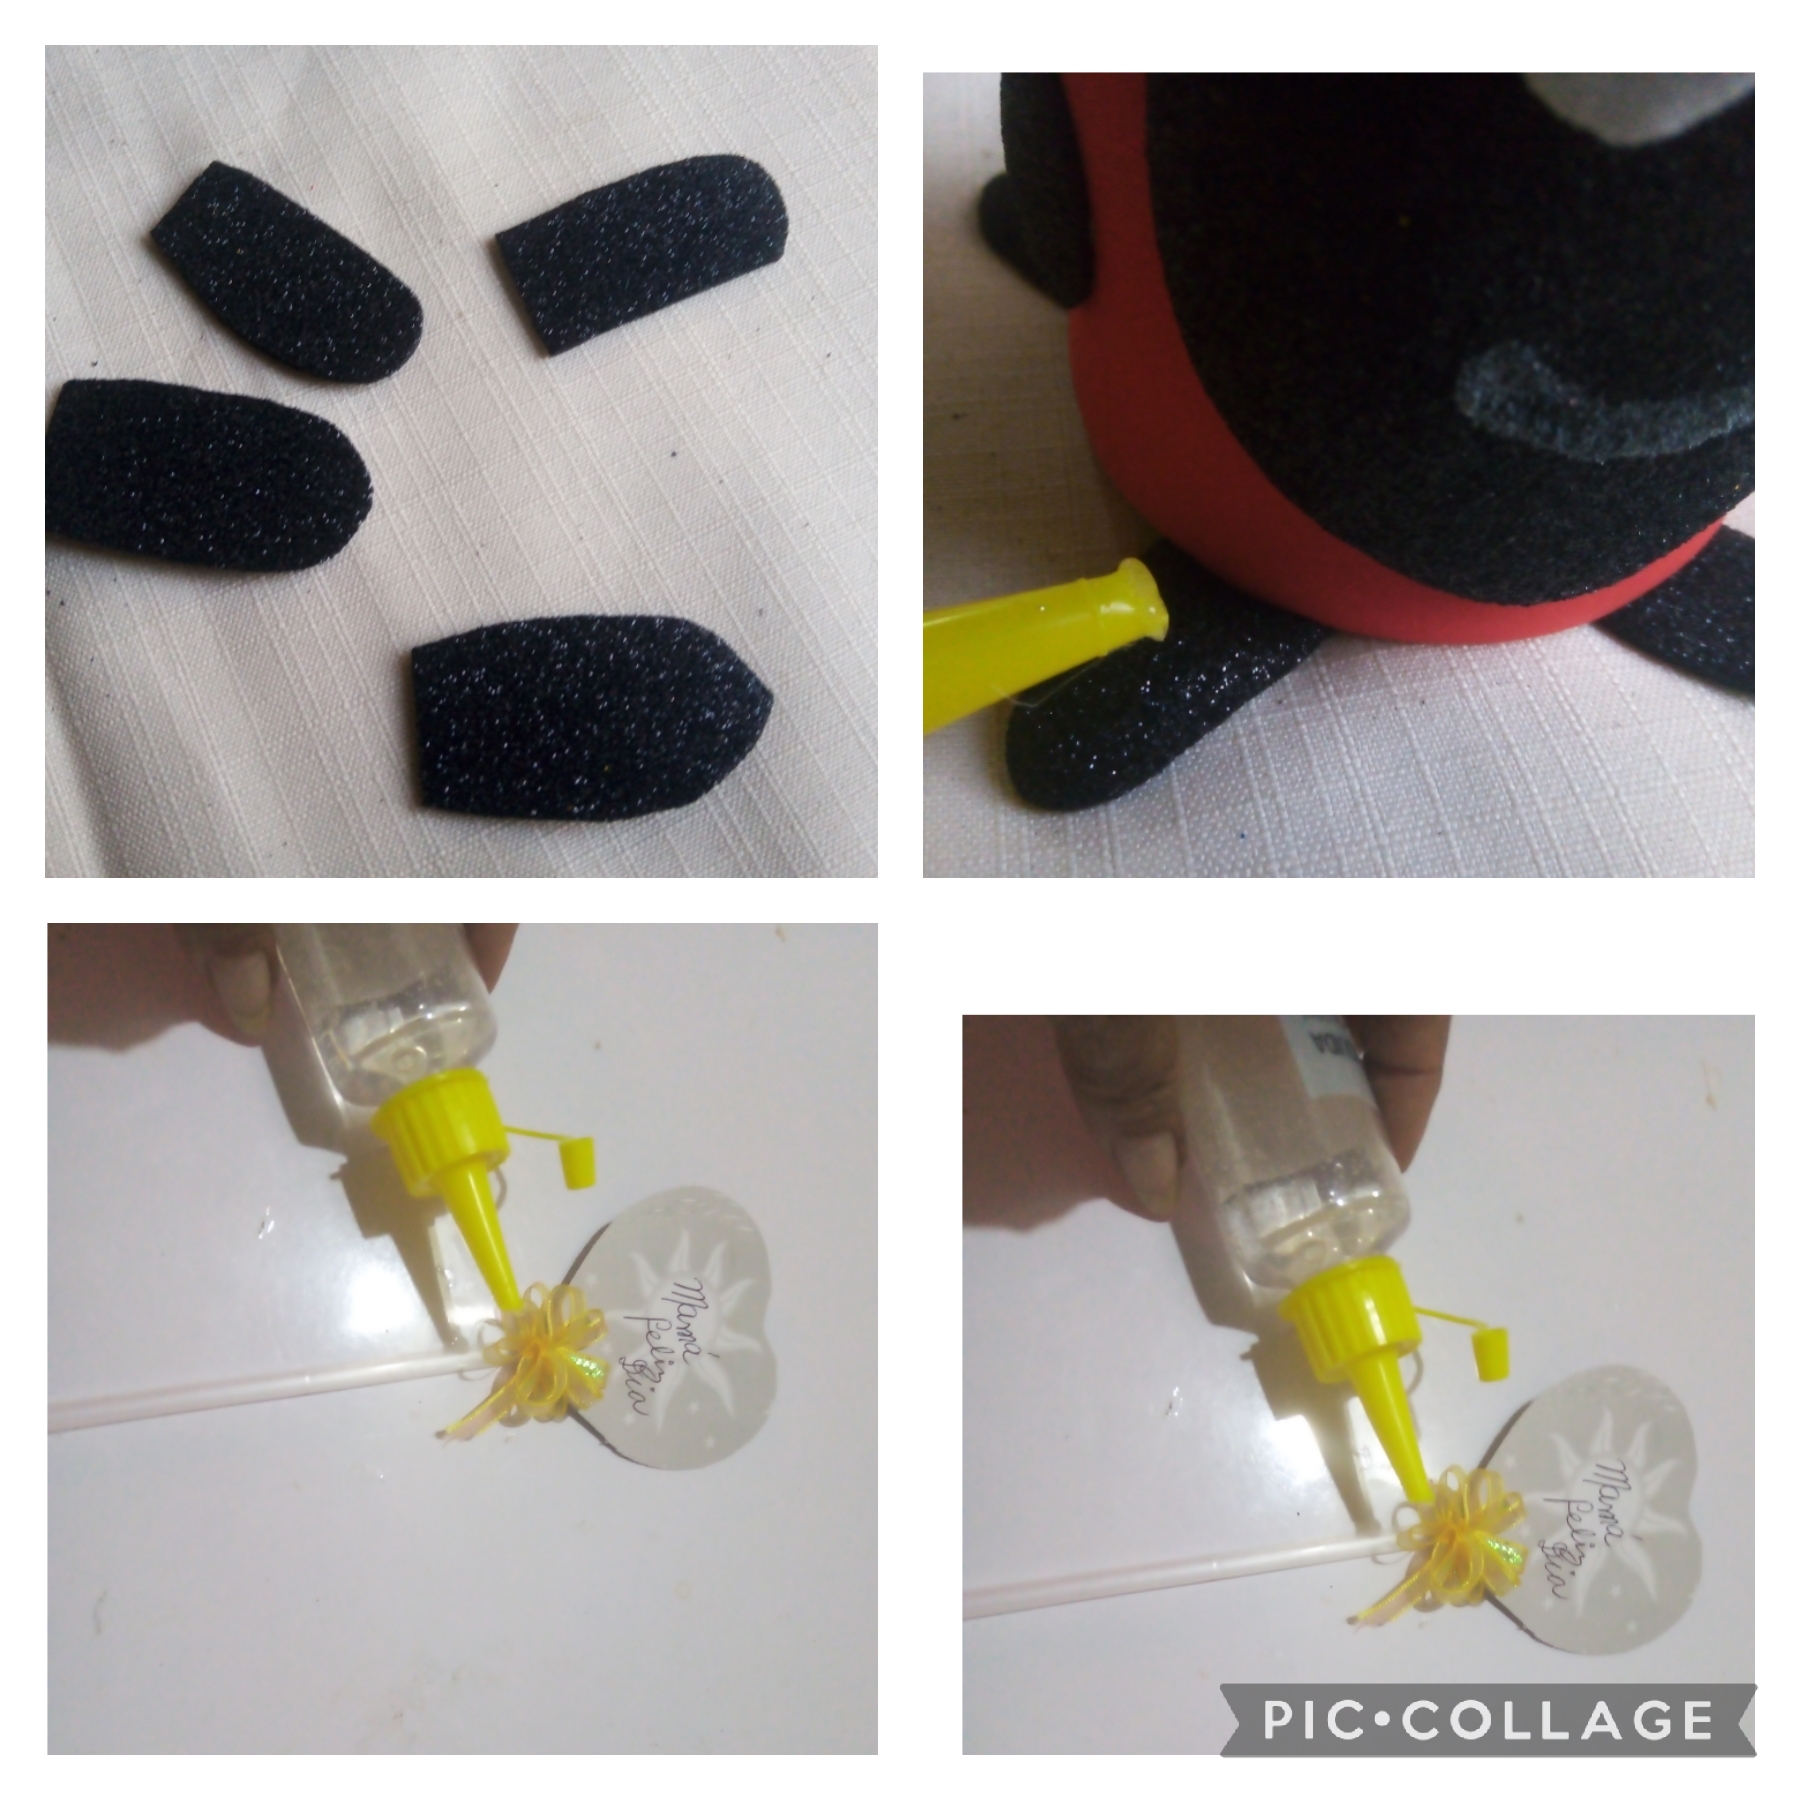
QUINTO PASO:
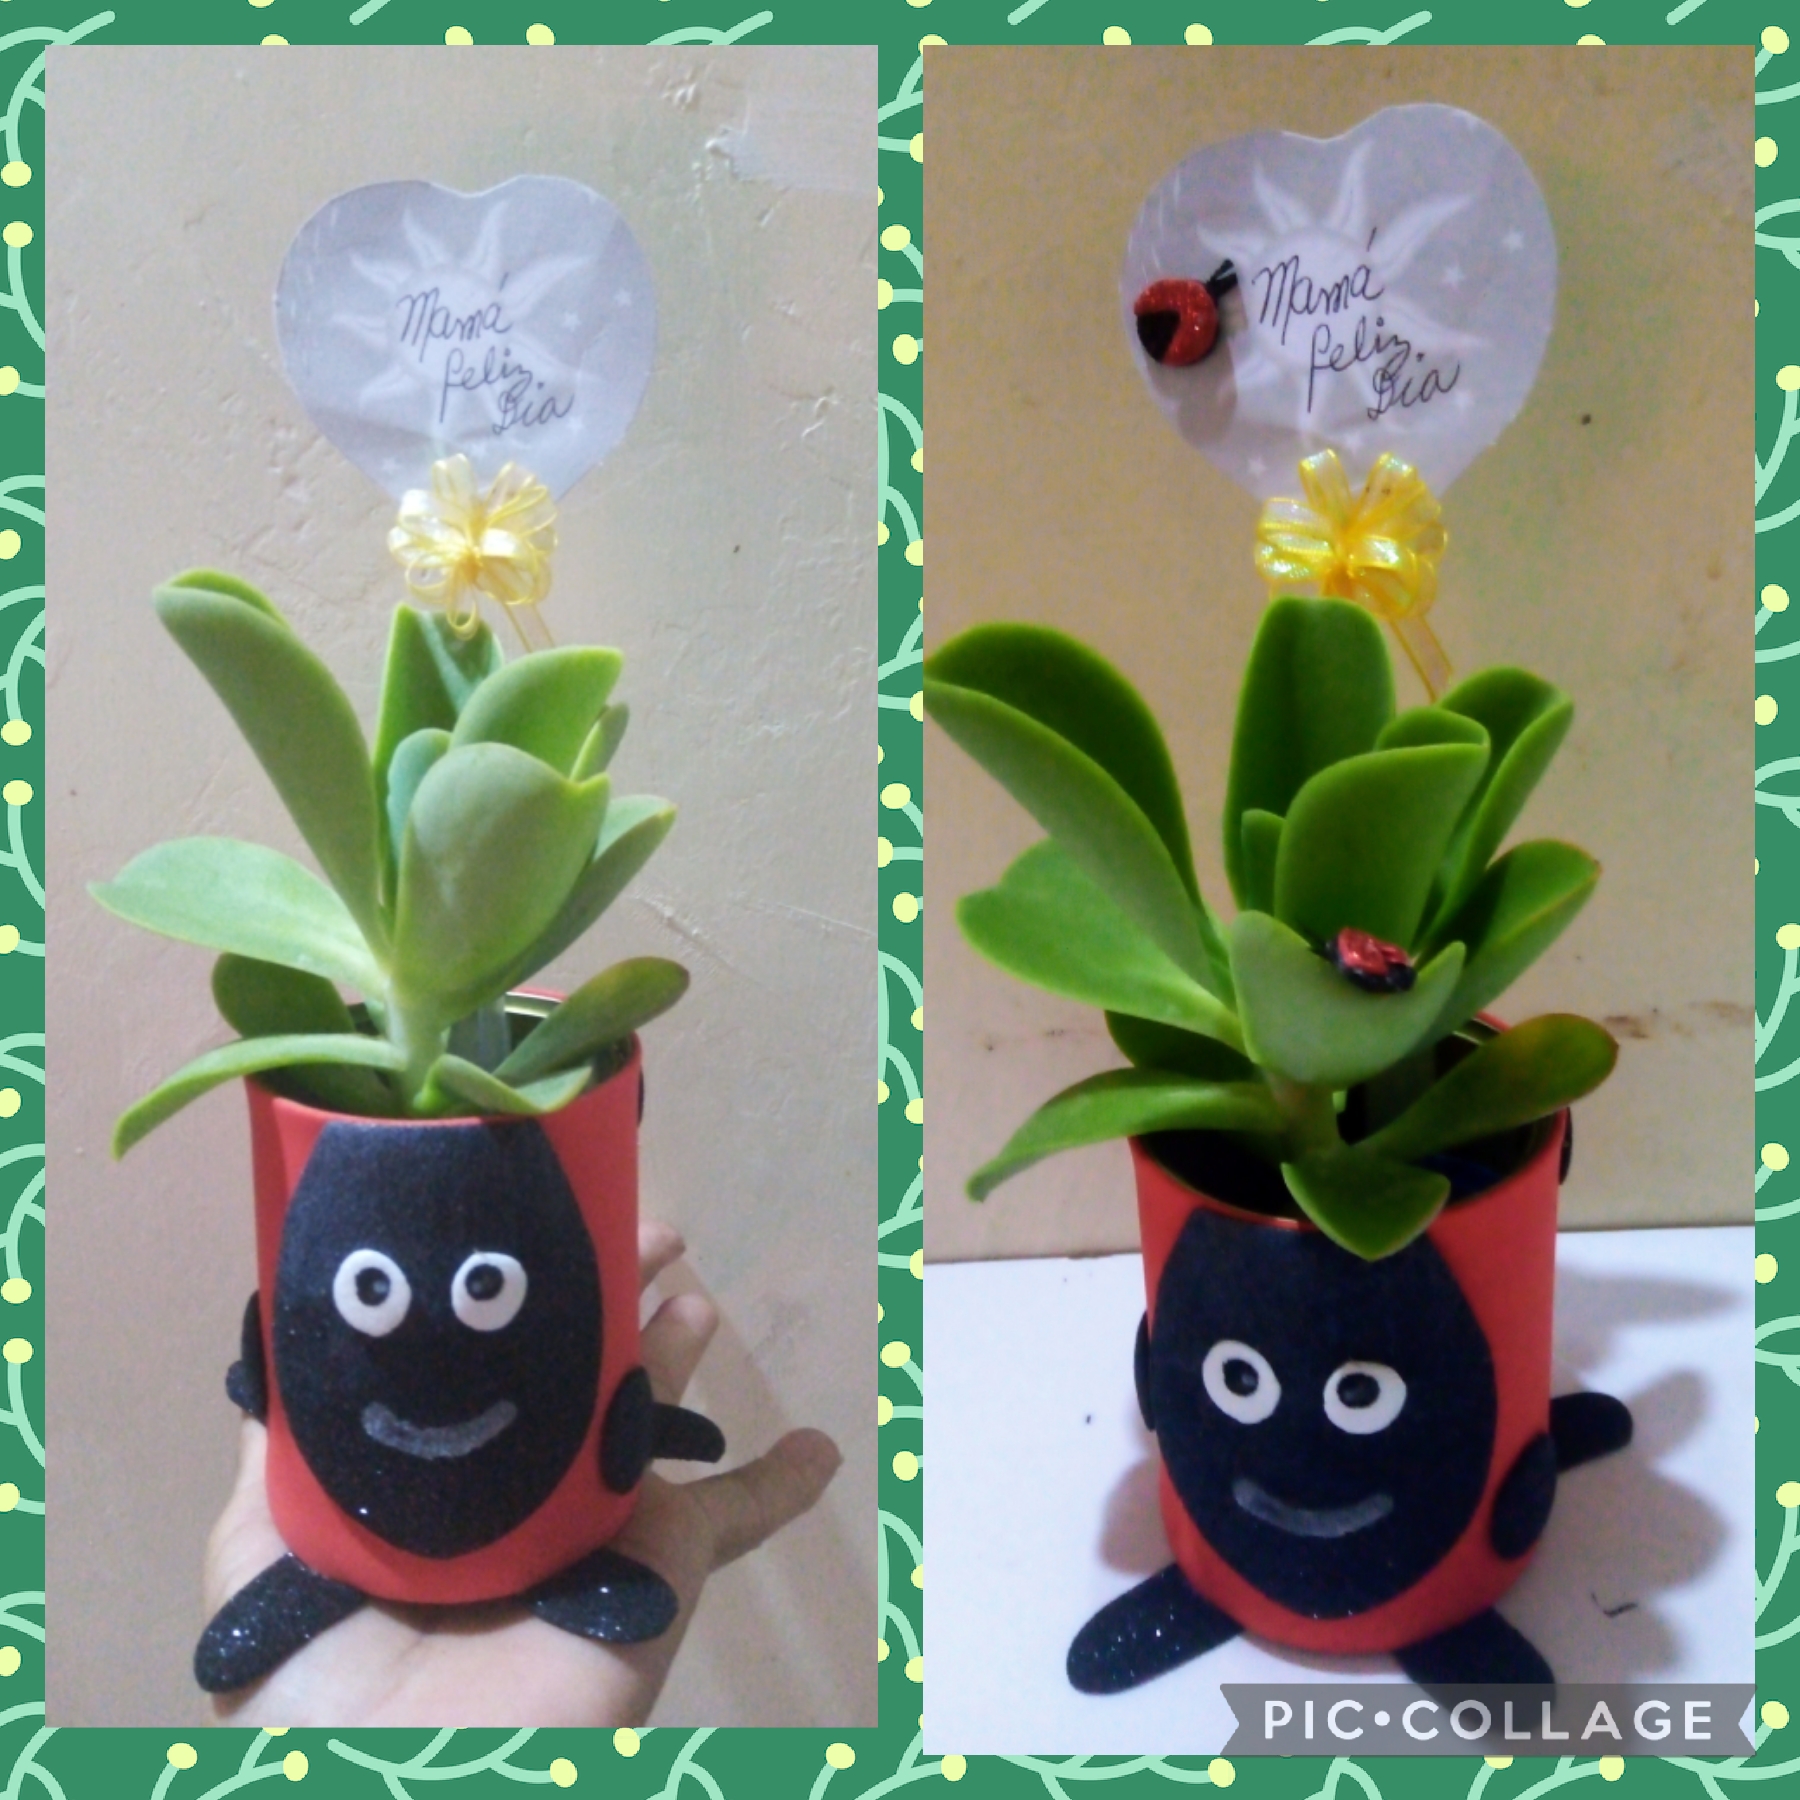
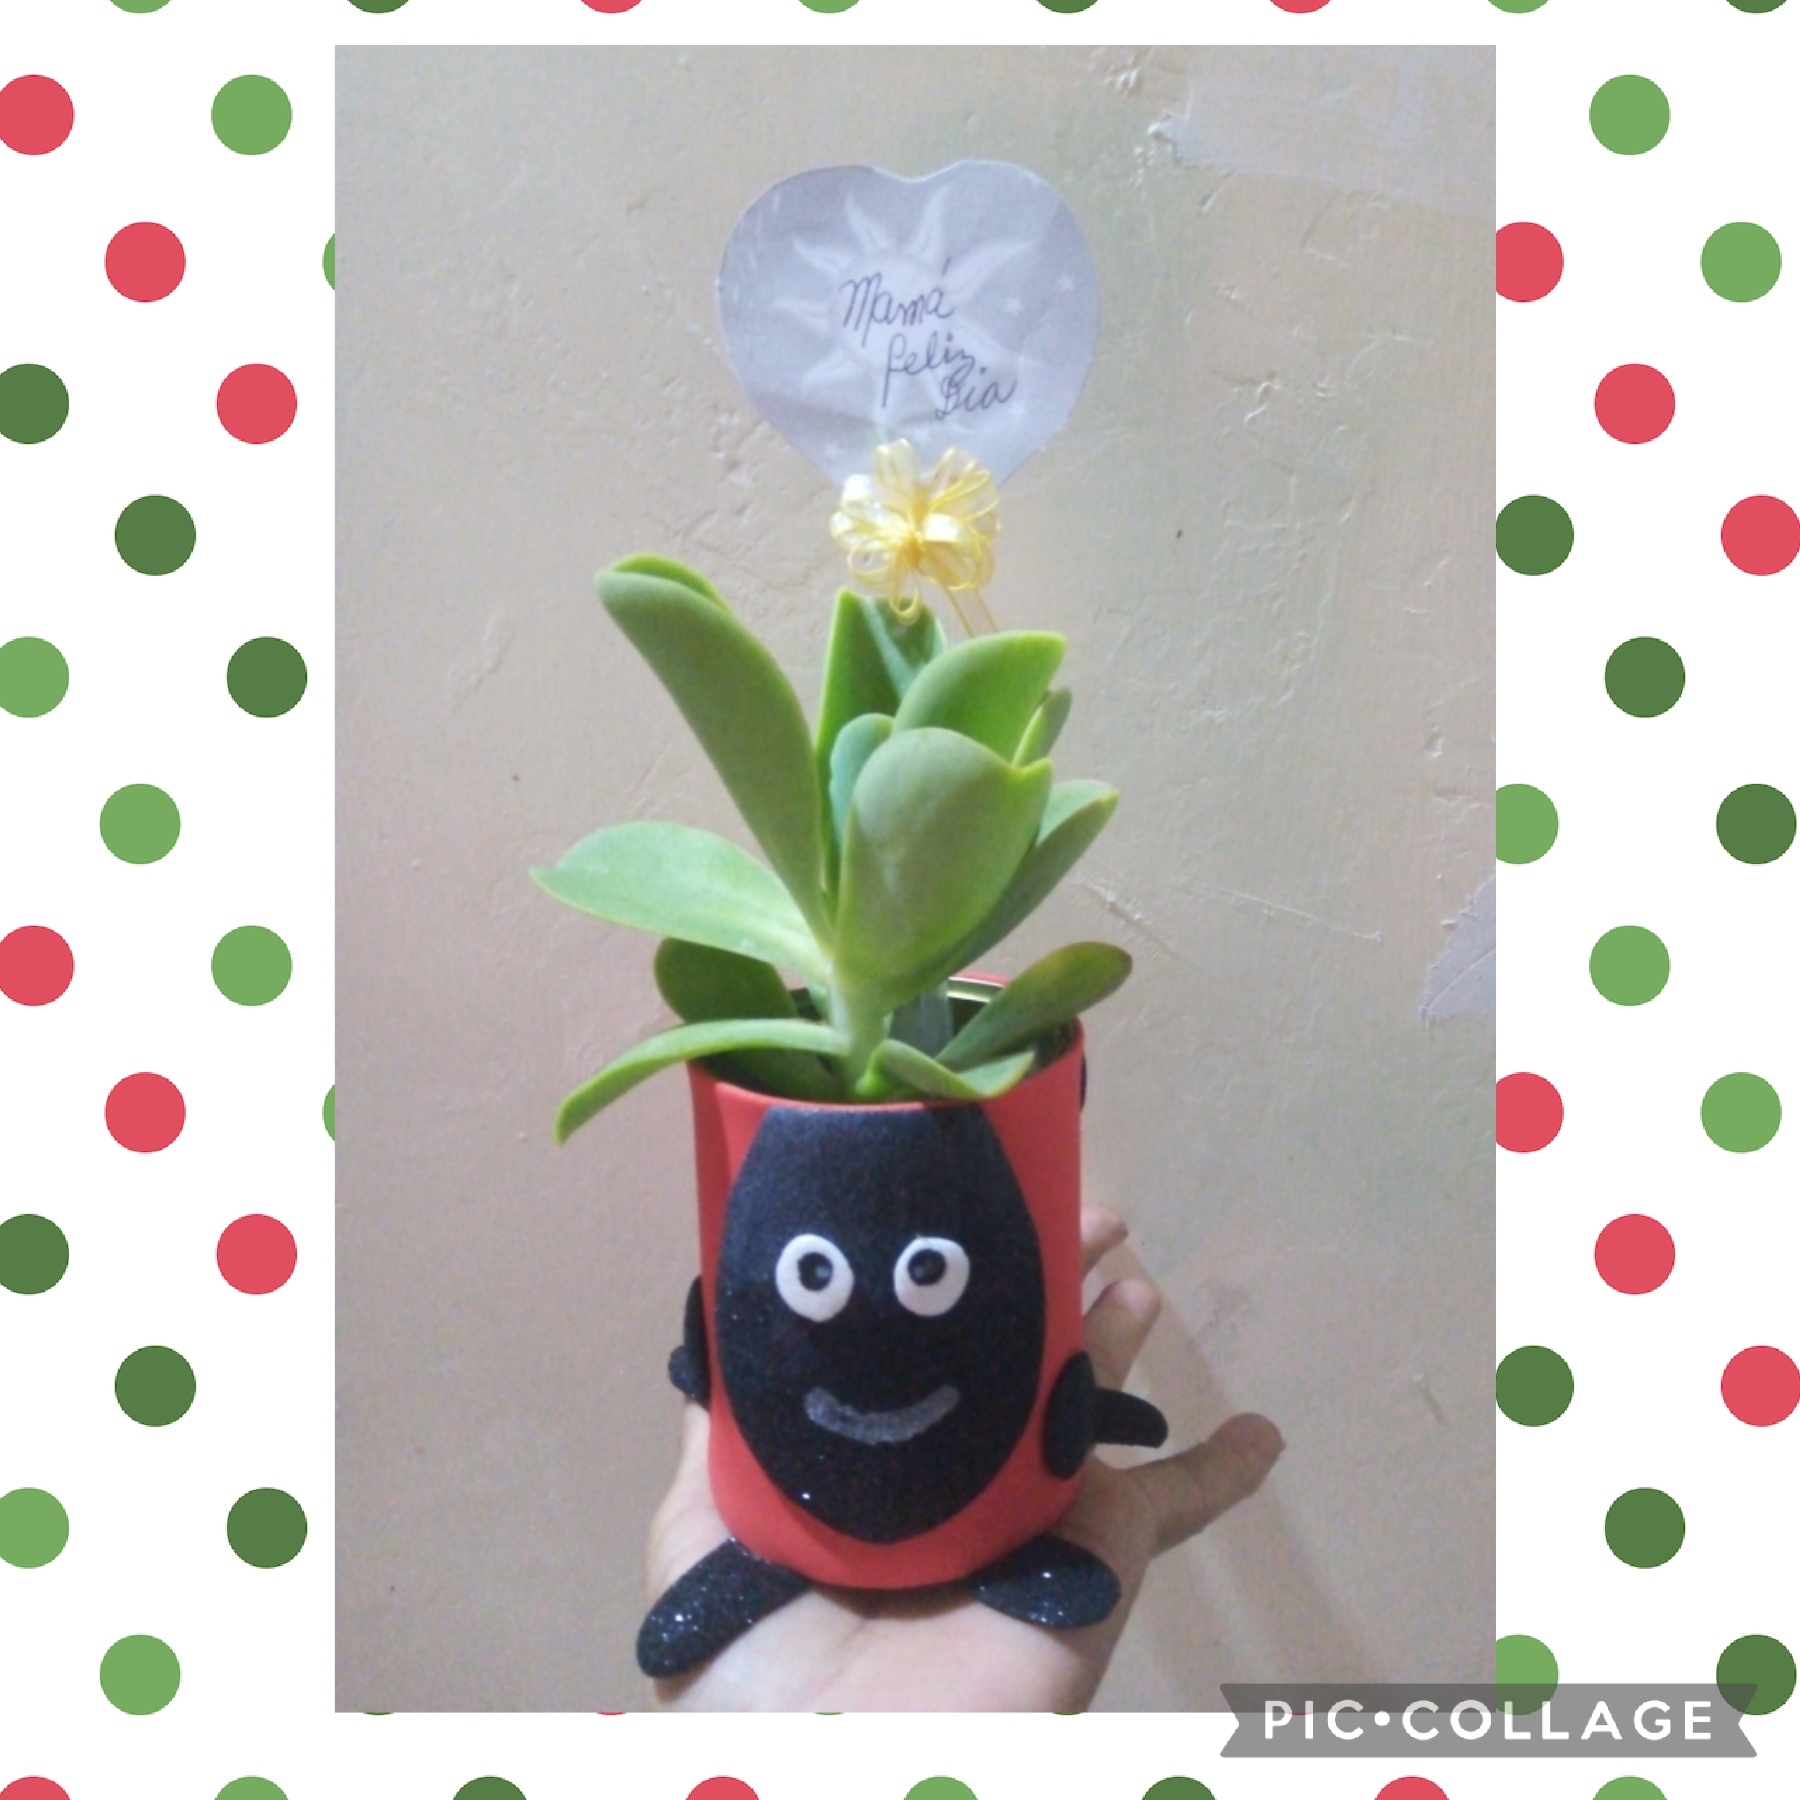
Con foamis negro brillante corto cuatro formas para las patas que pegó como se ve en las fotos, ahora con cartulina gris decorada hago la forma de un corazon y escribo "Feliz Día Mamá" también lo pongo en un pitillo para darle altura y también coloco el lacito dorado; para que tenga más encantó después de colocar la bella suculenta en el macetero pongo una mariquita en el corazón y otra en la planta y no me pueden negar que se ve Geniaaal.
FIFTH STEP:
With shiny black foamis I cut four shapes for the legs that I glued as seen in the photos, now with decorated gray cardboard I make the shape of a heart and write "Happy Mother's Day" I also put it in a straw to give it height and I also place the golden bow; so that it has more charm after placing the beautiful succulent in the pot I put a ladybug in the heart and another in the plant and they cannot deny me that it looks Geniaaal.
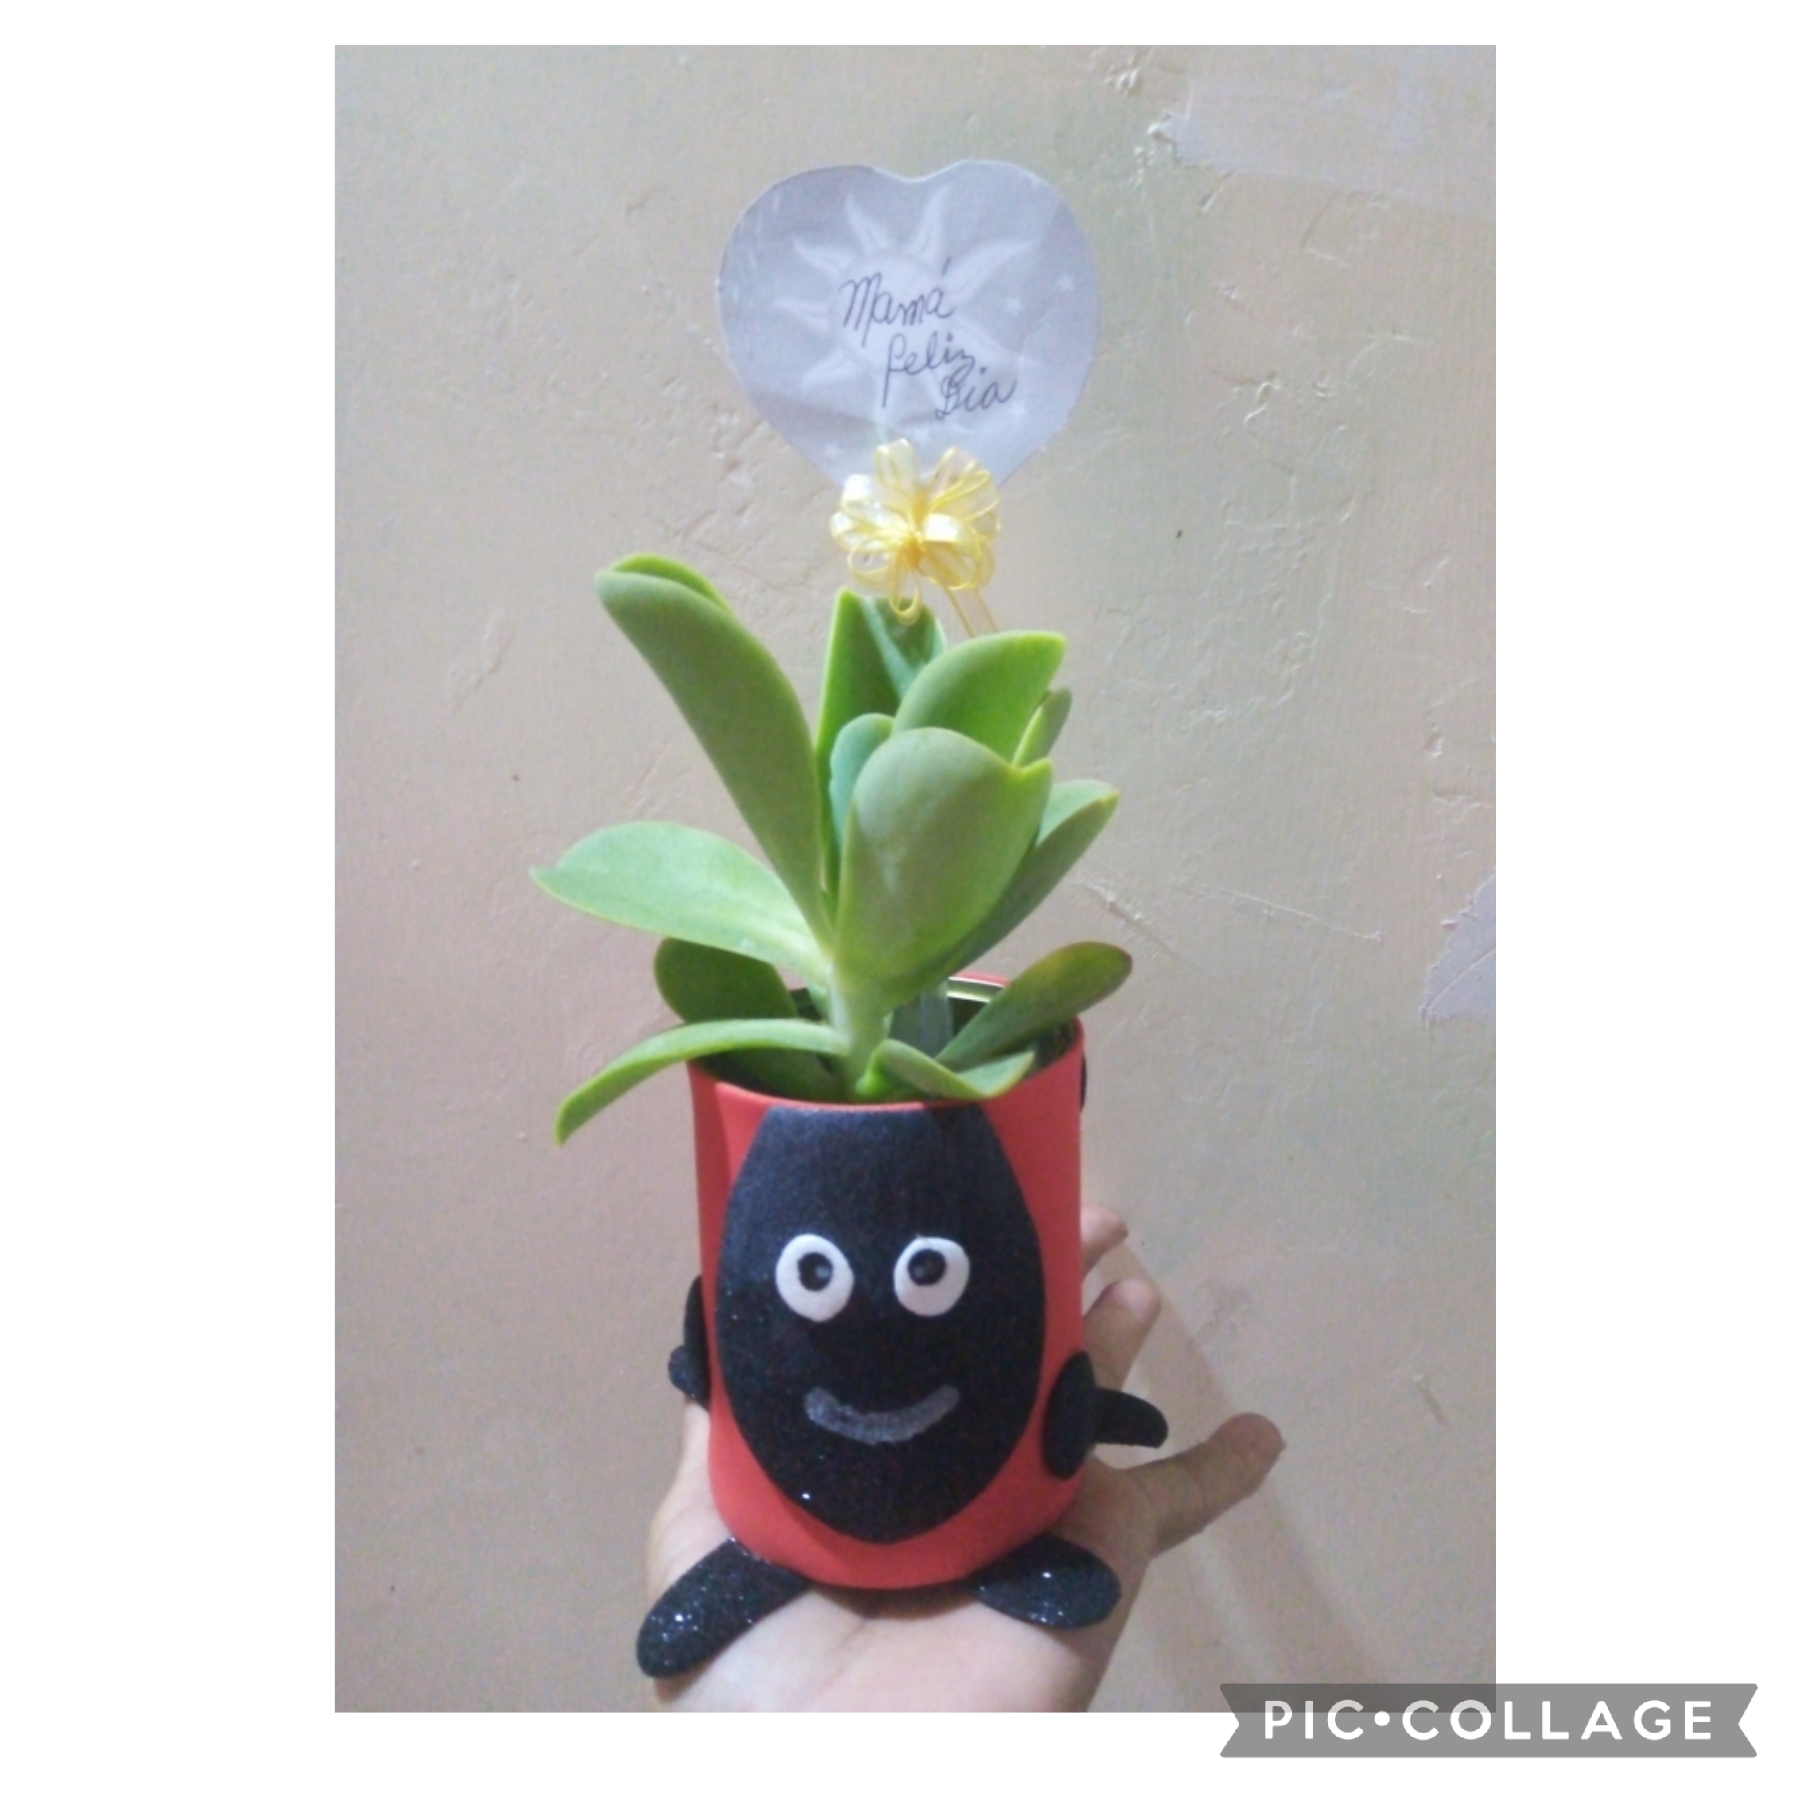
Artistas Creativos, este es el resultado final de mi manualidad de hoy, un hermoso macetero en forma de mariquita, espero que les guste como a todas mis alumnas que están fascinadas y dispuestas a recoger todas las latas que encuentren en el camino para hacer lindos maceteros.
Agradecida con todos los que diariamente revisan mi blog y apoyan mis publicaciones.
Nos vemos en la próxima manualidad.
Creative Artists, this is the final result of my craft today, a beautiful flowerpot in the shape of a ladybug, I hope you like it like all my students who are fascinated and willing to collect all the cans they find along the way to make beautiful flowerpots .
Grateful to everyone who checks my blog daily and supports my posts.
See you at the next craft.
Las imágenes de este tutorial son de mi propiedad las fotos las tomé con mi celular Motorola E6 y las edite con una aplicación gratis del mismo.
Para traducir texto usé geogle traduuctor.
The images in this tutorial are my property, the photos were taken with my Motorola E6 cell phone and I edited them with a free application of the same.
To translate text I used geogle translator.

Genial trabajo y muy divertido, me imagino que esa planta debe sentirse orgullosa por ese original macetero. 😊🤗🤗
Que casualidad! Acabo de ver tu publicación y le dije a mi plantita conformate con esta mariquita, que tú dueña no puedes competir con @emiliocabrera haciendo originales maceteros, así que conformate por lo menos te protegerá de los pulgones y ácaros; jajajaja. Un abrazo.
Thank you for sharing this amazing post on HIVE!
Your content got selected by our fellow curator @rezoanulvibes & you just received a little thank you via an upvote from our non-profit curation initiative!
You will be featured in one of our recurring curation compilations and on our pinterest boards! Both are aiming to offer you a stage to widen your audience within and outside of the DIY scene of hive.
Join the official DIYHub community on HIVE and show us more of your amazing work and feel free to connect with us and other DIYers via our discord server: https://discord.gg/mY5uCfQ !
If you want to support our goal to motivate other DIY/art/music/homesteading/... creators just delegate to us and earn 100% of your curation rewards!
Stay creative & hive on!