¡Hola amigos de Hive, gratos saludos tengan todos!
Hello friends of Hive, greetings to all!
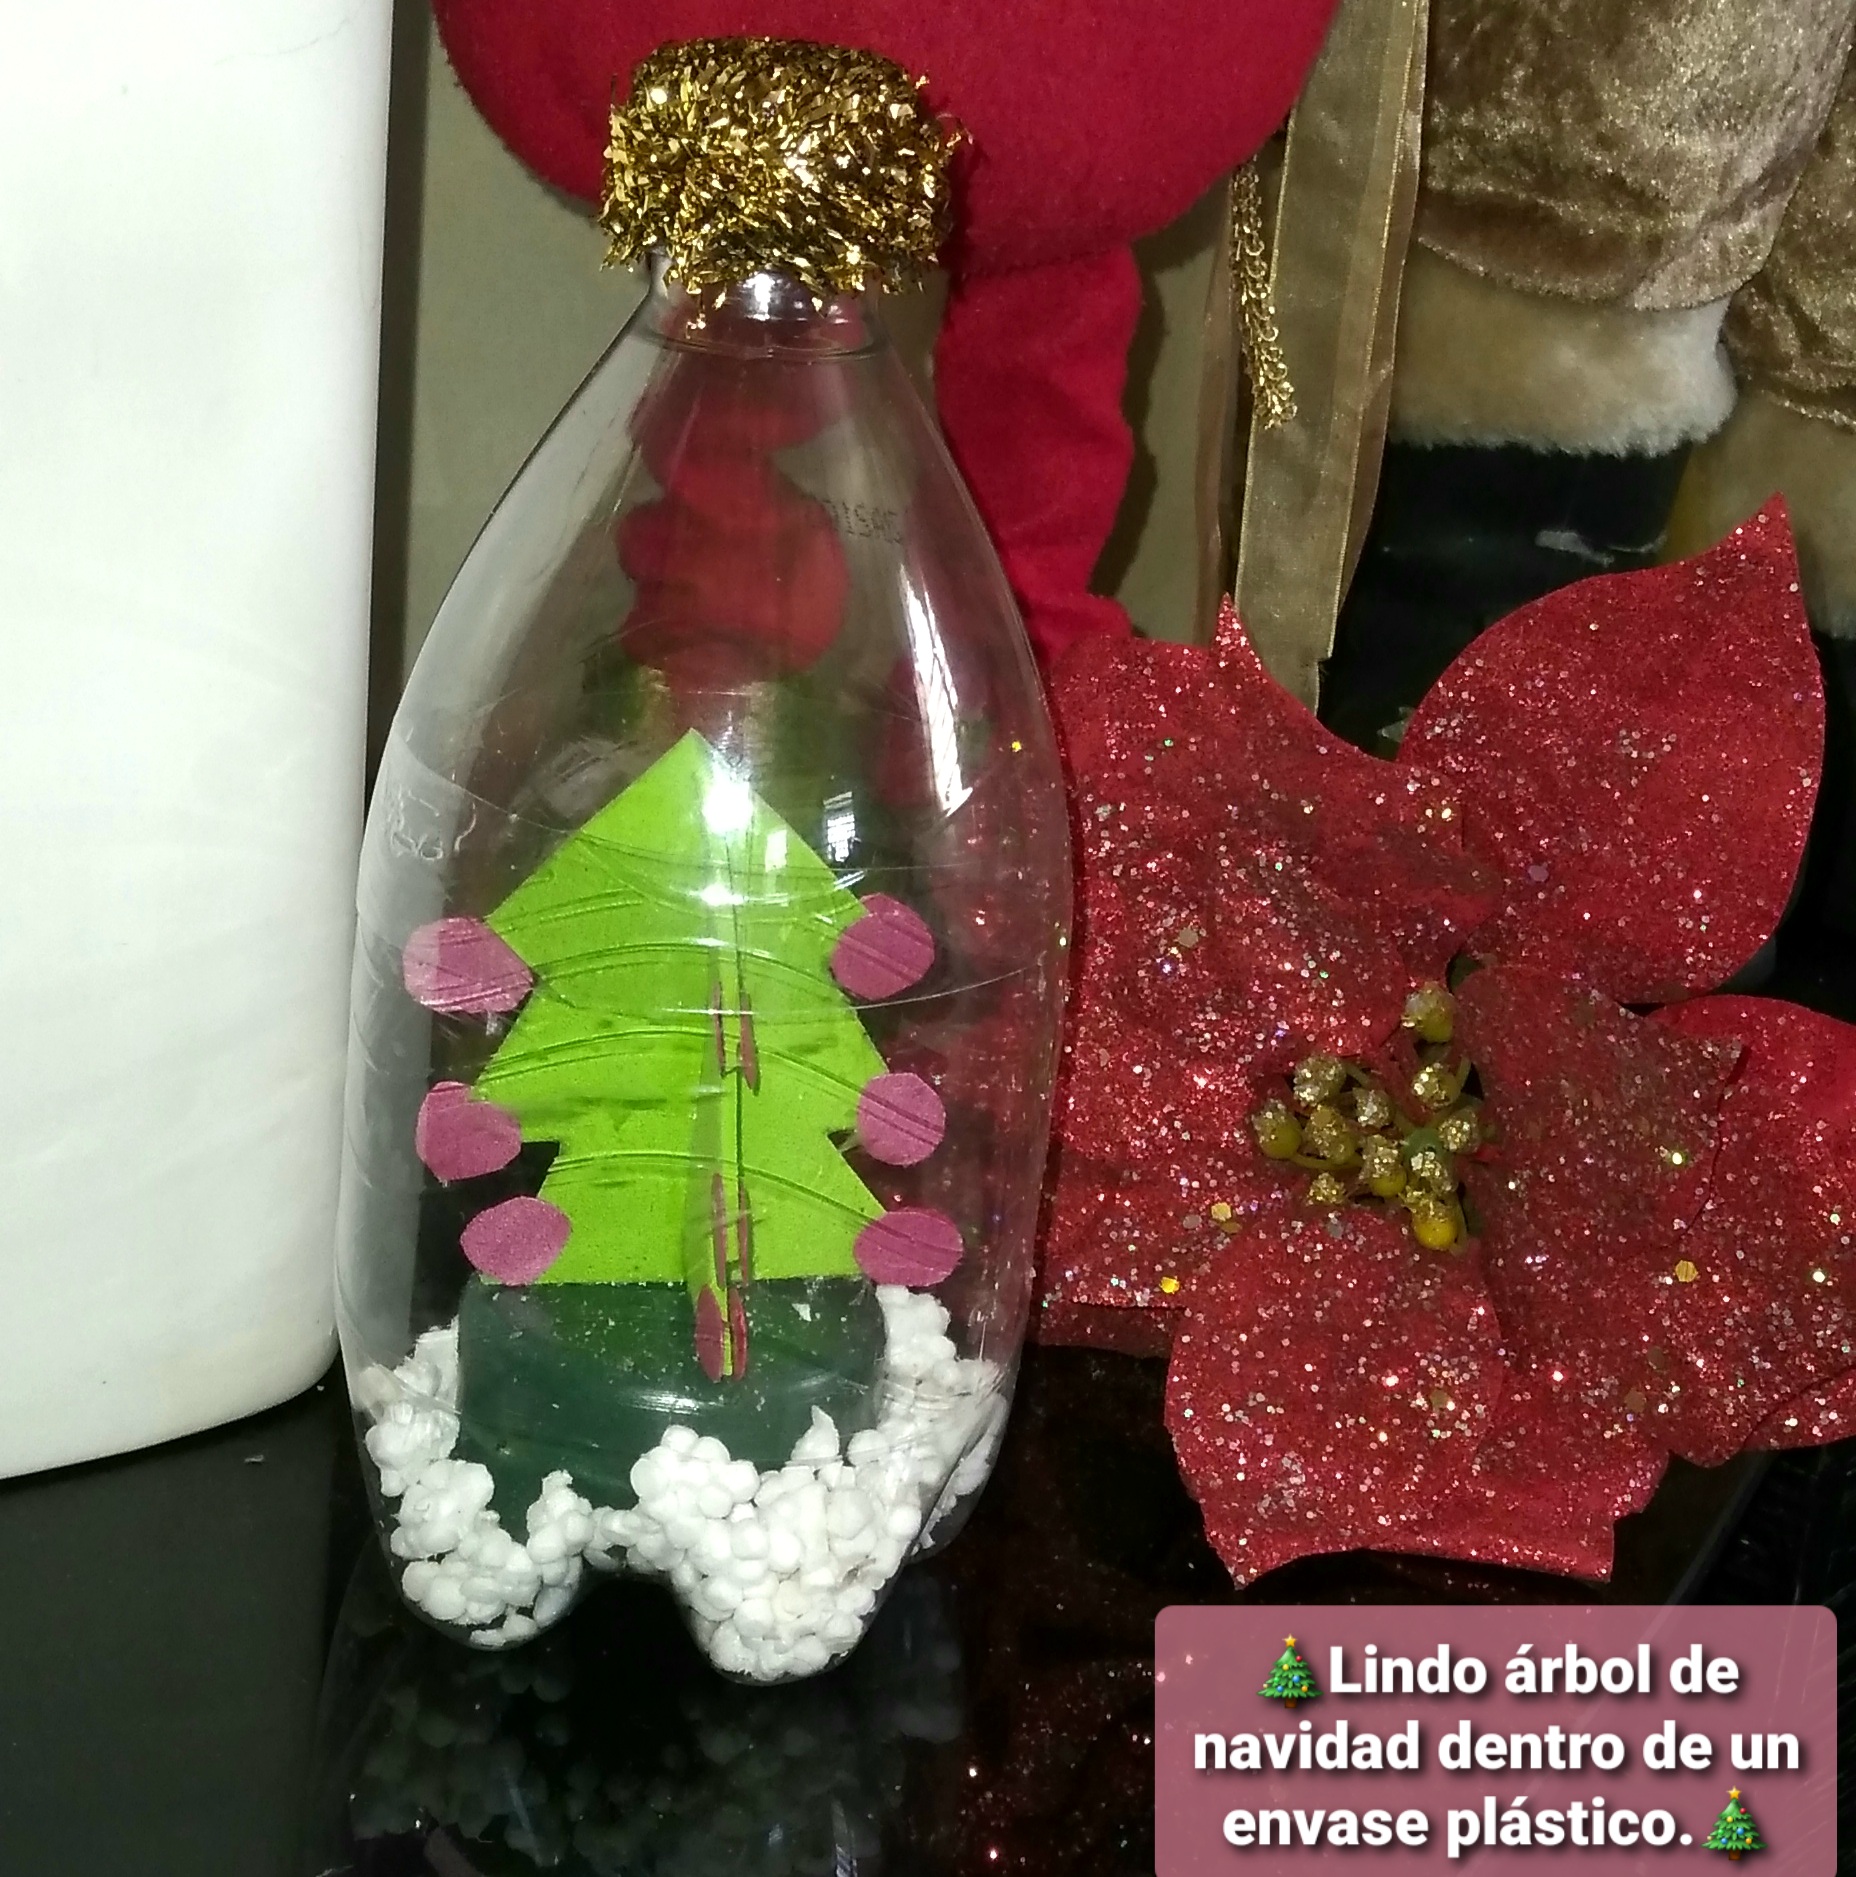
La navidad siempre será la época más bonita del año, siempre emana alegría y despierta en todos nosotros en espíritu creativo para vivirla al máximo, me gusta mucho realizar manualidades y aunque tenía tiempo sin hacerlas hoy les muestro como desde los materiales de provecho podemos hacerla, hermosa y creativa.
Christmas will always be the most beautiful time of the year, always emanates joy and awakens in all of us in creative spirit to live it to the fullest, I really like to make crafts and although I had time without doing them today I show you how from the materials of profit we can make it, beautiful and creative.
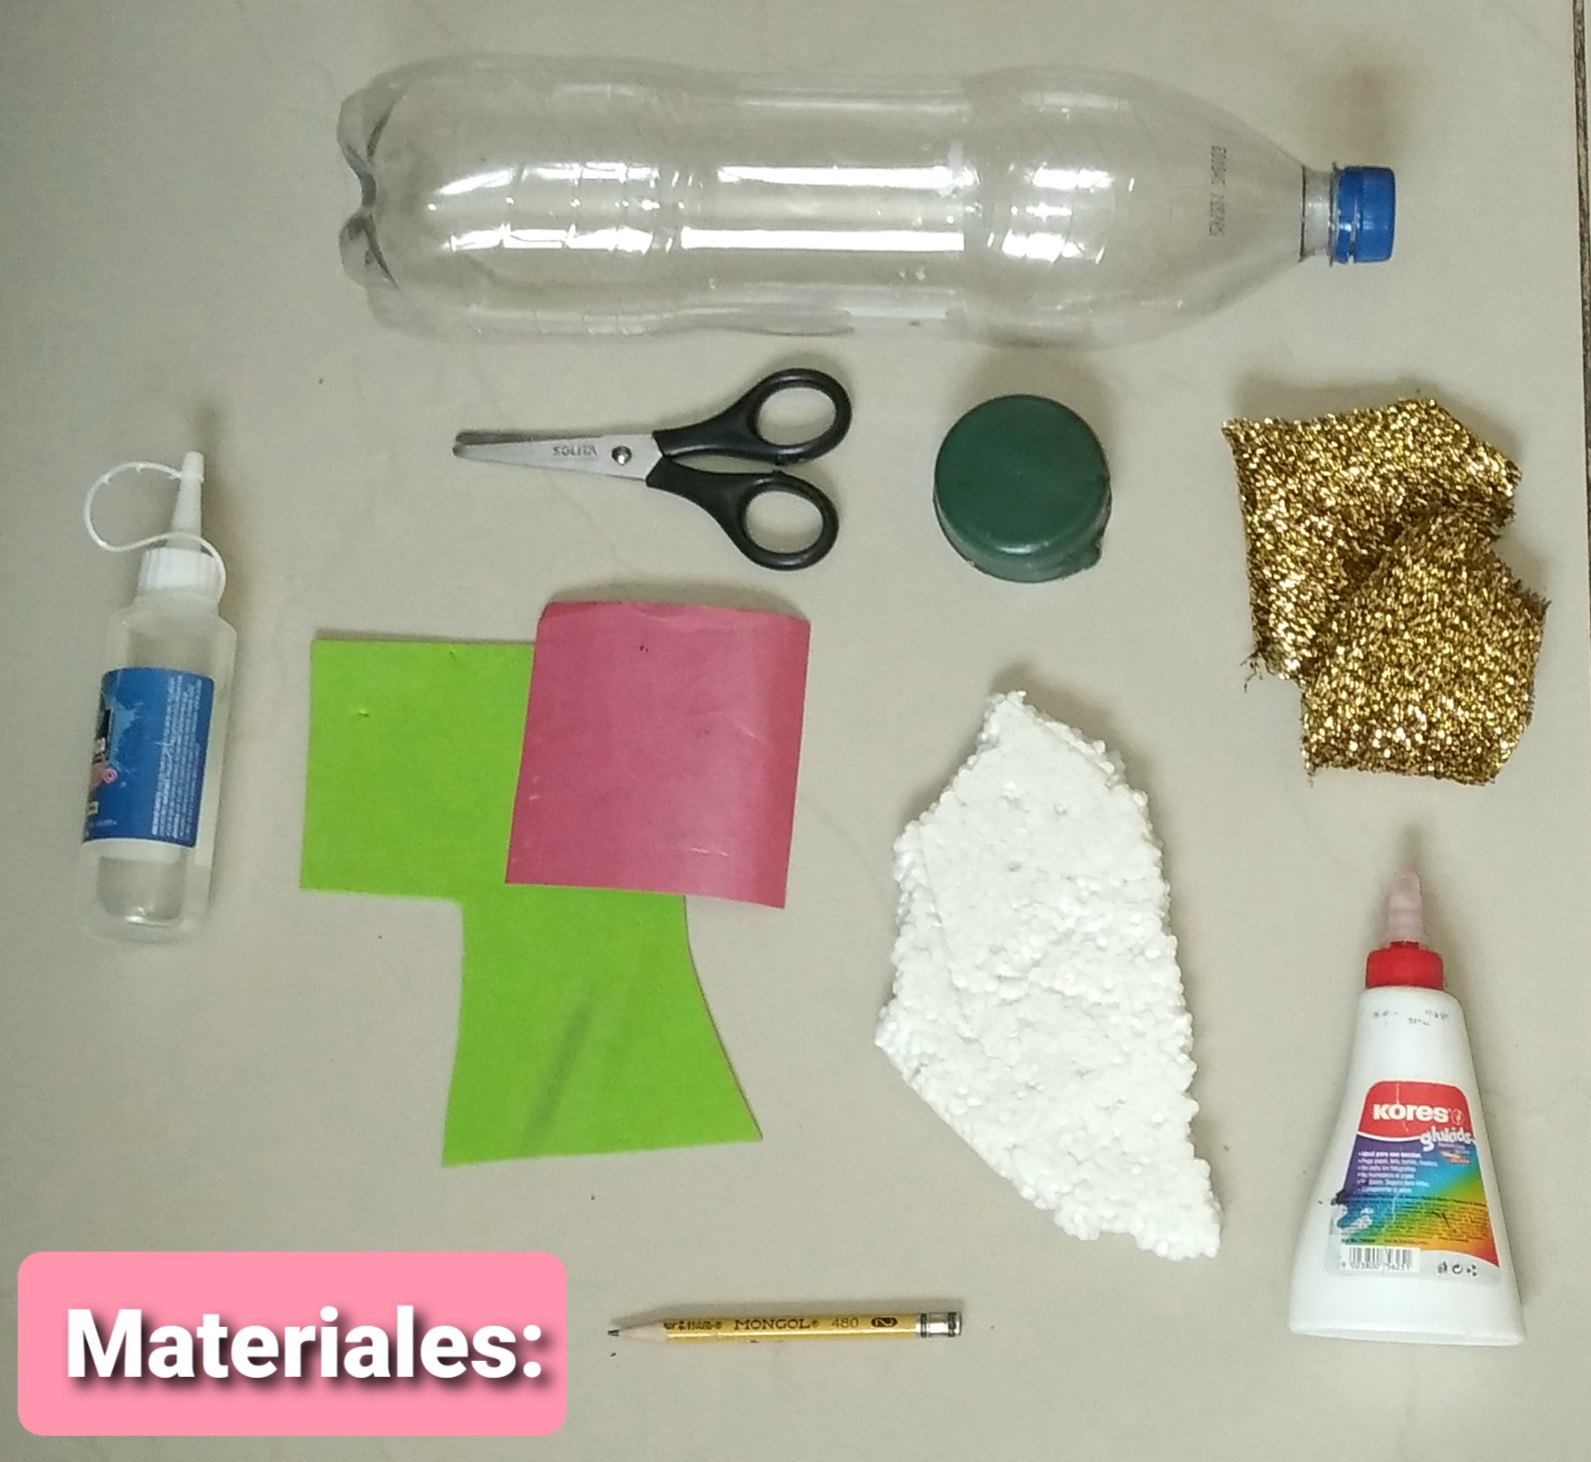
Materiales:
🎄Un envase de plástico de refresco.
🎄Una tapa plástica grande de botella.
🎄Un trozo de animé.
🎄Un trozo pequeño de tela brillante.
🎄Silicón liquido y pega blanca de cola.
🎄Un pequeño trozo de foami verde.
🎄Un pequeño trozo de cartulina roja.
🎄Tijera y lápiz.
Materials:
🎄A plastic soft drink container.
🎄A large plastic bottle cap.
🎄A piece of anime.
🎄A small piece of shiny fabric.
🎄Liquid silicone and white glue glue.
🎄A small piece of green foami.
🎄A small piece of red cardstock.
🎄Scissors and pencil.
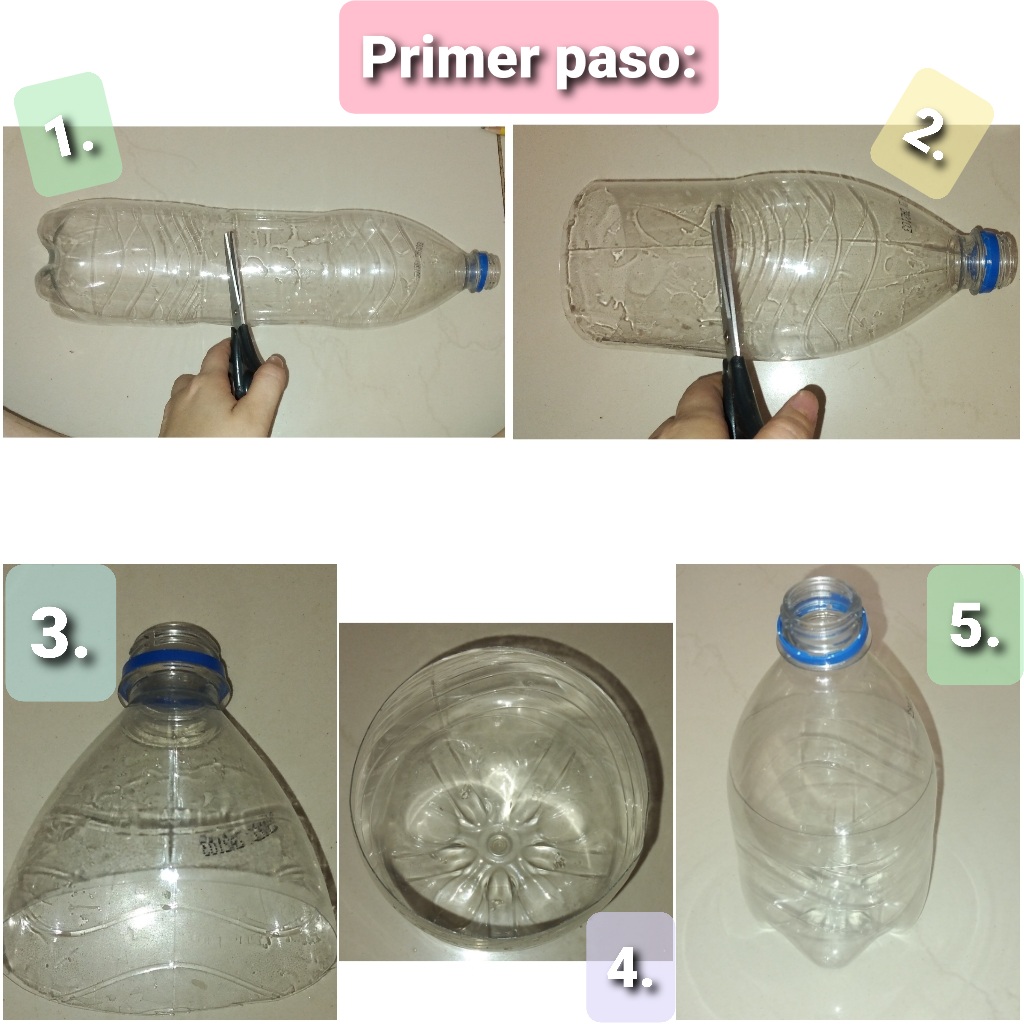
Primer paso:
Primeramente agarramos la botella plástica de refresco luego comenzamos a cortas con un ayuda de una tijera el extremo inferior, así mismo el extremo superior, ambos lados deben quedar parejos y deben ajustarse asegúrate que pueden pegarse las dos partes muy bien y mide. Luego colocas las dos partes juntas y quedará como ajustado y reducido.
First step:
First we grab the plastic soda bottle then we start to cut with the help of a scissors the lower end and the upper end, both sides must be even and must be adjusted, make sure that the two parts can be glued very well and measure. Then put the two parts together and it will be as tight and reduced.
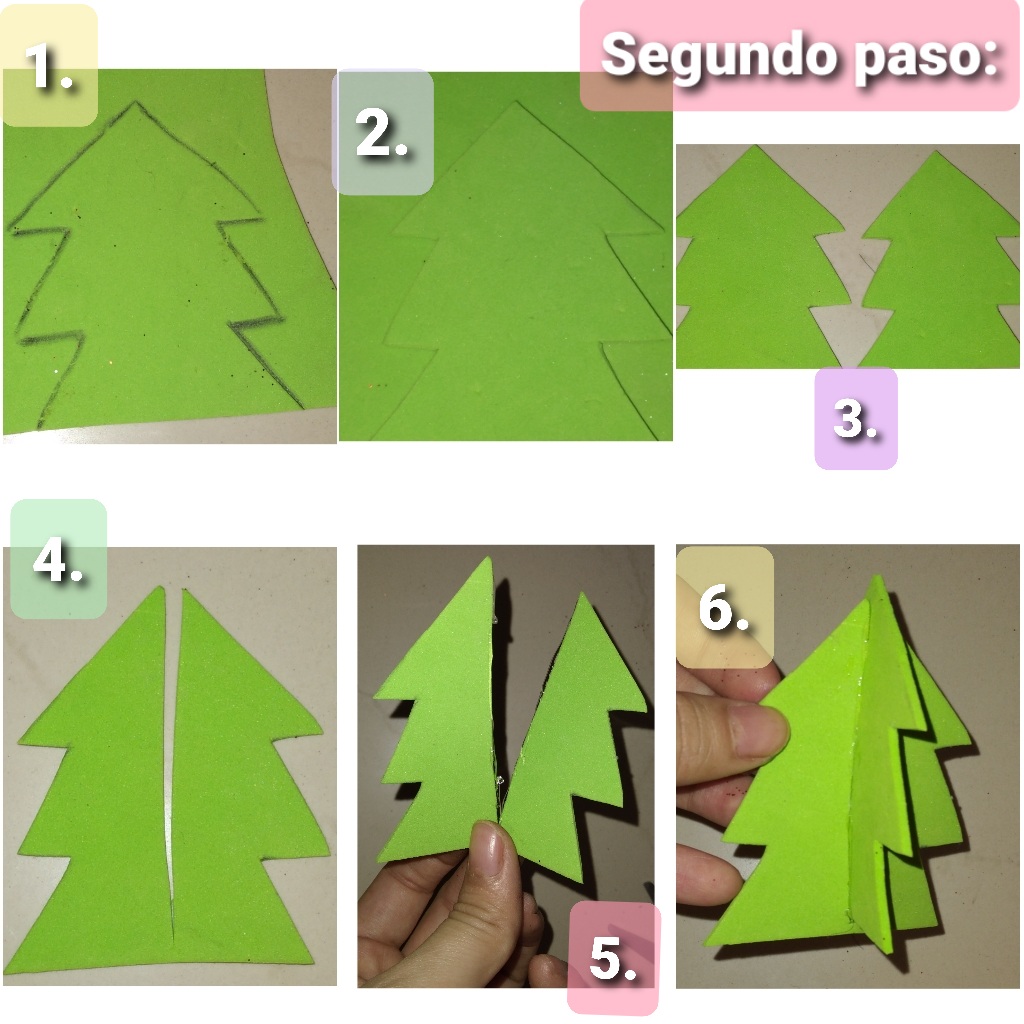
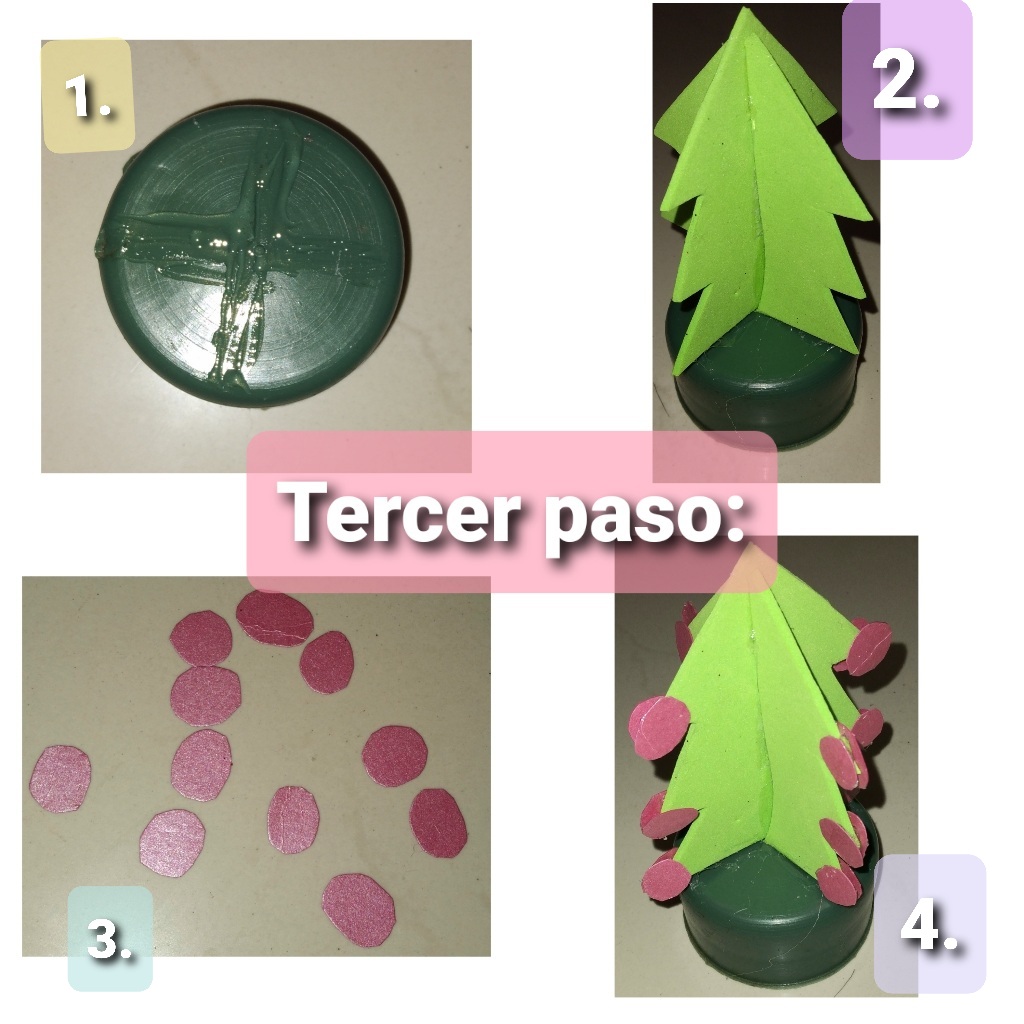
Segundo paso:
En el foami verde dibuja un árbol de navidad pequeño, una vez dibujado recorta, úsalo como referencia para hacer otro, tendrás dos arboles de navidad pequeños, a un árbol hazle una línea en el medio recortada con la tijera, luego coloca en sus bordes cortados silicón líquido, introduce en esa línea el otro árbol y quedará tridimensional con distintas ramas.
Second step:
On the green foami draw a small Christmas tree, once drawn cut it out, use it as a reference to make another one, you will have two small Christmas trees, make a line in the middle of one tree cut out with the scissors, then place liquid silicone on its cut edges, insert the other tree on that line and it will be three-dimensional with different branches.
Tercer paso:
Una vez que nuestro pequeño árbol de navidad este listo, procedemos a pegarlo, en sus extremidades inferiores coloca silicón liquido luego agrega otro poco de silicón al frío en la tapa grande haz presión y pega por completo el árbol de navidad en la tapa, asegúrate que pueda quedar bien pegado, luego recorta diminutos círculos que será nuestras bambalinas y pégalas en cada rama de lado a lado.
Third step:
Once our little Christmas tree is ready, we proceed to glue it, on its lower extremities place liquid silicone then add another bit of cold silicone on the big lid, press and glue the Christmas tree completely on the lid, make sure it can be well glued, then cut out tiny circles that will be our bambalinas and glue them on each branch from side to side.
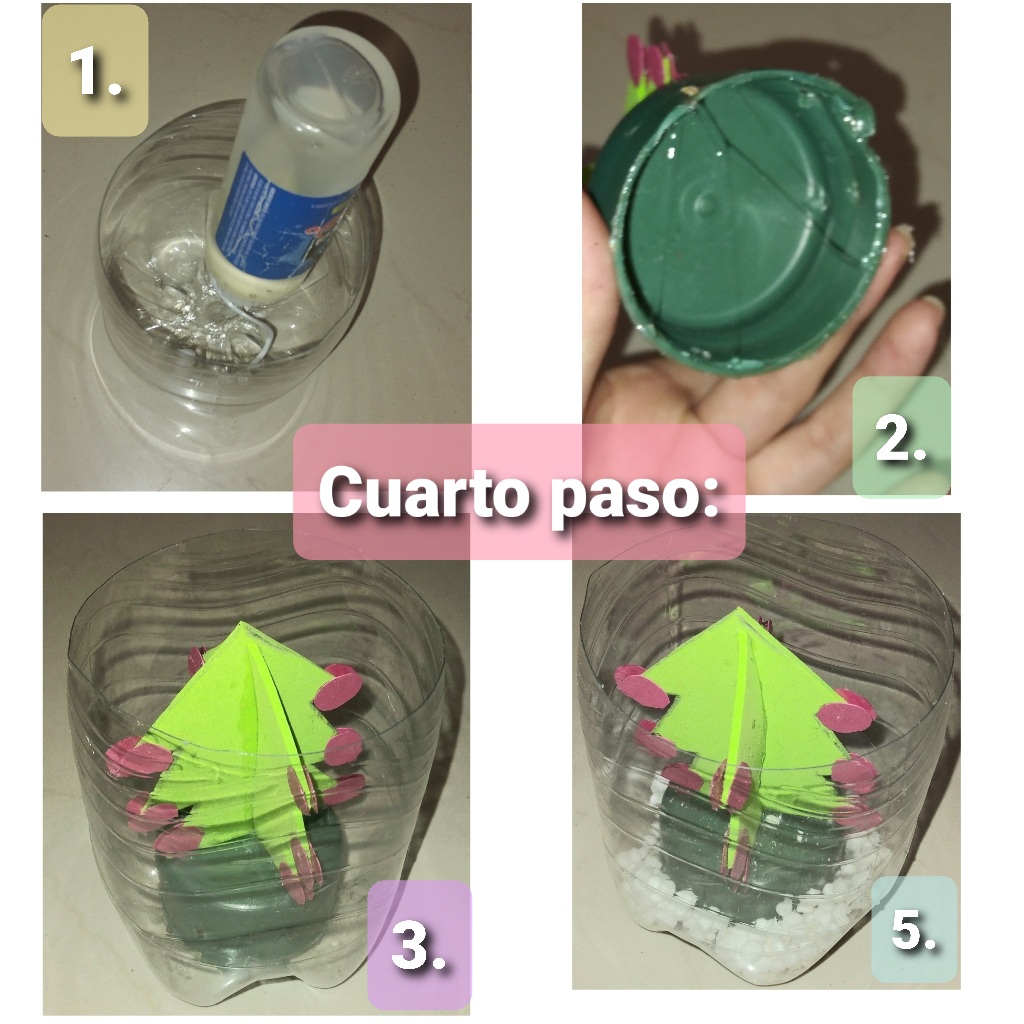
Cuarto paso:
Vierte el silicón líquido a la parte interna inferior de la botella plástica, luego agrega también silicón liquido a los bordes debajo de la tapa, pega muy bien, una vez que este pegado, tritura con tus dedos al anime y déjalo caer alrededor del árbol de navidad, para que sea la nieve.
Fourth step:
Pour the liquid silicone to the inside bottom of the plastic bottle, then also add liquid silicone to the edges under the lid, glue very well, once it is glued, crush with your fingers the anime and let it fall around the Christmas tree, to be the snow.
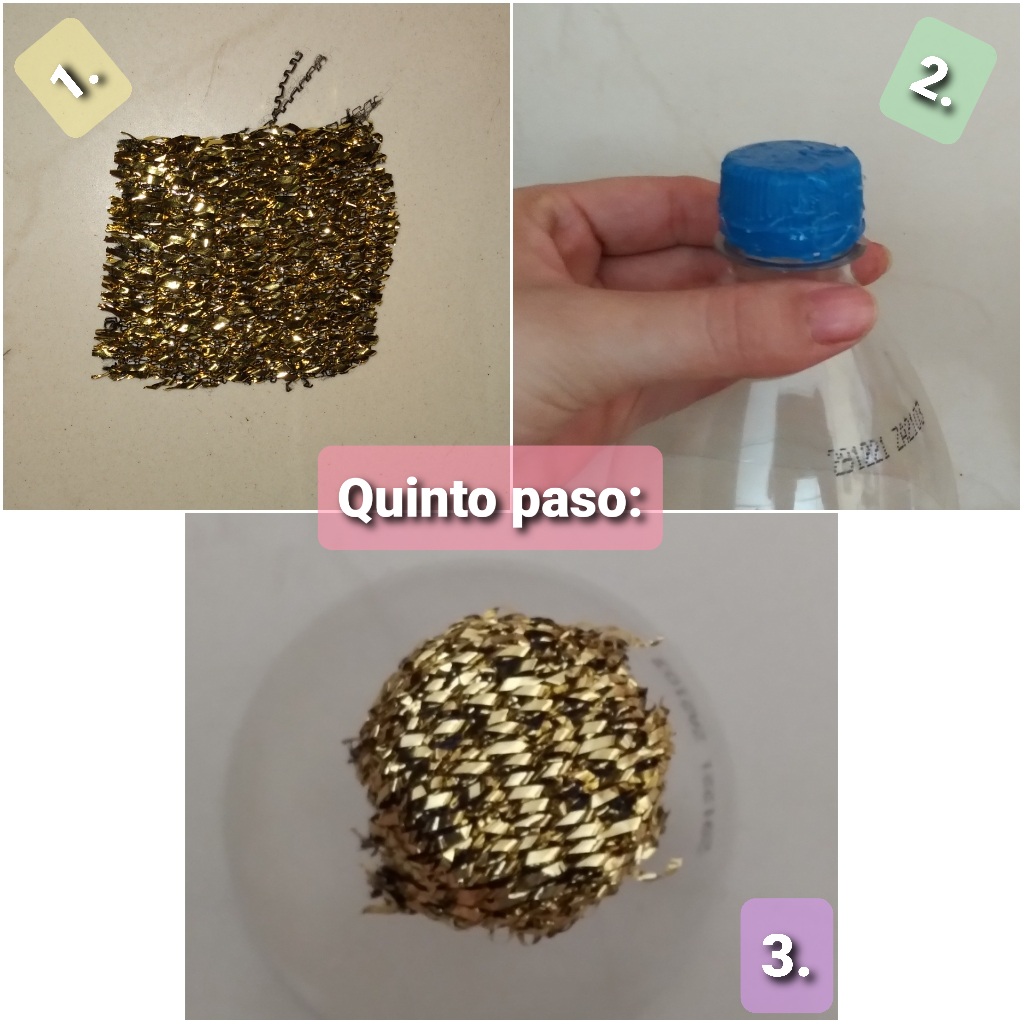
Quinto paso:
Por último para el extremo superior de la tapa del envase, corta un pequeño pedazo de tela brillante en forma de cuadrado, luego agrega pega en la tapa y coloca el cuadro de tela brillante haz presión para que pegue bien, este último paso representa una linda estrella y le dará un toque hermoso.
Fifth step:
Finally for the upper end of the lid of the container, cut a small piece of shiny fabric in the shape of a square, then add glue on the lid and place the shiny fabric square make pressure so that it sticks well, this last step represents a nice star and will give a beautiful touch.
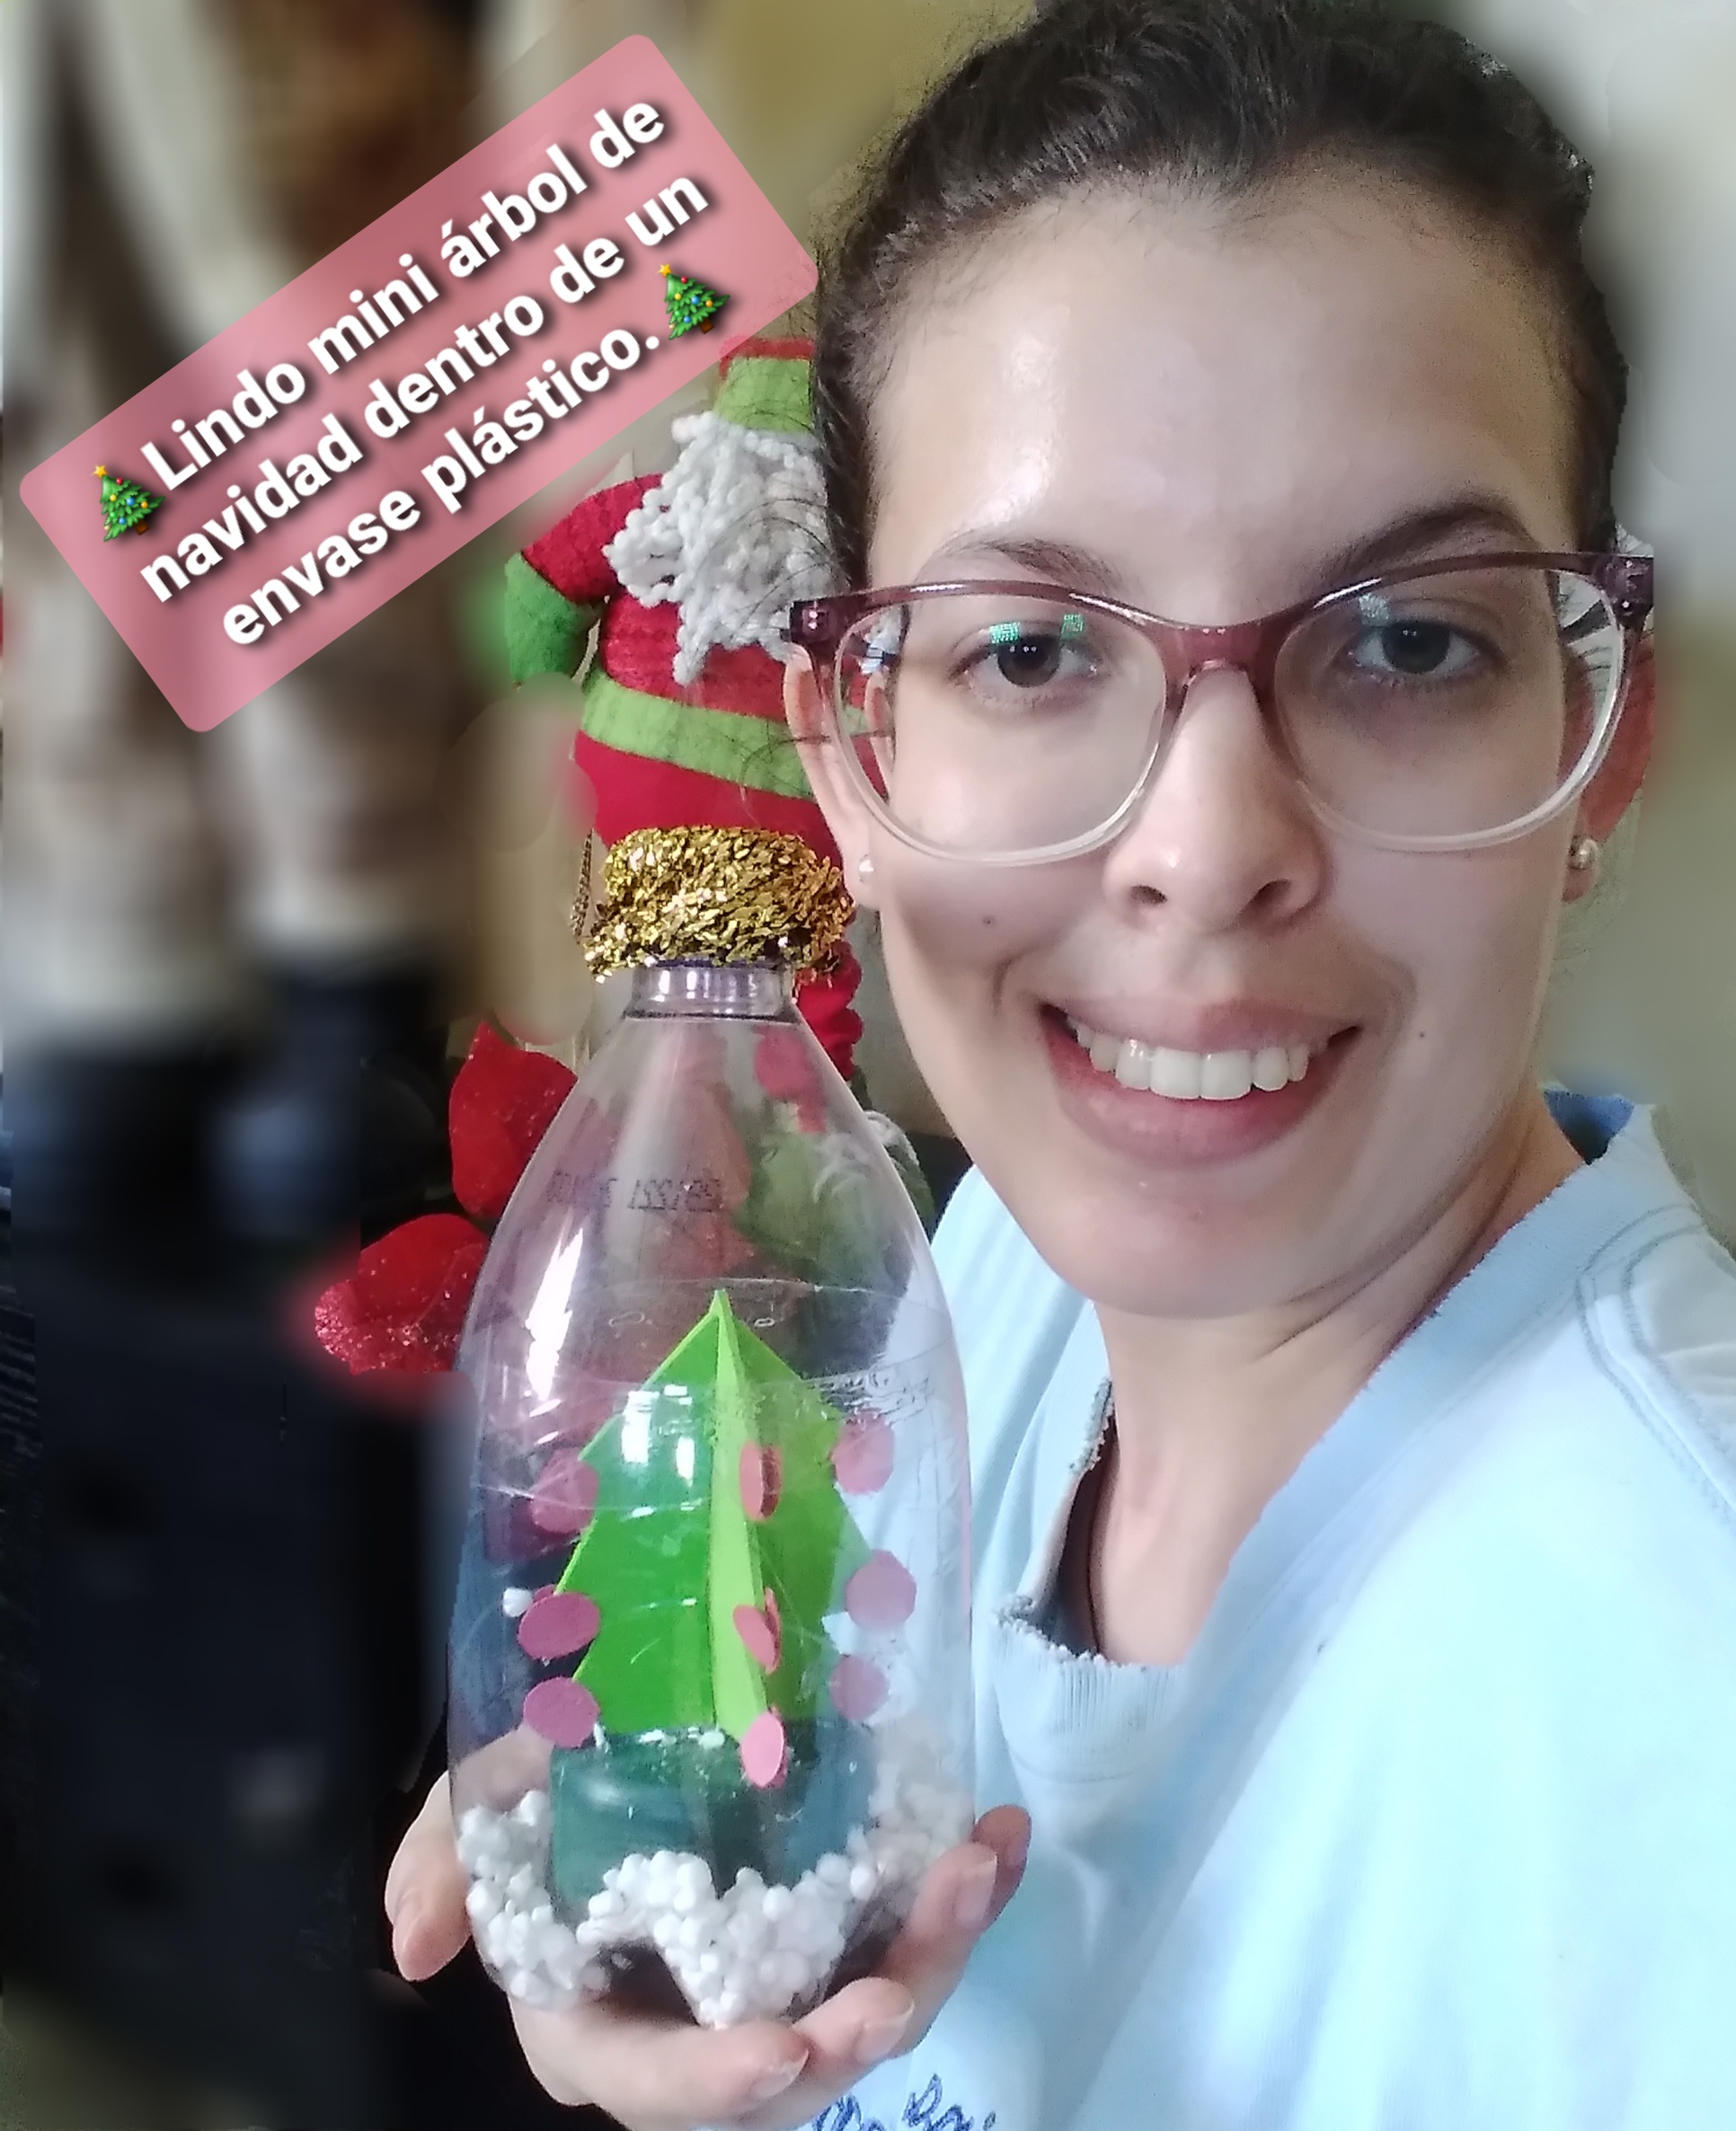
Así de hermoso quedara nuestro lindo adorno de navidad.
This is how beautiful our beautiful Christmas ornament will look like.

 créditos @doze

Texto traducido en Deelp