Hoolaa hermosos hivers creativos! 😘
Feliz y bendecido lunes, espero se encuentren muy bien y que tengan un inicio de semana lleno de mucho éxitos....!! Es cierto que me he encontrado un poco ausente talvez porque me he enfocado en otros aprendizajes sin embargo es un verdadero gusto para mí compartir un nuevo contenido creativo con ustedes.
Happy and blessed Monday, I hope you are very well and that you have a very successful start to the week....!! It is true that I have found myself a bit absent, perhaps because I have focused on other learning, however it is a real pleasure for me to share new creative content with you.
Para recompensar todo este tiempo hoy no le traigo una sino tres ideas hermosas para cumpleaños con la temática de Minnie y se preguntaran ¿porqué?; bueno les cuento que esta muy cerca el cumpleaños y de mi consentida hija y ella por cuenta propia a escogido este personaje como el protagonista de su agasajo y yo encantada de complacer sus deseos ya comencé con los preparativos.
To reward all this time, today I bring you not one but three beautiful ideas for Minnie-themed birthdays and you will wonder why? Well, I'll tell you that my spoiled daughter's birthday is very close and she, on her own, has chosen this character as the protagonist of her entertainment and I am delighted to please her wishes and have already started with the preparations.
A pesar de que ha evolucionado mucho las decoraciones festivas, creo que está decoracion nunca pasará de moda pues realzan la belleza del pastel, le dan ese toque único a los centro de mesas e incluso hasta los cotillones...Así que si tienes una niña que también ama este personaje no te pierdas este tutorial de tres lindos toppers para la decoración con la temática de Minnie, acompáñame hasta el final cada paso!!!
Despite the fact that festive decorations have evolved a lot, I think that this decoration will never go out of style because they enhance the beauty of the cake, they give that unique touch to the centerpieces and even to the party favors... So if you have a girl who also loves this character, don't miss this tutorial of three cute Minnie-themed decoration toppers, come with me until the end of each step!!!
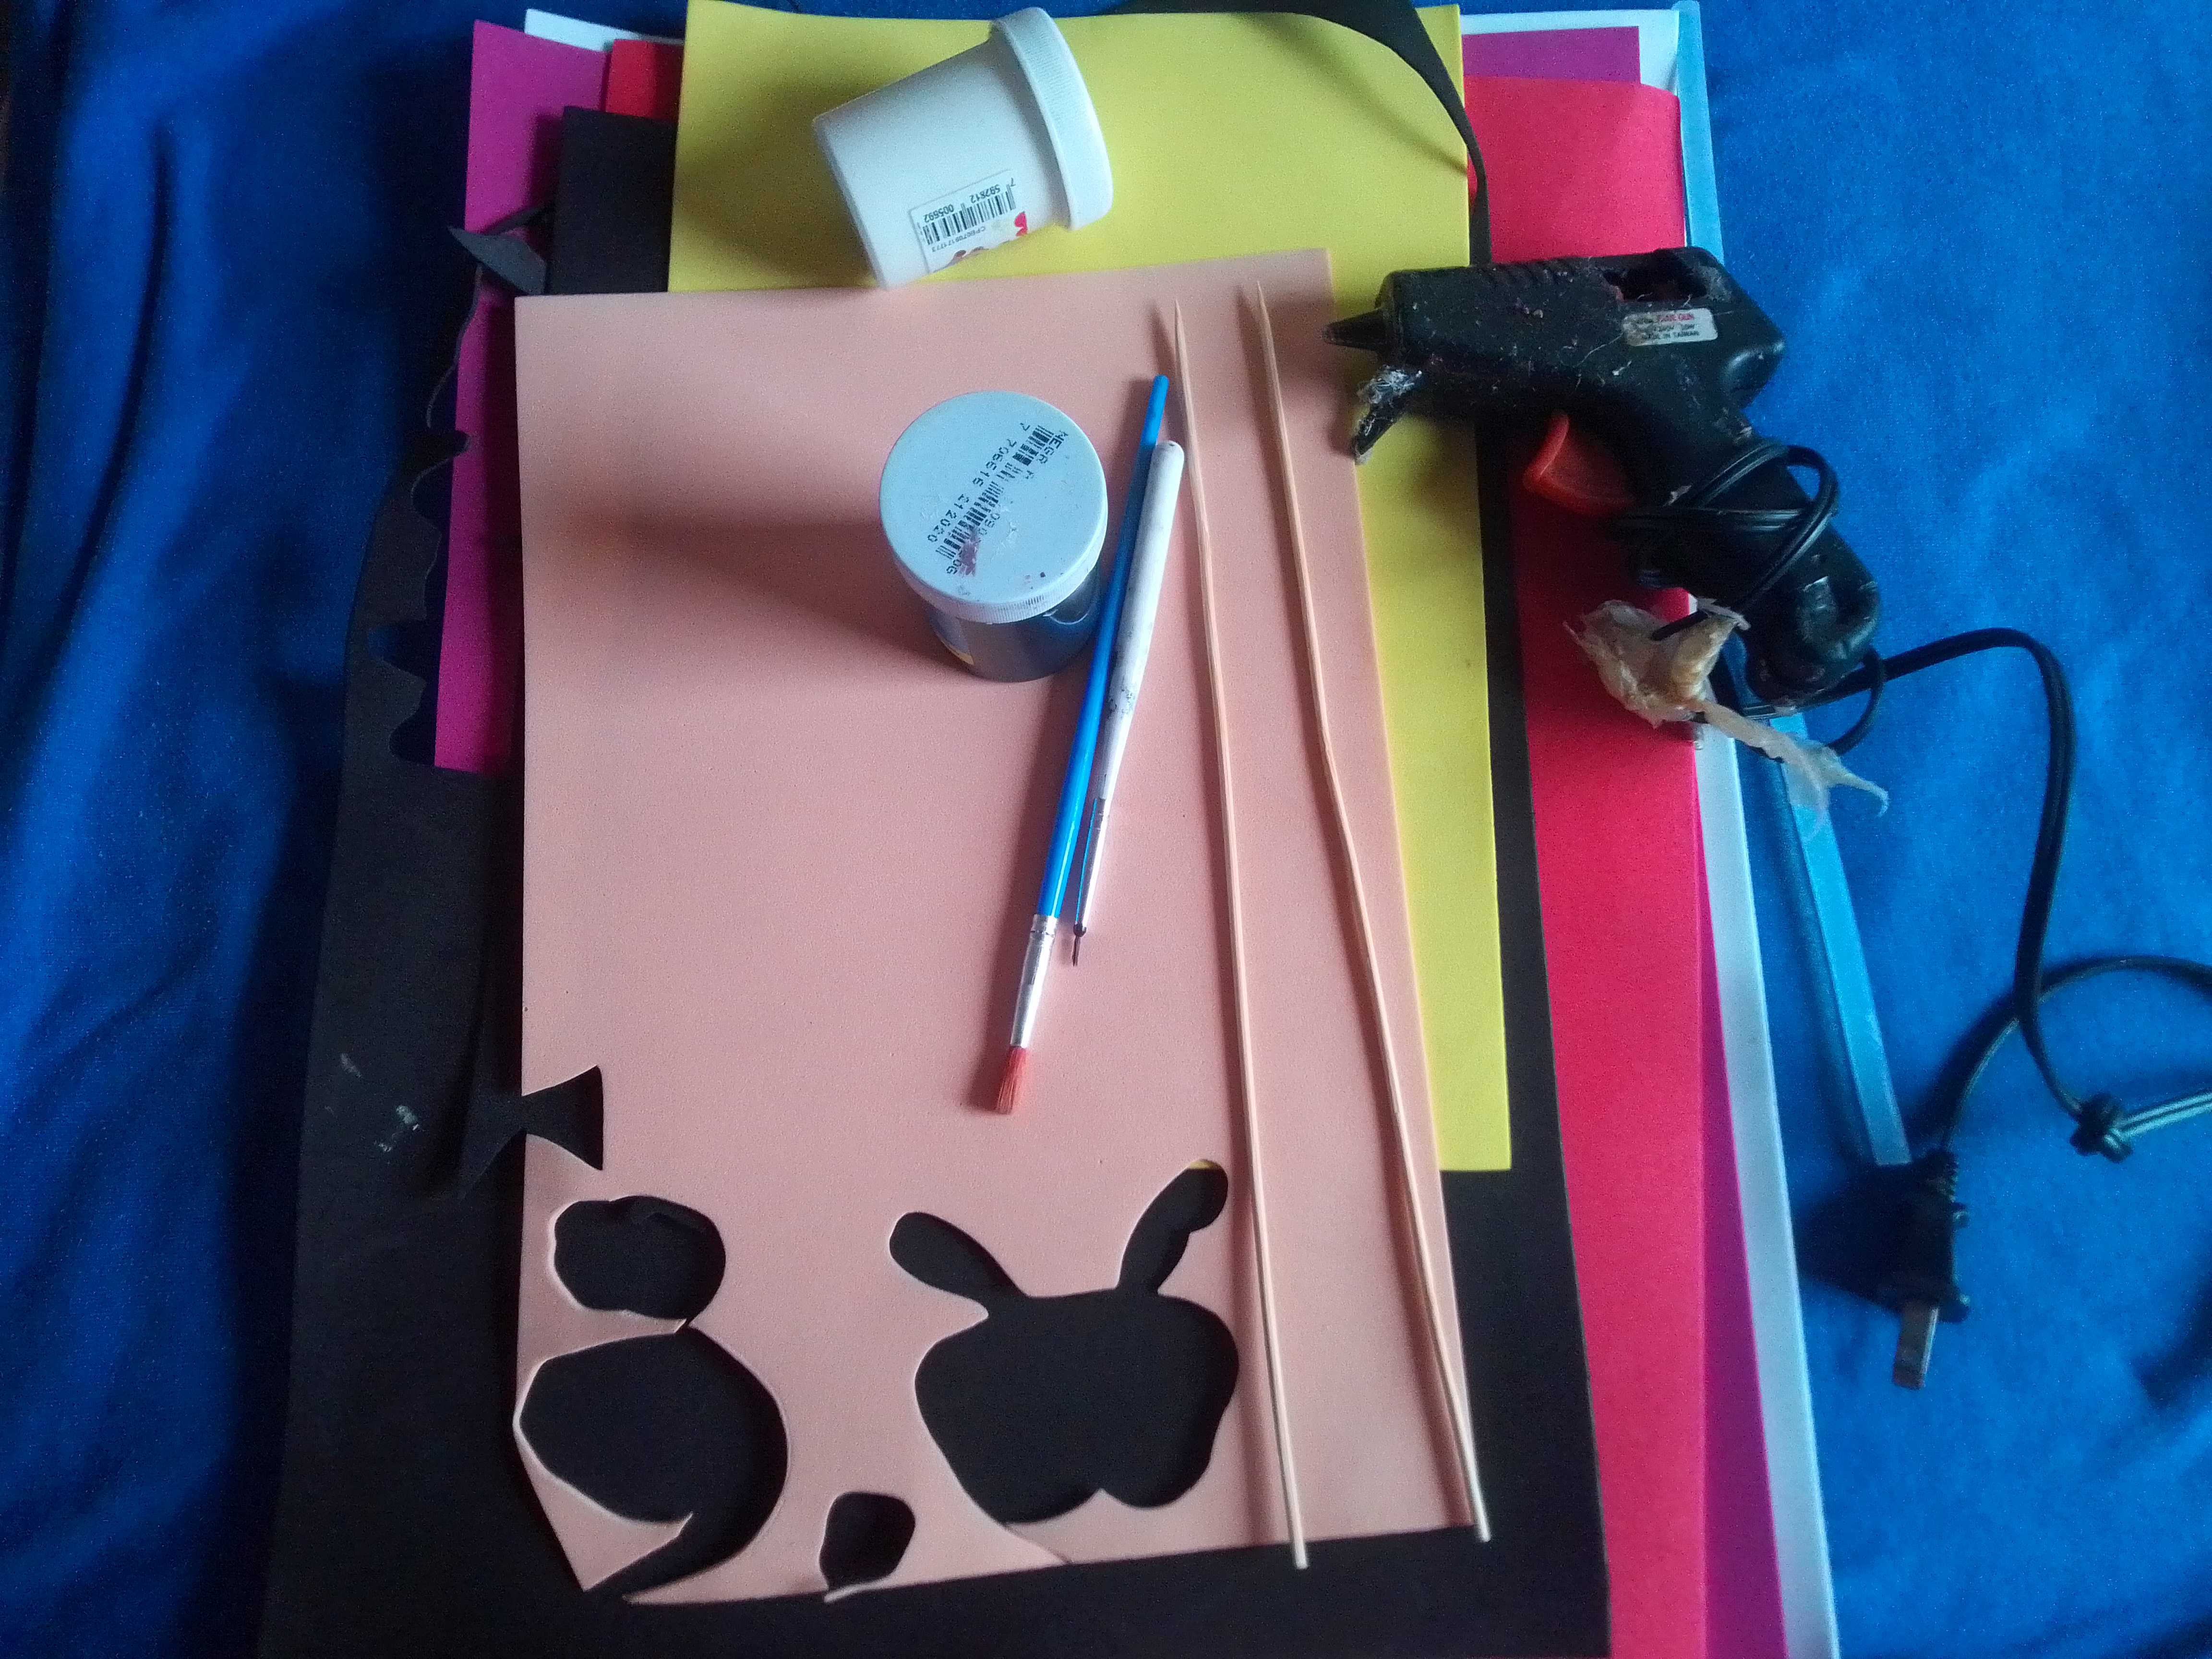
Materiales que necesitas:
- Foami fucsia, negro, rojo, amarillo, blanco y color piel.
- Silicón.
- Tijeras.
- Palillo s de altura.
- Pintura negra, roja y blanca.
- Pincel fino.
- Dibujo de Minnie.
Materials you need:
- Foami fuchsia, black, red, yellow, white and skin color.
- Silicone.
- Scissors.
- Height sticks.
- Black, red and white paint.
- Fine brush.
- Minnie drawing.
(PROCEDIMIENTO)
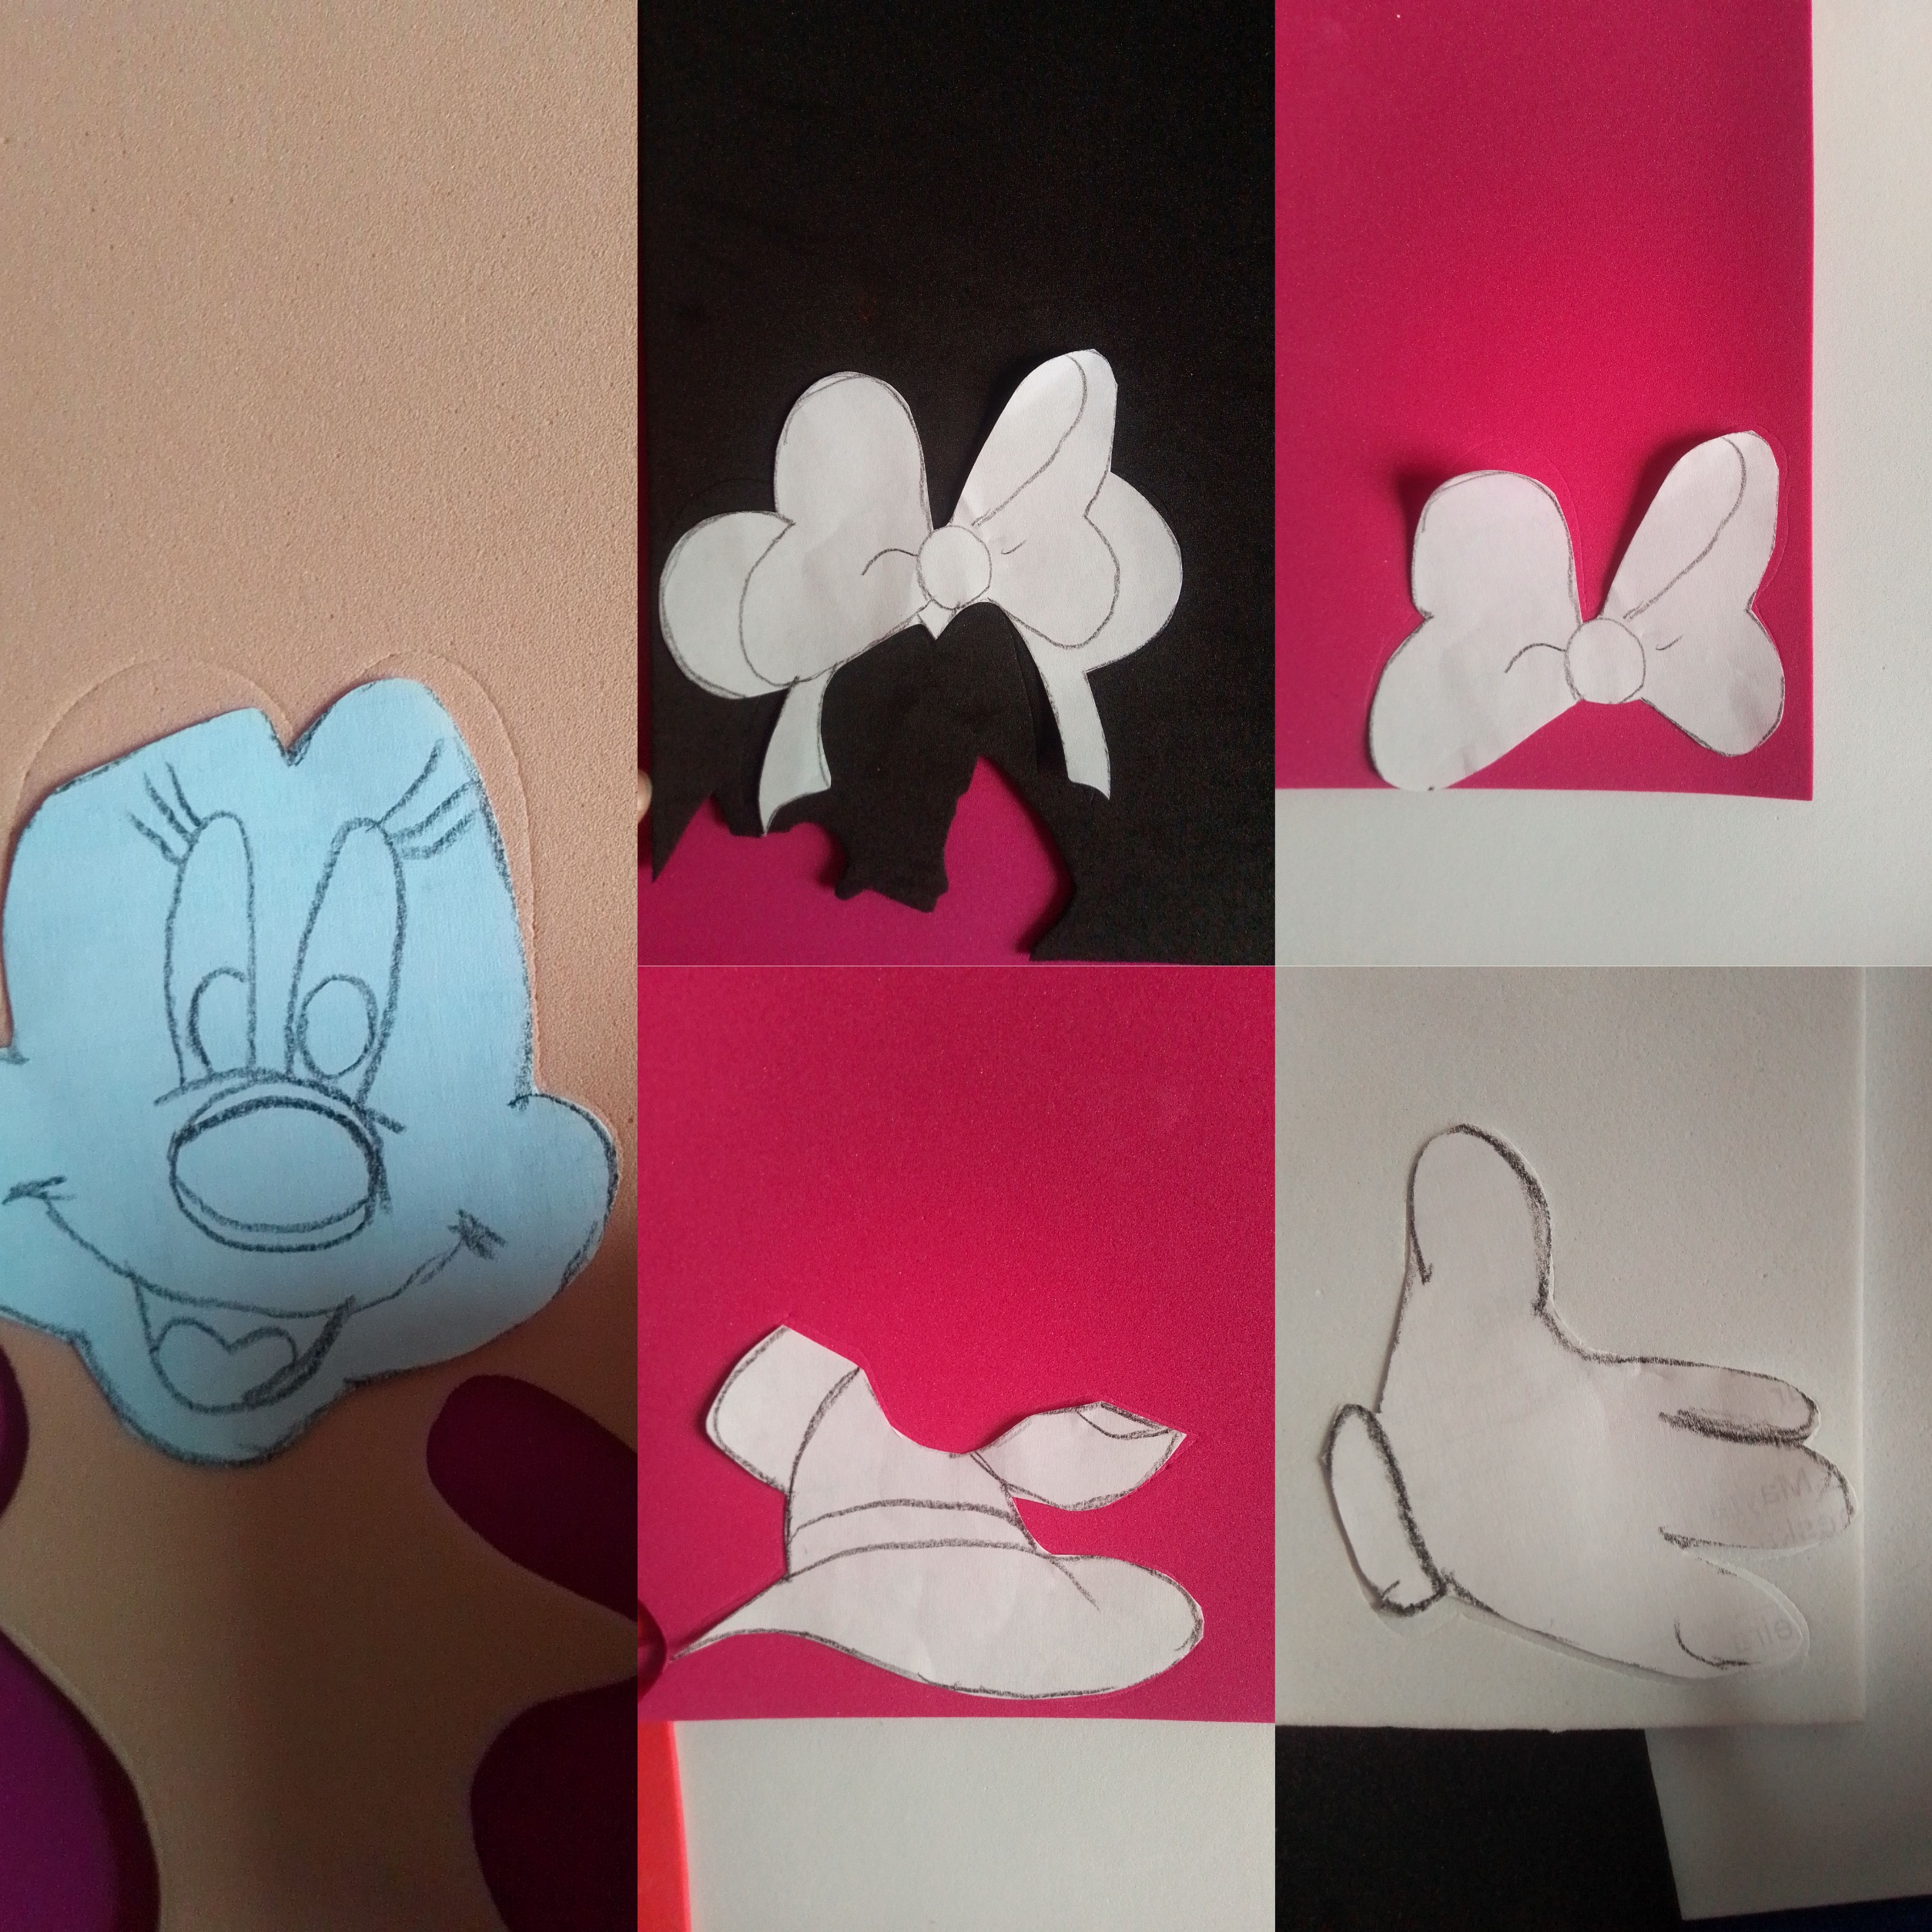
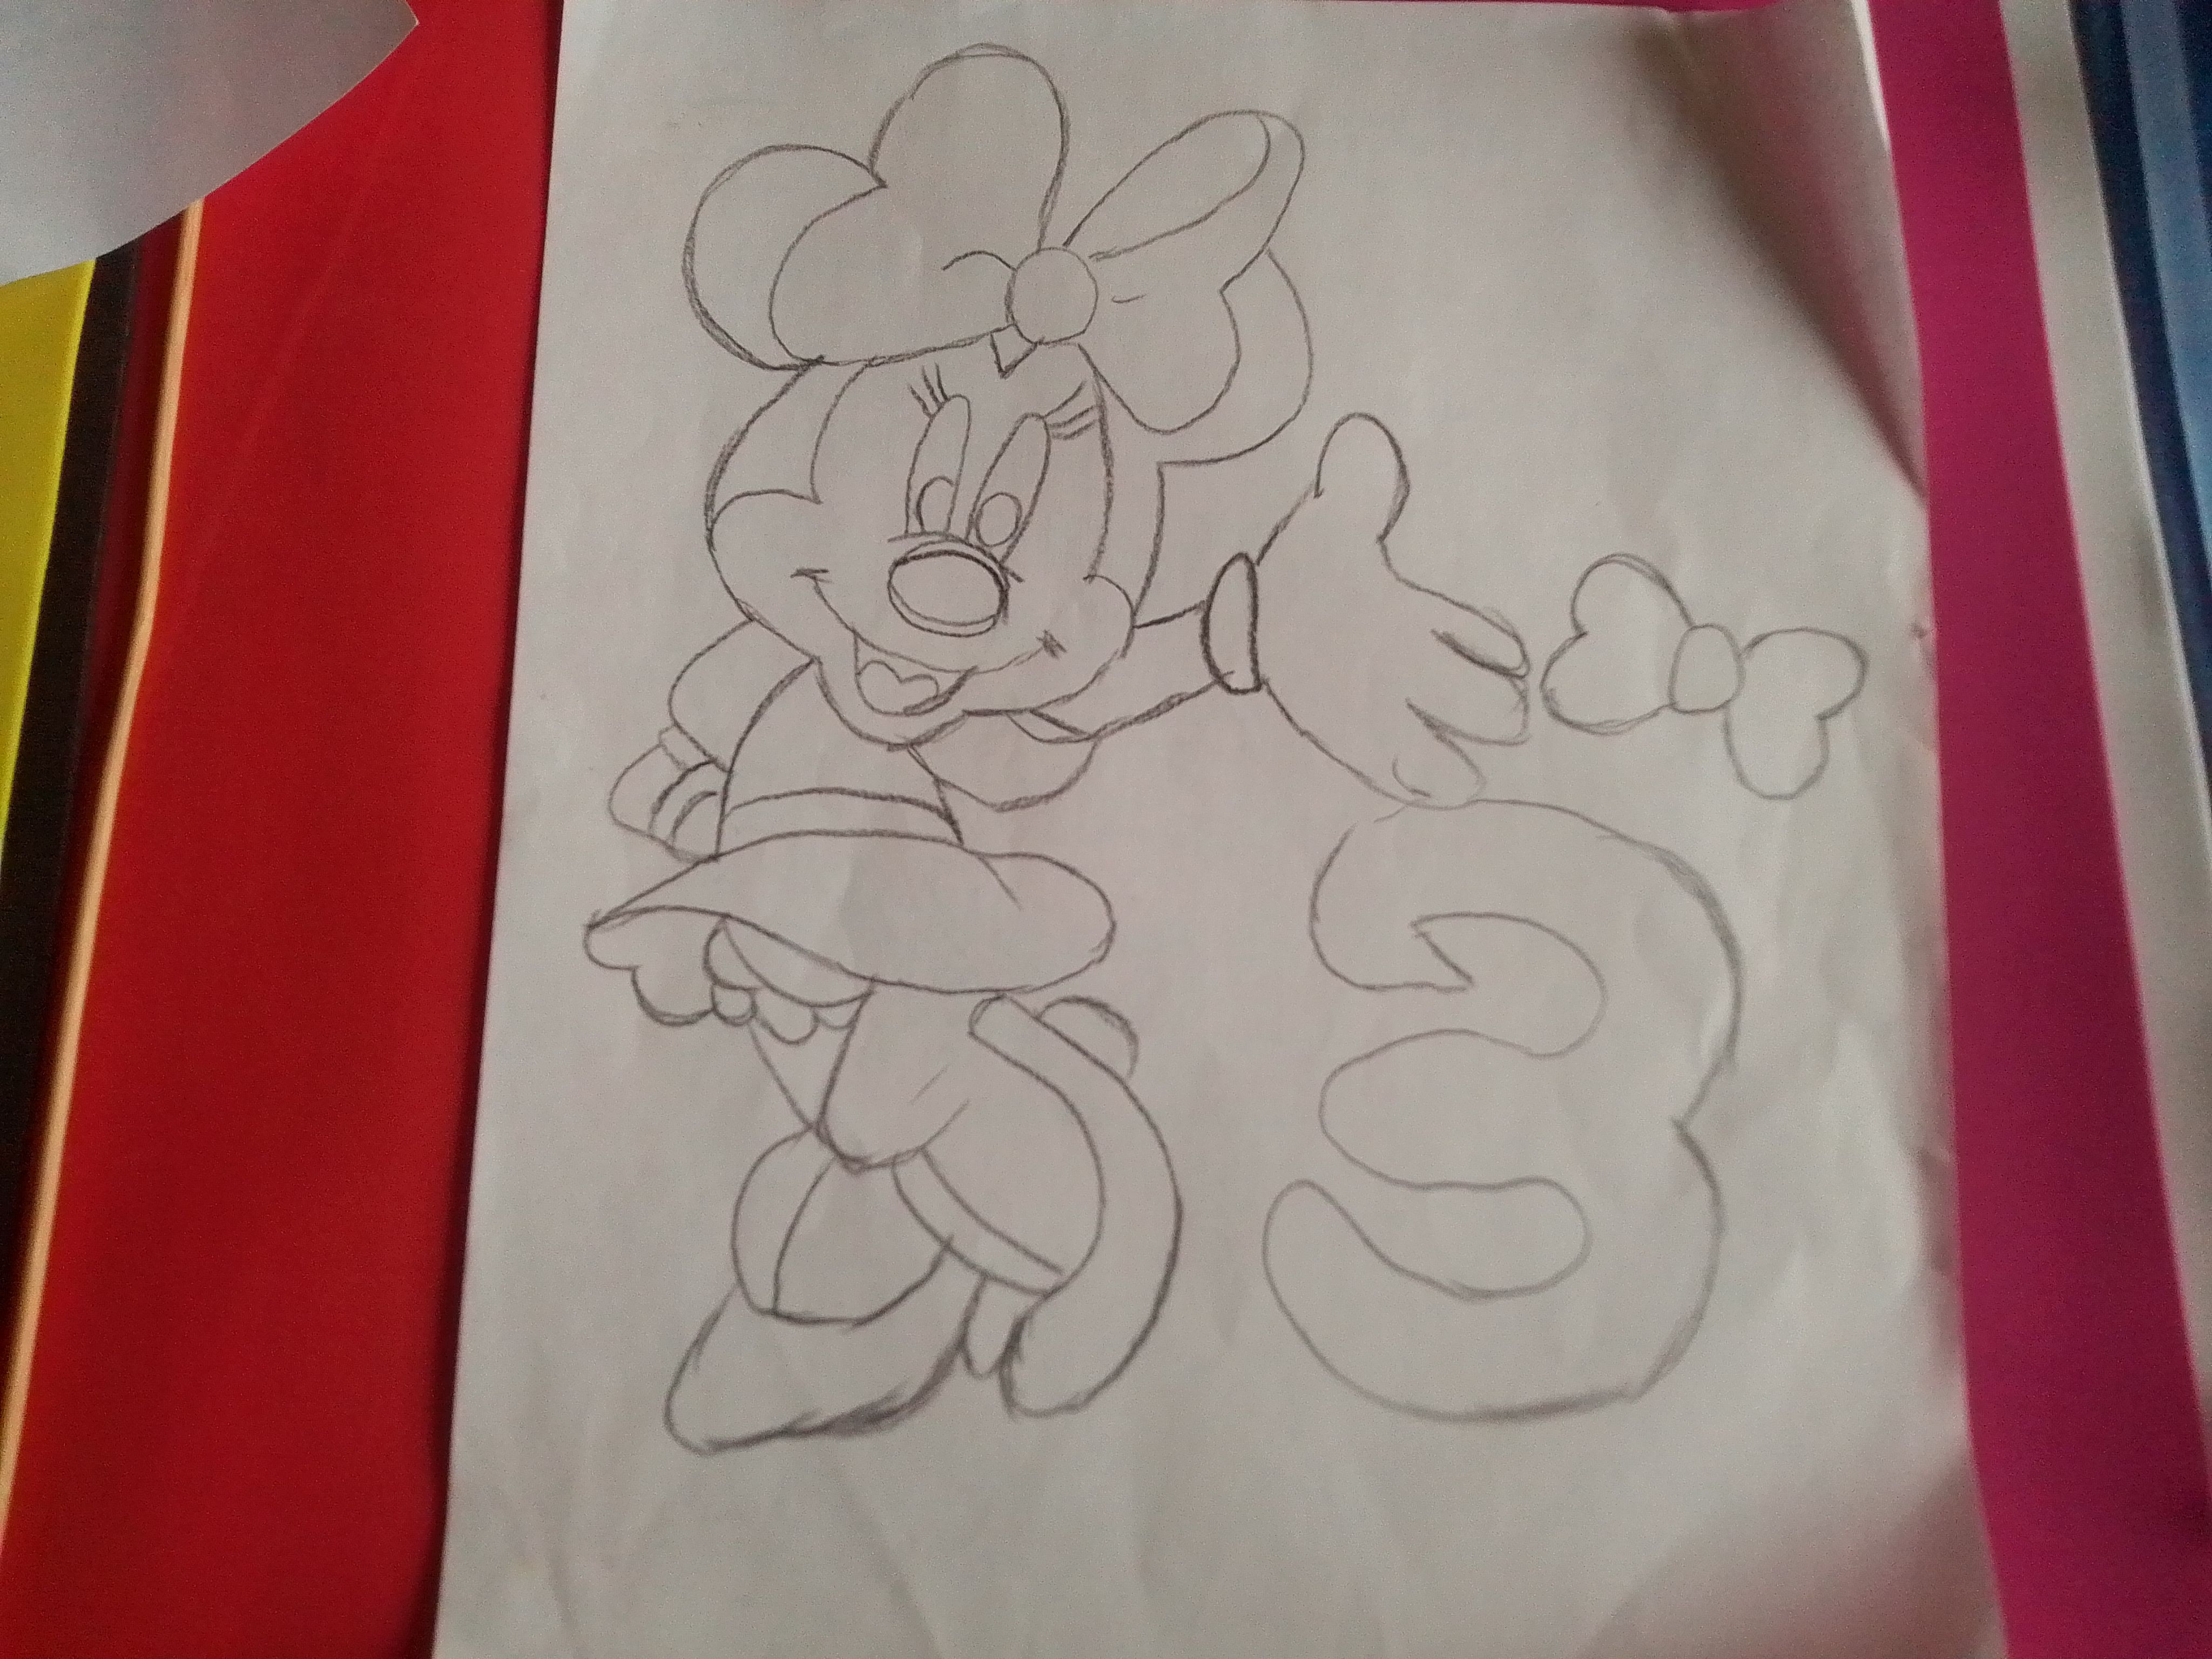
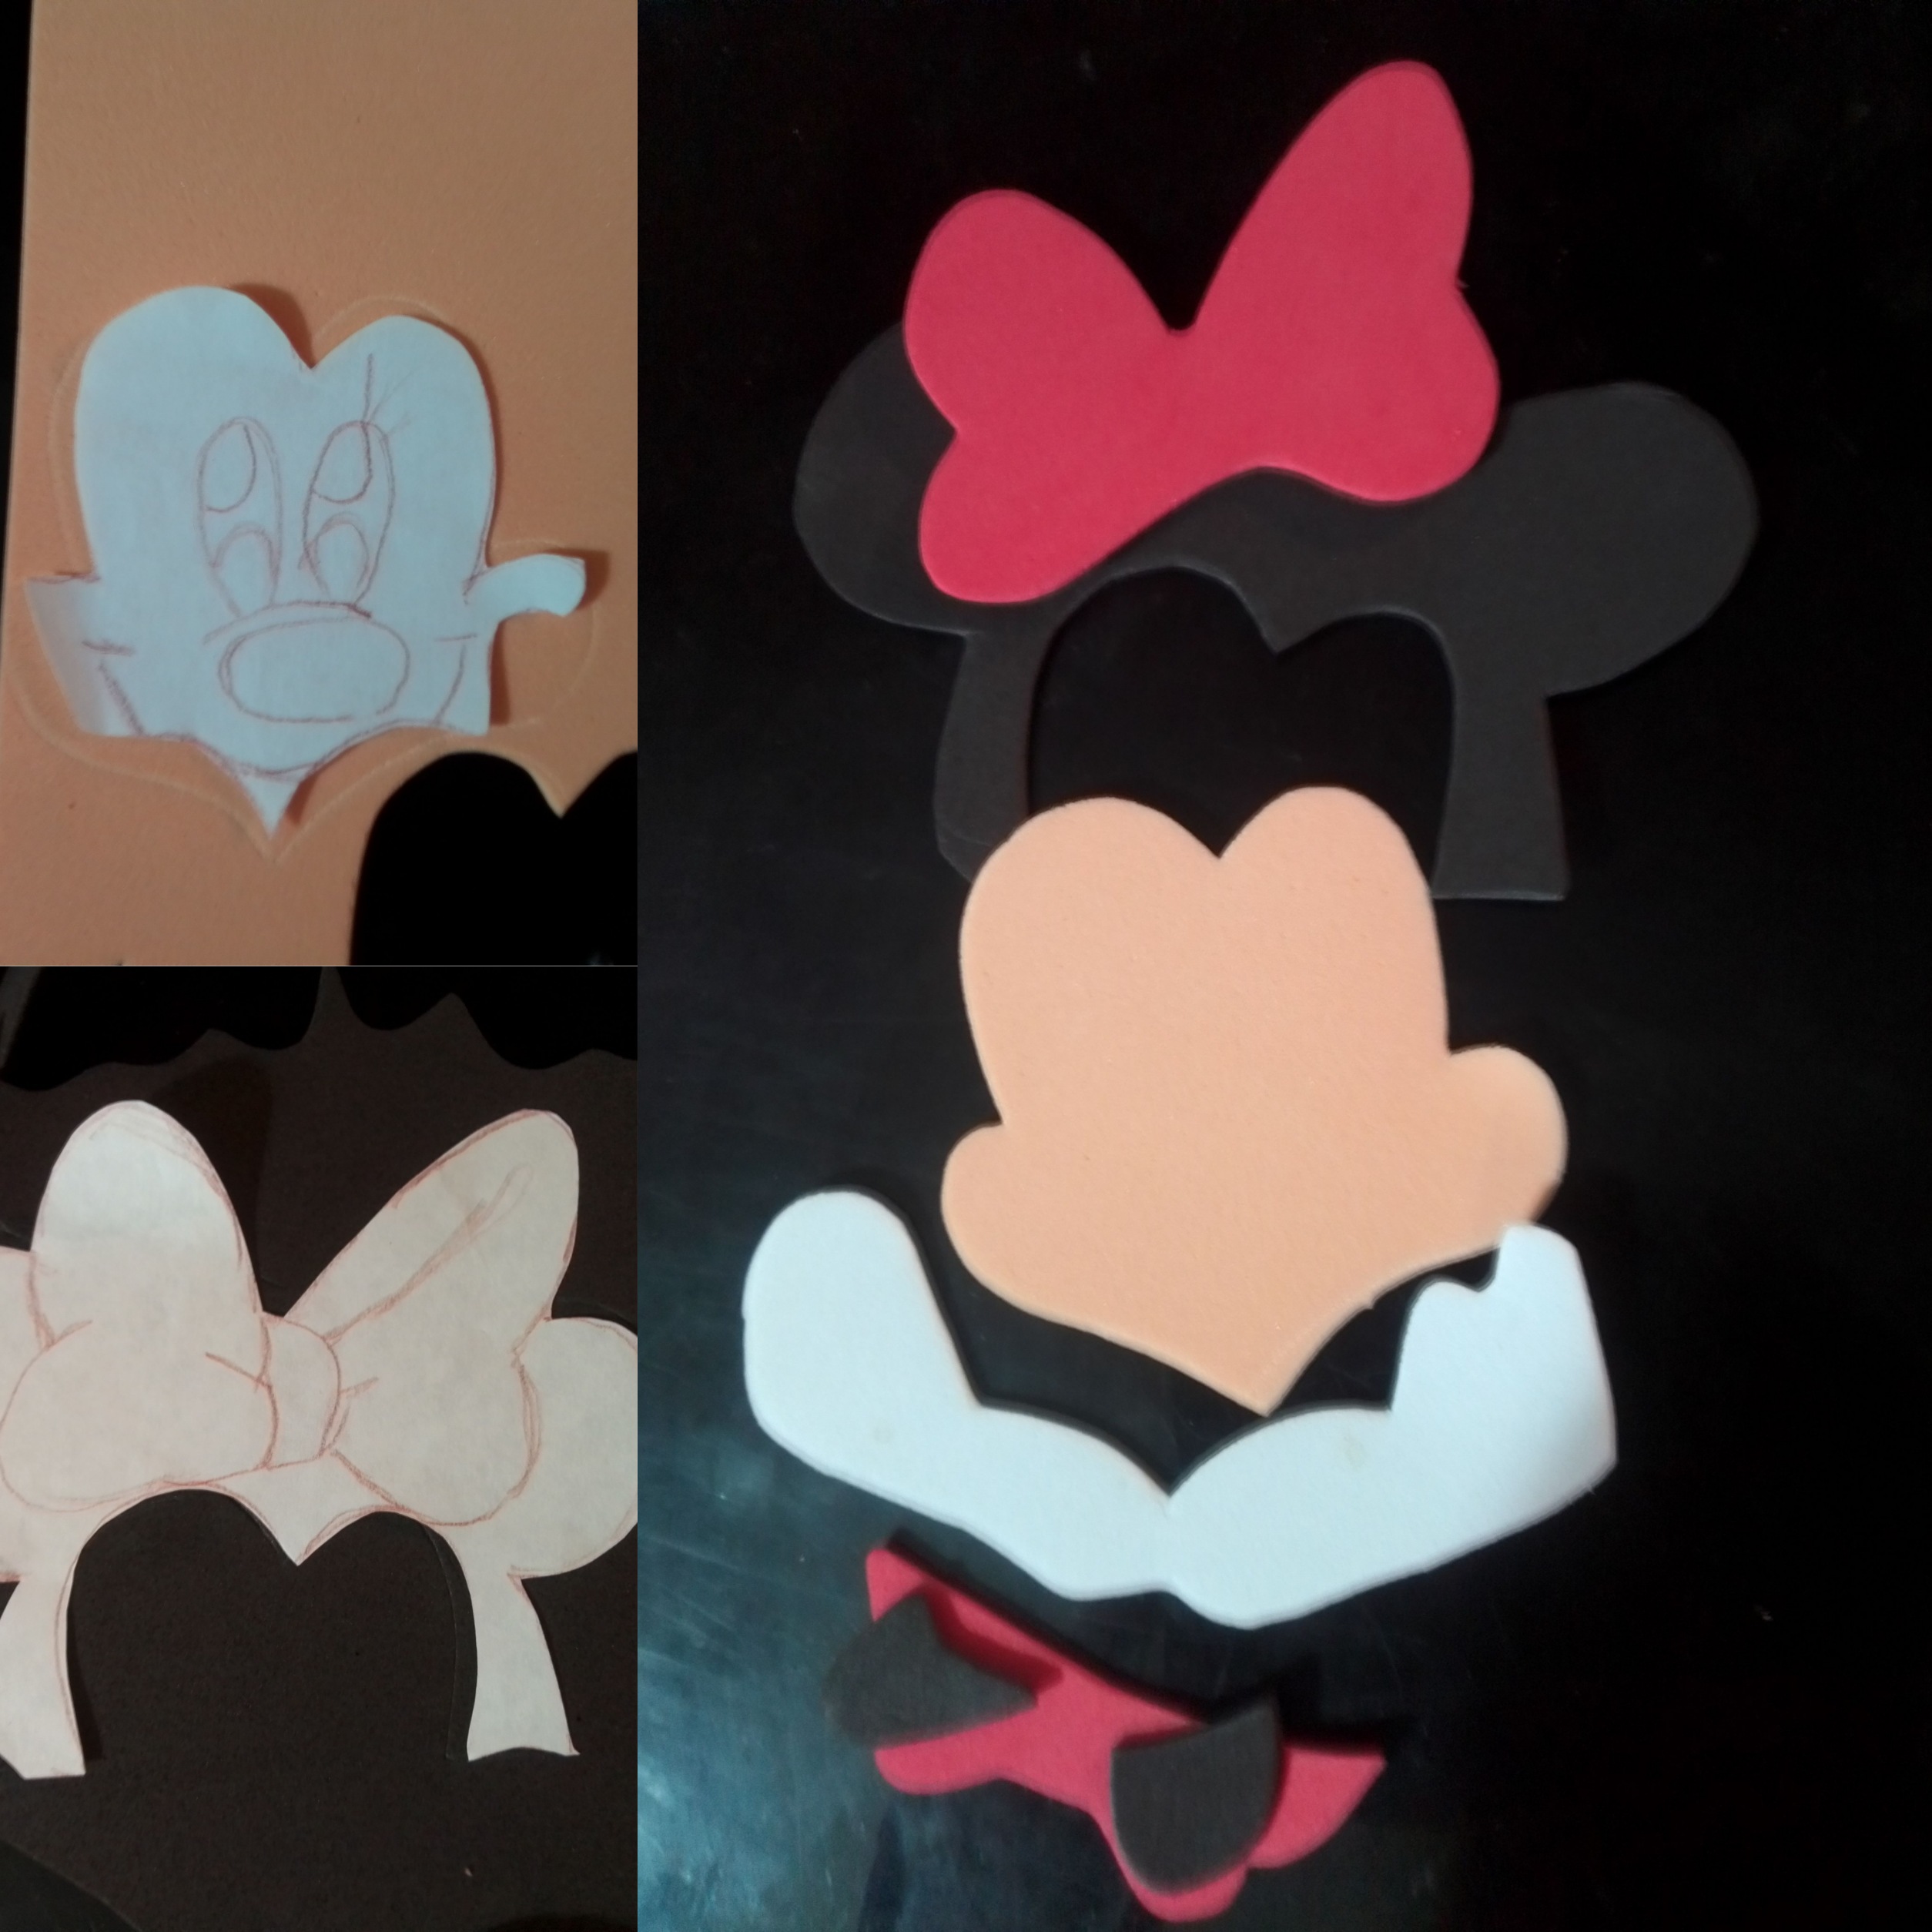
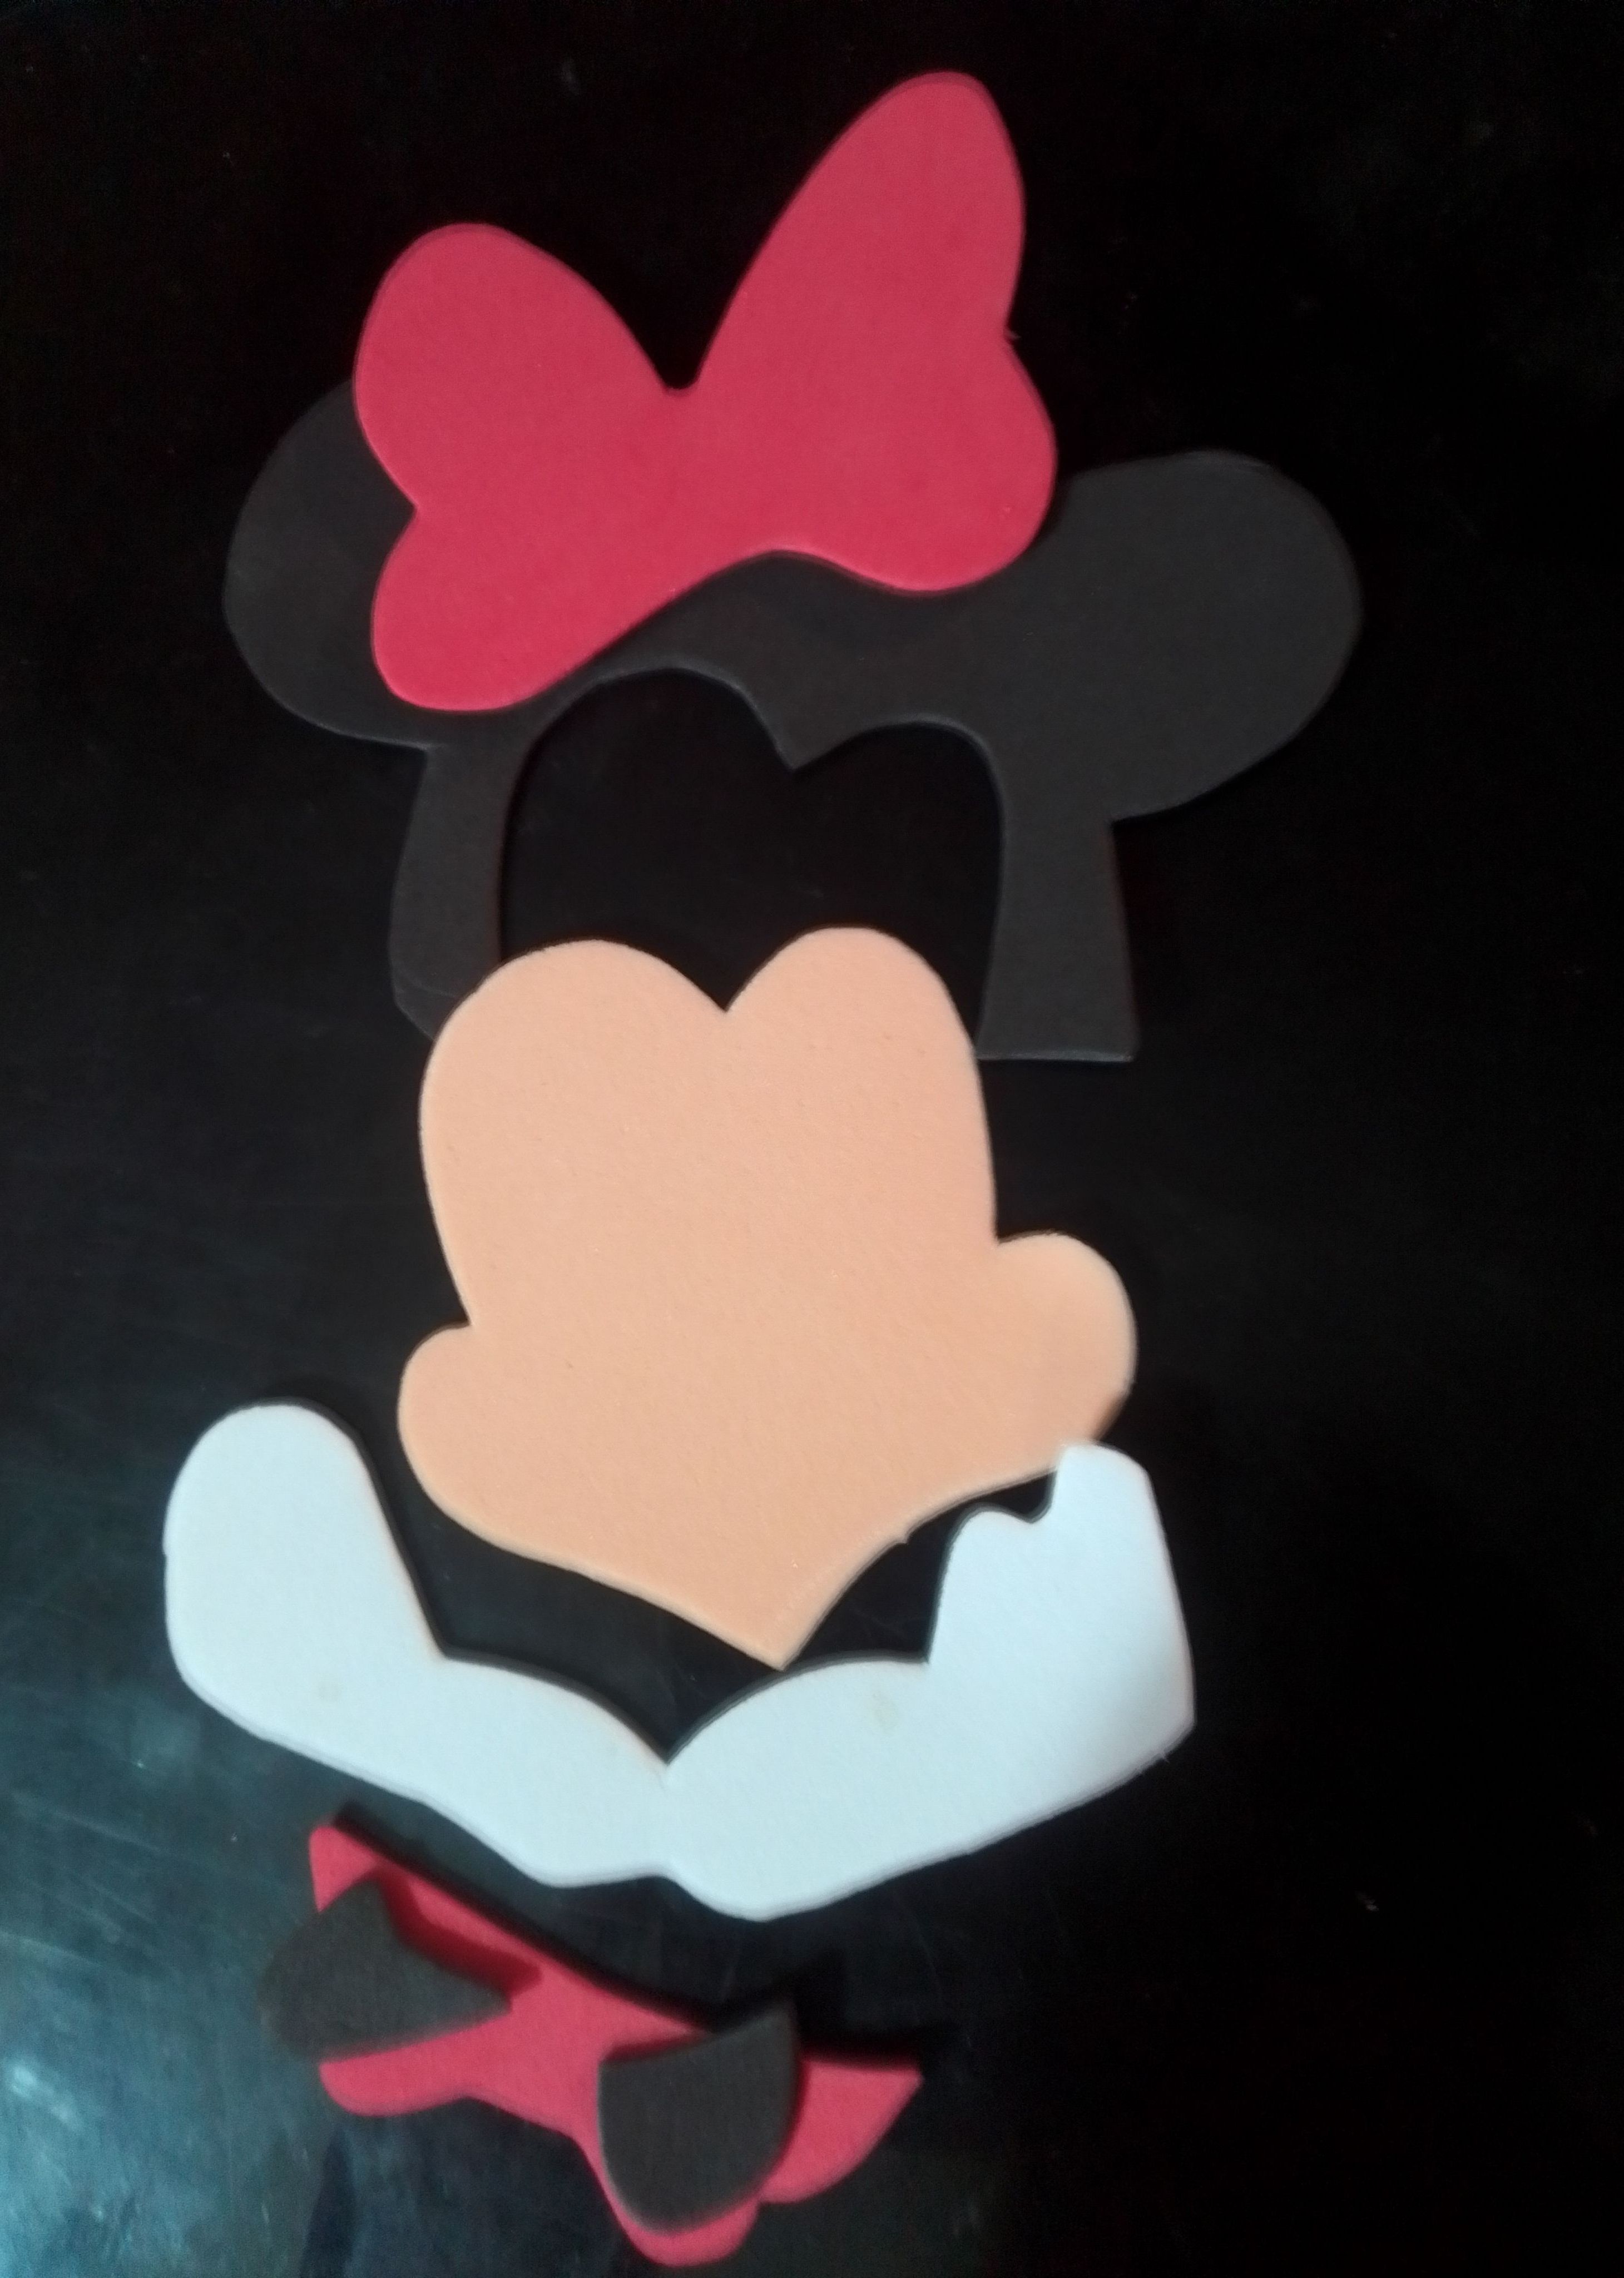
Paso 01
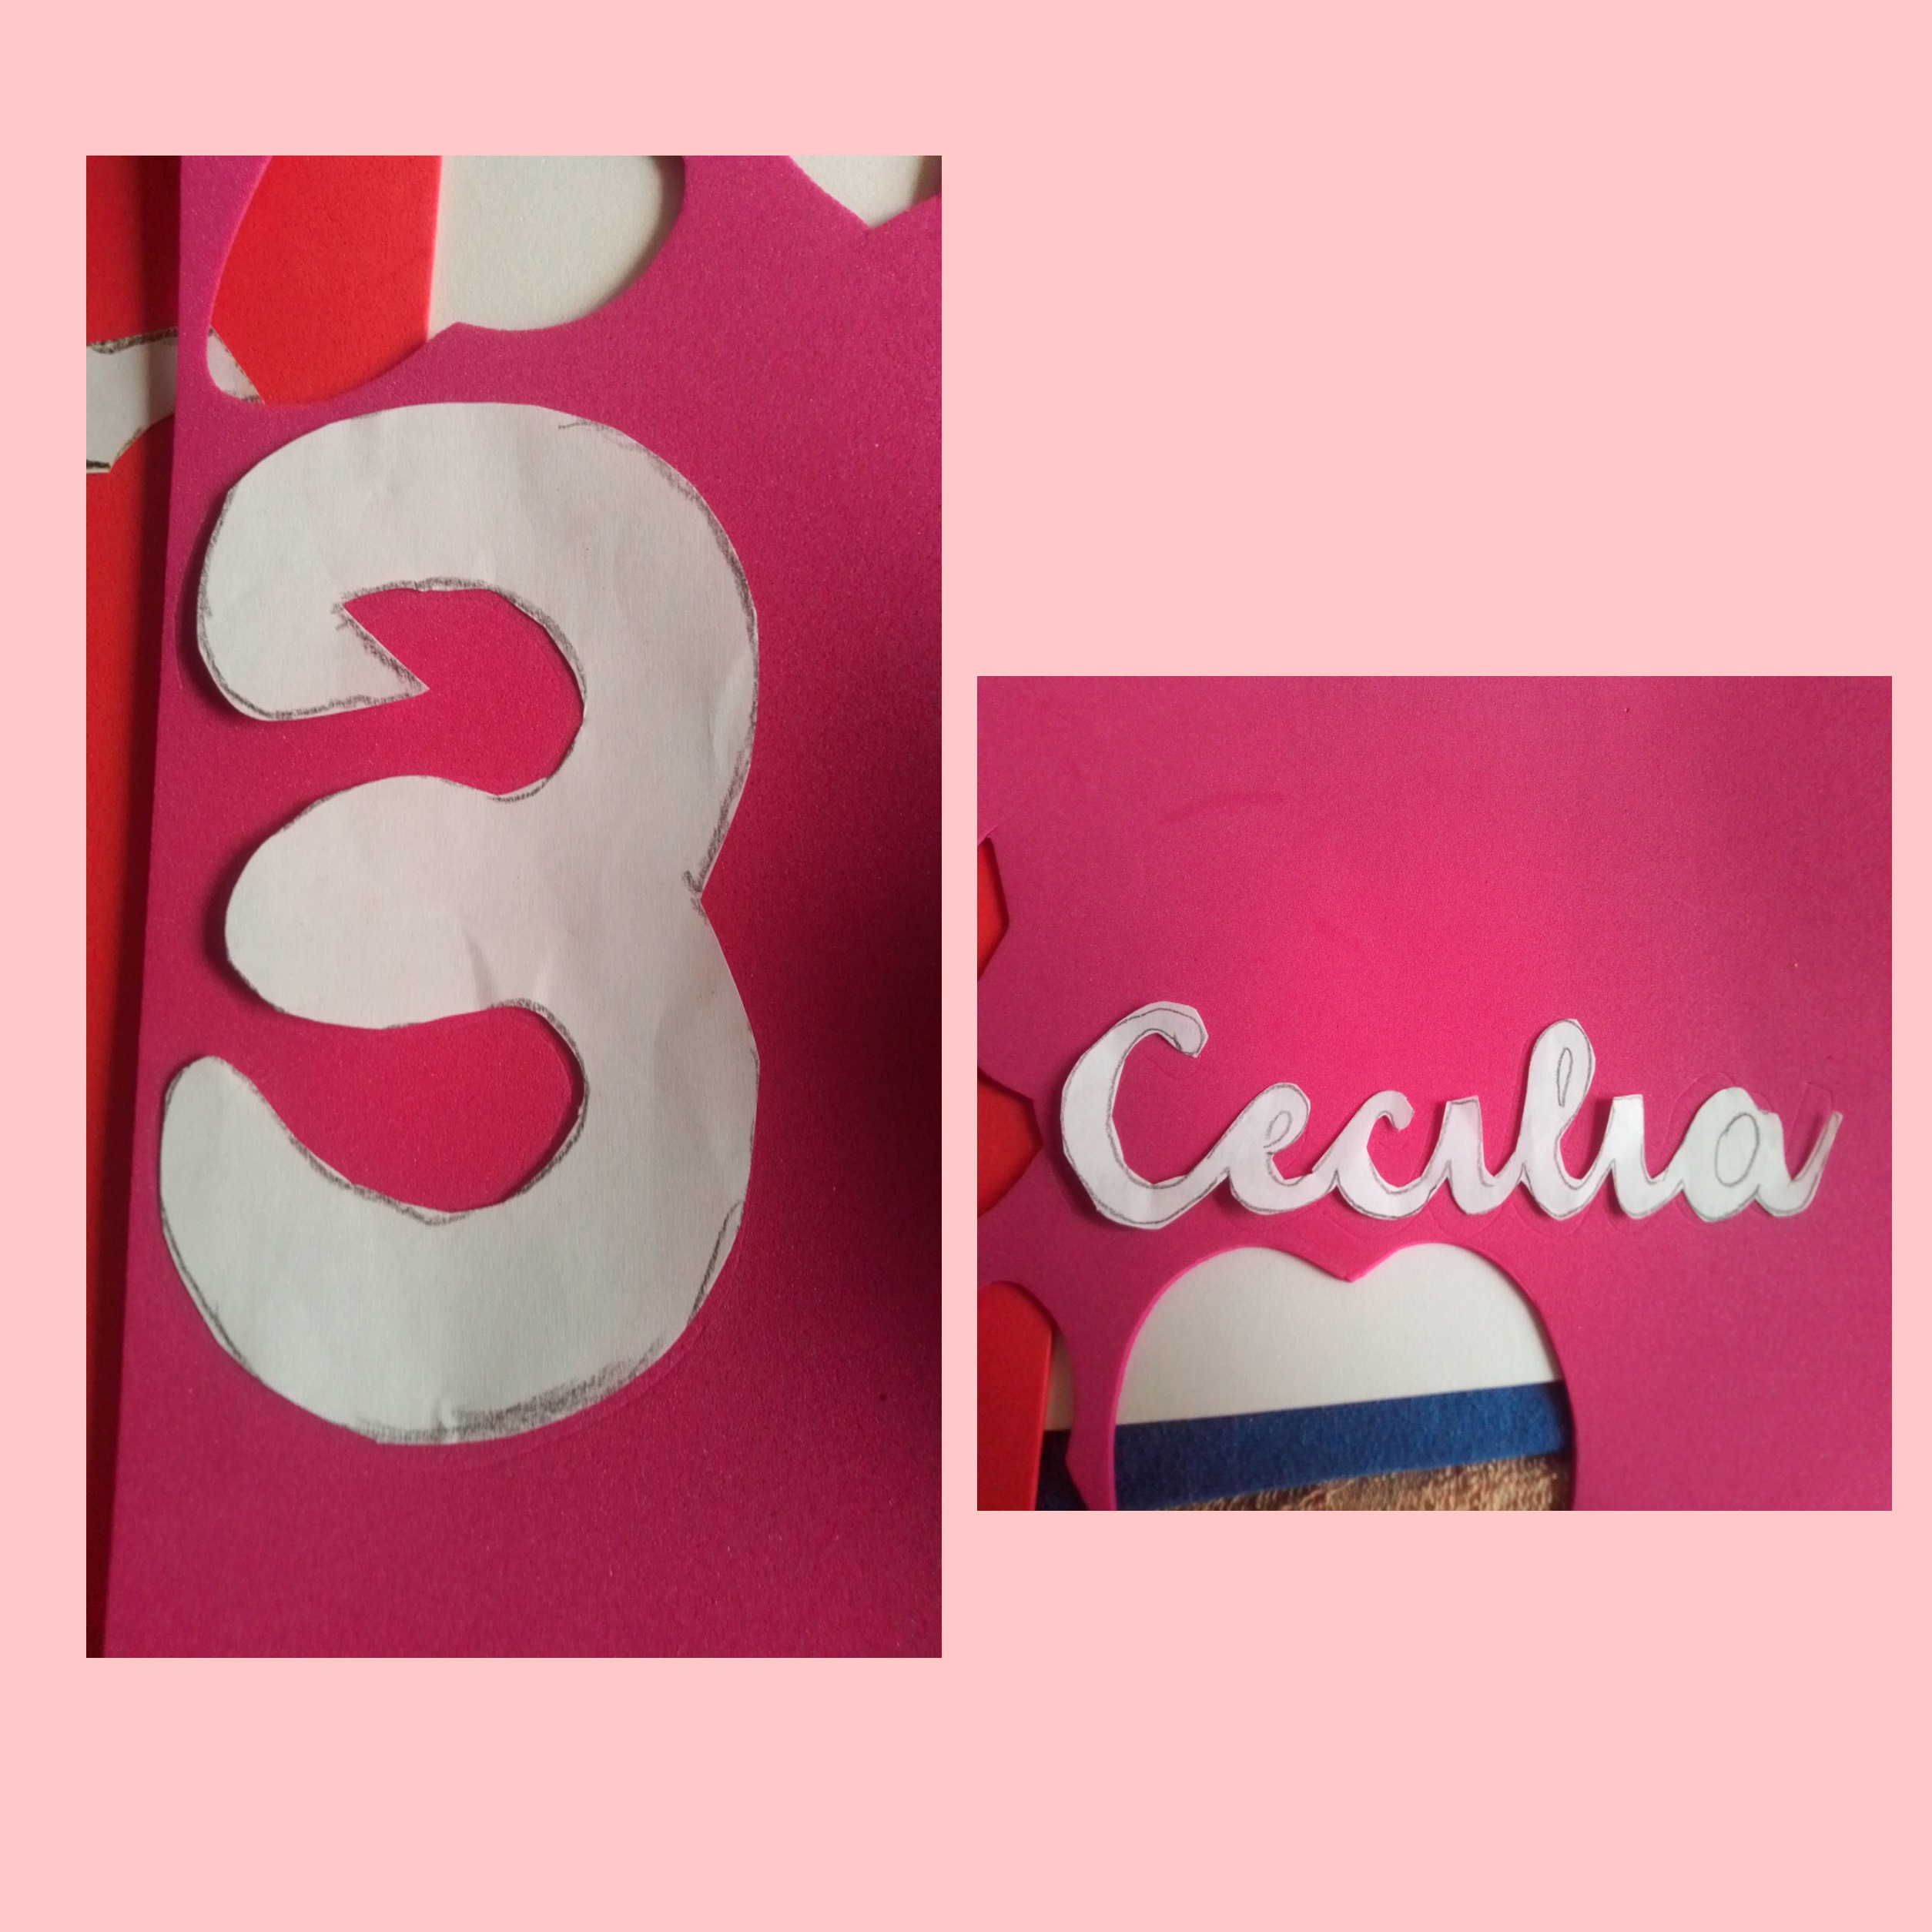
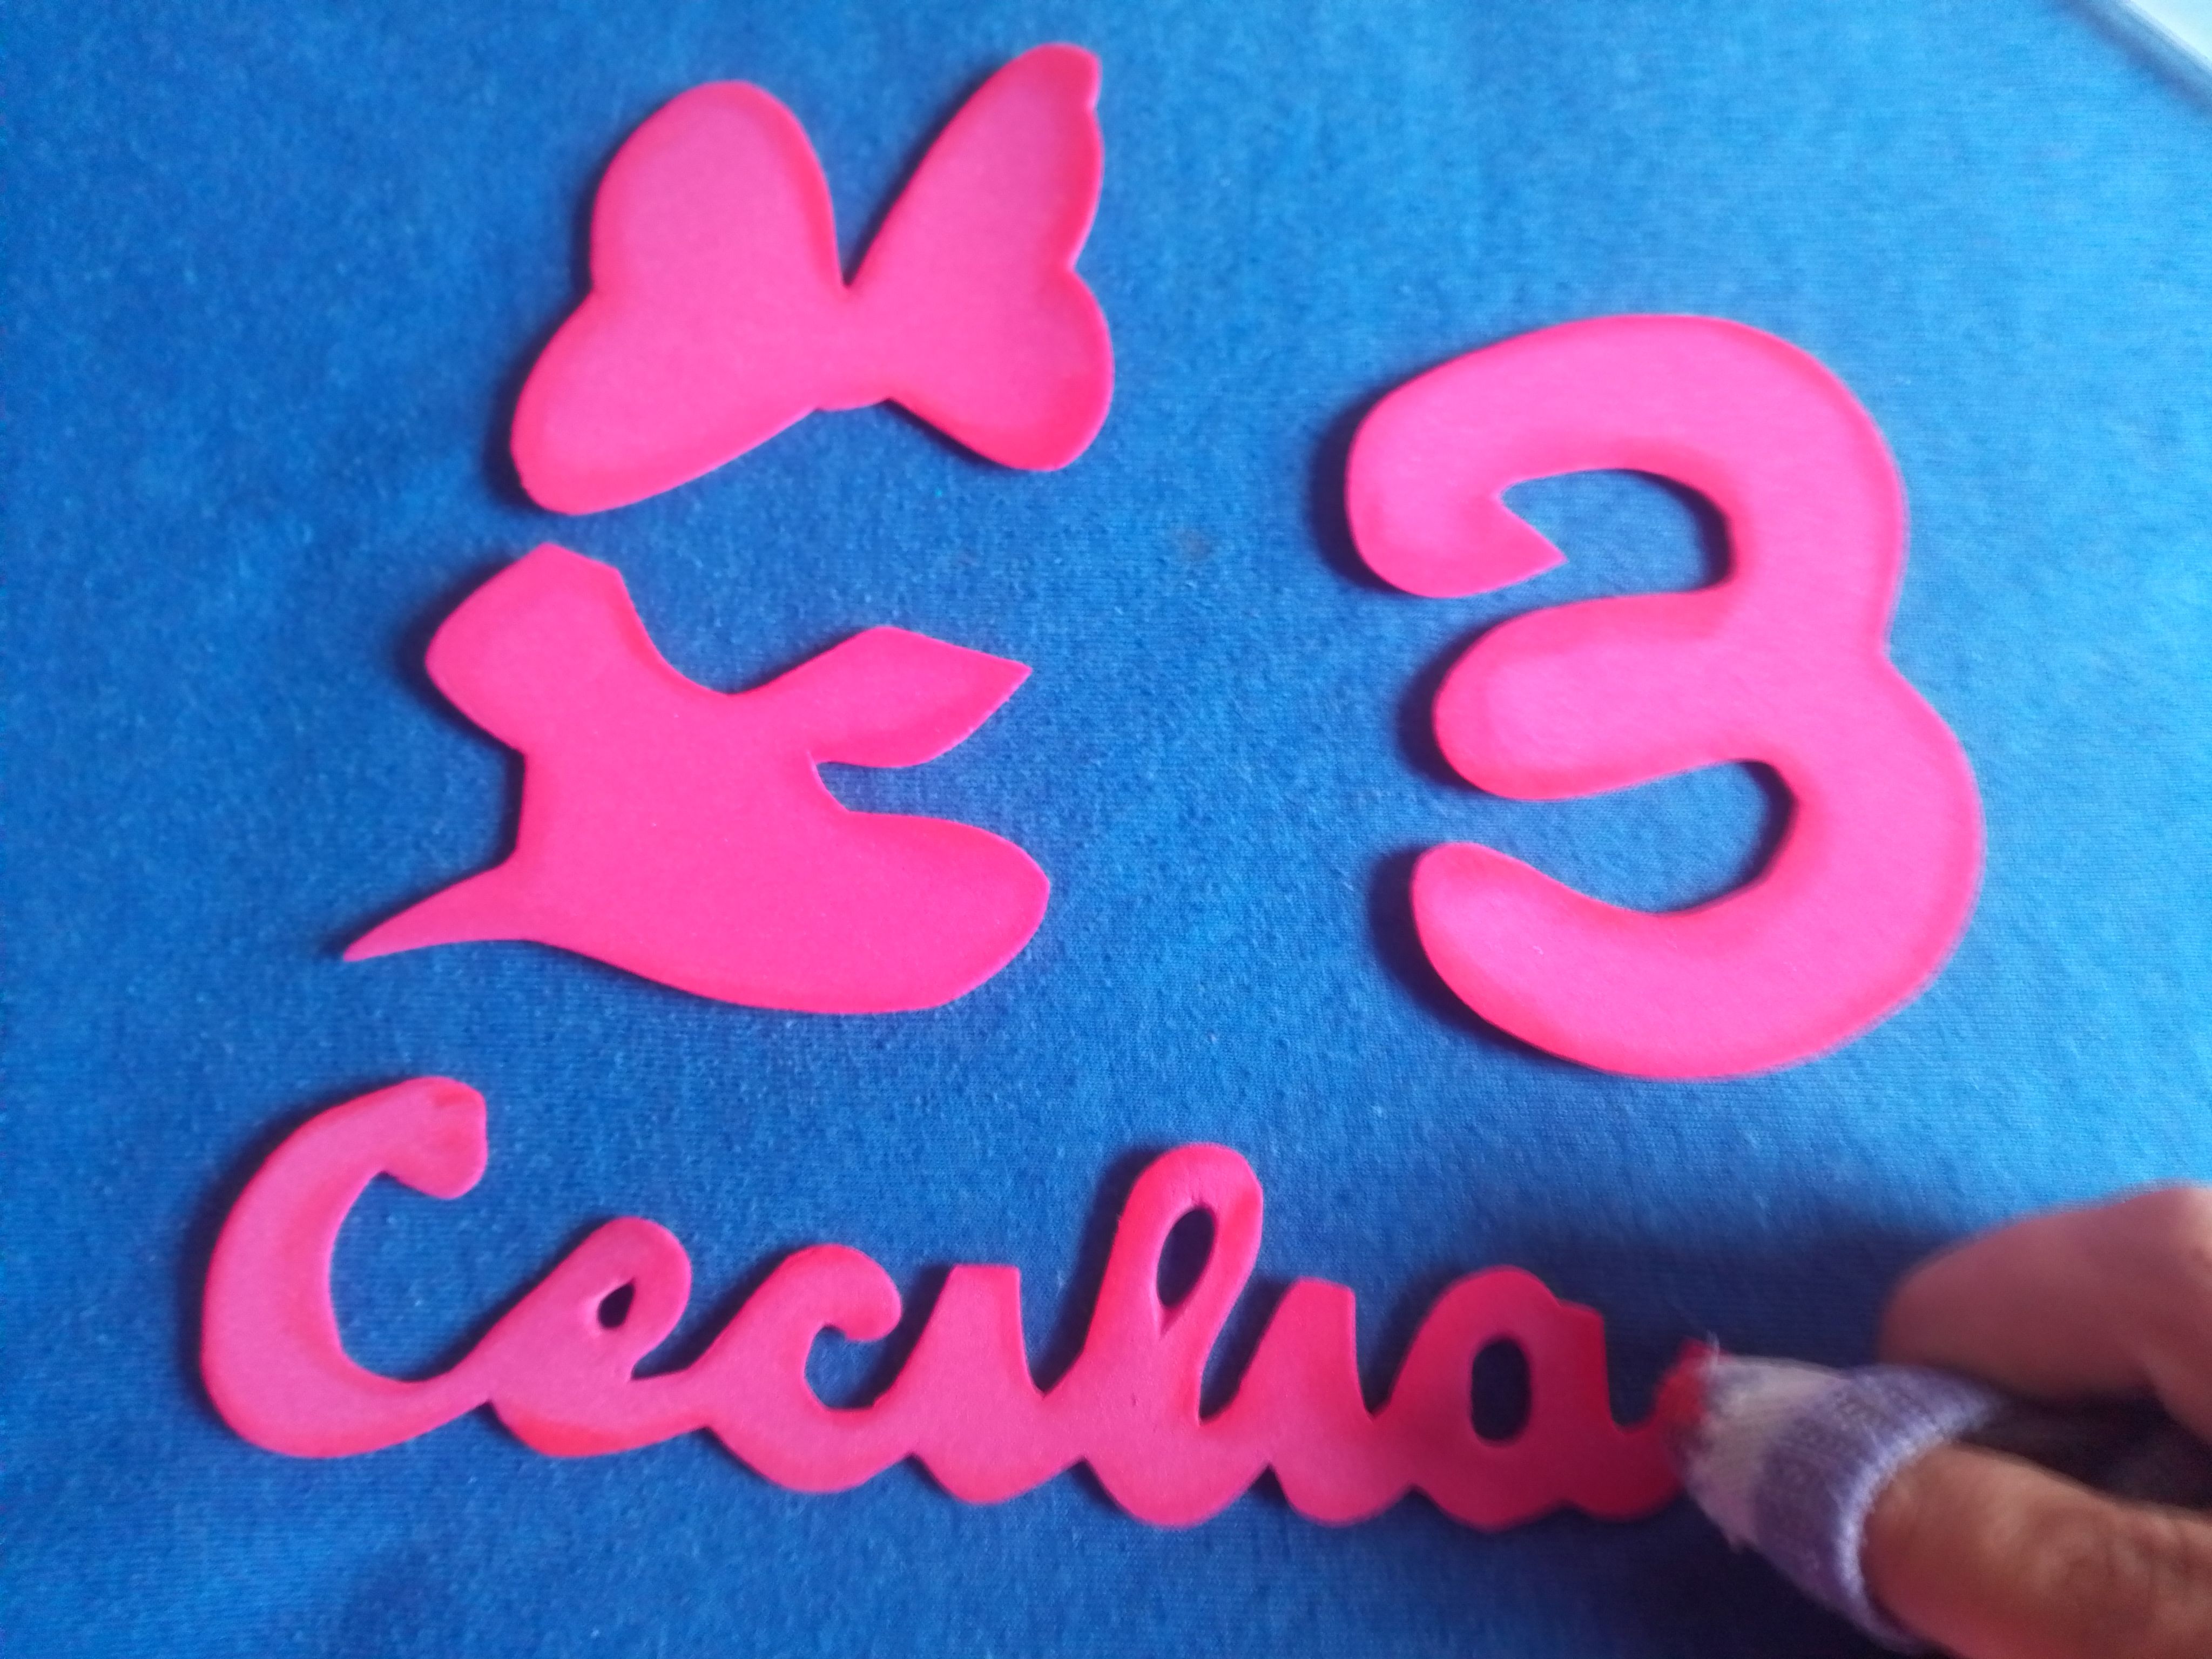
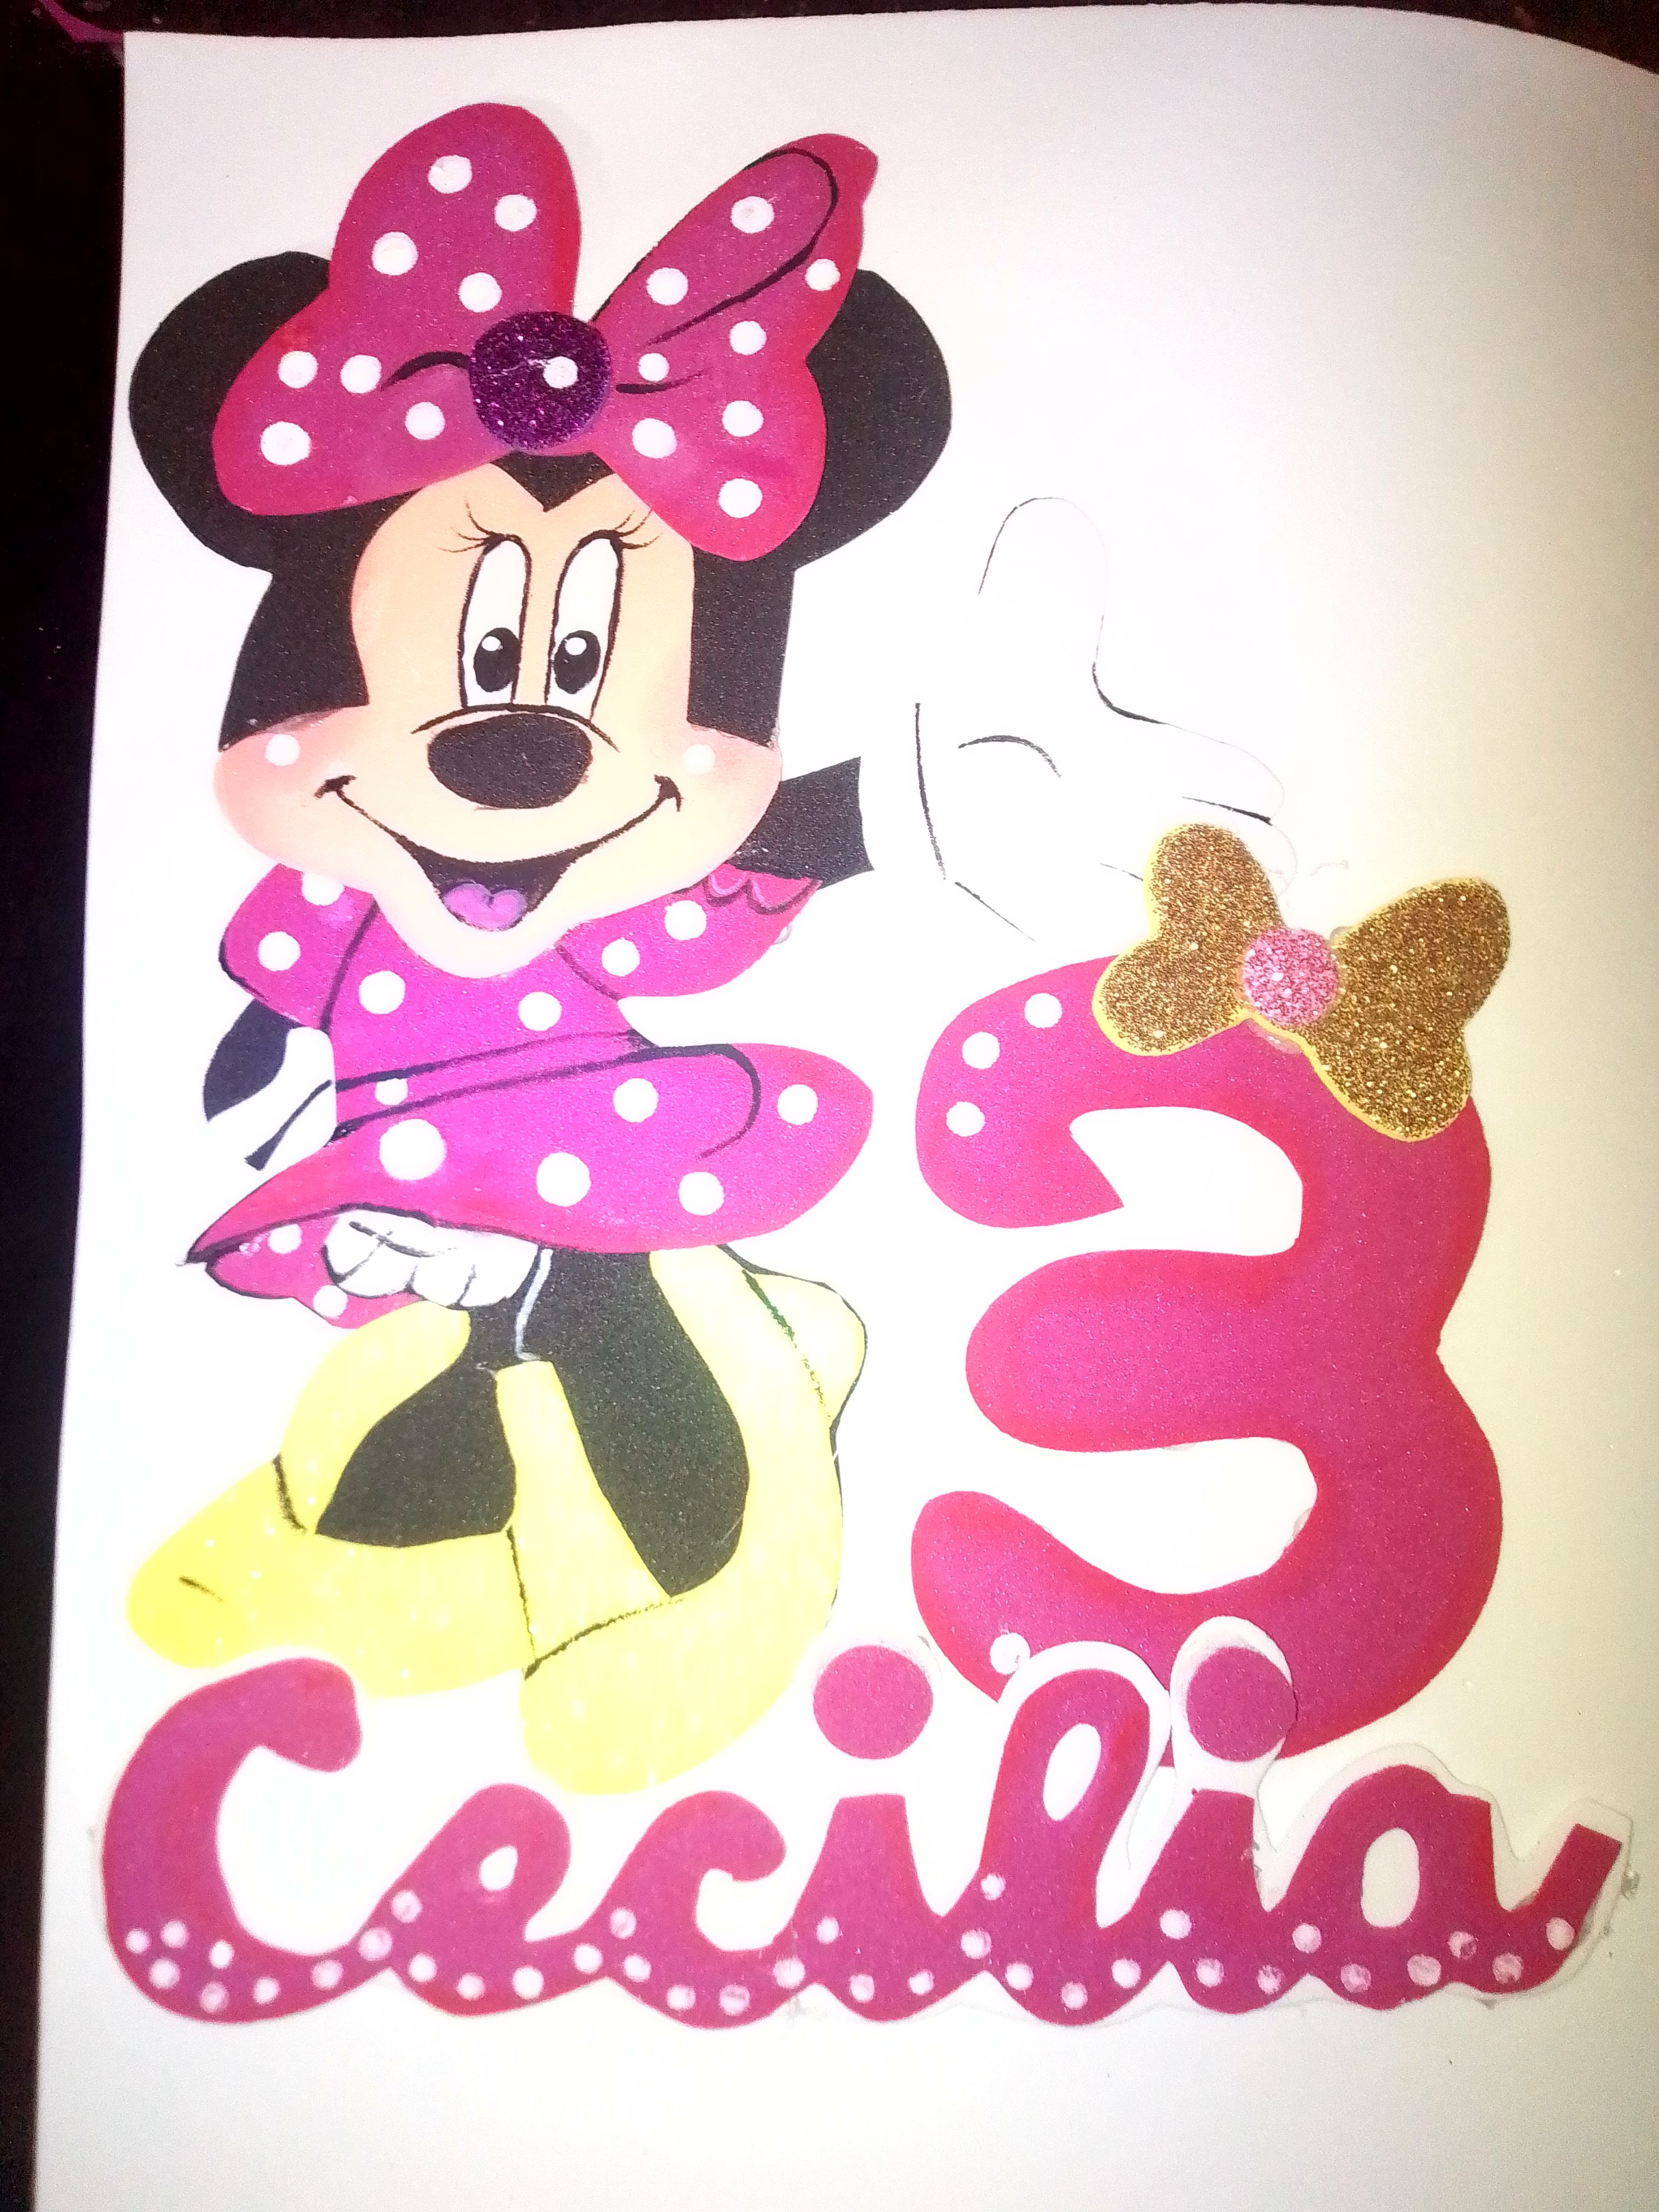
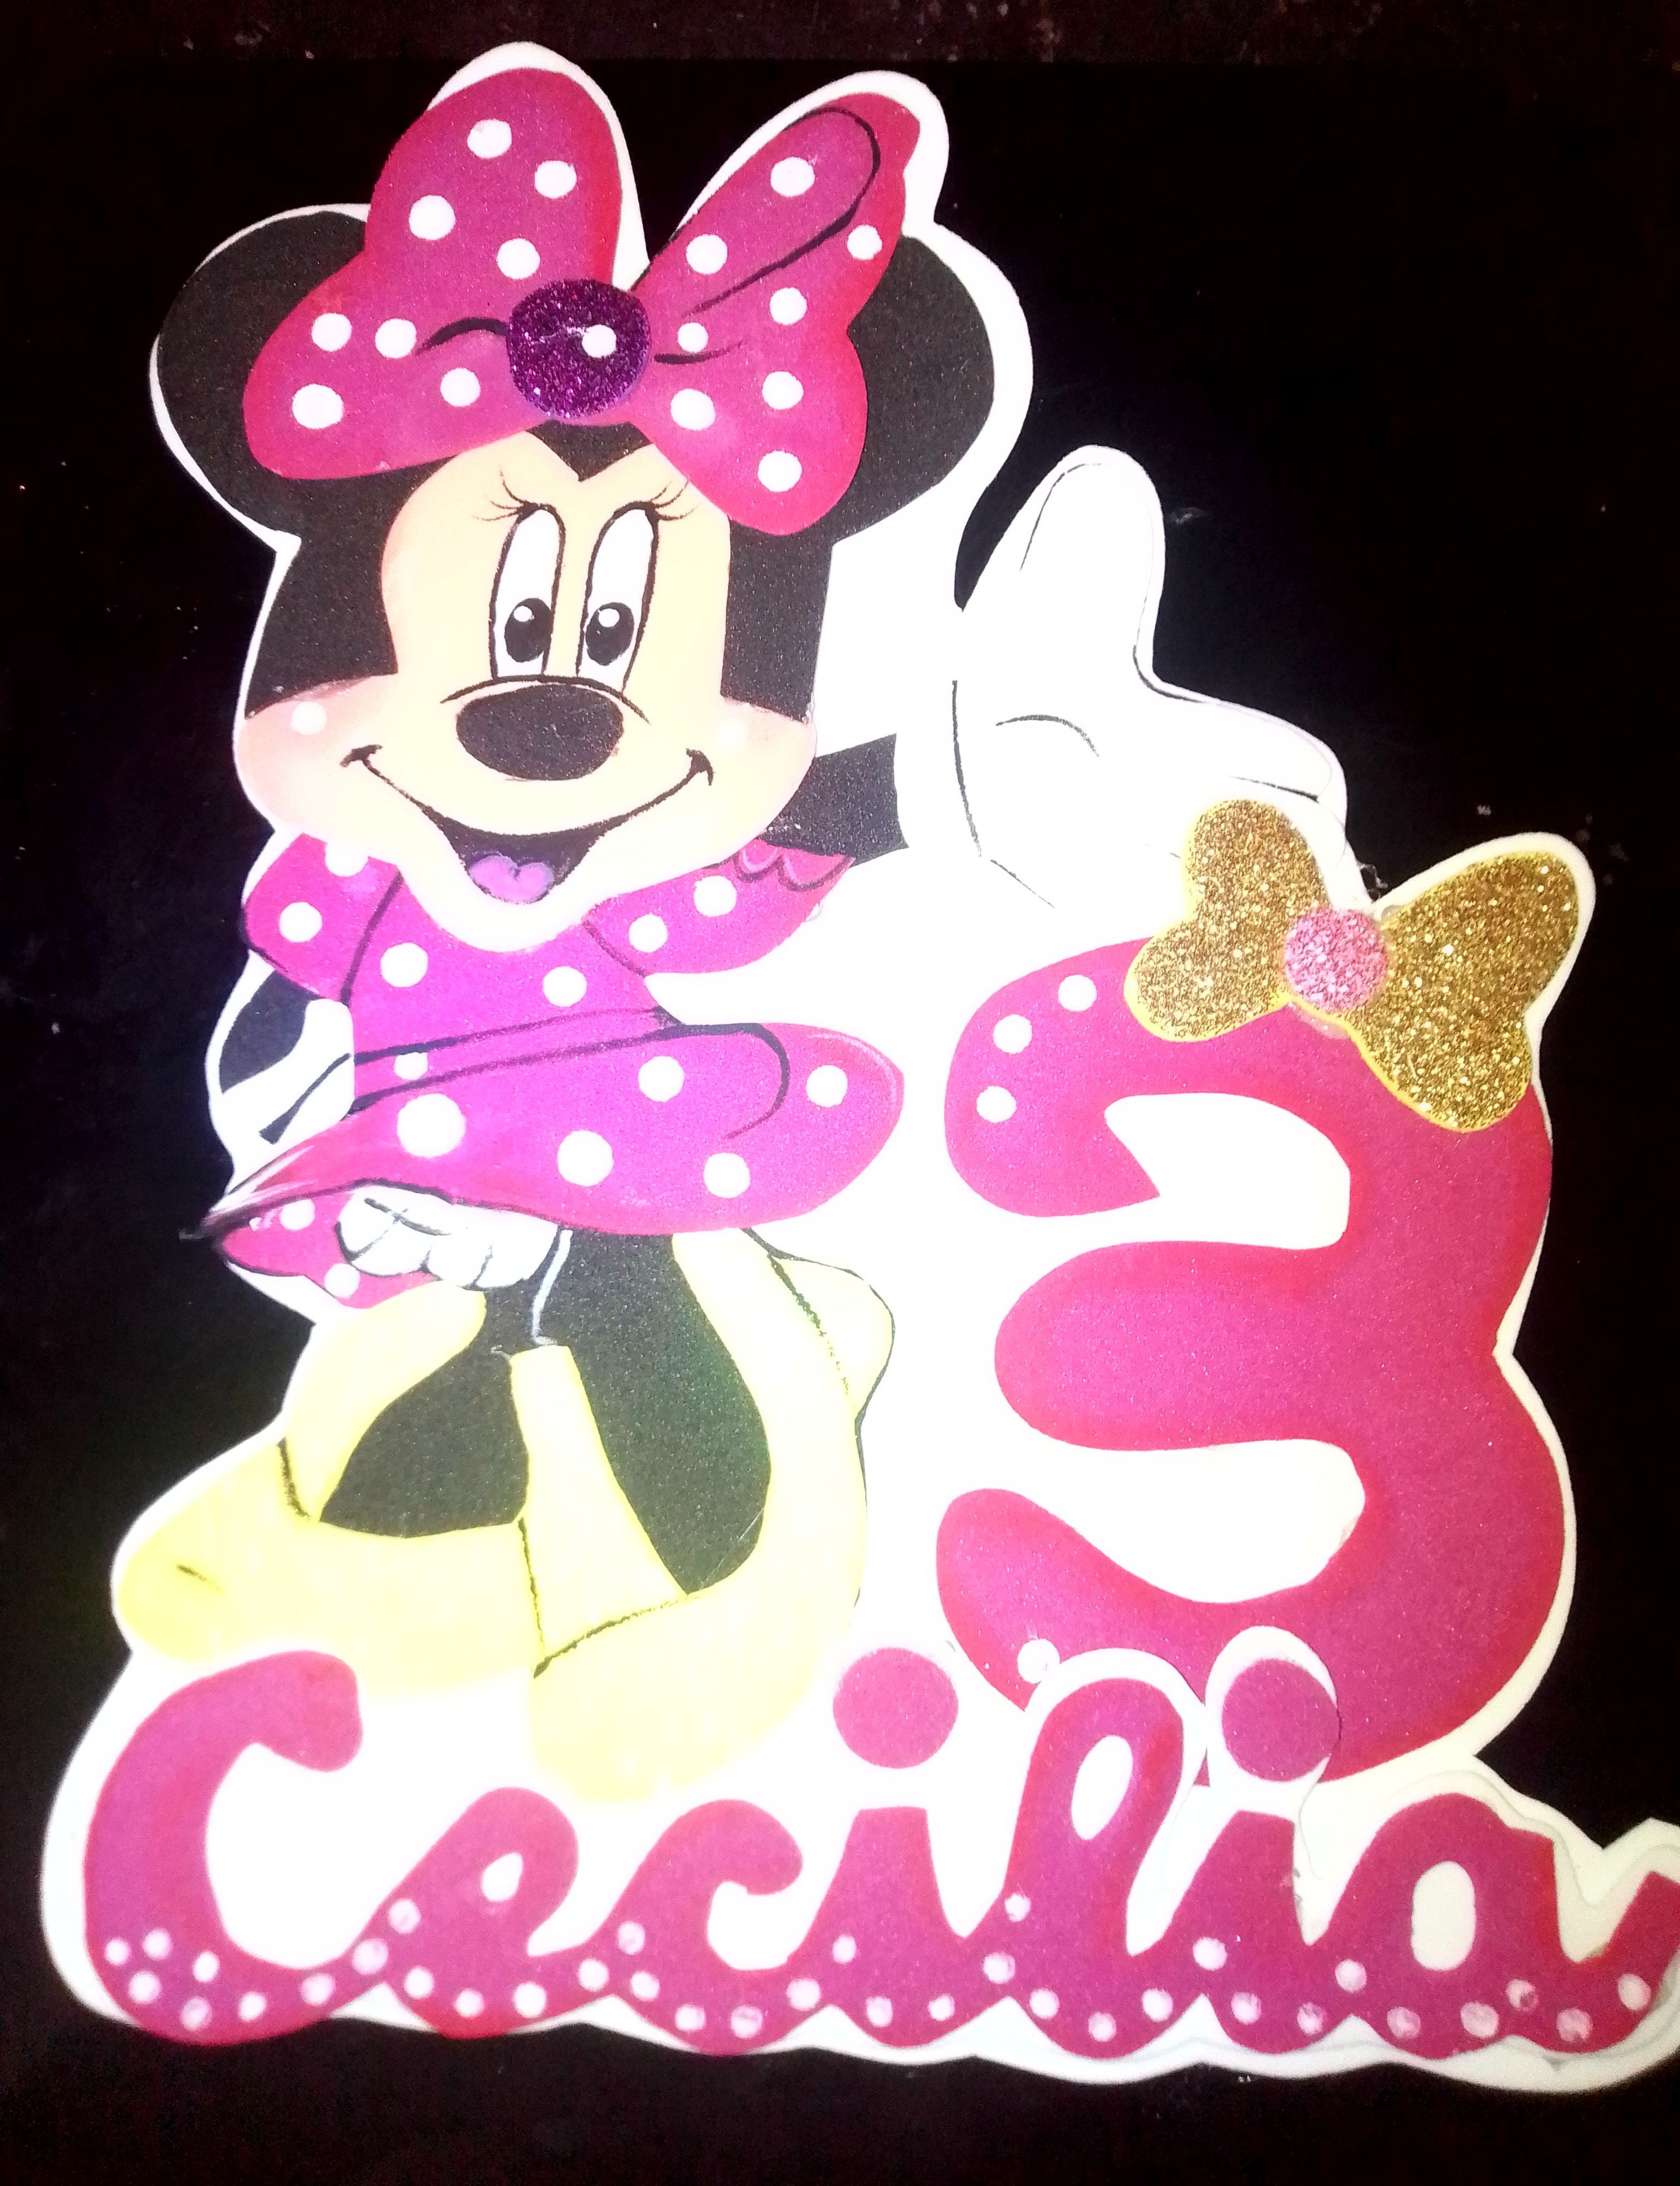
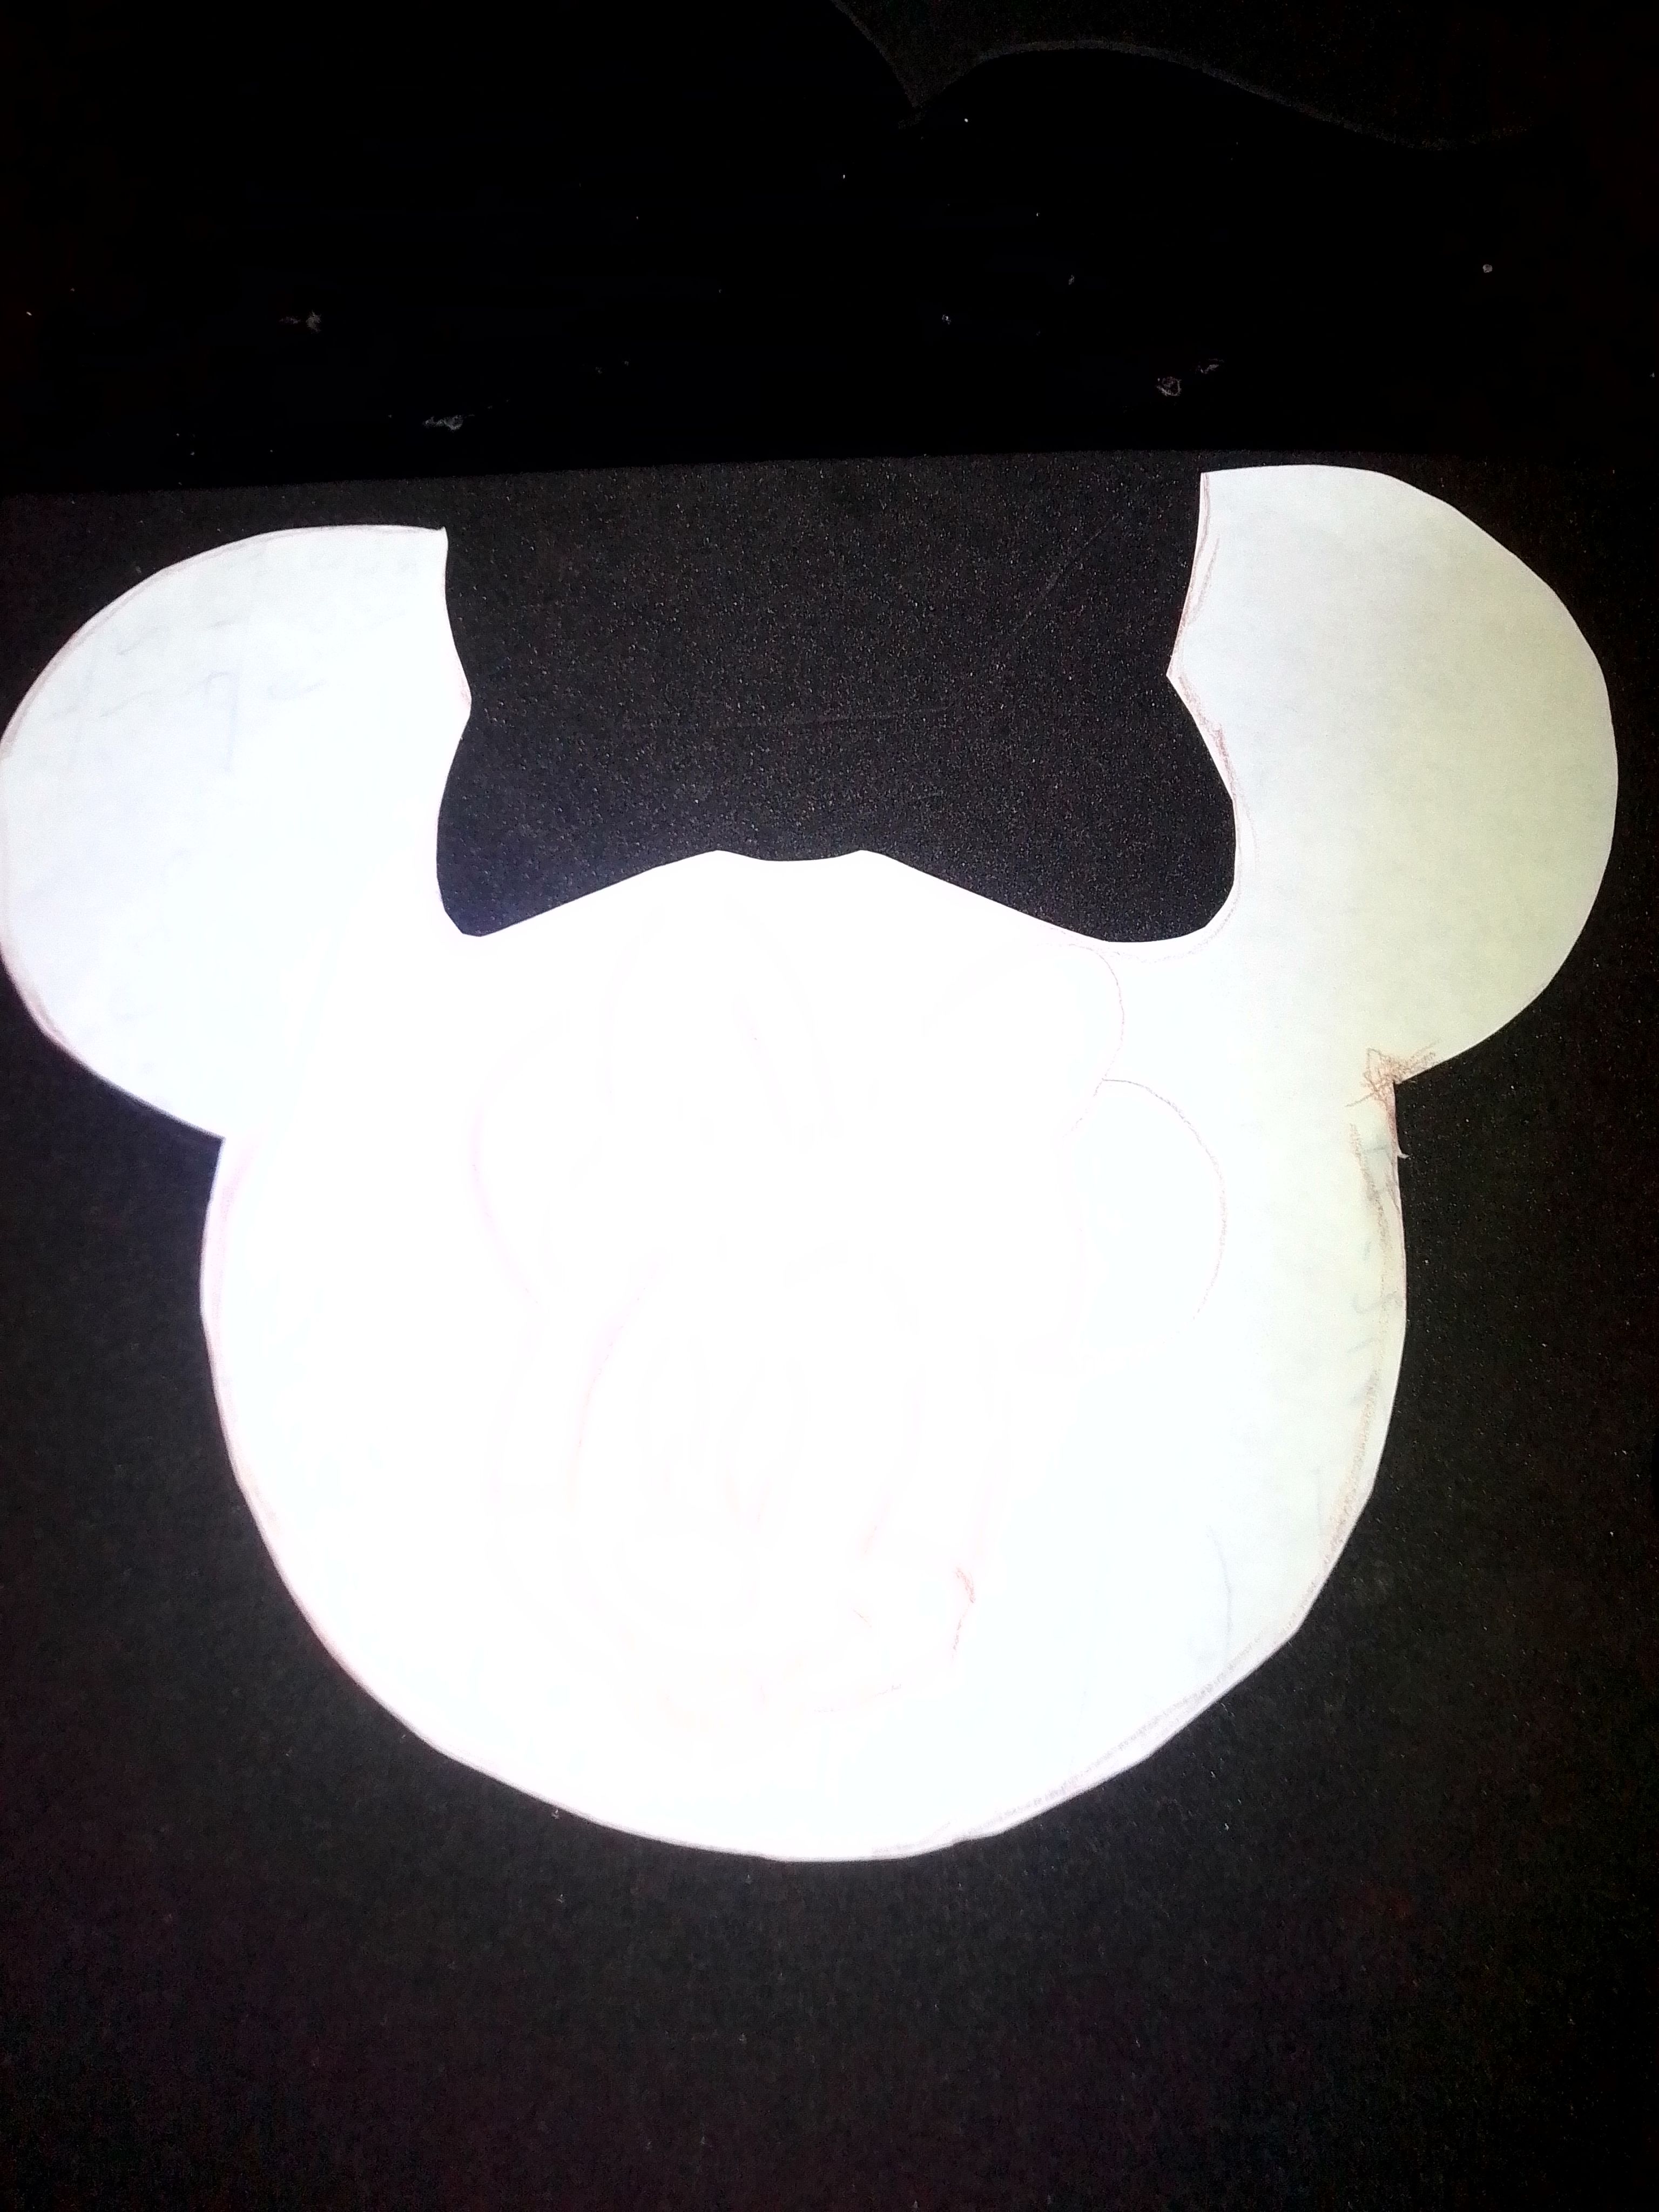
Iniciamos con el primer topper recortando todas la partes del dibujo y transfiriendo todas las piezas en el foami correspondiente, es decir; las orejas, brazos y piernas en el foami negro, la cara en el foami color piel, el vestido y lazo en foami fucsia. También marcamos sus coquetos zapatos en foami amarillo. luego marcamos el número y nombre en foami fucsia para la combinación, en mi caso fue el número “3” y el nombre de mi hija “Cecilia”, y cortamos todas estás piezas.
Step 01
We start with the first topper, cutting out all the parts of the drawing and transferring all the pieces to the corresponding foami, that is; the ears, arms and legs in black foami, the face in skin-colored foami, the dress and bow in fuchsia foami. We also mark their coquettish shoes in yellow foami. then we marked the number and name in fuchsia foami for the combination, in my case it was the number “3” and the name of my daughter “Cecilia”, and we cut all these pieces.

Paso 02
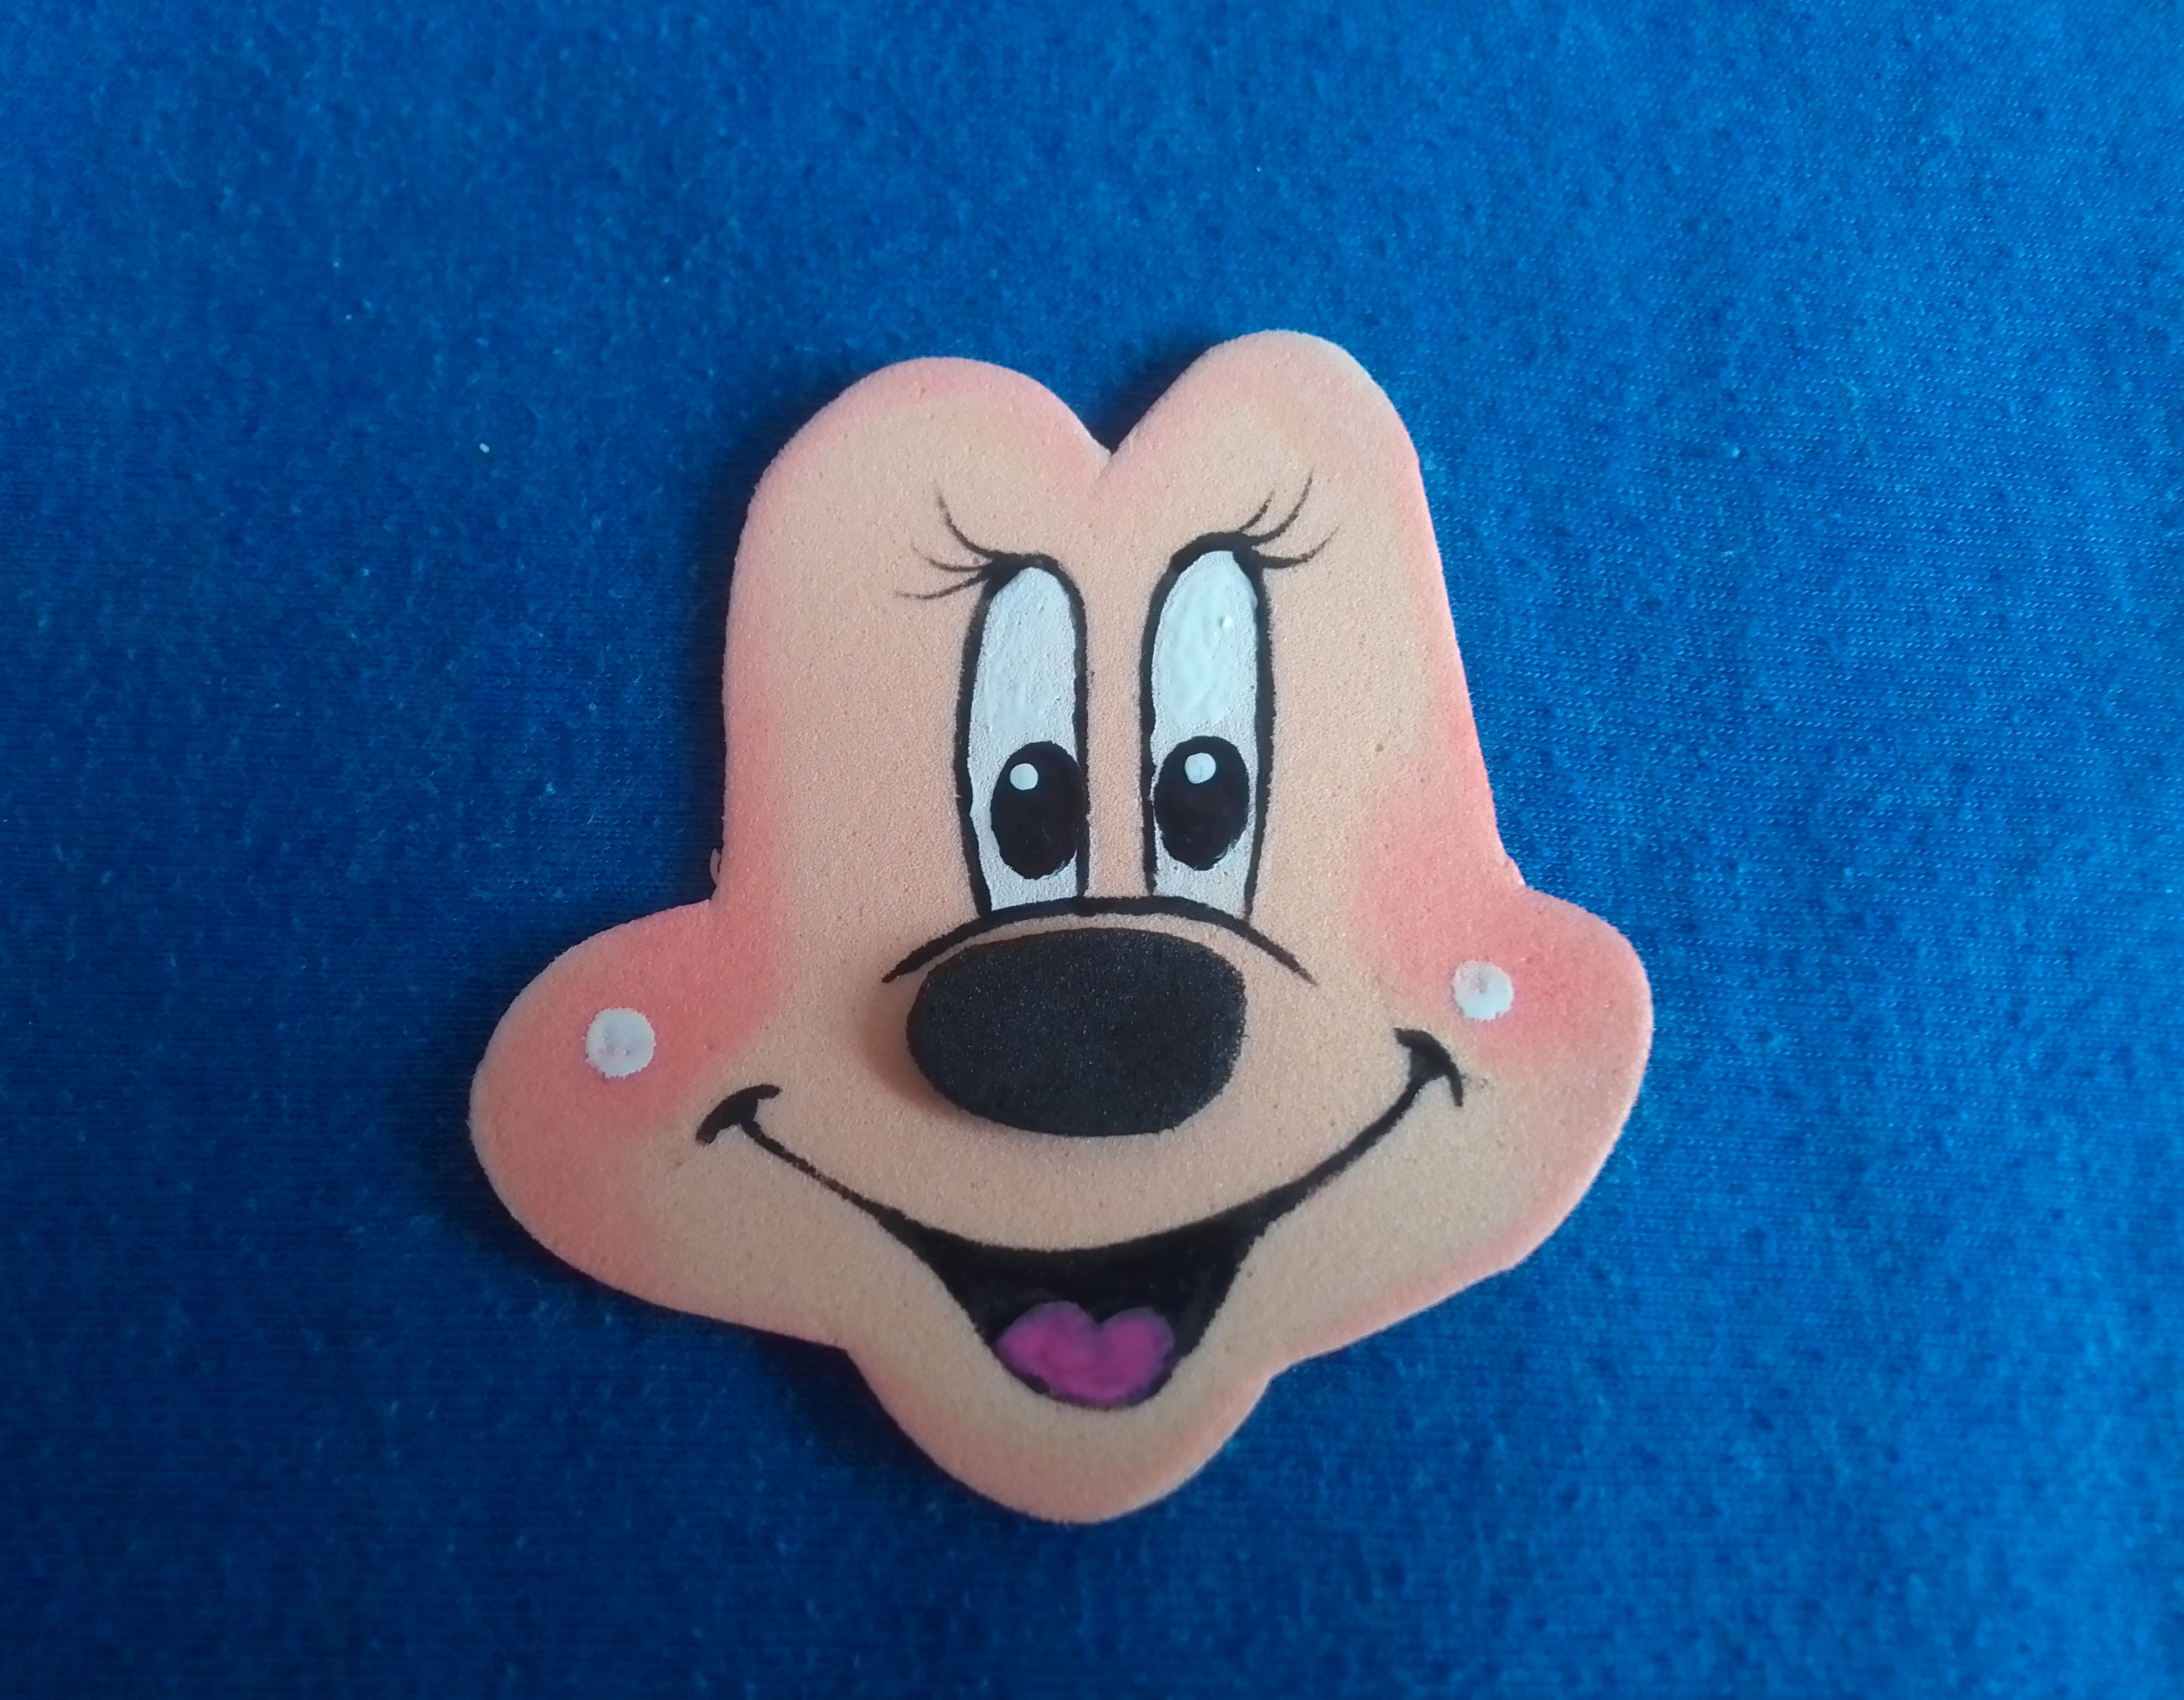
Ahora comienzo a pintar los ojos de la coqueta Minnie con pintura blanca y negra con el enfoque de su mirada hacia el frente utilizando un pincel fino y corto su nariz ovalada de foami negra, y pinto su gran sonrisa.
Step 02
Now I begin to paint the eyes of the flirtatious Minnie with black and white paint with the focus of her gaze facing forward using a fine brush and I cut her oval nose out of black foami, and I paint her big smile.

Paso 03
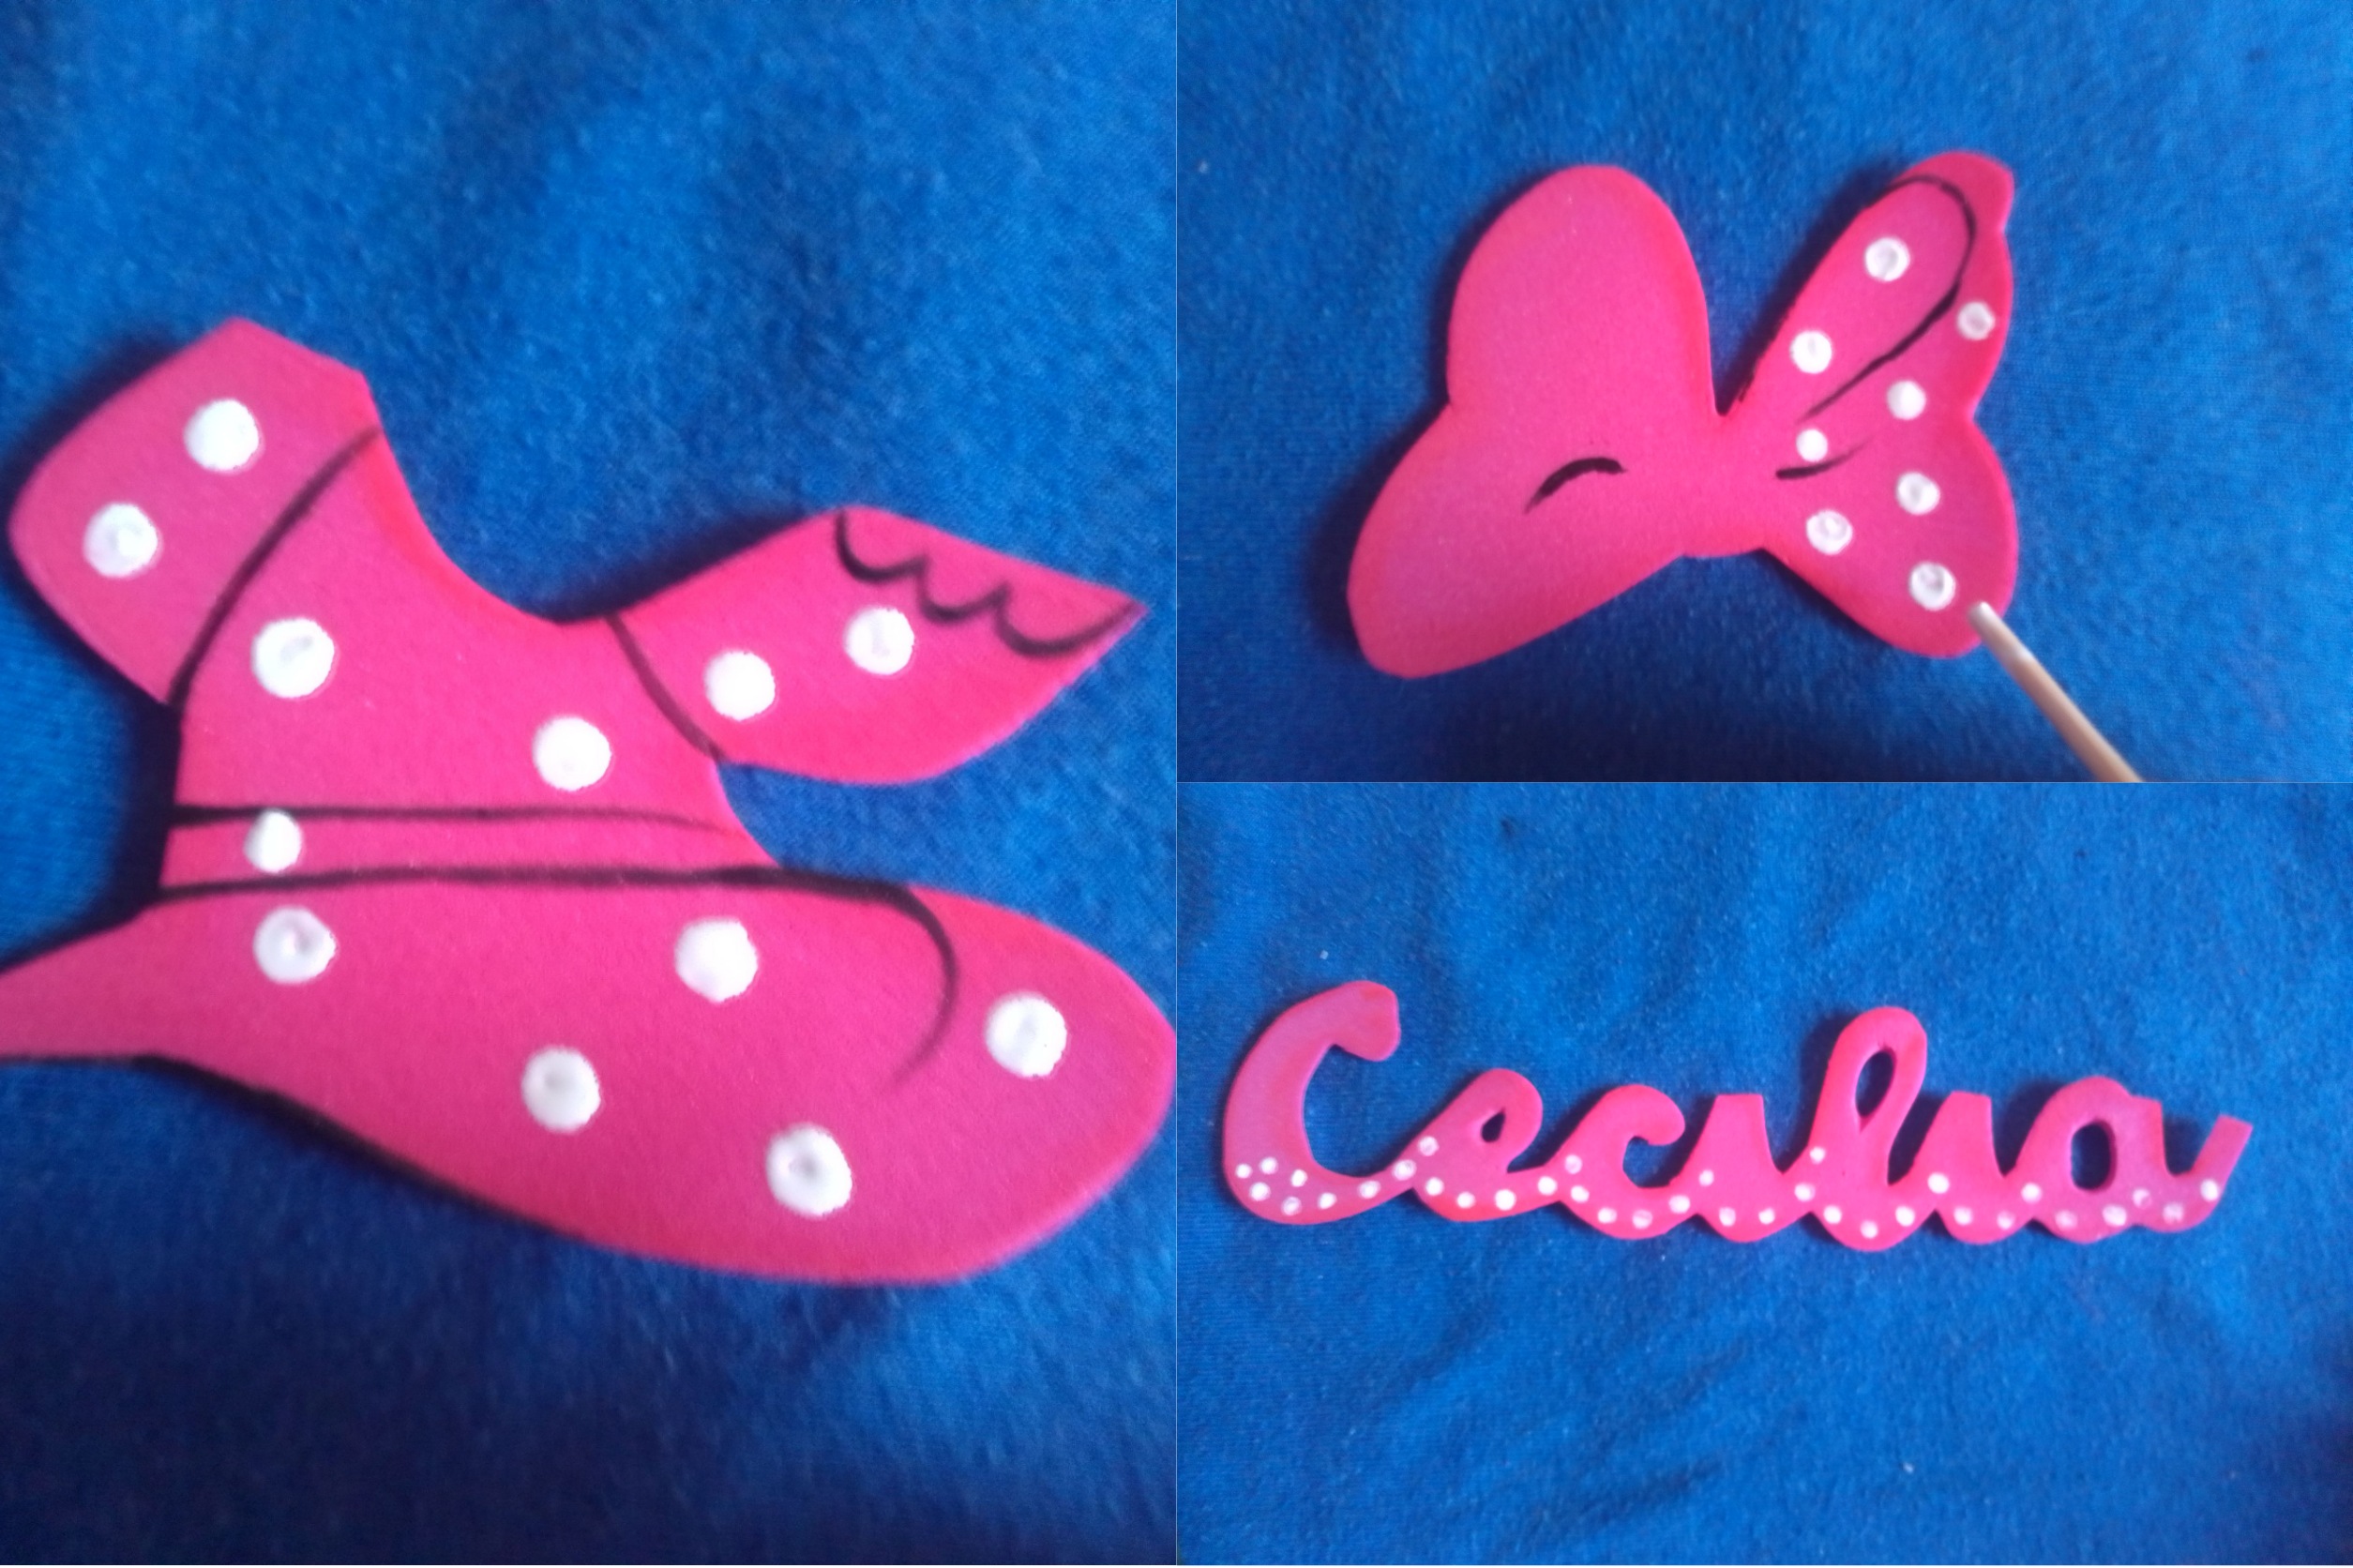
Tomo pintura roja para difuminar los bordes de las piezas de color fuscia, separó cada detalle del vestido y el lazo con pintura negra y realizo puntos blancos en todas estás partes incluyendo en nombre.
Step 03
I take red paint to blur the edges of the fuchsia pieces, I separate each detail of the dress and the bow with black paint and do white dots on all these parts including the name.
Paso 04
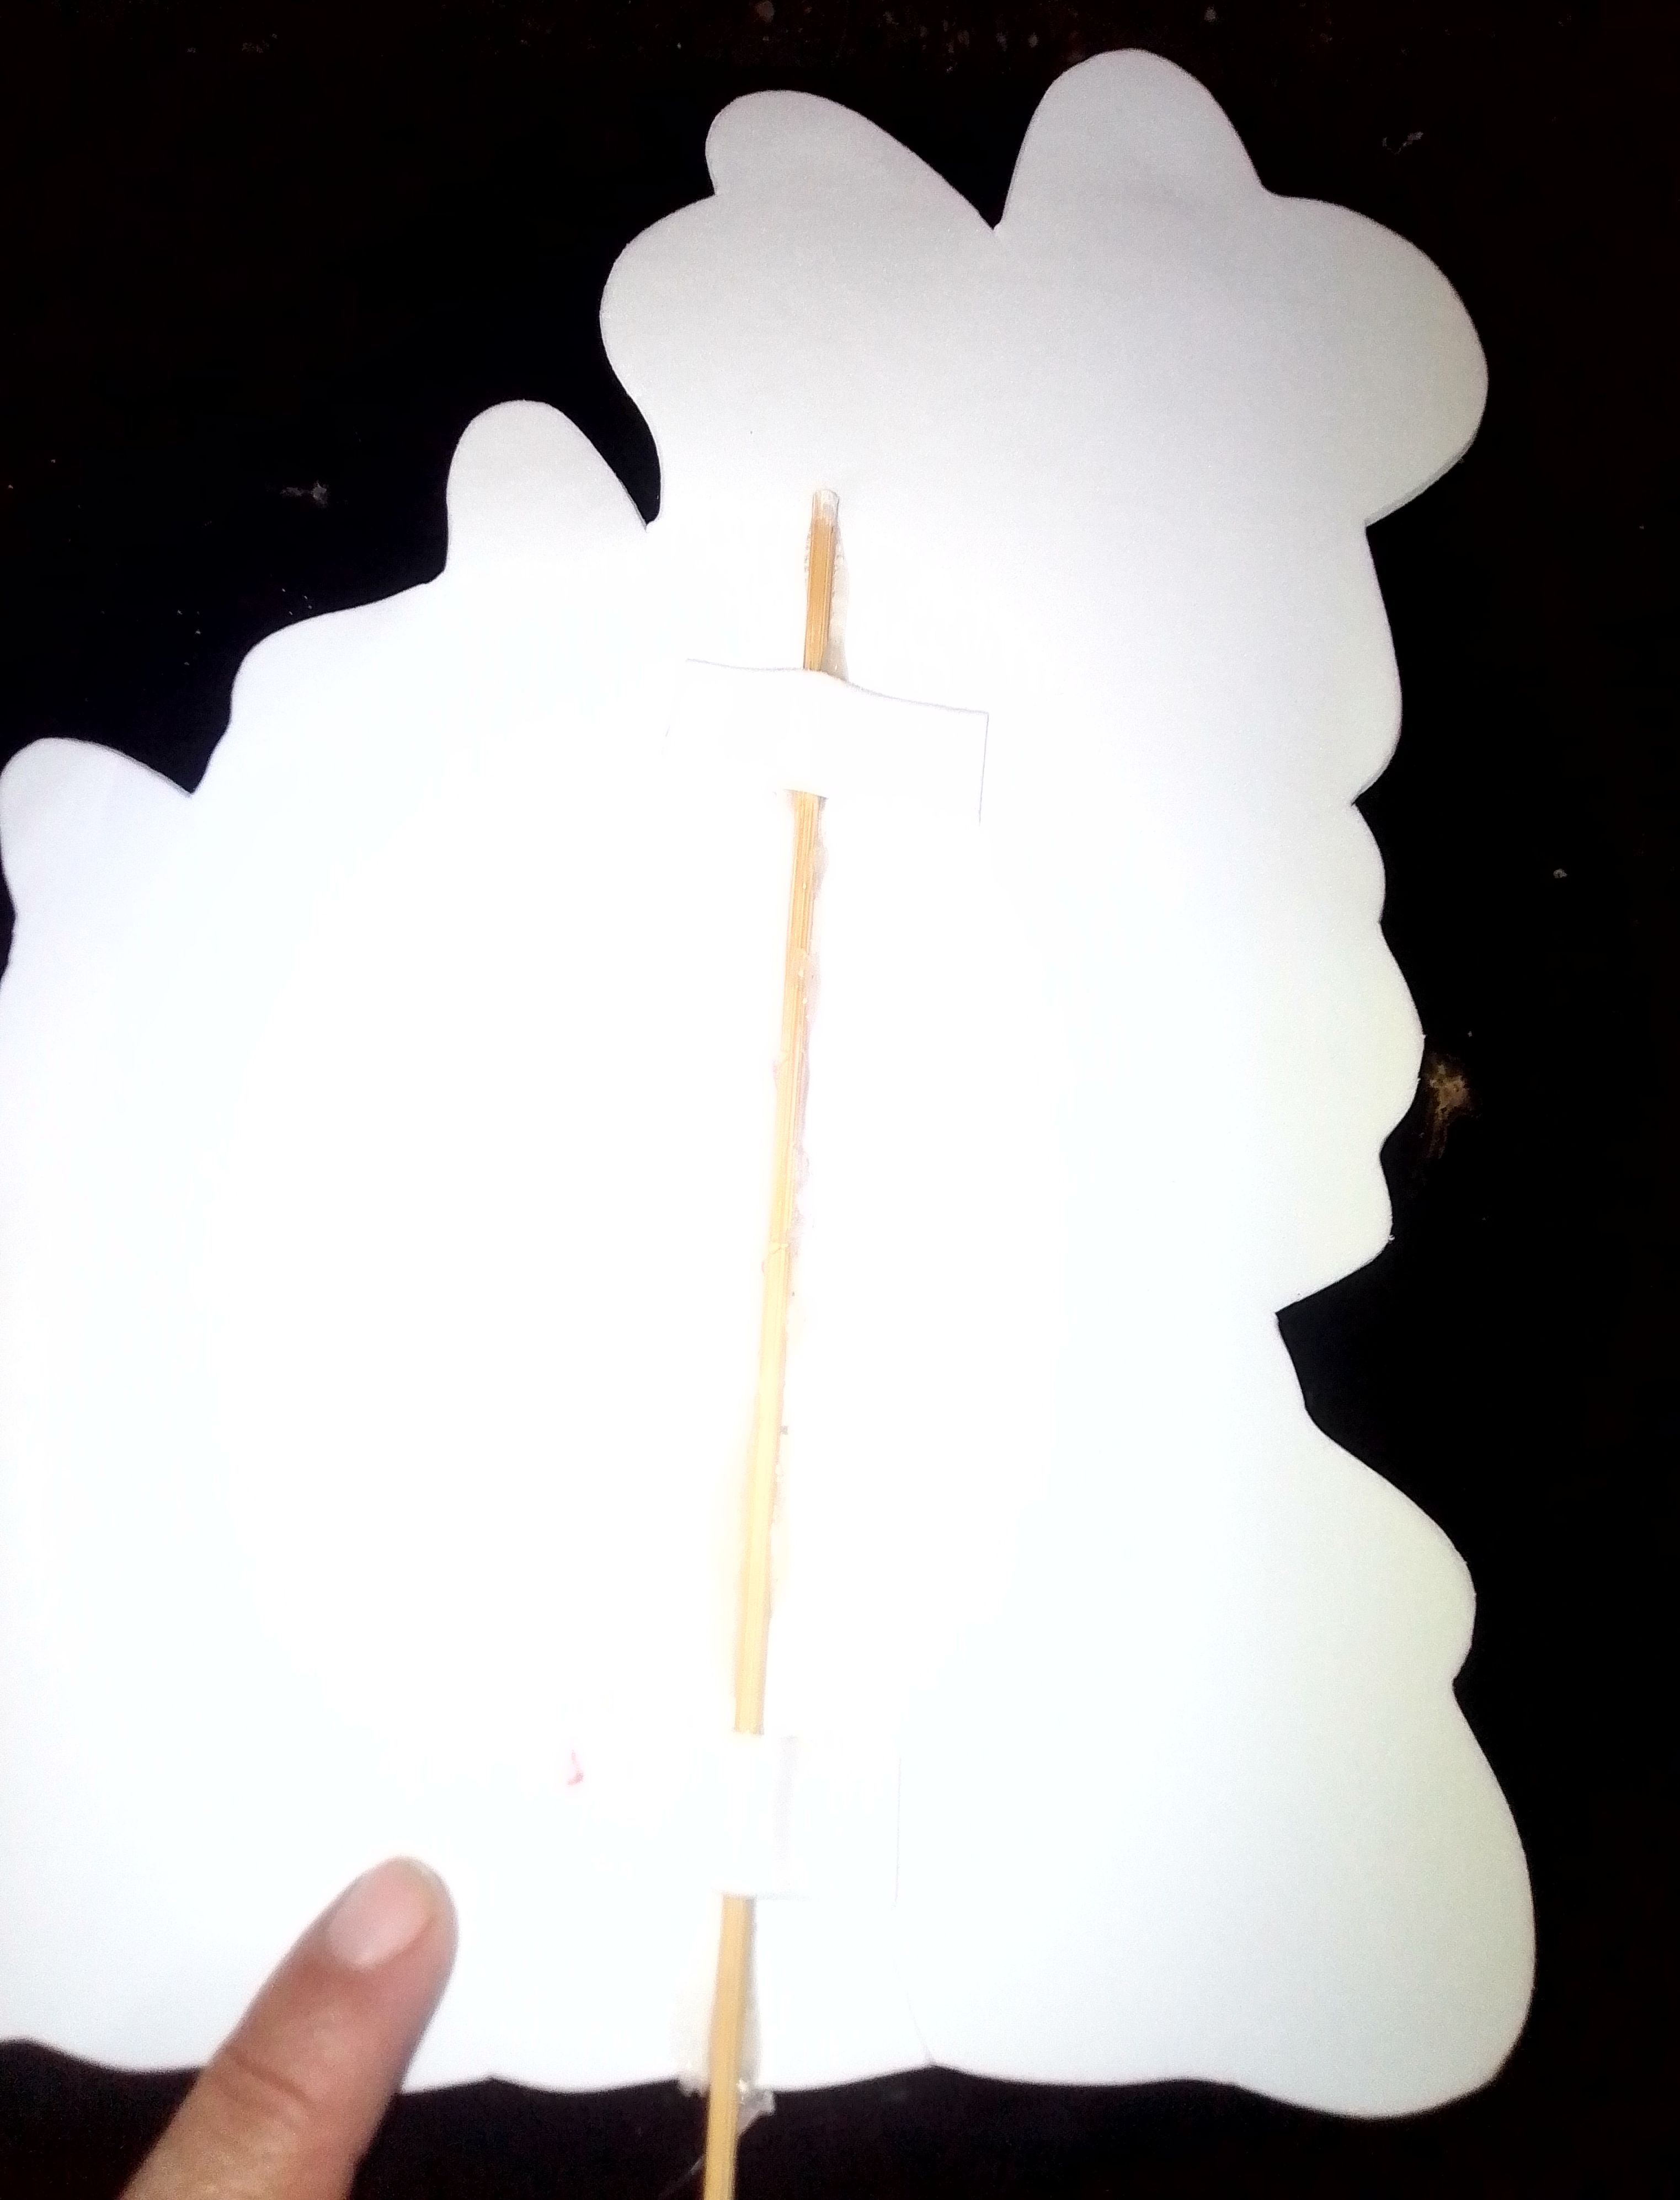
Es momento de armar está primera propuesta, entonces pegamos todas la piezas del personaje según el dibujo que escogimos. Hecho esto la pegamos junto al nombre y el número sobre un foami blanco y con mucho cuidado cortamos todo el contorno. Para darle estabilidad a este primer Topper le pegamos un palillo de altura en la parte de atrás.
Step 04
It is time to assemble this first proposal, then we glue all the pieces of the character according to the drawing we chose. Once this is done, we paste it next to the name and number on a white foami and very carefully cut the entire contour. To give stability to this first Topper we stick a height stick on the back.
Paso 05
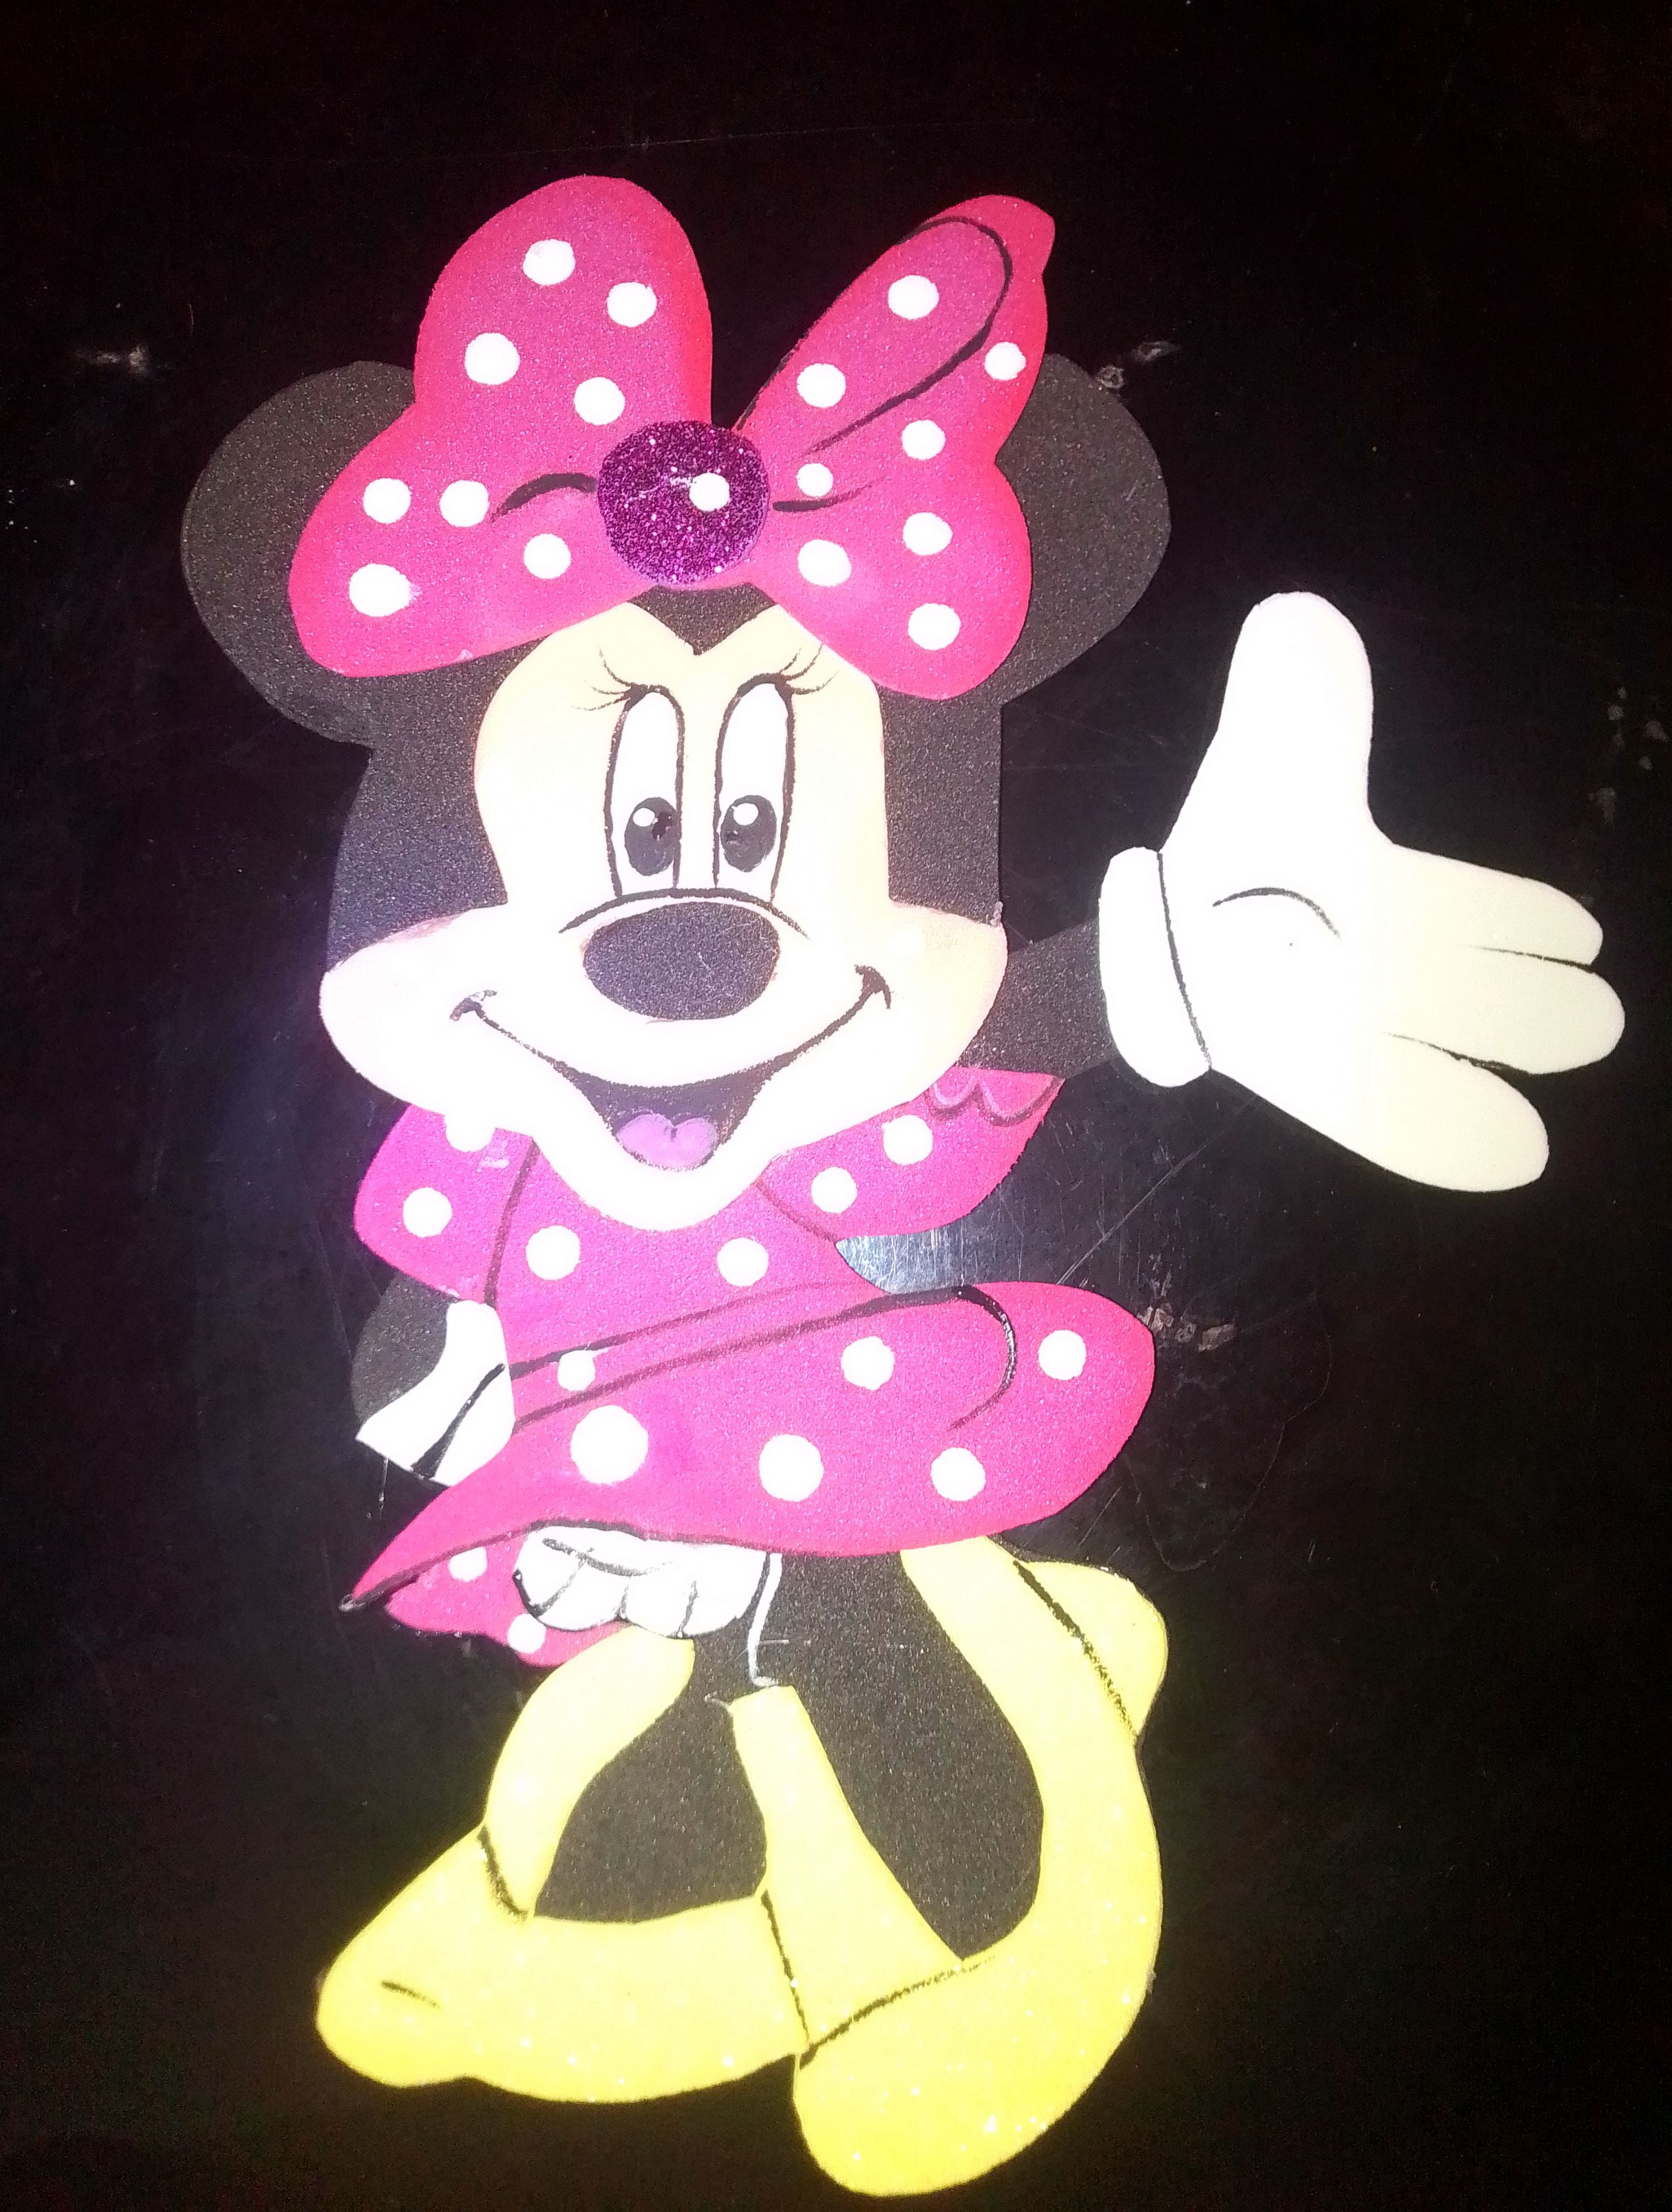
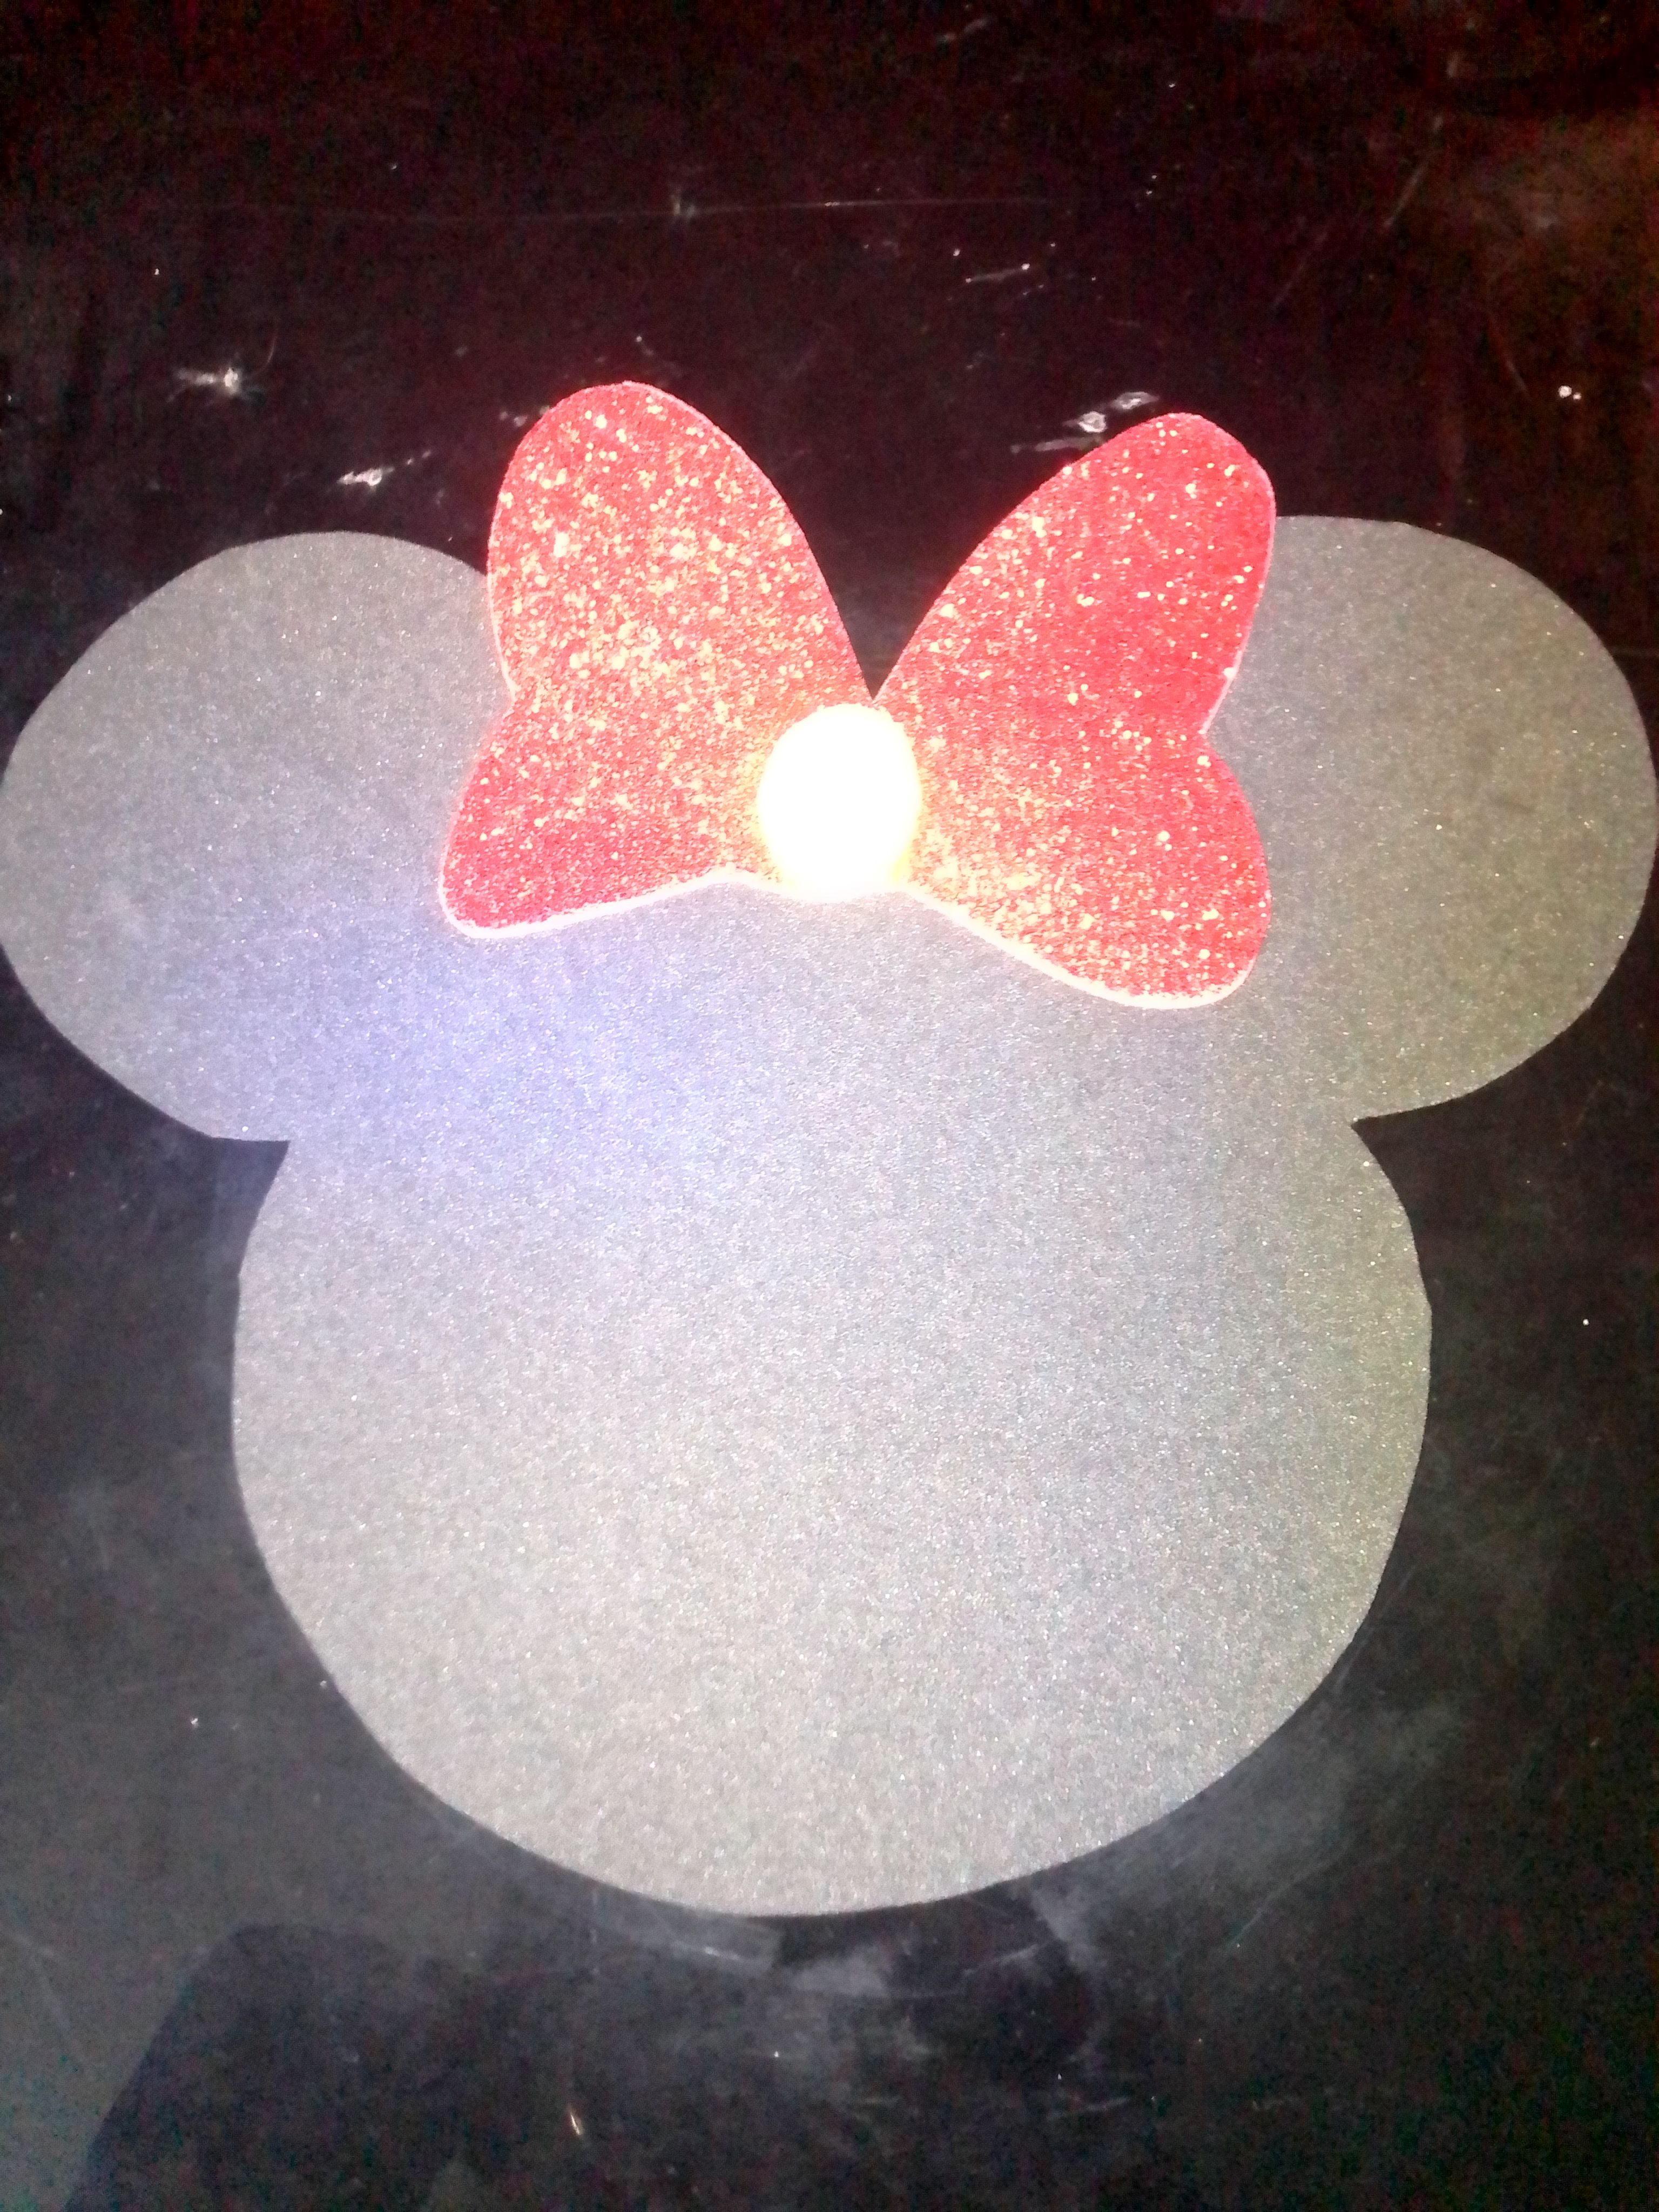
Continuamos con el segundo adorno, y ente caso solo haremos la silueta de la cabeza del personaje en fomai negro para el fondo del Topper, cortamos un gran lazo de foami rojo brillante con el centro de foami amarillo.
Step 05
We continue with the second ornament, and in this case we will only make the silhouette of the character's head in black foam for the background of the Topper, we cut a large bow of bright red foam with the center of the foam yellow.
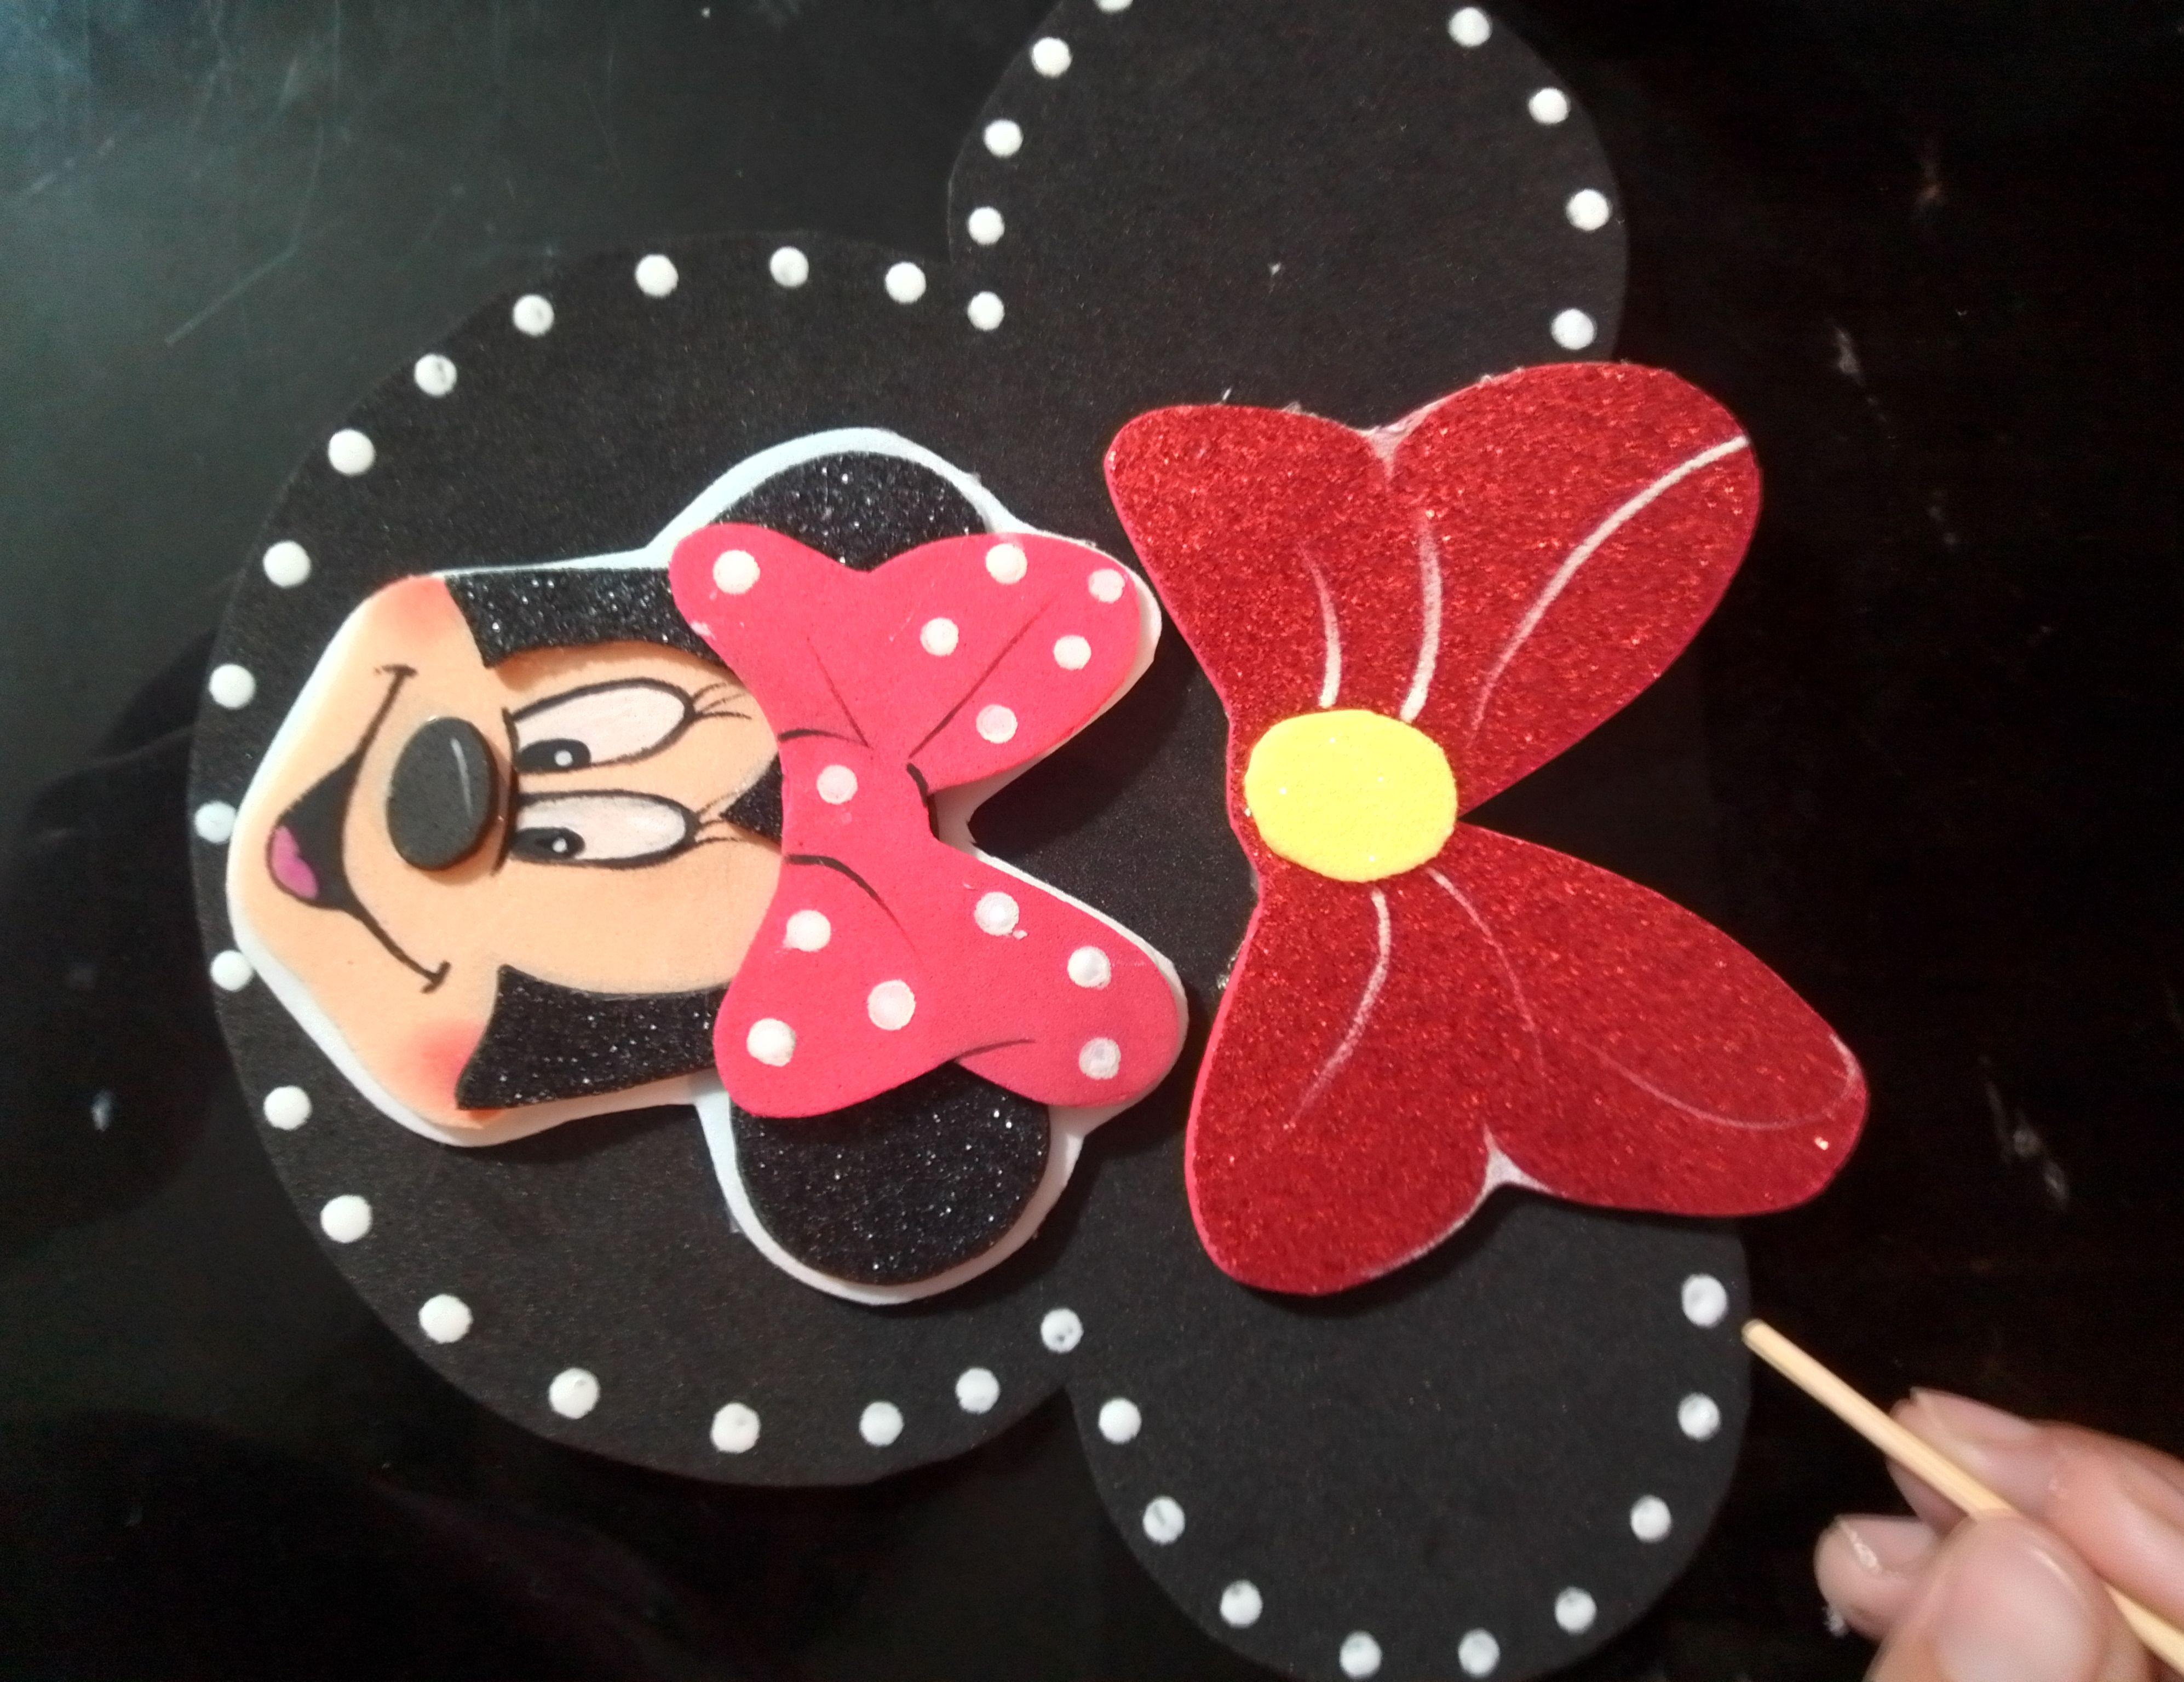
Paso 06
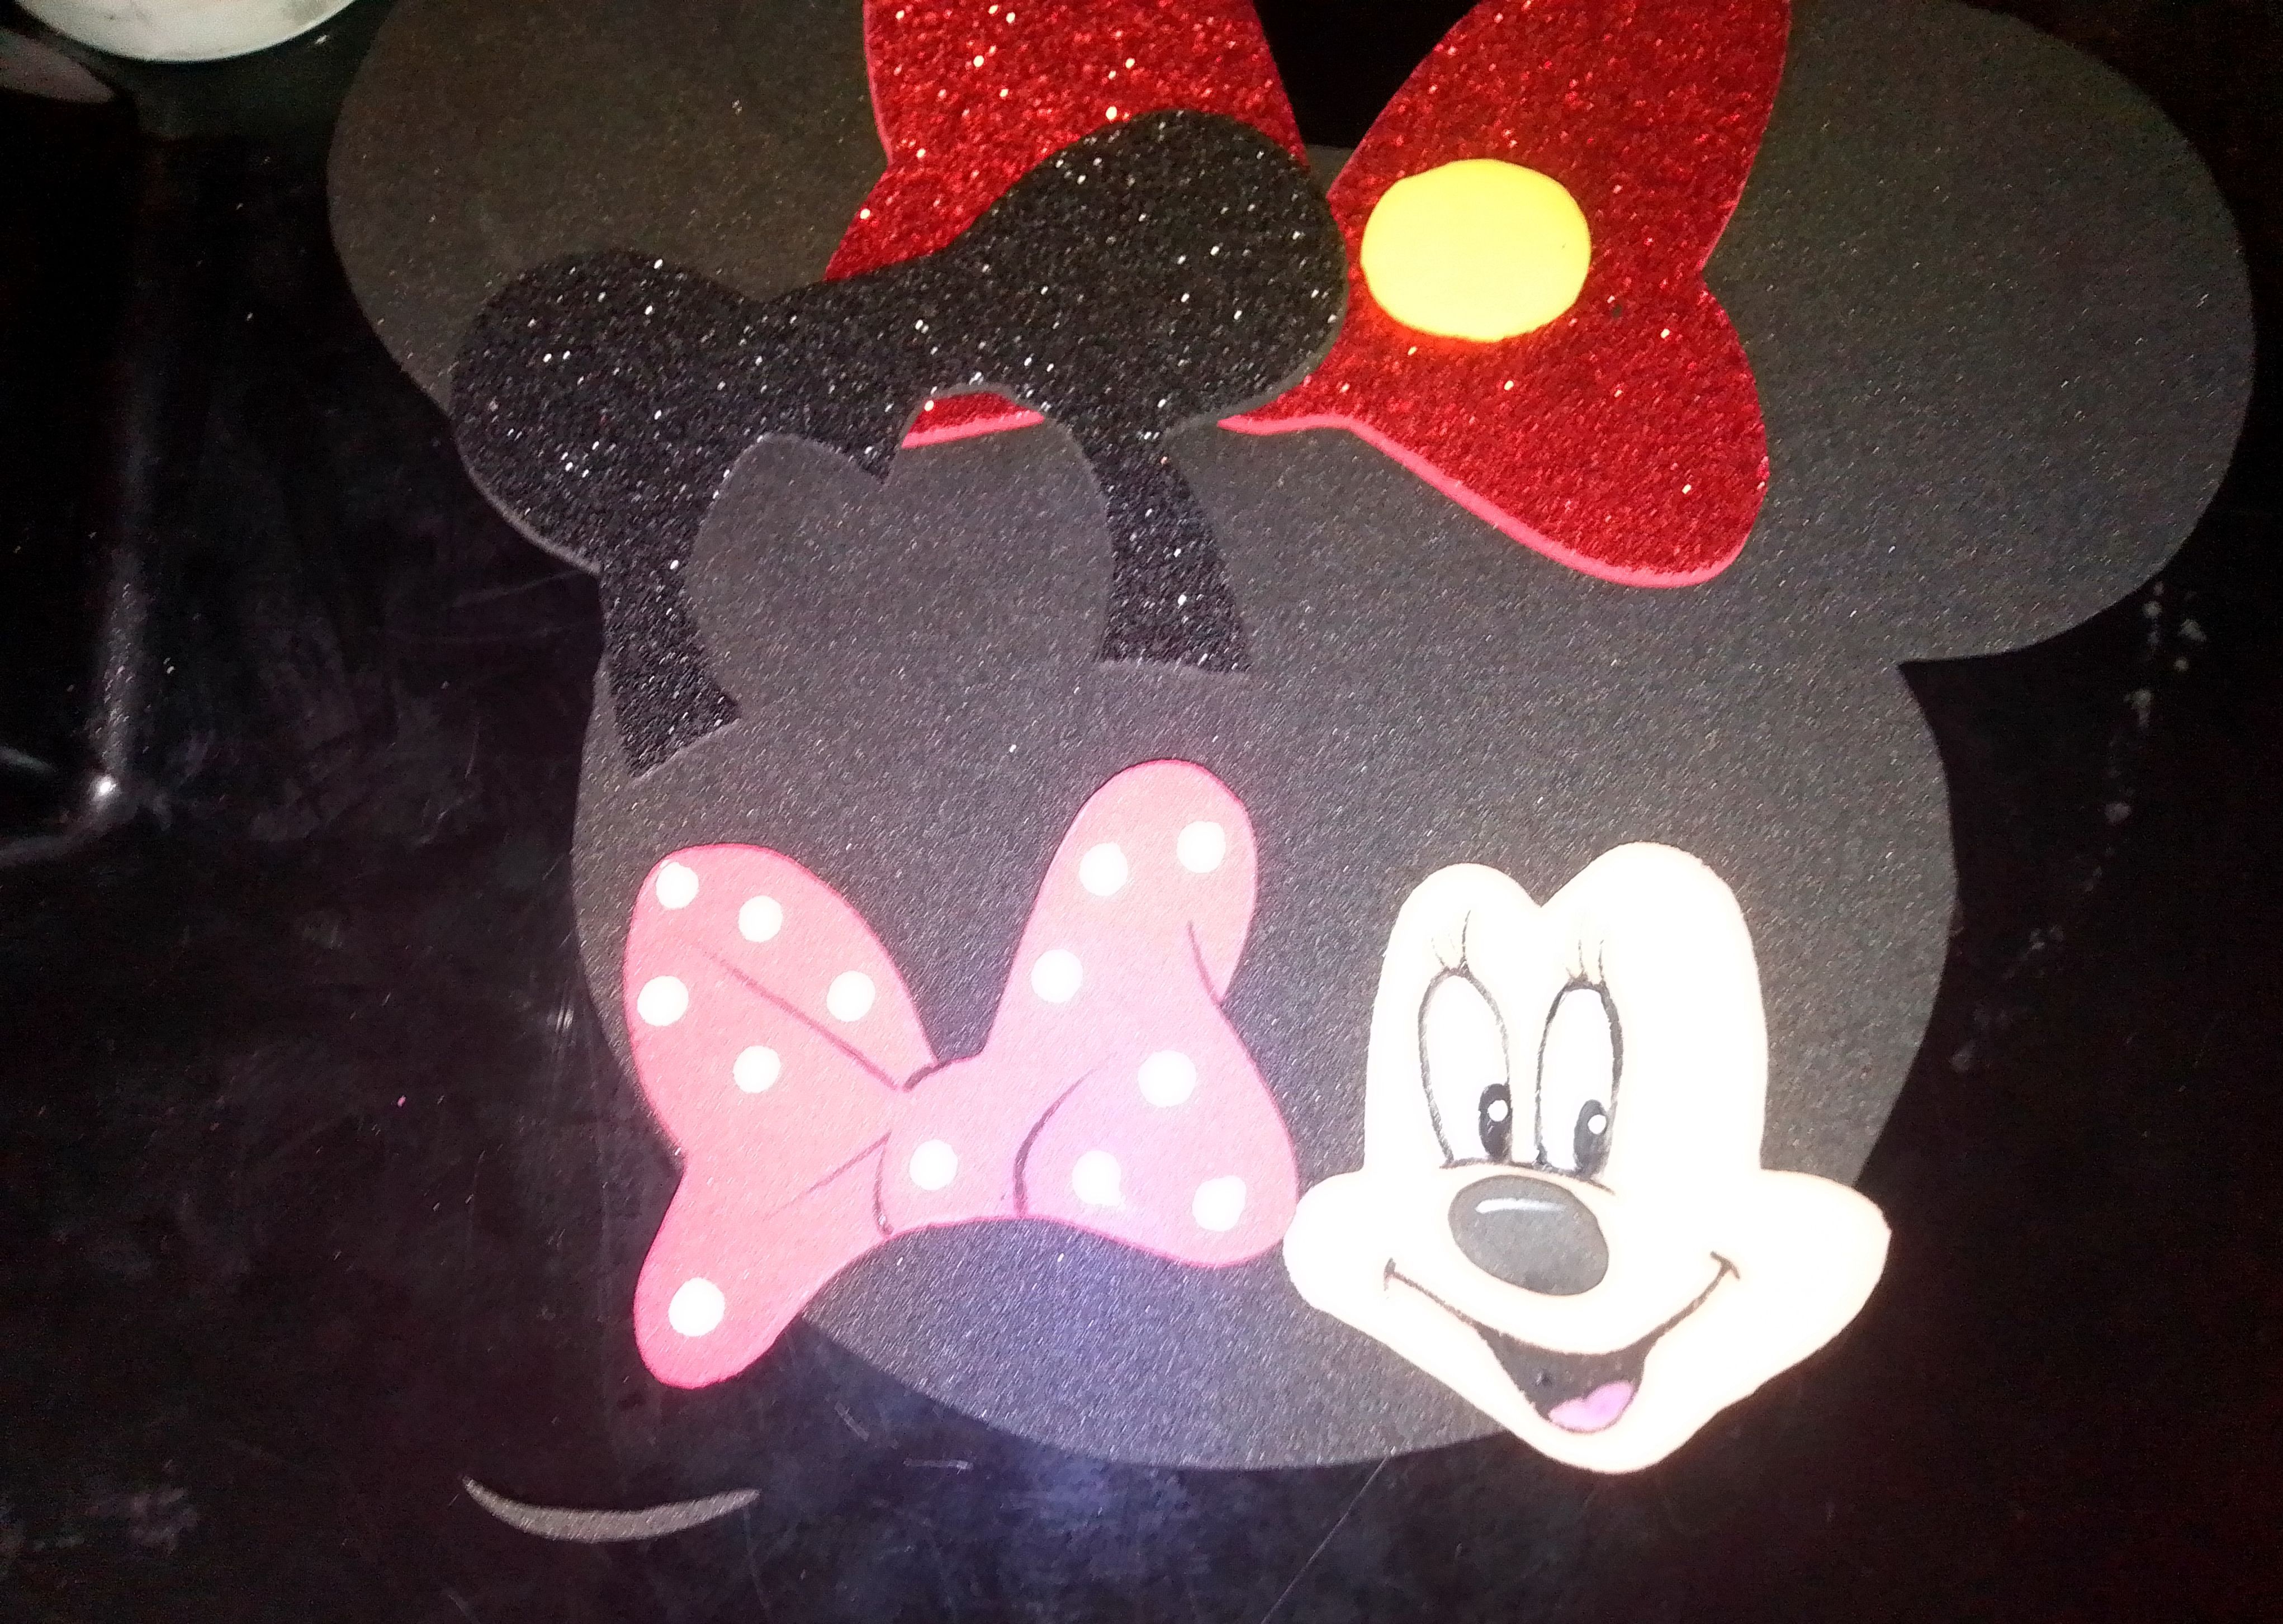
Cortamos la carita de Minnie en foami color piel y pintamos sus ojos utilizado una vez más la pintura negra y blanca y el mismo pincel pero está vez con la mirada hacia un lado. Para el lazo utilizamos foami rojo y hacemos los respectivos puntos blancos. La armamos y pegamos en un foami blanco y cortamos los bordes; luego la pegamos en el centro de la pieza anterior y con el reverso del pincel y pintura blanca hacemos puntos en todo el contorno del Topper. Finalizamos colocando 2 palillos cubiertos con foami rojo de altura en la parte trasera.
Step 06
We cut Minnie's face out of skin-colored foam and painted her eyes using black and white paint and the same brush once again, but this time looking to the side. For the bow we use red foami and we make the respective white dots. We put it together and glue it on a white foami and cut the edges; then we paste it in the center of the previous piece and with the back of the brush and white paint we make dots around the contour of the Topper. We finish by placing 2 sticks covered with red foami height in the back.
Paso 07
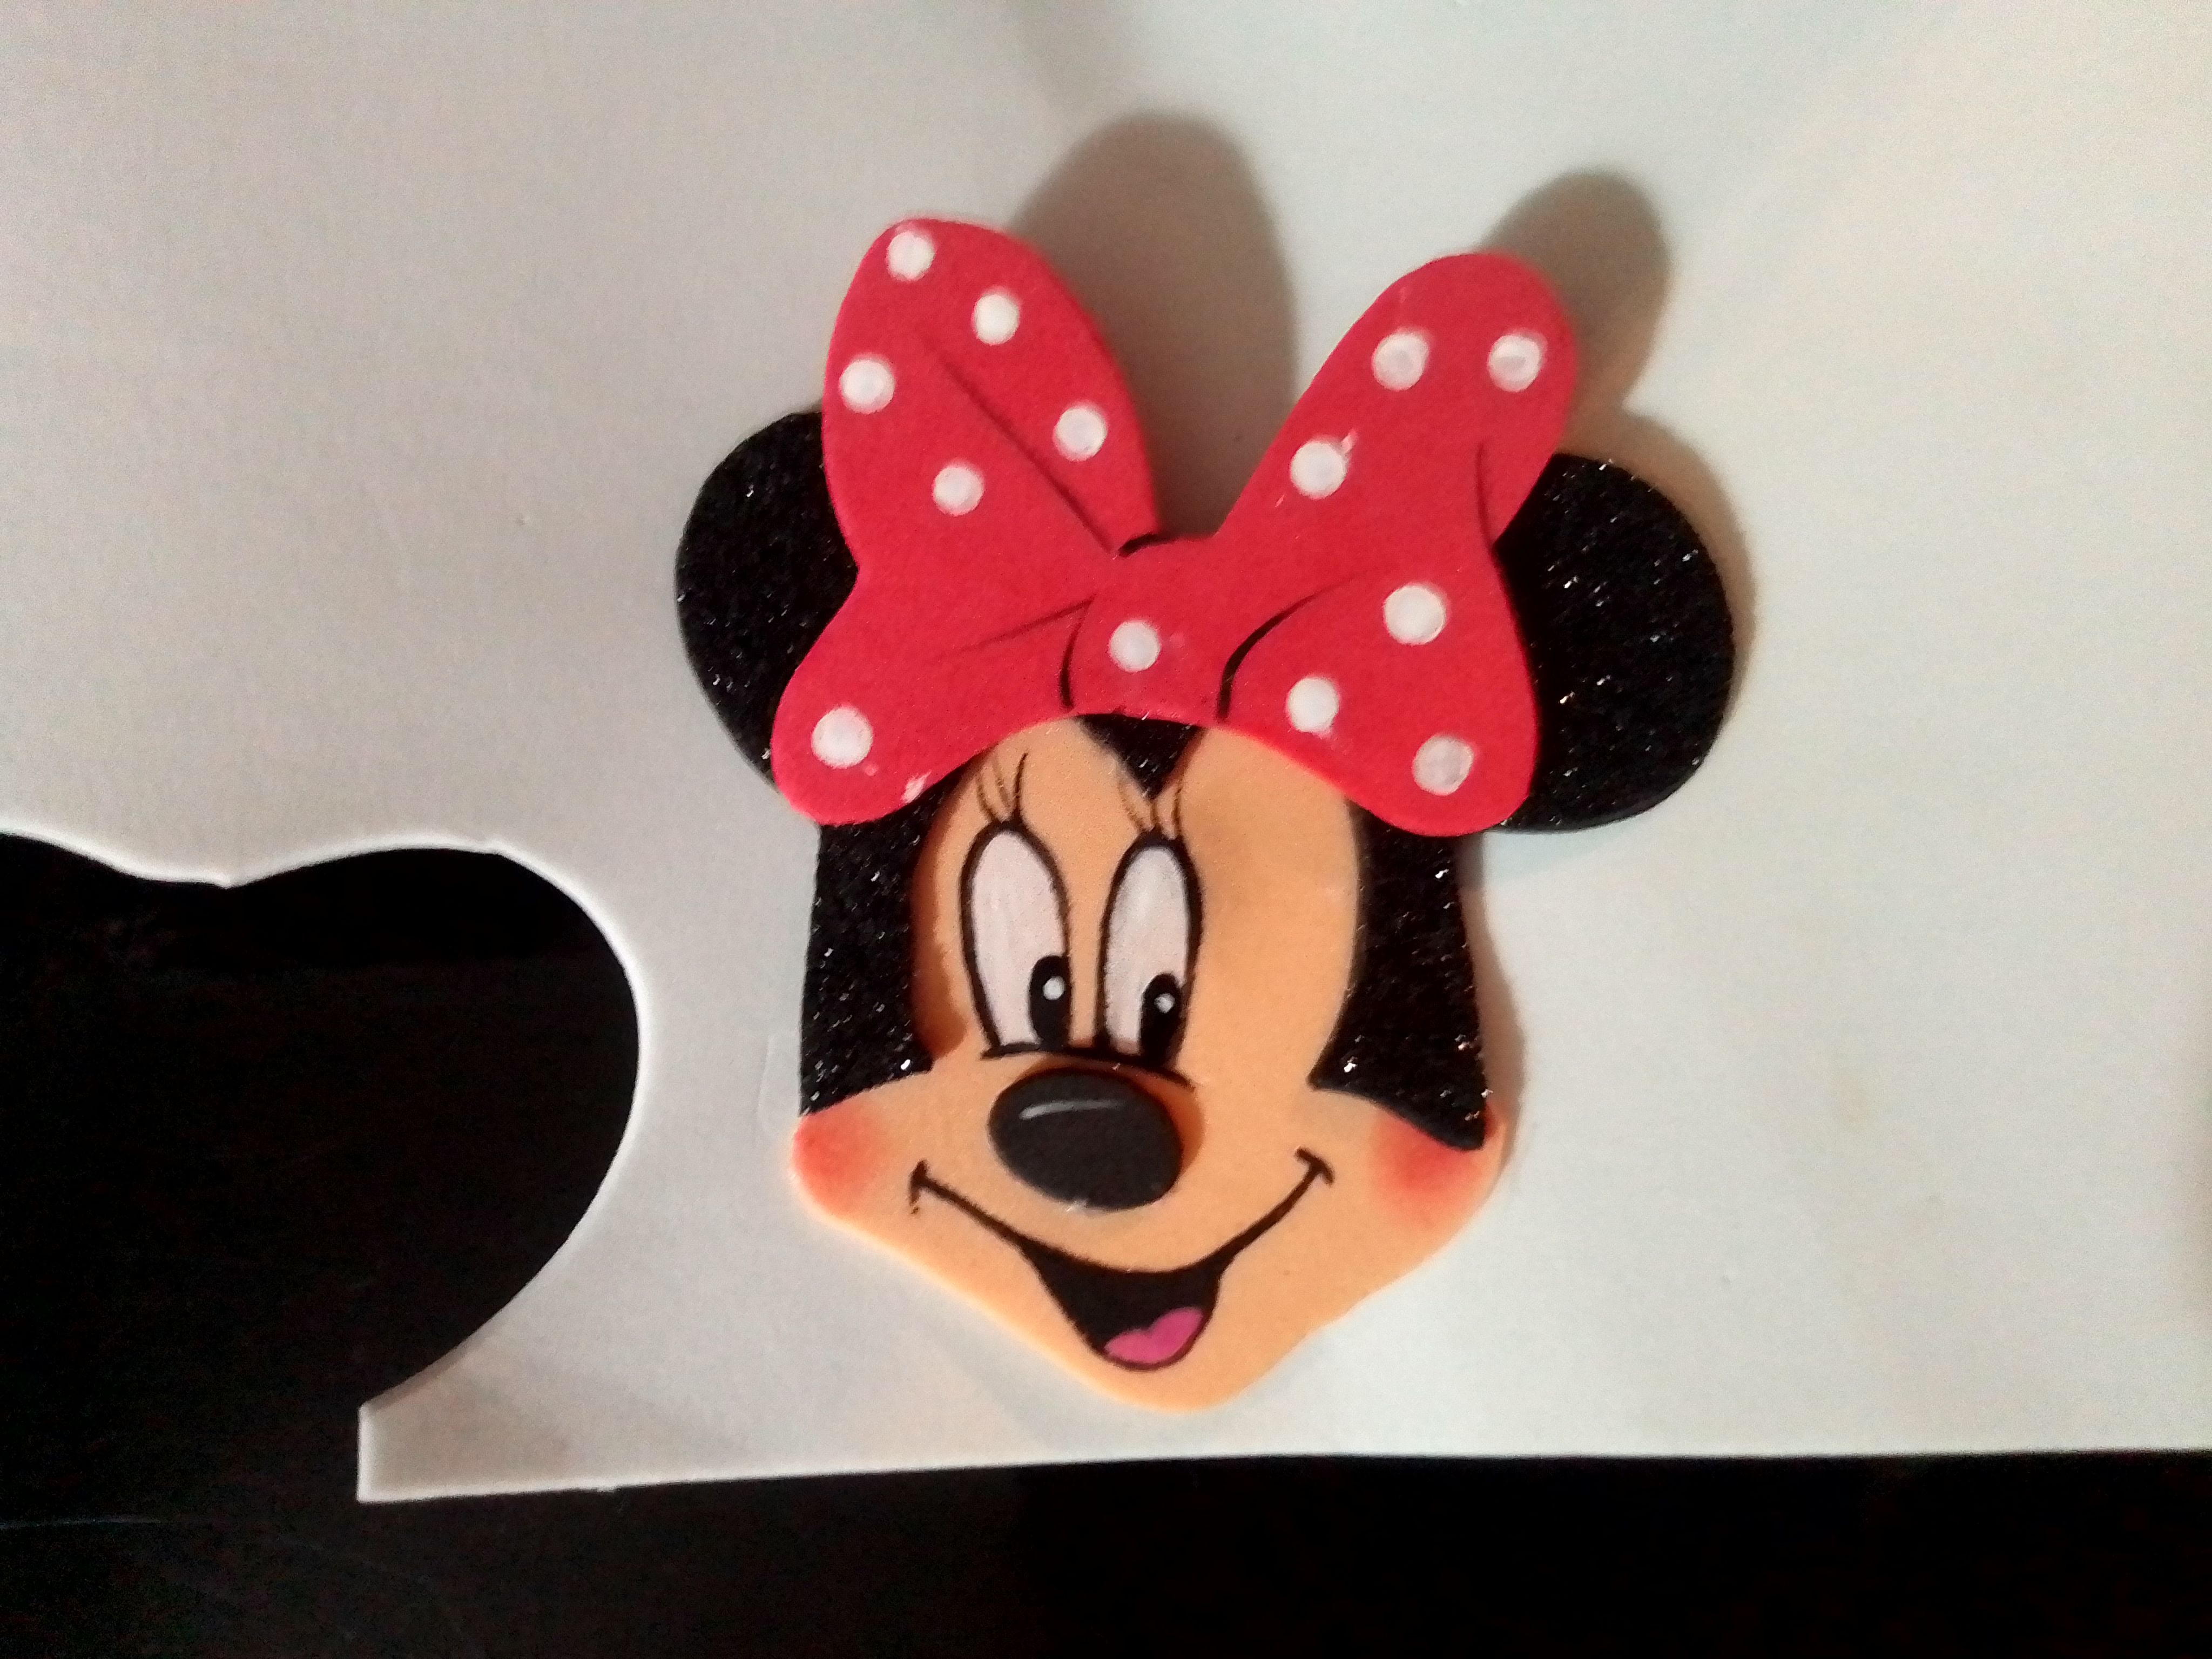
Para el siguiente modelos utilizamos un nuevo diseño de la coqueta Minnie y cortamos nuevamente todas las partes dependiendo el foami que necesites, yo por mi parte decid utilizar el foami rojo para el lazo.
Step 07
For the following models we use a new design of the flirtatious Minnie and we cut all the parts again depending on the foami you need, for my part I decided to use the red foami for the bow.
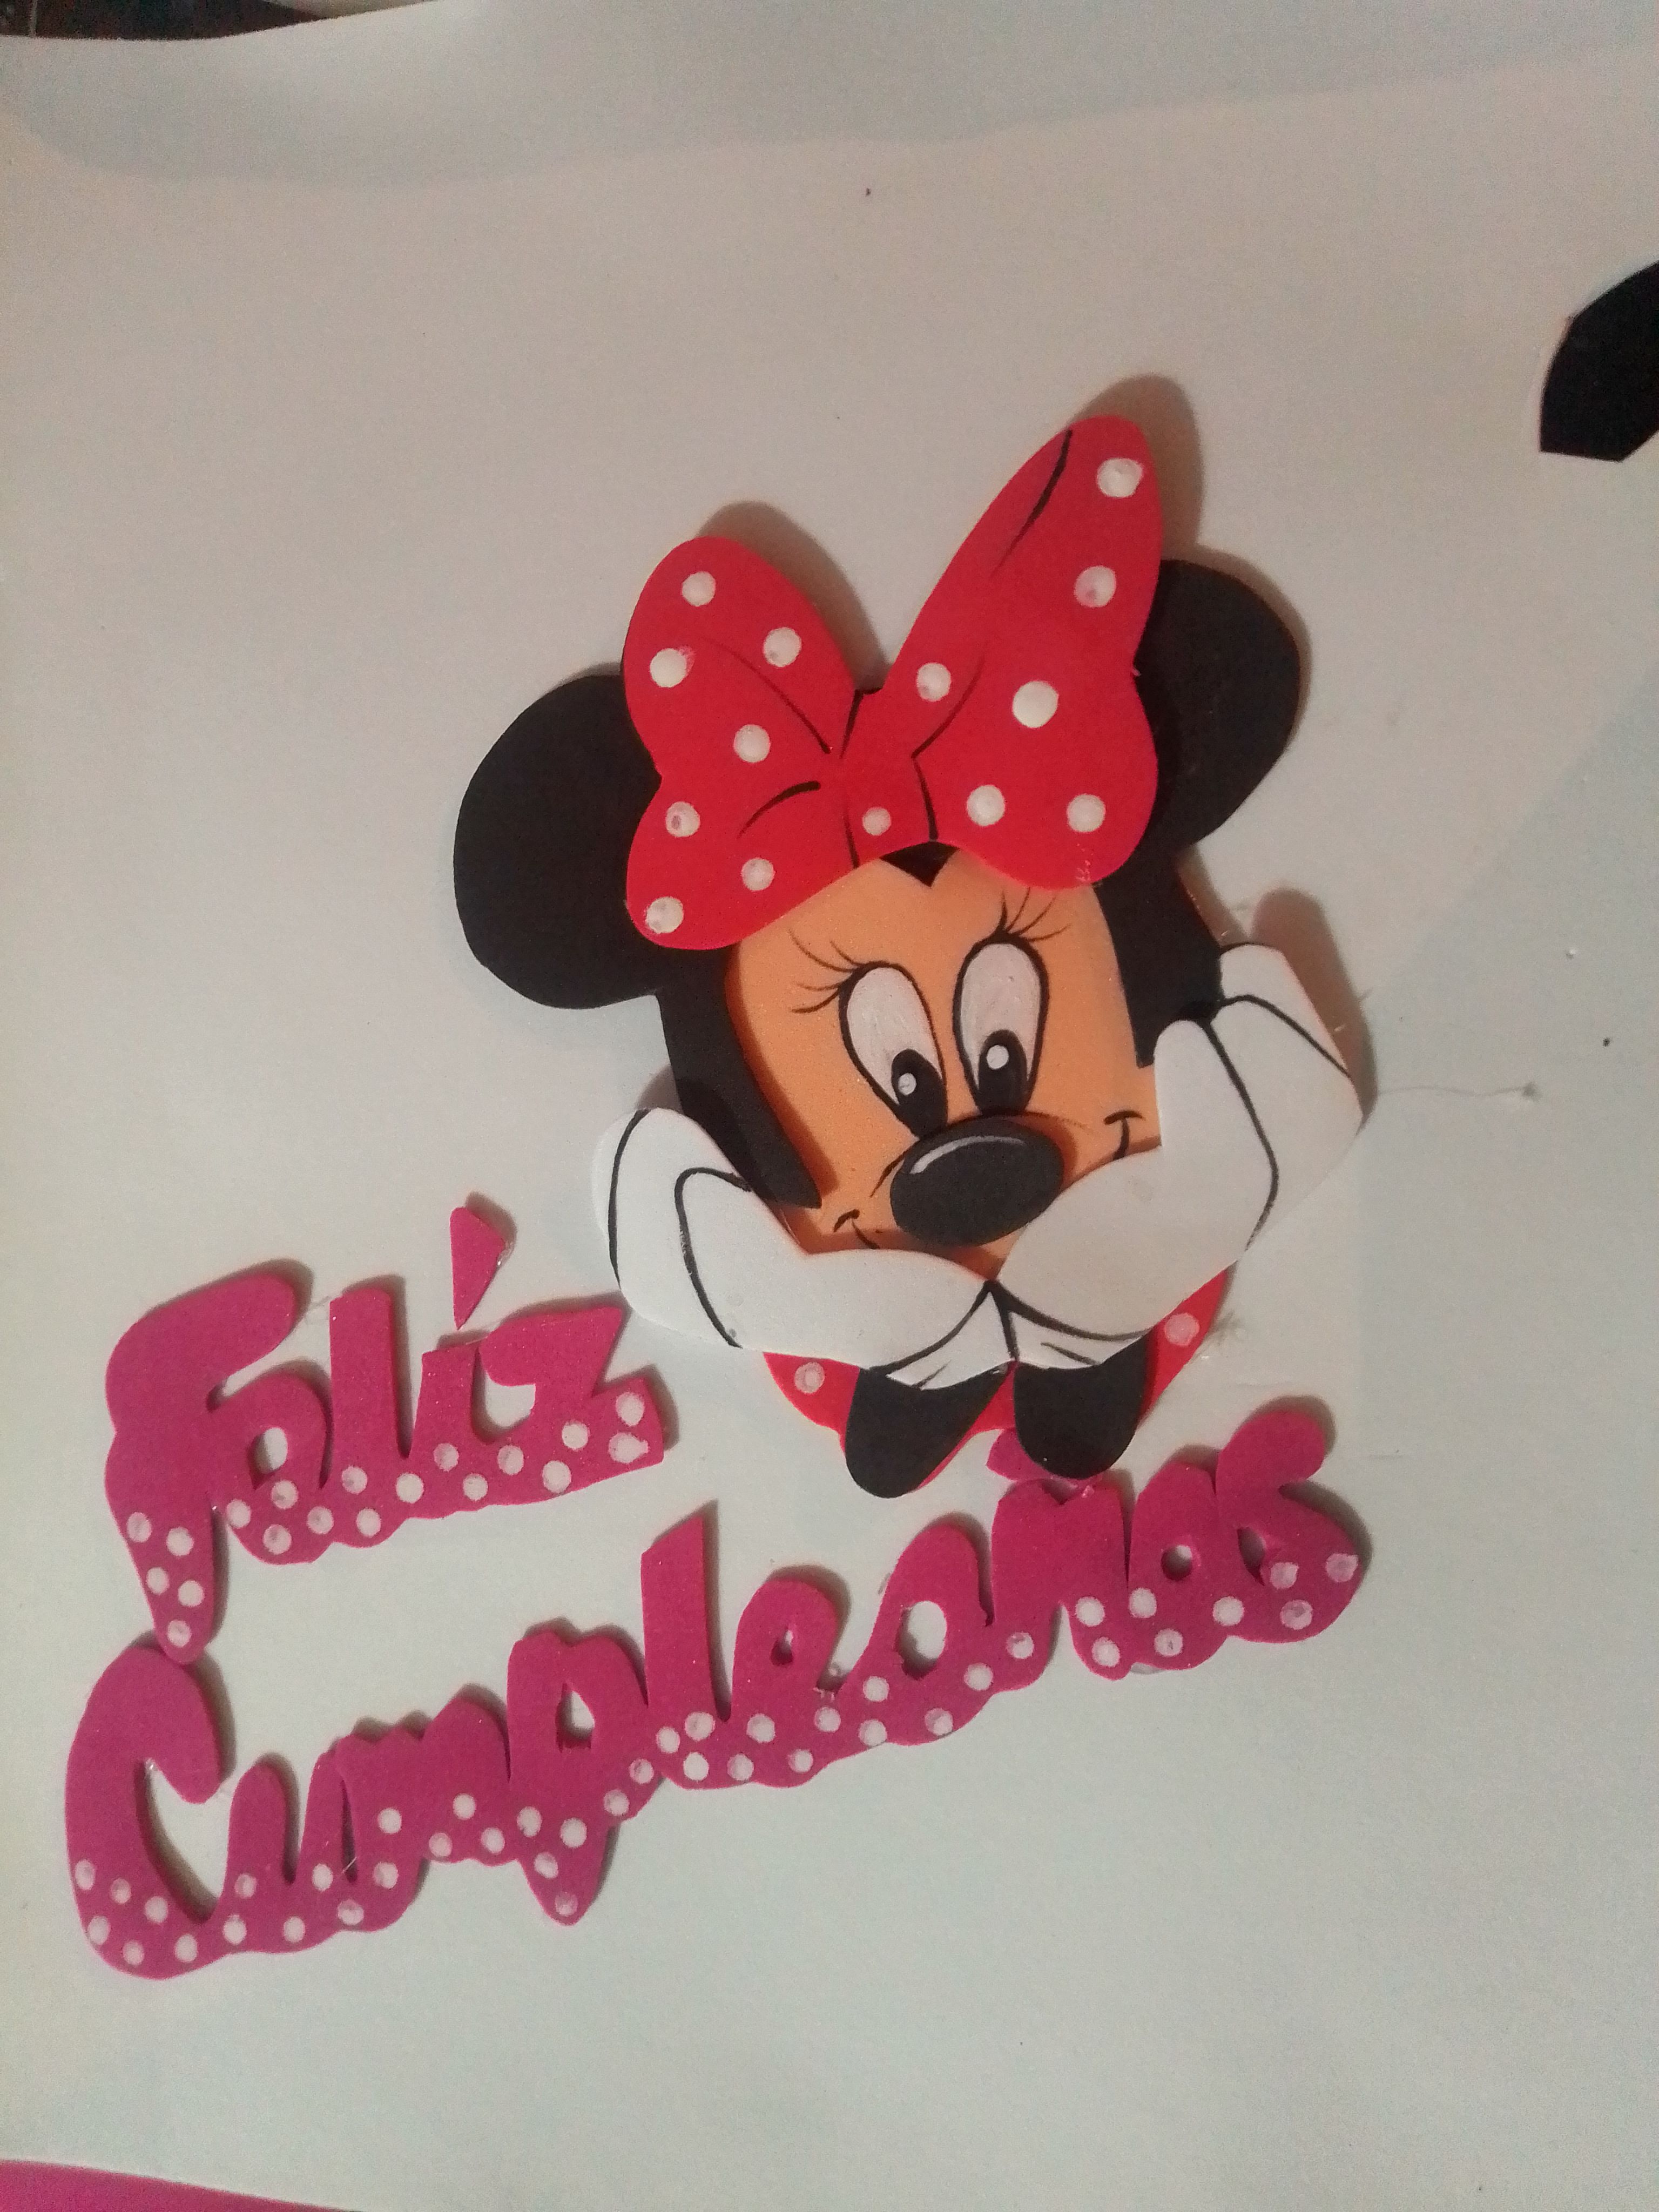
Paso 08
Pintamos una vez sus ojos con la mirada al frente y su gran sonrisa, definimos los detalles de su guantes blancos pintura negra y armamos todas las piezas pegandolas con silicón. Cortamos letras corridas de “Feliz cumpleaños” en fomai color fuscia y pegamos nuevamente sobre un foami blanco para luego cortar todo el contorno y colocar el palillo de altura para darle firmeza.
Step 08
We paint once his eyes with the look to the front and his big smile, we define the details of his white gloves black paint and we put together all the pieces by gluing them with silicone. We cut running letters of "Happy Birthday" in fuchsia foam and glued again on a white foam and then cut the entire contour and place the height stick to give it firmness.
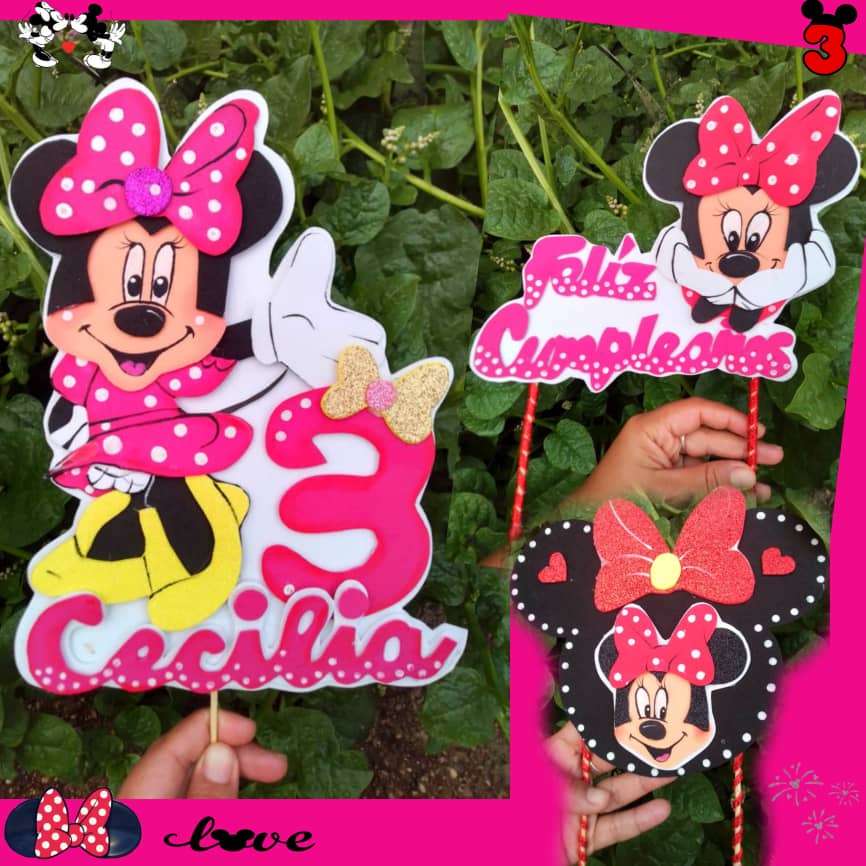
🎀❣️Resultado! ❣️🎀
Listo mis bellos amigos! Aquí les muestro con mucho cariño este hermoso resultado de estos tres lindos toppers que podrás utilizar en tu fiesta de cumpleaños con la temática de Minnie. Espero te haya gustado mi trabajo el día de hoy!.
Ready my beautiful friends! Here I show you with love this beautiful result of these three cute toppers that you can use at your Minnie-themed birthday party. I hope you liked my work today!.

☺ Gracias por tu linda visita a mi post! ☺
Dios te bendiga y Dios te guarde! Cuídate mucho! Te mando un fuerte abrazo desde la distancia. Nos leemos en el próximo post.
God bless you and God keep you! Take care! I send you a big hug from a distance. See you in the next post.

Hola amiga!, te quedaron bellos los Toppers de Minie, yo tambien pienso que esta decoración festiva nunca pasaran de moda, son muy adorables, seguramente el cumpleaños de tu niña quedara hermosooo❤ , saludos!
Hola bella! Muchas gracias.. me alegra compartir la opinión.. Eso espero en realidad.. Muchas gracias por comentar! Feliz día.!
Hola! @razielmorales, una de las figuras infantiles muy tierna es Minie siempre me gustó, te quedaron lindas te felicito.
Holaaa! A mí también me gusta mucha y me alegra que a mí hija también le guste.. es muy divertido hacer manualidades con esta coqueta ratoncita!
Hermoso amiga
Gracias nena!