Hello creative friends from this wonderful #HiveDiy creative community. I hope as always that you are all very well. Today I bring you a very sweet job that I did at the request of a client.
Hola amigos creativos de esta maravillosa comunidad creativa de #HiveDiy. Espero como siempre que se encuentren todos muy bien. Hoy les traigo un trabajo muy dulce que hice a pedido de un cliente.
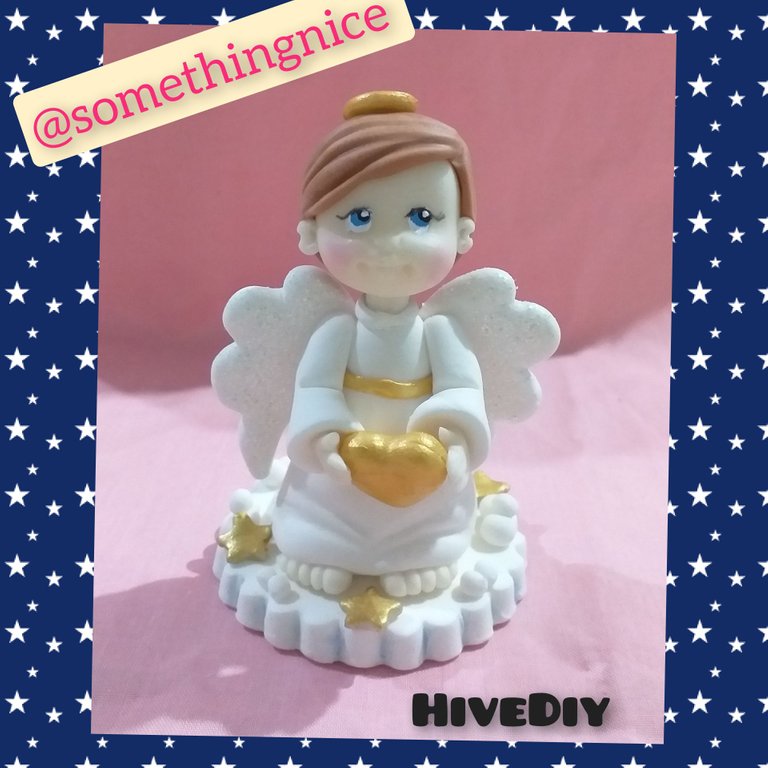
I made this piece with an image that the client sent me and with several more images from Pinterest as well as adding my personal touch.
Esta pieza la realicé con una imagen que me envió el cliente y con varias imágenes más de Pinterest además de agregarle mi toque personal.
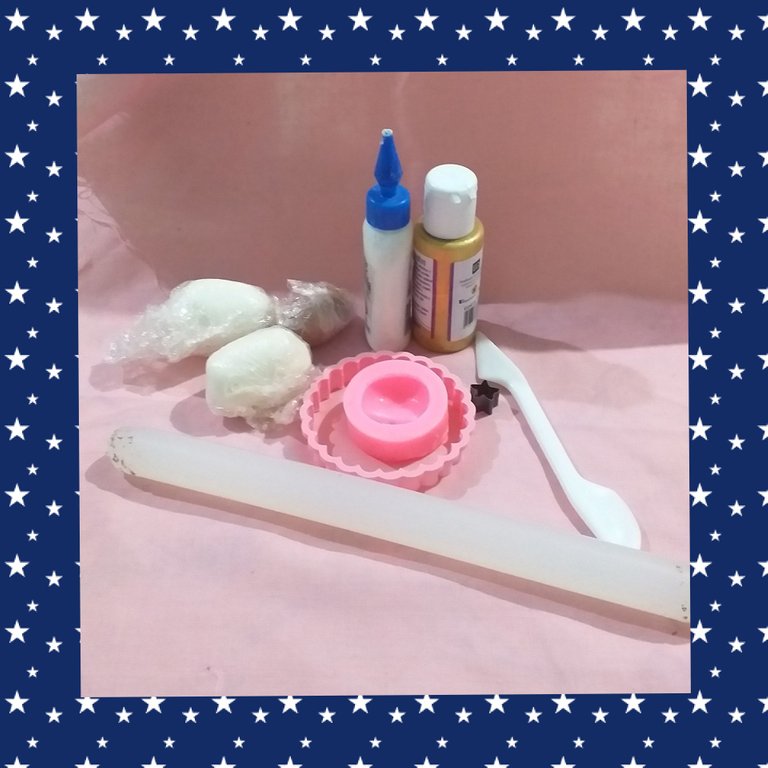
Materials
😇 cold porcelain
😇 vinyl glue
😇 cuttings
😇 rolling pin
😇 face mold
😇 sharp
😇 gold acrylic
😇 gibré
Materiales
😇 porcelana fría
😇 cola vinilica
😇 estecas
😇 palo de amasar
😇 molde de cara
😇 cortantes
😇 acrílico dorado
😇 gibré
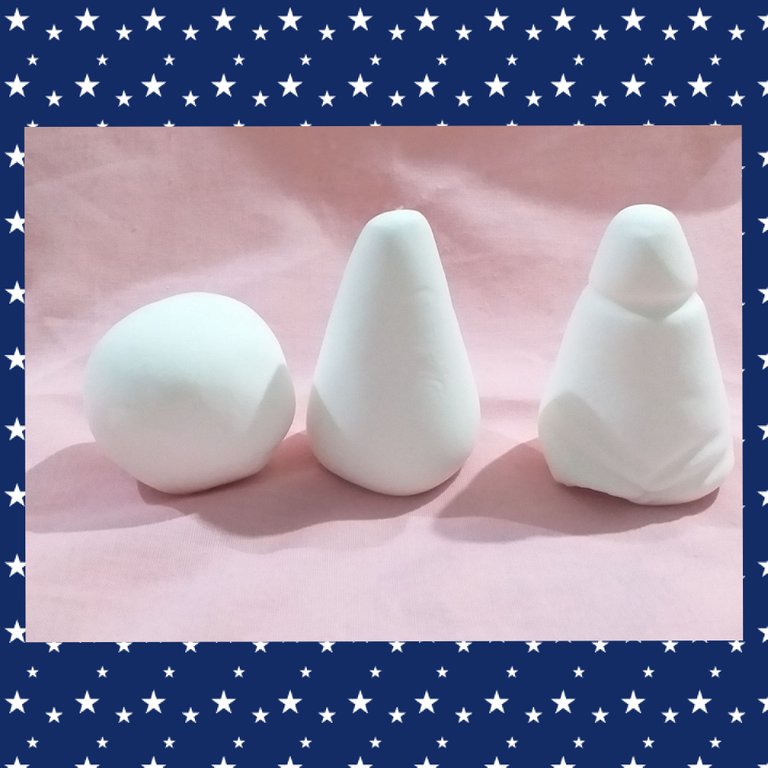
For the body, make a ball, shape it into a cone. At the bottom give base against the table. Mark to simulate wrinkles.
Para el cuerpo hacer una bolita, dar forma de cono. En la parte inferior dar base contra la mesa. Marcar para simular las arrugas.
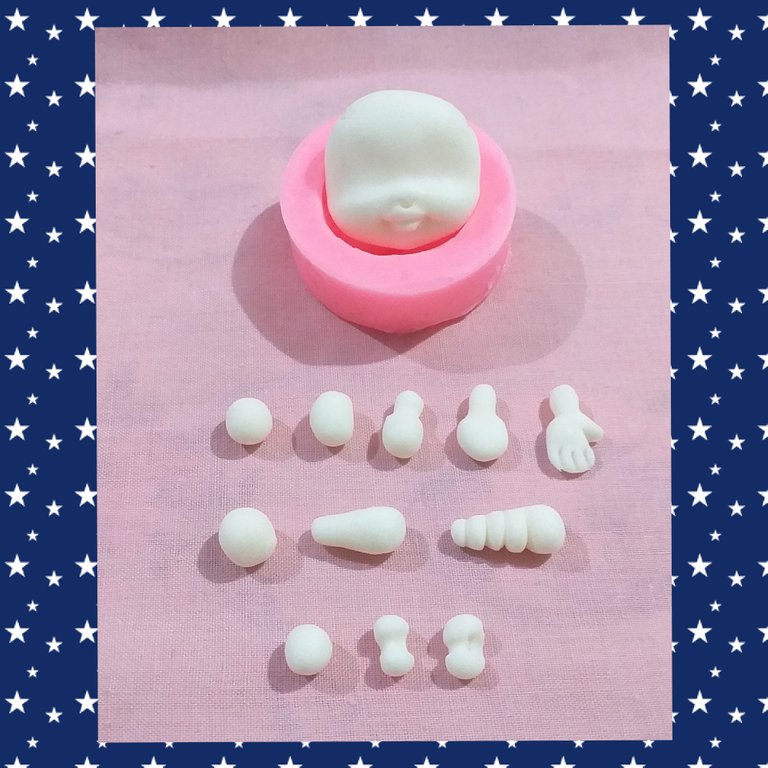
Make the face using the mold.
For the hands make two equal balls, shape a cylinder, mark the wrist, flatten, remove a portion in the shape of a "1" for the thumb and mark the rest of the fingers.
For the feet we are only going to do the toes because the rest is not seen. Make two equal balls, stretch into an elongated teardrop shape, mark the fingers.
For the ears, make two equal balls, shape into a cylinder, gently mark in the middle and hollow out at one end.
Always remember that hands, feet and ears have to have a left side and a right side.
Hacer la cara utilizando el molde.
Para las manos hacer dos bolitas iguales, dar forma de cilindro, marcar la muñeca, aplanar,quitar una porción en forma de "1" para el dedo pulgar y marcar el resto de los dedos.
Para los pies solo vamos a hacer los dedos porque el resto no se ve. Hacer dos bolitas iguales, estirar dando forma de lágrima alargada, marcar los dedos.
Para las orejas hacer dos bolitas iguales, dar forma de cilindro, marcar suavemente a la mitad y ahuecar en un extremo.
Recordar siempre que manos, pies y orejas tienen que tener un lado izquierdo y un lado derecho.
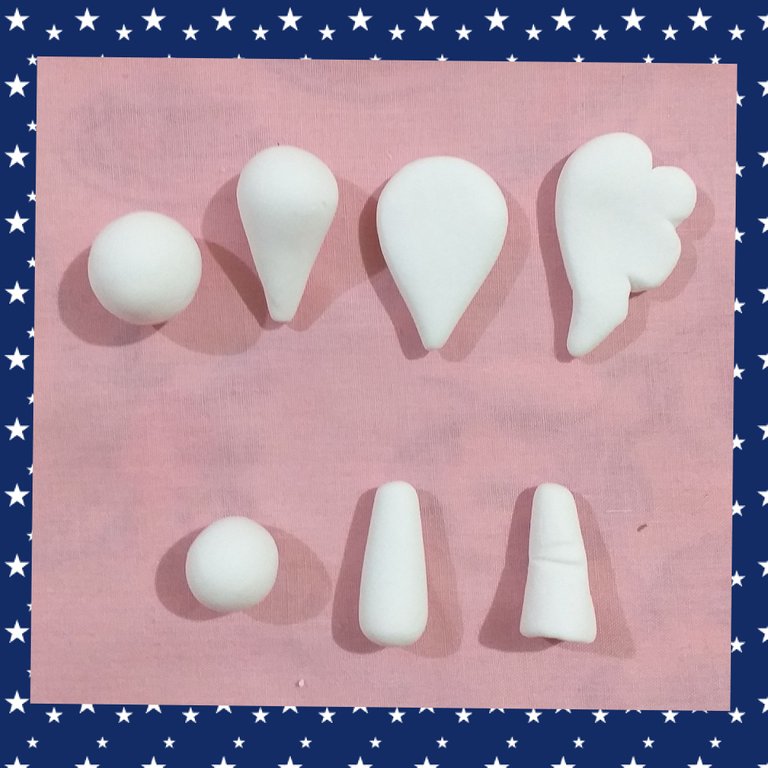
For the wings, make two equal balls, shape an elongated teardrop, flatten, mark and with your fingers smooth the marks.
For the arms, make two equal balls and shape into a cylinder, leaving a wider part that is where the hands will go, hollow out and mark the wrinkles.
Para las alas hacer dos bolitas iguales, dar forma de lágrima alargada, aplanar, marcar y con los dedos suavizar las marcas.
Para los brazos hacer dos bolitas iguales y dar forma de cilindro dejando una parte más ancha que es donde van a ir las manos, ahuecar y marcar las arrugas.
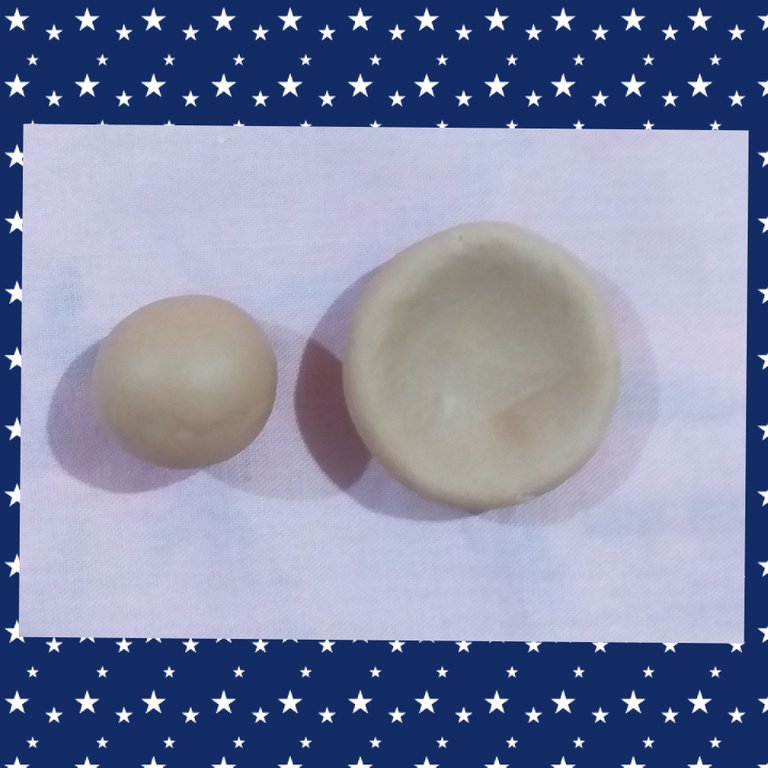
For the hair, make a brown ball and hollow it out to give it the shape of a helmet. It is important to remember that it must be put on when the head is dry or it can be deformed. Mark to simulate hairs.
Para el pelo hacer una bolita color marrón y ahuecar para darle forma de casco. Es importante recordar que hay que ponerlo cuando la cabeza esté seca o sino se puede deformar. Marcar para simular los pelos.
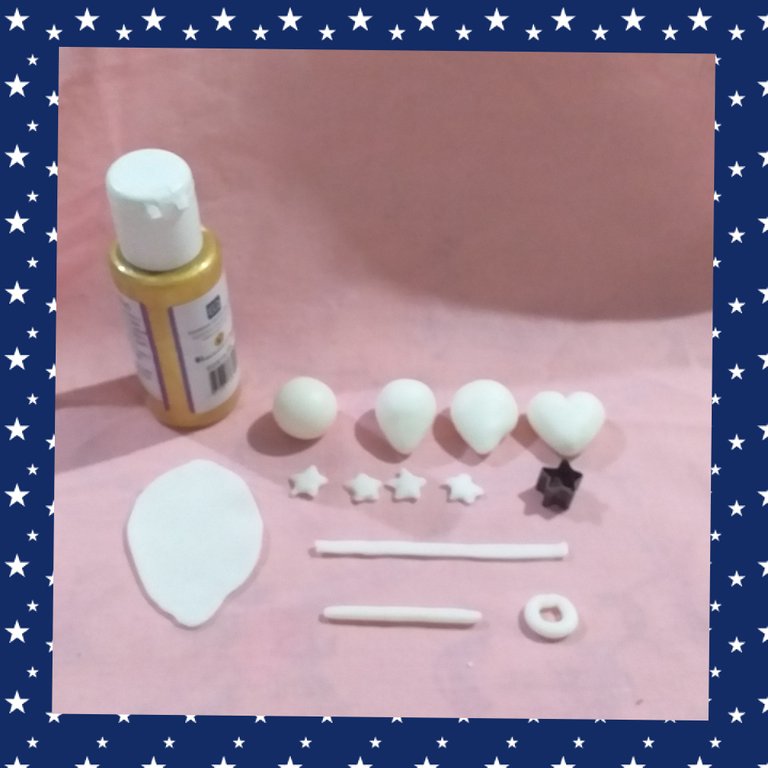
For the details we use dough without color.
For the heart, make a ball, shape into a drop, flatten and mark at the top, smooth the mark with your fingers so that it is rounded.
Roll out dough and cut several stars.
Cut a strap for the belt.
For the halo, make a roll and join it in the shape of a circle.
Let everything dry and paint with golden acrylic.
Para los detalles usamos masa sin color.
Para el corazón hacer una bolita, dar forma de gota, aplanar y marcar en la parte superior, suavizar la marca con los dedos para que quede redondeado.
Estirar masa y cortar varias estrellas.
Cortar una tira para el cinturón.
Para la aureola hacer un rollo y unirlo en forma de círculo.
Dejar secar todo y pintar con acrílico dorado.
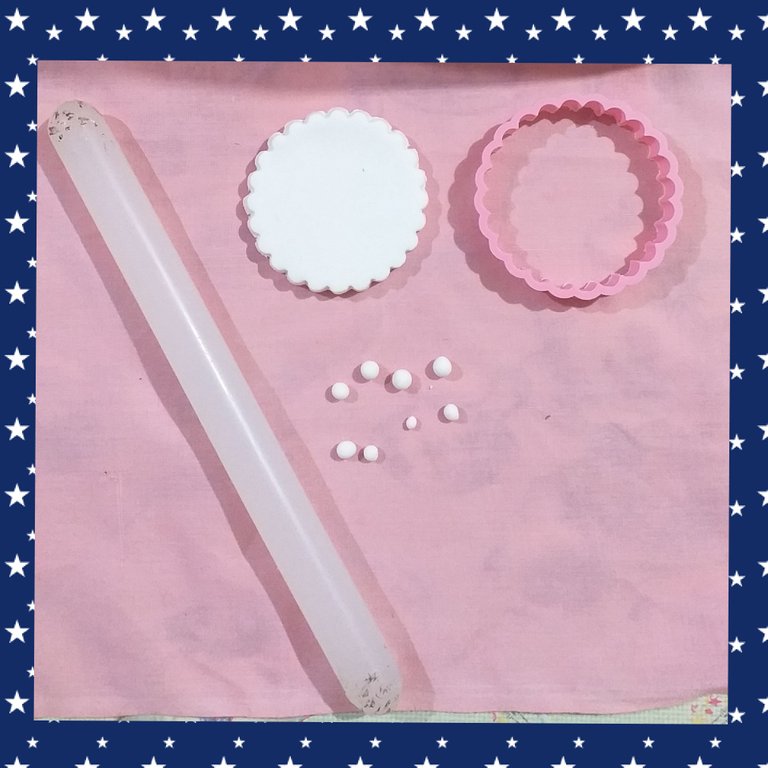
For the base, stretch the dough and use the cutting tool.
Make balls of different sizes to make the clouds.
Para la base estirar masa y utilizar el cortante.
Hacer bolitas de diferentes tamaños para hacer las nubes.
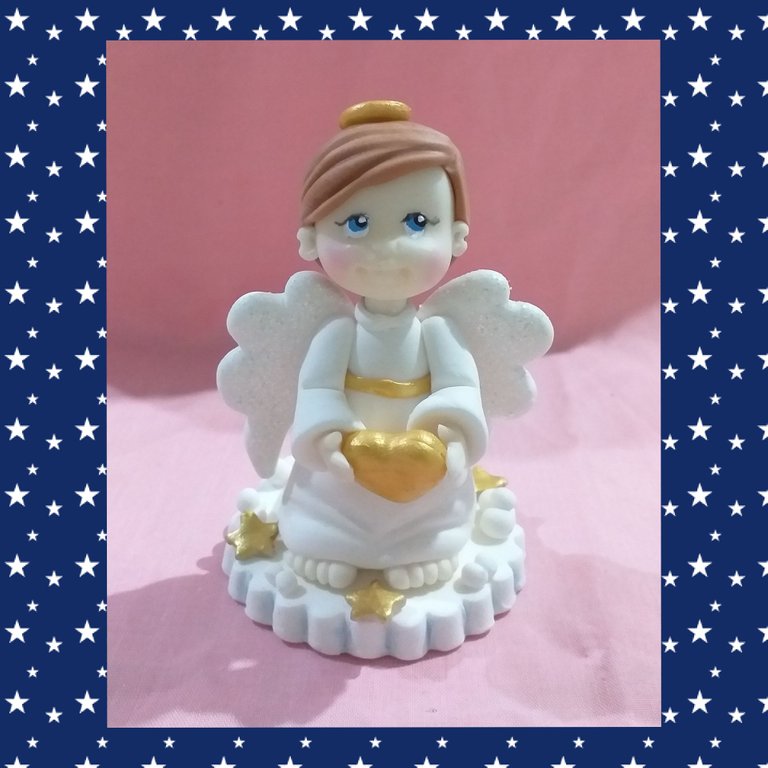
Join the pieces with vinyl glue, before gluing put the gibré wings (in the photo it is not noticeable because it is white), paint the eyes with acrylics or markers. Finally make up.
For this post I took photos with my Samsung Galaxy j4 cell phone and used the Collage Marker app and Google translator.
I hope you liked this sweet little angel that I think is quite simple and is very beautiful both for cake decoration or souvenir. Greetings. Andrea ❤❤❤
Unir las piezas con cola vinilica, antes de pegar poner a las alas gibré (en la foto no se nota mucho porque es blanco), pintar los ojos con acrílicos o marcadores. Por último maquillar.
Para este post tomé fotos con mi teléfono celular Samsung Galaxy j4 y utilicé la aplicación Collage Marker y el traductor de Google.
Ojalá les haya gustado este dulce angelito que me parece bastante sencillo y queda muy hermoso tanto para adorno de torta o souvenir. Saludos. Andrea ❤❤❤
Congratulations @somethingnice! You have completed the following achievement on the Hive blockchain and have been rewarded with new badge(s):
Your next target is to reach 80 posts.
You can view your badges on your board and compare yourself to others in the Ranking
If you no longer want to receive notifications, reply to this comment with the word
STOPTo support your work, I also upvoted your post!
Check out the last post from @hivebuzz: