Hola amigos de Hive, deseo que todos ustedes están muy bien, llenos de energía y ganas de compartir sus contenidos con toda la comunidad.
Hoy voy a enseñarles a hacer una diadema tipo turbante que están muy de moda, entre las mujeres y las niñas.
Muchos no lo saben pero yo me dedico a al fabricación de accesorios para mujeres, y ya tengo varios años con mi emprendimiento, entonces les voy a guiar paso a paso como lo hago.
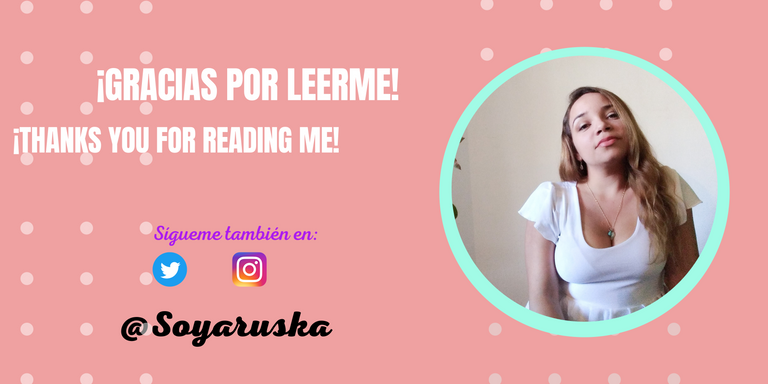
Les dejo acá mi cuenta de instagram para los que quieran conocer mi trabajo: 😂
Taru Accesorios
Hello friends of Hive, I wish you all are very well, full of energy and eager to share your content with the entire community.
Today I am going to teach you how to make a turban-type headband that is very fashionable, among women and girls.
Many do not know it but I am dedicated to the manufacture of accessories for women, and I have already been in business for several years, so I am going to guide you step by step how I do it.
Here is my instagram account for those who want to know my work: 😂
Taru Accesories
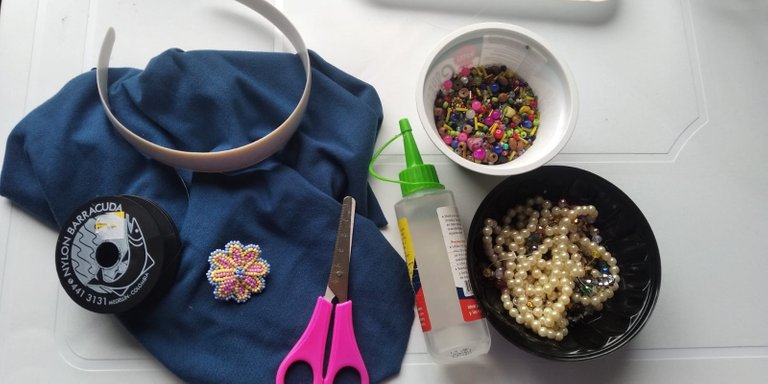
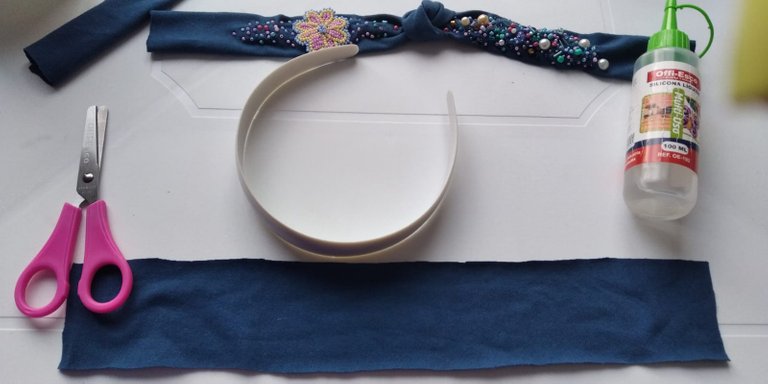
Materiales:
- Tela para forrar el cintillo (cualquiera que estire)
- Tijera
- Silicón frío
- Mostacillas, perlas y canutillos.
- Cintillo
- Hilo nylón y aguja.
Yo además utilicé una flor de mostacillas que había hecho antes y no sabía como usarla, (Luego les enseño como hacerla también).
Materials:
- Fabric to line the headband (any that stretches)
- Scissor
- Cold sylicon
- Beads, pearls and beads.
- Headband
- Nylon thread and needle.
I also used a bead flower that I had made before and did not know how to use it, (Then I teach them how to make it too).
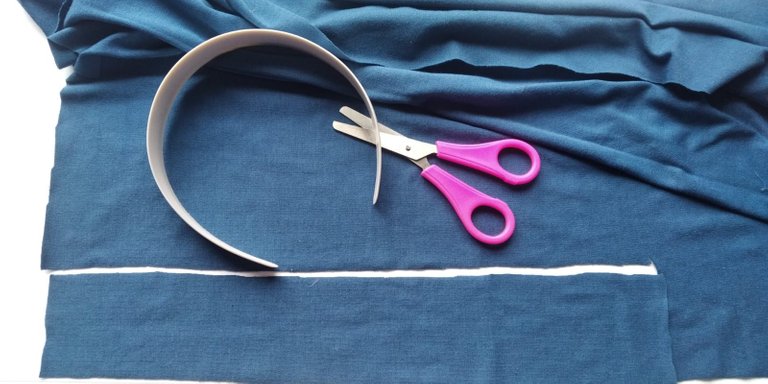
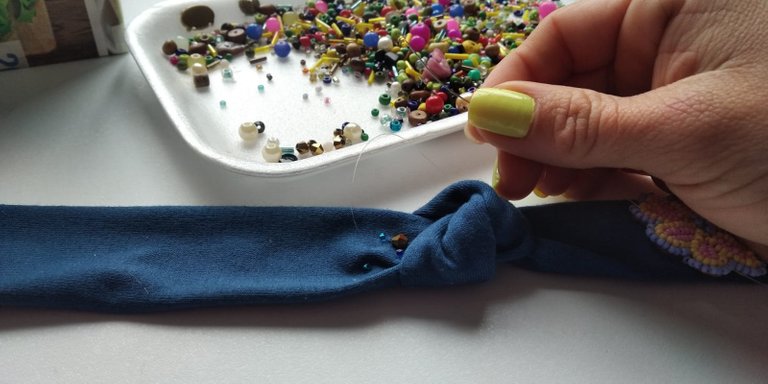
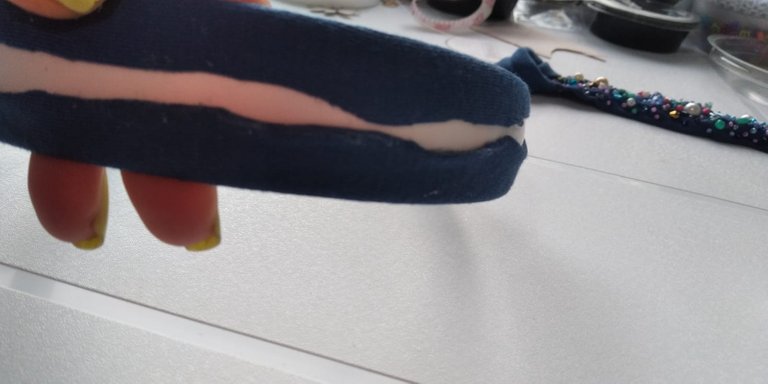
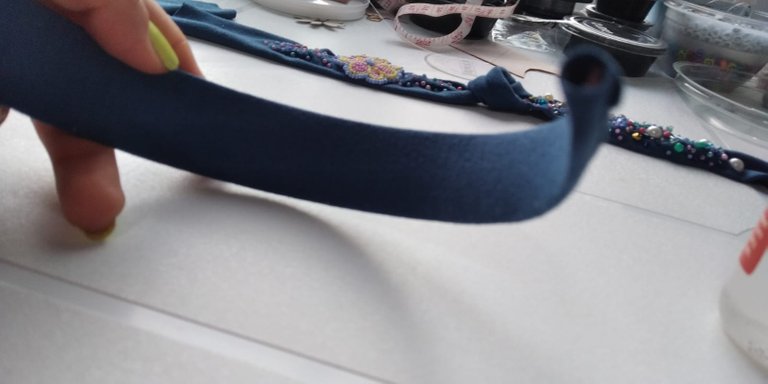
Nuestro primer paso será medir nuestro cintillo y cortar la tela. Siempre dejando un centímetro de largo de más, para prevenir cualquier accidente.
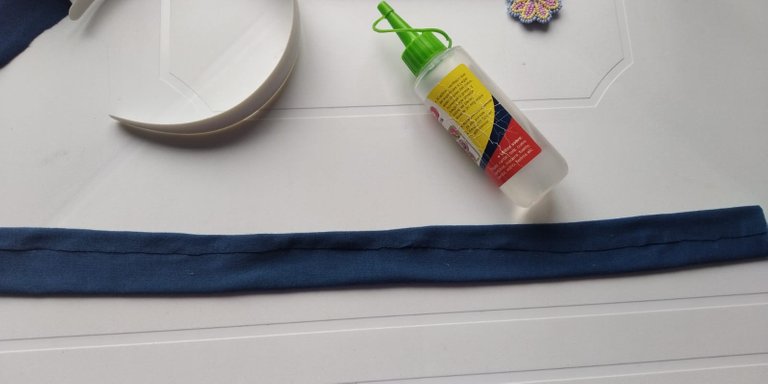
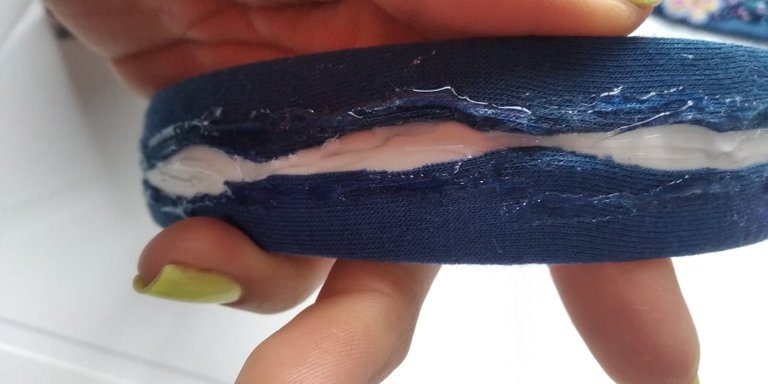
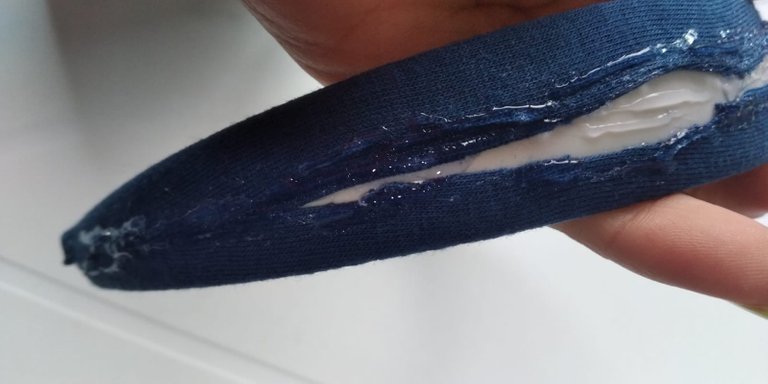
Vamos a pegar nuestra tela en todo lo largo, y haremos una especie de tubito, una vez que este bien pegado, haremos un nudo al medio que será nuestro centro.
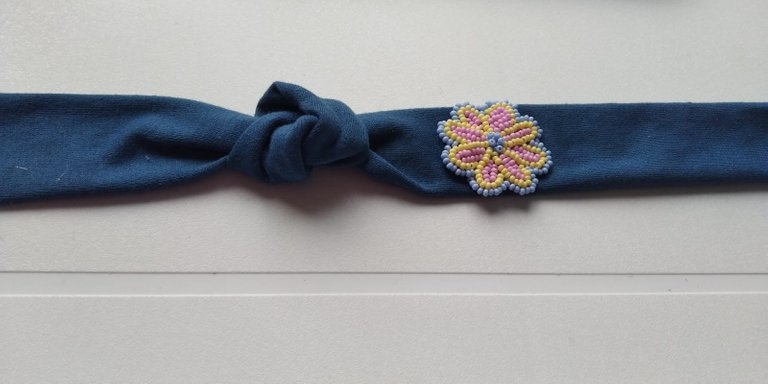
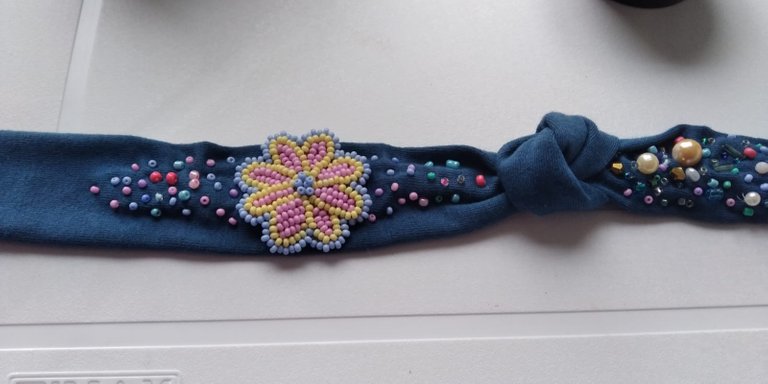
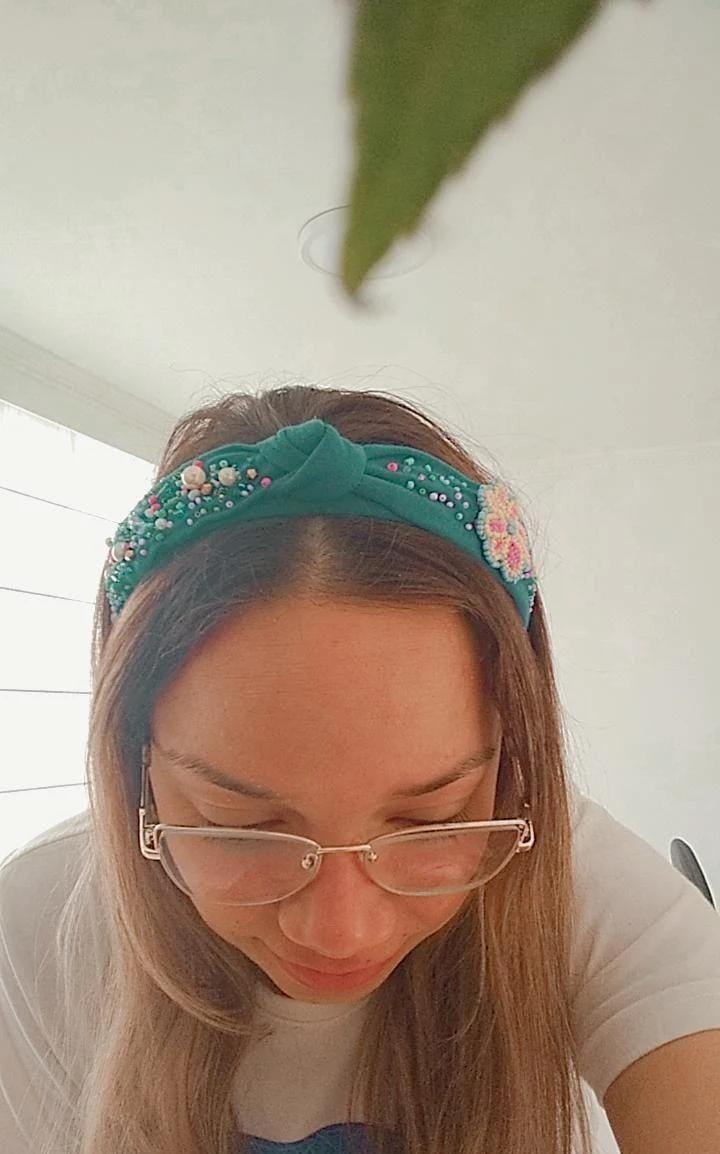
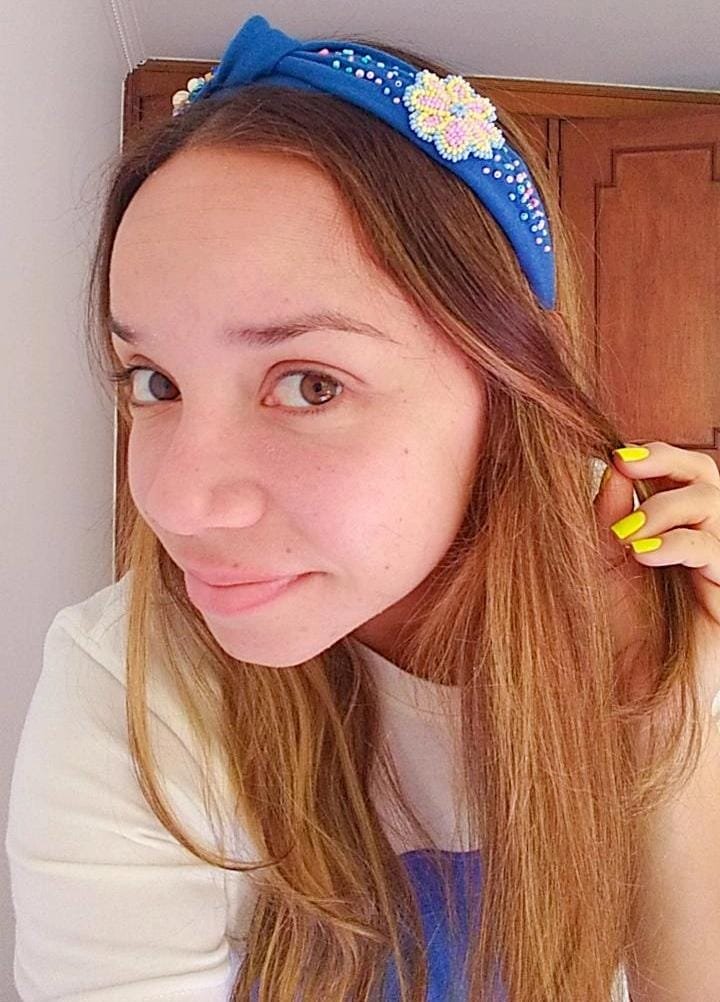
Elige un lugar para colocar la flor bordada, y si no tienes puedes bordar de cada lado de la misma forma, recuerda que es un adorno que ya tenía en casa.
Our first step will be to measure our headband and cut the fabric. Always leaving an extra centimeter long, to prevent any accident.
We are going to glue our fabric along the entire length, and we will make a kind of tube,Once it is well glued, we will make a knot in the middle that will be our center.
Choose a place to place the embroidered flower, and if you cannot embroider on each side in the same way, remember that it is an ornament that you already had at home.
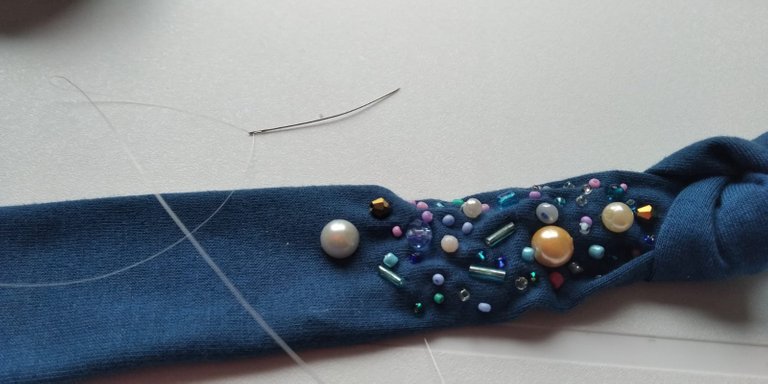
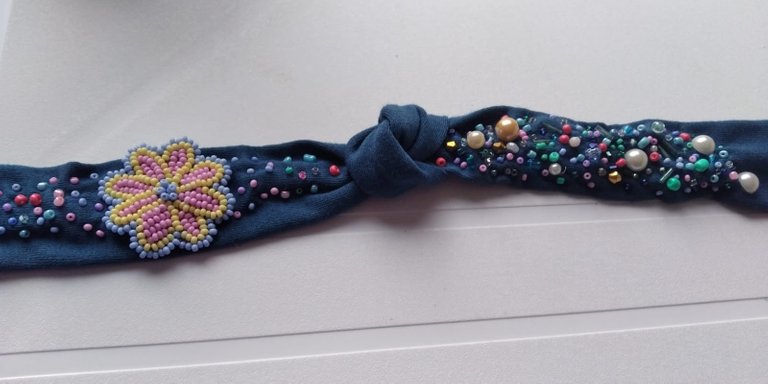
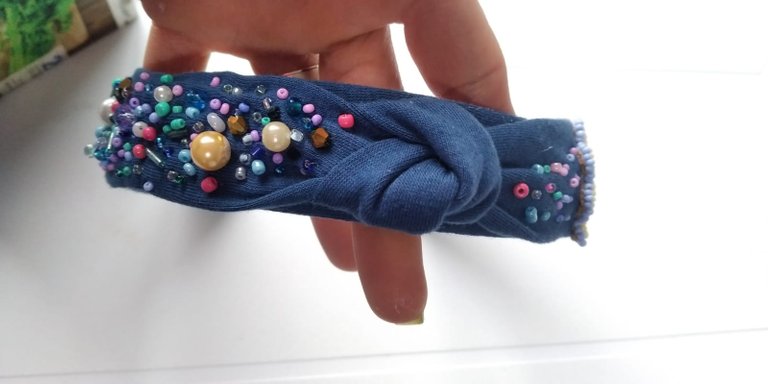
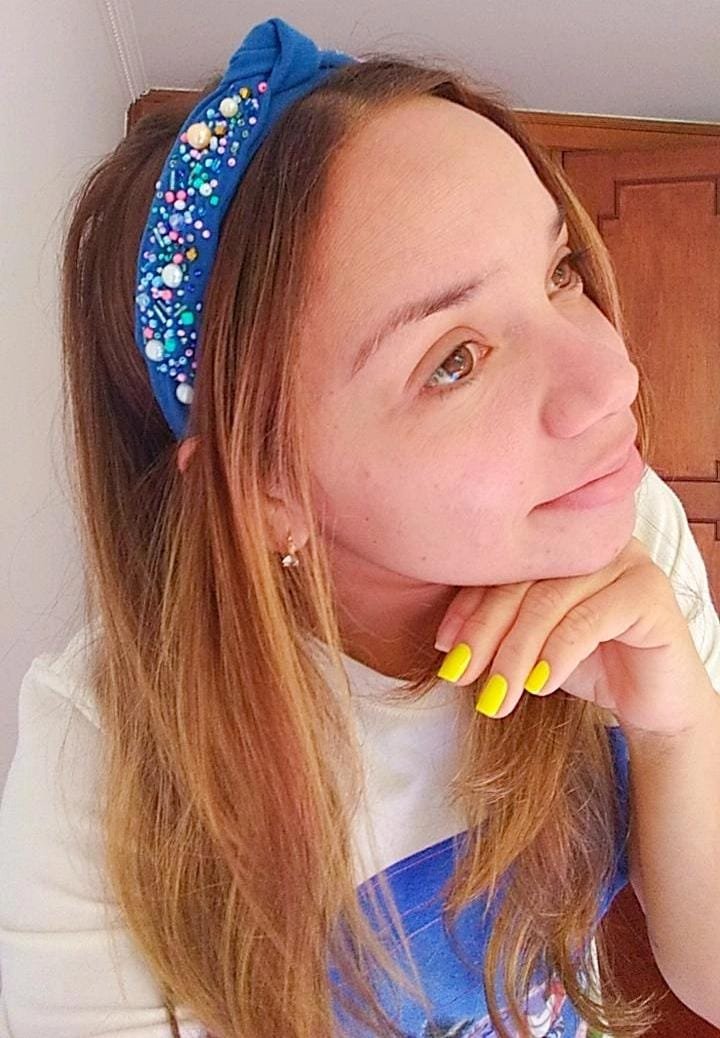
Ya tenemos nuestro cilindro con nuestra flor pegada, entonces vamos a empezar a bordar... Yo comencé por el lado izquierdo, y básicamente mi idea era ponerle canutillos, perlas, lentejuelas y todo lo que tuviese a la mano, Siempre cuidando que los colores combinen y se vean armónicos.
Uso normalmente 50 cm de hilo nailon y una aguja finita para que entren todas las piedritas pequeñas.
We already have our cylinder with our flower attached, then we are going to start embroidering ... I started on the left side, and basically my idea was to put beads, pearls, sequins and everything I had on hand, always taking care that the colors combine and look harmonic.
I normally use 50 cm of nylon thread and a fine needle to fit all the small pebbles.


Para este trabajo hay que tener mucha paciencia, hay que ir colocando cada piedrita una por una, y vamos viendo que quede bien cosido y combinado.
For this work you have to be very patient, you have to place each pebble one by one, and we see that it is well sewn and combined.
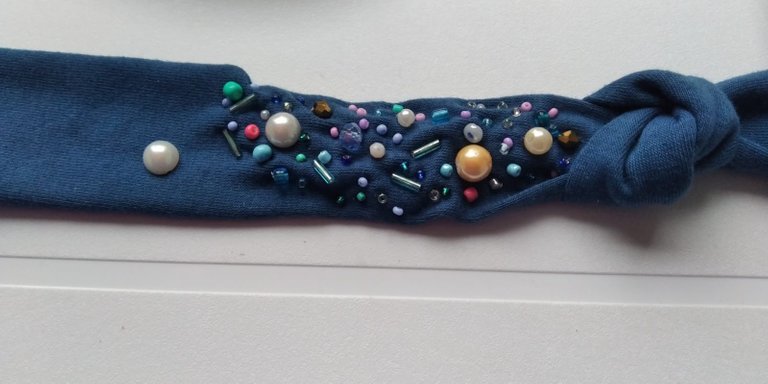
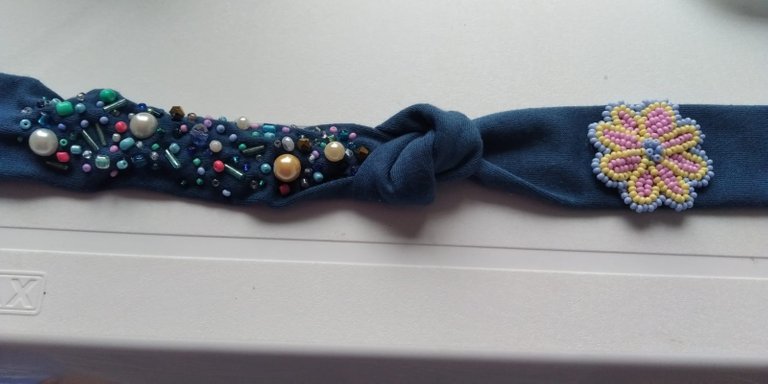
Ya terminé el lado izquierdo, ahora vamos al lado derecho. Aquí bordaremos menos piedritas porque lo más importante es resaltar nuestra flor.
Entonces coloqué puras mostacillas de color mate para darle unos destellitos de luz.
I already finished the left side, now we go to the right side. Here we will embroider less pebbles because the most important thing is to highlight our flower.
So I put in pure matte colored beads to give it a few flashes of light.

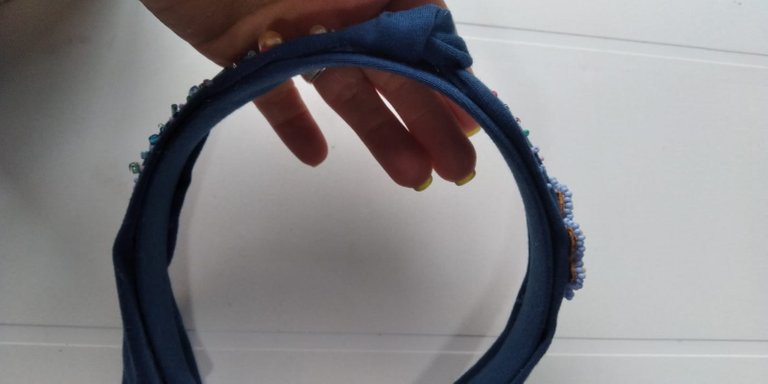
Ya tenemos bordado lado y lado, entonces, vamos a cortar otro trozo de tela para forrar la parte de abajo de nuestro cintillo.
La medida aproximada para este cintillo es de 36 cm x 6cm.
Vamos a pegarlo de abajo hacía arriba.
We already have side and side embroidery, so we are going to cut another piece of fabric to line the bottom of our headband.
The approximate measurement for this headband is 36 cm x 6cm.
We are going to stick it from the bottom up.
Ahora vamos a colocar bastante pega sobre la tela y sobre el medio de nuestro cintillo, en la parte superior.
Entonces ahora pegamos nuestro cillindro que ya esta bordado y listo.
Now we are going to place a lot of glue on the fabric and on the middle of our headband, at the top.
So now we glue our cylinder that is already embroidered and that's it.
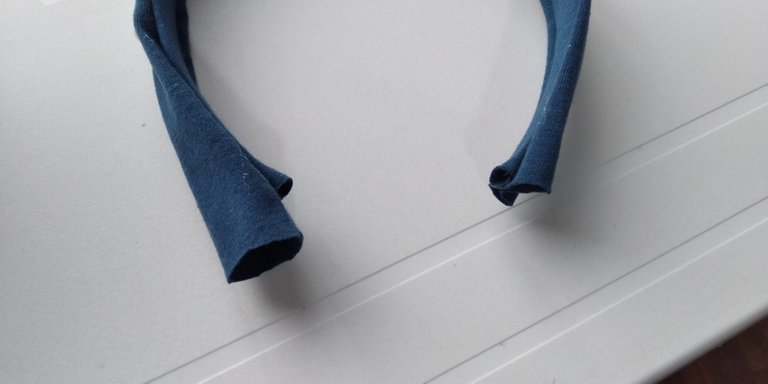
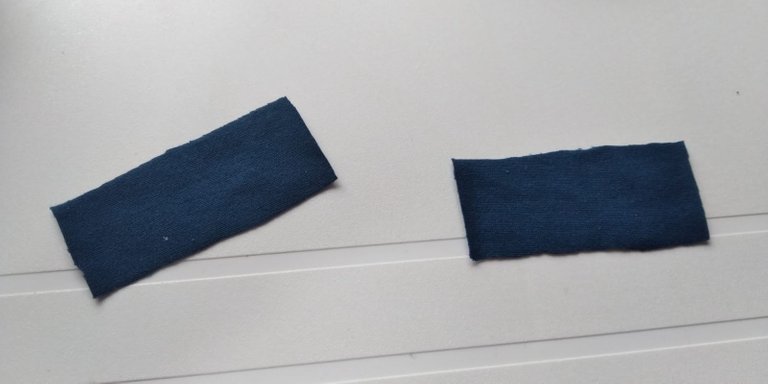
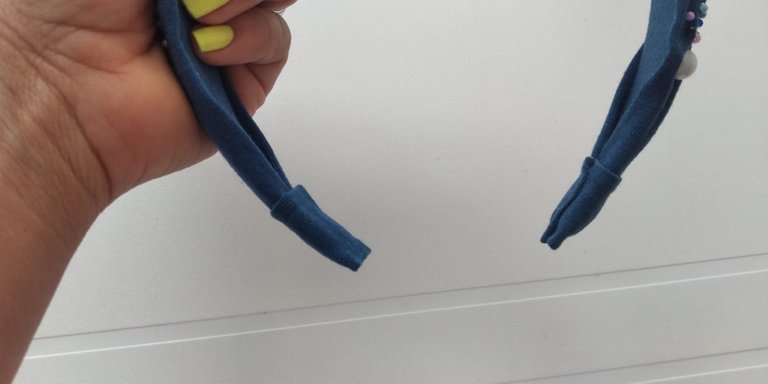
Vamos a rematar las puntas para que queden bien fijas y además con un acabado presentable.
Vamos a cortar unos pedacitos de tela de 4 cm x 6 cm. Y vamos a forrar y pegarlo al final de nuestra diadema.
You are almost done!
We are going to finish off the tips so that they are well fixed and also with a presentable finish.
We are going to cut some 4 cm x 6 cm pieces of fabric. And we are going to line and glue it to the end of our headband.

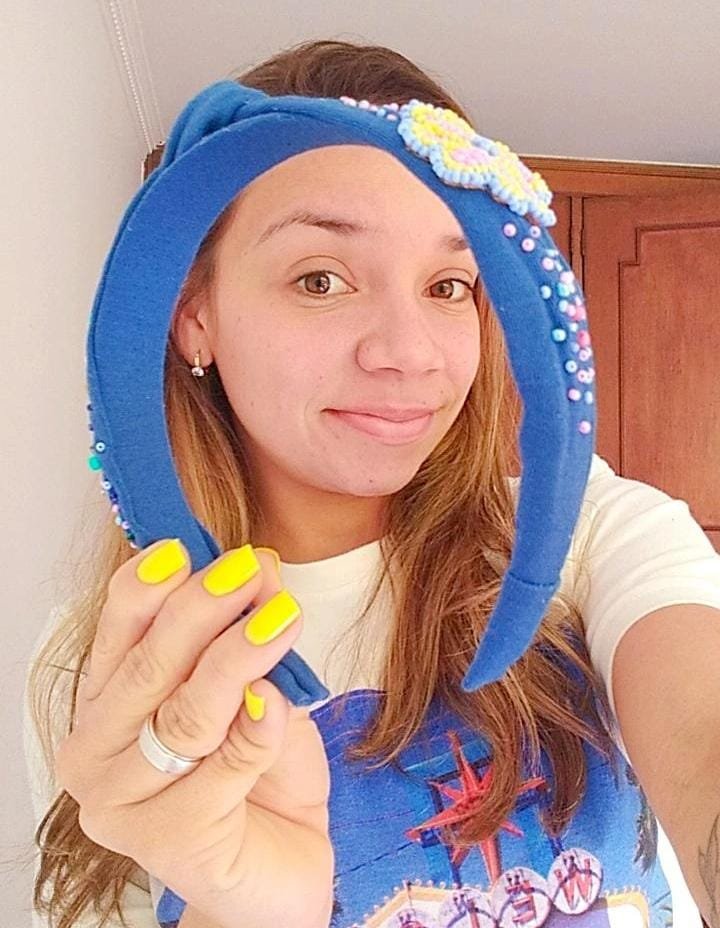
¡Listooooo! ... no es por nada, pero quedó muy lindo.
Readyoooo! ... not for nothing, but it was very nice.
Gracias por leer mi post, espero te guste muchísimo esta idea y la hagas en casa. Es muy fácil crear cosas en materiales que ya tenemos en el hogar.
Lo importante es darle riendas a al creatividad
Todas las fotos fueron tomadas por mi, con mi celular Xiaomi 7A.
Thanks for reading my post, I hope you like this idea very much and do it at home. It is very easy to create things out of materials that we already have at home.
The important thing is to give reins to creativity
All the photos were taken by me, with my Xiaomi 7A cell phone.
Congratulations @soyaruska! You have completed the following achievement on the Hive blockchain and have been rewarded with new badge(s) :
Your next target is to reach 7000 upvotes.
You can view your badges on your board and compare yourself to others in the Ranking
If you no longer want to receive notifications, reply to this comment with the word
STOPThanks :)
You're welcome @soyaruska 😊🌹
Hermosa y muy coqueta!!! Excelente idea, crearla modo cintillo, pues amarrarlas detras de la cabeza a veces es algo molesto, pues quedan gruesas.
Totalmente cierto, es práctico y fácil de usar. La idea de diseñar es crear cosas que sean cómodas. Mil gracias por el apoyo.
Excelente, muy hermoso.
Gracias, BEY :)
Bellísimo!
Mil gracias :)
The rewards earned on this comment will go directly to the person sharing the post on Twitter as long as they are registered with @poshtoken. Sign up at https://hiveposh.com.
Que hermosoooo
Graciiiias, linda :)
Hermoso!
Graciiias
Muchas gracias por el apoyo 🙂