Hello everyone! I hope you are well, very well dear community of Hive Diy. My name is Stefania, I am delighted, because today I share my first post in this wonderful community, which I love, because I have always liked to do crafts and things on my own, putting all my creativity, love and details in what I do, I feel it is a great way to distract, doing something useful, interesting and very nice.
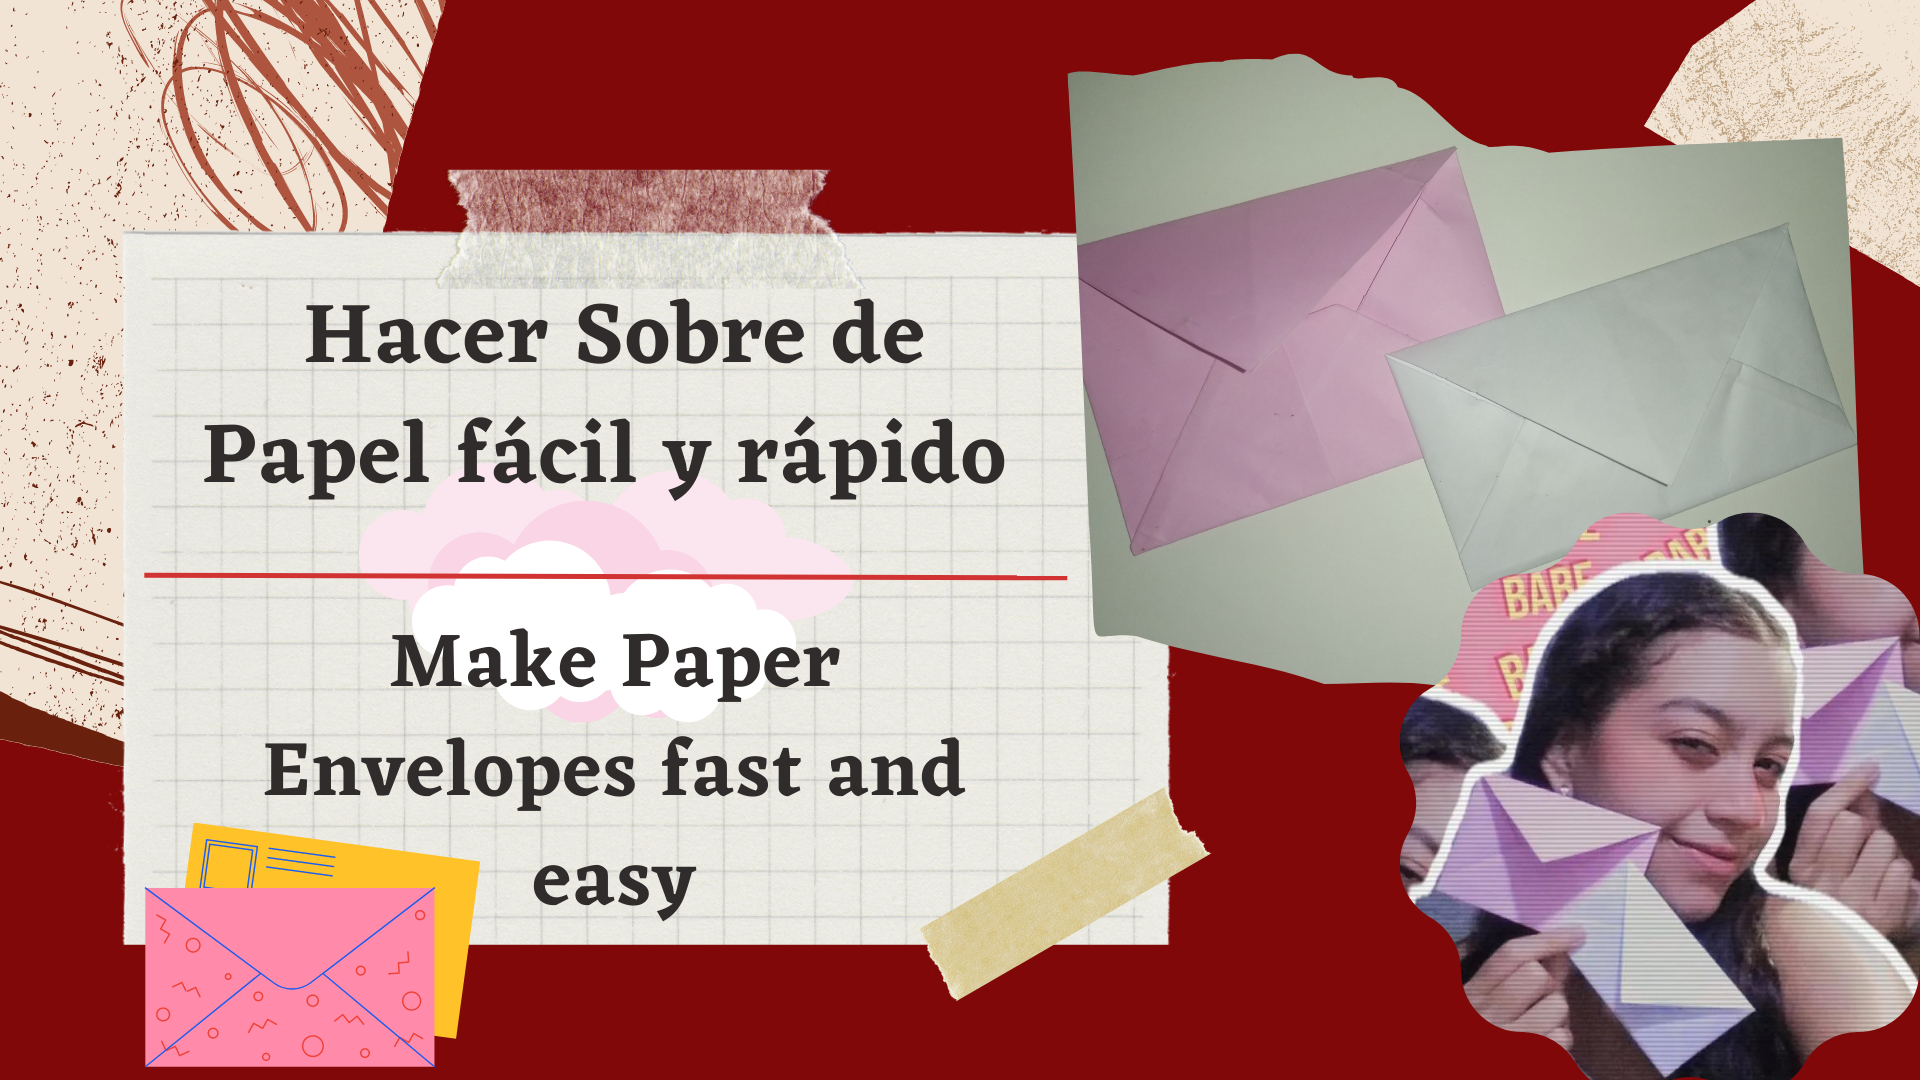
En está ocasión les traigo, se podría decir, "el tutorial" de algo muy básico y sencillo de hacer, para esas personas que quieren dar un regalo con una carta, o los que aún hacen cartas, cosa que no se debería dejar de hacer, pienso que una carta es una manera muy bonita de expresar tus sentimientos mediante a palabras, es un detalle muy único, y nunca pasan de moda, se les puede dar, a un amigo, una amiga, un novio, un familiar, entre otros. Yo podría decir que nunca me canso de ellas, soy de las personas que se conforman con poco, porque para mí una carta es un detalle único, si me regalan una carta, en mi cumpleaños o alguna festividad, mientras sea con cariño, amor y sinceridad, soy muy feliz. Las cartas son presentes para guardar y recordar, tengo unas cuantas guardadas, de amistades y familia.
This time I bring you, you could say, "the tutorial" of something very basic and simple to do, for those people who want to give a gift with a letter, or those who still make letters, which should not stop doing, I think a letter is a very nice way to express your feelings through words, is a very unique detail, and never go out of fashion, you can give them to a friend, a friend, a boyfriend, a family member, among others. I could say that I never get tired of them, I am one of those people who are satisfied with little, because for me a letter is a unique detail, if I get a letter, on my birthday or any holiday, as long as it is with affection, love and sincerity, I am very happy. Letters are presents to keep and remember, I have a few saved, from friends and family.
En fin para el momento en el que querramos hacer una carta, entregarlo en un sobre es esencial, queda muy bonito y lo representa bien, así se cuida de ensuciarse u arrugarse, este también se puede decorar al gusto de uno. Y pues ahora sin más preámbulo, vamos con el paso a paso sencillo y muy fácil.
Finally for the moment we want to make a letter, to deliver it in an envelope is essential, it looks very nice and represents it well, so it takes care of getting dirty or wrinkled, this can also be decorated to one's taste. And so now without further ado, let's go with the simple and easy step by step.
Solo necesitaremos materiales muy sencillos y fáciles de conseguir:
We will only need very simple and easy to obtain materials:
- Una hoja o cartulina como prefieran
- Pega.
- A sheet of paper or cardboard as you prefer
- Glue.
Paso 1:
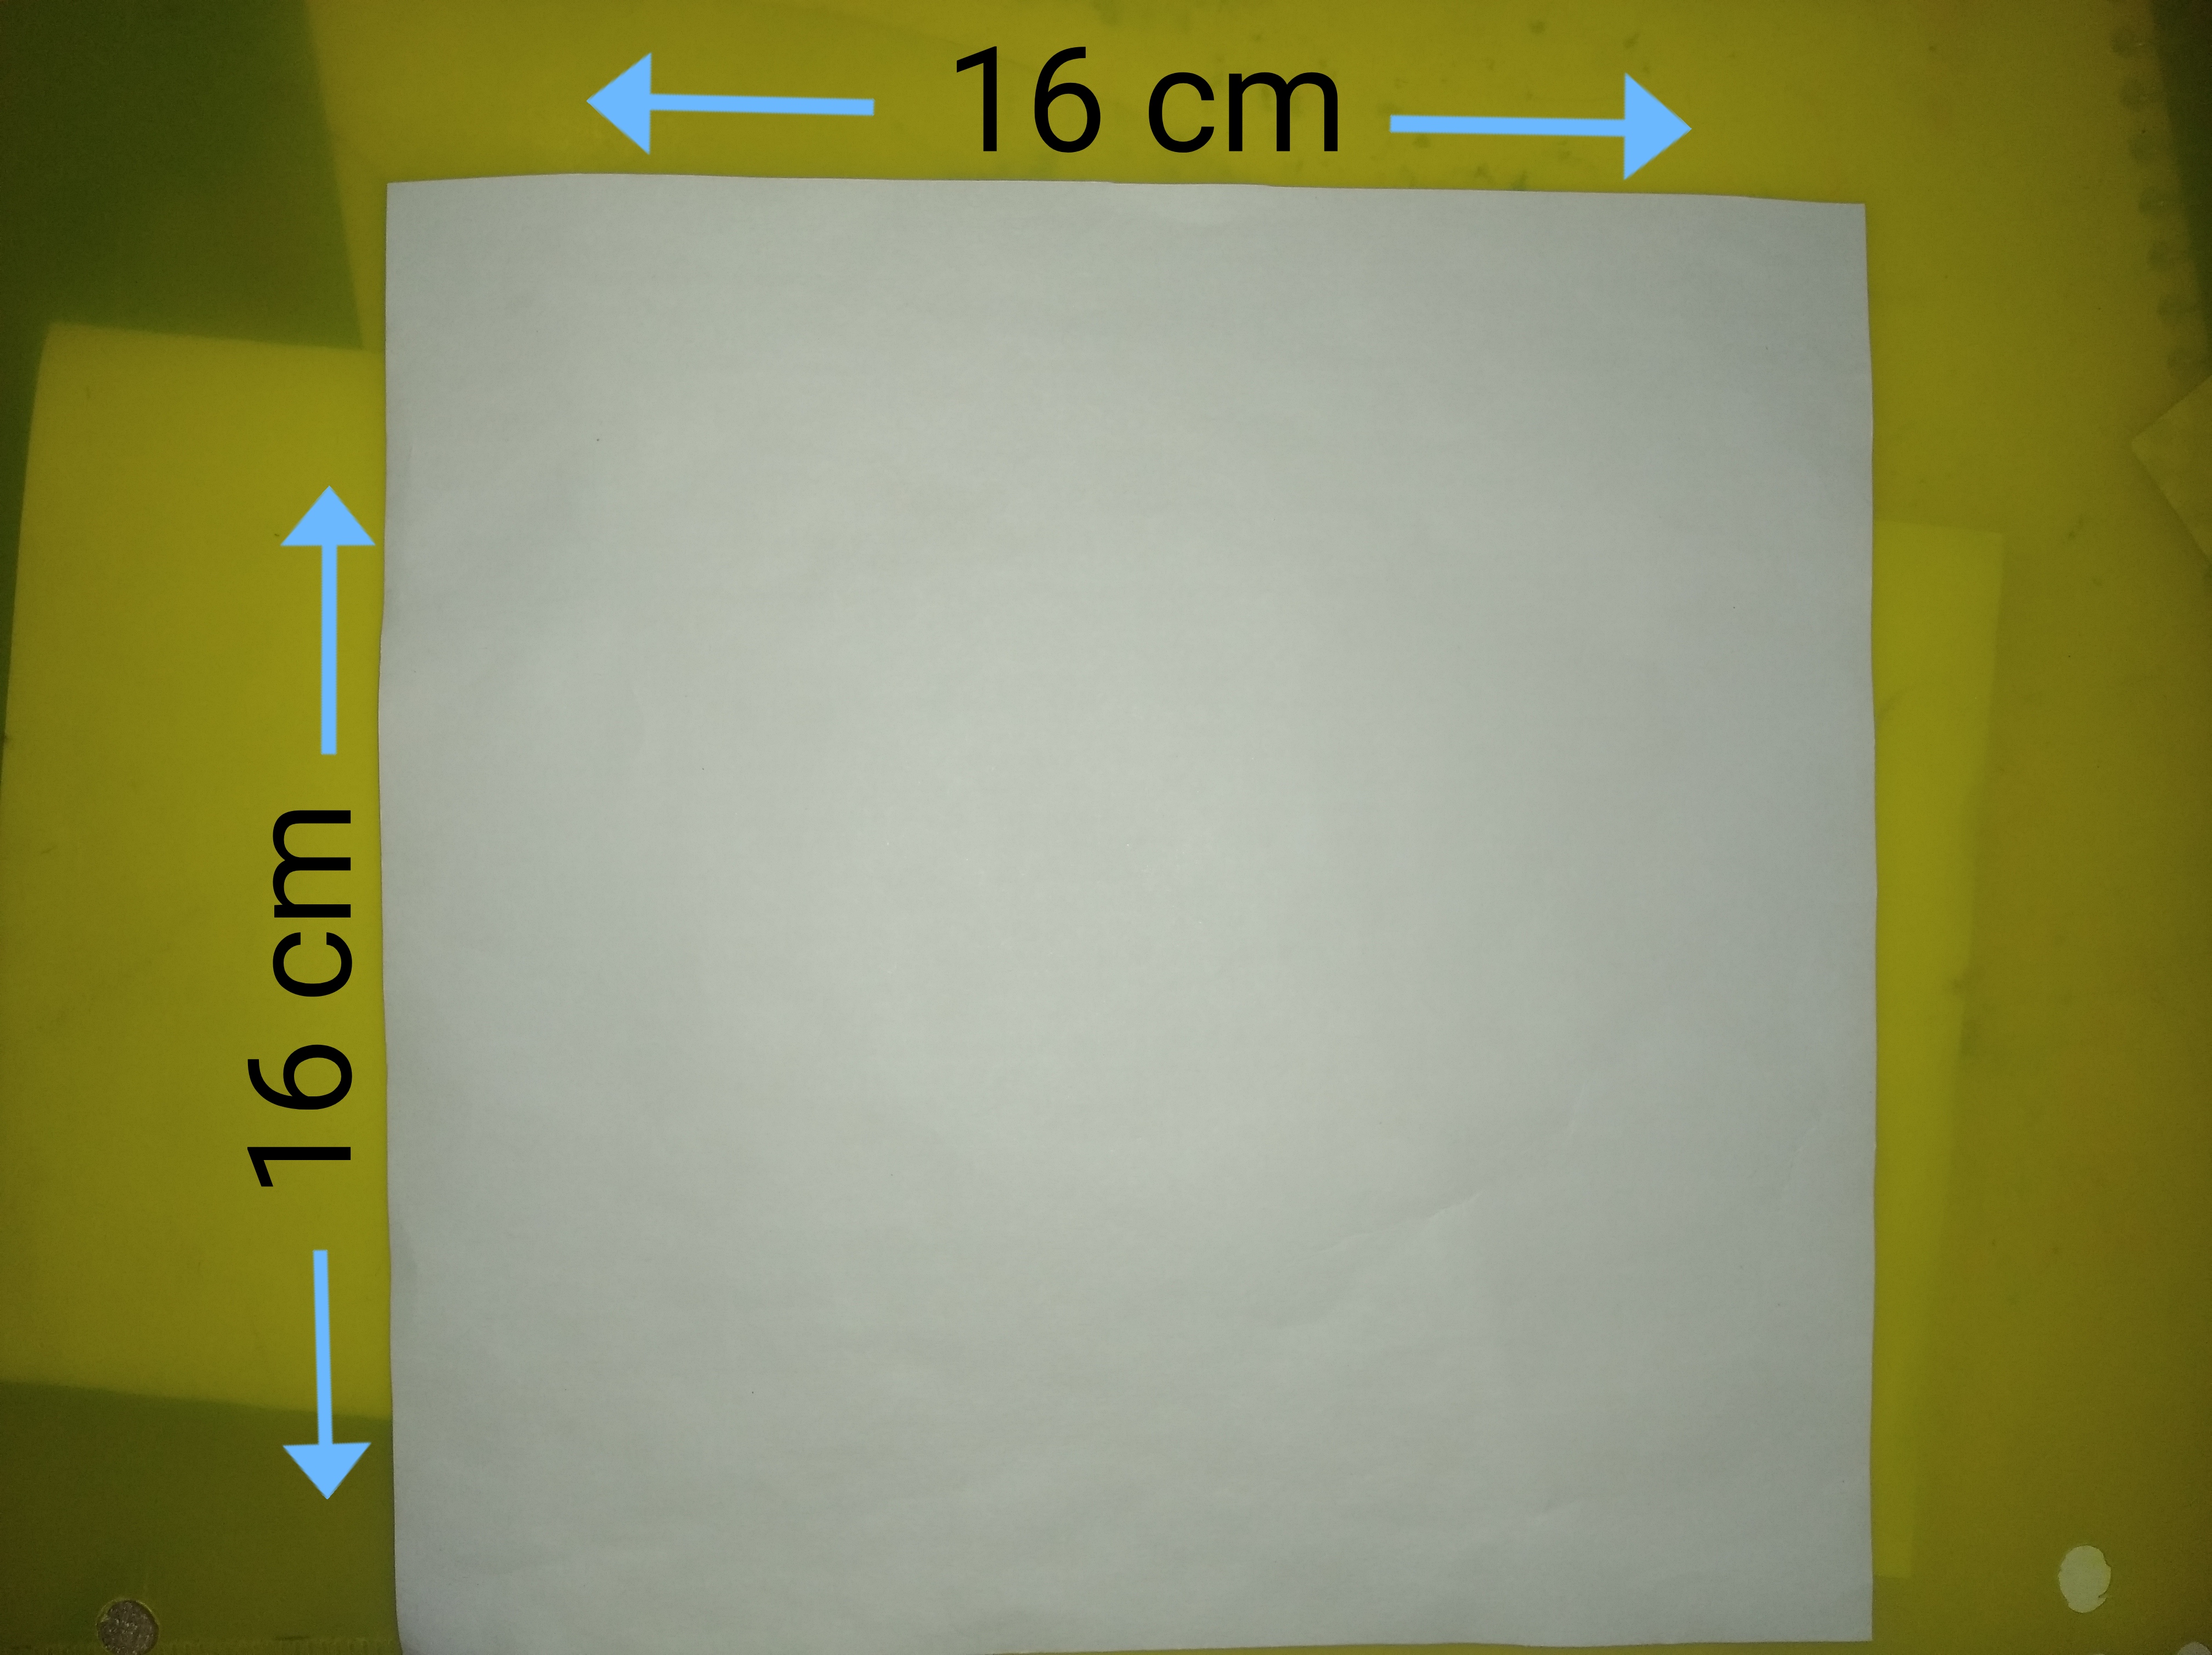
Primeramente de la hoja/cartulina vamos a recortar un cuadrado que mida lo mismo de ancho, por lo mismo de largo, el que yo hice es para uno mediano, este cuadrado es de 16 cm de ancho, por 16 cm de largo (16x16).
Step 1:
First of all, we are going to cut out a square that measures the same width, by the same length, the one I made is for a medium one, this square is 16 cm wide, by 16 cm long (16x16).
Paso 2:
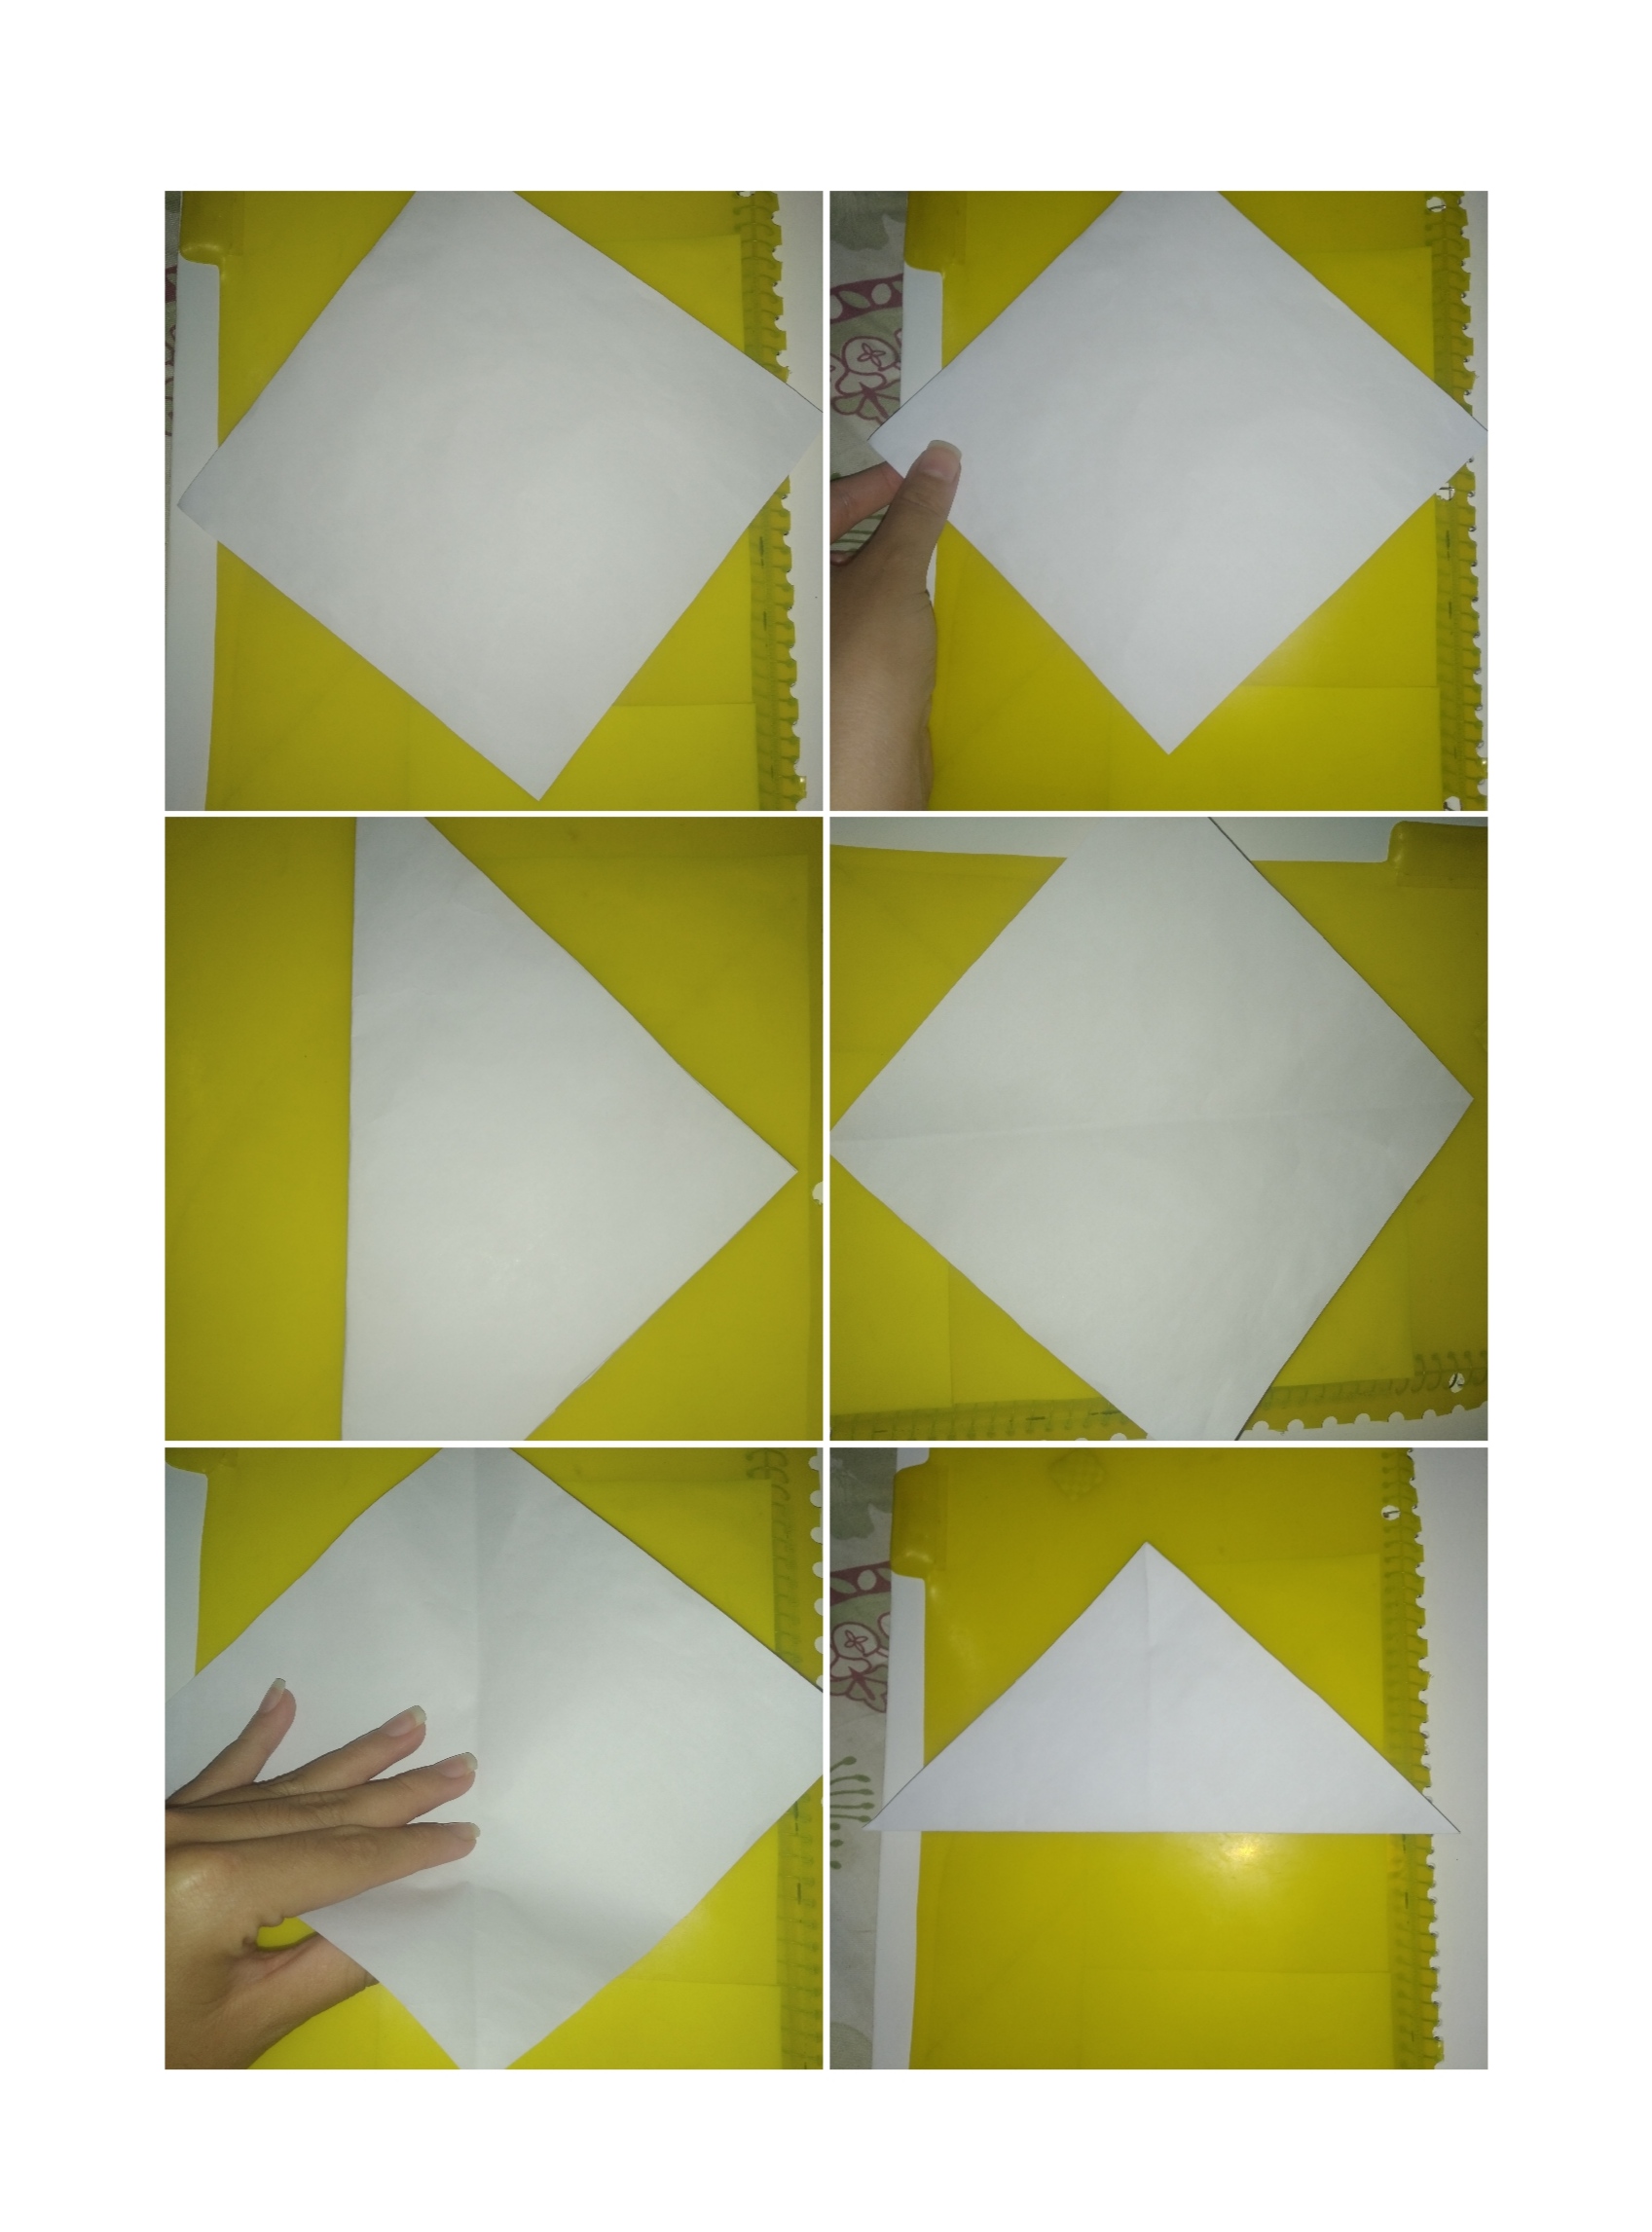
Cómo segundo paso, vamos a voltear nuestro cuadrado, de manera que quede una punta apuntando hacía nosotros (tipo, diamante), luego tomaremos una punta de un extremo y la llevaremos directamente, hacía el otro extremo y haremos presión, marcando, después hacemos lo mismo con la punta que está frente a nosotros, de la misma manera, haciendo que la hoja tenga estás marcas diagonales, como se muestra en el collage.
Step 2:
As a second step, we are going to turn our square, so that one point is pointing towards us (type, diamond), then we will take a point from one end and take it directly to the other end and make pressure, marking, then we do the same with the point that is in front of us, in the same way, making the sheet has these diagonal marks, as shown in the collage.
Paso 3:
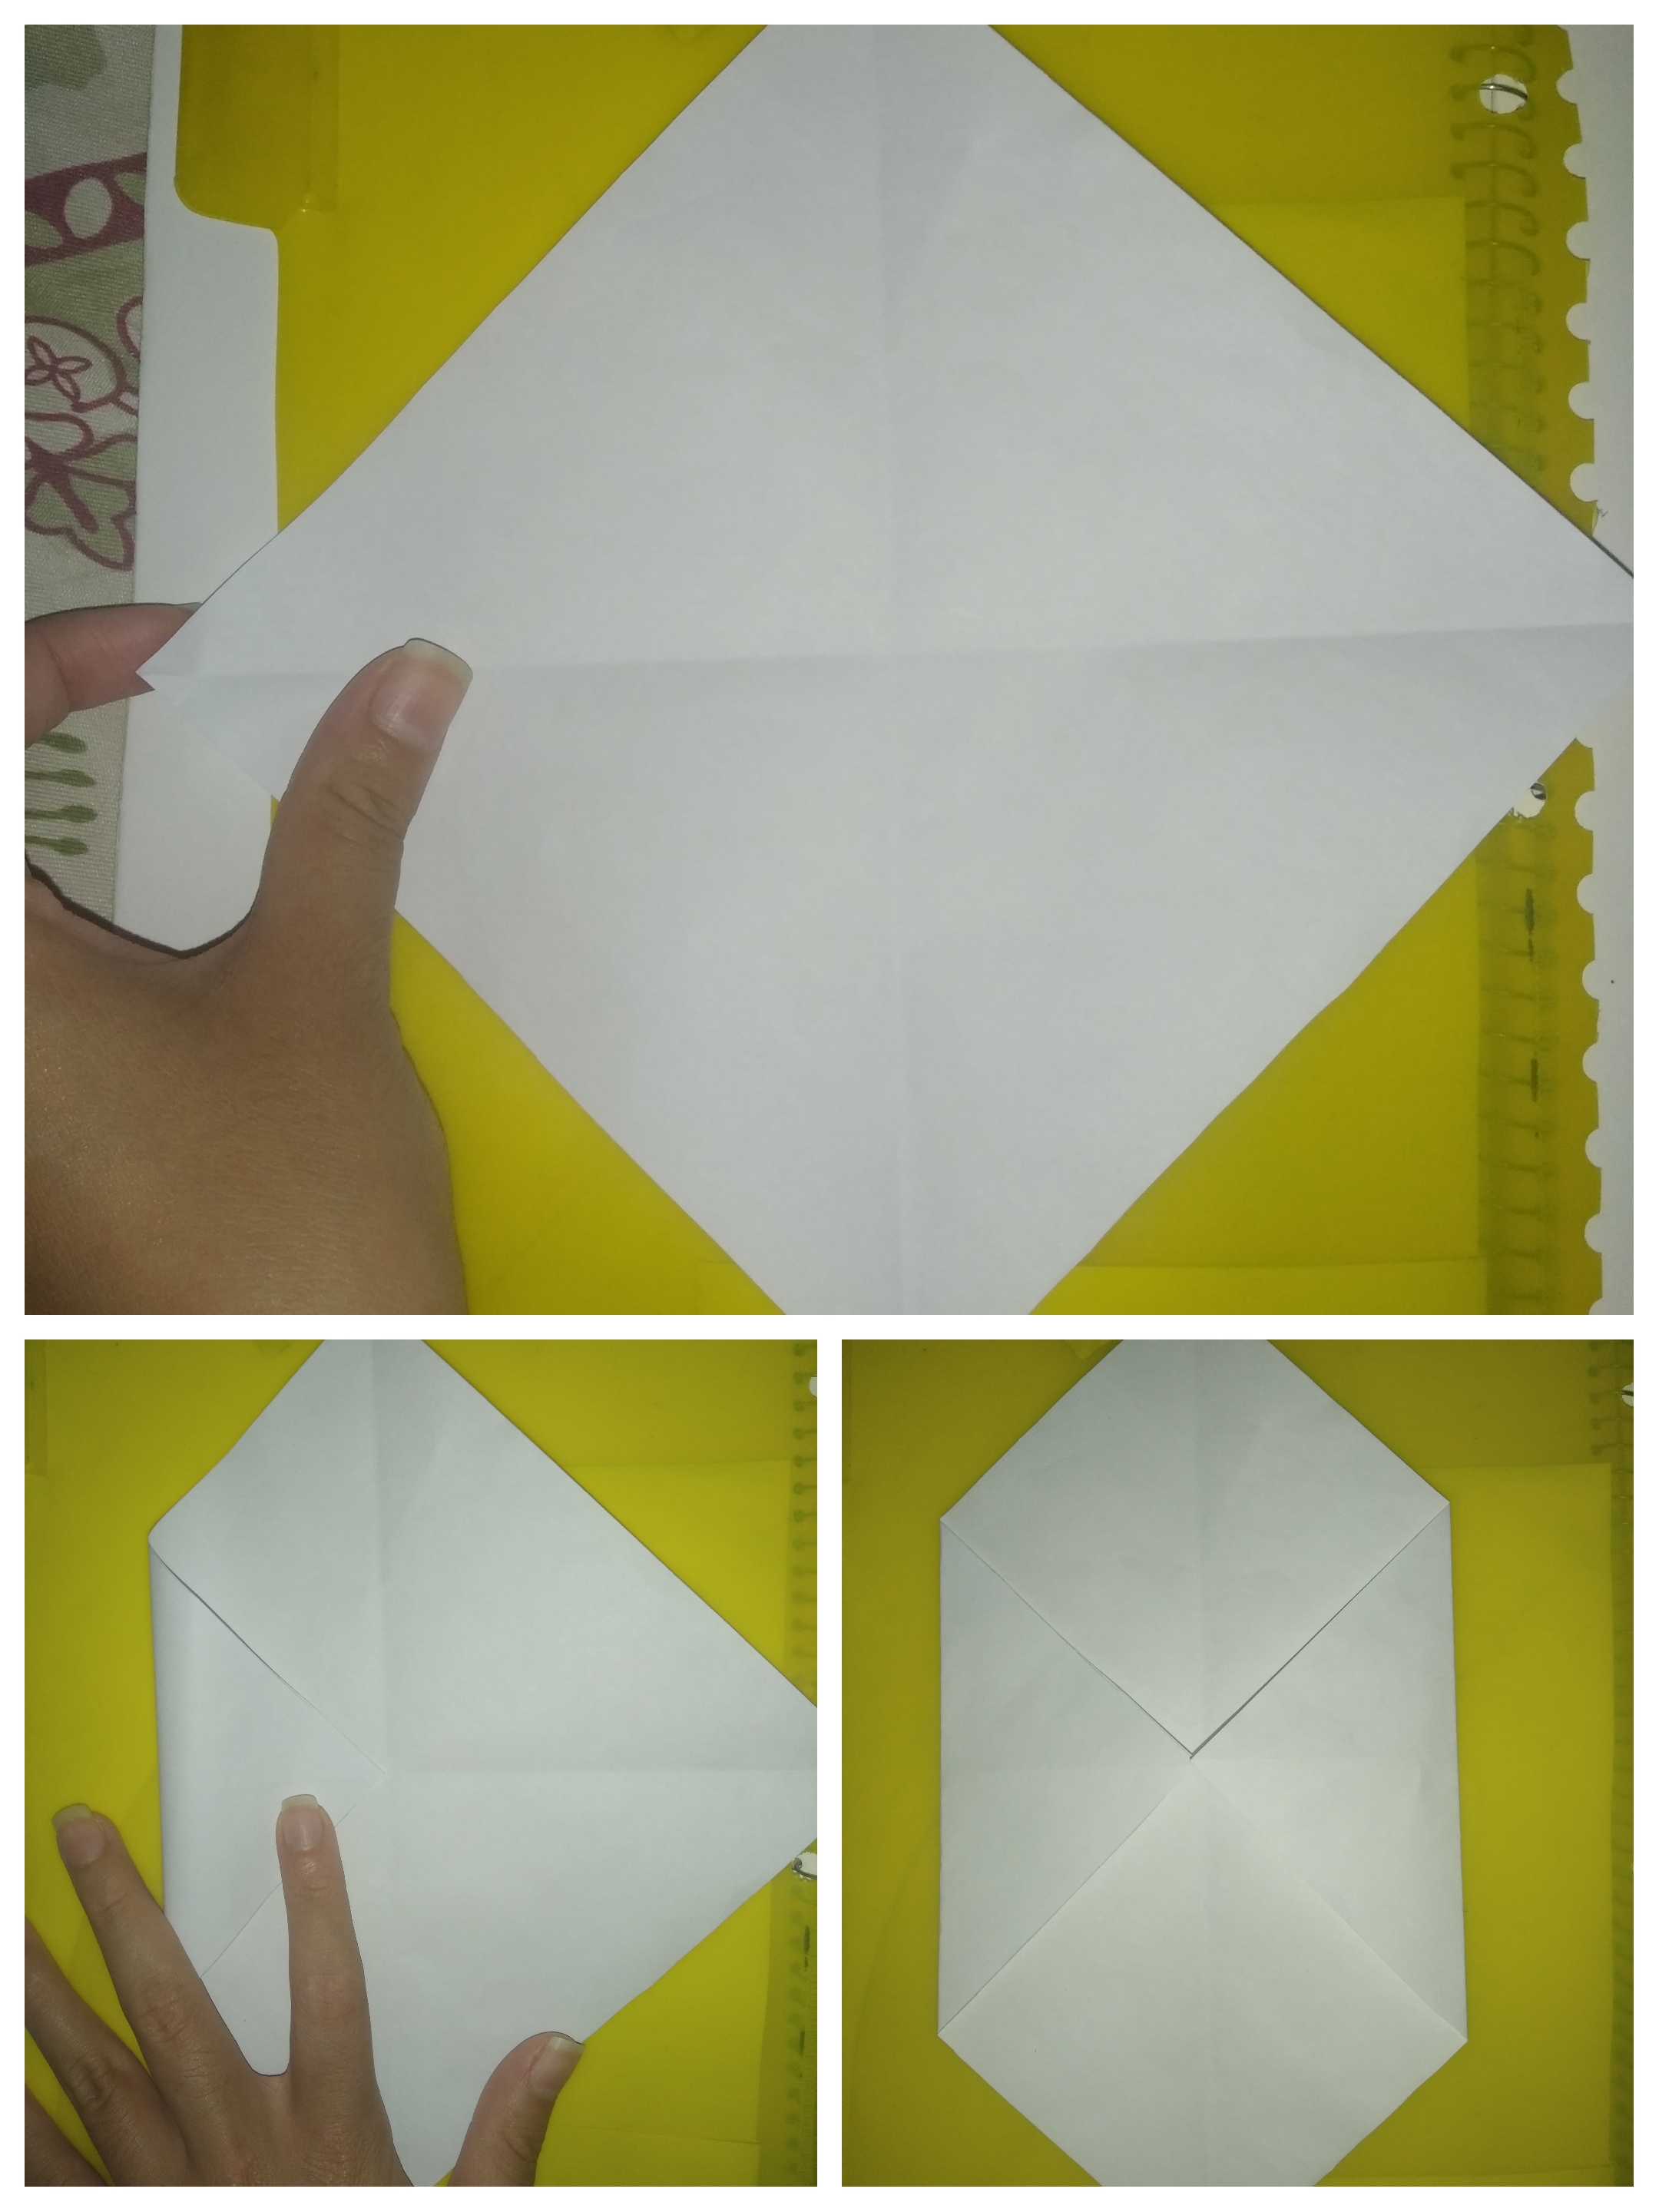
Ahora tomaremos las puntas de los lados, agarramos la primera, y la llevaremos, justo al Medio y hacemos el dobles, haremos lo mismo con la restante, ambas llevándolas al centro.
Step 3:.
Now we will take the ends of the sides, we will take the first one, and we will take it, right to the middle and we will do the doubles, we will do the same with the remaining one, both taking them to the center.
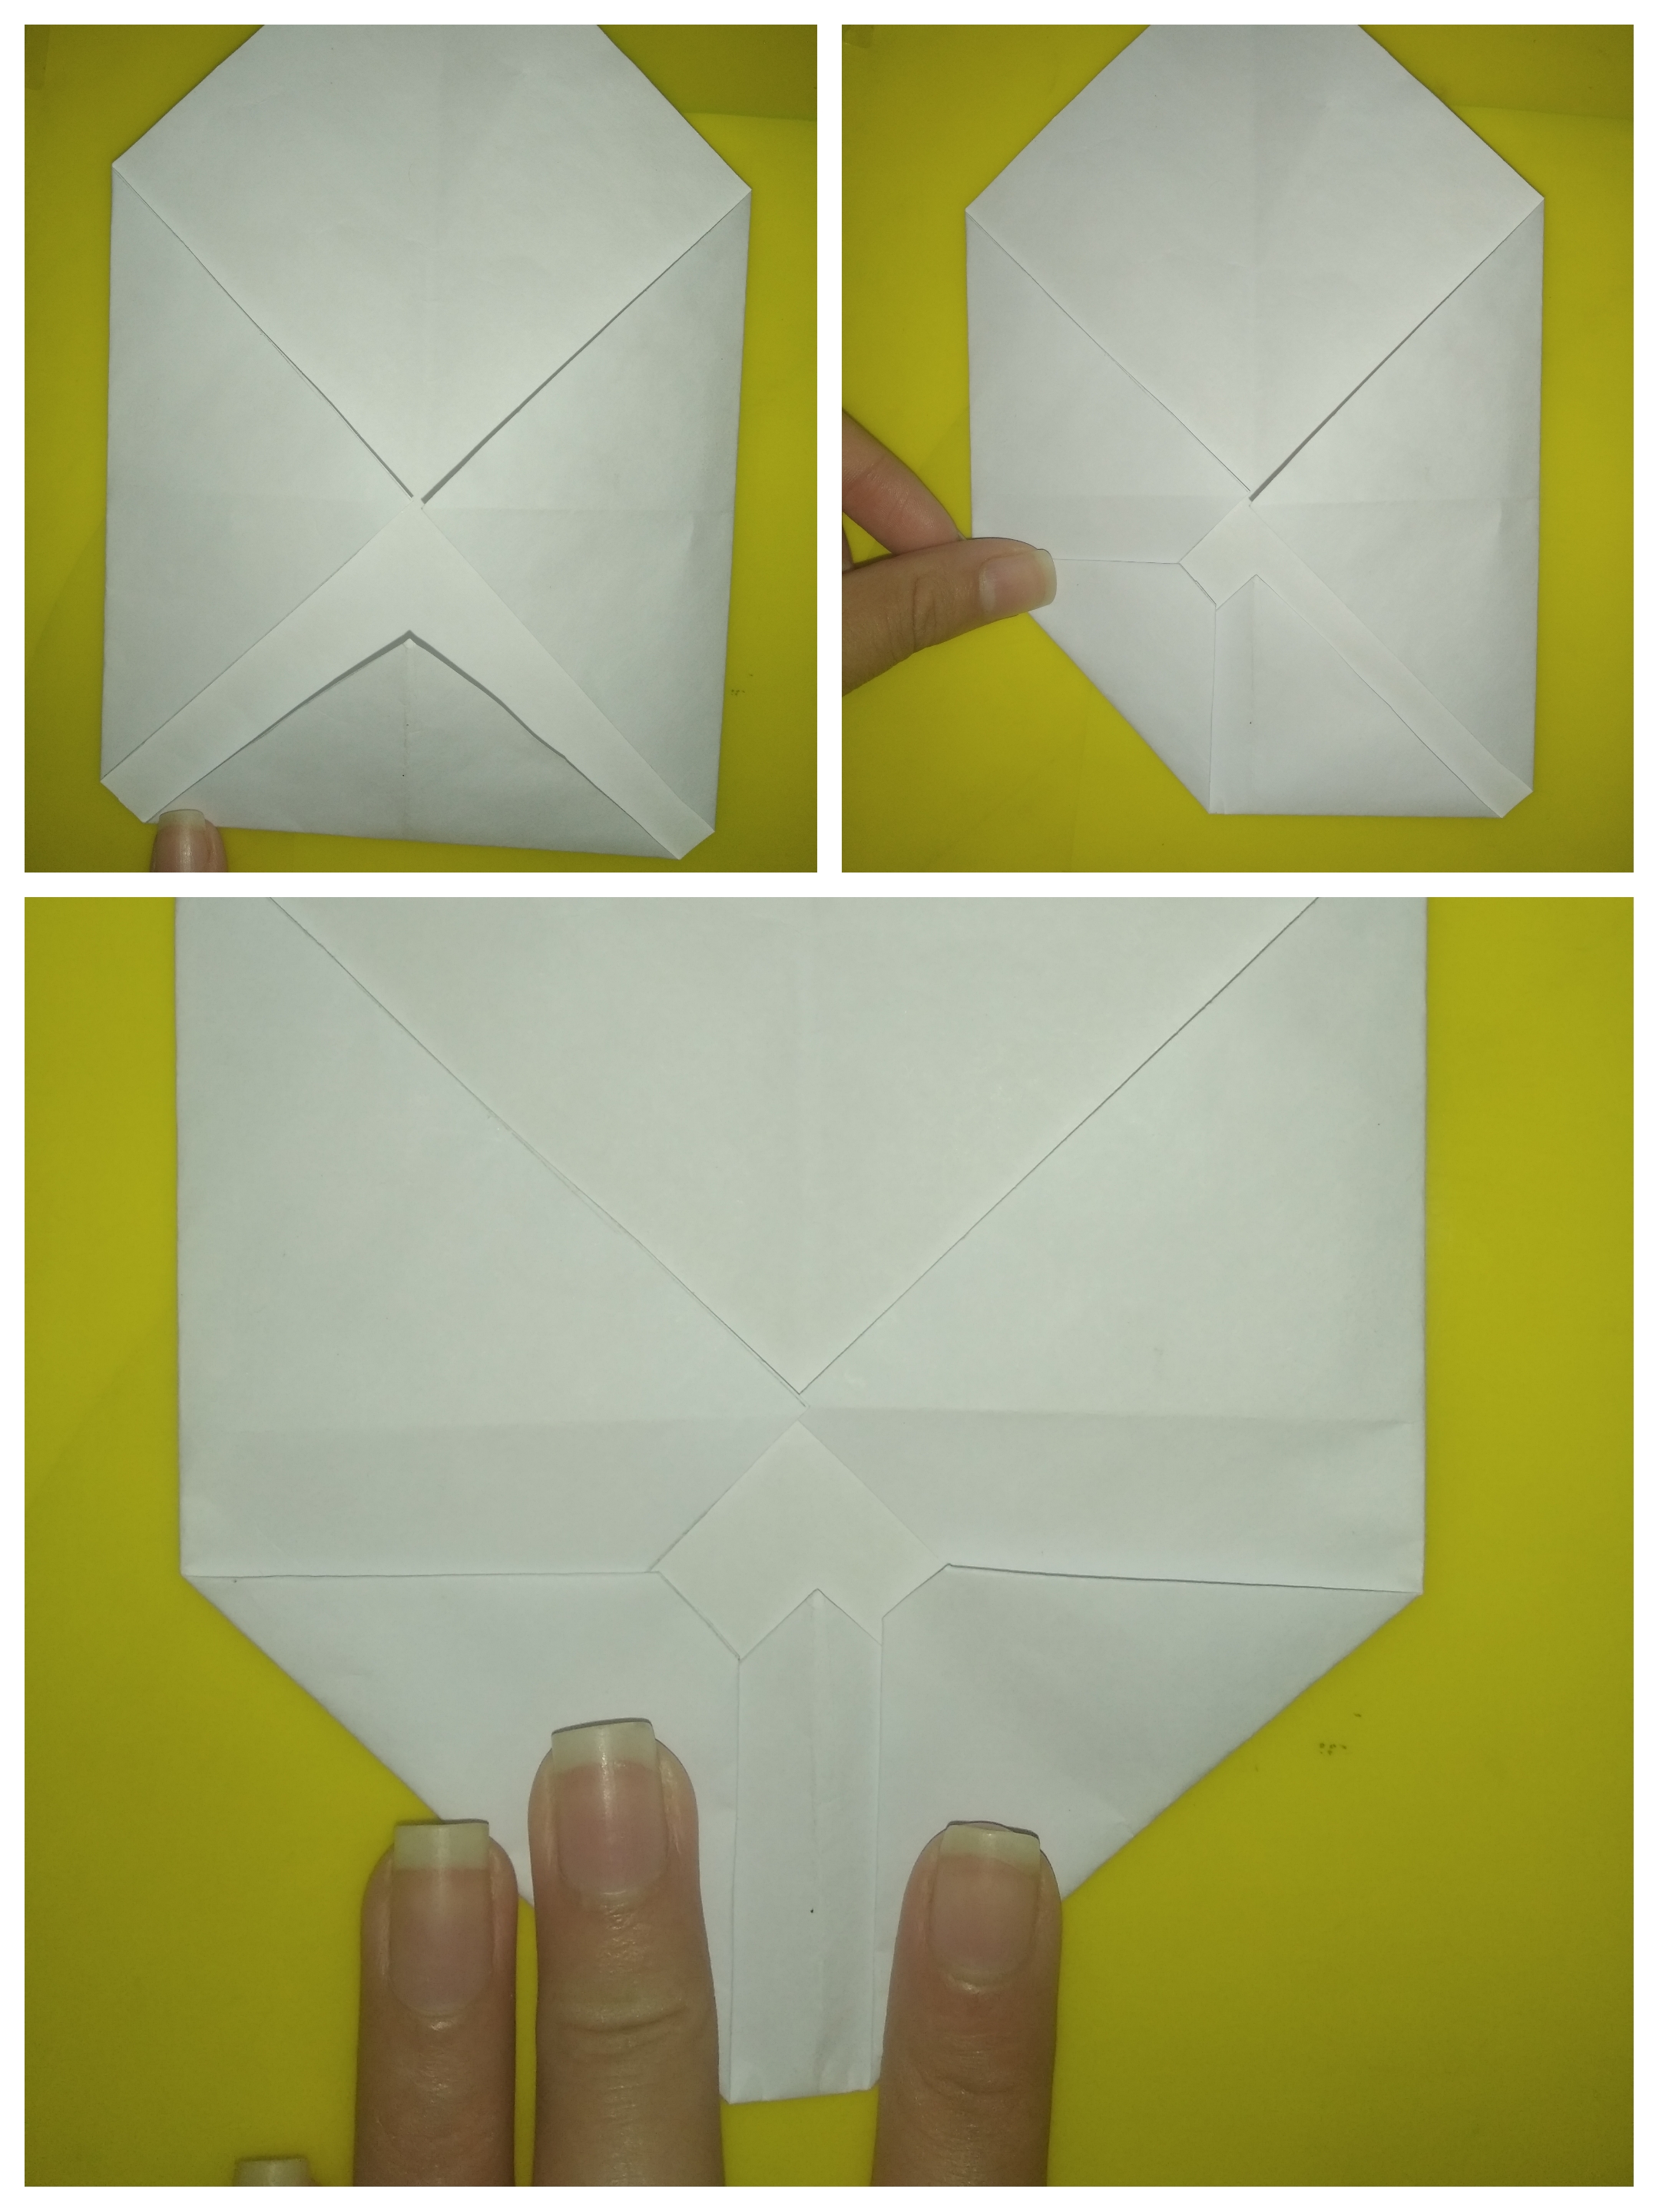
Paso 4:
Cómo siguiente paso, doblaremos la esquina de abajo que apunta hacía nosotros, tipo al Medio guiandonos de la línea, pero dejando aproximadamente una línea de un centímetro (1 cm), después doblaremos las esquinas que nos quedan en esa parte cuadrada, llevandolas cerca del centro, dejando separación, así con ambas, como pueden apreciar en la imagen.
Step 4:
As a next step, we will fold the bottom corner that points towards us, kind of in the middle of the line, but leaving approximately a line of one centimeter (1 cm), then we will fold the corners that we have left in that square part, taking them near the center, leaving separation, and so with both, as you can see in the picture.
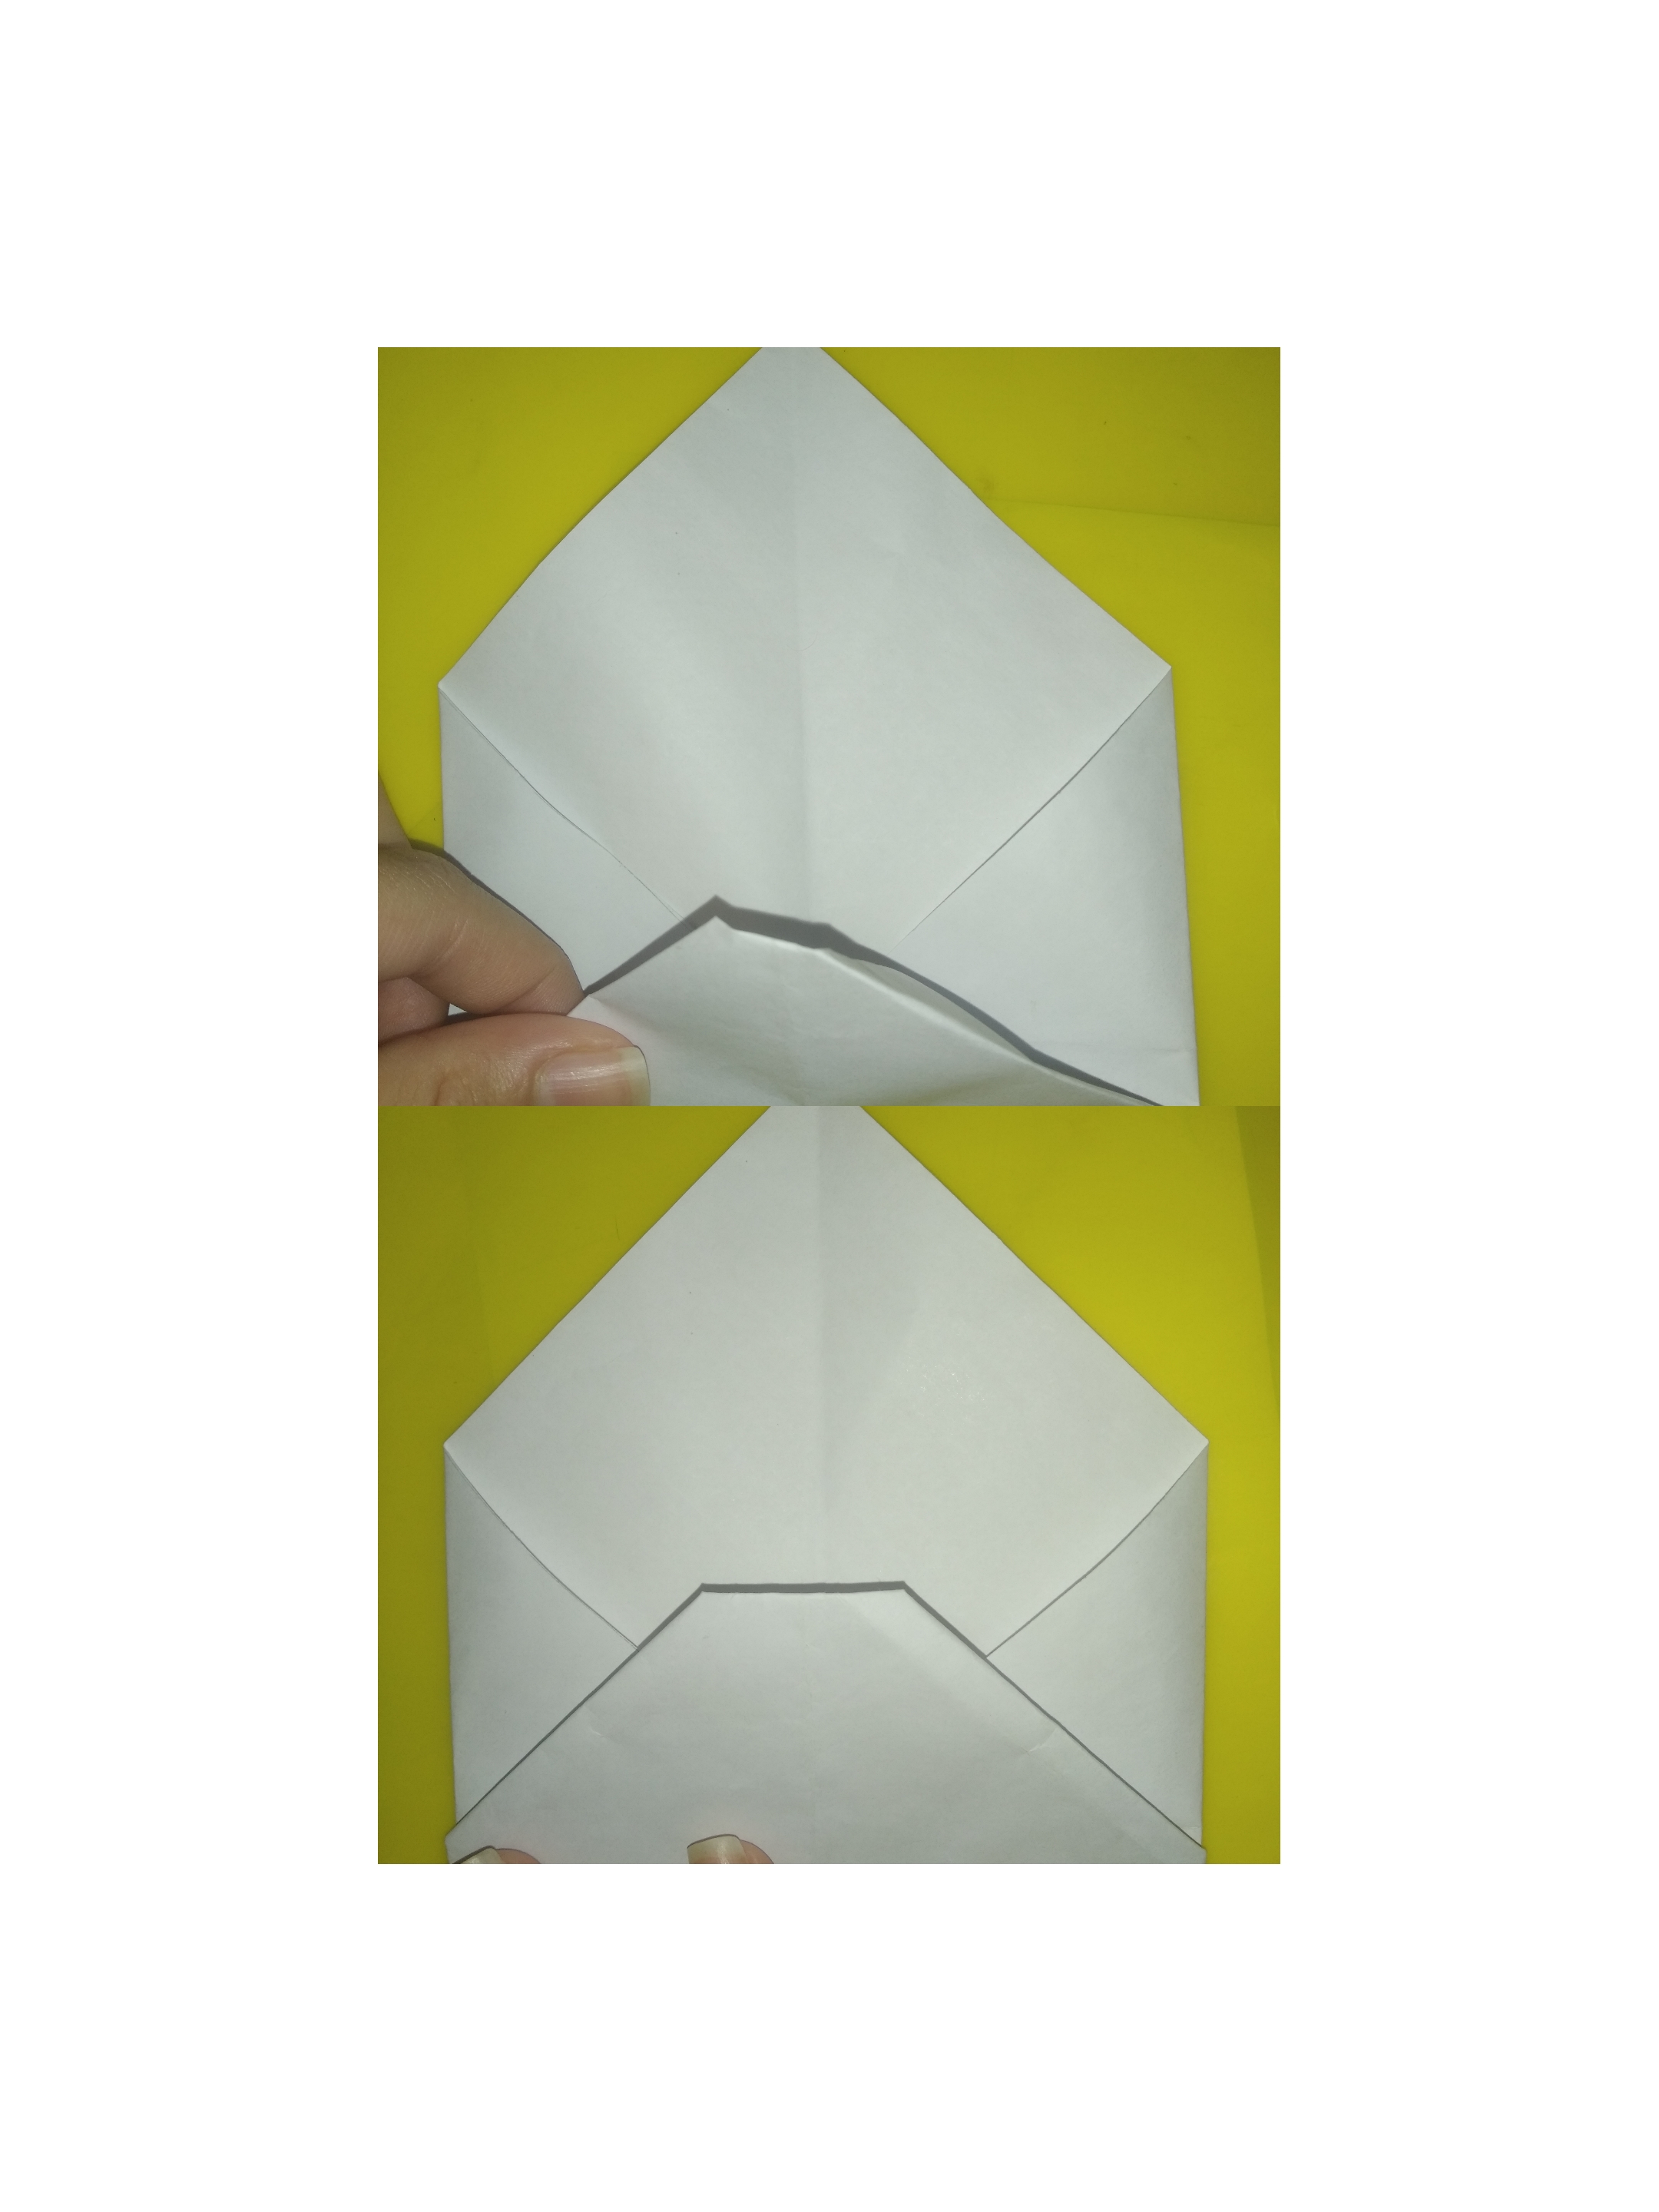
Paso 5:
Luego llevamos la parte de abajo, hacía arriba, de la manera que se muestra en la imagen nuevamente.
Step 5:
Then we bring the bottom part upwards, as shown in the image again.
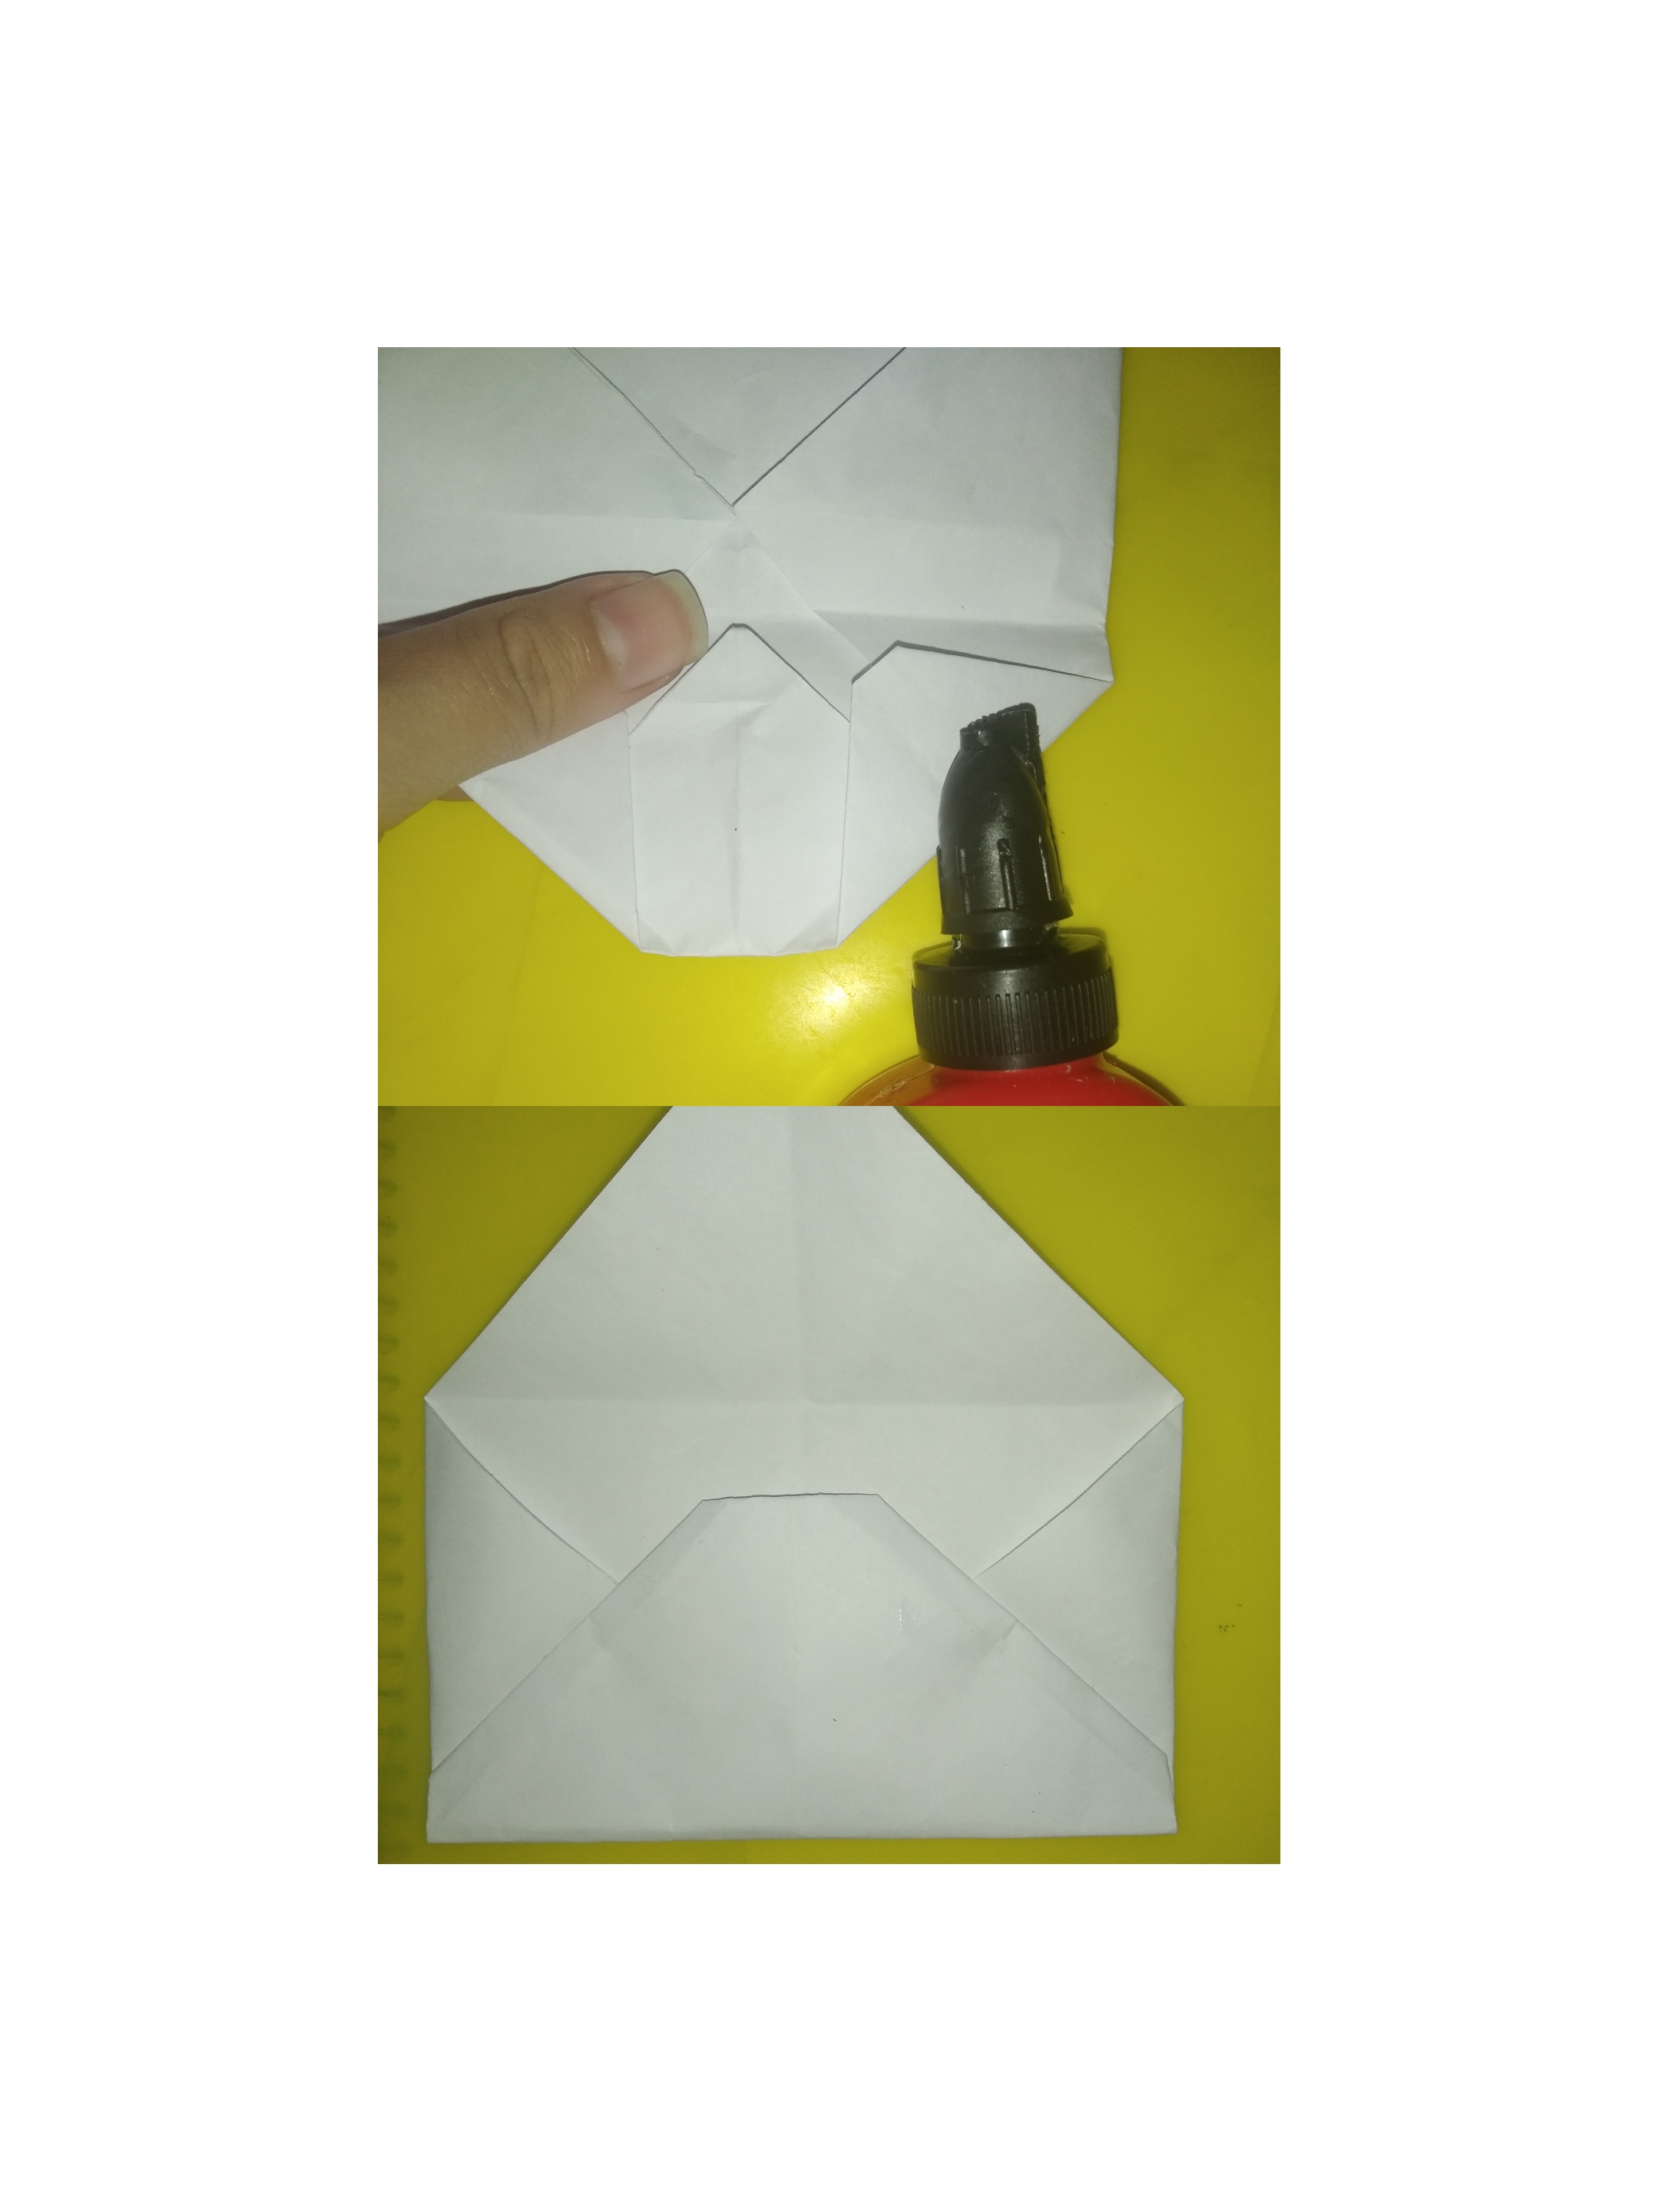
Paso 6:
Por último solo nos queda agregar un poco, solo un poco de pega, en está, porsupuesto sin pegar hacia la parte de adentro porque ahí irá nuestra carta, solo pegaremos hasta donde lo permita, respetando el espacio.
*Step 6:
Finally we just need to add a little, just a little glue, in this one, of course without gluing to the inside because that is where our letter will go, we will only glue as far as it allows, respecting the space.
Con este último paso ¡ya estaría listo! Solo nos queda agregar nuestra carta y sellarla, puede ser con teipe, cinta o pega también.
With this last step we are ready! We only have to add our letter and seal it, it can be with tape, ribbon or glue as well.
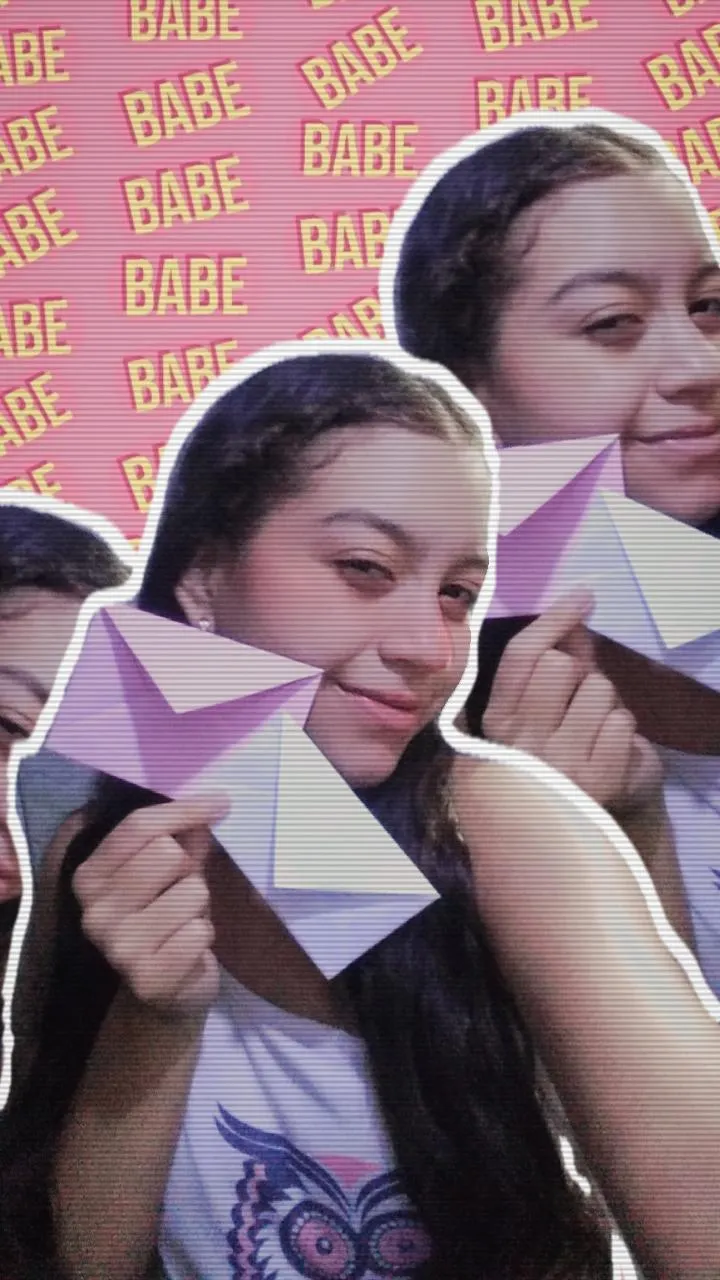
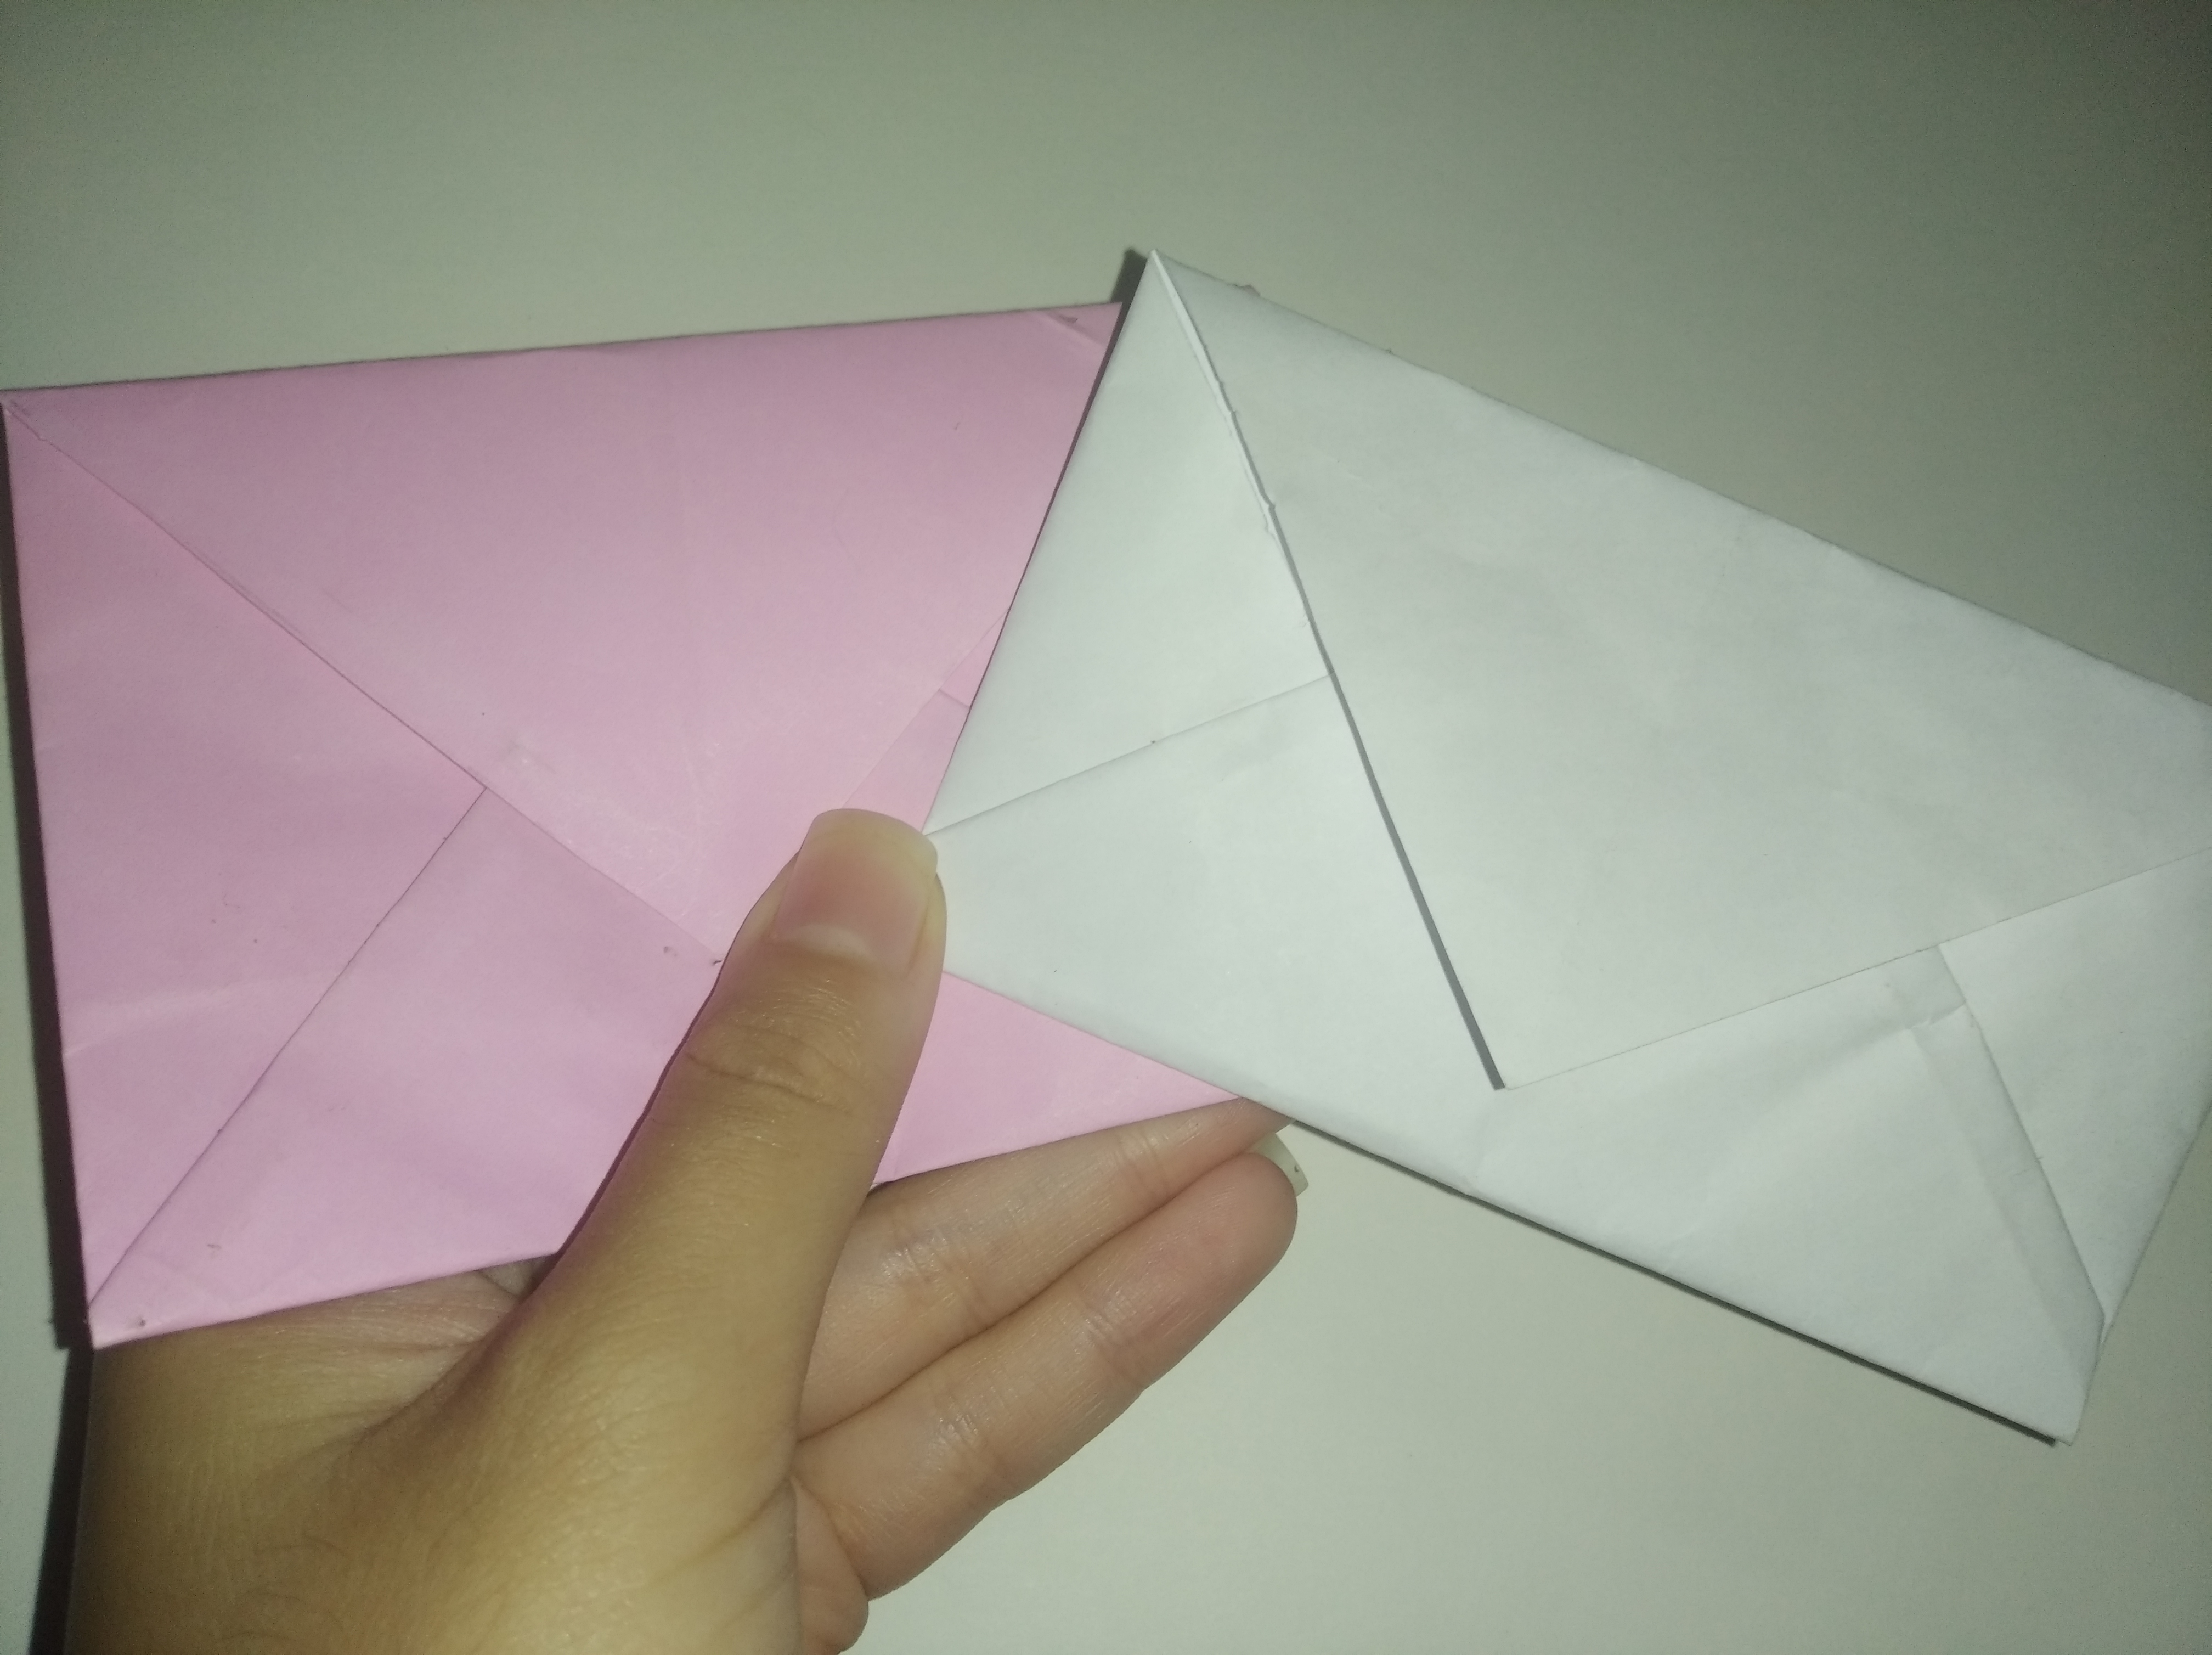
Cómo pueden ver en esta imagen, hice una con papel normal y otra con cartulina, las dos me gustaron.
As you can see in this image, I made one with regular paper and the other with cardboard, both of which I liked.
Este sería todo el paso a paso, espero les haya gustado y lo realicen, es muy fácil y útil.
This would be the whole step by step, I hope you liked it and make it, it is very easy and useful.
¡Graciasss por leer una vez más, hasta la próxima, me despido, besos!.
Thank you for reading once again, until next time, I say goodbye, kisses.
Your content has been voted as a part of Encouragement program. Keep up the good work!
Use Ecency daily to boost your growth on platform!
Support Ecency
Vote for new Proposal
Delegate HP and earn more
Wow, amazing! I'm really glad.
I will take everything into consideration thank you. 💗✨
Congratulations @stefania16! You have completed the following achievement on the Hive blockchain and have been rewarded with new badge(s):
Your next target is to reach 1000 upvotes.
You can view your badges on your board and compare yourself to others in the Ranking
If you no longer want to receive notifications, reply to this comment with the word
STOPCheck out the last post from @hivebuzz:
Support the HiveBuzz project. Vote for our proposal!
Fácil y rápido...tienes razón 👍🏼🙂😃🤗😉😊
Gracias por compartir tu técnica
💐🌸🏵️🥀🌷🌺🌹👏🏼🌼💜🍁🍄👍🏼
Así es, gracias a usted por apreciar el post, saludos. 💗✨