✨🐔🥚¡Hola amigos amantes de la creatividad! Espero que hayan pasado un muy buen comienzo de semana.🥚🐔✨
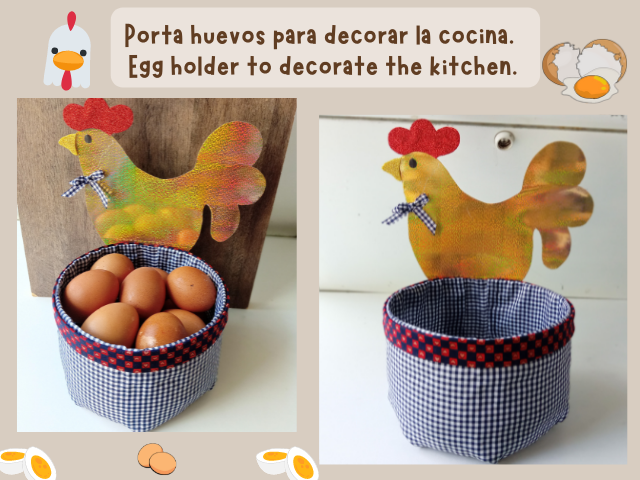
Siempre me han gustado las decoraciones para la cocina, es por eso que hoy les comparto un lindo organizador para huevos o porta huevos. Es muy fácil, rápido de hacer y consta de pocos materiales, algunos materiales reciclados o de igual manera muy fácil de conseguir, pueden ser fácilmente reemplazados por otros o decorar acorde a los colores de tú cocina. Además de poder decorarlo como queramos, es muy útil, porque es una idea genial para tener los huevos organizados en un espacio sin moverlos.
🔸A continuación, los dejo con el paso a paso:
✨🐔🥚¡Hello friends who love creativity! I hope you had a very good start to the week.🥚🐔✨
I have always liked decorations for the kitchen, that is why today I am sharing with you a nice organizer or egg holder. It is very easy, quick to make and consists of few materials, some recycled materials or in the same way very easy to get, they can also be easily achieved by others or decorate according to the colors of your kitchen. In addition to being able to decorate it as we want, it is very useful, because it is a great idea to keep the eggs organized in a space without moving them.
🔸Here I leave you with the step by step:
♥️ESPERO QUE TE GUSTE,
¡Empecemos!
♥️I HOPE YOU LIKE IT,
Let's start!

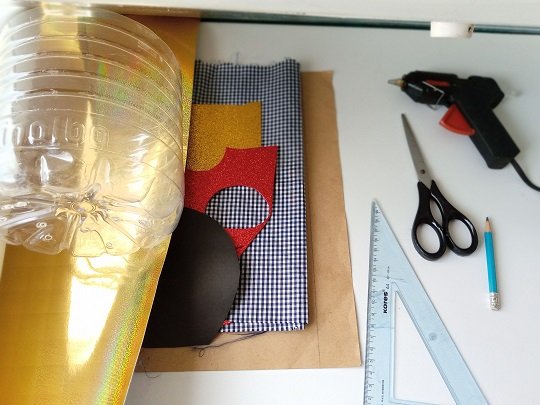
✂️ MATERIALES | ✂️ MATERIALS
- Botellón plástico de agua.
- Telas del diseño y color deseado.
- Cartulina metalizada dorada.
- Foami escarchado rojo.
- Foami escarchado dorado.
- Foami o cartulina negra.
- Silicona caliente.
- Cartón.
- Regla.
- Papel.
- Lápiz.
- Plastic bottle of water.
- Fabrics of the desired design and color.
- Gold metallic card.
- Red frosty foami.
- Gold frosted foami.
- Foami or black cardboard.
- Hot silicone.
- Paperboard.
- Rule.
- Paper.
- Pencil.
🐔 PROCEDIMIENTO | 🥚 PROCESS
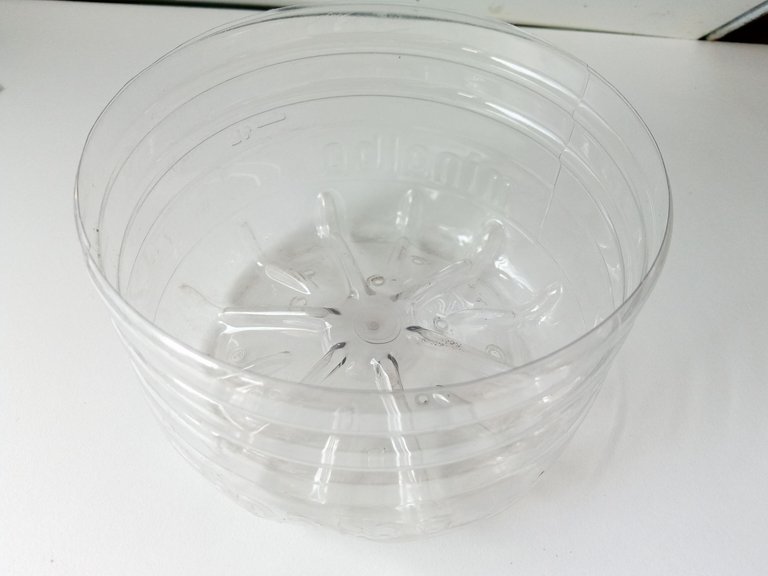
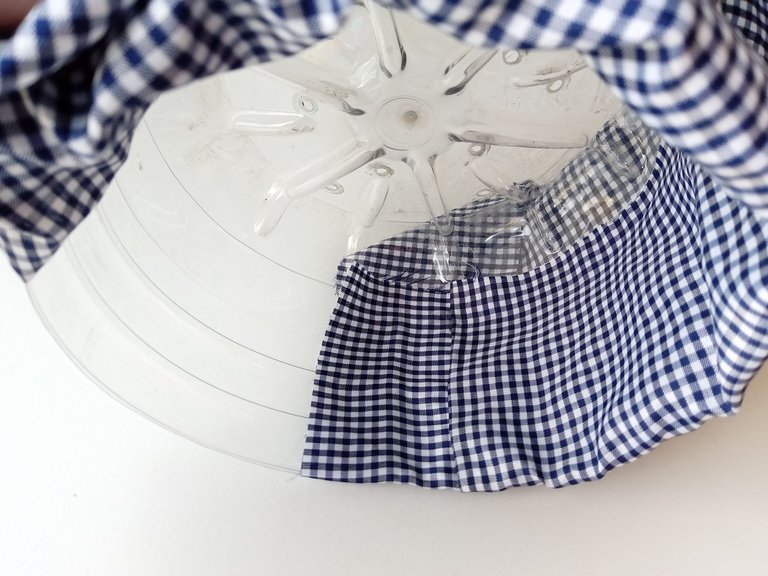
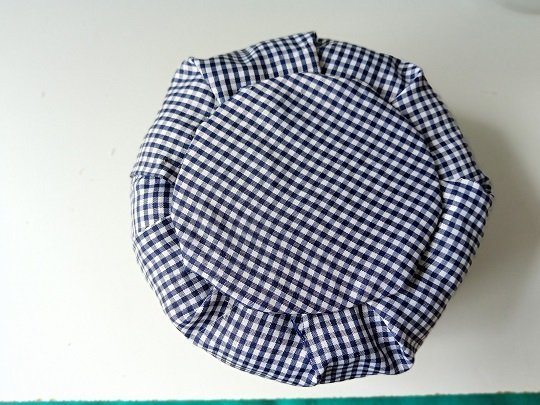
- PASO 1:
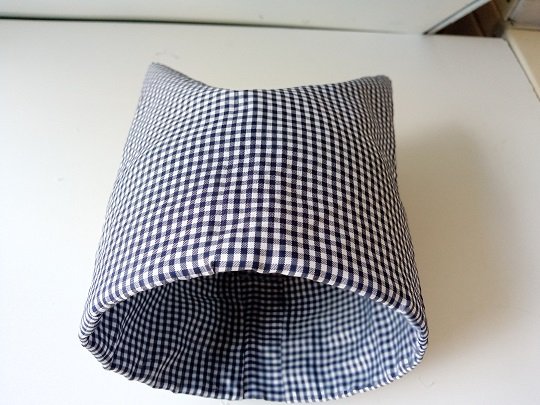
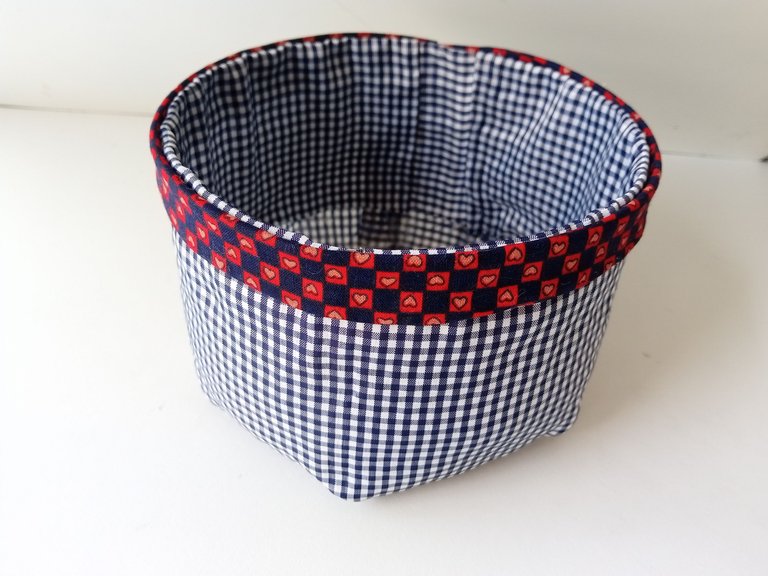
Lo primero que debemos hacer es cortar el botellón de agua a la altura deseada, en mi caso: 10 cm de largo y 15 cm de ancho. Luego, tomar la tela deseada y pegar en el interior de la botella con silicona caliente. Una vez forrado el interior de la botella con la tela, cubrir el exterior con el exceso de la misma, pegando también con silicona caliente.
- STEP 1:
The first thing we must do is cut the water bottle to the desired height, in my case: 10 cm long and 15 cm wide. Then, take the desired fabric and glue it to the inside of the bottle with hot silicone. Once the inside of the bottle is lined with the fabric, cover the outside with the excess of it, also sticking with hot silicone.
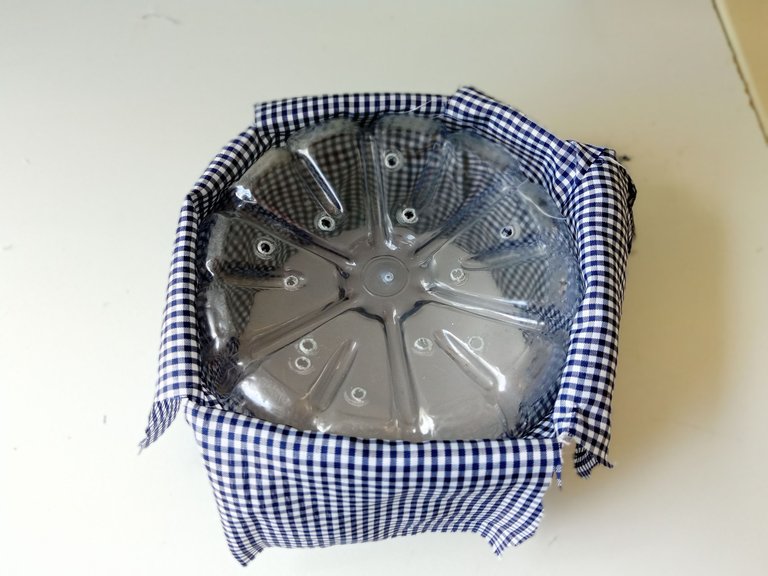
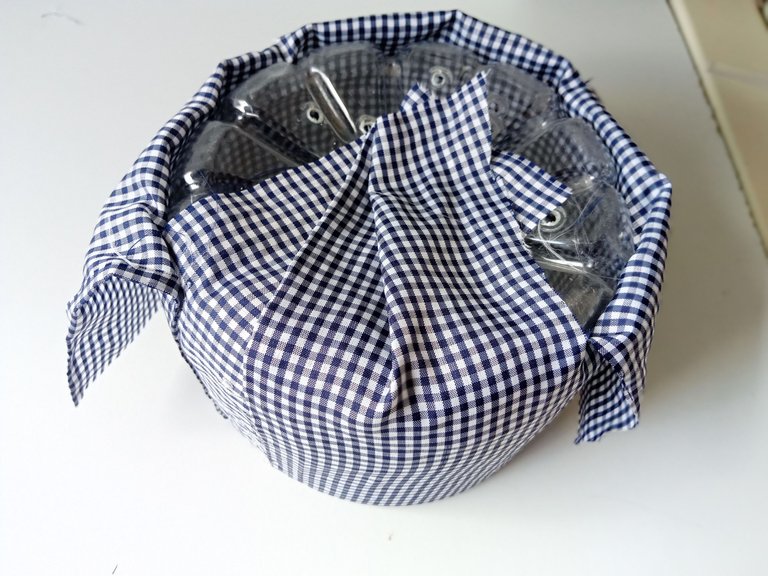
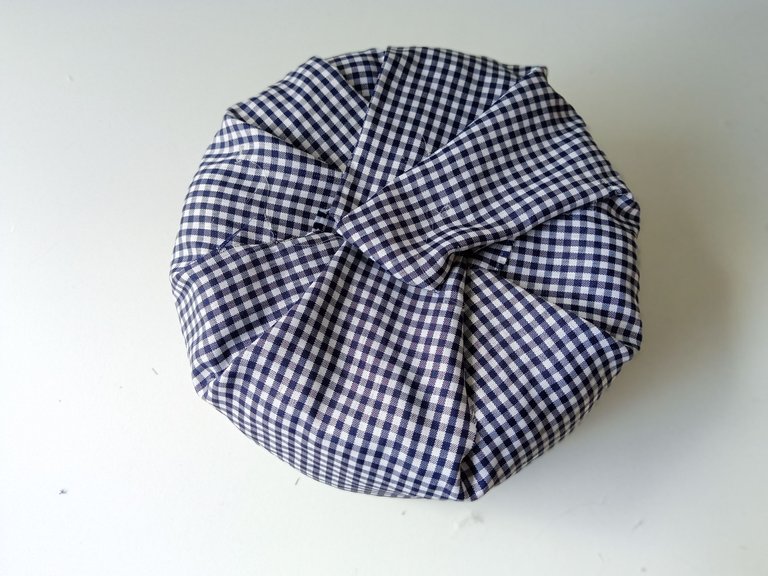
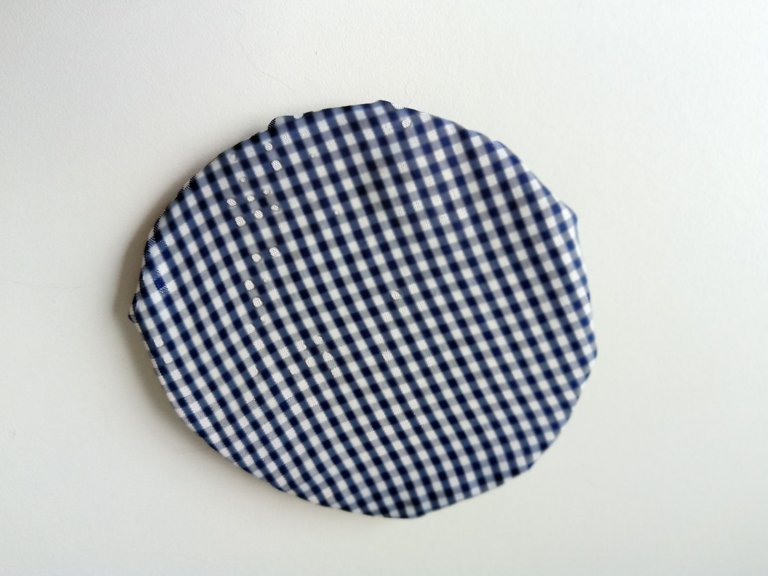
- PASO 2:
Luego, con el resto, córtalo en 4 partes y pega cada una a la base de la botella, yo las pegué en forma triangular para que se amoldara a la forma circular de la botella.
- STEP 2:
Then, with the remainder, cut it into 4 parts and stick each one to the base of the bottle, I glued them in a triangular shape so that it conforms to the circular shape of the bottle.
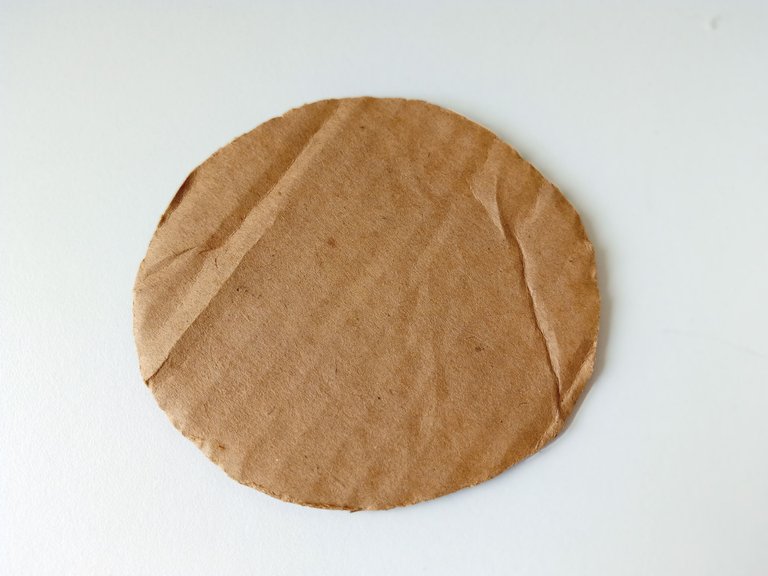
- PASO 3:
Una vez hecho esto, tomar el cartón y recortar un círculo un poco más pequeño que la base, en mi caso de 10 cm. Luego, cubre el círculo con el mismo diseño o color de tela que usaste anteriormente y pégalo en la base.
- STEP 3:
Once this is done, take the cardboard and cut out a circle a little smaller than the base, in my case 10 cm. Then cover the circle with the same pattern or color of fabric you used earlier and glue it to the base.
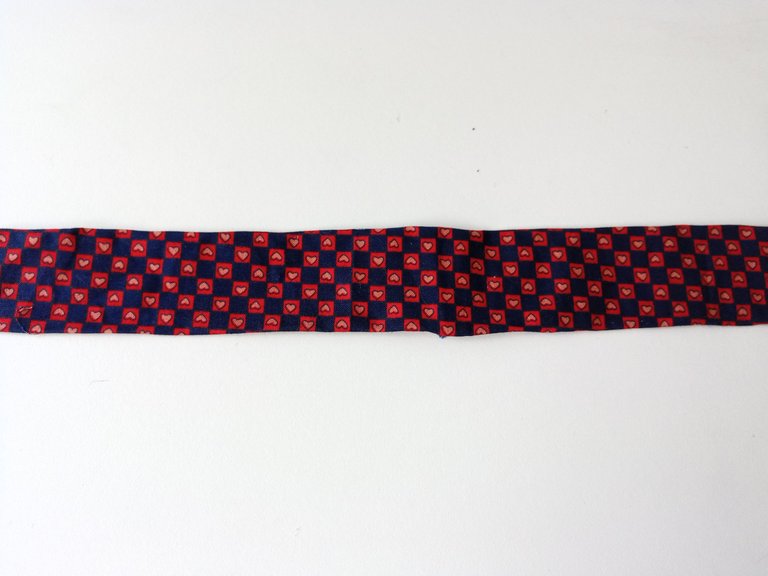
- PASO 4:
Luego, toma otro diseño o color de tela, corta una cinta de 2 cm de ancho y pégala en el borde superior del recipiente.
Nota: Puedes cortar la cinta con un ancho de 3 cm, pegar los bordes de la cinta con silicona formando un dobladillo para que la tela no se deshilache.
- STEP 4:
Then, take another design or color of fabric, cut a 2 cm wide ribbon and stick to the top edge of the container.
Note: You can cut the tape with a width of 3 cm, paste the edges of the tape with silicone forming a hem so that the fabric does not fray.
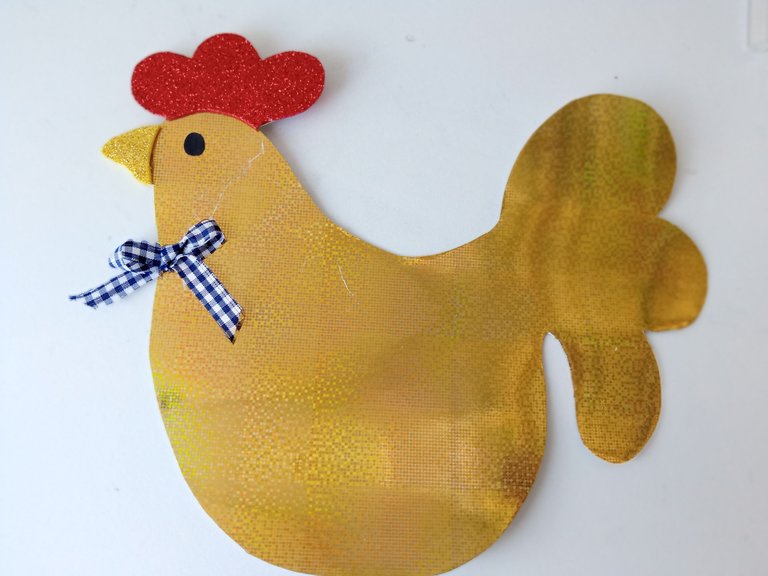
- PASO 5:
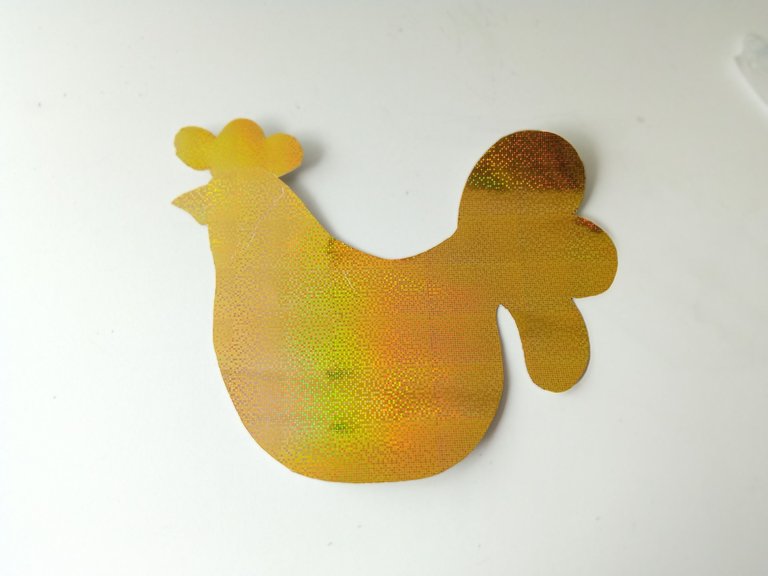
Para hacer la gallina debemos buscar una imagen de referencia, dibujar la silueta de la gallina en una hoja, ésta transferirla a la cartulina dorada metalizada y, por último, recortar.
- STEP 5:
To make the chicken we must find a reference image, draw the silhouette of the chicken on a sheet, transfer it to the metallic gold cardboard and, finally, cut it out.

- PASO 6:
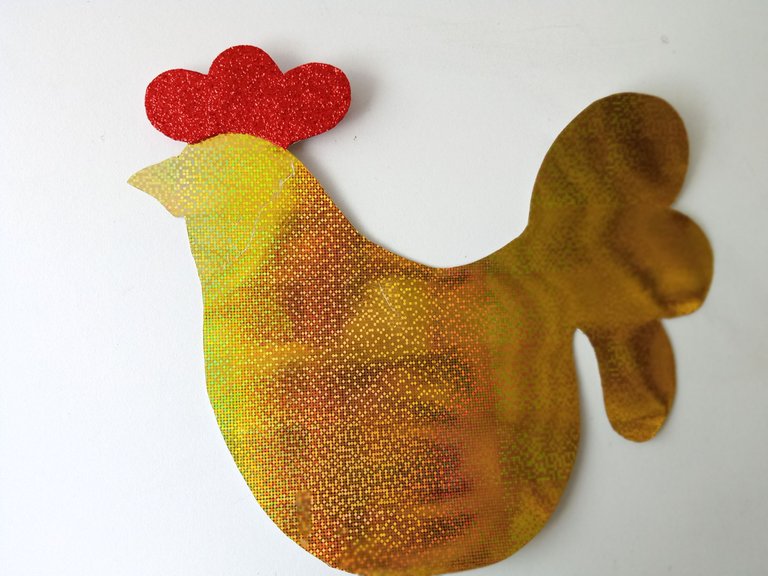
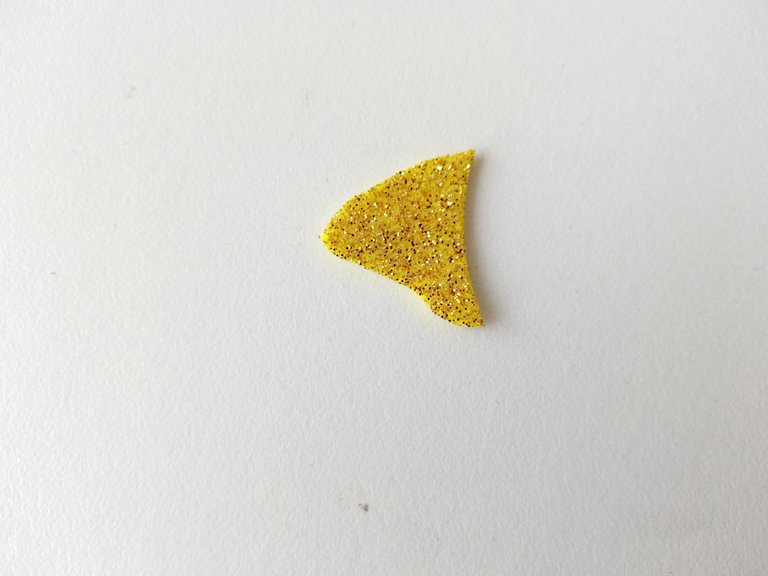
Para darle una bonita apariencia a la gallina, dibujar la cresta en foami escarchado rojo, recortar y pegar. Repetir el mismo proceso con el pico, dibujar el pico en foami escarchado dorado, recortar y pegar.
- STEP 6:
To give the hen a nice appearance, draw the crest on red frosted foam, cut out and glue. Repeat the same process with the beak, draw the beak in gold frosted foam, cut out and glue.
- PASO 7:
Para el ojo: dibujar el diseño de ojo deseado en cartulina o foami negro, recortar y pegar. Para darle un bonito toque a la gallina, recortar una tira delgada con la tela deseada, formar un lazo y pegar a la gallina. Para terminar, pegar la gallina en la parte superior trasera del envase.
- STEP 7:
For the eye: draw the desired eye design on black cardboard or foami, cut out and glue. To give the chicken a nice touch, cut a thin strip with the desired fabric, form a bow and stick to the chicken. To finish, glue the chicken to the top back of the container.
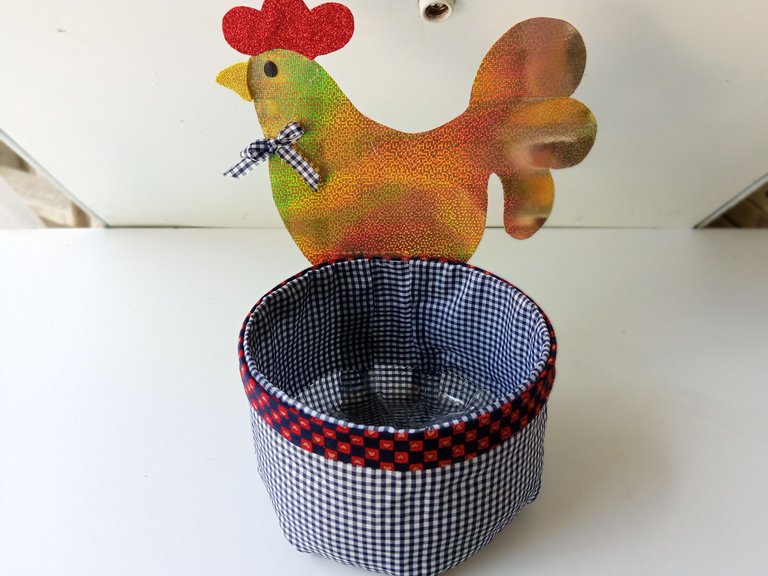
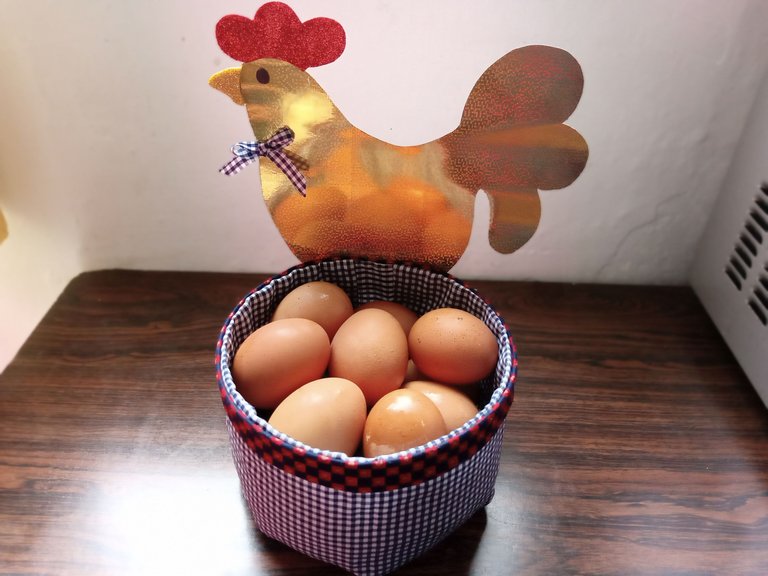
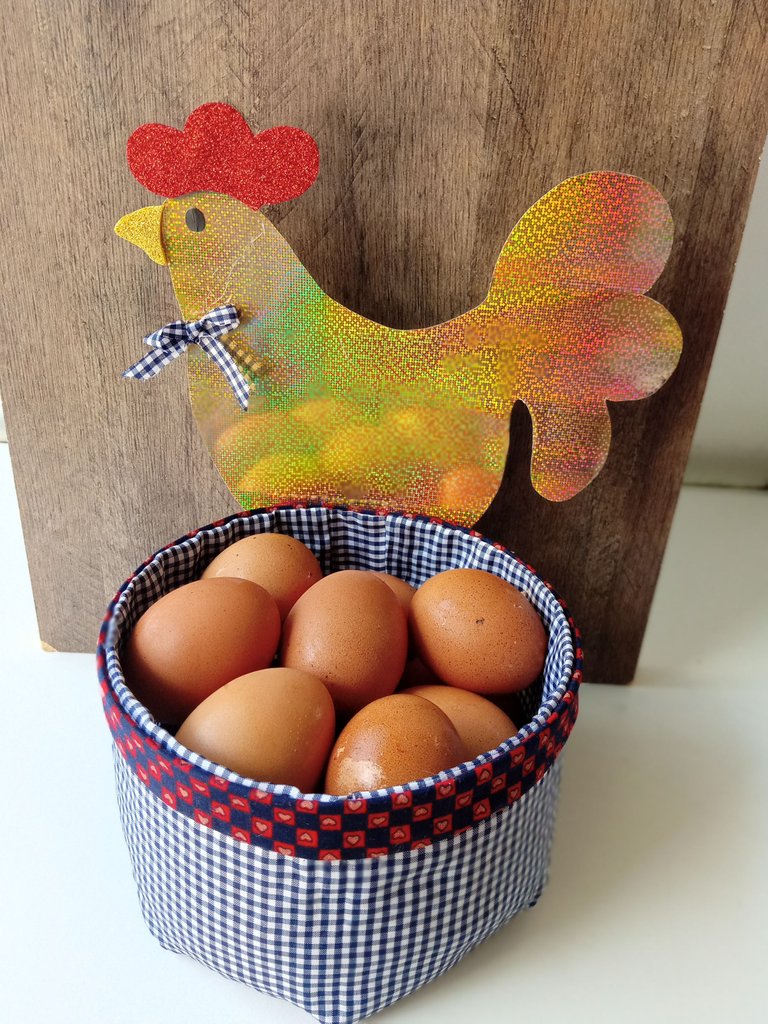
✨🐔🥚¡Y listo!🥚🐔✨ Habremos terminado con la elaboración de este lindo y muy útil porta huevos. Ahora puedes agregar los huevos y guardarlos en un lugar seguro ideal para decorar tu cocina o para dar un lindo regalo a los amantes de la cocina. Me gustó mucho hacer este organizador para huevos, me parece una gran idea para mantener los huevos organizados en un espacio sin moverse y evitar que se rompan. Espero que se animen a hacer esta decoración para sus cocinas y disfruten del proceso tanto como yo.
Hasta la próxima publicación.
✨🐔🥚¡And ready!🥚🐔✨ We will have finished with the elaboration of this cute and very useful egg holder. Now you can add the eggs and keep them in a safe place ideal to decorate your kitchen or to give a nice gift to those who love cooking, I really liked making this organizer for eggs, I think it's a great idea to keep eggs organized in a space without moving and prevent them from breaking. I hope you are encouraged to make this decoration for your kitchens and enjoy the process as much as I do.
Until the next post.


Todas las fotografías son de mi propiedad.
Separador y Fotos editadas en Canva
All photographs are my property.
Photos edited in Canva
The rewards earned on this comment will go directly to the people sharing the post on Twitter as long as they are registered with @poshtoken. Sign up at https://hiveposh.com.
Muchas gracias por el apoyo ☺️♥️
Thank you for sharing this amazing post on HIVE!
Your content got selected by our fellow curator @rezoanulvibes & you just received a little thank you via an upvote from our non-profit curation initiative!
You will be featured in one of our recurring curation compilations and on our pinterest boards! Both are aiming to offer you a stage to widen your audience within and outside of the DIY scene of hive.
Join the official DIYHub community on HIVE and show us more of your amazing work and feel free to connect with us and other DIYers via our discord server: https://discord.gg/mY5uCfQ !
If you want to support our goal to motivate other DIY/art/music/homesteading/... creators just delegate to us and earn 100% of your curation rewards!
Stay creative & hive on!
Muchas gracias por el apoyo amigos. ✨♥️😊
Hola Valen, que lindo organizador te quedó muy precioso.
Hola linda! ✨
Muchas gracias, me alegra mucho que te haya gustado.
Saludos. ✨❣️
Wao! Que idea tan linda, me gusto todo el diseño de este porta huevos, así ya no los tendré que guardar en la aburrida caja de cartón en la que vienen, de verdad te felicito por el increíble trabajo que has hecho. Un saludo!
Hola @russellab17 😊.
Muchas gracias por tan lindo comentario. Me alegra mucho que te haya gustado.♥️
Espero te sea útil, puedes hacerlo del color que desees para combinar con los colores de tu cocina. Además, puedes utilizar cualquier diseño de gallina.
Muchas gracias por comentar, lindo día. ✨😊
Oye pero que buena idea para reciclar plástico, me gusta el acabado simple a veces menos es más, gracias por compartir.
Hola linda ✨ un placer tenerte por acá.
Es una muy buena opción para utilizar botellas plásticas que tenemos guardadas.
Me alegraría mucho que te haya gustado.😊
Un saludos. ❣️
Congratulations @valenpba! You have completed the following achievement on the Hive blockchain and have been rewarded with new badge(s):
Your next target is to reach 100 posts.
You can view your badges on your board and compare yourself to others in the Ranking
If you no longer want to receive notifications, reply to this comment with the word
STOPTo support your work, I also upvoted your post!
Check out the last post from @hivebuzz:
Support the HiveBuzz project. Vote for our proposal!
Que linda quedó ésta cesta, lograste una forma estable para guardar algo tan delicado como son los huevos, la tela a cuadros que utilizaste me encanta. Es una buena confección, bendiciones para ti 🌹
Hola @bleuclair ✨
Me alegra que te guste. 😊
Intenté hacer algo simple , con algunos detalles que llamara la atención pero que aún así,se viera un poco elegante.
Muchas gracias por comentar linda! ✨ Saludos y muchas bendiciones para ti también.🌼
Saludos preciosa..
¡QUE BONITA CANASTA!
Sin duda alguna ahora aparte de organizar, va a ser una muy bonita decoración en la cocina, me gustó mucho de l resultado.. ✨💜
Hola linda!✨😊
La verdad es una muy buena idea como organizador y para decorar como gustemos, utilizando los colores deseados a juego con la cocina.
Me alegra mucho que te haya gustado, gracias por pasarte y comentar, Saludos. ♥️
Hermoso!!!❤
Muchísimas gracias.♥️✨
Dear @valenpba,
May I ask you to review and support the Dev Marketing Proposal (https://peakd.com/me/proposals/232) we presented on Conference Day 1 at HiveFest?
The campaign aims to onboard new application developers to grow our ecosystem. If you missed the presentation, you can watch it on YouTube.
You cast your vote for the proposal on Peakd, Ecency,
Thank you!