Buenas noches tengan todos mis amigos de hivers, es grato para mi poder participar en este bonito concurso moderado por @equipodelta en la temática "Tercera Dimensión". Hoy quiero compartir esta hermosa tarjeta de flores, que podemos elaborar para cualquier ocasión especial como: cumpleaños, comuniones, día de las madres, día de san Valentín entre otros momentos especiales que quieras usarla. A qui te dejo mi paso a paso.
Good evening to all my friends of hivers, it is a pleasure for me to participate in this nice contest moderated by @equipodelta in the theme "Third Dimension". Today I want to share this beautiful flower card, that we can make for any special occasion such as: birthdays, communions, Mother's Day, Valentine's Day among other special moments that you want to use it. Here is my step by step.
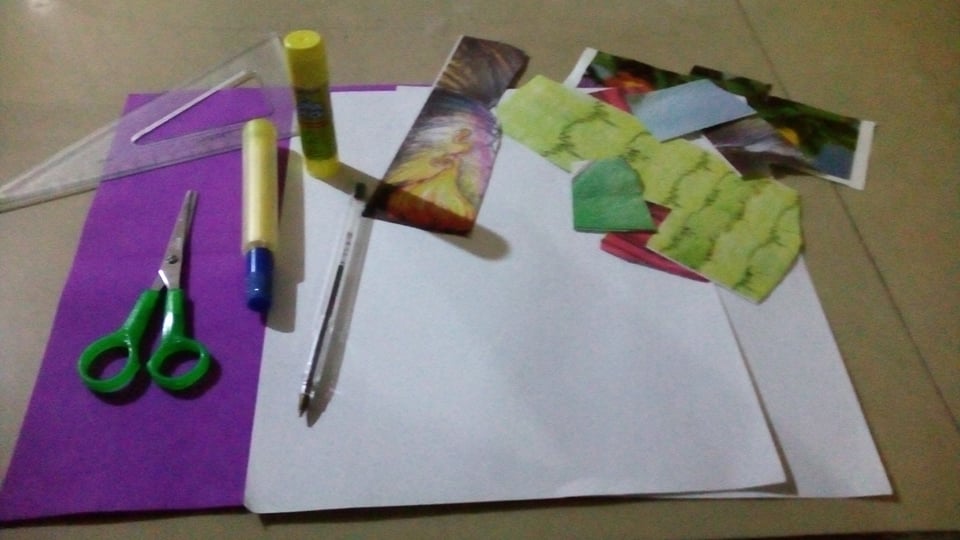
Materiales:
- 2 hojas de maquinas blancas.
- Una hoja de foami tamaño carta color morado.
- Lapicero color negro.
- Pega en barra.
- Tijera
- Marcador fosforescente de color amarillo.
- Retazos de papel de revista.
- Regla.
Materials:
- 2 white machine sheets.
- One sheet of purple colored foami.
- Black pencil.
- Glue stick.
- Scissors
- Yellow phosphorescent marker.
- Magazine paper scraps.
- Ruler.
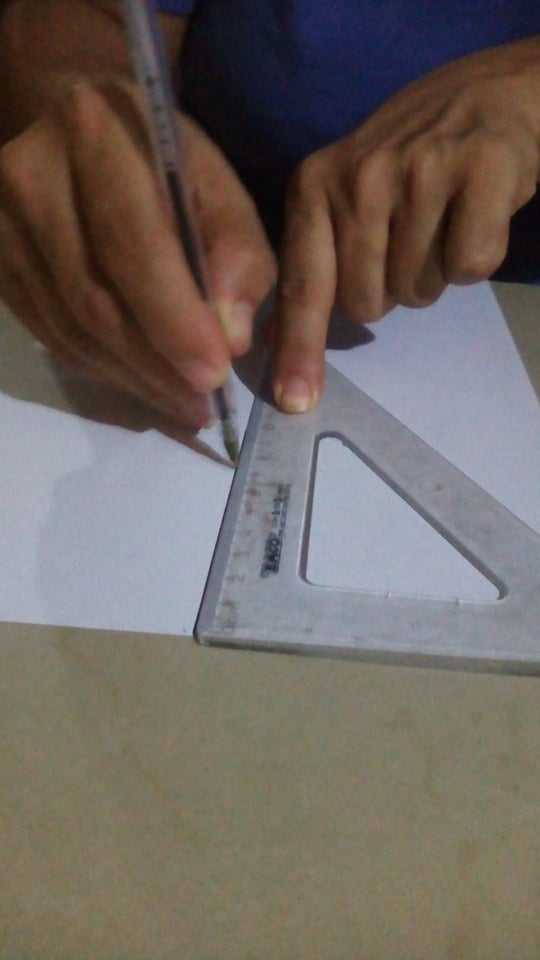
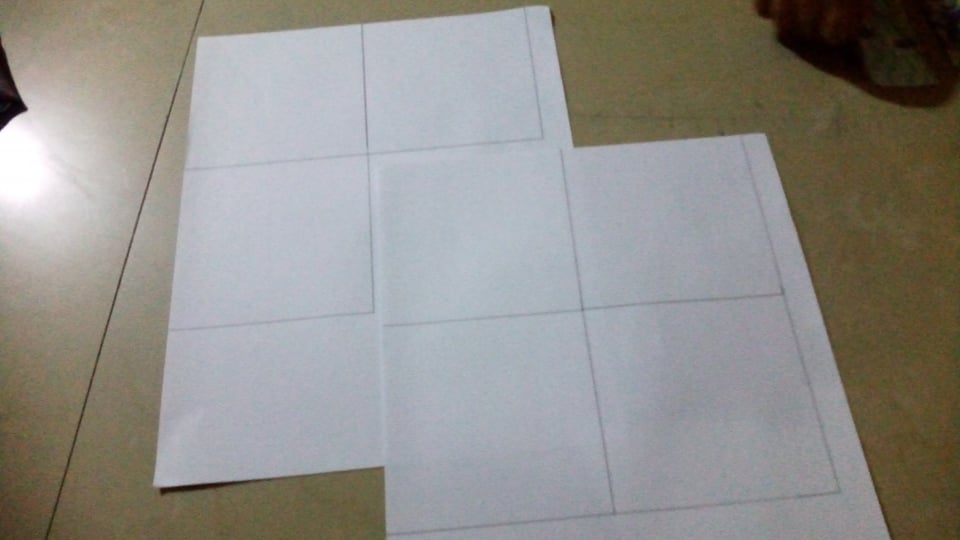
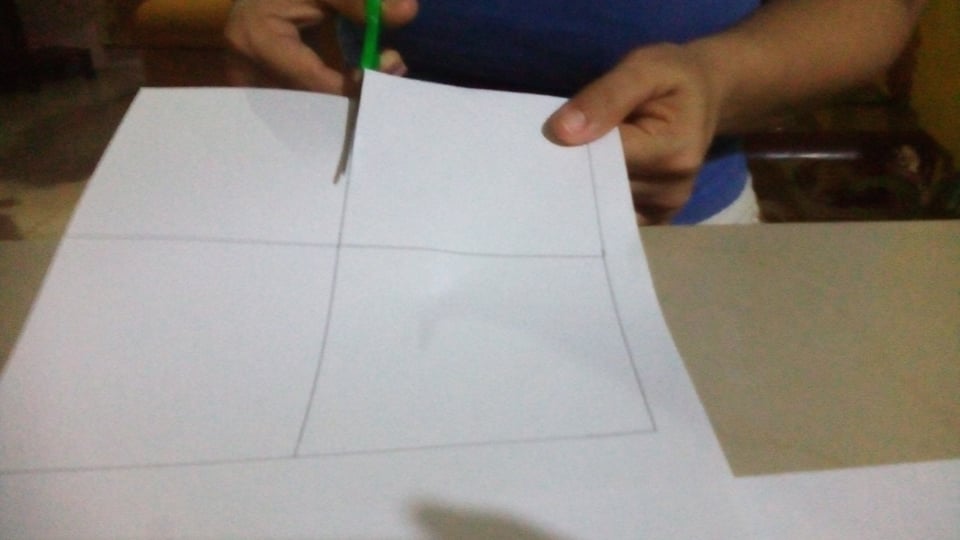
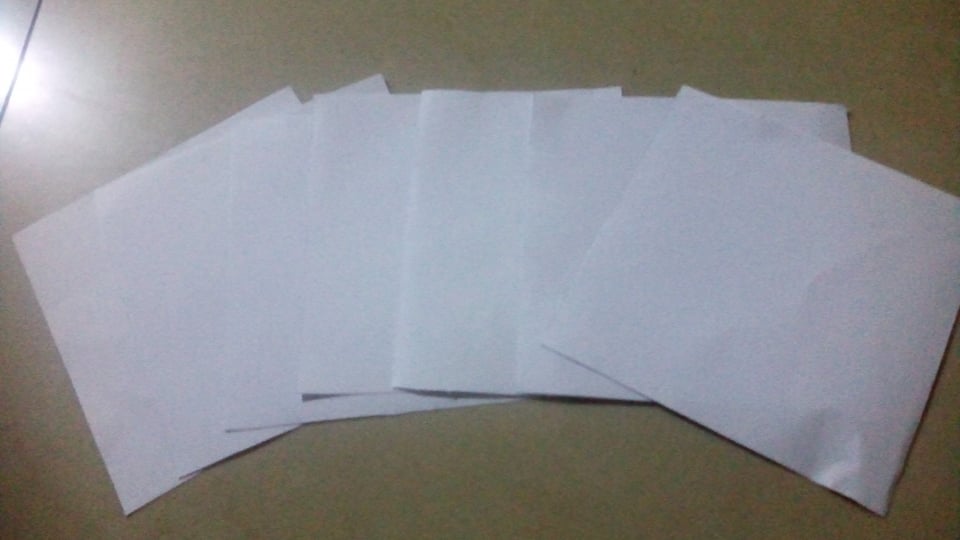
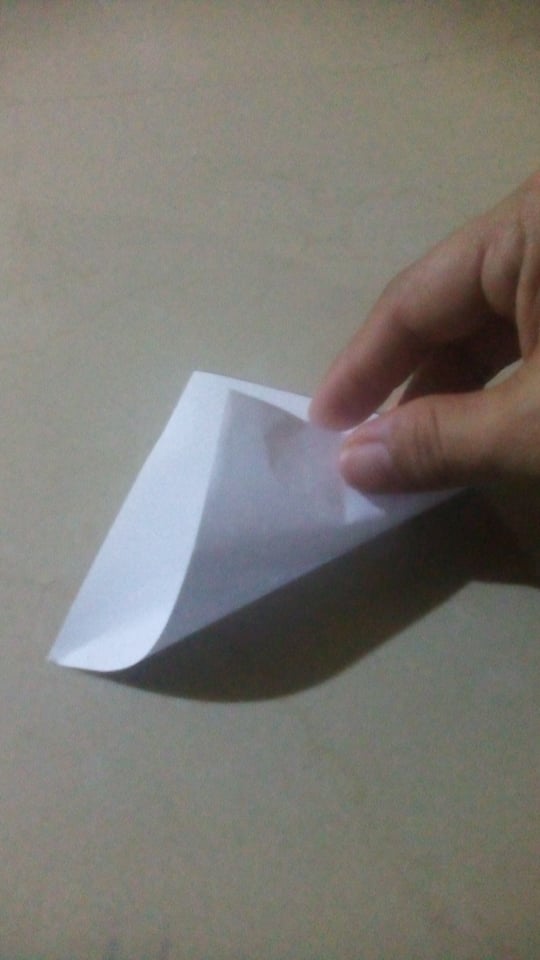
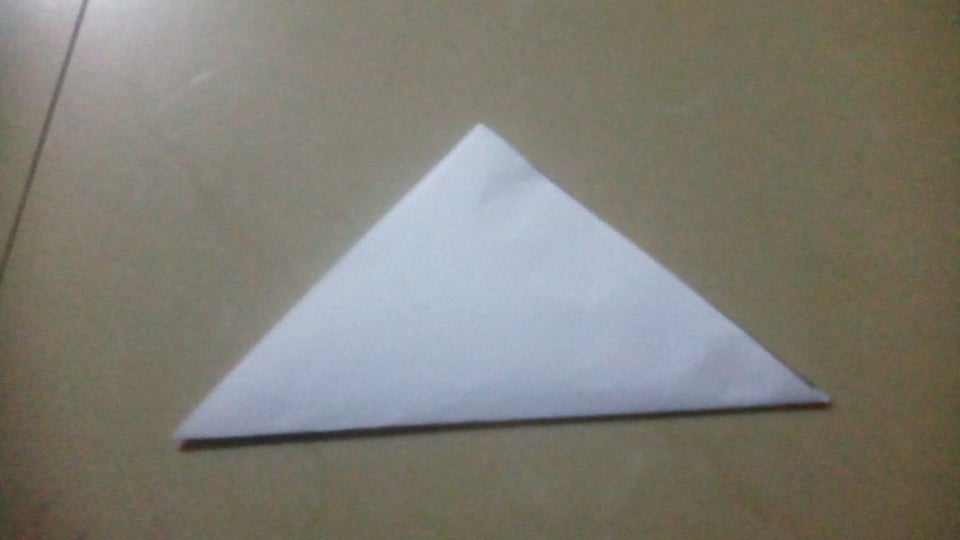
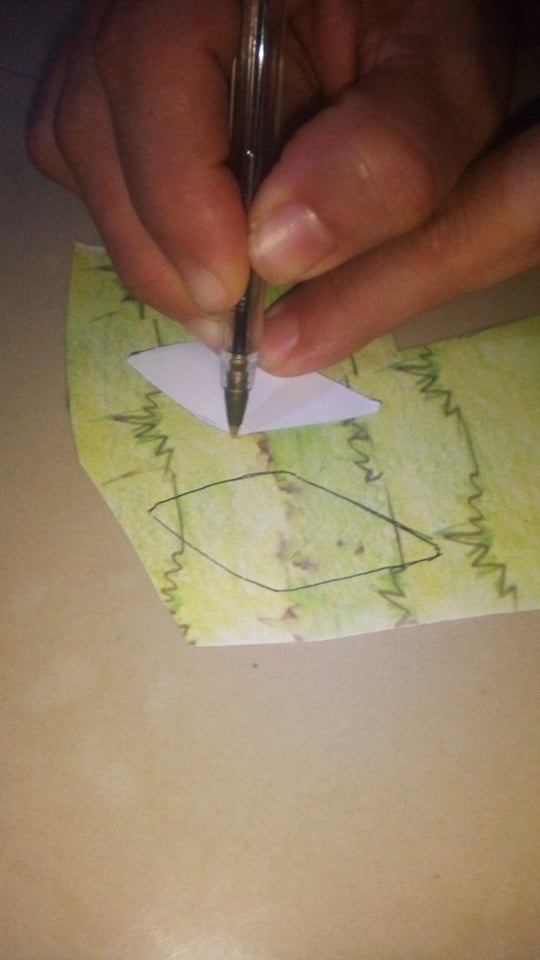
Paso 1
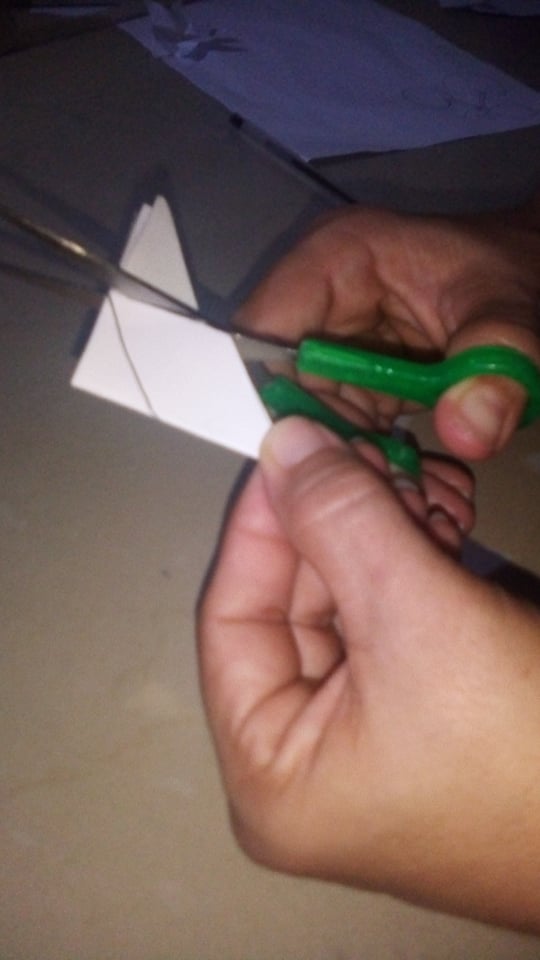
Empezaremos utilizando una regla, lapicero y las hojas de maquinas blancas para hacer 7 cuadros de 10cm d alto x 10m de ancho. Una vez ya cortado 7 cuadros, lo doblamos en forma de triangulo, repitiendo el procedimiento dos veces mas hasta que obtengamos un triangulo mas pequeño
Step 1
We will start by using a ruler, pencil and the white machine sheets to make 7 squares of 10cm high x 10m wide. Once we have cut 7 squares, we fold it in a triangle shape, repeating the procedure two more times until we get a smaller triangle.

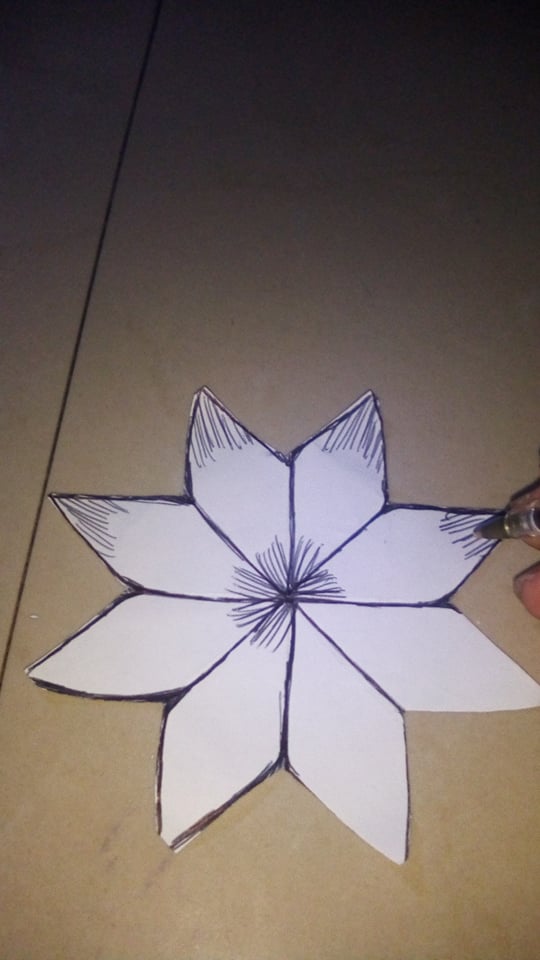
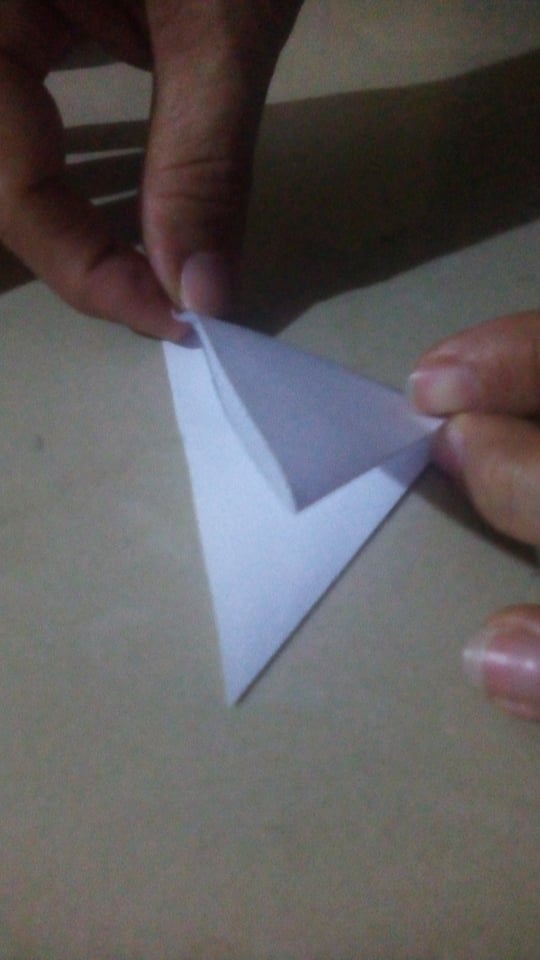
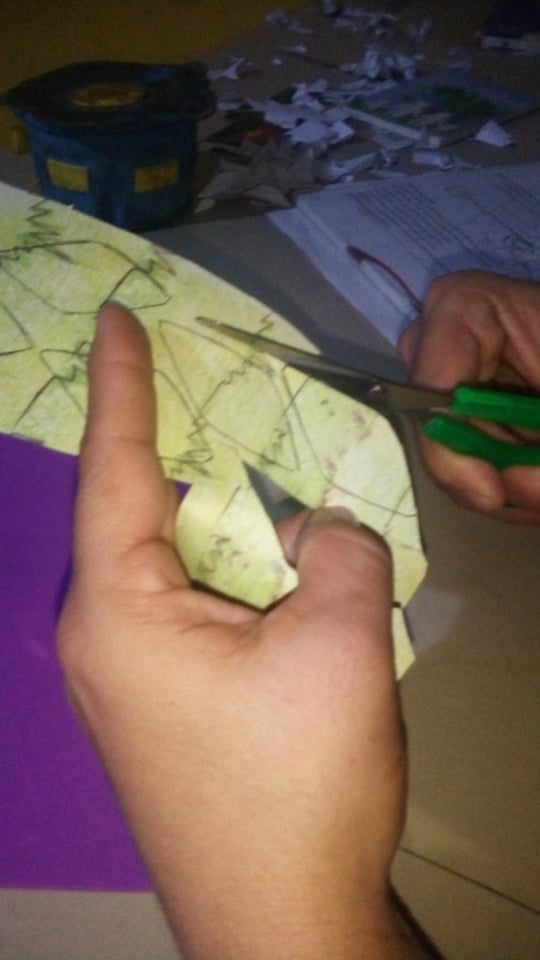
Paso 2
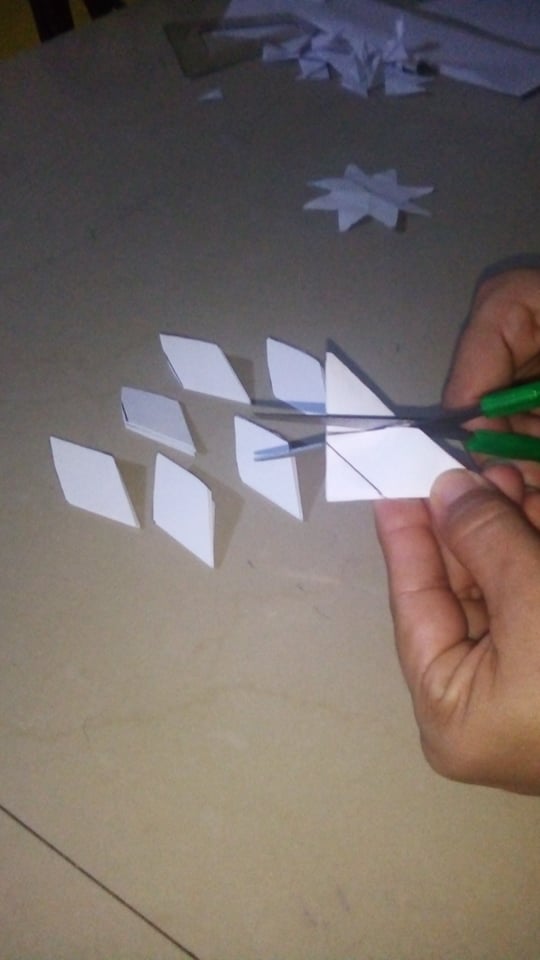
Luego con el lapicero dibujamos los pétalos, después recortamos, es importante usar el primer molde que recortamos para que nos quede todos los pétalos del mismo tamaño. Cuando estén lista nuestras flores empezamos a decorarlas utilizando un lapicero negro dándole un toque a tu imaginación.
Step 2
Then with the pencil we draw the petals, then we cut them out, it is important to use the first mold we cut out so that all the petals are the same size. When our flowers are ready we begin to decorate them using a black pencil giving a touch to your imagination.
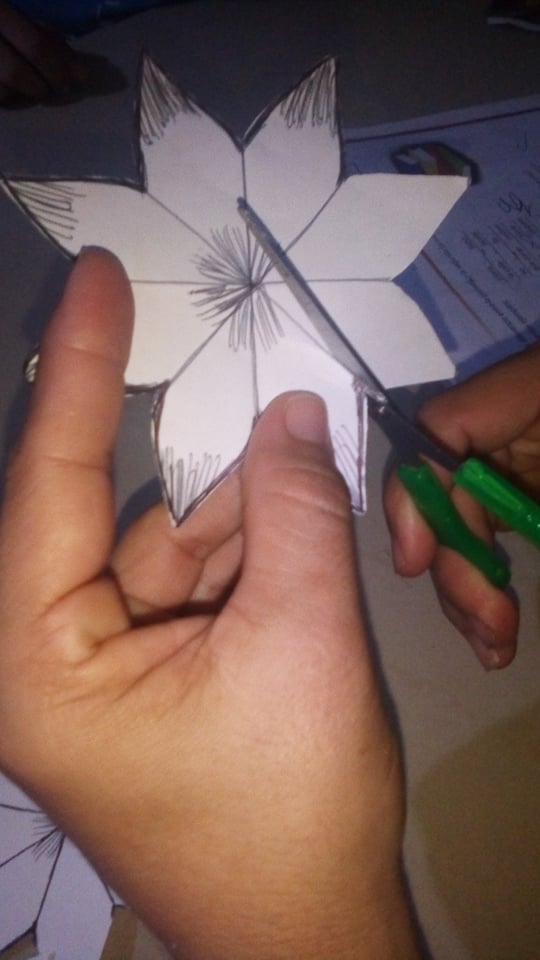
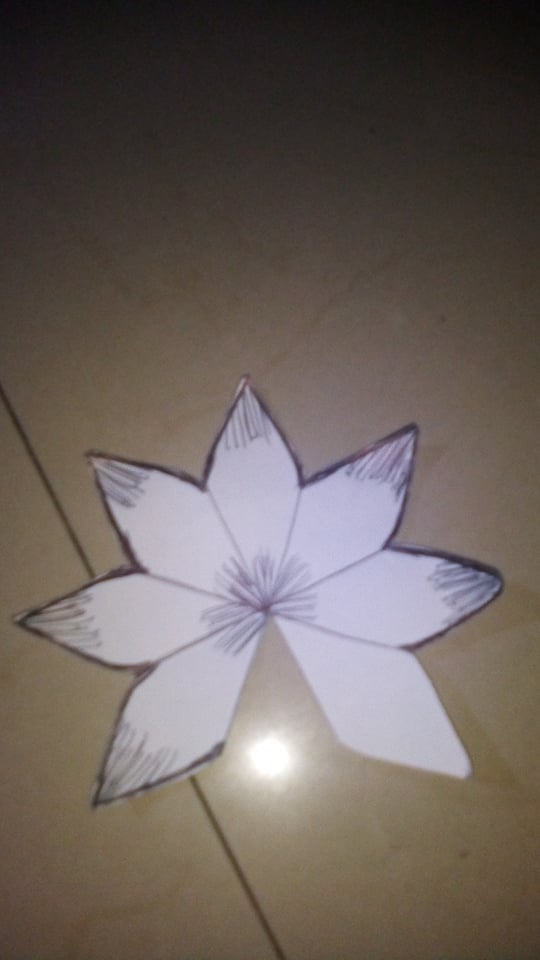
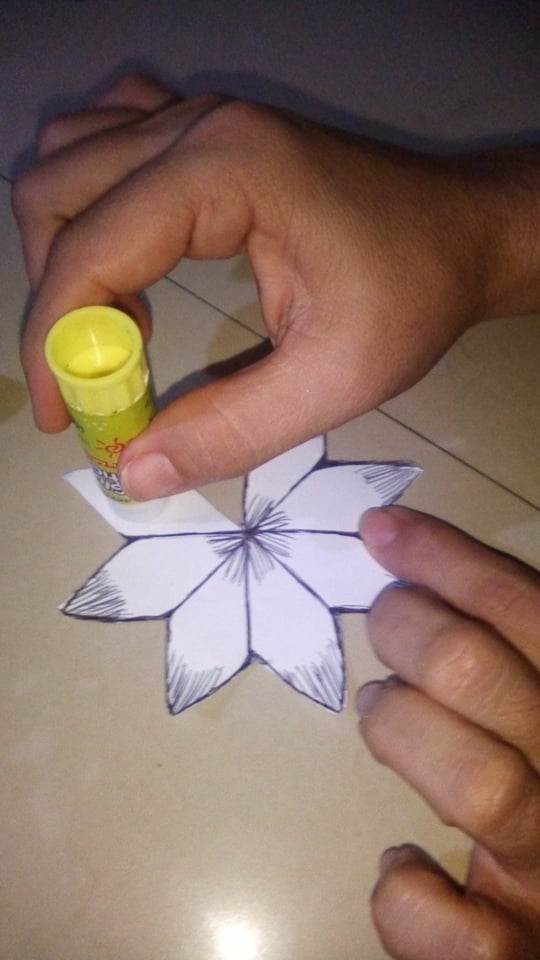
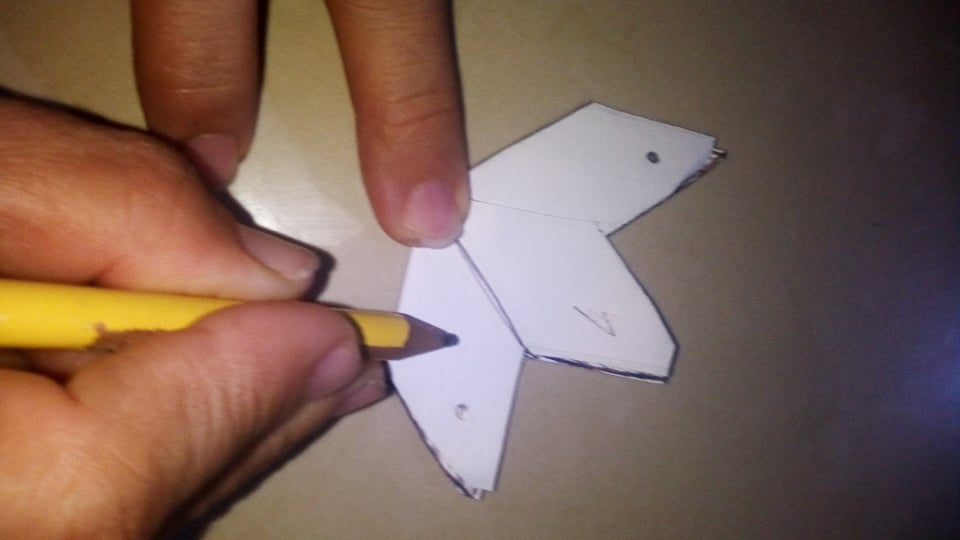

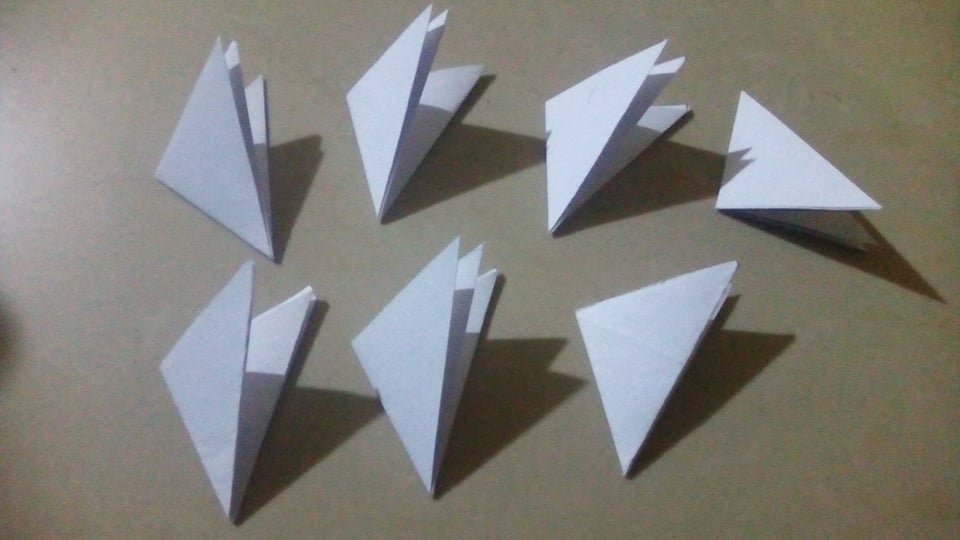
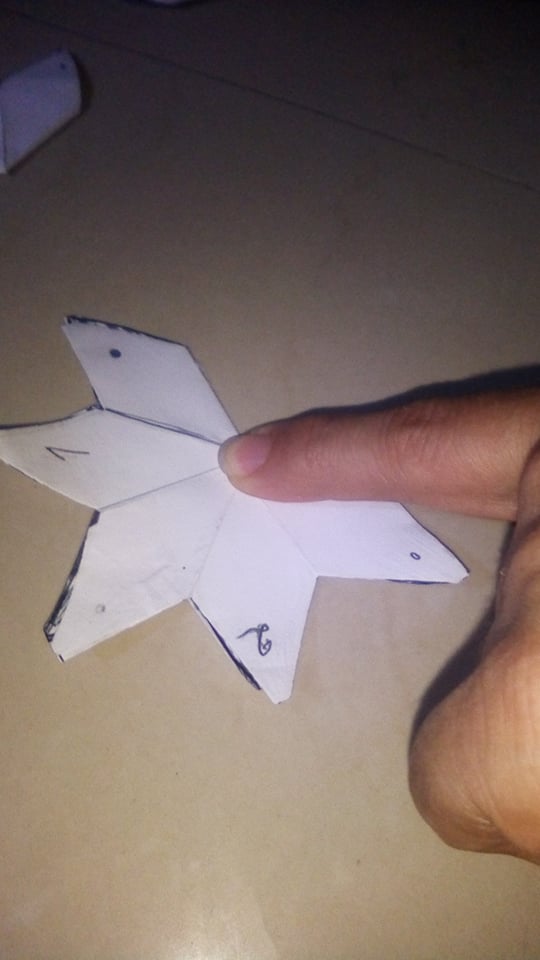
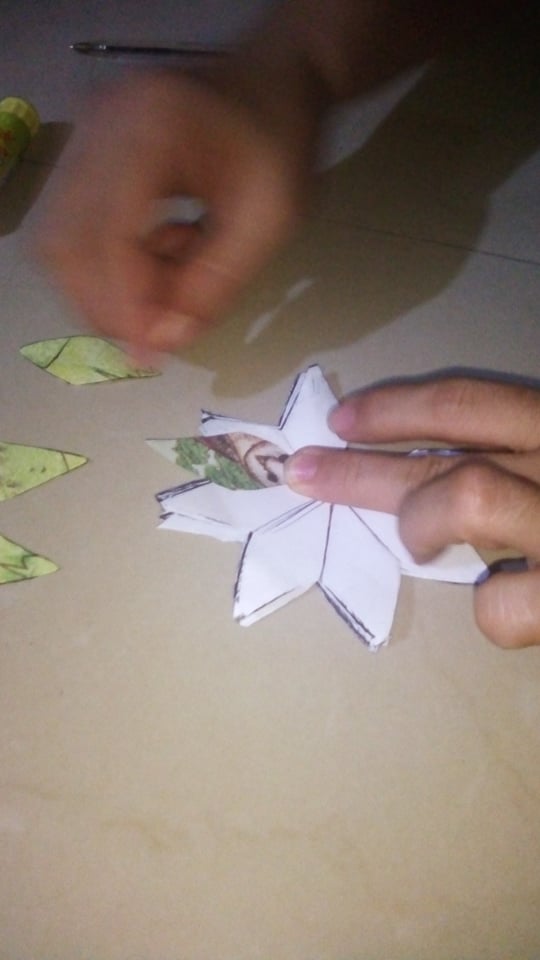
Paso 3
Cuando ya las flores estén dibujadas, recortaremos un pétalo a cada flor, Colocamos pega en barra en el pétalo que quedo en blanco y uniremos el otro pétalo encima. Luego doblamos por la mitad cada flor, quedando tres pétalos de ambos lados, colocaremos un punto a los lados y en pétalo del medio el numero 1, así haremos sucesivamente con el resto hasta el numero 7.
Step 3
When the flowers are already drawn, we will cut a petal to each flower, we place glue stick on the petal that was left blank and we will join the other petal on top. Then fold each flower in half, leaving three petals on both sides, place a dot on the sides and in the middle petal the number 1, and so on with the rest until the number 7.
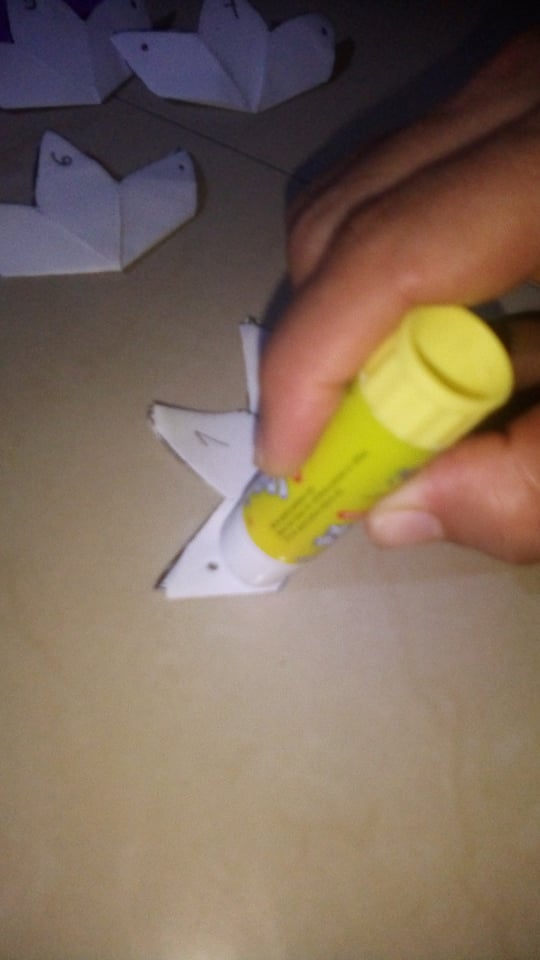
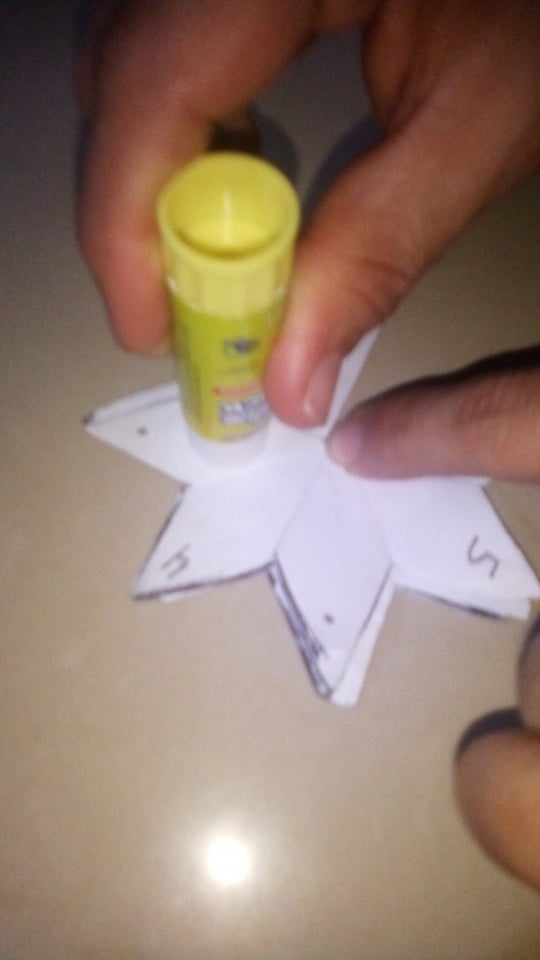
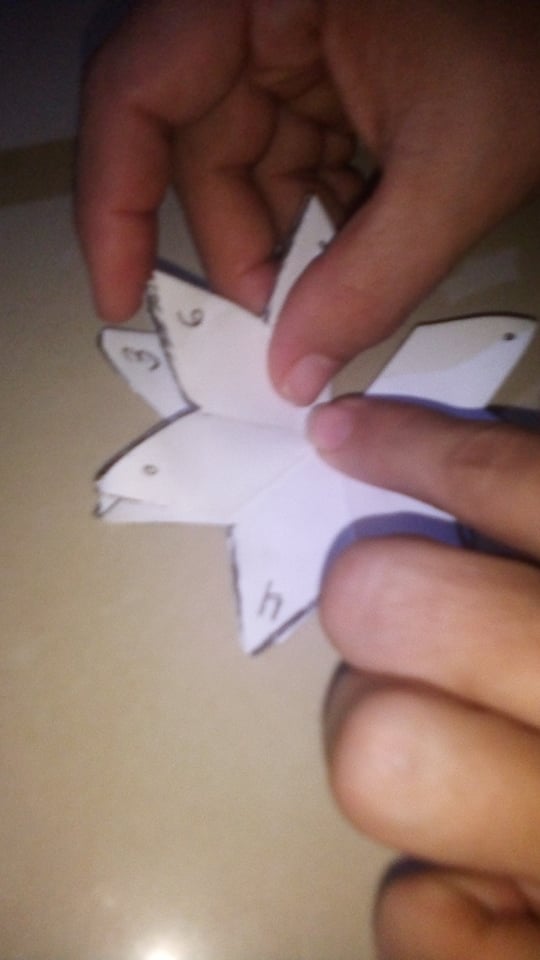

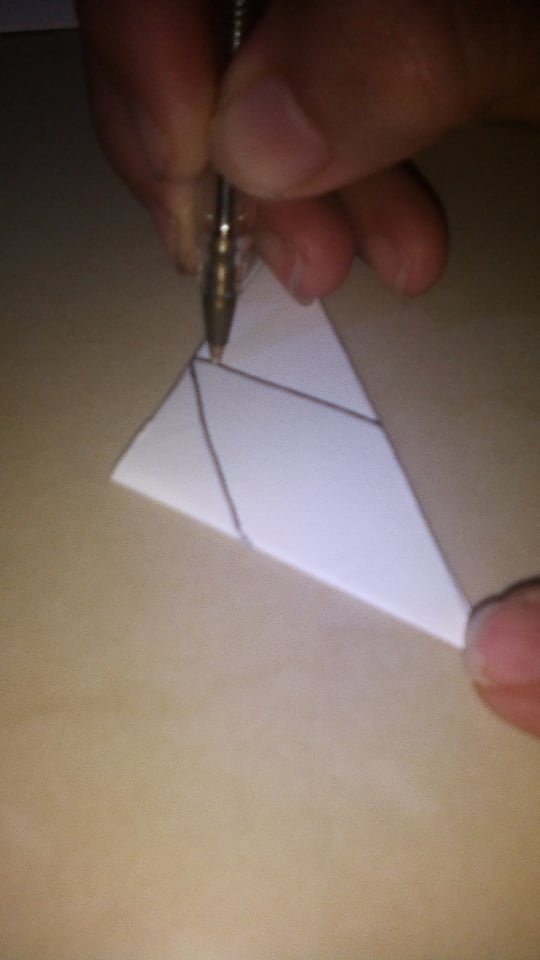
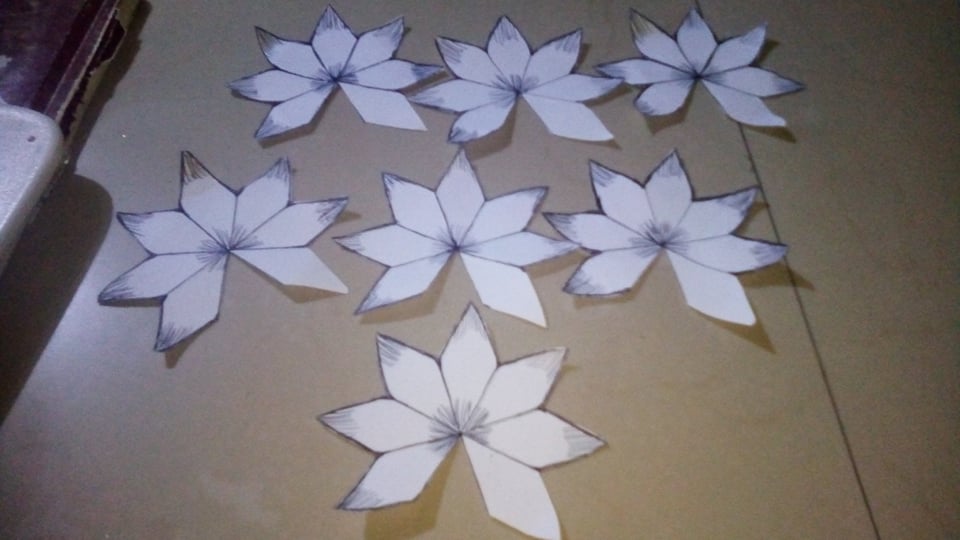
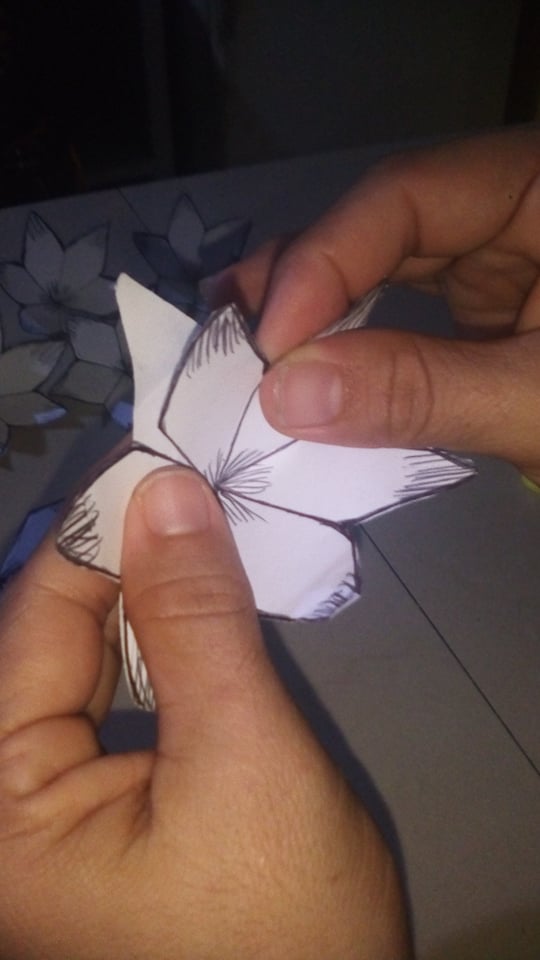
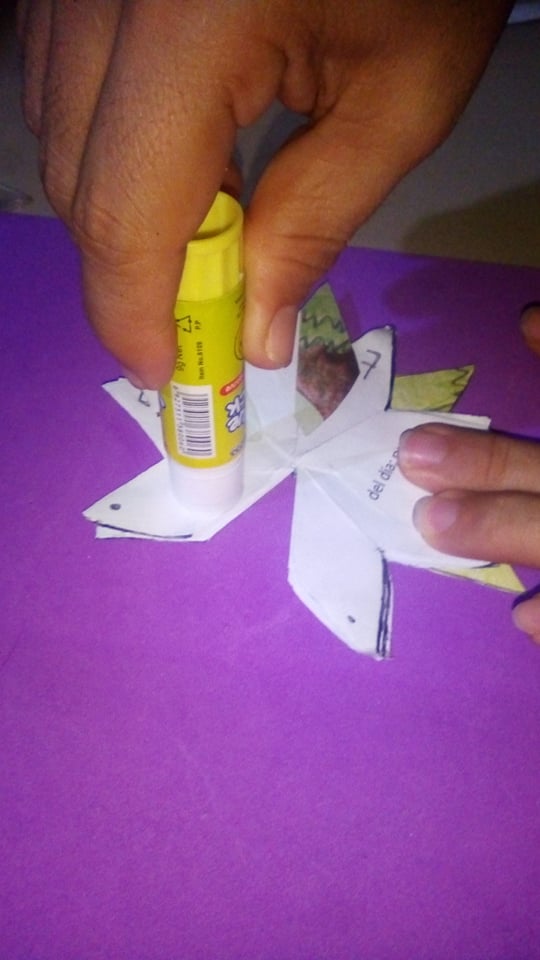
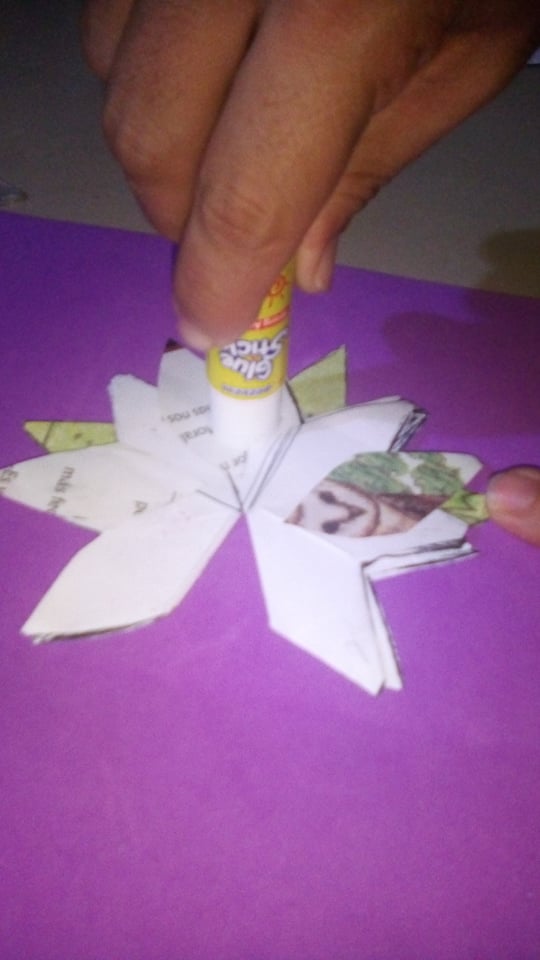
Paso # 4
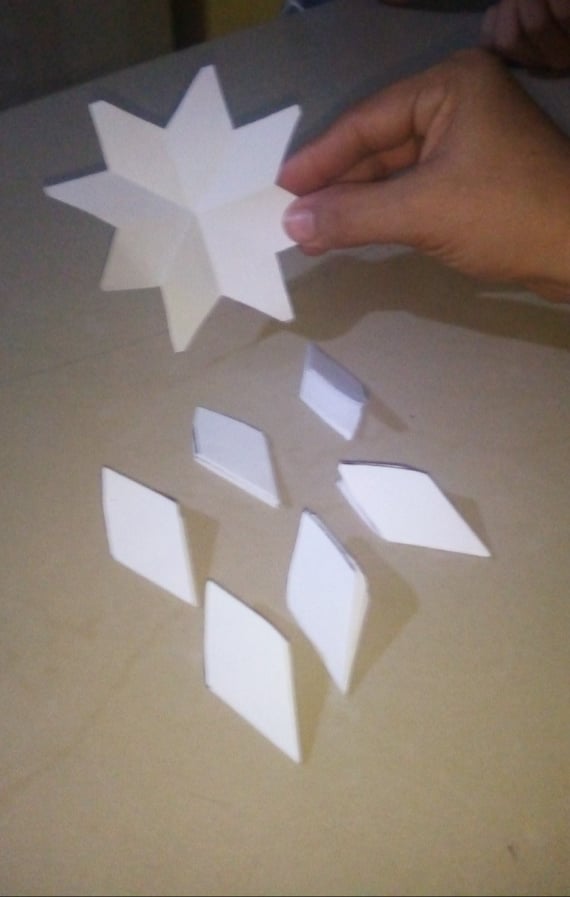
Ahora empezaremos a pegar con pega de barra, colocaremos pega alrededor de los puntos iniciaremos con el numero 2, el numero 3, esperamos que se seque dos minutos, Una ves se haya secado seguimos aplicando pega en cada punto marcado ahora el numero 4, seguido el numero 5, el numero 6 y por ultimo el numero 7. Es importante recordar que cada pétalos se van a ir pegando en el punto de la parte izquierda luego en el punto derecho del numero siguiente y el numero 7 va en centro. Para que pueda abrir nuestras flores. Una ves nuestros pétalos estén todos pegados utilizaremos retazos de papel color verde y dibujaremos seis hojas y las pegaremos alrededor de los pétalos por ambos lados.
Step # 4
Now we will start gluing with glue stick, we will place glue around the points, we will start with number 2, number 3, we will wait two minutes for it to dry, once it has dried we continue applying glue on each point marked now number 4, followed by number 5, number 6 and finally number 7. It is important to remember that each petal will be glued on the left point, then on the right point of the next number and number 7 goes in the center. So you can open our flowers. Once our petals are all glued together we will use scraps of green paper and draw six leaves and glue them around the petals on both sides.
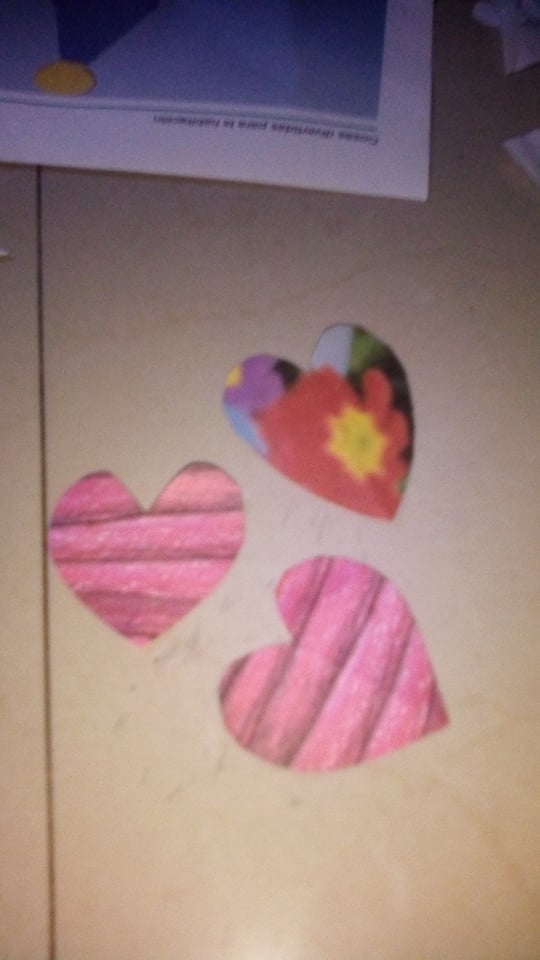
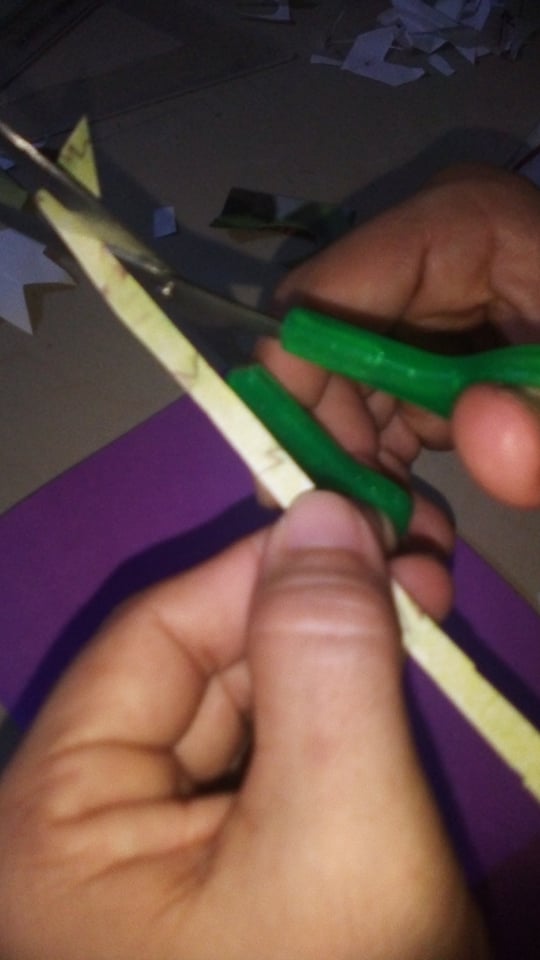
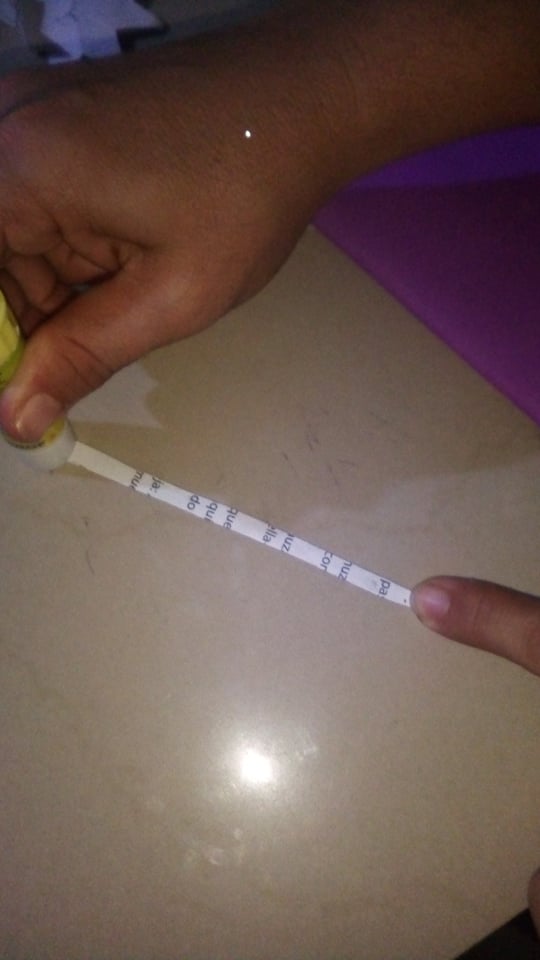

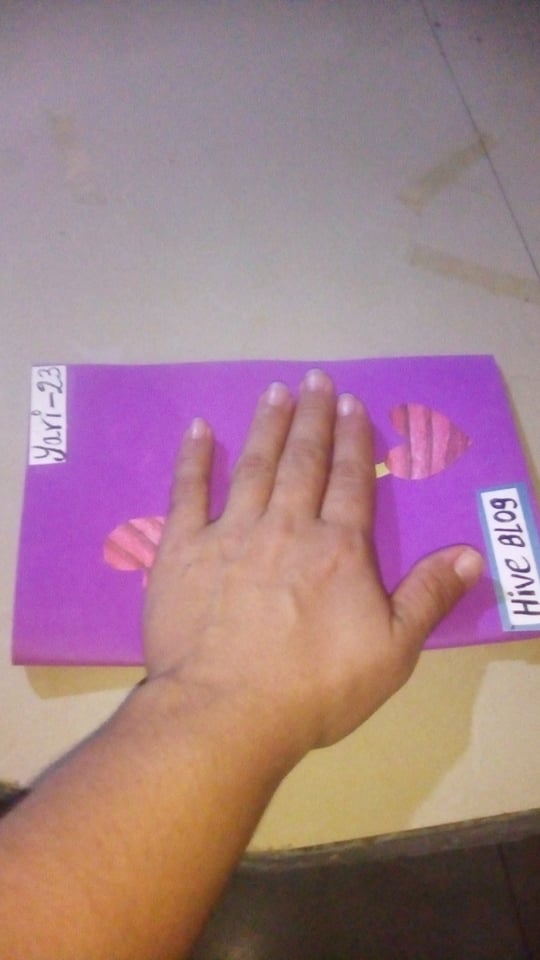
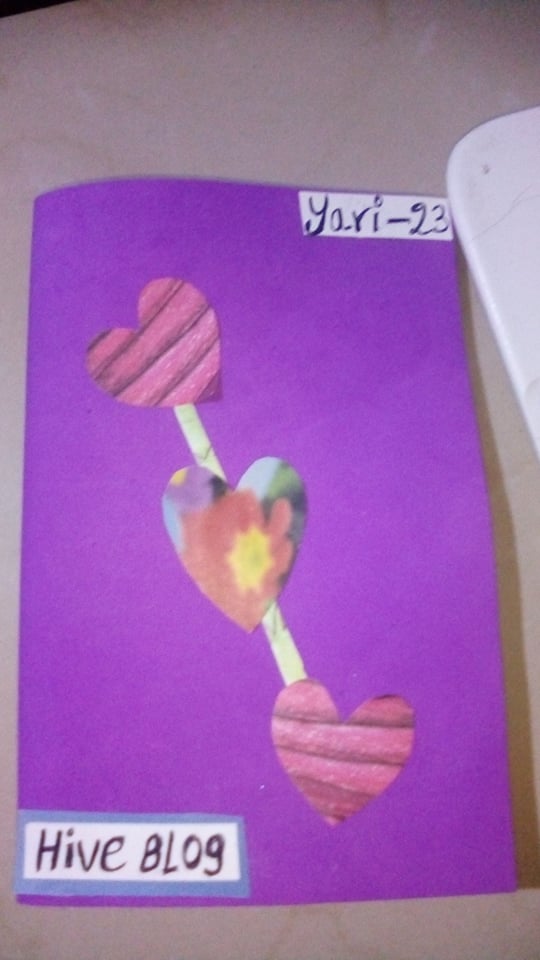
Paso 5
Mientras se seca las flores agarraremos la hoja de foami y la doblamos por la mitad, después dibujaremos unos corazones con retazos de revista para hacer nuestra portada, recortamos una tira de revista aplicamos pega y pegamos sucesivamente los corazones. En un pedacito de papel coloque mi nombre de usuario, mas el nombre de Hive blog y pegamos.
Step 5
While the flowers are drying we will take the foami sheet and fold it in half, then we will draw some hearts with magazine scraps to make our cover, we cut a strip of magazine, apply glue and glue the hearts successively. On a small piece of paper I put my user name, plus the name of Hive blog and we glued.
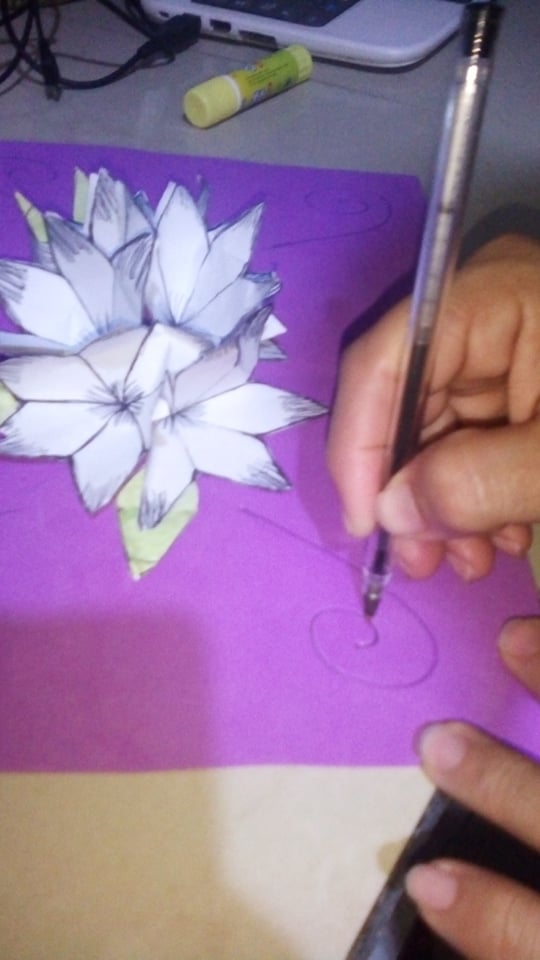
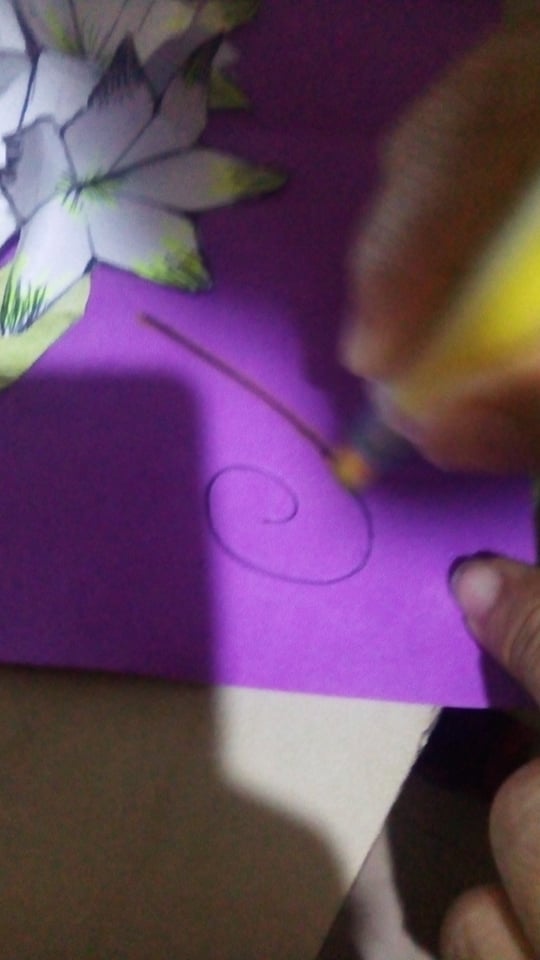

Paso 6
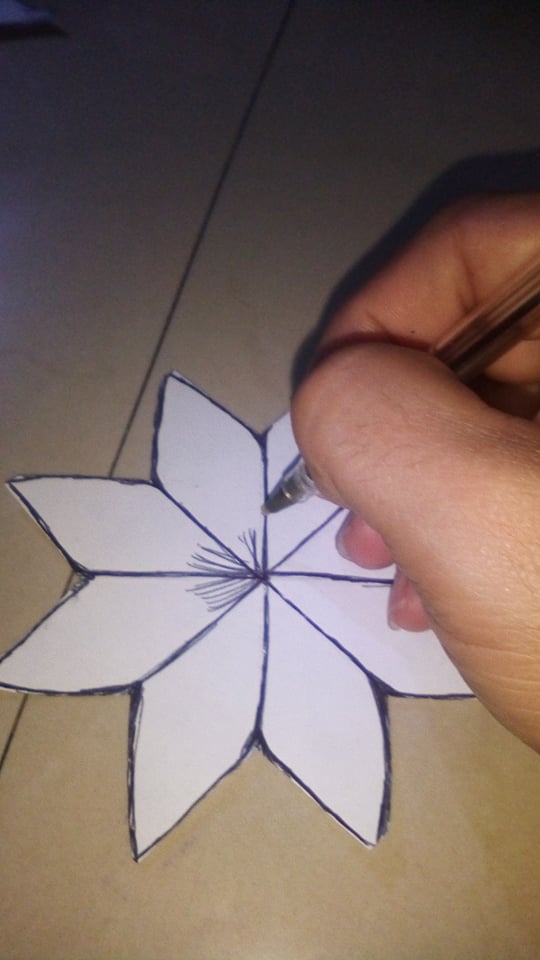
Ahora procedemos a pegar nuestro ramillete centramos el ramo en la mitad del foami, primero aplicamos pega en los dos pétalos en blanco y pegamos, luego aplicamos pega en el numero 7, cerramos la tapa del foami y presionamos hasta que seque. Abrimos poco a poco por ultimo con un lapicero negro hacemos decoraciones en el foami y con el marcador fosforescente dibujamos las flores para darle un toque llamativo.
Step 6
Now we proceed to glue our bouquet we center the bouquet in the middle of the foami, first apply glue on the two petals in white and glue, then apply glue on the number 7, close the lid of the foami and press until dry. We open little by little and finally with a black pencil we make decorations on the foami and with the phosphorescent marker we draw the flowers to give it a striking touch.
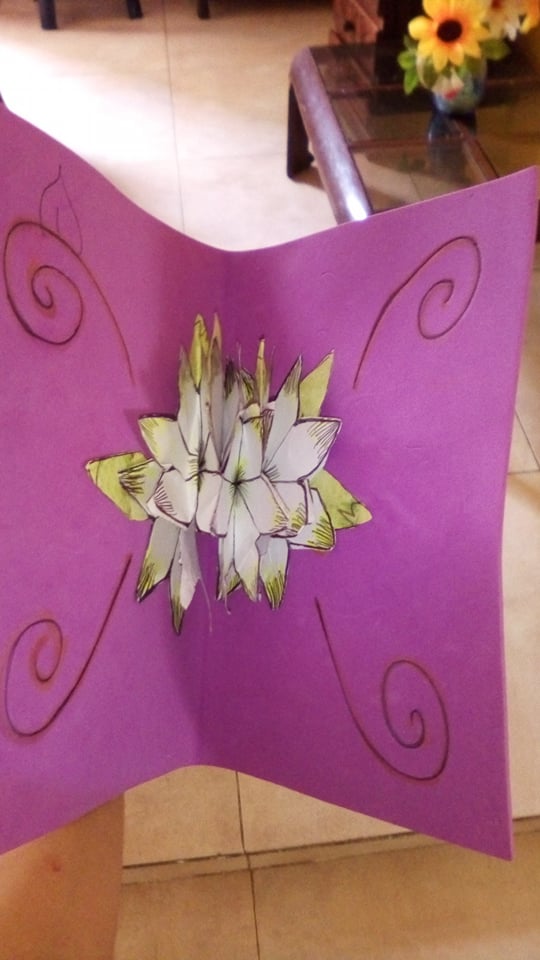
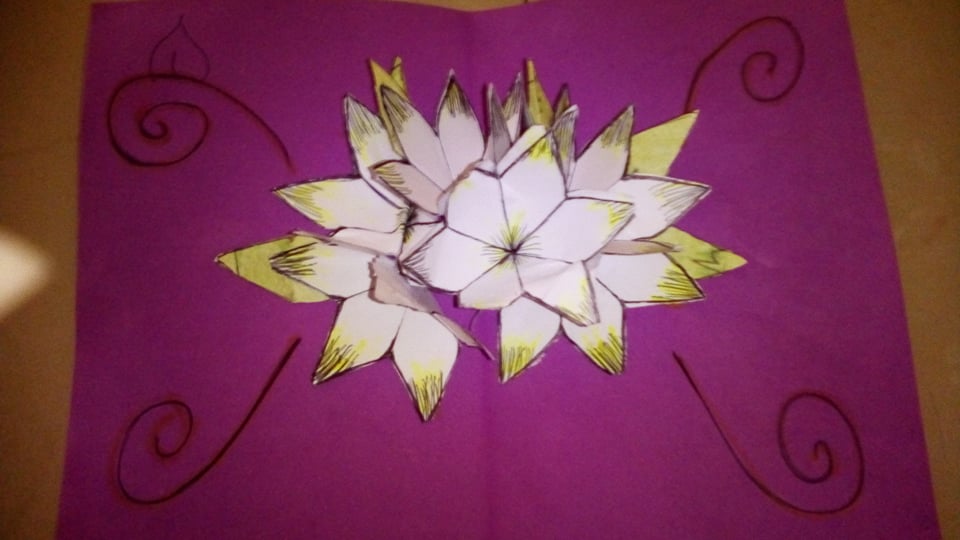
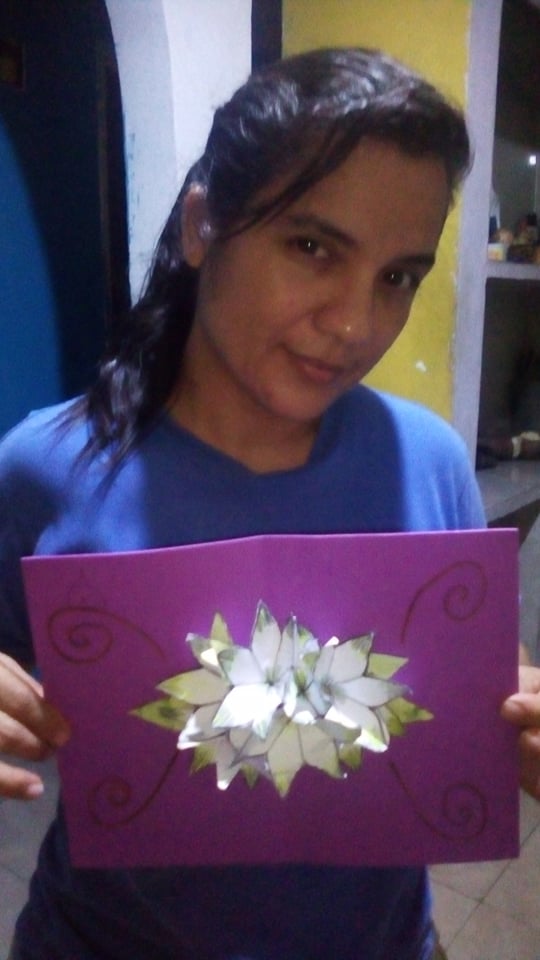
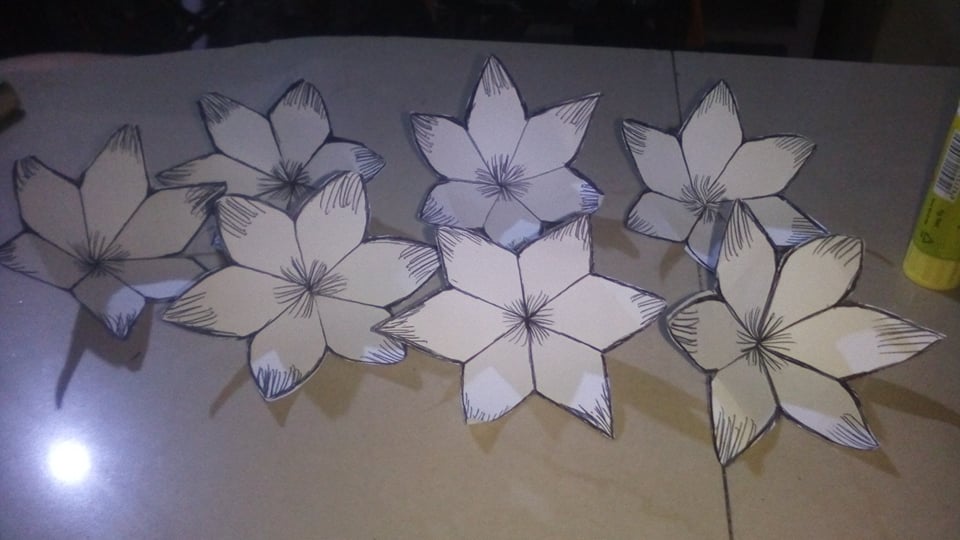
Aquí presento el resultado de mi trabajo, espero les guste mi participación.
Here I present the result of my work, I hope you like my participation.
En este bello concurso en tercera dimension invito a mis amigas @nubrasca11 @yelix @mariannis a participar.
In this beautiful contest in third dimension I invite my friends @nubrasca11 @yelix @mariannis to participate.
Gracias por leerme, vota, comenta y comparte. Se les quiere.
Thank you for reading, voting, commenting and sharing. You are loved.
Las fotos son de mi autoría.
Traducido con Deepl traductor.
The photos are my own.
Translated with Deepl translator.
La forma que creas la flor es muy interesante, gracias por enseñarnos cómo se hace, mucha suerte en el concurso.
Gracias @equipodelta por su bonito comentario, me siento feliz de participar en su bello concurso.
Congratulations @yari-23! You have completed the following achievement on the Hive blockchain and have been rewarded with new badge(s) :
Your next target is to reach 100 comments.
You can view your badges on your board and compare yourself to others in the Ranking
If you no longer want to receive notifications, reply to this comment with the word
STOPTo support your work, I also upvoted your post!
Check out the last post from @hivebuzz: