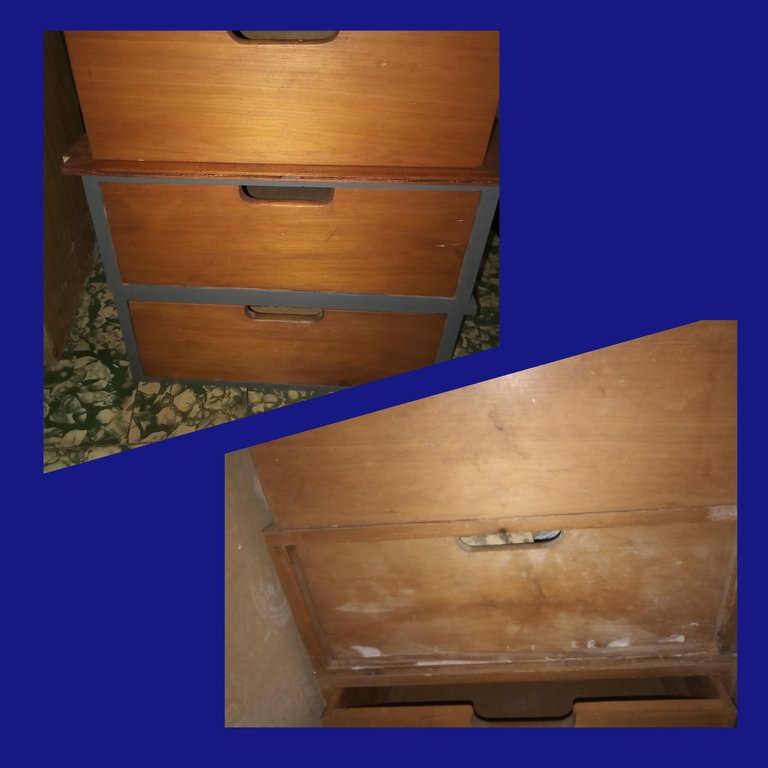
Como les comenté en el post anterior, esta semana estuve lijando, pintando, inventando con cosas de madera que tengo en la casa, las cuales iban a ser tiradas al contenedor por otras personas pero yo les dí otra oportunidad de uso, así reciclamos, reusamos y contribuímos con nuestro lindo Planeta! En esta publicación les muestro el paso a paso de las mejoras de un gavetero que utiliza mi esposo colocando la ropa de trabajo, ese estaba para tirar en una obra de construcción donde el estuvo trabajando y le faltaban unas piezas.
As I told you in the previous post, this week I was sanding, painting, inventing with wooden things that I have in the house, which were going to be thrown into the container by other people but I gave them another opportunity to use them, so we recycle, reuse and we contribute with our beautiful Planet! In this publication I show you the step by step of the improvements of a dresser that my husband uses to put his work clothes, that one was to be thrown away in a construction site where he was working and some pieces were missing.
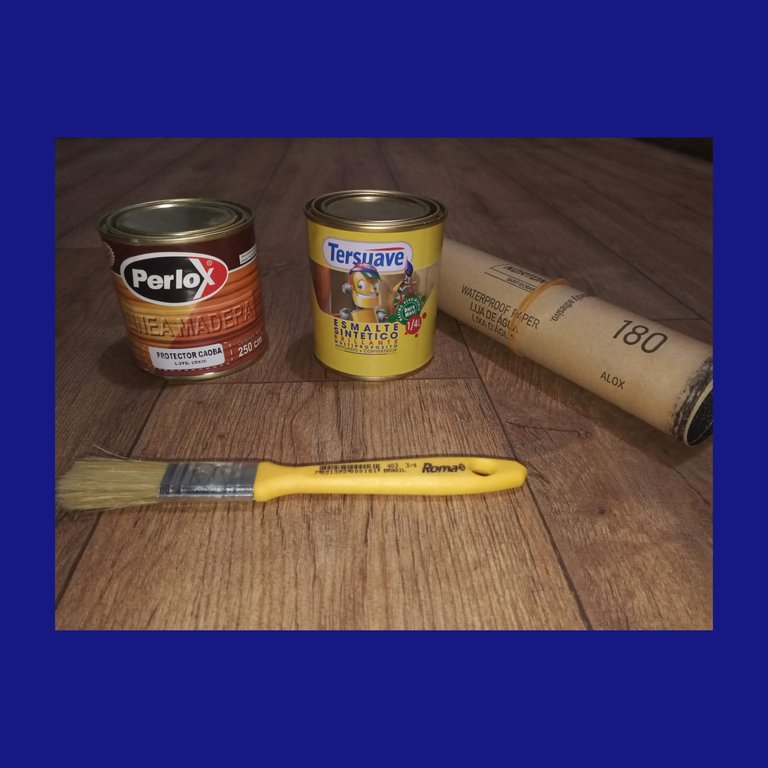
Materiales usados:
- Lijadora eléctrica
- Pliego de lija #180
- Pintura acrílica brillante color gris
- Protector para madera color caoba
- Trapo sin felpas
- Brocha
- Thiner ( removedor de pintura )
- Guantes
***Used materials:
- Electric sander
- Sheet of sandpaper #180
- Glossy gray acrylic paint
- Protector for mahogany wood
- Cloth without plush
- Brush
- Thiner (paint remover)
- Gloves***
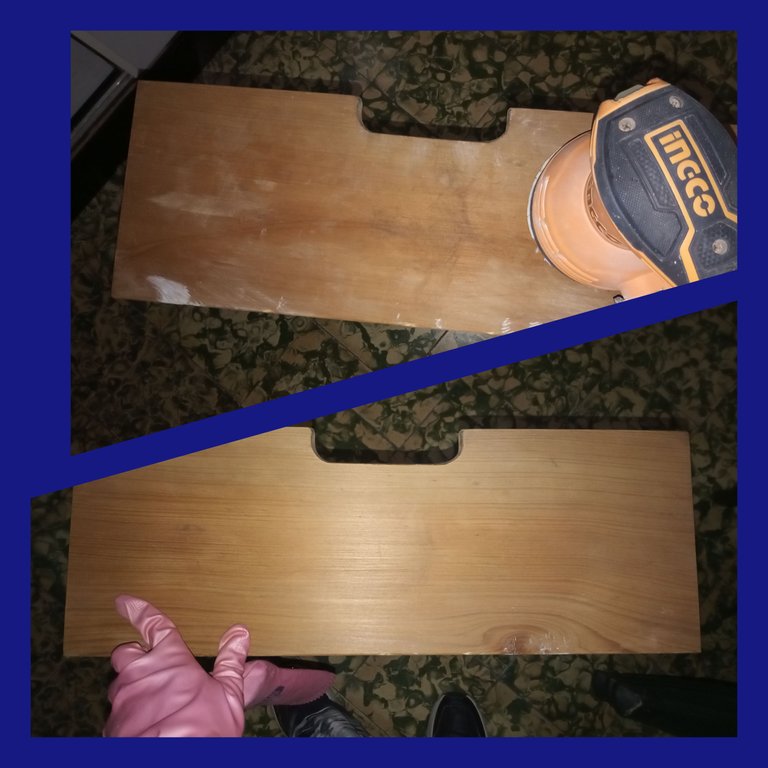
Paso 1
Sacar los cajones del gavetero y con la lijadora eléctrica lijar muy bien la parte frontal en el sentido de las vetas (Hacer lo mismo con todos los cajones). En caso de que los laterales estén muy manchados o sucios se pueden lijar un poco.
Step 1
Remove the drawers from the dresser and with the electric sander sand the front part very well in the direction of the grain (Do the same with all the drawers). If the sides are very stained or dirty, they can be sanded a little.
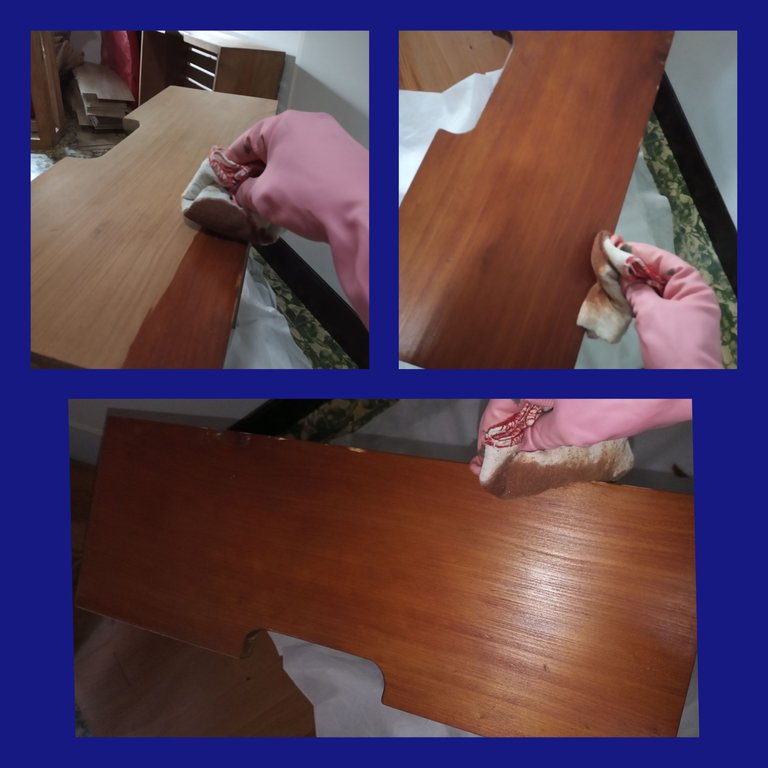
Paso 2:
Colocar en el trapo un poco del protector para madera y aplicarlo en la parte frontal en el sentido de las vetas tratando de exenderlo de un extremo a otro, hasta cubrirla toda incluyendo el borde superior.
Con lo que queda en el trapo pásele a los laterales y parte interna de la gaveta.
Step 2:
Place a little of the wood protector on the cloth and apply it to the front in the direction of the grain, trying to extend it from one end to the other, until it covers the entire area, including the upper edge.
With what remains in the cloth, pass it to the sides and inside of the drawer.
Paso 3:
Estructura
Si la estructura está muy dañada se puede lijar un poco con el pliego de lija 180.
Step 3:
Structure
If the structure is very damaged, it can be sanded a little with the 180 sandpaper sheet.
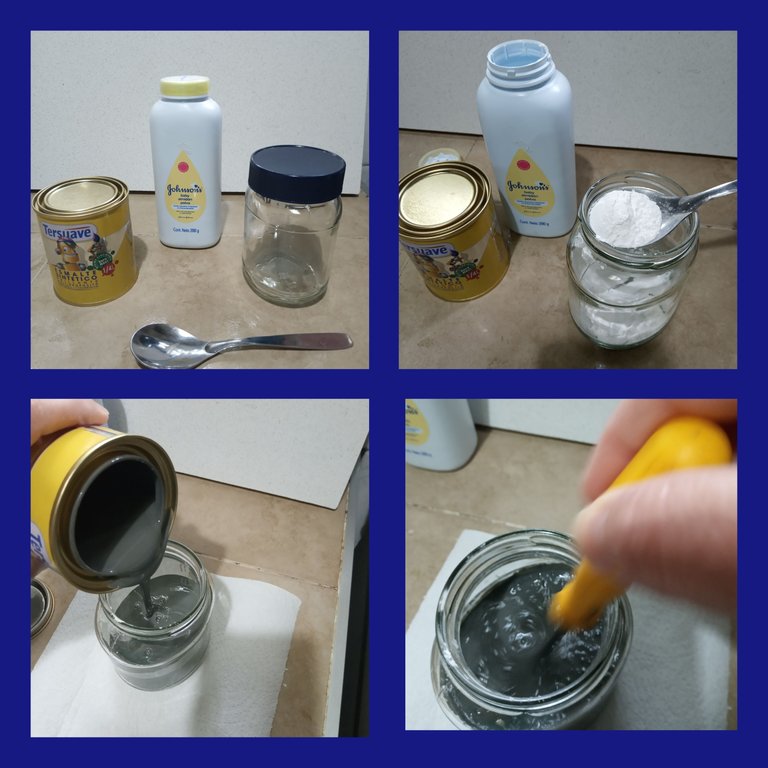
Paso 4:
Pintura
Para poner mate la pintura de esmalte colóquele 4 cucharadas de talco a 1/4 de litro,revuelva muy bien y listo.
Step 4:
Painting
To matte the enamel paint, add 4 tablespoons of talcum powder to 1/4 of a liter, stir very well and that's it.
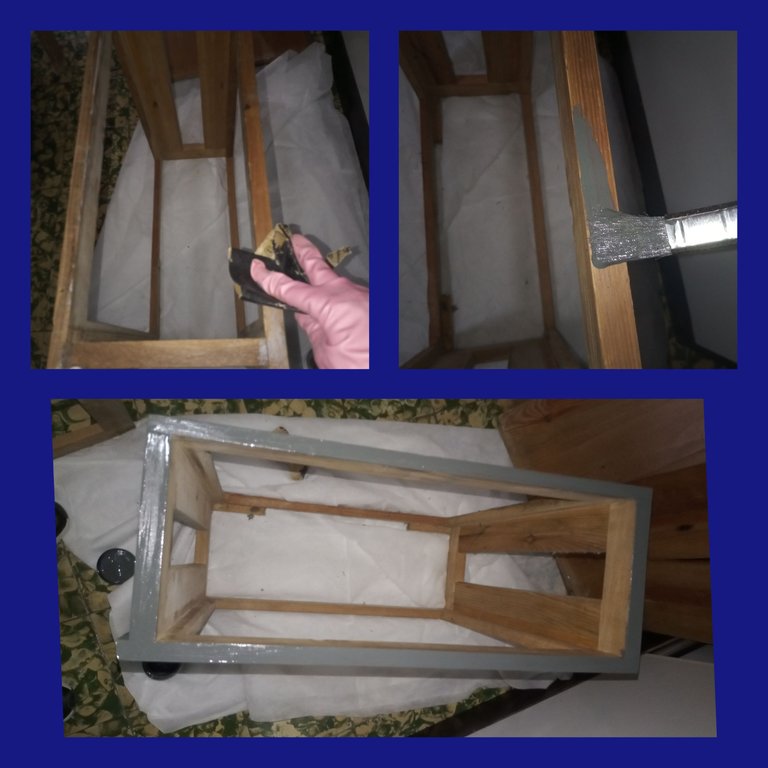
Paso 5:
Pinte con la pintura gris ya preparada solo la parte frontal y laterales de la estructura donde va la gaveta, evitando la parte interna por donde esta se desliza.
Step 5:
Paint with the gray paint already prepared only the front and sides of the structure where the drawer goes, avoiding the internal part where it slides.
Paso 6:
Dejar secar por tres horas antes de armar de nuevo. Verificar al tacto.
Step 6:
Let dry for three hours before reassembling. Check by touch.
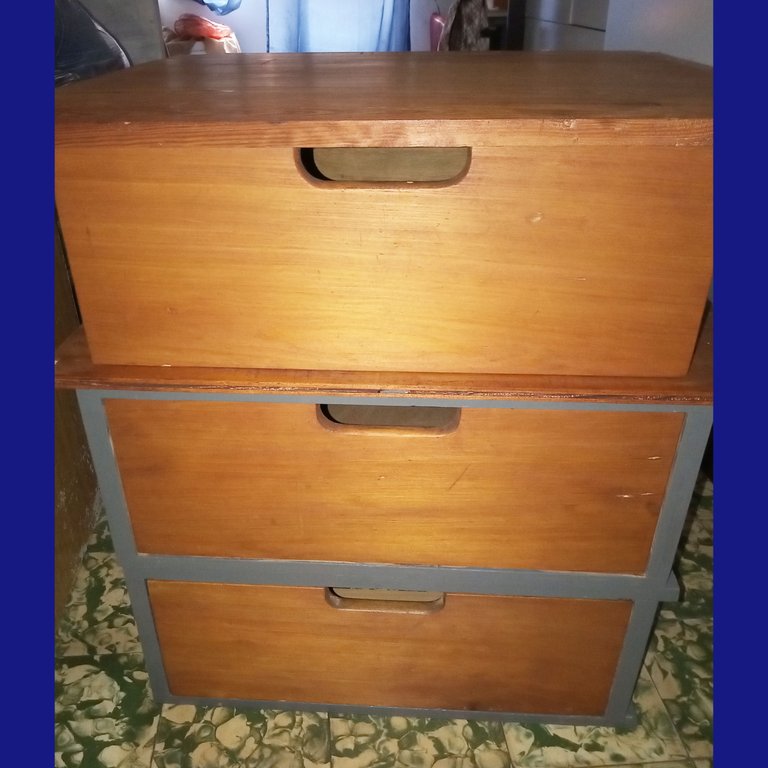
y Listo!!! Ahora tenemos un gavetero con mejor apariencia!!!
Gracias por leerme y espero les sirva!!!
***And ready!!! Now we have a better looking dresser!!!
Thank you for reading and I hope you find it useful!
Gracias por mostrarnos cómo restaurar los muebles, dándoles así una segunda oportunidad.
Gracias a ustedes por estar!!!