So you've got a new scope and need to mount it? Check out this tool to ensure the reticle is level. As @galenkp pointed out in his recent post, when you mount a new (or old) scope to a rifle, it is critical that the reticle is level for accurate adjustments later. I used to get quite disappointed when I would mount a new scope, then take it to the range for sight in, only to find that my adjustments were not always what I thought they should be, especially when going out past 100yards.
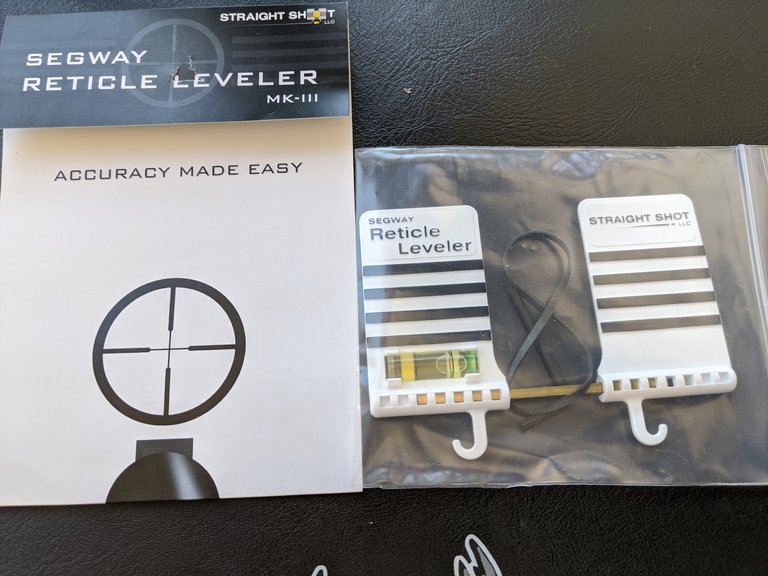
A friend of my turned me on to this slick tool 3-4 years ago, and I love it. One of the best $20 ever spent. This is the Segway Reticle Leveler. It's very simple and easy to use. Creative folks could probably even make one yourself if you have a spare level hanging around.
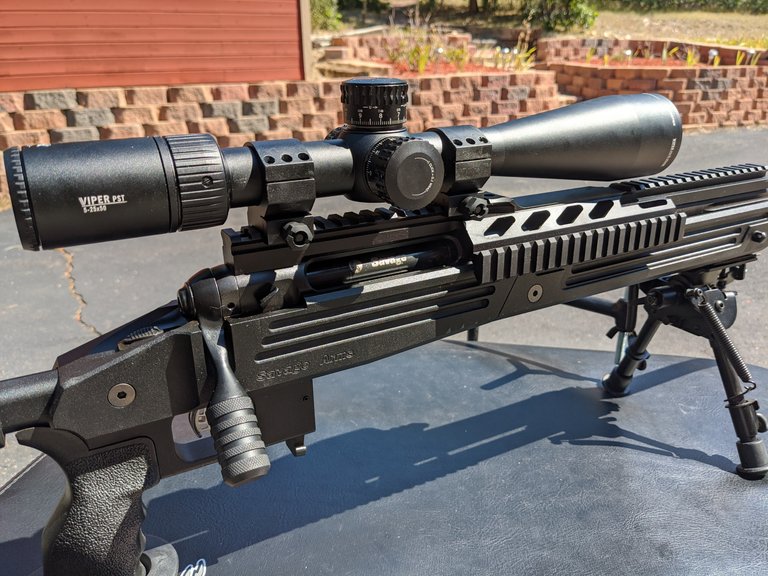
Since I have this tool, I go through a slightly different process than @galenkp but of course many ways to get there. On a picatinny rail, there is usually a lot more room for adjustment than on a rifle with just fixed dovetail mounts, but my process for both is the same. You'll also note that I like the Burris Xtreme mounts, which have three screws on each side, rather than just one or two like some mounts have. This ensures a stable platform that will not move from shooting recoil.
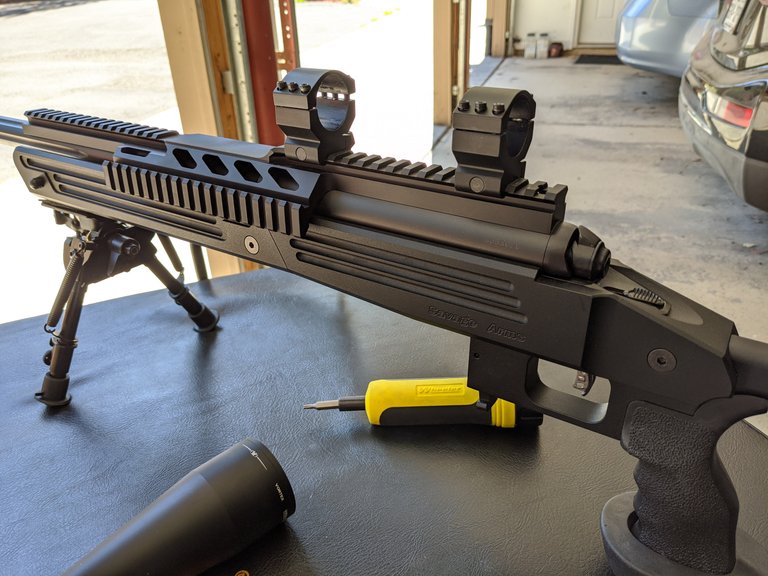
First, I put on the base of the scope mount where I think they should go. I then loosen the screws if they are installed and remove the tops. Then, I put scope on top to see if the eye relief (distance between eye and scope) is where I want it.If not, I'll adjust the scope mount position. This is a critical step. If you have it mounted too far forward or too far back, two things will happen. One, your view in the scope will be restricted to a smaller than normal view, making it near impossible to find targets in the view. If too close, the scope could also jump up and give you a black eye if on a high power rifle and not shouldered properly. Once I'm confident that the scope mounts are in the right position, I'll screw the tops on very lightly and prepare for final eye relief and leveling adjustments.
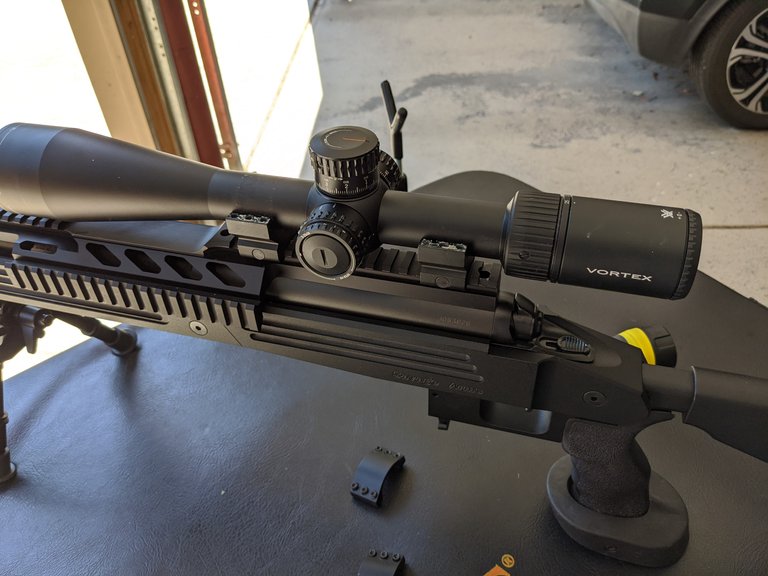
If you look closely, you'll see that I actually had to move the scope mounts back one slot from my original estimate. Now there is only one slot open at the back, instead of two slots that were showing initially.
Now that the top of the rings are on, try multiple times putting it against your shoulder with face in normal natural firing position so that it comes up with a nice full view each time without having to slide your head closer or farther. Another critical piece here is be sure to do this again with the scope zoomed in at full magnification, as it will be a more restrictive view and more sensitive to proper eye relief.
Once setting eye relief is done, the tops of the mounts should already be just snug enough so that you can turn the scope with a little resistance. It's now time for leveling.
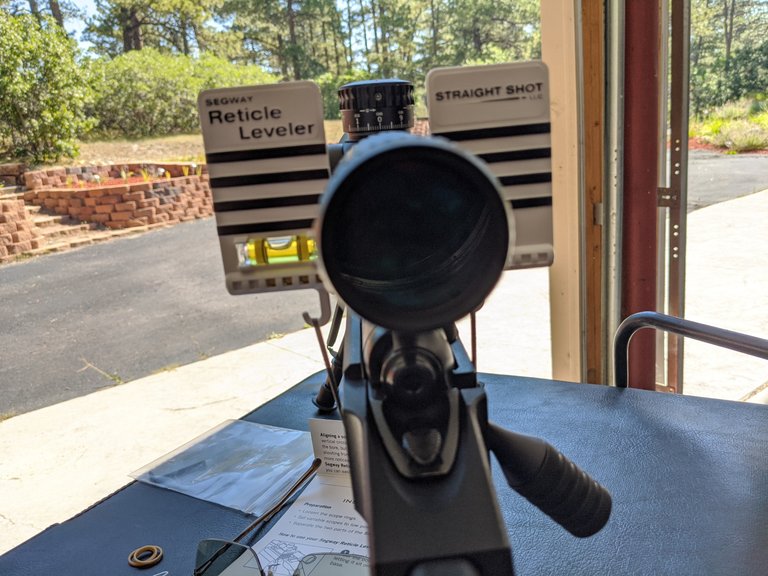
If you saw on the very first picture, the leveling tool has a little brass bar at the bottom. You simply place that on the top of the picatinny rail or other flat portion at top of your rifle, then pull the rubber band down around the bottom of rifle to hold it snug. Adjust the bubble to be level (bipod and/or stable rest recommended for this part). Then just look through the scope and align the crosshairs with the black lines on the tool. You'll be amazed how fast and easy it is to tell when they are off by even a little bit. This is also an excellent tool for a gunsmith or friend to check if other's scopes are level.
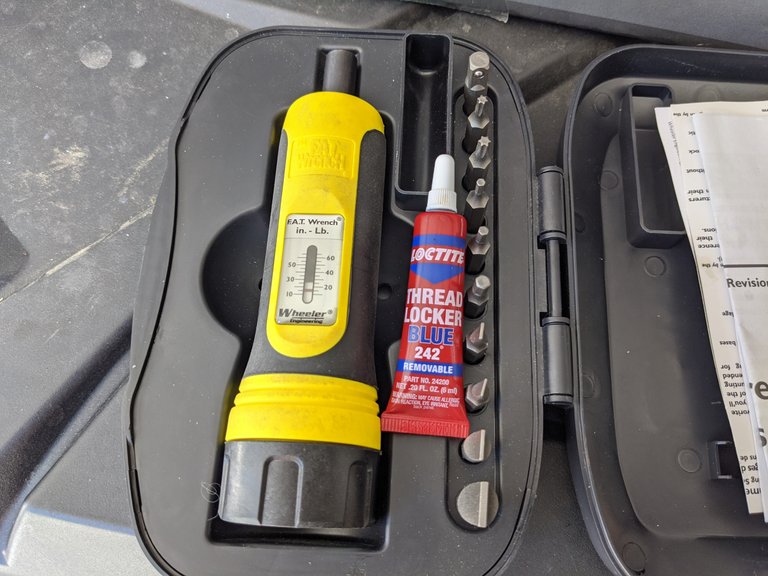
Once you're sure it's level, snug the mount screws down very gradually and equally on both sides. Also, be sure not to over-tighten. Most recommend no more than 18 ft. lbs. of torque. Applying too much pressure can actually damage your scope. Invest in a cheap torque driver, and a bit of blue (removable) locktite. I can't even tell you how many scope screws I stripped out in my younger days before I learned this trick. I like the Fat Wrench, but there are many types.
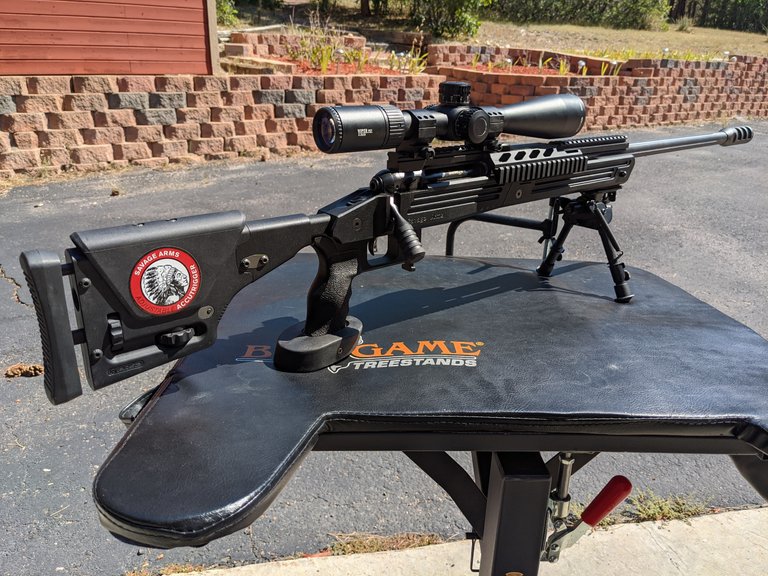
So here's the final product, all ready to head to the range for zeroing in. That's for another day, it's 98F degrees (36C) here today and just after noon so won't be going out until I can get out on an early morning day when cooler.

Looking forward to getting out. I've got some new 300 grain Accubond loads built up that look very promising.
Scope eye trademark of many an inexperienced shooter. Lol.
Looks like a good little tool and a bit easier than the plumb-line process I use...May have to see if I can get one. Also, I've never used Loctite on my rings...You use it on the screws or where the rings meet together?
On the screws. Just use the right type that is designed to be removed. This keeps them from working loose even if not tightened extra hard. Doesn't take much, just a drop. Great for any screws that may vibrate loose over time. The kit is still like only $20 U.S. at Brownells and other. Not sure what shipping like over there but well worth the time savings.
$20 is $28 here, postage is likely to be at least the same so under $60. Seems reasonable.
I use Loctite on other stuff, never felt I needed it on the guns, but it makes sense...As long one uses the right colour.