I am pleased to participate in the "Think and Create" contest of this new Womentribe community, where I am sure we will all grow in this relationship of knowledge exchange. The name of the contest gave me the idea of creating a beautiful decorative painting inspired by the harmony of perfect nature, with contrasting colors and simple beauty, for which I used useful materials.
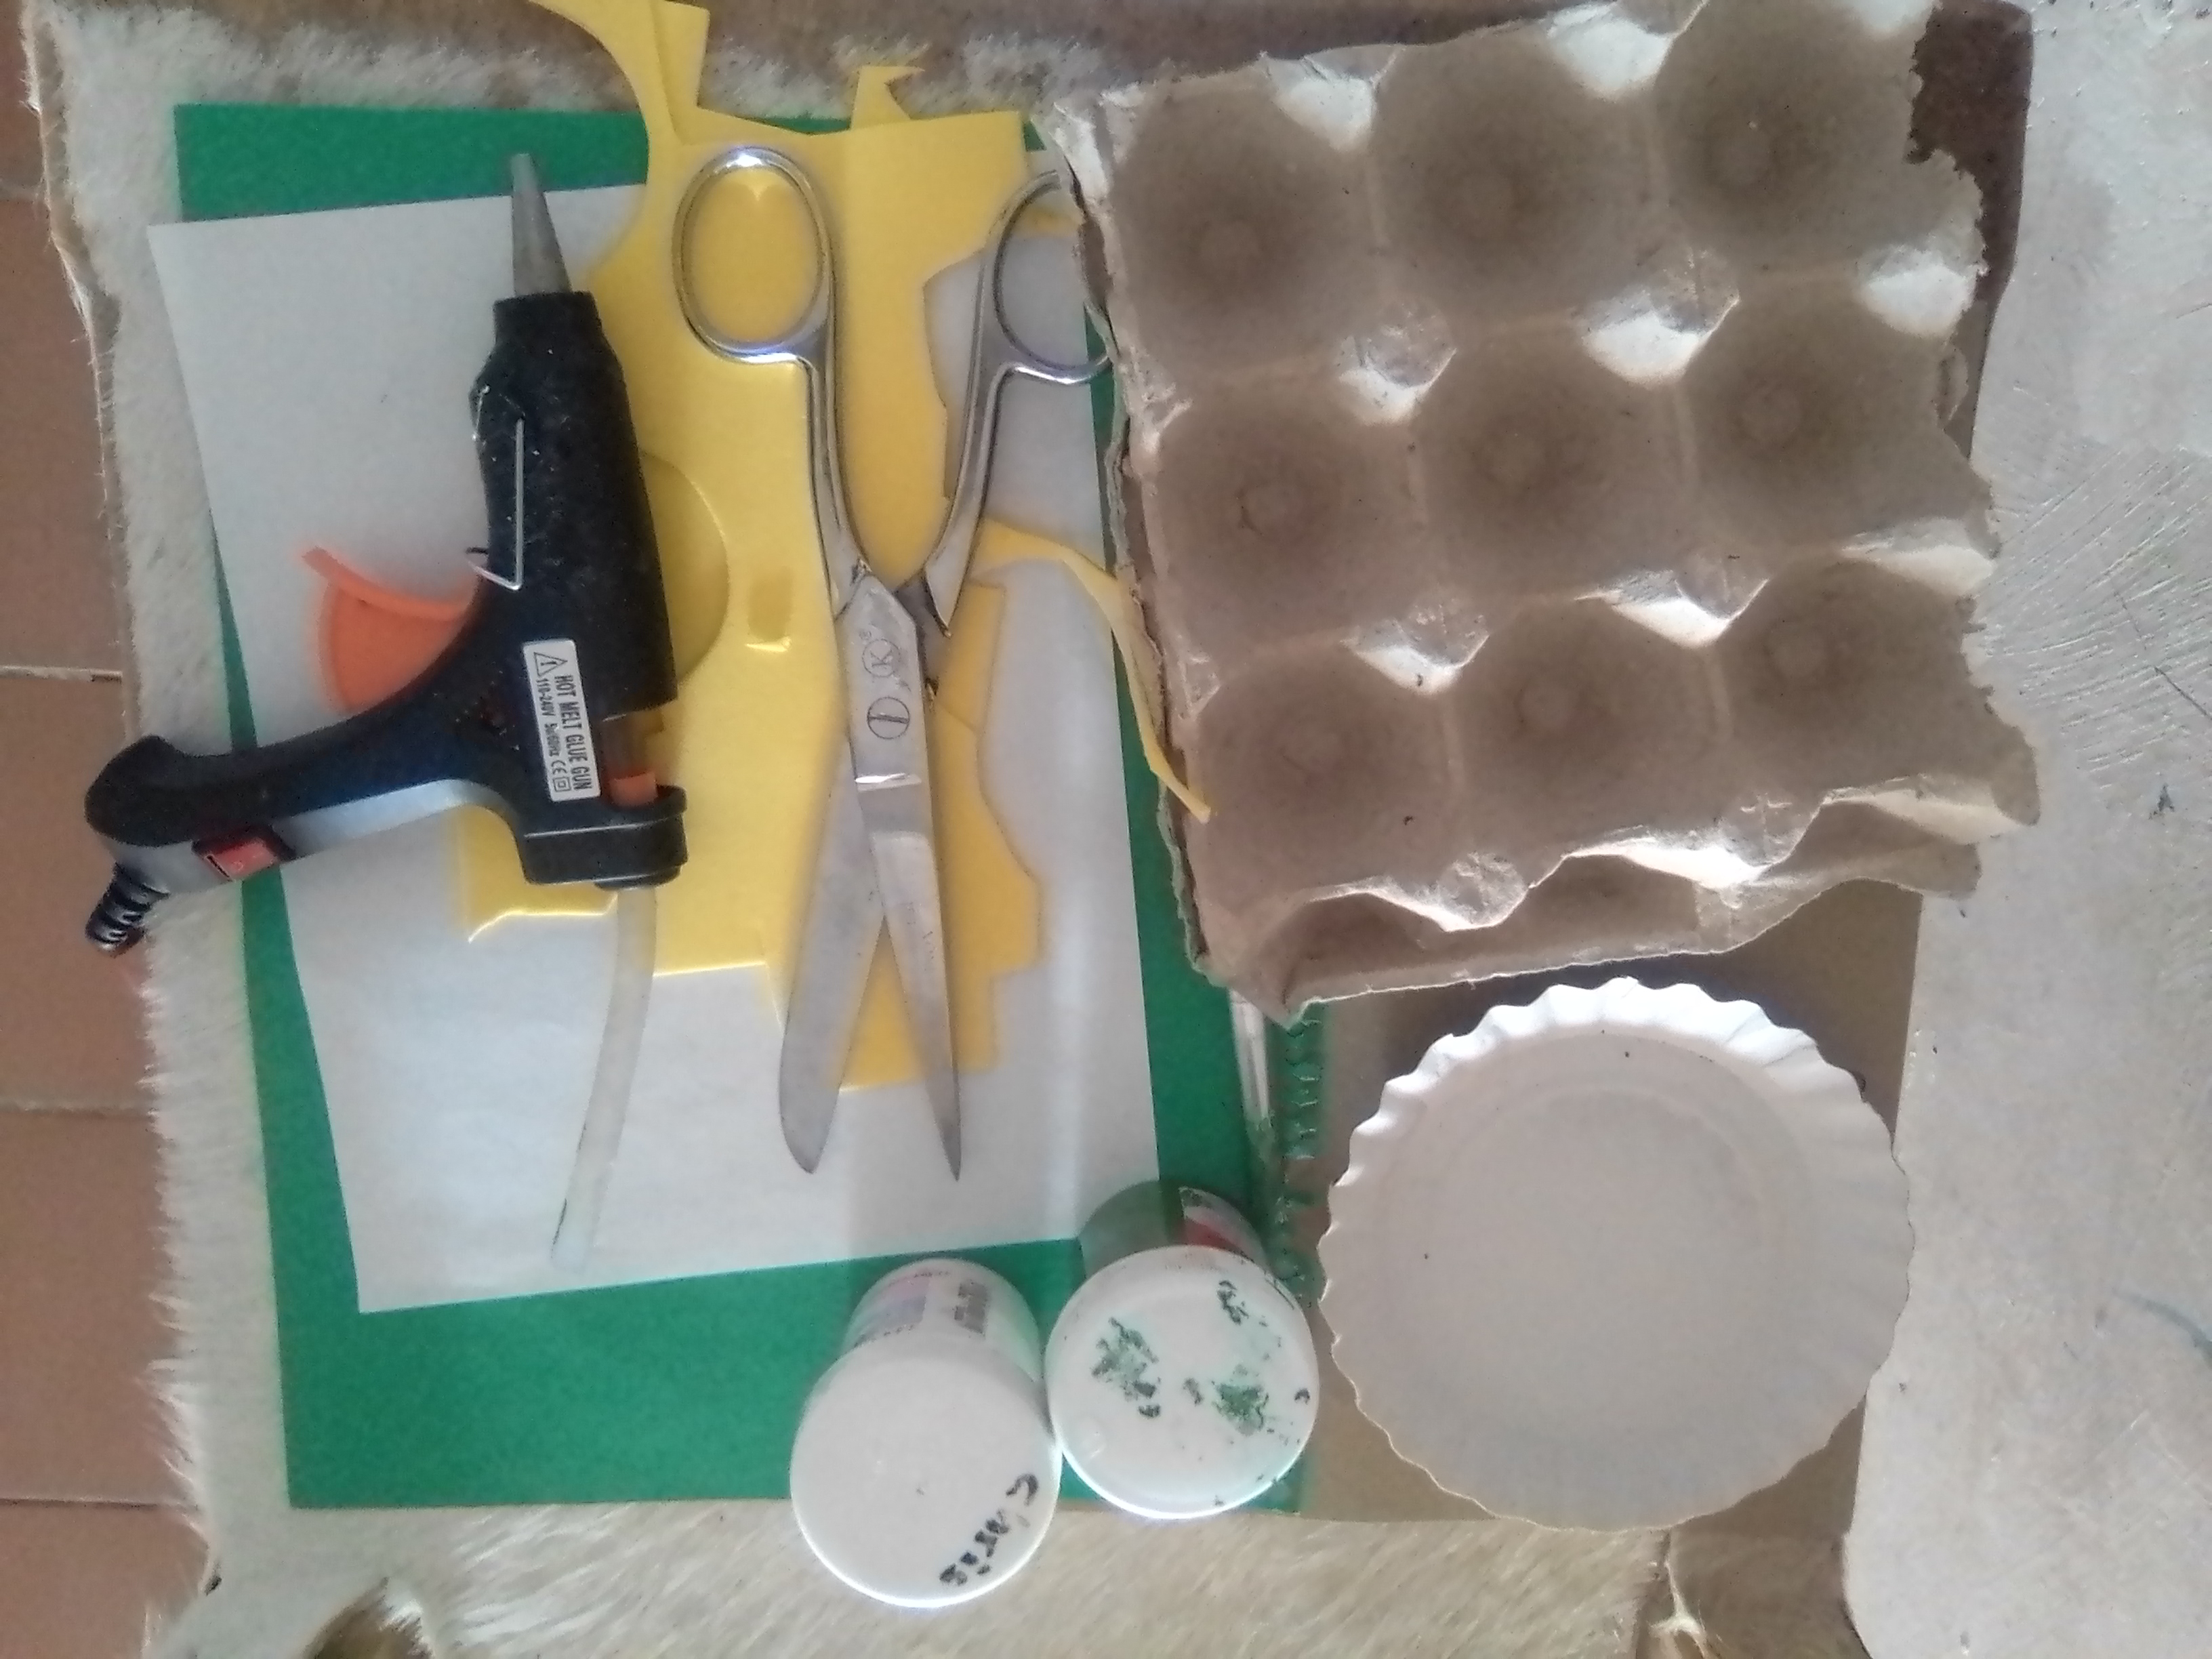
Materiales Materials
- Cartón duro
- Cartón de huevos
- Hoja blanca te reciclada.
- Plato de cartón
- Pinturas verde claro y negro
- Cartulina roja, verde y marrón
- Pistola y barra de Silicon
- Tijera
- Foami amarillo
- Hard cardboard
- Egg carton
- Recycled white sheet of paper.
- Cardboard plate
- Light green and black paints
- Red, green and brown cardboard
- Silicon gun and rod * Scissors
- Scissors
- Yellow Foami
Step by Step
Primer paso First step
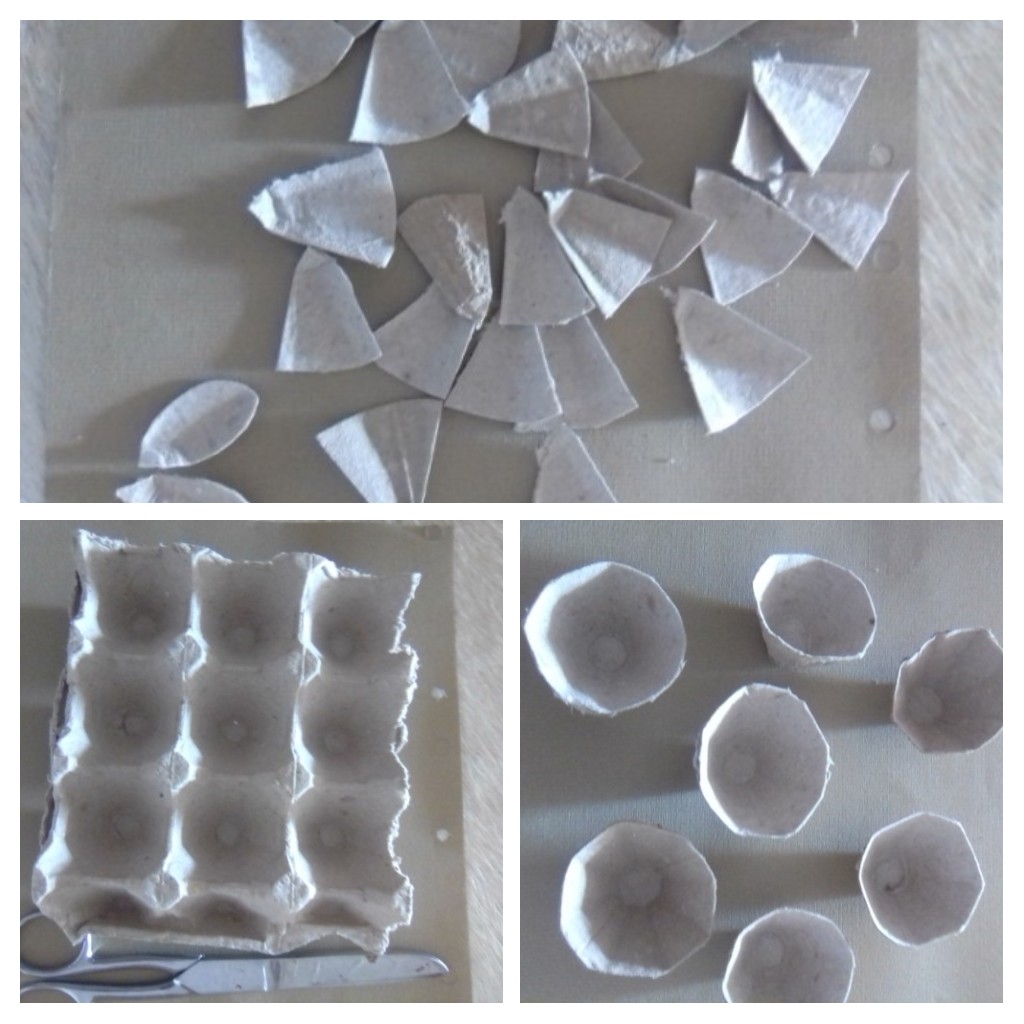
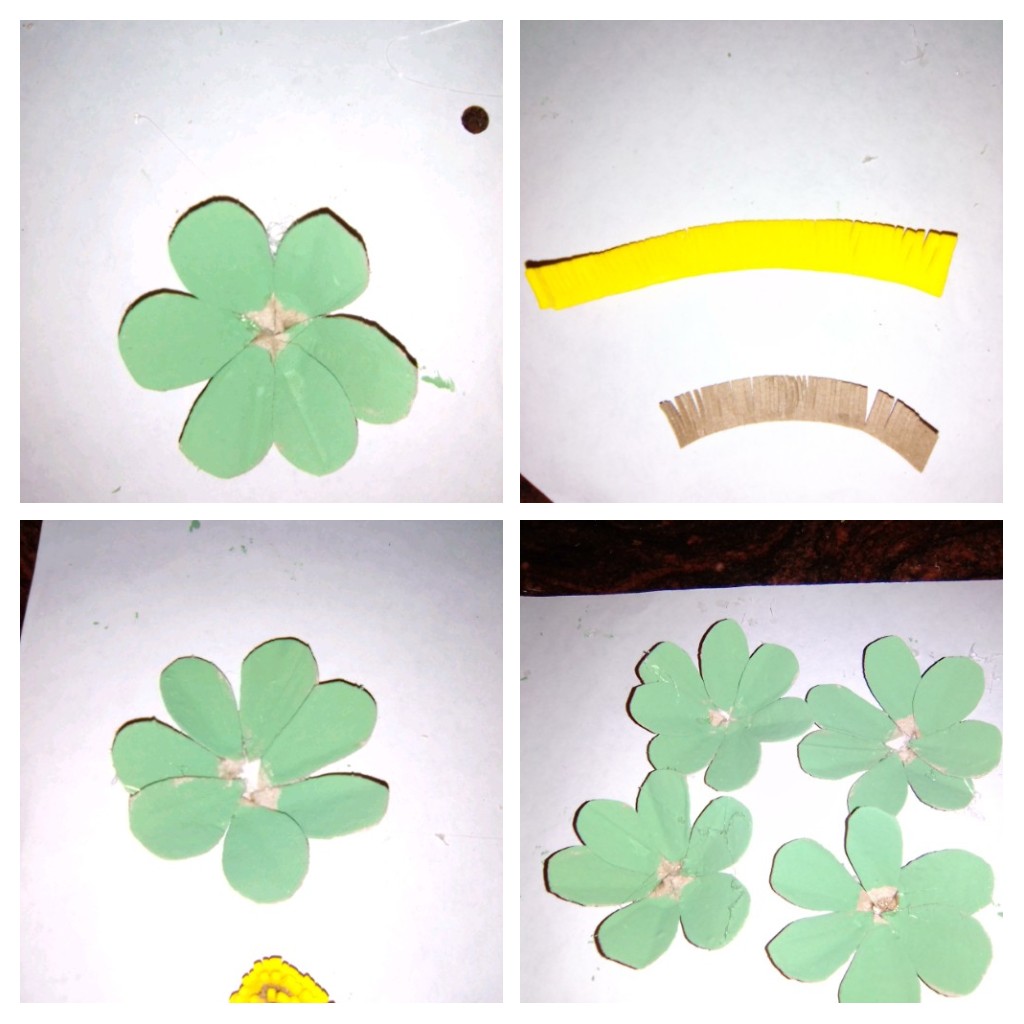
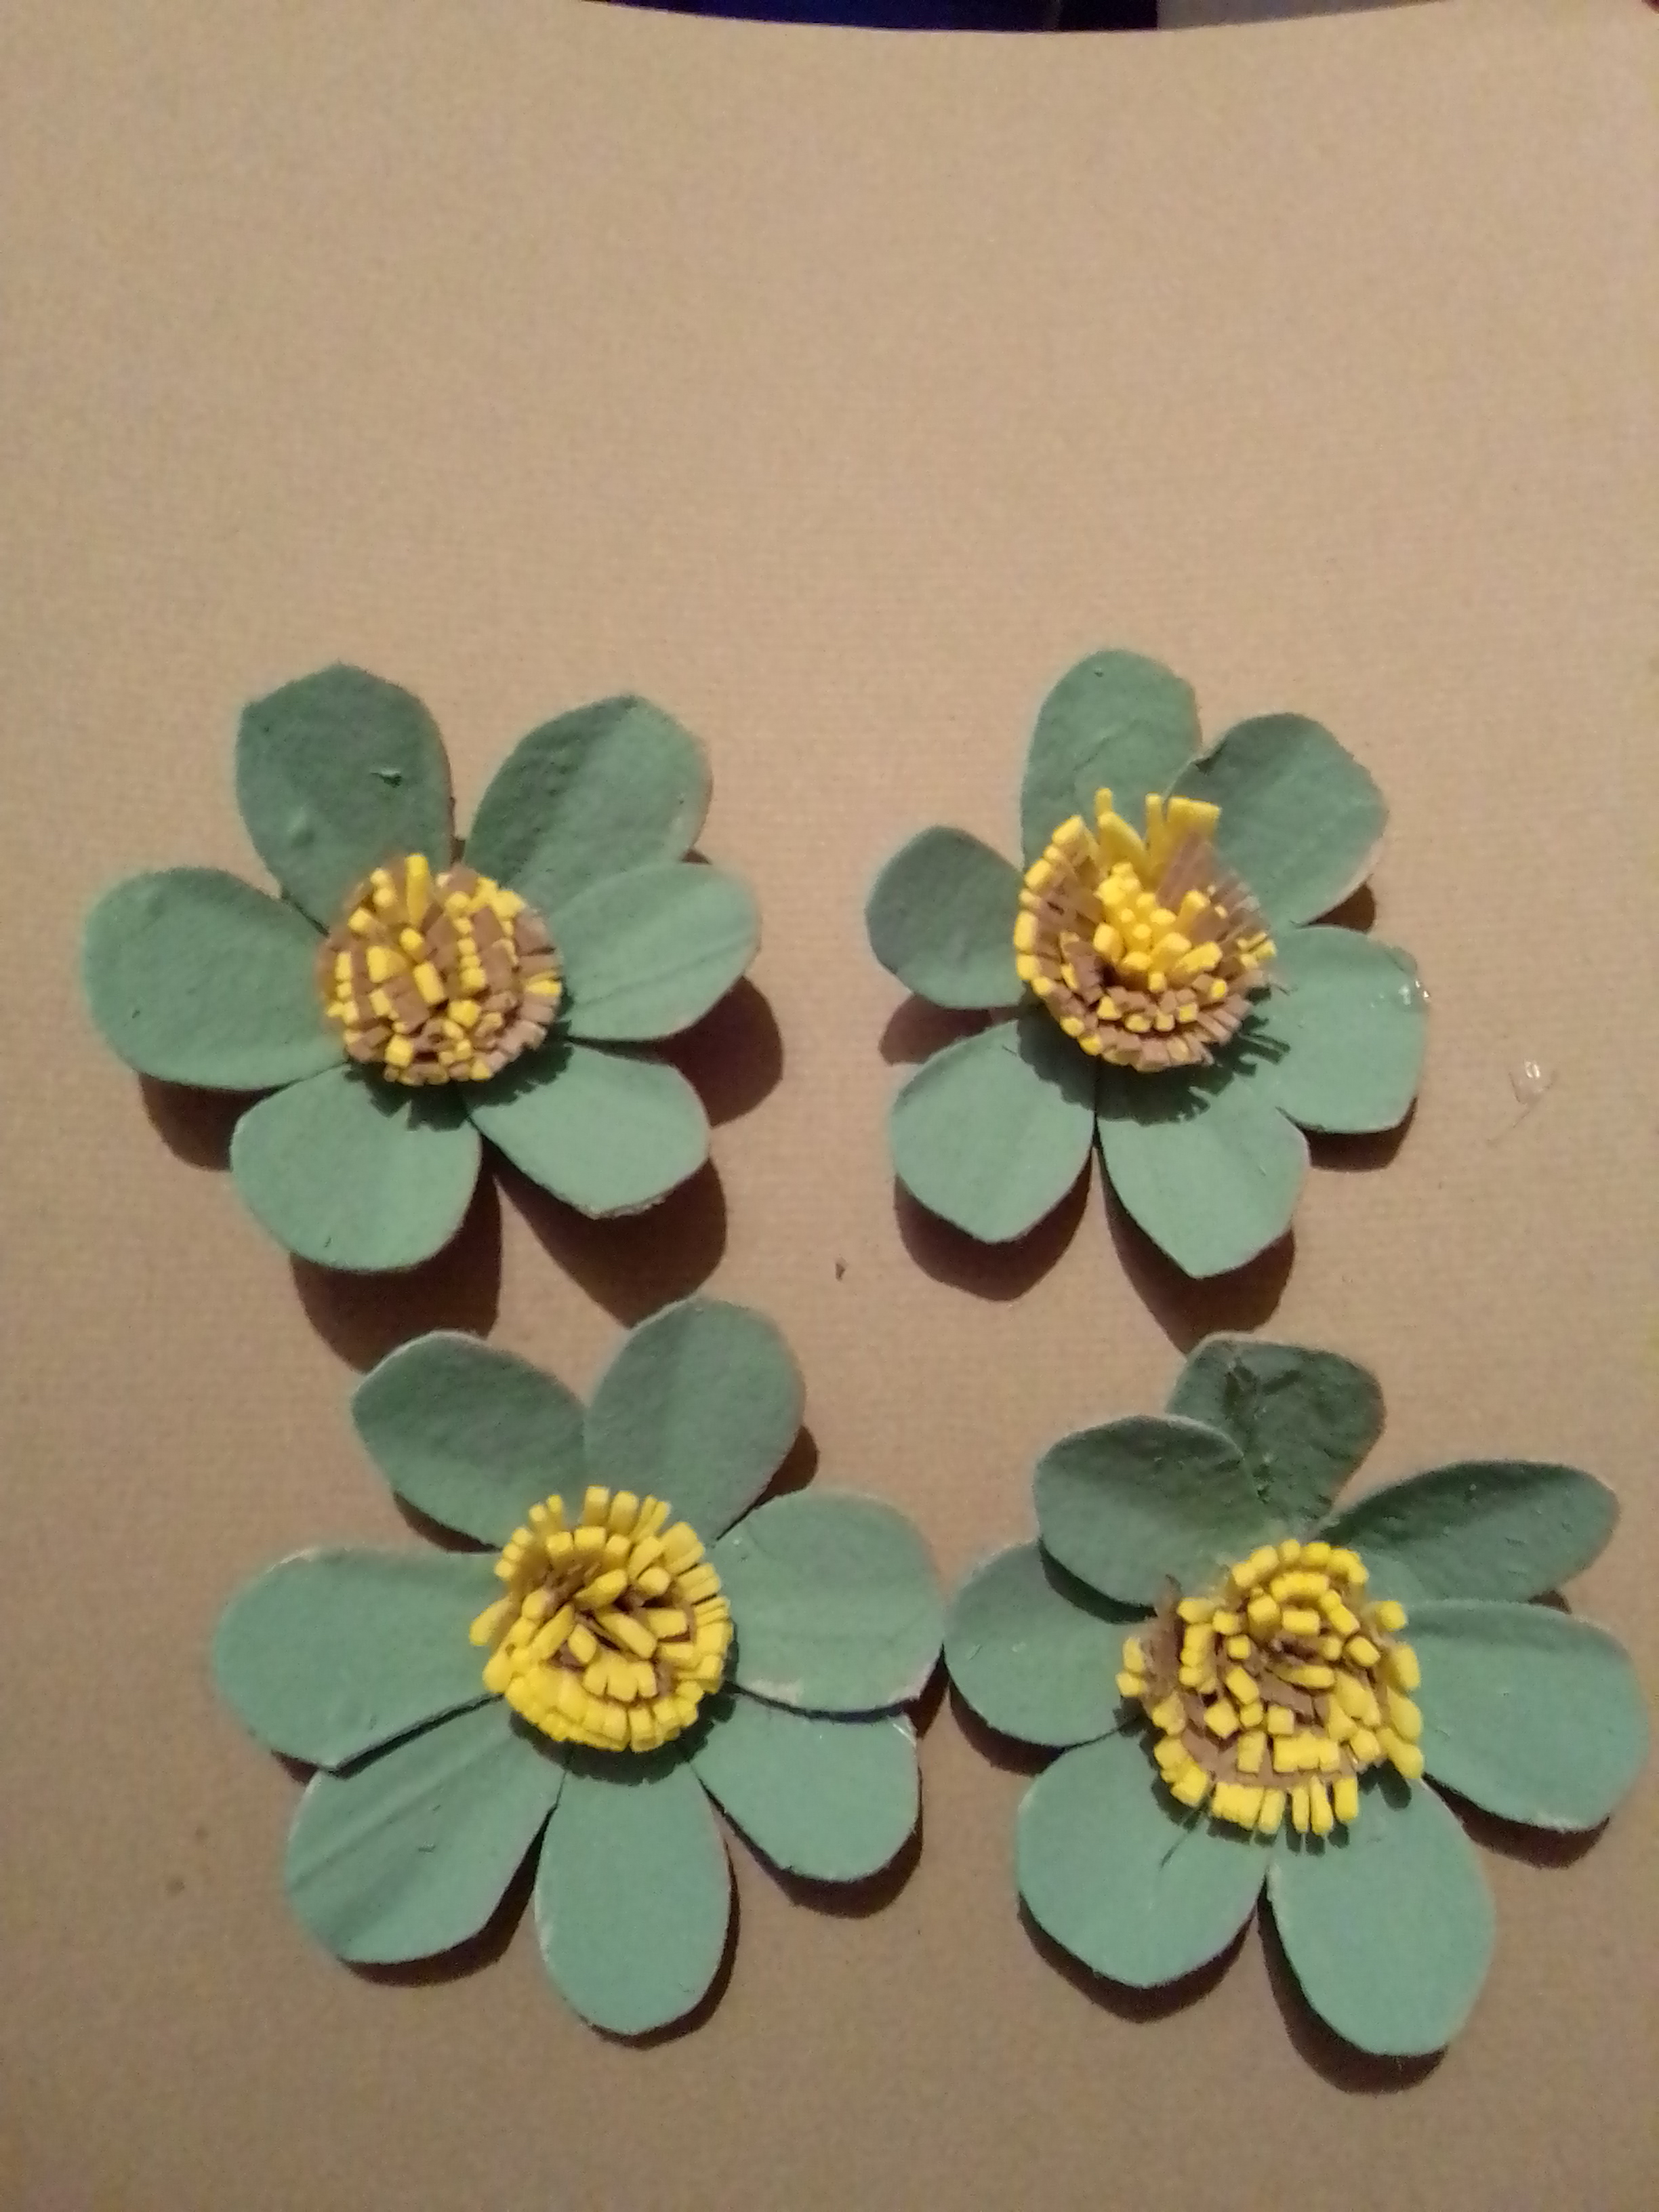
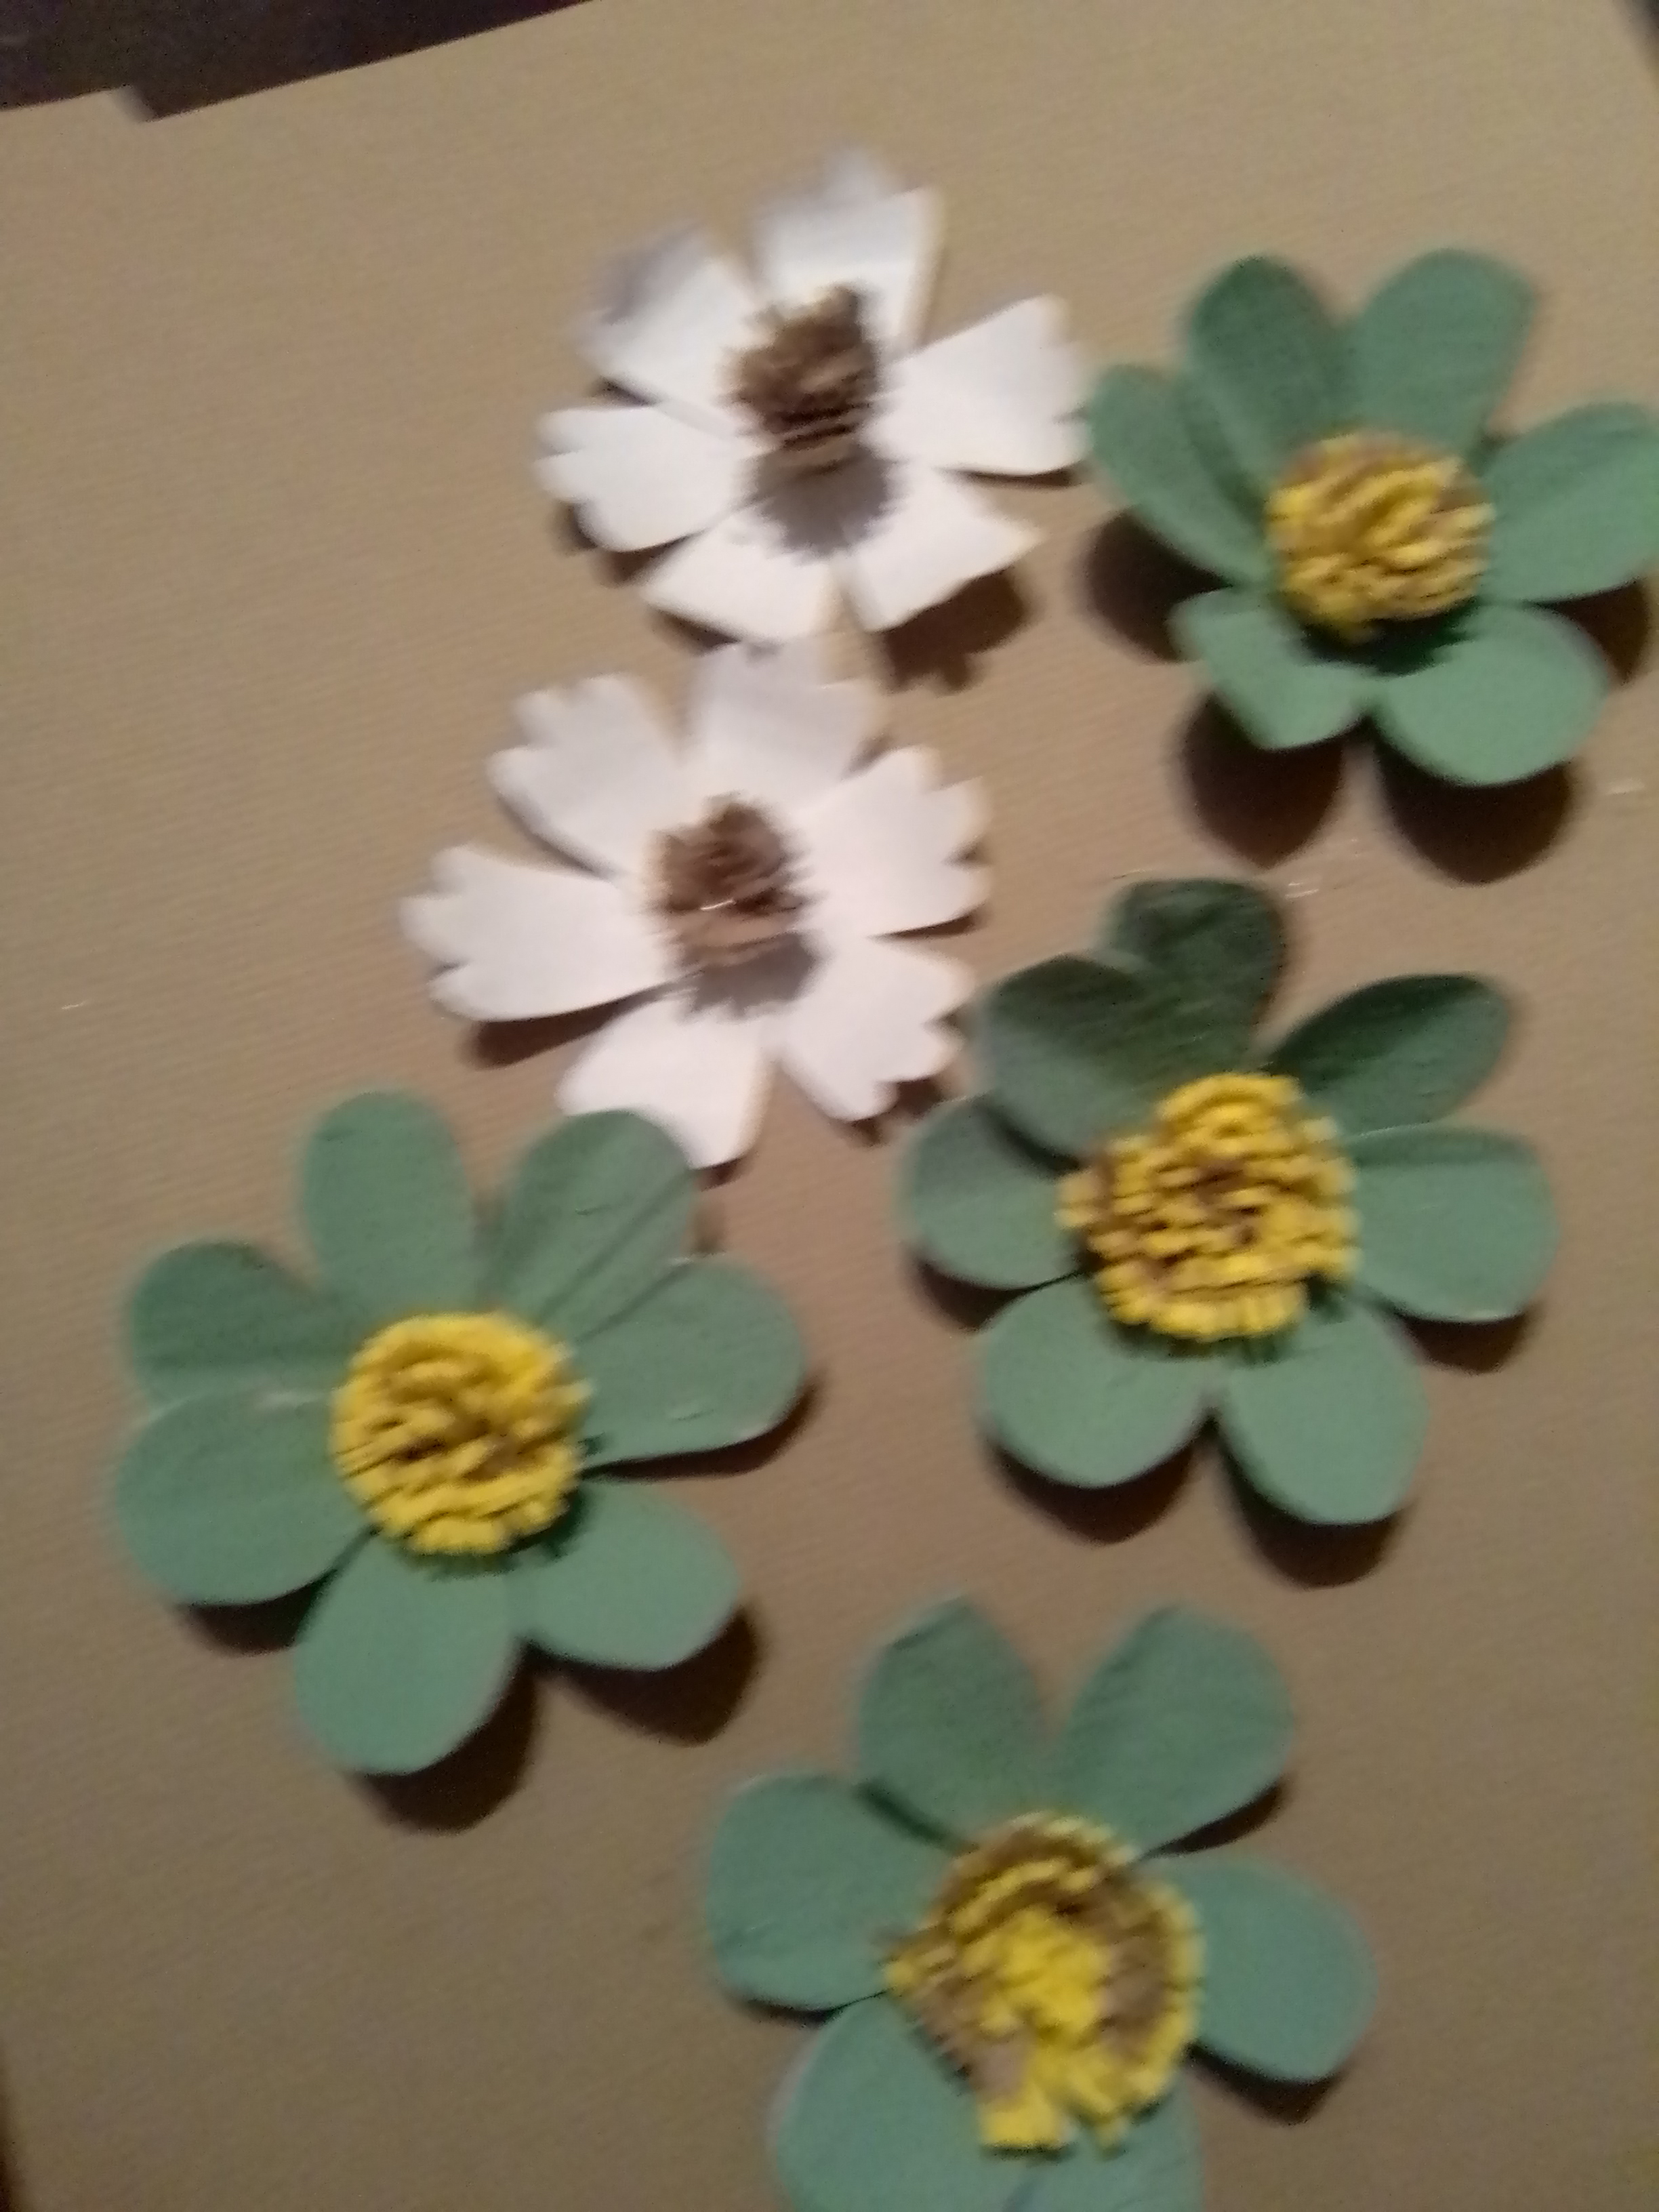
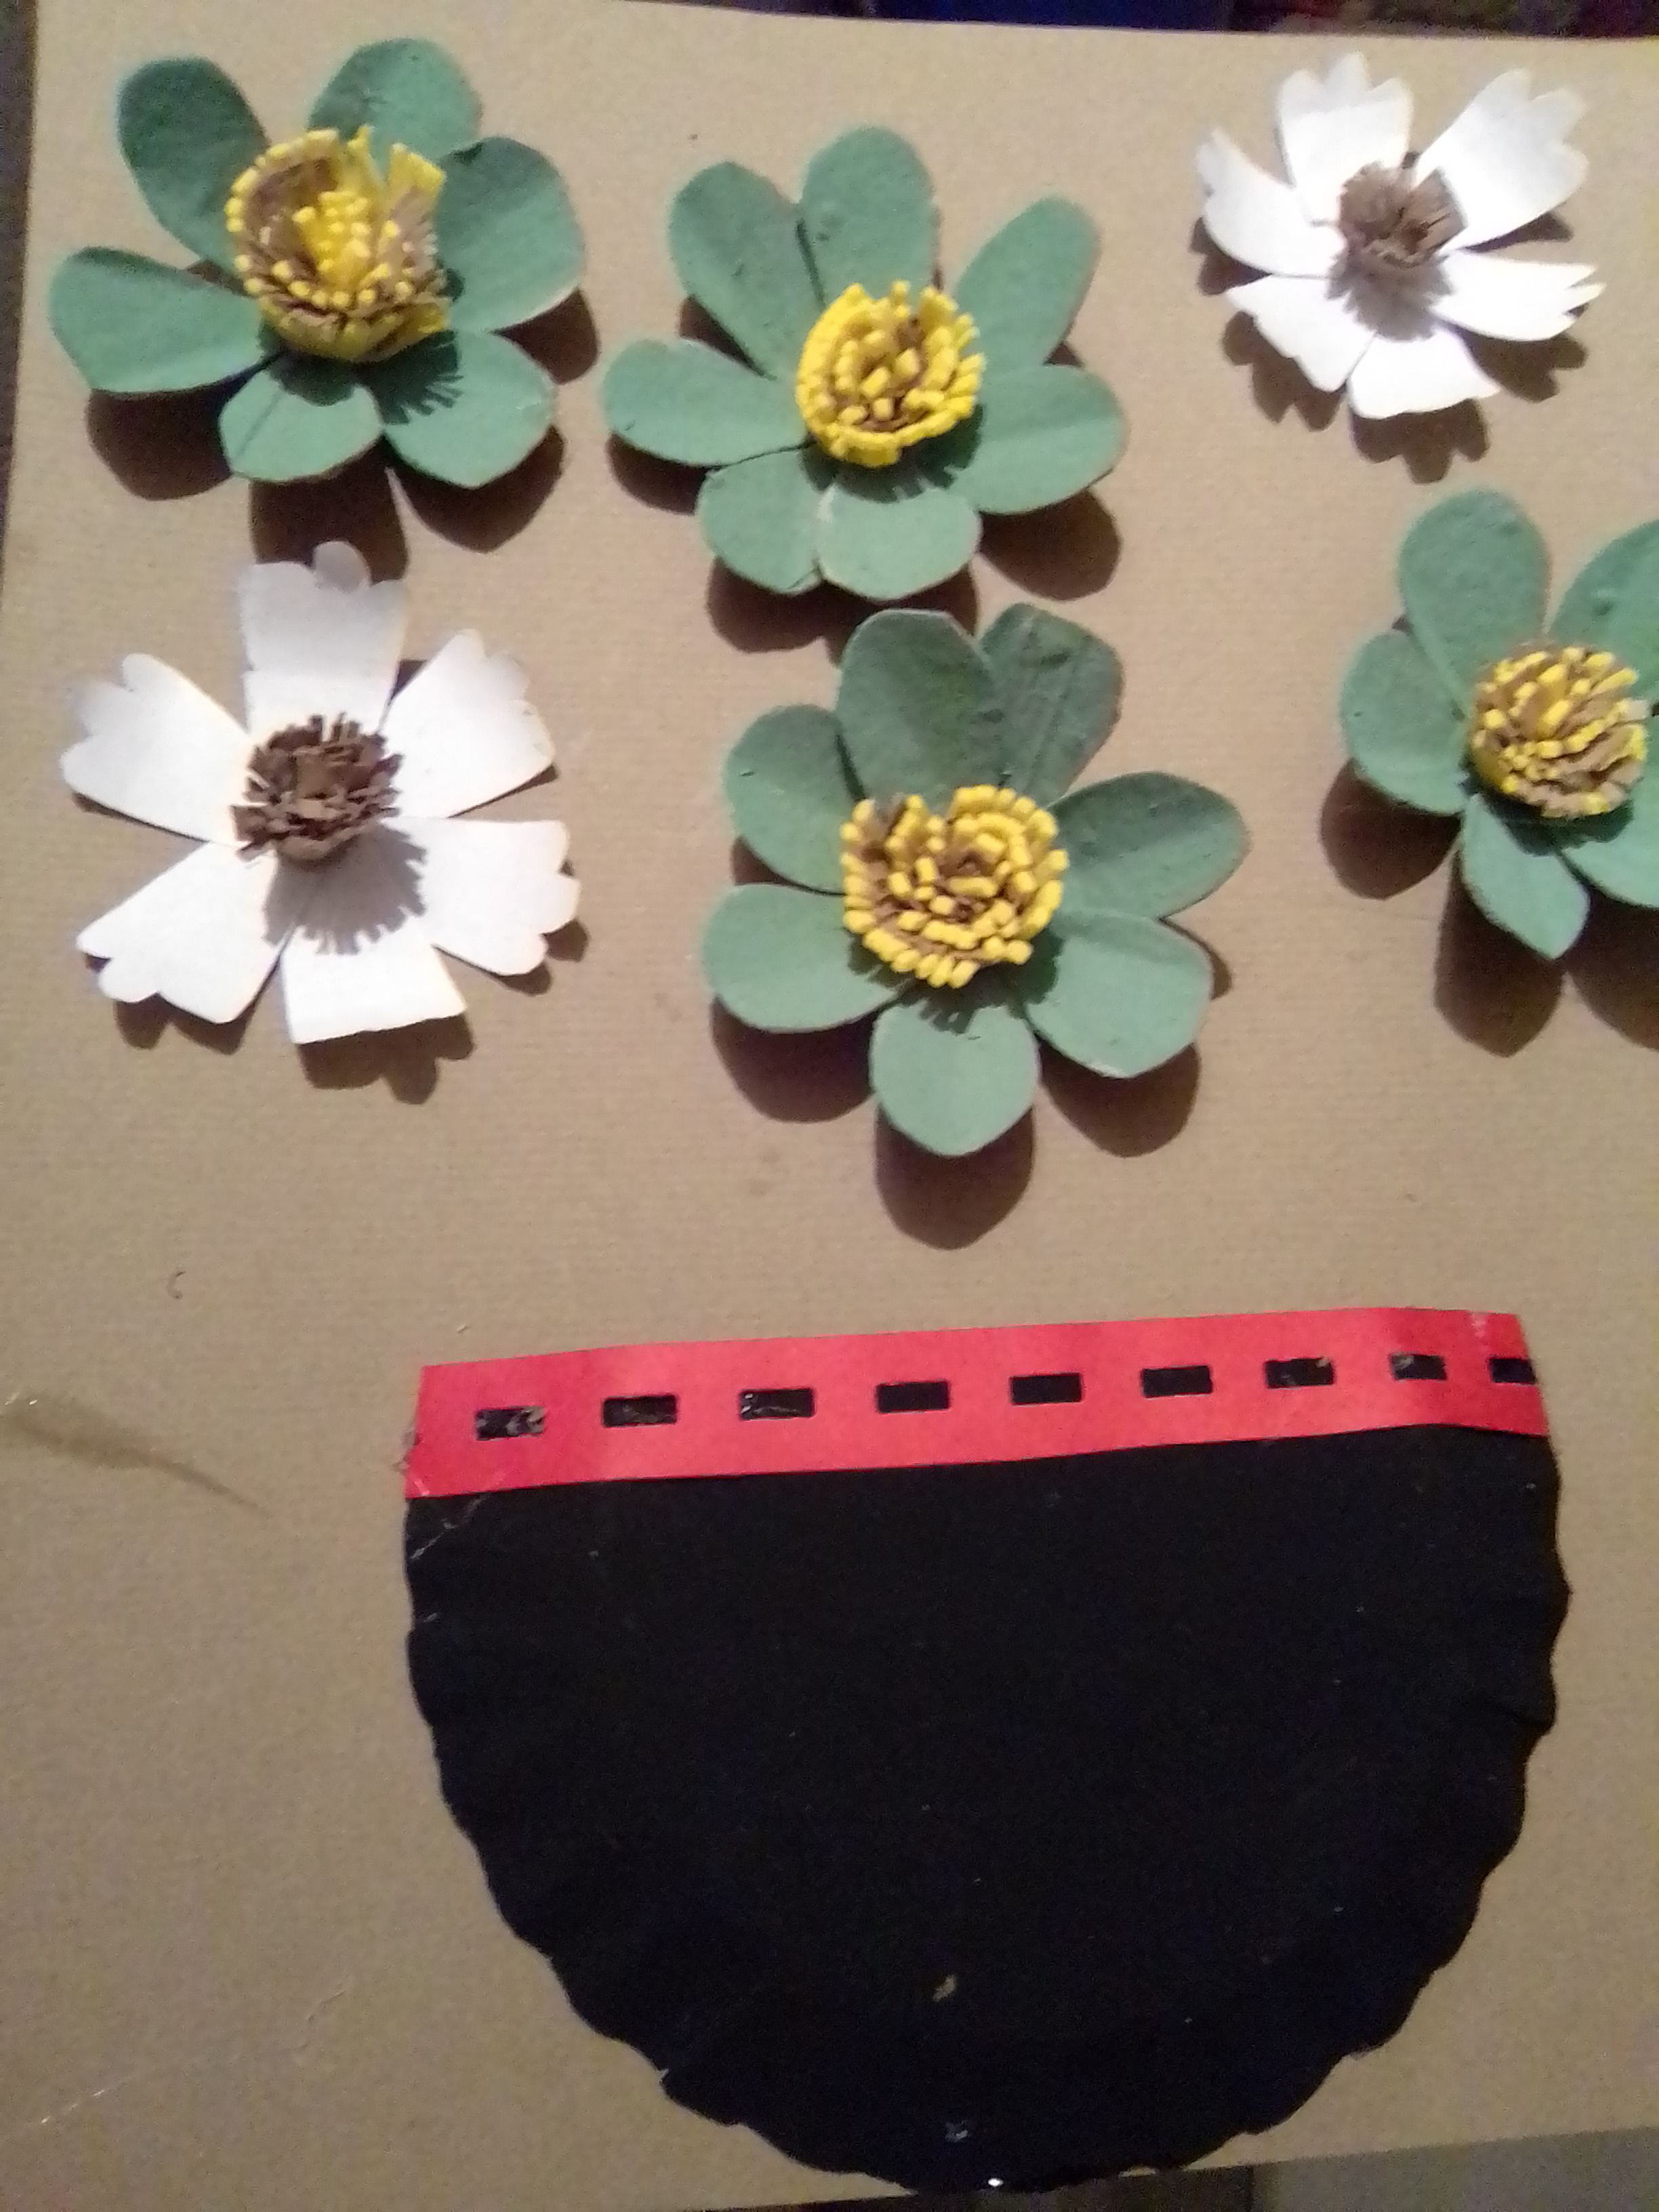
Lo primero fue recortar del cartón de huevos, obteniendo de ellos un cono para luego recortar pétalos.
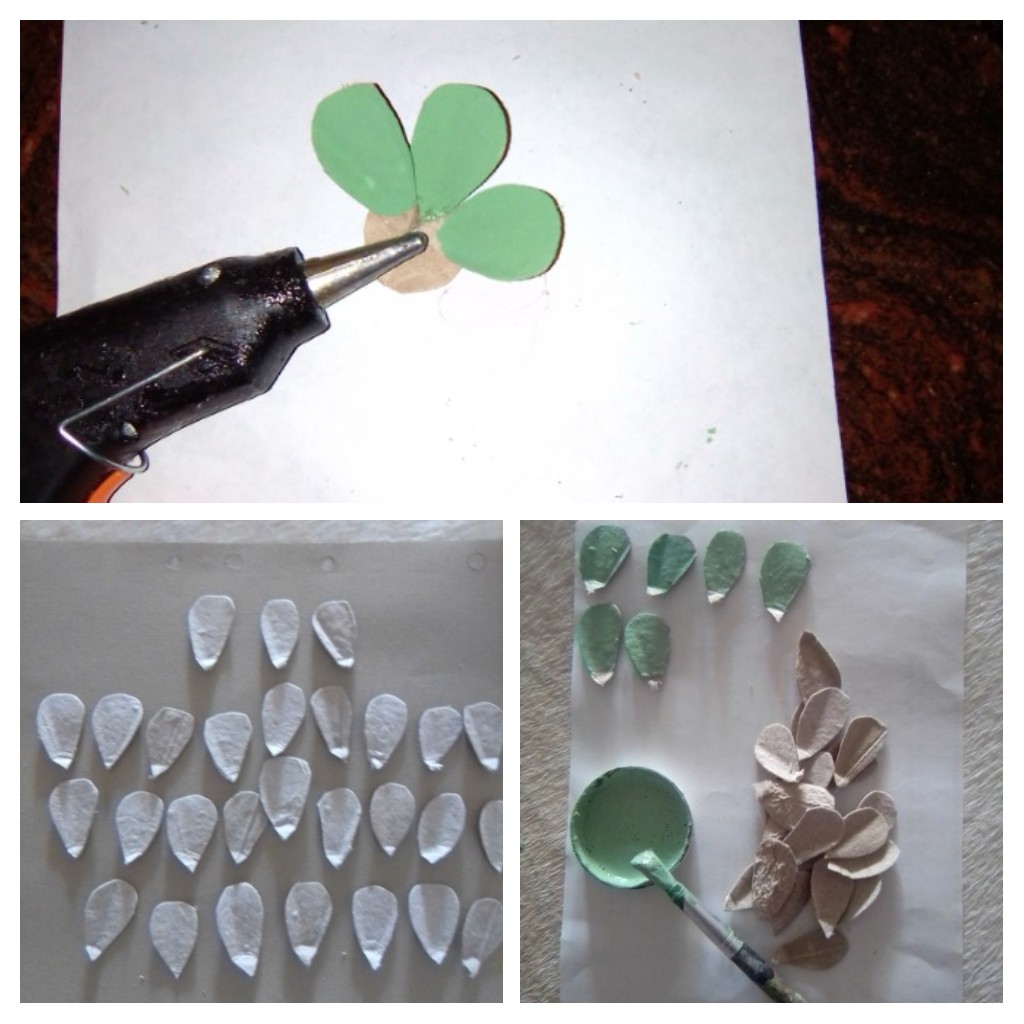
Recorte los pétalos lo más prolijo posible y seguidamente los pinte de un verde muy claro, deje que secaran y procedí a armar las flores, para lo cual necesite un círculo pequeño de cartón y fijé los pétalos en esa base, así realice cuatro flores. Tome una tira de foami amarillo y una de cartulina marrón y realice cortes en toda su extensión las uni y fui enrollando, fijé en la punta y pegue al centro de cada flor.
The first thing to do was to cut out the egg carton, obtaining from them a cone and then cut out petals.
Cut out the petals as neatly as possible and then paint them a very light green, let them dry and proceeded to assemble the flowers, for which I needed a small circle of cardboard and fixed the petals on that base, so I made four flowers. I took a strip of yellow foami and a strip of brown cardboard and made cuts along their entire length and rolled them together, fixed them at the tip and glued them to the center of each flower.
Segundo paso Second step
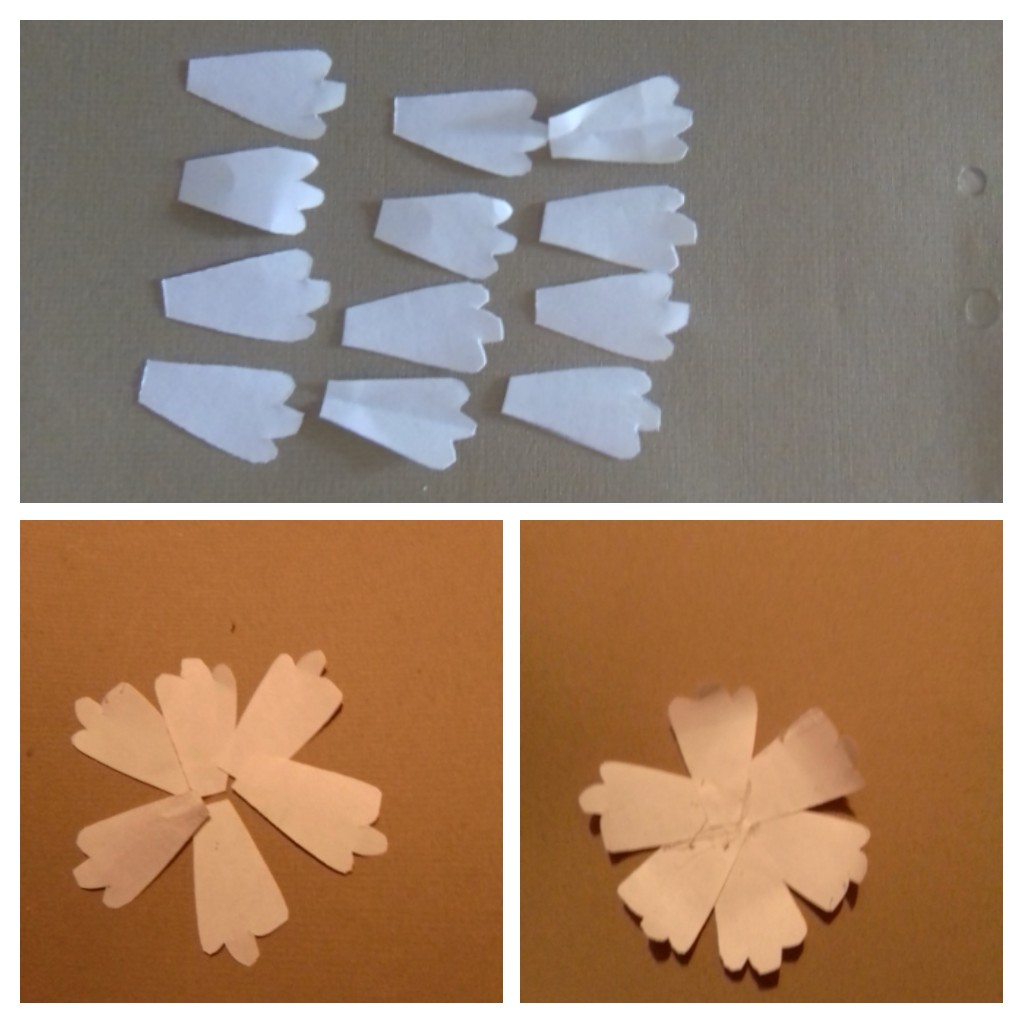
En la hoja blanca de reciclaje, dibuje una forma de pétalo, y me guíe para recortar varias. Uni los pétalos unos con otros y obtuve dos flores, recorte dos tiras de cartulina marrón y realice igual que en procedimiento anterior varios corte y enrollo y fijé al centro de las flores blancas.
On the white recycled sheet, I drew a petal signature, and guided myself to cut out several. I joined the petals with each other and obtained two flowers, cut out two strips of brown cardboard and did the same as in the previous procedure several cuts and rolls and attached them to the center of the white flowers
Tercer paso Third step
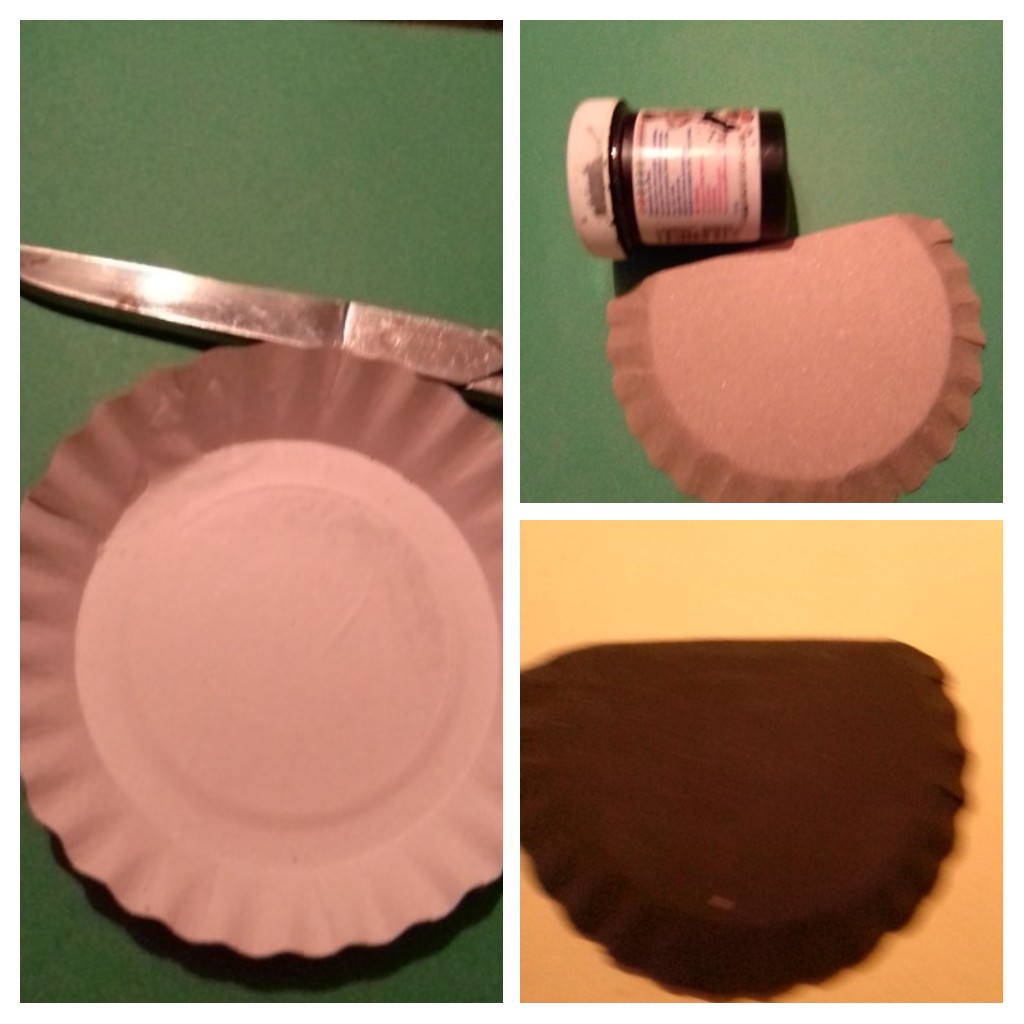
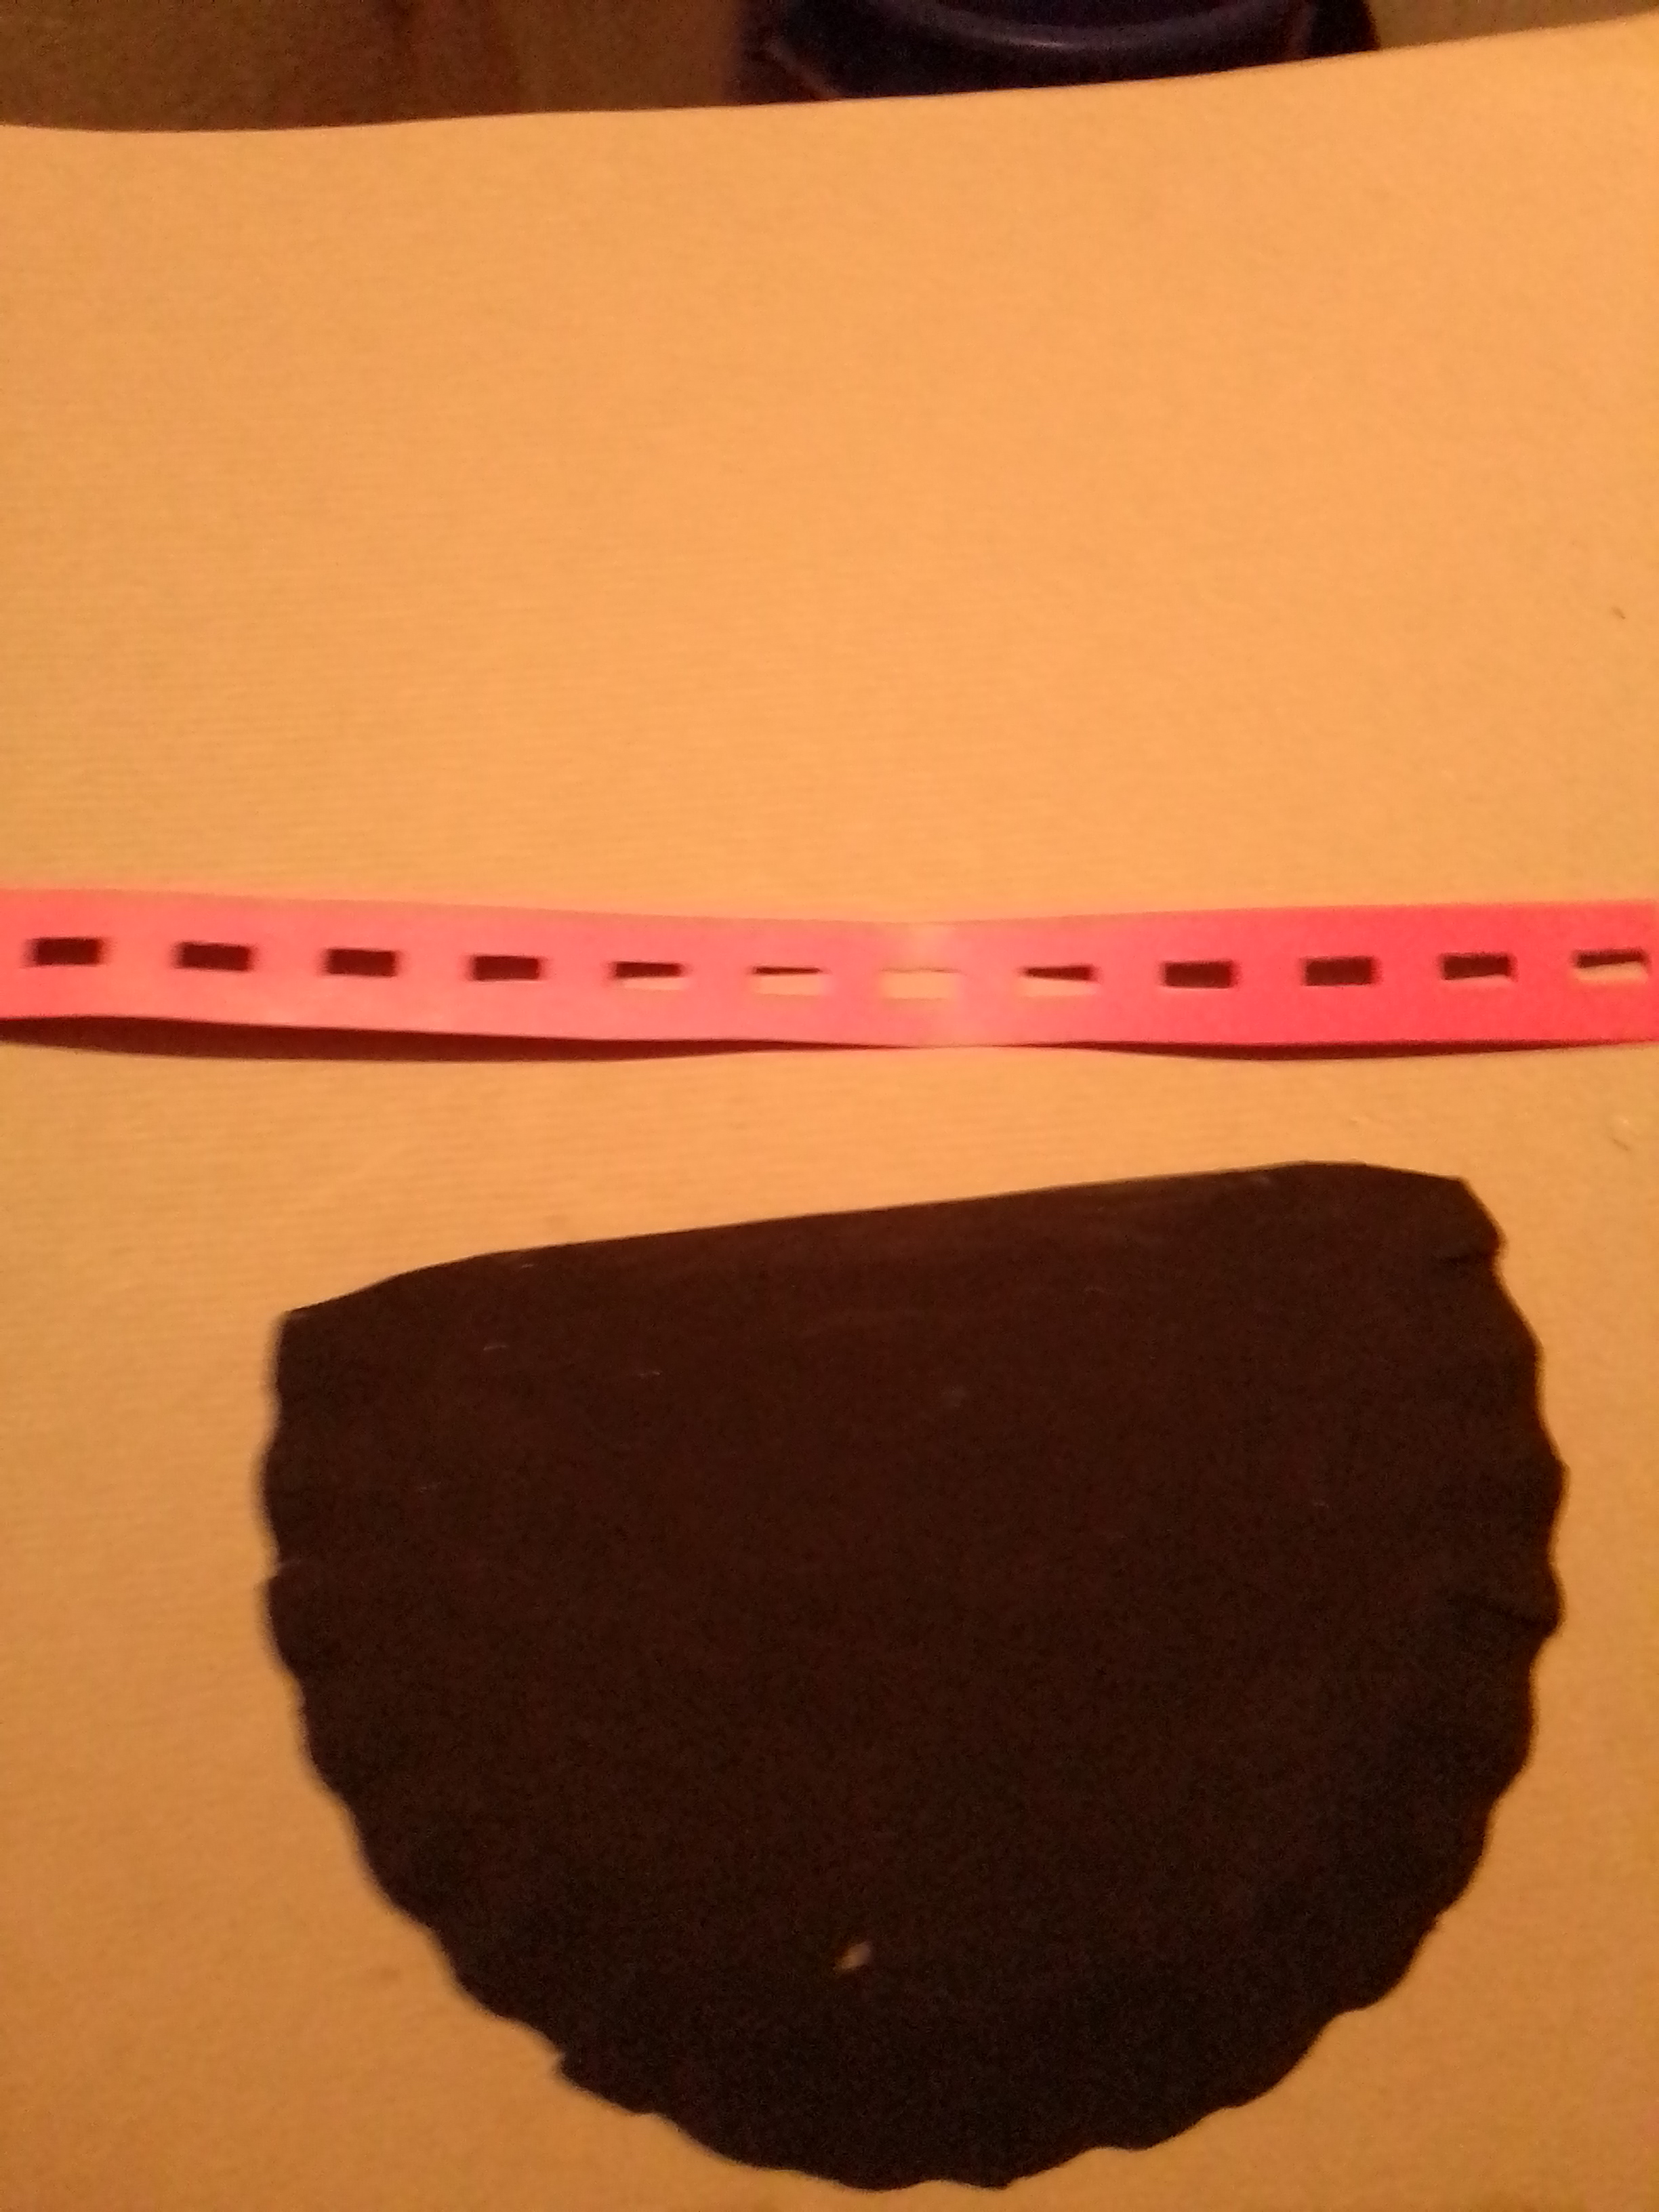
Tome el plato de cartón recorte una parte, lo pinte de negro espere que secara. De una cartulina roja que había sido usada para encuadernar, recorte un tira de la parte perforada y la pegue al borde superior de cartón negro para decorarlo.
Take the cardboard plate, cut out part of it, paint it black and wait for it to dry. From a red cardboard that had been used for binding, cut out a strip of the perforated part and glue it to the top edge of the black cardboard to decorate it.
Cuarto paso Fourth step
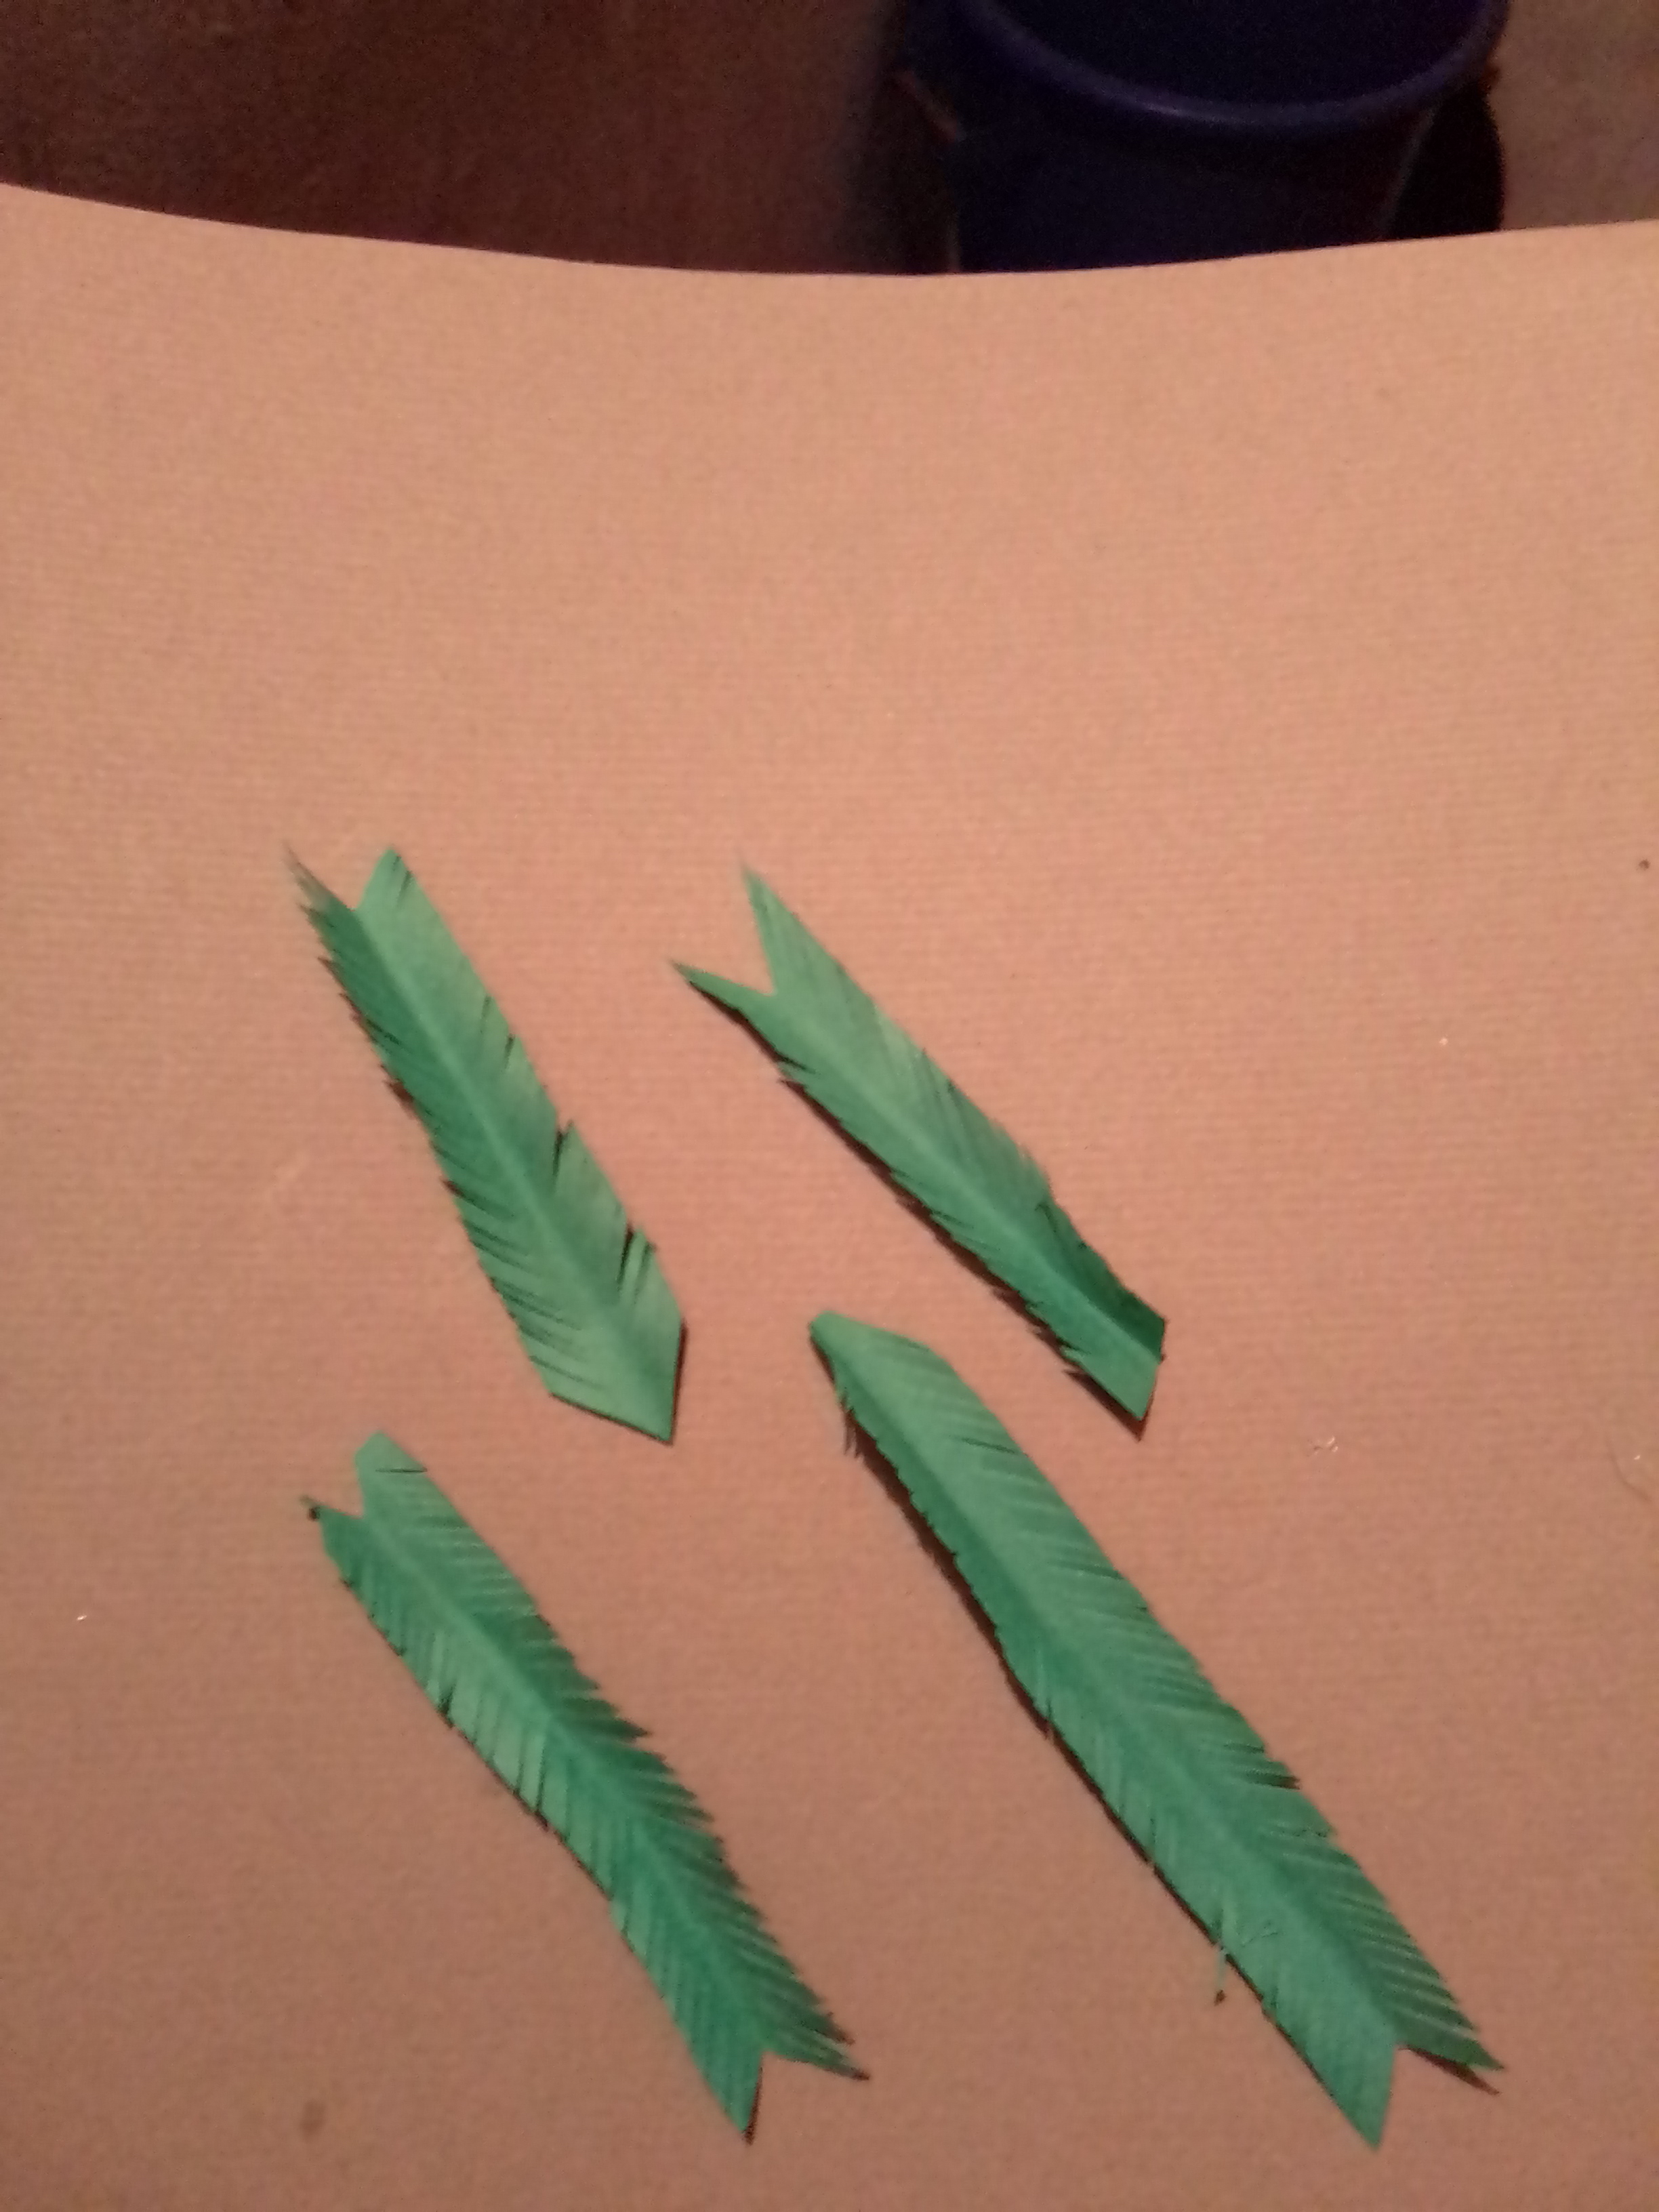
Recorte varios hojas verdes de diferentes tamaños, y además realice una especie de espiga verde, doblando una tira de cartulina verde, y haciendo cortes transversales.
Cut out several green leaves of different sizes, and also make a kind of green herringbone by folding a strip of green cardboard, and making transverse cuts.
Quinto paso Fifth step
Pegue con silicon caliente el cartón negro decorado, al centro del borde inferior del cartón base, luego organice las flores y fui fijando con silicon, para luego pegar las hojas verdes y las espigas verdes, por último coloque un detalle rojo en las esquinas del cartón.
Hot glue the decorated black cardboard to the center of the bottom edge of the cardboard base, then arrange the flowers and fix them with silicone, then glue the green leaves and the green spikes, and finally place a red detail on the corners of the cardboard.
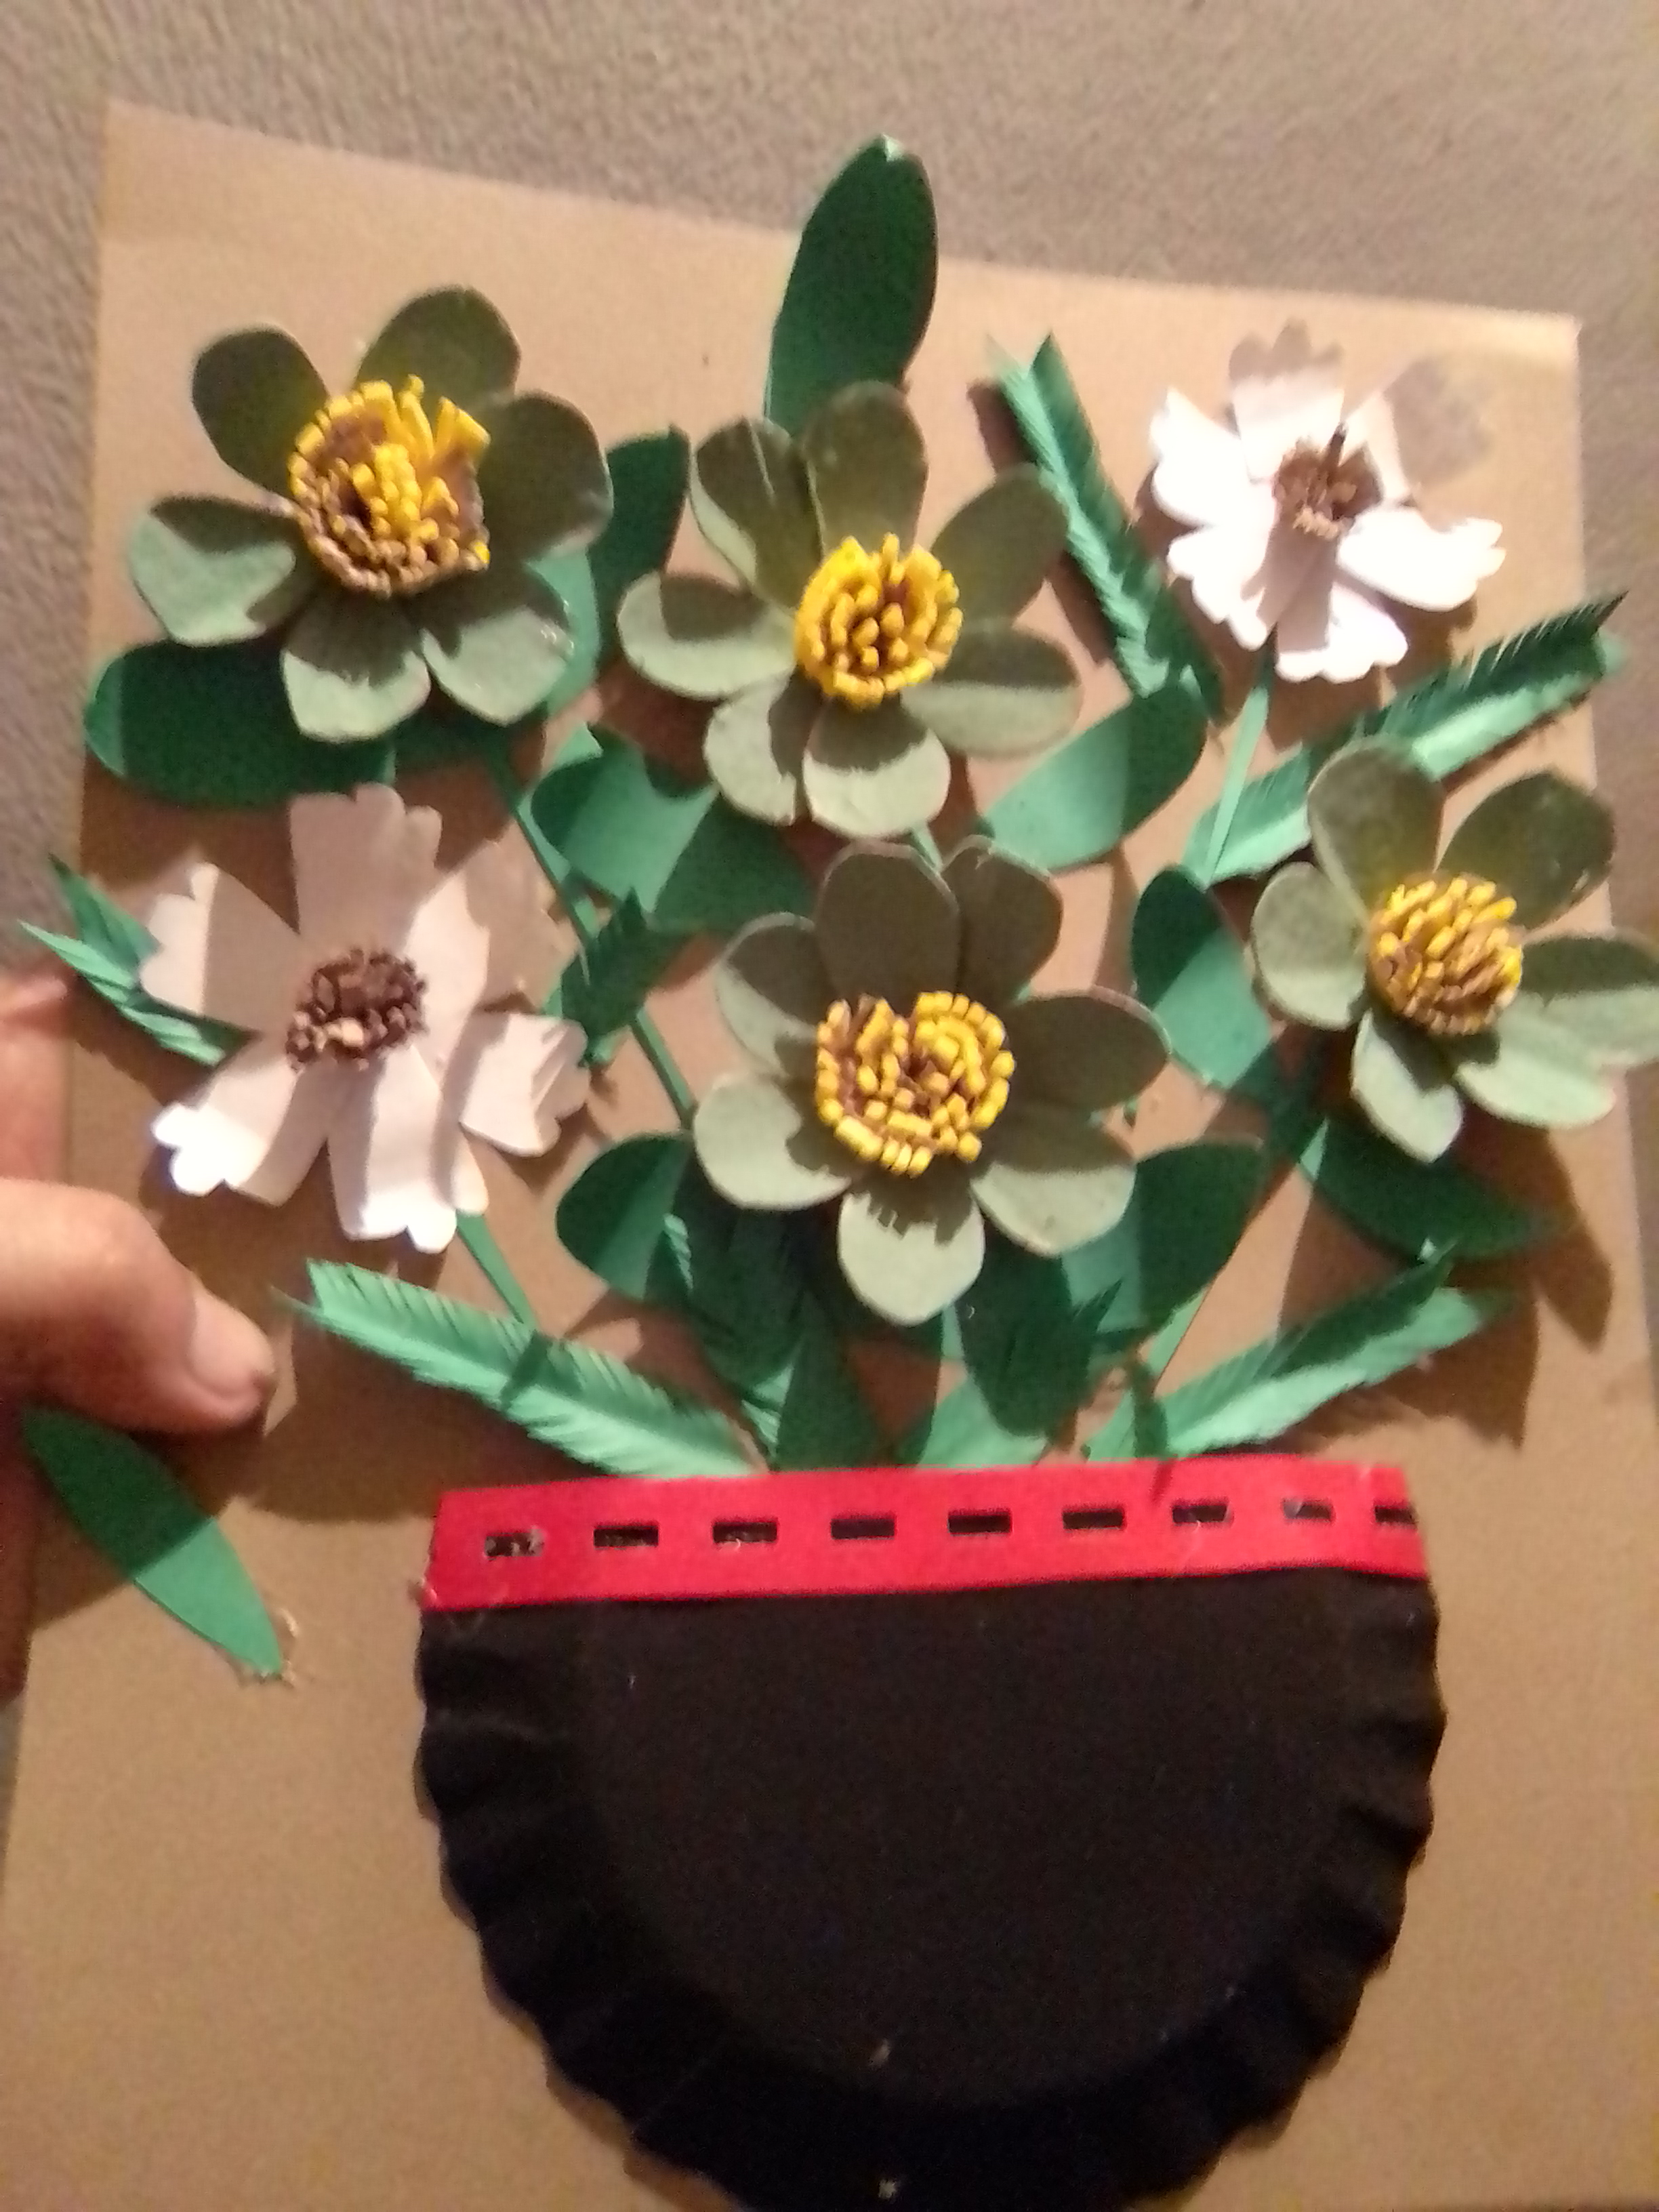
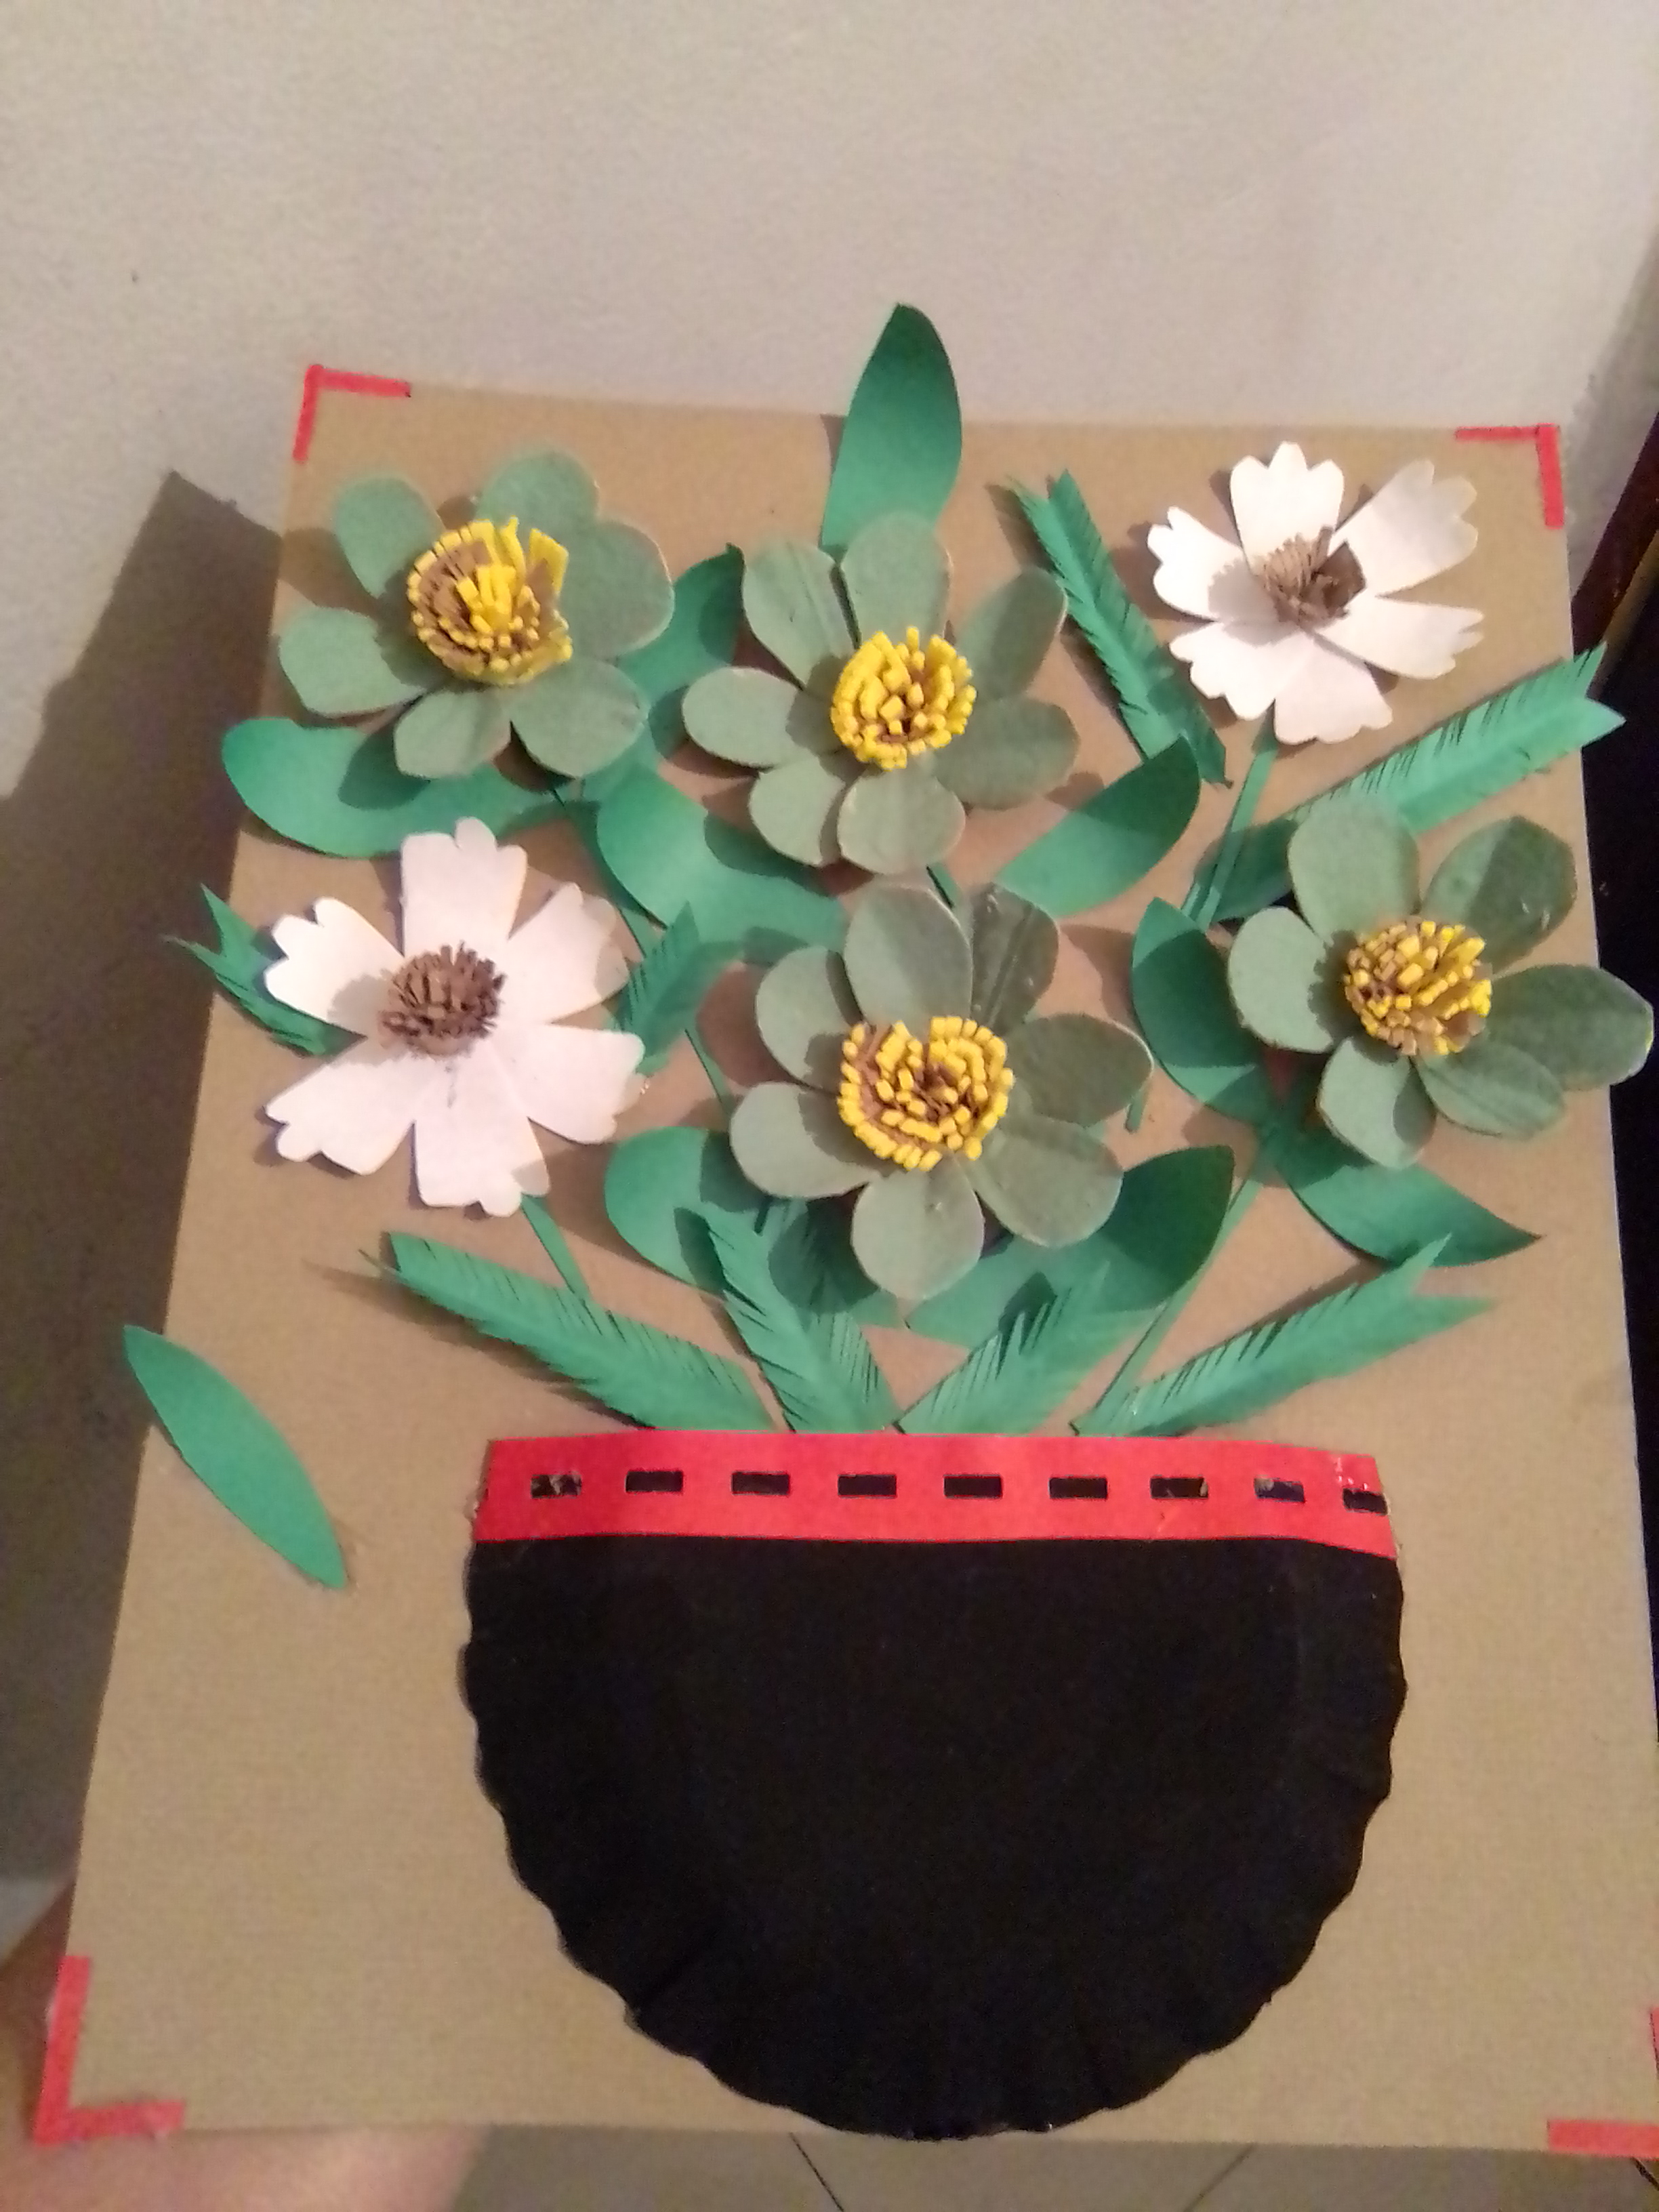
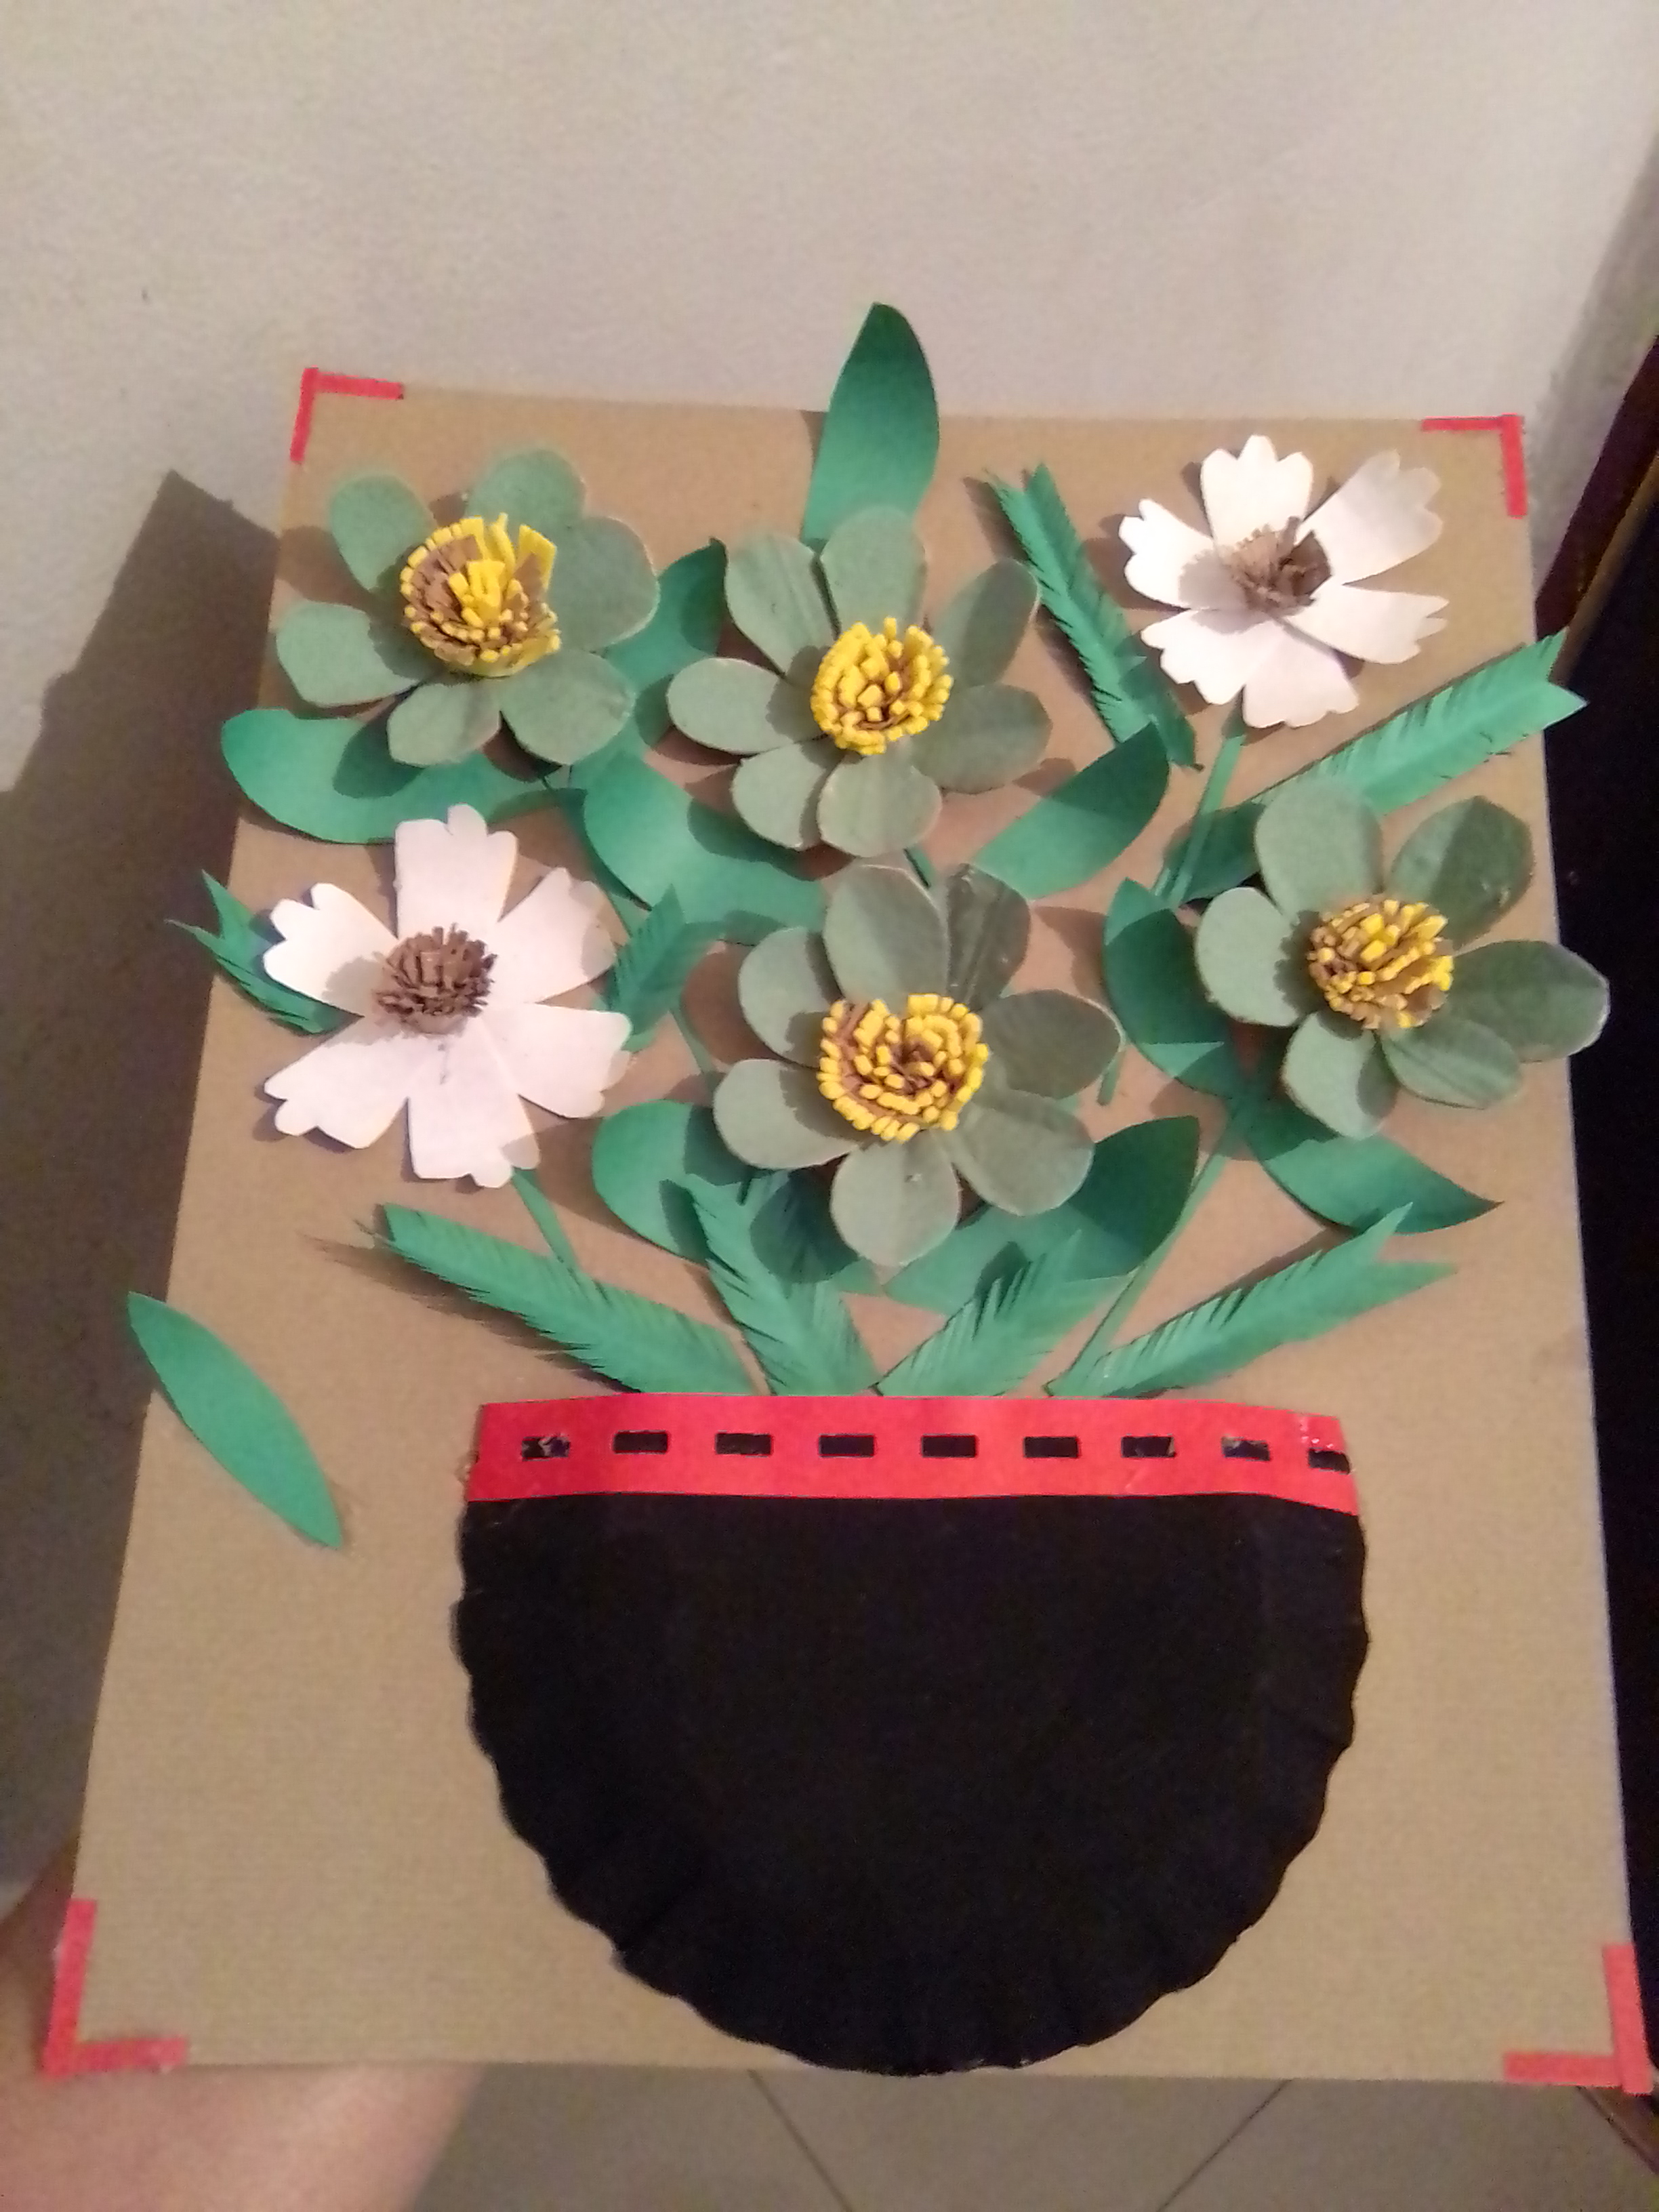
Resultado Result
Acá les presento el resultado, un cuadrado decorativo hermoso, sencillo y lleno de contrastes con la armonía e inclusión de la naturaleza
Here is the result, a beautiful decorative square, simple and full of contrasts with the harmony and inclusion of nature.
Invito a @bella76 y @brume7 para que se animen y participen en este reto creativo
I invite @bella76 and @brume7 to take part in this creative challenge.
Este es un trabajo manual realizado para esta ocasión y espero sea de su agrado, y nos animemos a realizarlo en casa
This is a manual work done for this occasion and I hope you like it, and we encourage us to do it at home.
Las fotos son de mi propiedad tomadas exclusivamente en este proyecto.
The photos are my property taken exclusively for this project.
Traductor usado Translator used
DeepL Traductor
Gracias por leer y apoyar mi blog
Thank you for reading and supporting my blog
Nunca me imaginé que era un plato de cartón que sería la maceta, una idea muy chévere y sencilla. Me gustó tu trabajo amiga éxitos!
Gracias
Está muy buena la idea amiga, pero las flores hubiesen sido más llamativas en otros colores, dado que el fondo del cuadro no permite apreciarlas en todo su esplendor porque su matiz es muy parecido al de las hojas. Un placer saludarte.
Gracias, si para la próxima la próxima lo tomaré en cuenta