🔸¡HOLA MIS QUERIDOS LECTORES!🔸HELLO MY DEAR READERS!!🔸
🇪🇸Español
El día de hoy les traigo una receta de un pan que es preparado en la isla de Madeira en Portugal, es un pan super famoso en esta isla, todo aquel que vaya de turismo ha probado este pan, incluso, si caíste aquí es porque ya lo has probado o tu familia es de madeira. Realmente es super sencillo de hacer.
La receta original de antaño dice que este pan lleva harina de batata dulce, pero hoy en día no se prepara así en ningún lado. Realmente muy difícil de conseguir que lo preparen con la receta original. Sencillamente se usa harina normal y sin mucho stress.
Me parece curioso que en otras regiones de Portugal no consigas o no sea muy popular conseguir este pan, incluso hasta llega a ser muy caro.
Para la próxima semana les traeré otra receta que tiene que ver con este Bolo do Caco.
Quiero recordarles que todos los viernes les traeré post de cocina en mi blog, para deleitar sus paladares y darle un poco de sabor en sus vidas.
Nota: Este post tiene como dos semanas para ser publicado, lol. Pero he estado de curso en curso que no he tenido paciencia para sentarme a terminar el post jajaja. Siento la tardanza. Aquí tienen mi post de los viernes como les prometí.
¡Sígueme leyendo para conocer más de esta receta!
🌟INGREDIENTES🌟
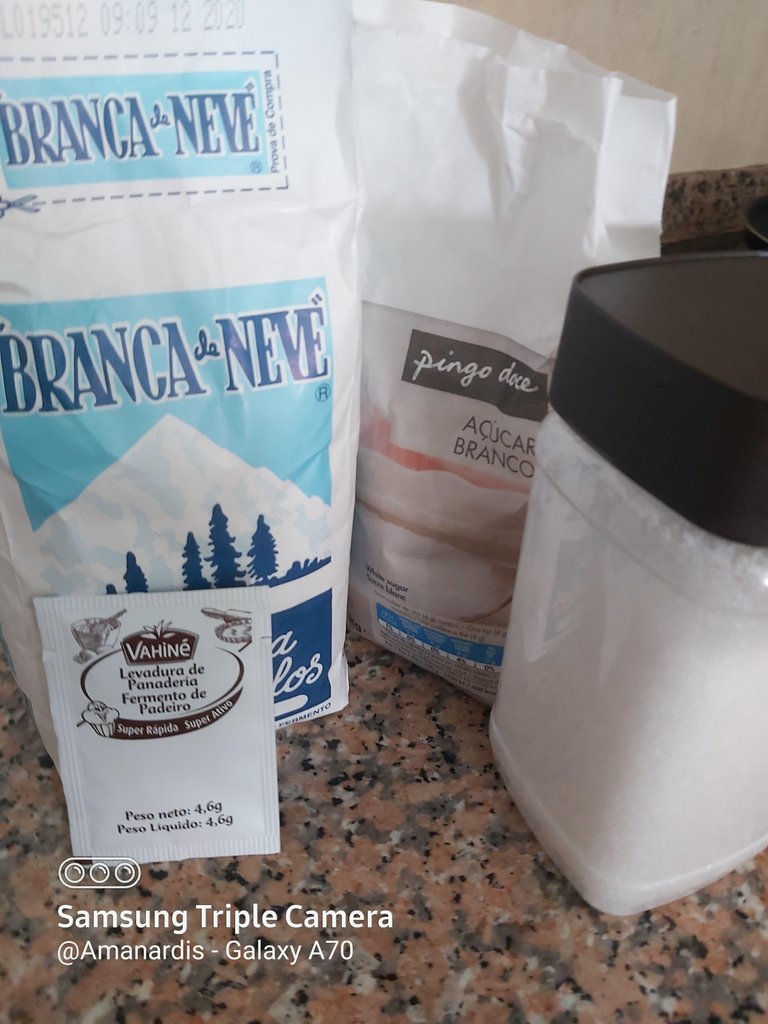
800 gr de harina.
4,6gr de Levadura seca.
1/2 cucharadita de sal.
1 cucharadita de azúcar.
1/2 litro de agua.
🌟OTROS DETALLES🌟
Tiempo de preparación: 2h - 2h30.
Tiempo de Cocción: 20 - 30 minutos.
Porción por persona: 2-3 personas / 2-3 platos.
🌟PROCEDIMIENTOS🌟
(1) Vamos a tomar una pequeña porción del litro y medio de agua, la calentamos a punto tibio y le agregamos nuestro sobre de levadura seca y el azúcar. El agua debe ser tibia, no hervida. Mezclamos y dejamos reposar en un sitio donde no le llegue el sol por 10 minutos.
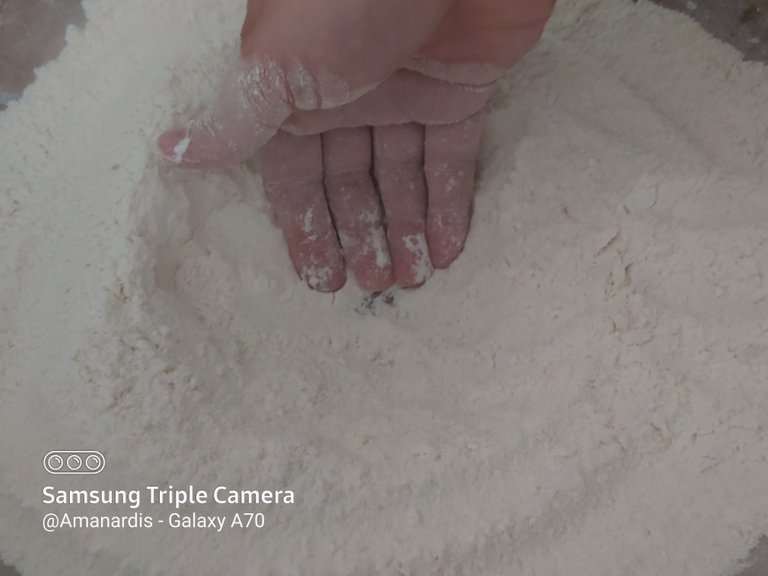
(2) En un envase grande agregamos 500 gr de harina y la sal, la mezclamos y hacemos un volcán.

(3) Ya pasados los 10 minutos, la levadura debió haber surtido efecto. Debes ver como subió y se hizo una capa gruesa de espuma. Lo adicionamos a nuestro volcán de harina.
(4) Vamos a ir mezclando el agua con levadura con nuestra harina con los dedos y poco a poco vamos adicionando el resto del agua a nuestra mezcla. No la adiciones todo junto, esta vez me distraje y lo agregue todo y lo que ocurrió es que me costo mezclarlo correctamente. Adicionar el agua poco a poco y vas mezclando poco a poco.

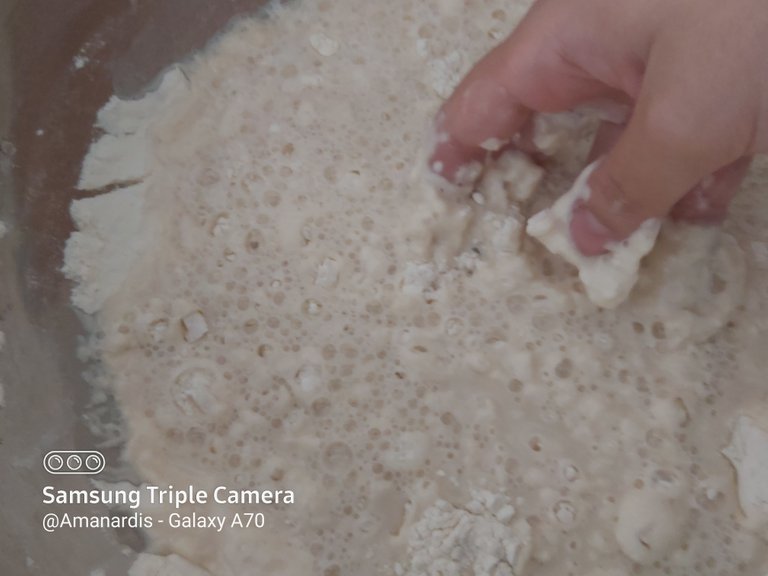
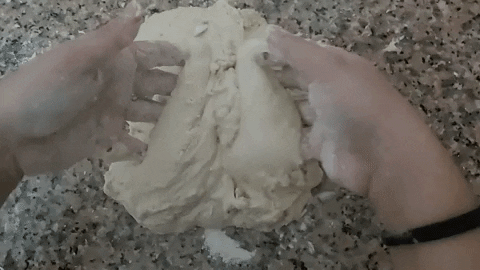
(5) Lo particular de esta masa es que no es dura, es pegajosa por la cantidad de agua. No le agregues más harina, ella es así. Solo si necesitas limpiarte las manos para seguir amasando, agrega un poco de harina y frota tus manos para despegar la que ya tienes.
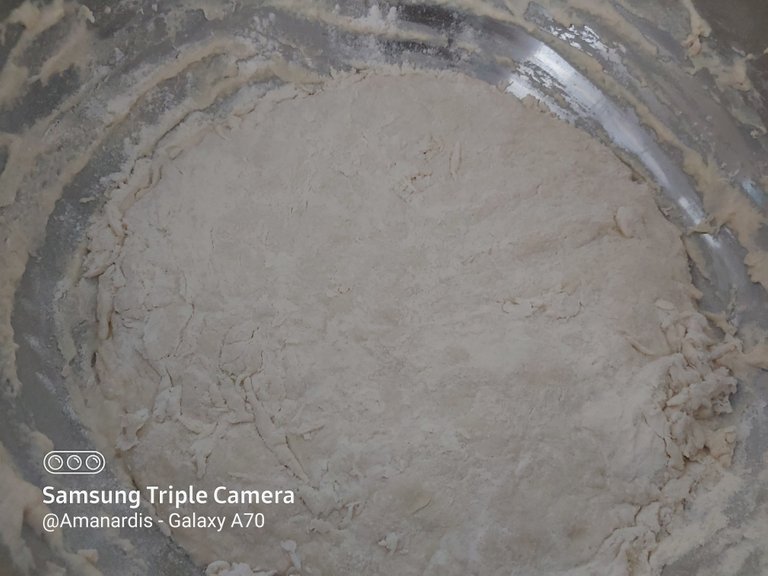
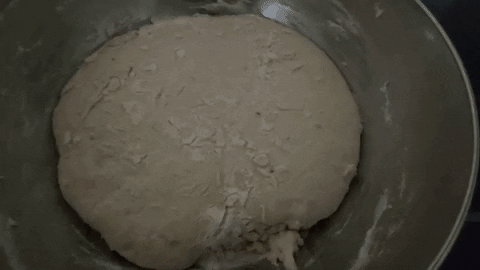
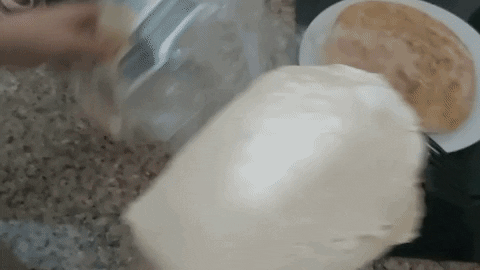
(6) Dejamos reposar nuestra masa por 1h, tapada con una toalla para que el aire no la reseque y se forme una capa dura de harina. Les dejo un gif para que vean lo blanda que es la masa. NO LO PINCHEN jajaja es solo para que lo vean.

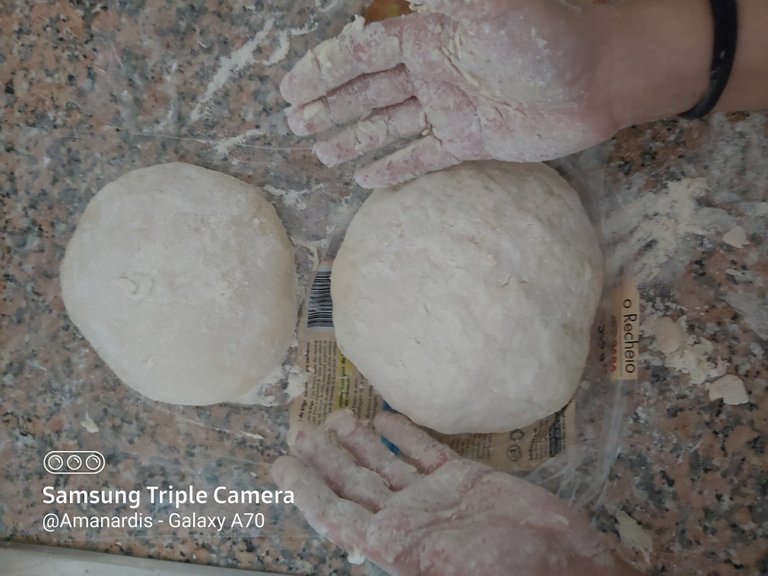
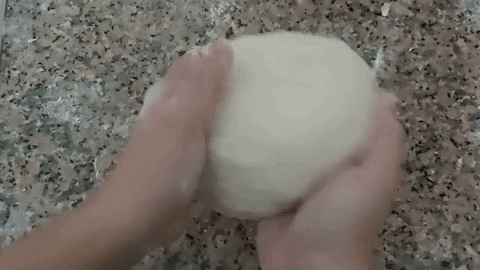
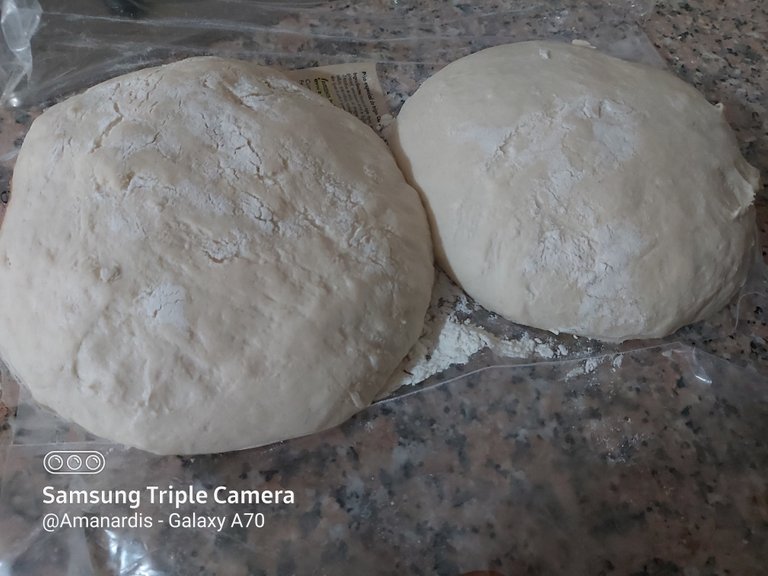
(7) Luego de que nuestra masa haya reposado una hora, la vamos a pasar al mesón para comenzar a amasar. Separamos nuestra masa en dos o tres partes y comenzamos a amasar con el resto de la harina, dándole forma circular. No uses mucha harina, la misma se seguirá pegando al mesón, no te preocupes, hasta que logres darle forma circular está bien.
(8) La cubrimos nuevamente con algún plástico y paños y lo dejamos reposar por media hora.

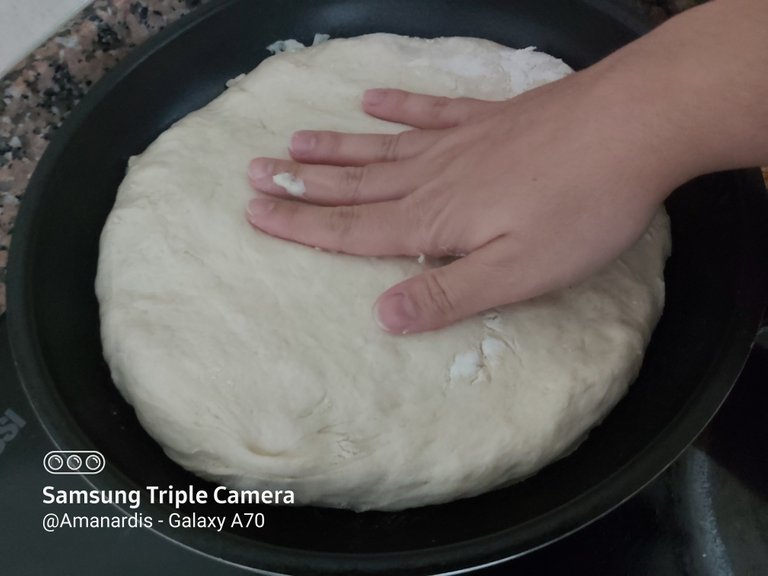
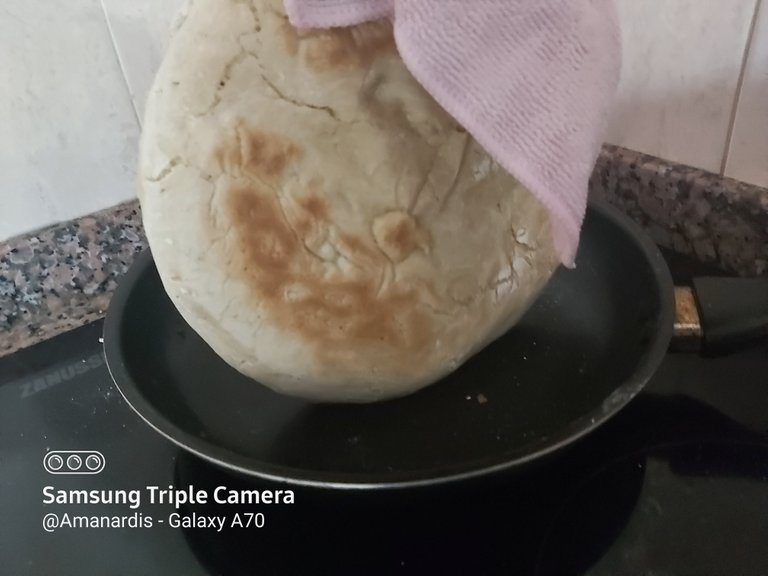
(9) Pasada nuestra hora, con cuidado tomamos nuestra masa en una plancha caliente a fuego medio alto y la aplastamos dándole siempre forma circular. Si no tienes una plancha puedes usar una sartén grande como yo hice. Verán en el gif como la masa sigue pegajosa, eso es lo que queremos.
(10) Vamos a cocinar por un lado, por otro e intentaremos por los lados también, luego que esté cocido por ambos lados, lo paramos y lo cocinamos un poco, le vas dando vueltas. Solo un par de minutos.
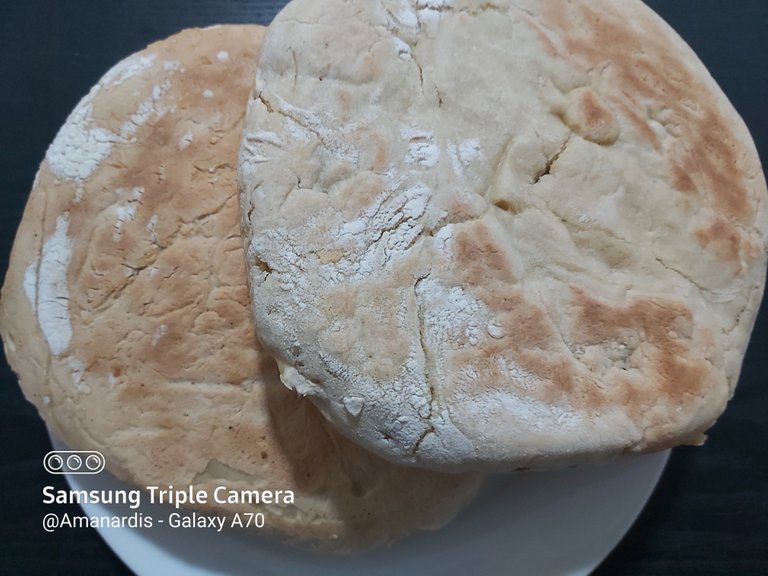
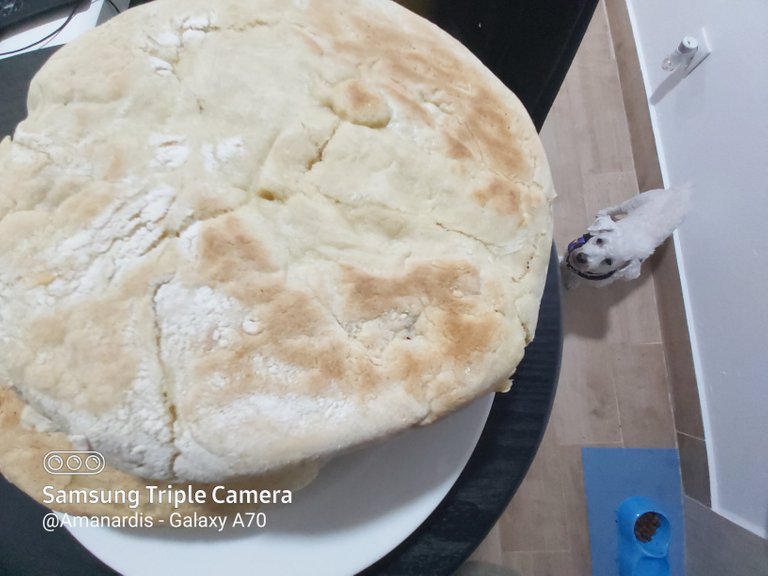
🔸🔷! VOILÀ!🔷🔸
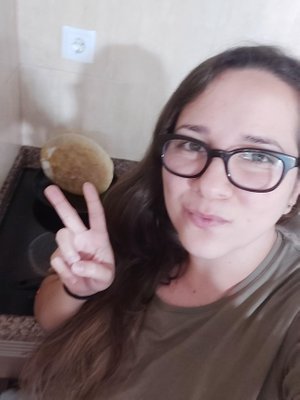
Nuestro Bolo do Caco está listo y listo para ser comido tanto en prego, como con mantequilla de ajo como en parrilla etc. En el próximo post les hablaré sobre cómo preparar este prego. ¡Nos vemos los viernes chicos!
¡Déjenme en los comentarios que les pareció esta receta y una foto para cuando la preparen!

🇺🇸English
Today I bring you a recipe for a bread that is prepared on the island of Madeira in Portugal, it is a super famous bread on this island, everyone who goes on tourism has tried this bread, even if you are here it is because you tried. Is super easy.
The original recipe says that this bread has sweet potato flour, but today it is not prepared like this anywhere. Really very difficult to find the original recipe. Just use normal flour and without much stress.
I find it curious that in other regions of Portugal you don't find it so easy, even it becomes very expensive.
For next week I will bring you another recipe that has to do with this Bolo do Caco.
I want to remind you that every Friday I will bring you a cooking post on my blog, to delight your palates and give it a little flavor in your lives.
Note: This post has about two weeks to be published, lol. But I have been from course to course that takes my time hahaha. Sorry I'm late. Here is my Friday post as promised.
Stay tuned to learn more about this recipe!
🌟 INGREDIENTS 🌟
800 gr of flour.
4.6 gr of dry yeast.
1/2 teaspoon of salt.
1 teaspoon of sugar.
1/2 liter of water.
🌟OTHER DETAILS🌟
Preparation Time: 2h - 2h30.
Cooking time:20 - 30 minutes.
Rations: 2-3 persons / 2-3 dishes.
🌟 PROCEDURE 🌟
(1) We are going to take a small portion of the liter and a half of water, heat it to a lukewarm point and add our envelope of dry yeast and sugar. The water should be lukewarm, not boiled. Mix and let stand in a place where the sun does not reach it for 10 minutes.
(2) In a large container add 500 gr of flour and salt, mix it and make a volcano.
(3) After 10 minutes, the yeast should have done effect. You should see how it went up and made a thick layer of foam. We add it to our flour volcano.
(4) Mix the yeast water and our flour with the fingers and little by little we are adding the rest of the water to our mixture. You don't add it all together, this time I got distracted and added it all and what happened is that it cost me to mix it correctly. Add the water little by little and mix little by little.
(5) The particular thing about this dough is that it is not hard, it is sticky due to the amount of water. Do not add more flour, it's like that. Only if you need to clean your hands to continue kneading, add a little flour and rub your hands to take off the one you already have.
(6) Let the dough rest for 1h, covered with a towel so that the air does not dry it out and a hard layer of flour is formed. I leave you a gif to see how soft the dough is. DON'T PUNCH it hahaha it's just for you to see.
(7) After our dough has rested for an hour, transfer it to the counter to begin kneading it. Separate our dough into two or three parts and begin to knead with the rest of the flour, giving it a circular shape. Do not use a lot of flour, it will continue to stick to the counter, don't worry, until you manage to give it a circular shape is fine.
(8) Cover it again with some plastic and cloths and let it rest for half an hour.
(9) After our hour, carefully take the dough on a hot griddle over medium-high heat and crush it, always giving it a circular shape. If you don't have a griddle you can use a large skillet like I did. You will see in the gif how the dough is still sticky, that's what we want.
(10) Cook on one side, on the other and we will try on the sides as well, after it is cooked on both sides, stop it and cook it a little around it. Just a couple of minutes.
🔸🔷! VOILÀ!🔷🔸
Our Bolo do Caco is ready to be eaten both in prego, with garlic butter and on the grill etc. In the next post I will talk about how to prepare this prego. See you guys on Fridays!
Let me know in the comments below if you like this dish, if you prepared share some pics of it!
Photography Details:

©2020 Pictures and content are of intellectual property of @Amanardis.
©2020 Fotografías y contenido son de propiedad intelectual de @Amanardis.