Hi friends!!
Hola Amigos!!
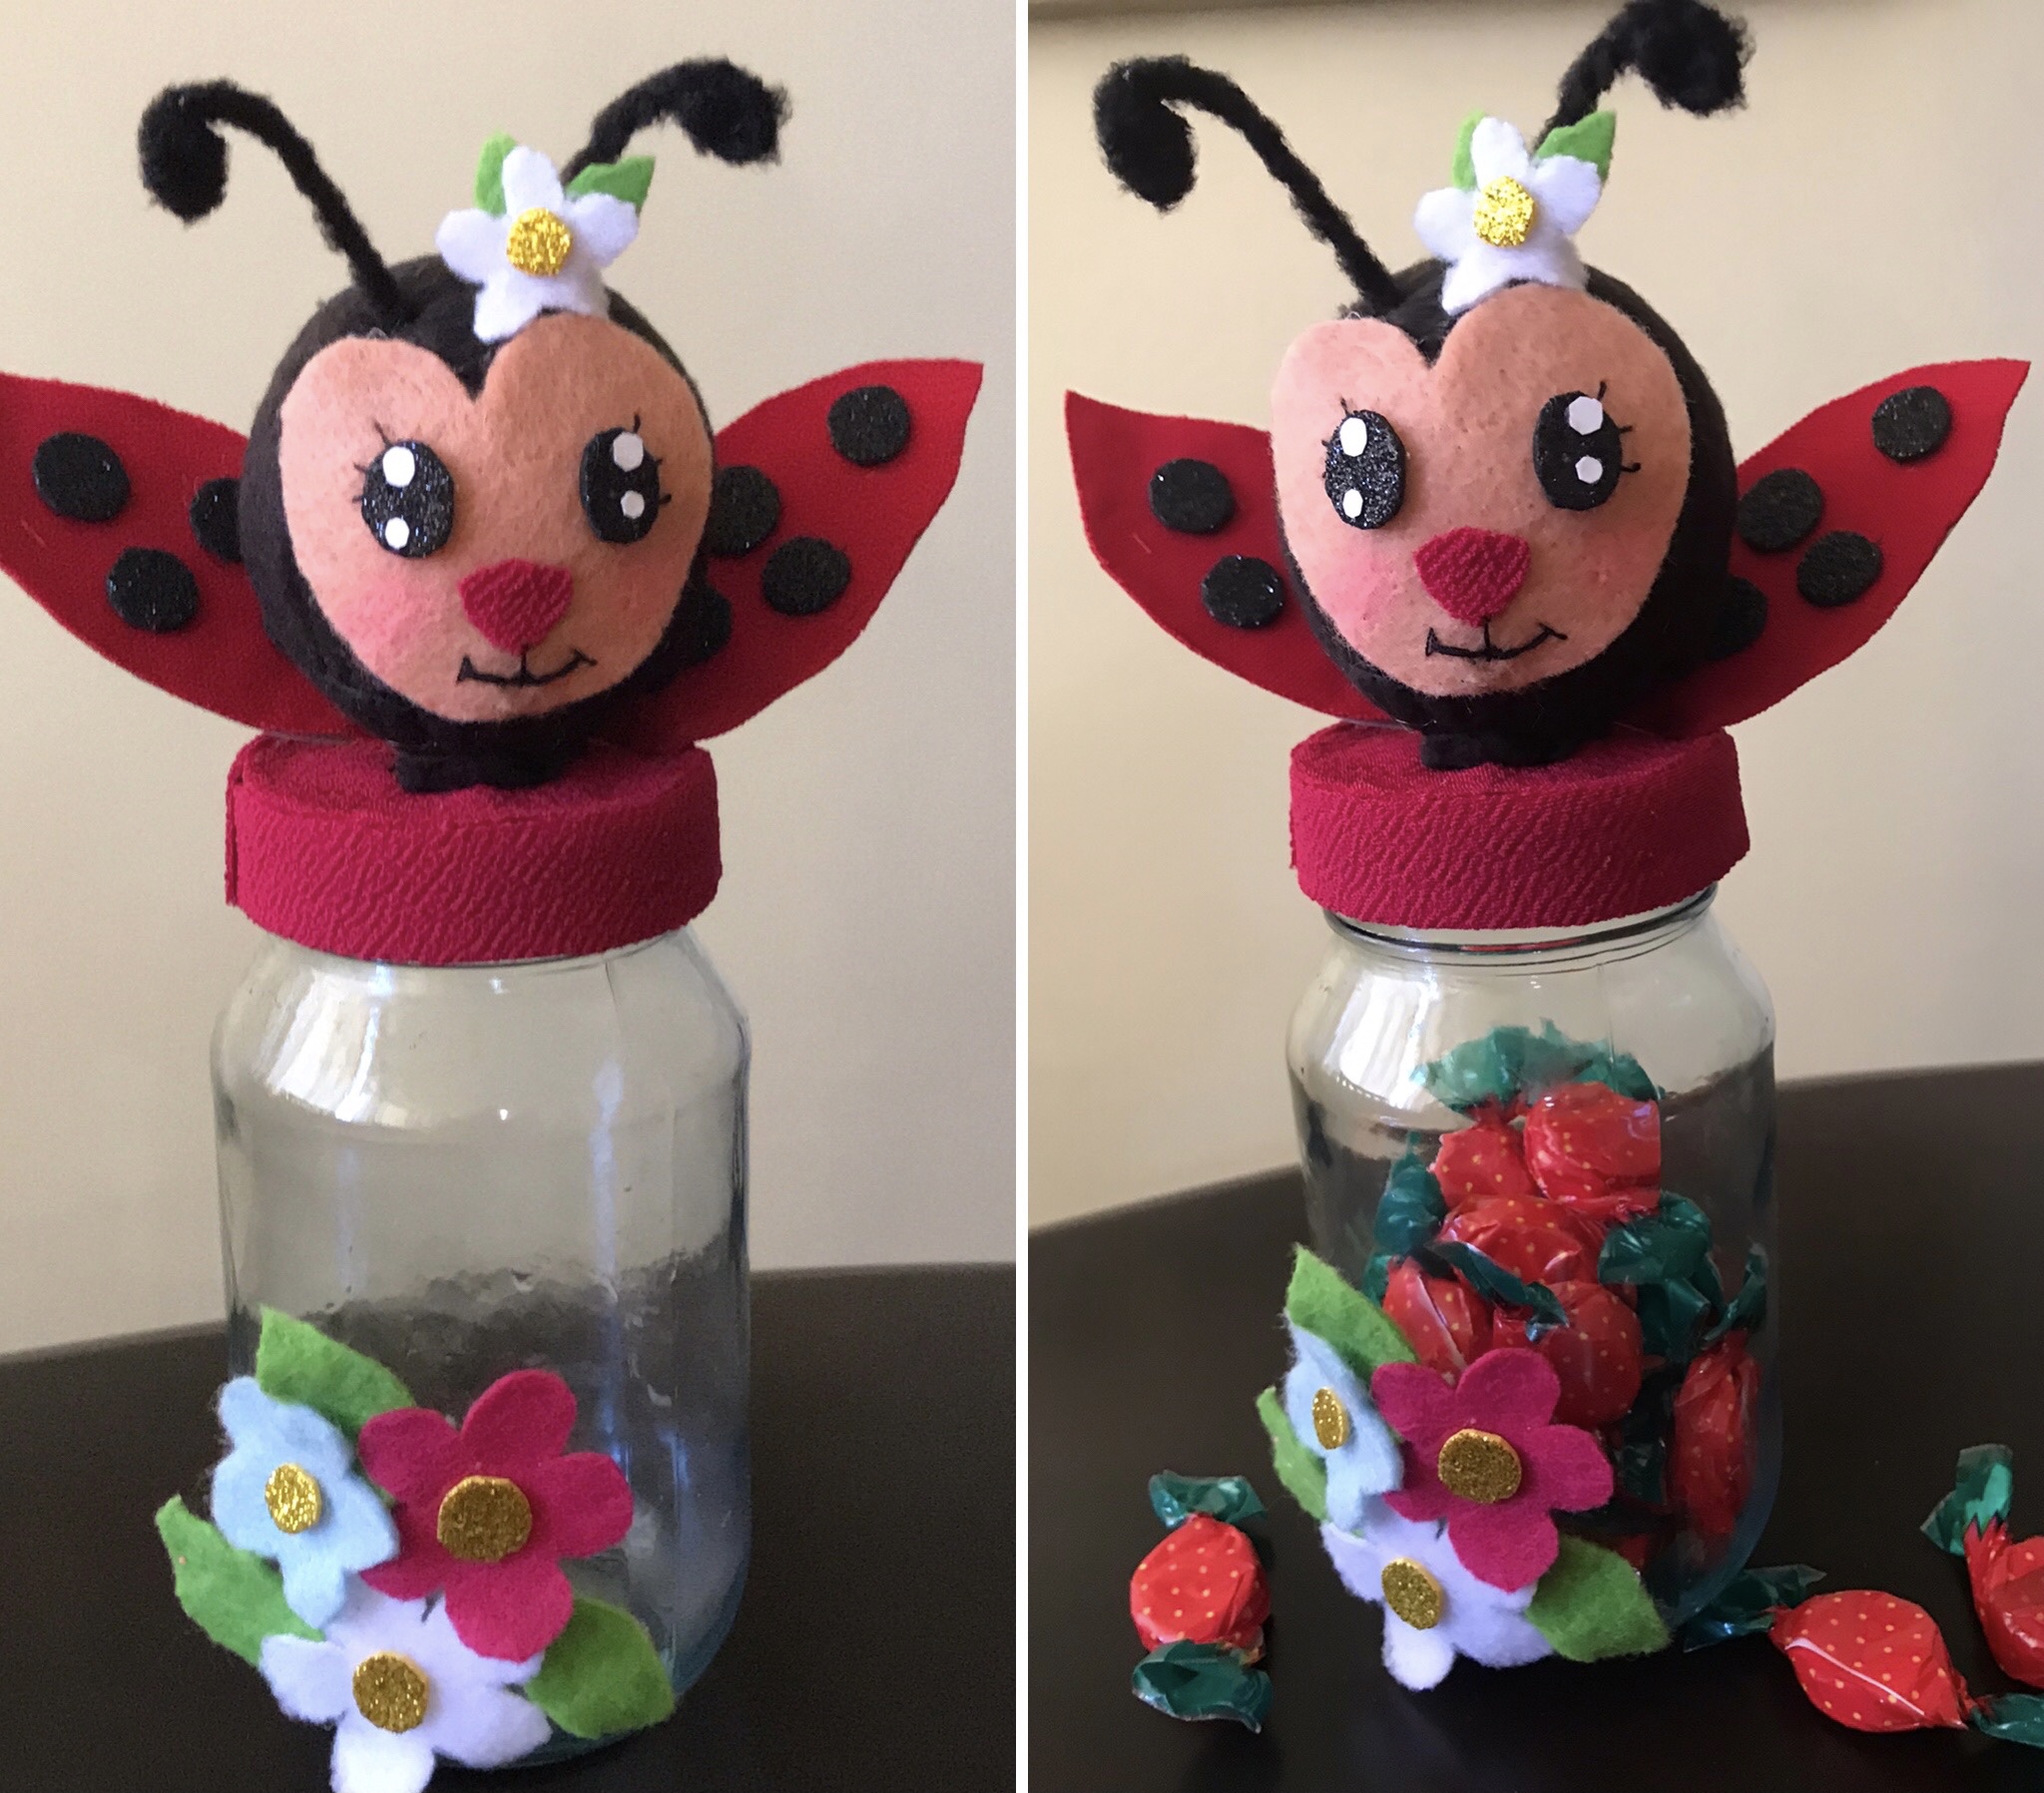
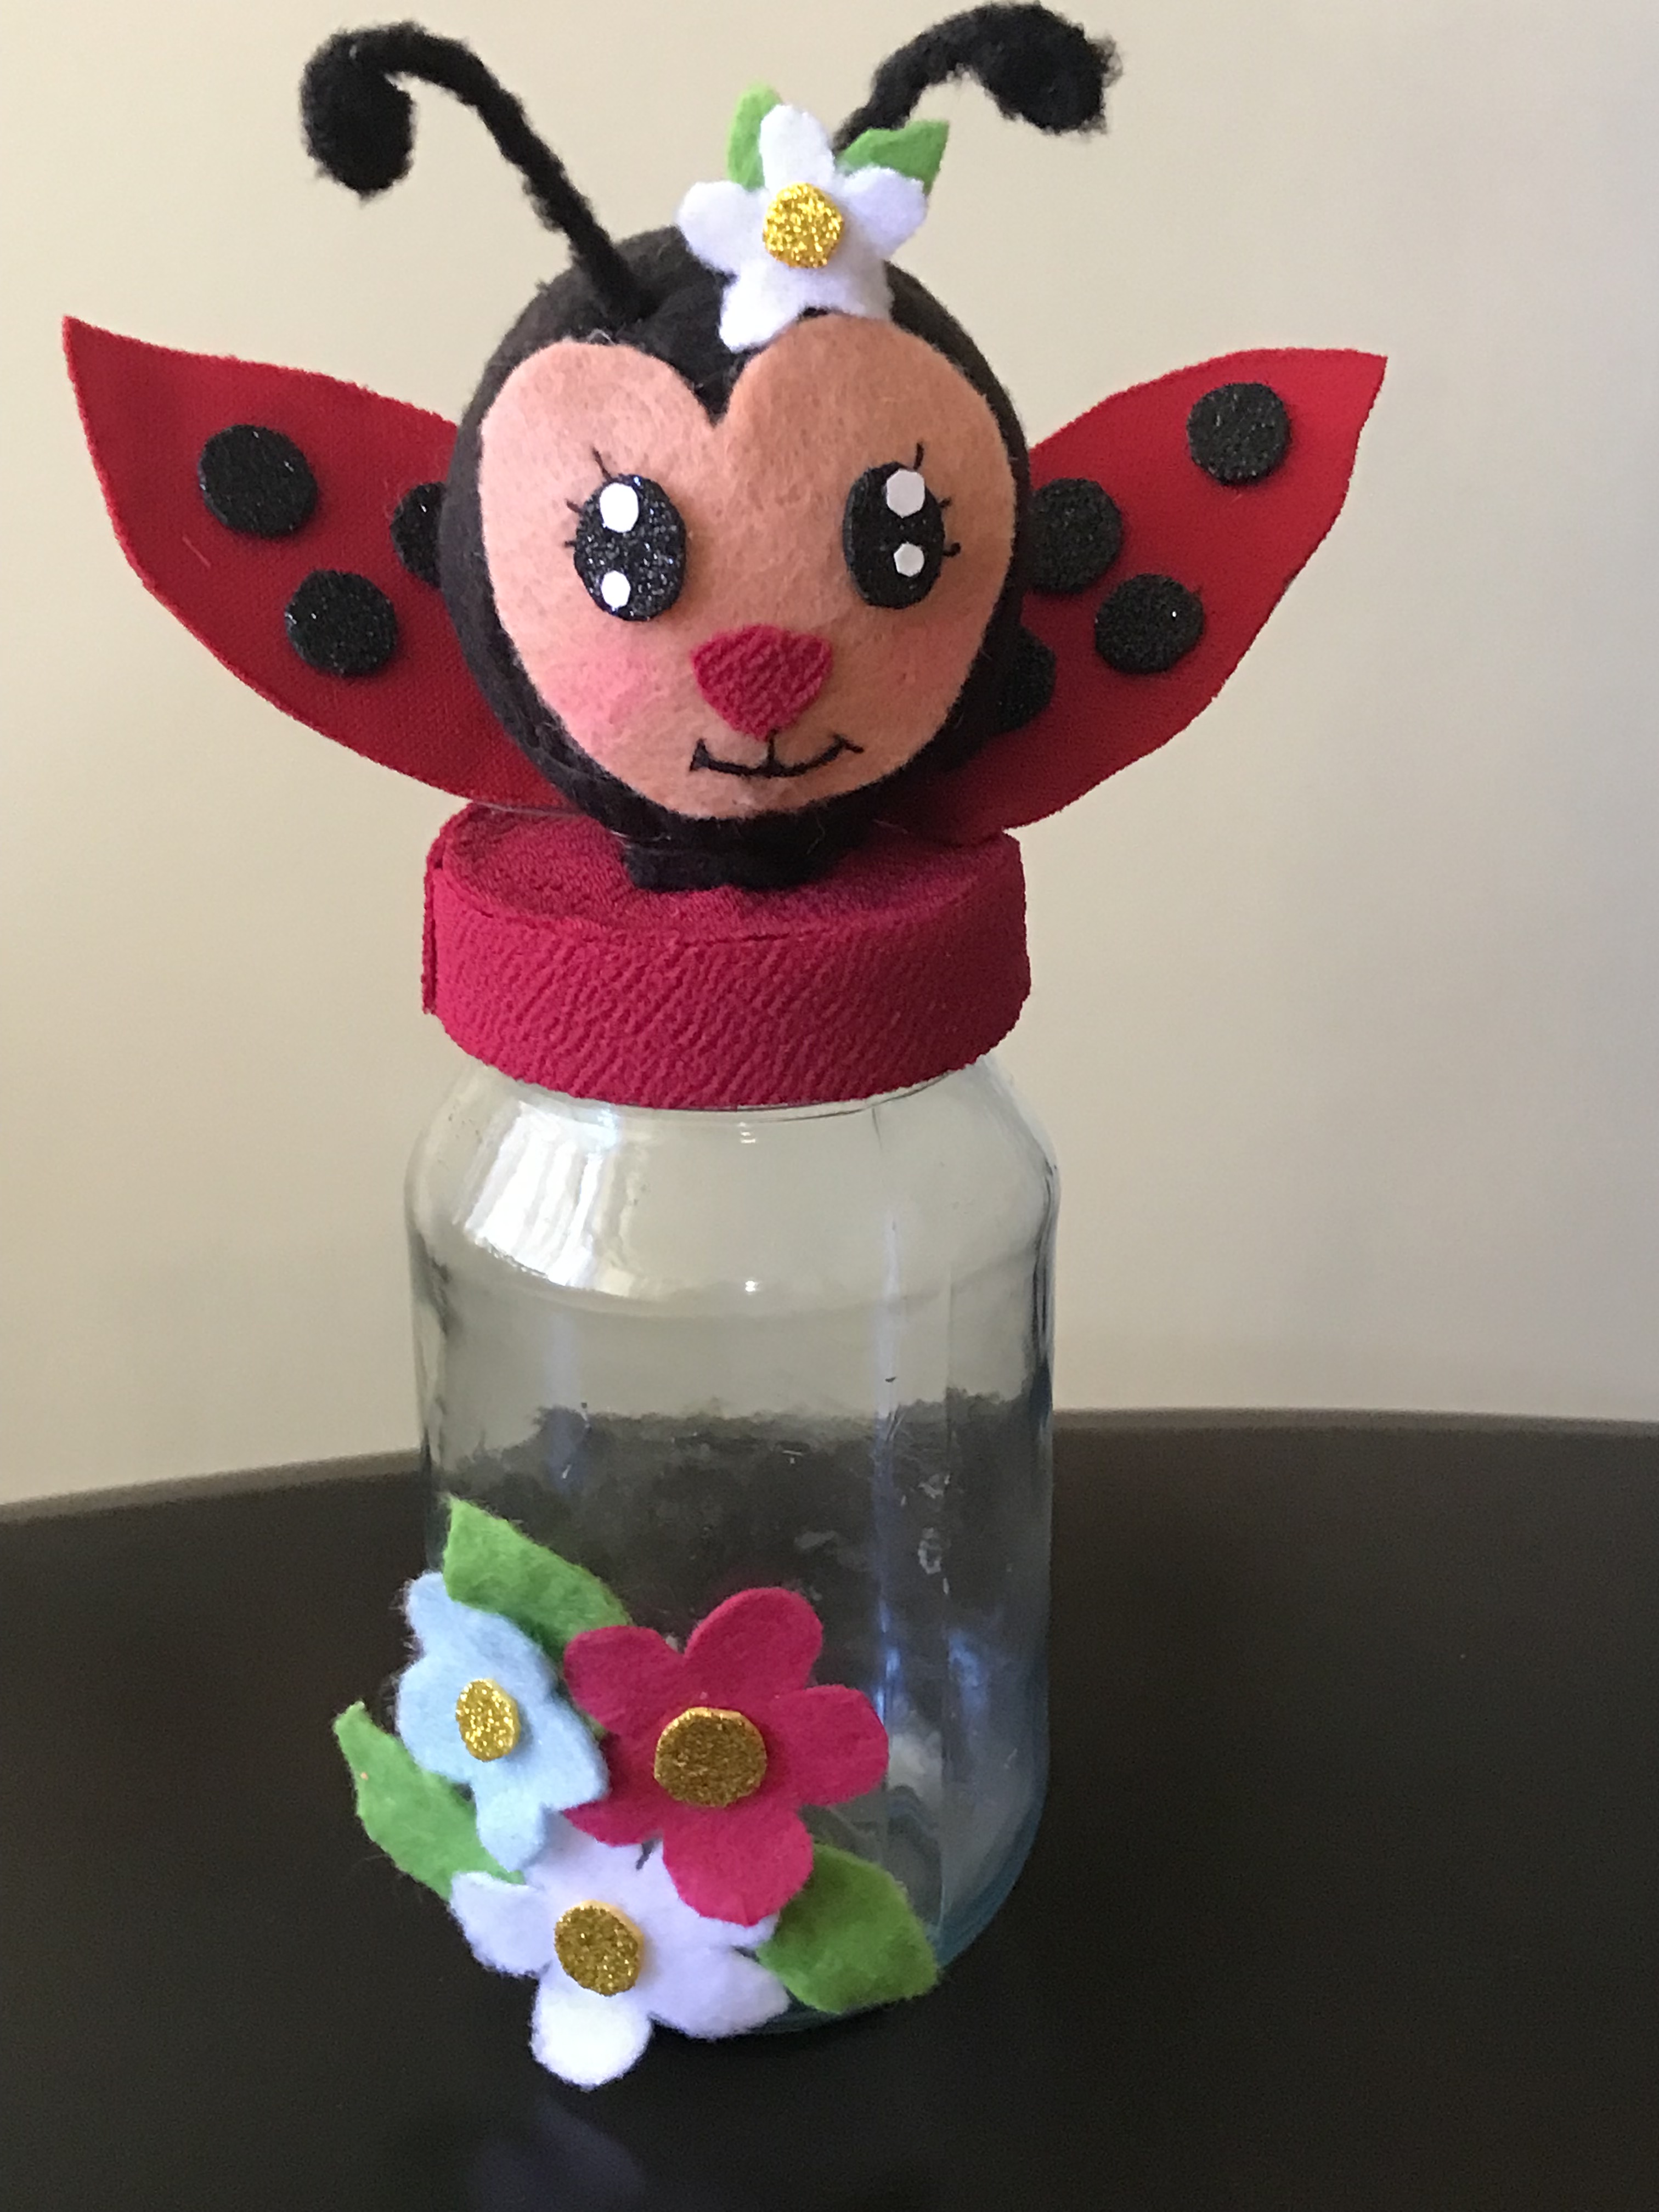
Today I want to show you how you can make a cute, useful and decorative craft at home at low cost that you will love. A beautiful and colorful candy cane with a cute ladybug.
El día de hoy les quiero mostrar como pueden hacer en casa una linda, útil y decorativa manualidad a bajo costó que les encantará. Una bella y colorida caramelera con linda mariquita.
They will need:
Necesitarán:
•Paper and pencil.
•Glass bottle.
•1 anime ball.
•Cardboard.
•Red cloth.
•Glossy gold and black foam.
•White, beige, blue, green and fuchsia felt.
•Black fleece fabric.
• 2 pieces of wire 12 centimeters each.
•Glue.
•Needle and thread.
•Scissor.
•Papel y lápiz.
•Envase de vidrio.
•1 bola de animé.
•Carton.
•Tela roja.
•Foami dorado y negro brillante.
•Fieltro blanco, beige, azul, verde y fucsia.
•Tela polar negra.
•2 trozos de alambre de 12 centímetros cada uno.
•Pegamento.
•Aguja e hilo.
•Tijera.
Start by cutting a rectangle of black fleece fabric, place the anime ball in its center and line it, joining the ends with a stitch, at the end cut the remaining ends of fabric. Then on the paper I draw the face of the ladybug and cut it out.
Inicio cortando un rectángulo de tela polar negra ubicó en su centro la bola de animé y forro juntando los extremos con puntada, al finalizar cortó las puntas sobrantes de tela. Luego en el papel dibujo la cara de la mariquita y recortó.
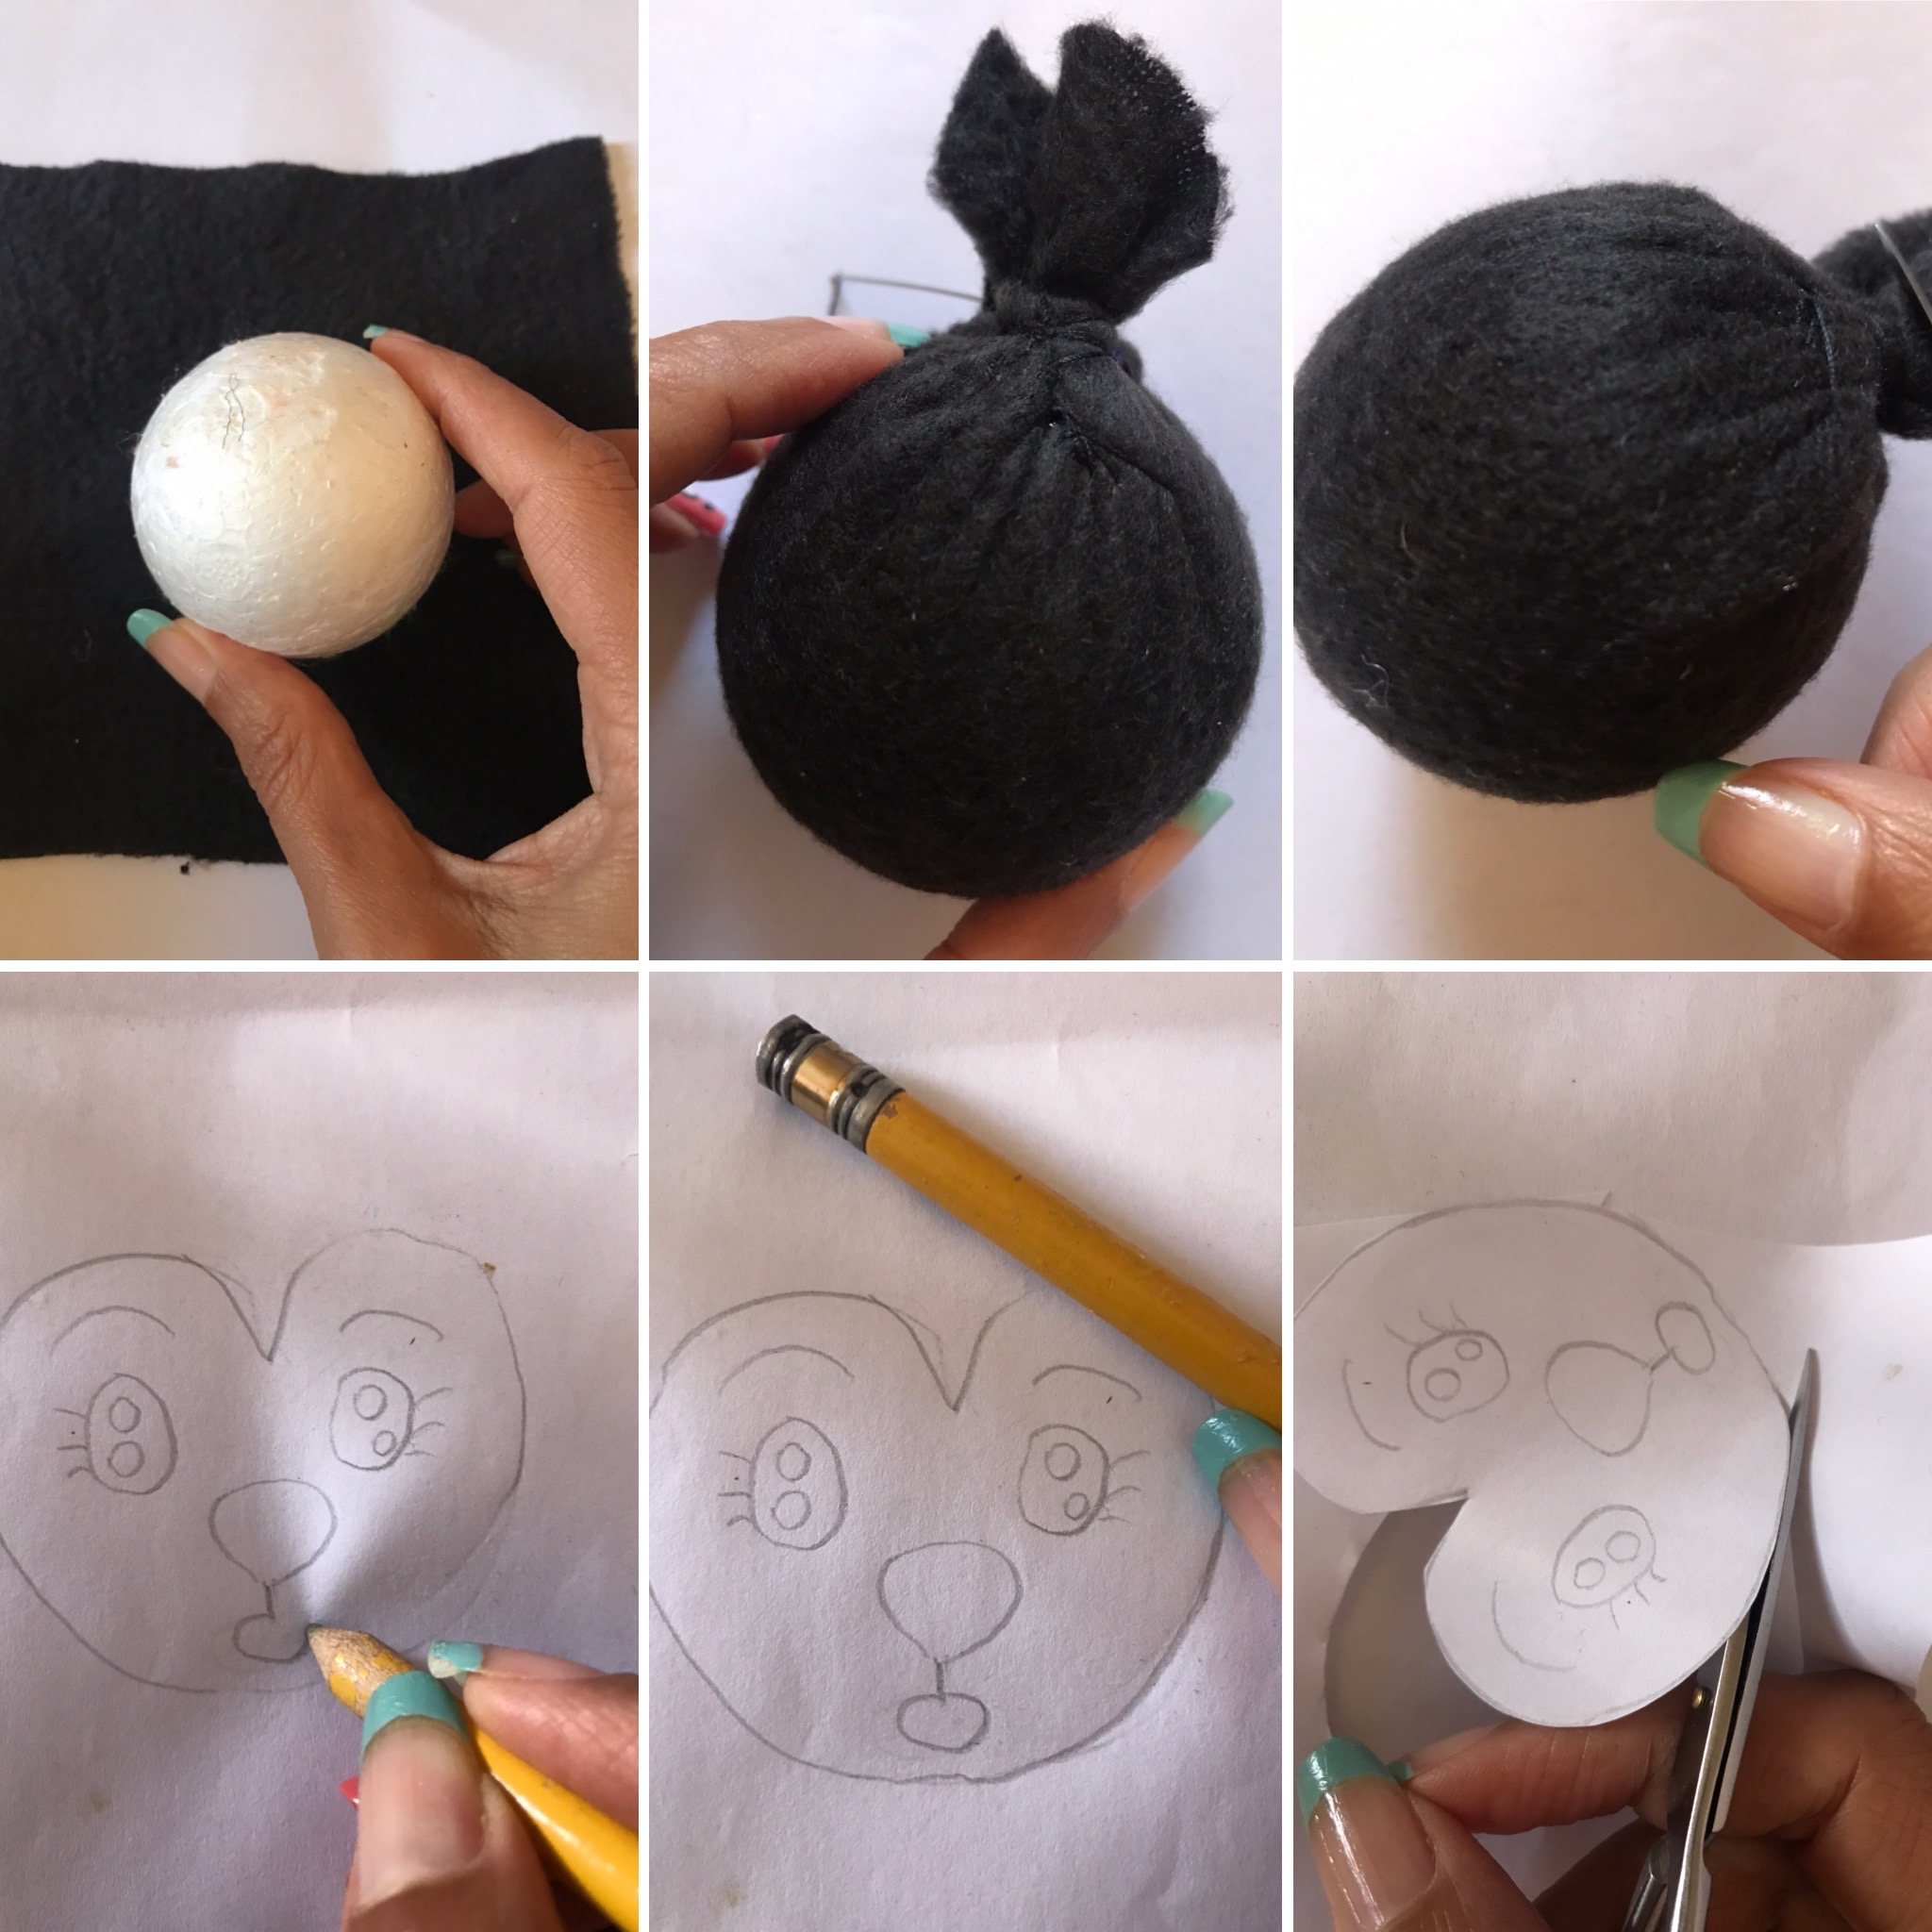
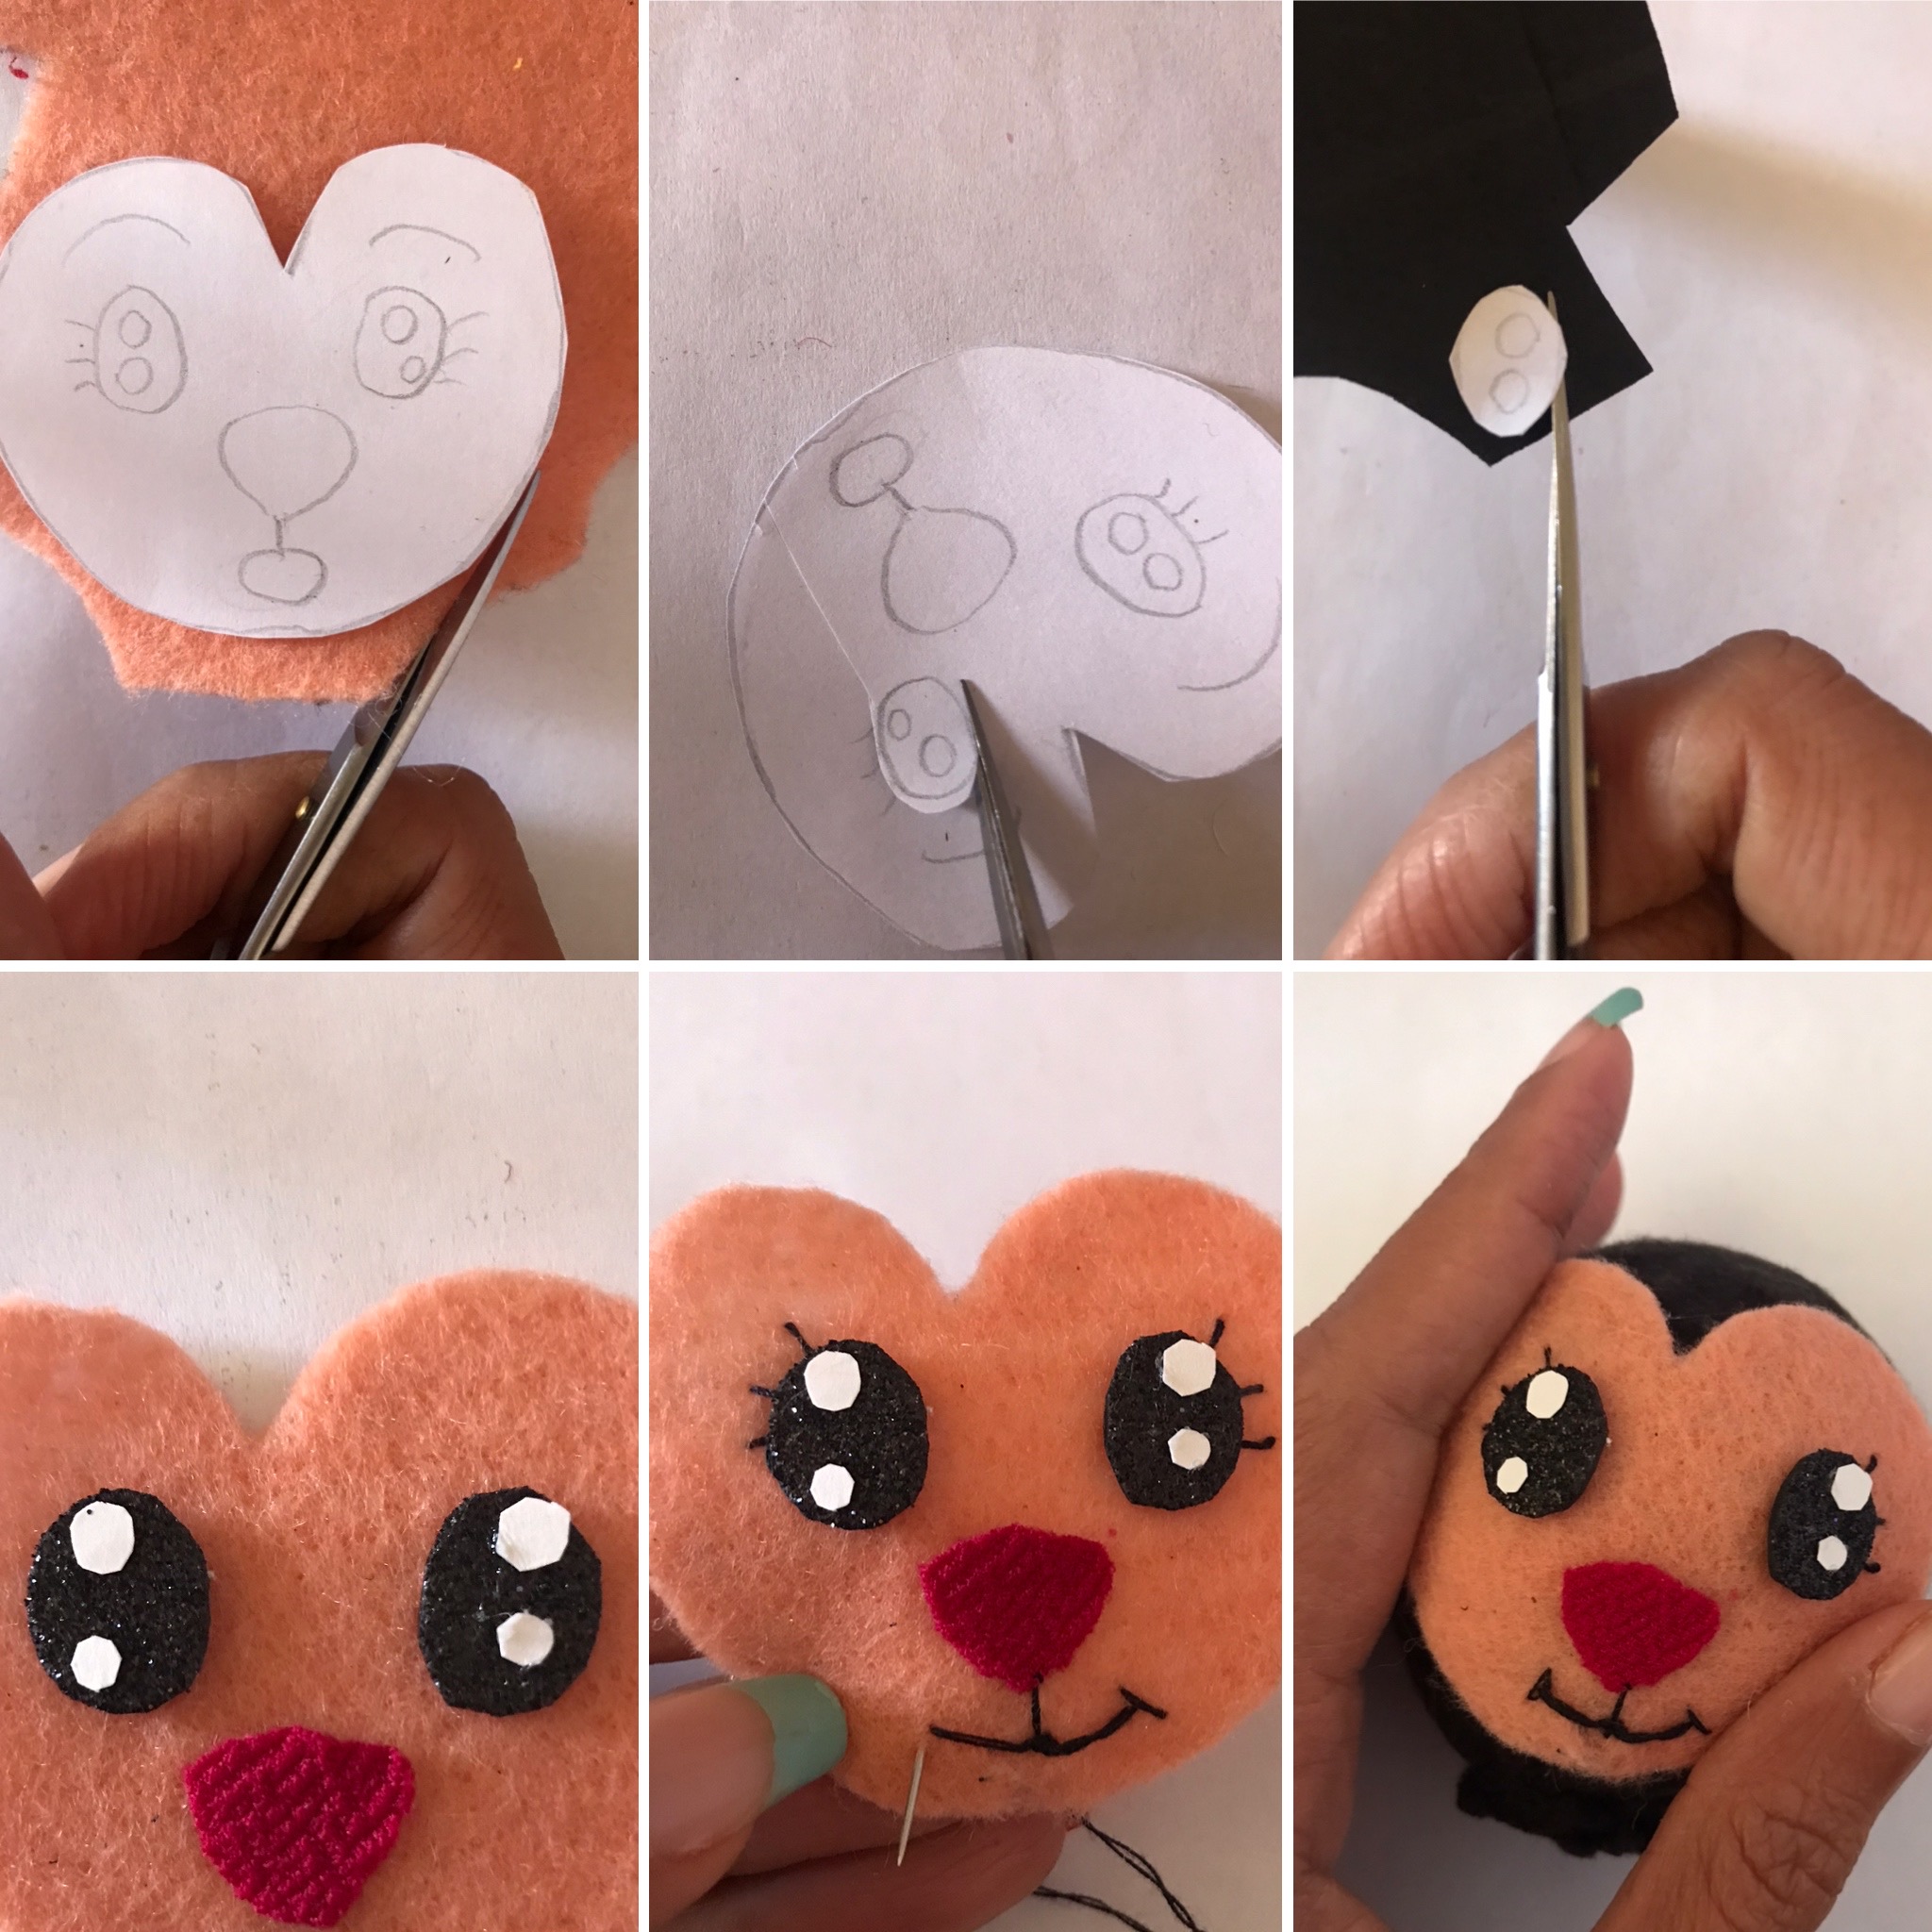
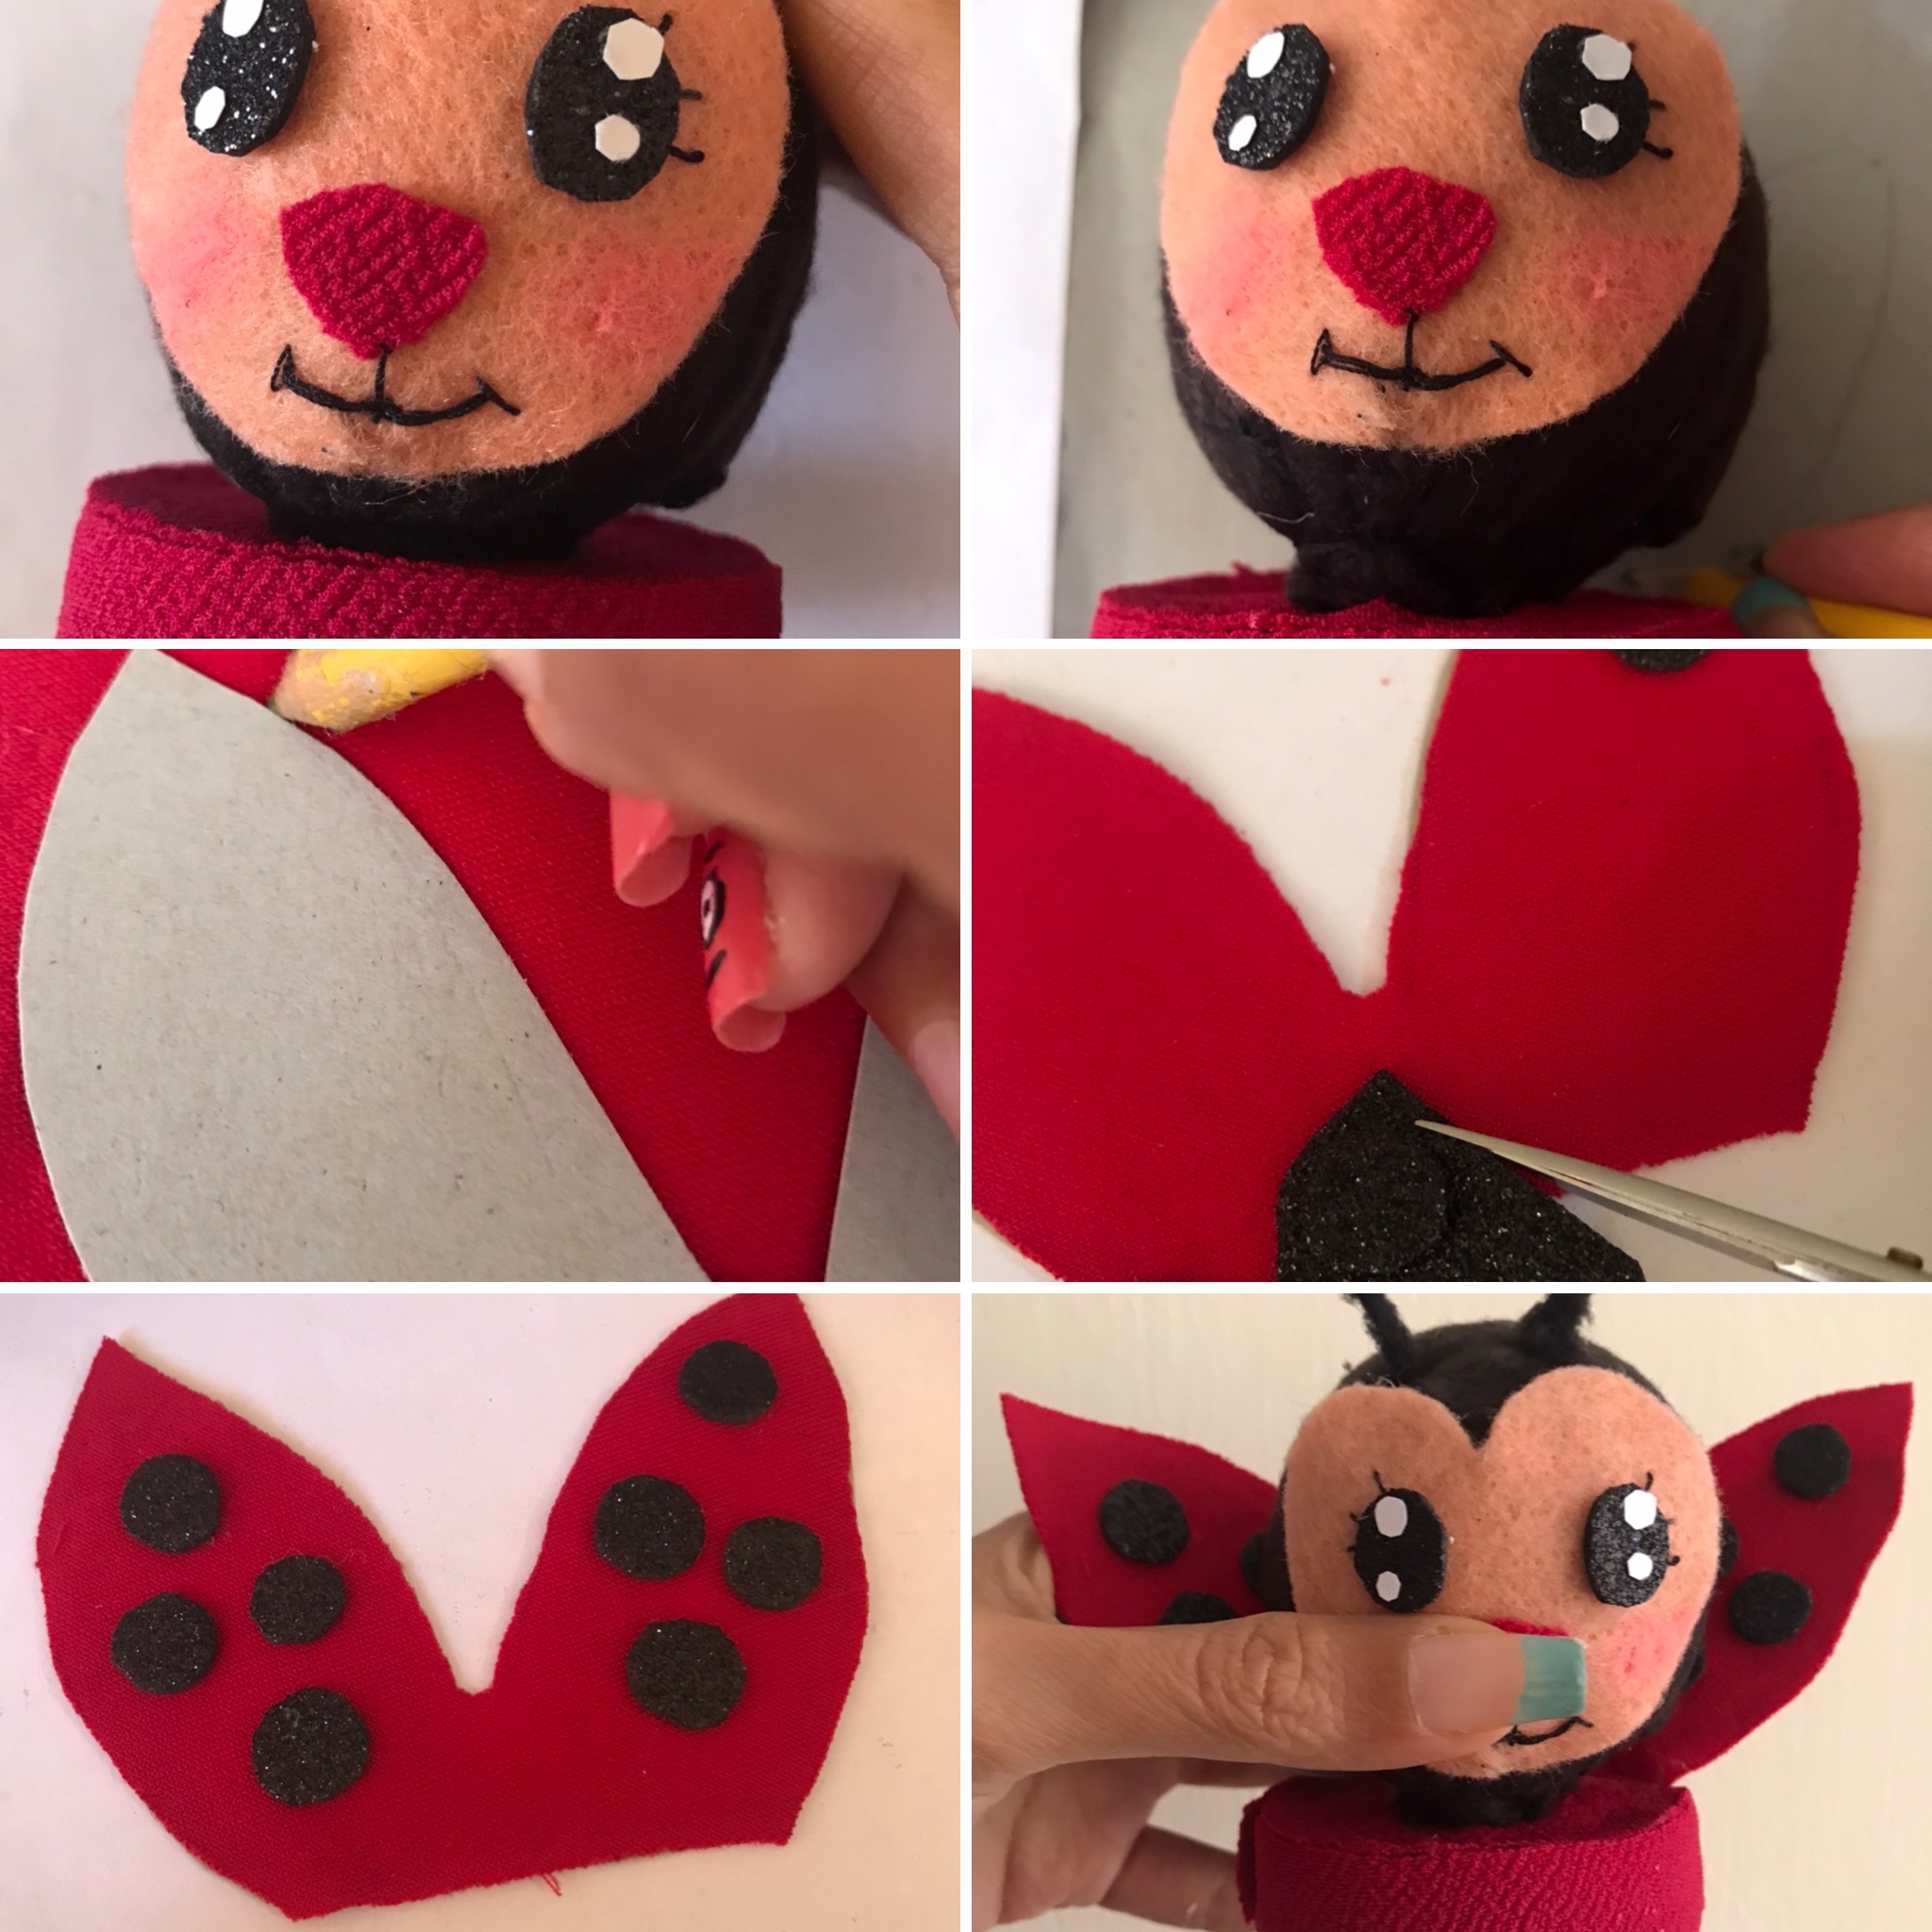
He placed the figure of the face on the beige fabric and cut it out. Then he cut out the paper figure and used it as a guide to cut eyes out of the black foami and a nose out of the red fabric, glued to the face. With black thread stitches I frame her eyelashes and mouth; he subsequently glued his face to the black-lined anime ball.
Ubicó la figura de la cara sobre la tela beige y recortar. Luego recortó la figura de papel y usó como guía para cortar ojos en el foami negro y nariz en la tela roja, pegó a la carita. Con puntadas de hilo negro marco sus pestañas y boca; posteriormente pegó la cara a la bola de animé forrada de negro.
Then he cut a strip of black cloth and with it he covered the wires, when he finished he rolled one of its ends, forming small spirals. I attach these to the top end of the ladybug's head to shape her antennae. I mark the upper end and contour of the lid to the red fabric, cut it out and glued it to the lid, in order to line it.
Luego cortó una tira de tela negra y con ella forro los alambres, al terminar enrrollo uno de sus extremos, formando pequeños espirales. Fijo éstos al extremo superior de la cabeza de la mariquita para dar forma a sus antenistas. Marco el extremo superior y contorno de la tapa a la tela roja, recortó y pegó a la tapa, para así forrarla.
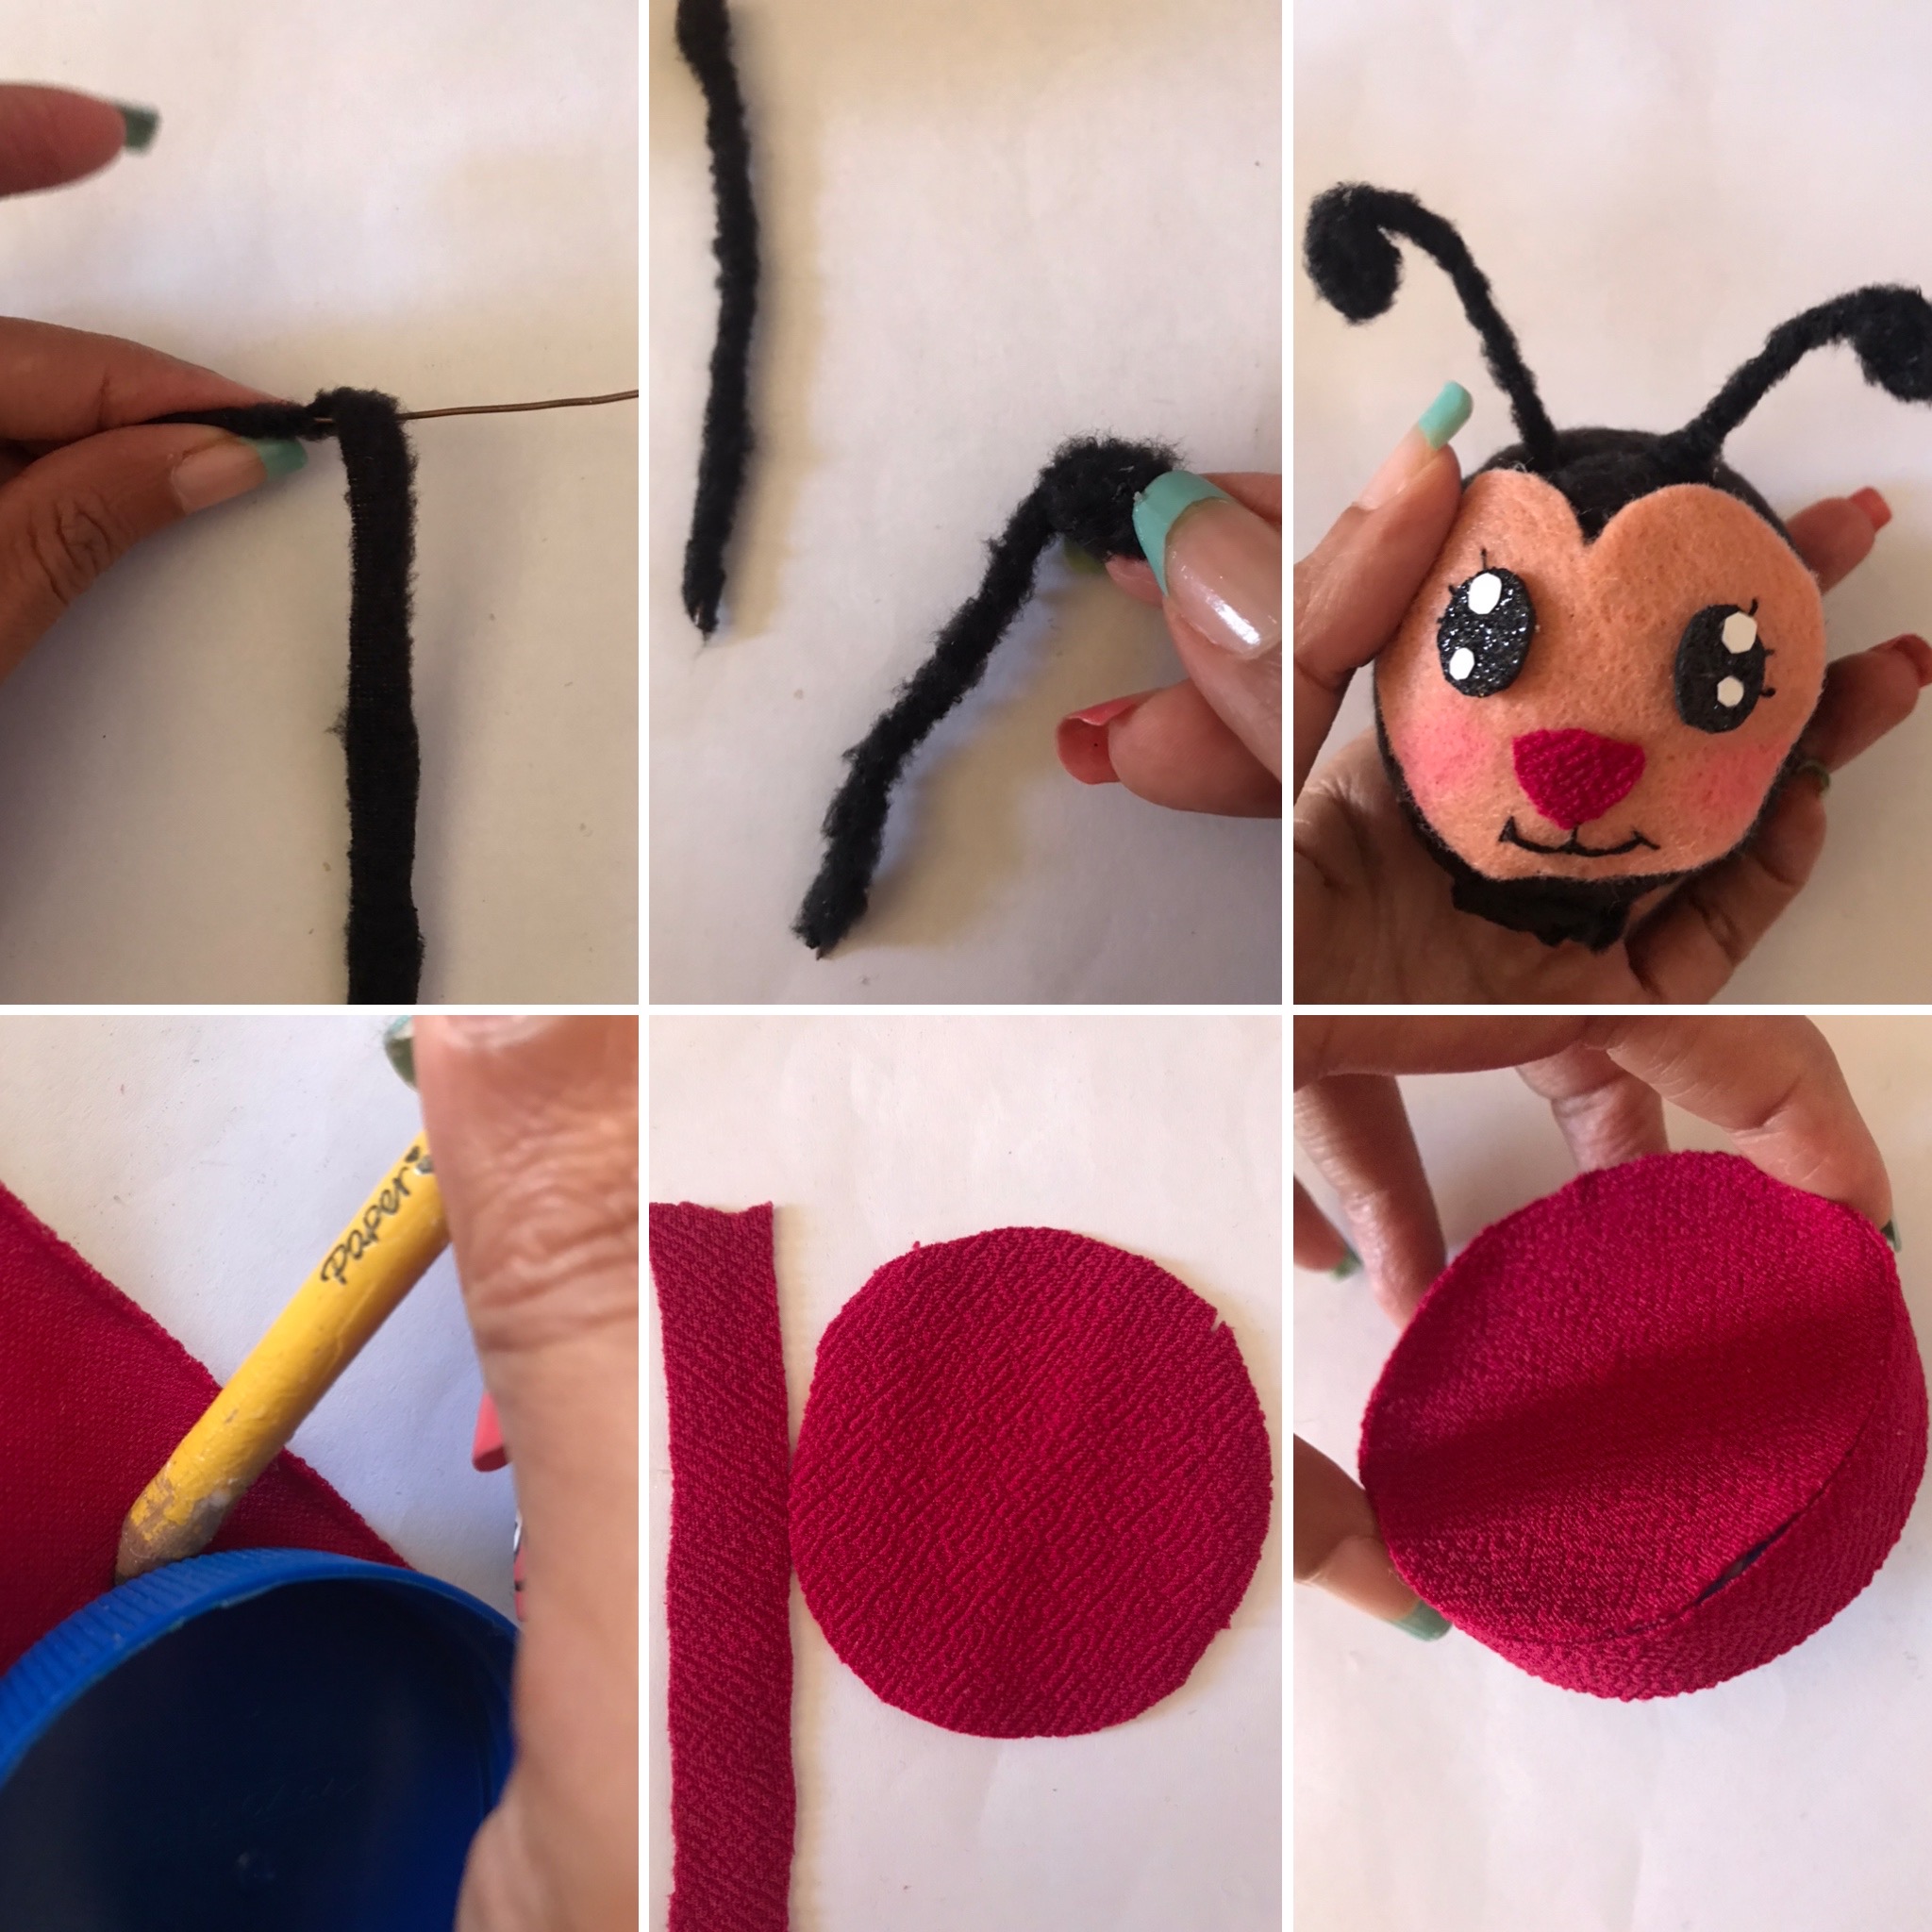
I attach the head of the figure to the top end of the lid. Then he placed it on the cardboard to have as a guide and draw a pair of wings, cut and mark on the red fabric, cut it out, also on the shiny black foami cut 8 small circles that I fixed to the fabric wings and you are to the cardboard ones . I continue to glue the wings to the back of the ladybug's head.
Fijo la cabeza de la figura al extremo superior de la tapa. Luego ubicó está sobre el cartón para tener como guía y dibujar un par de alas, recortar y marcar en la tela roja, recortó, además en el foami negro brillante recortar 8 pequeños círculos que fijo a las alas de tela y estás a las de cartón. Continuo pegando las alas a la parte posterior de la cabeza de la mariquita.
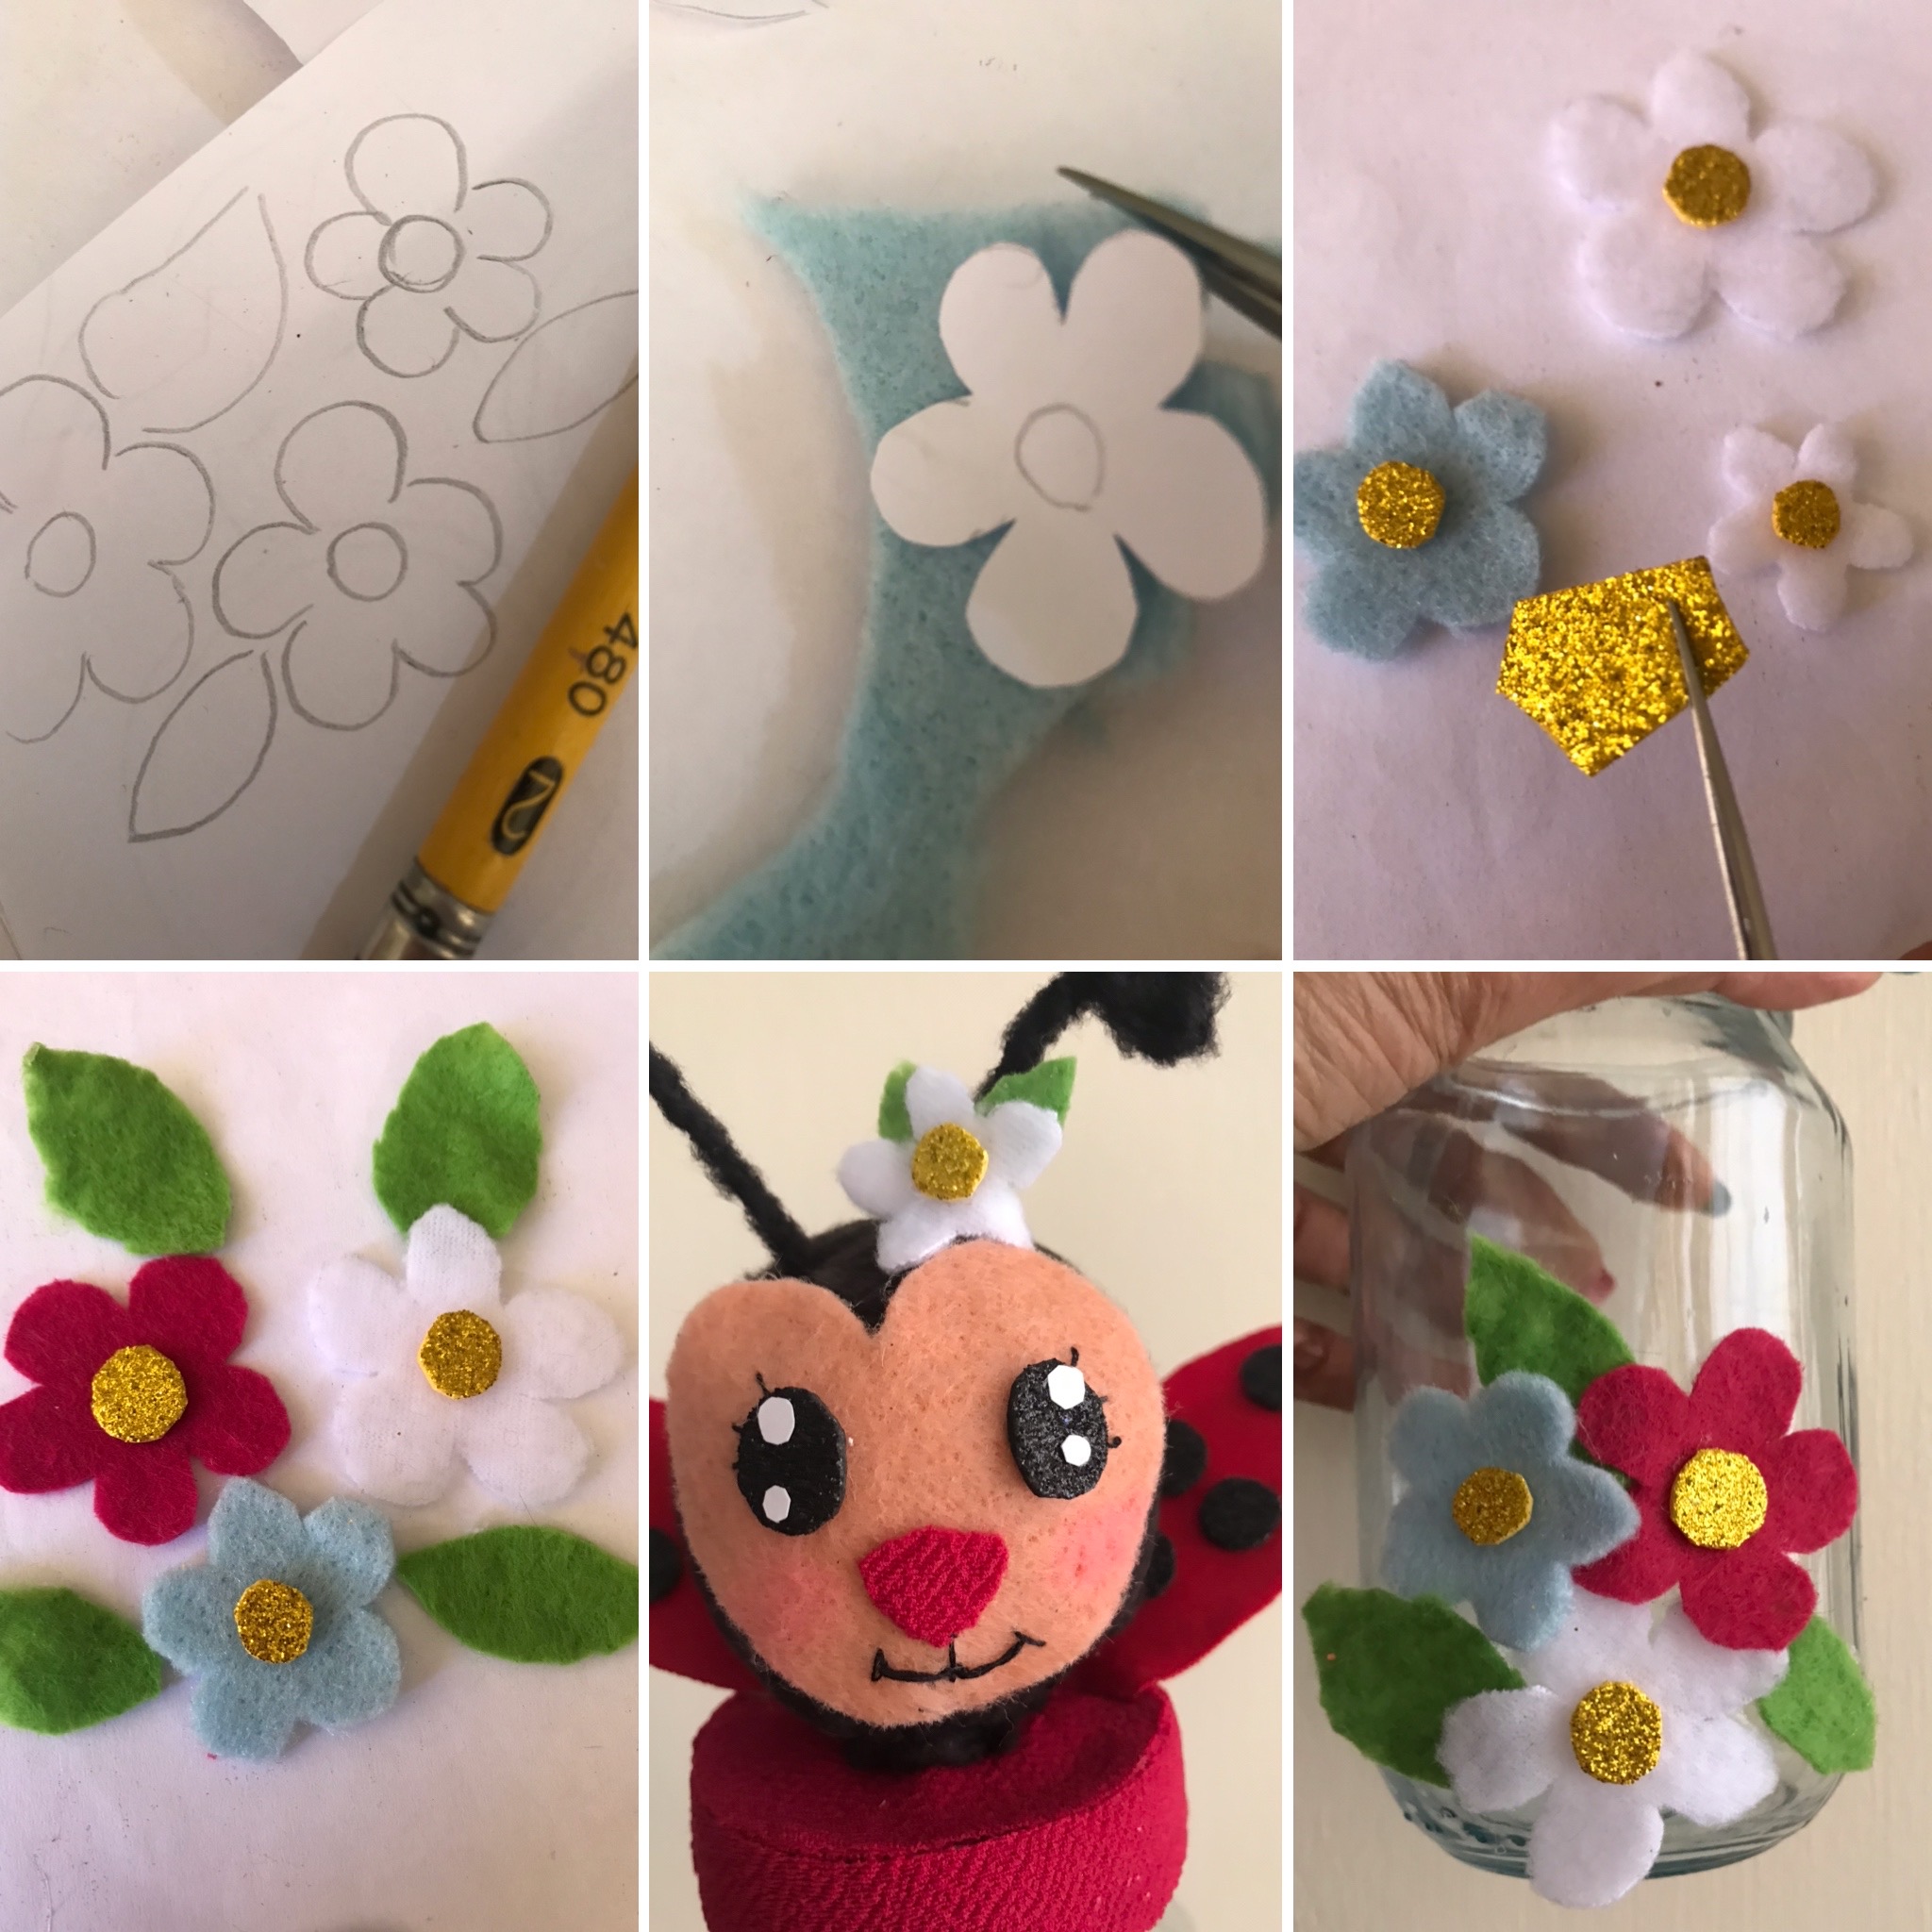
I draw some beautiful flowers and their leaves, cut and mark on the colored felts, also cut the center of the flowers in the gold foami and glued them. I continue gluing a flower to one side of the antennae of the ladybug and the others to one side of the container.
Dibujo unas lindas flores y sus hojas, recortar y marcar en los fieltros de colores, además cortó en el foami dorado el centro de las flores y pegó a estás. Continuo pegando una flor a un lado de la antenista de la mariquita y las otras de un costado del envase.
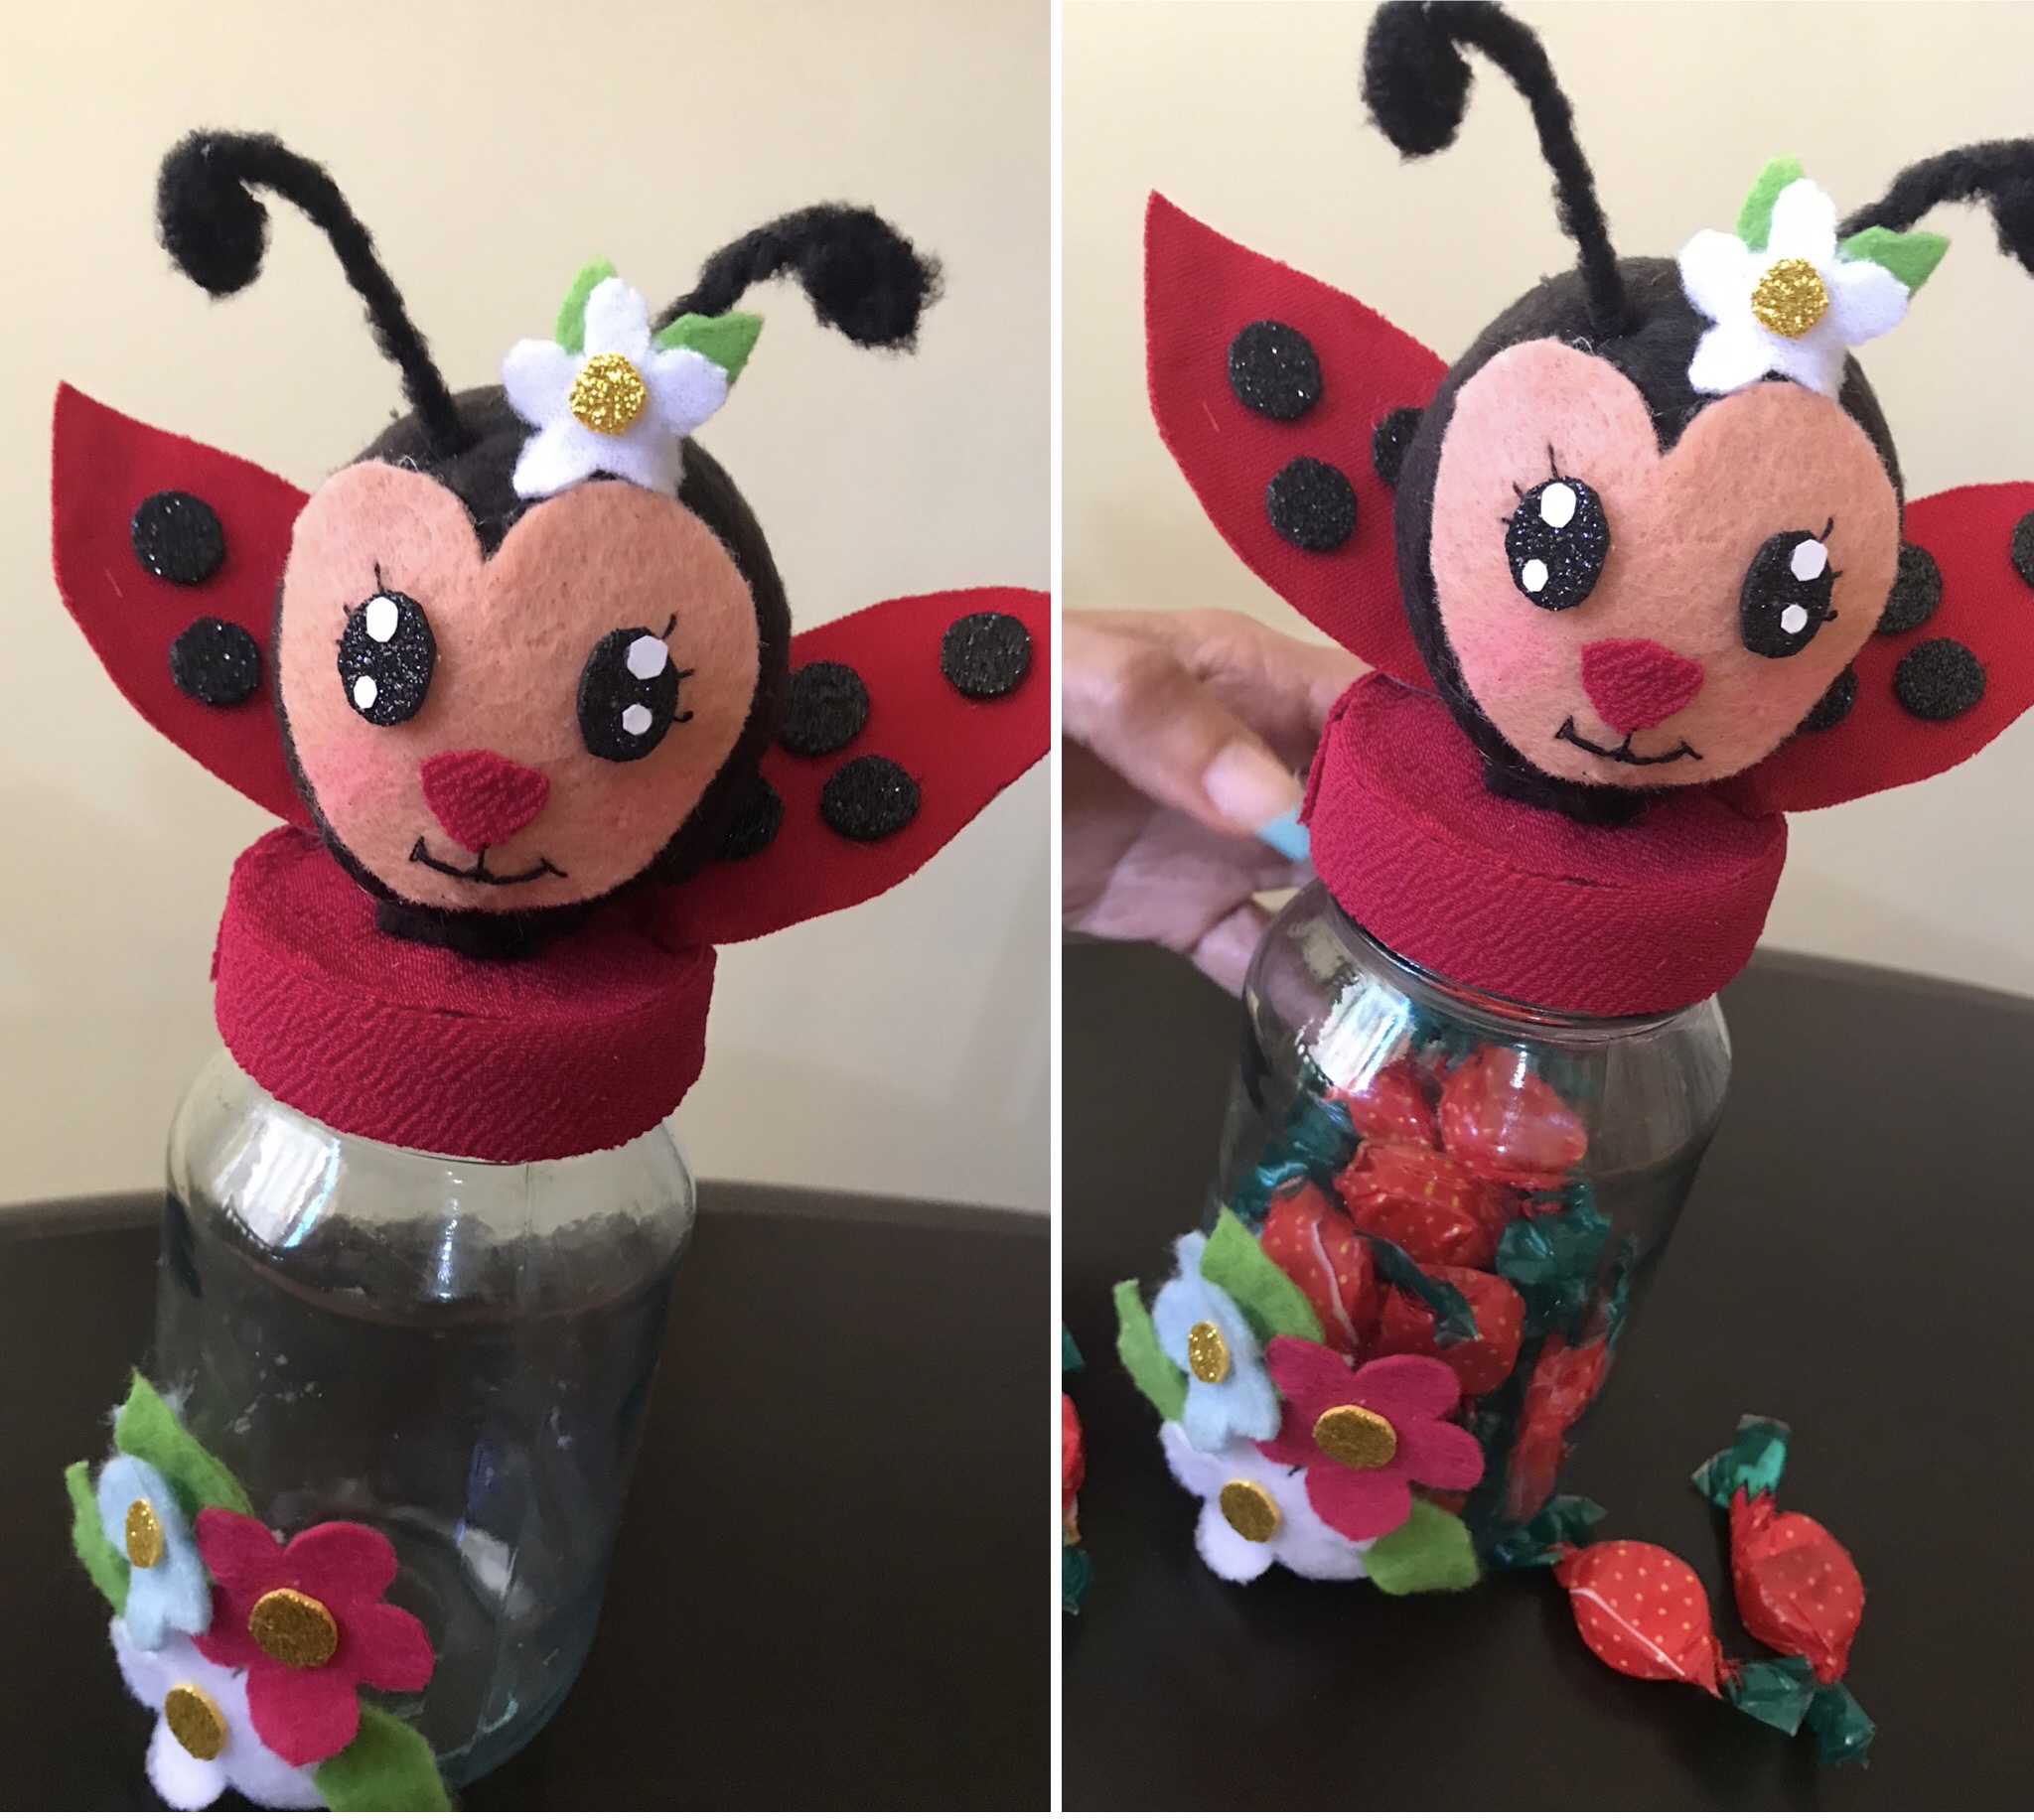
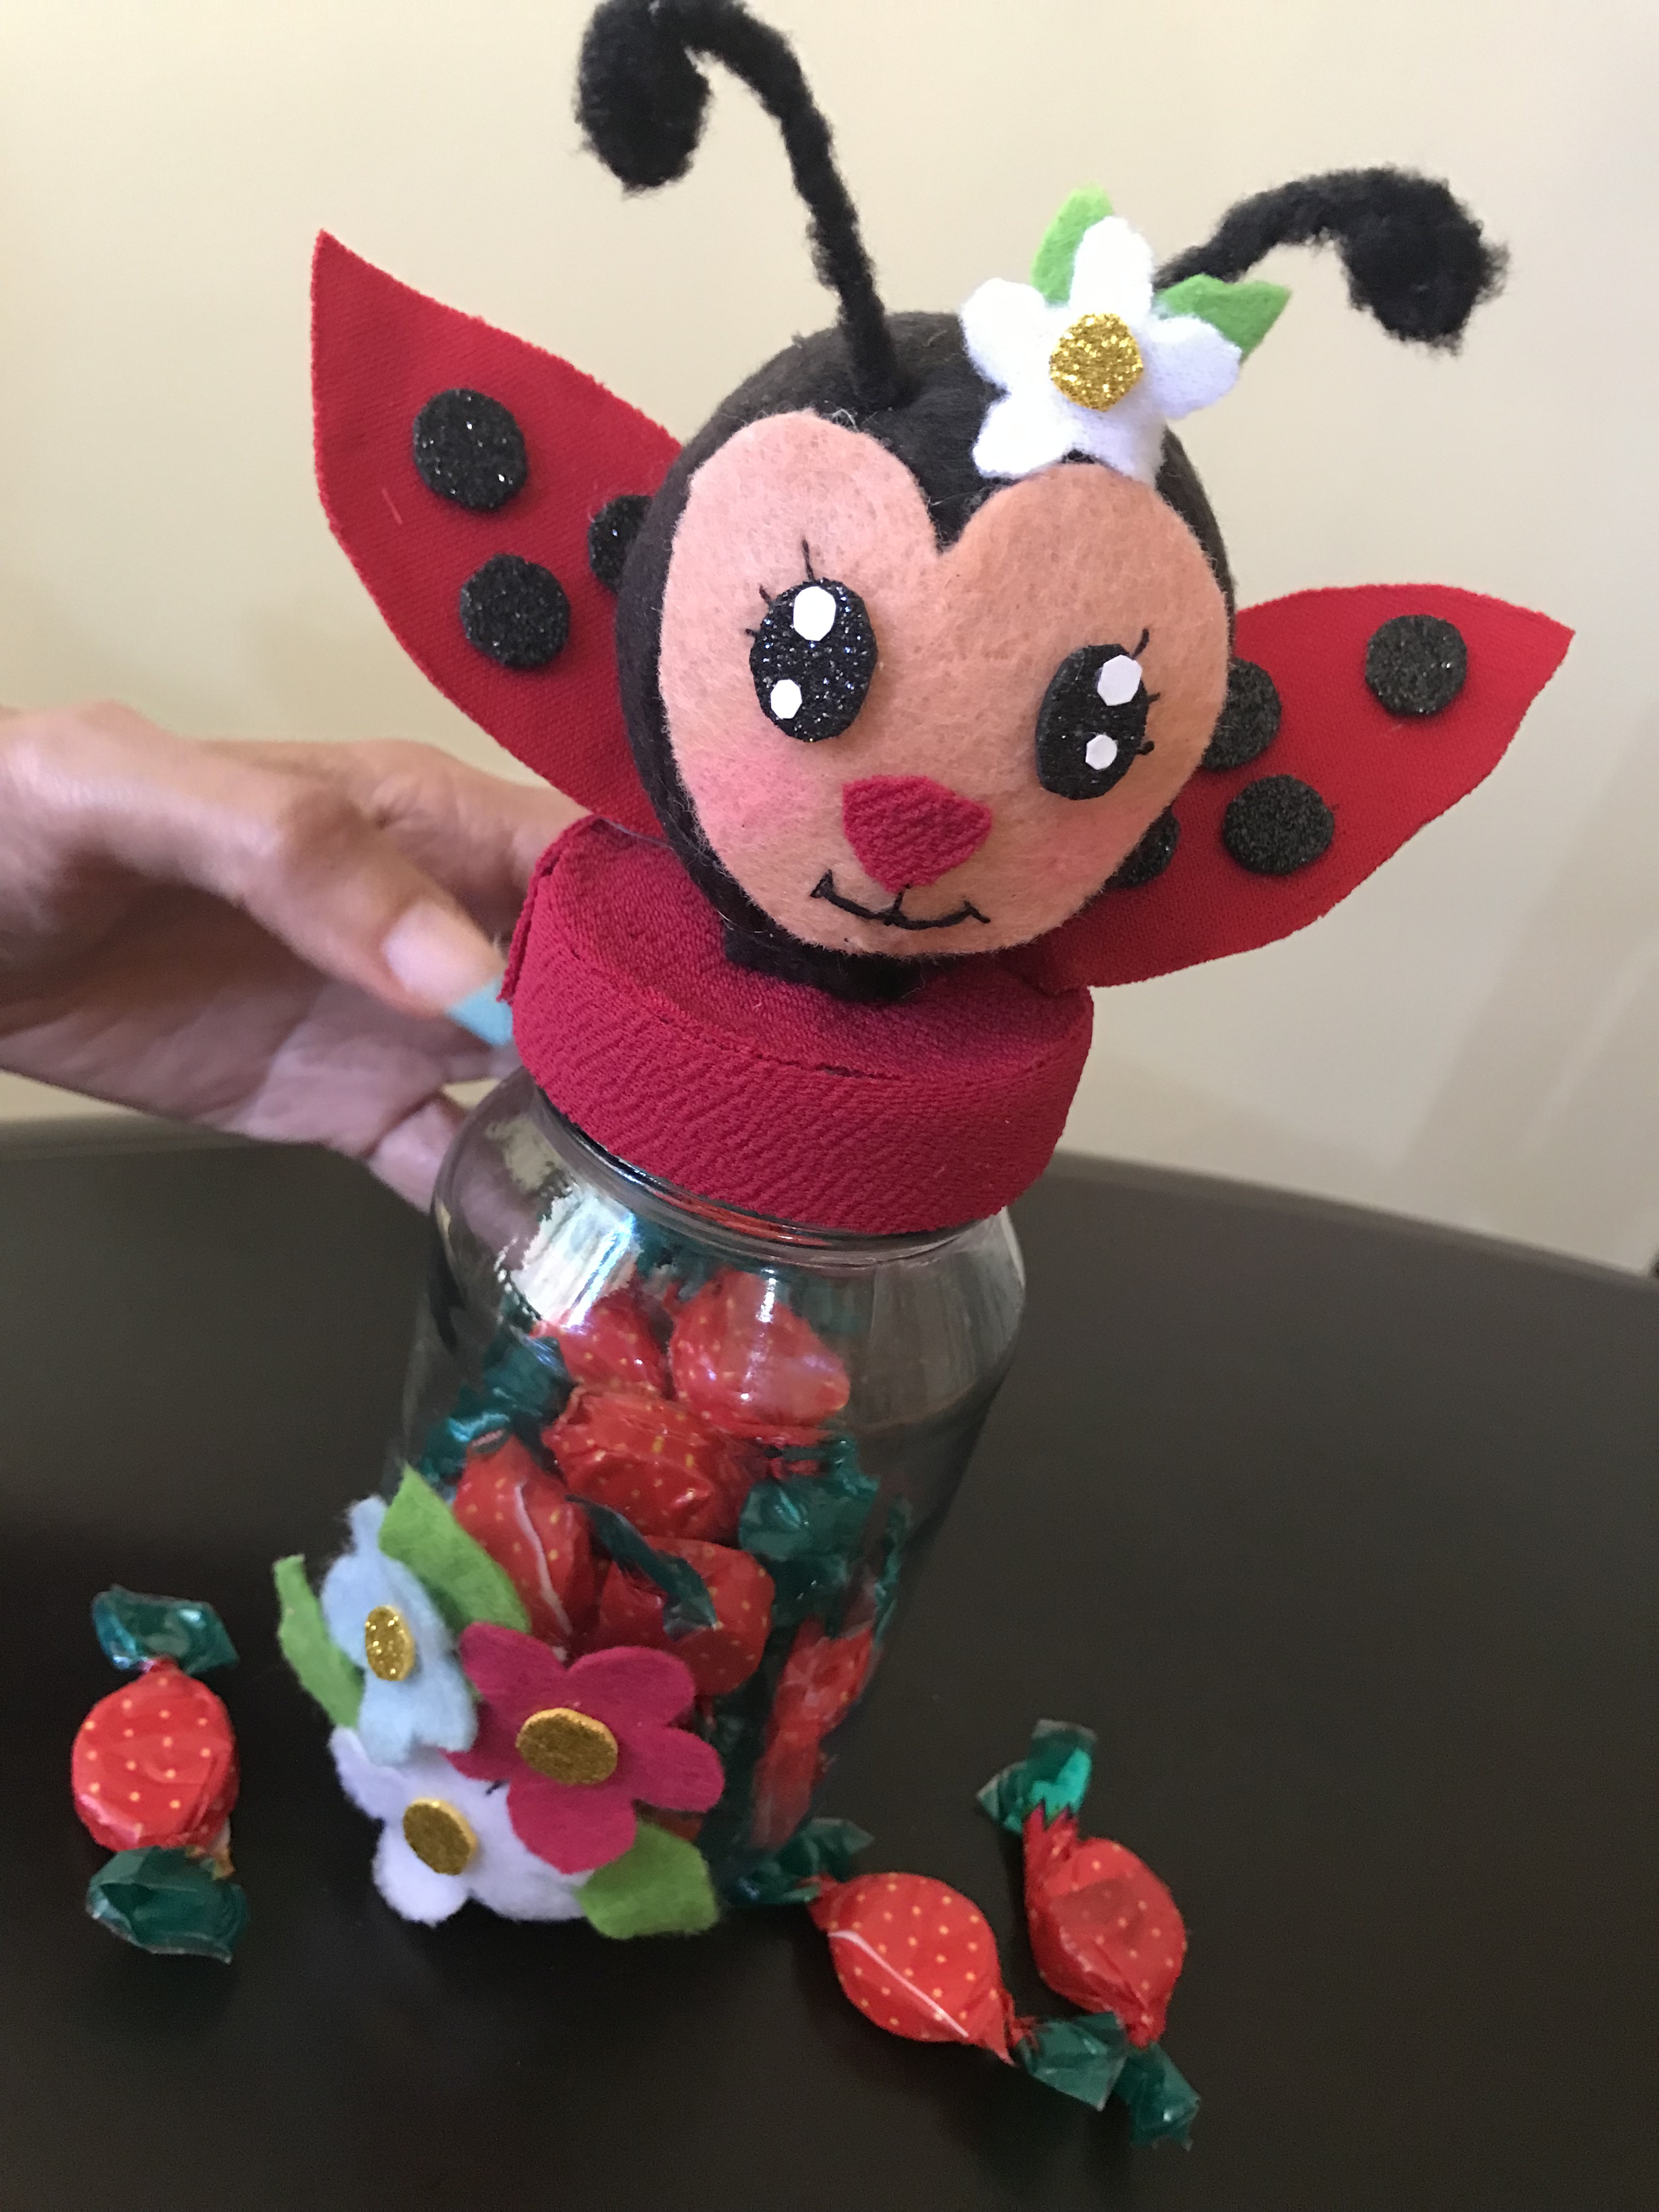
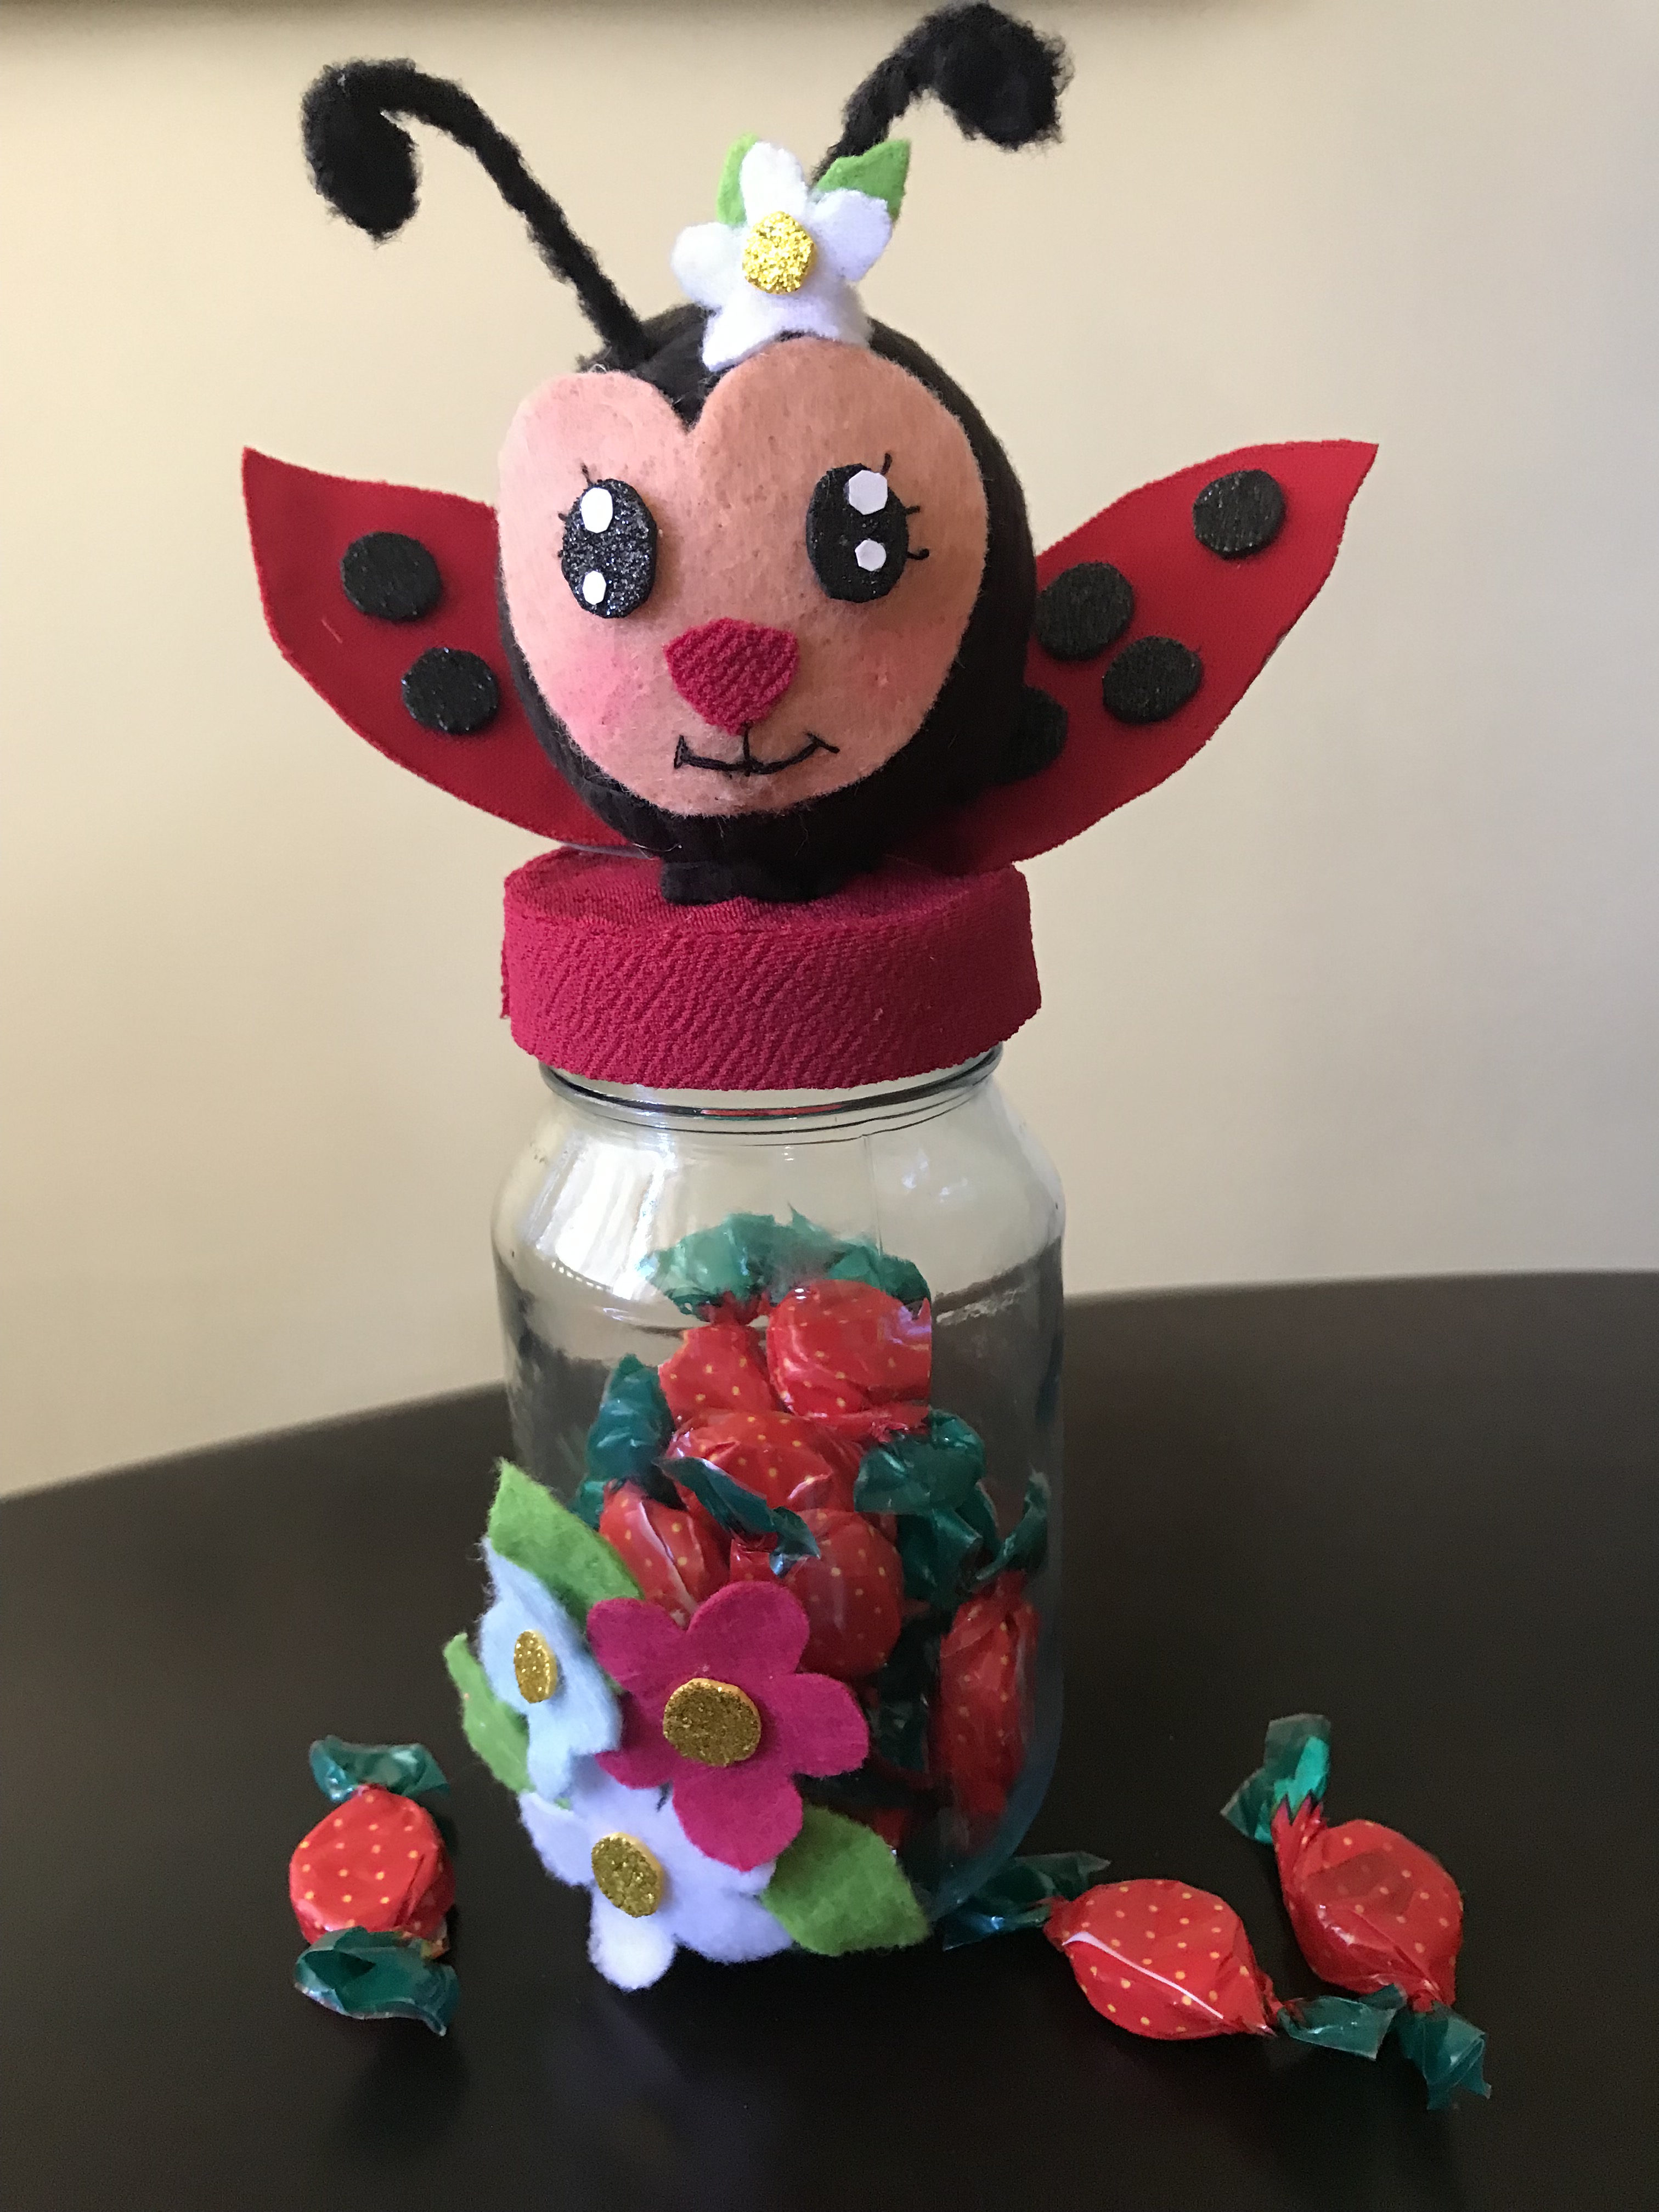
This beautiful and colorful candy box with a cute ladybug is a great and decorative idea to store our candies and sweets using this cute design.
Está bella y colorida caramelera con linda mariquita, es una idea genial y decorativa para guardar nuestros caramelos y dulces usando este coqueto diseño.
Until a next opportunity.
Hasta una próxima oportunidad.
The photos in this article are my own.
Las fotos de este artículo son de mi autoría.
Thank you for sharing this amazing post on HIVE!
Your content got selected by our fellow curator @stevenson7 & you just received a little thank you via an upvote from our non-profit curation initiative!
You will be featured in one of our recurring curation compilations and on our pinterest boards! Both are aiming to offer you a stage to widen your audience within and outside of the DIY scene of hive.
Join the official DIYHub community on HIVE and show us more of your amazing work and feel free to connect with us and other DIYers via our discord server: https://discord.gg/mY5uCfQ !
If you want to support our goal to motivate other DIY/art/music/homesteading/... creators just delegate to us and earn 100% of your curation rewards!
Stay creative & hive on!
Gracias amigos por su apoyo
Me encanto, quedo hermosa.
Muchas gracias!!! me alegra te guste...saludos!!!