Un cordial saludo apreciada comunidad, hoy me uno al concurso de nuestra amiga @jennyzer, motivandonos a inspirarnos a realizar un obsequio reciclable para ese ser maravilloso llamado Papá.
A cordial greeting, dear community, today I join the contest of our friend @jennyzer, motivating us to inspire us to make a recyclable gift for that wonderful being called Dad.
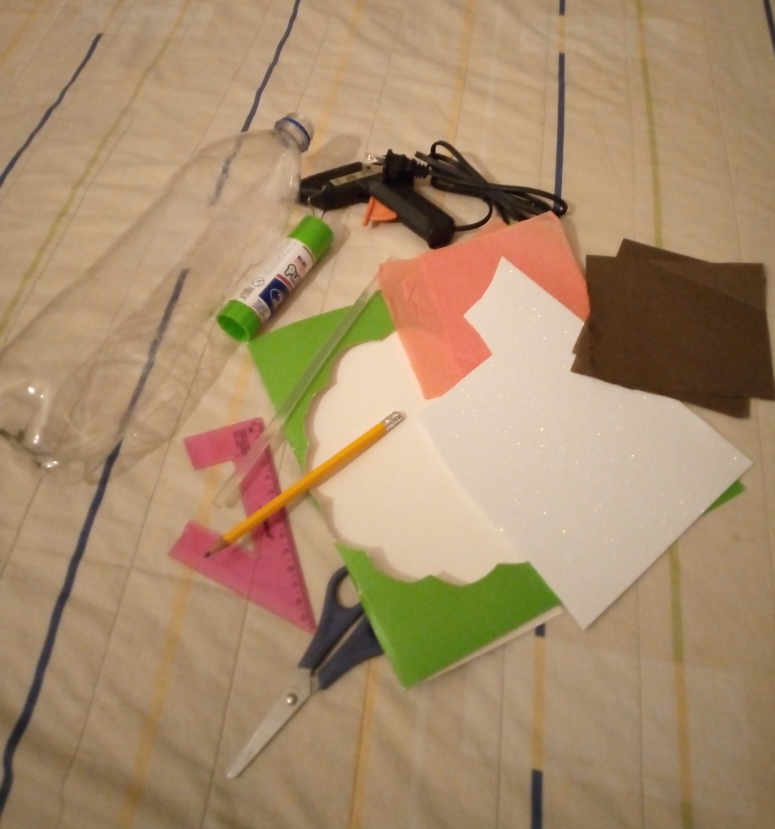
Materiales:
•1 botella plástica de refresco
•retazos de cartulina , papel de seda, foami,
tijeras, silicón en barra, lápiz, regla.
Materials:
• 1 plastic bottle of soda
• scraps of cardboard, tissue paper, foam,
scissors, silicone stick, pencil, ruler.
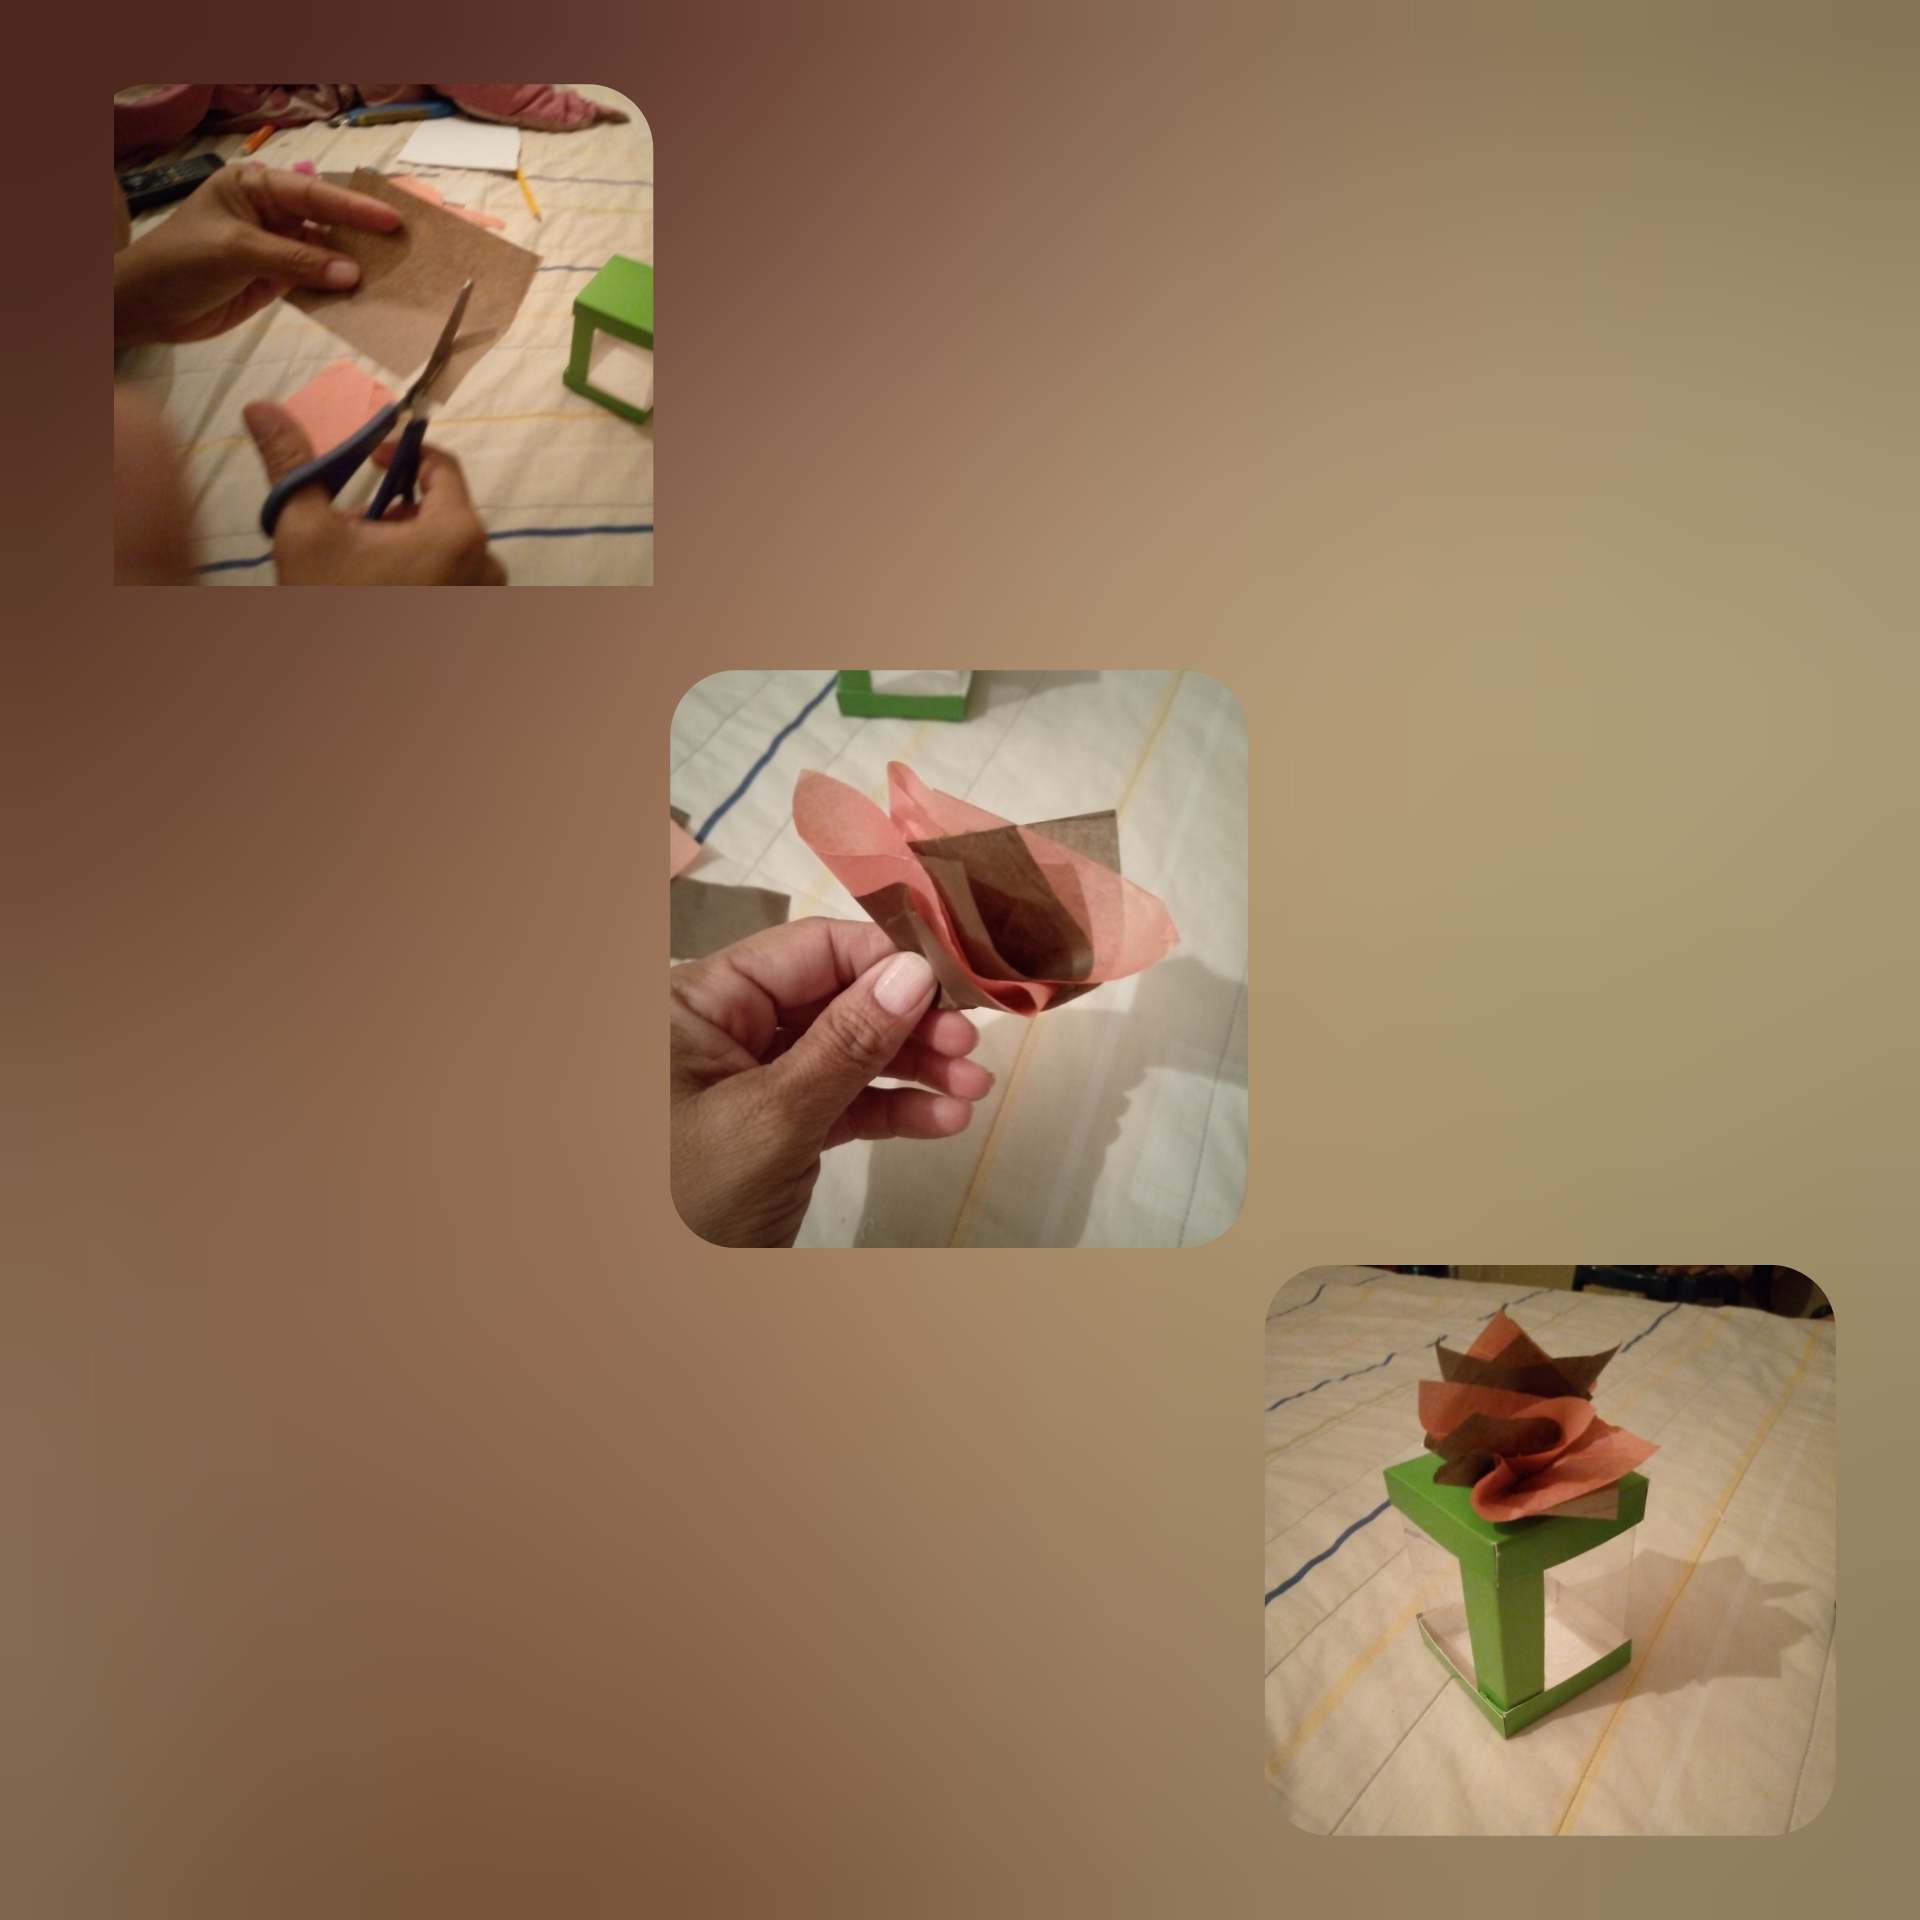
Proceso:
•Corte la botella dónde indican las líneas rectas, se hace primero un corte más arriba para luego con más facilidad cortar dónde queremos.
Process:
• Cut the bottle where the straight lines indicate, first a cut is made higher and then more easily cut where we want.
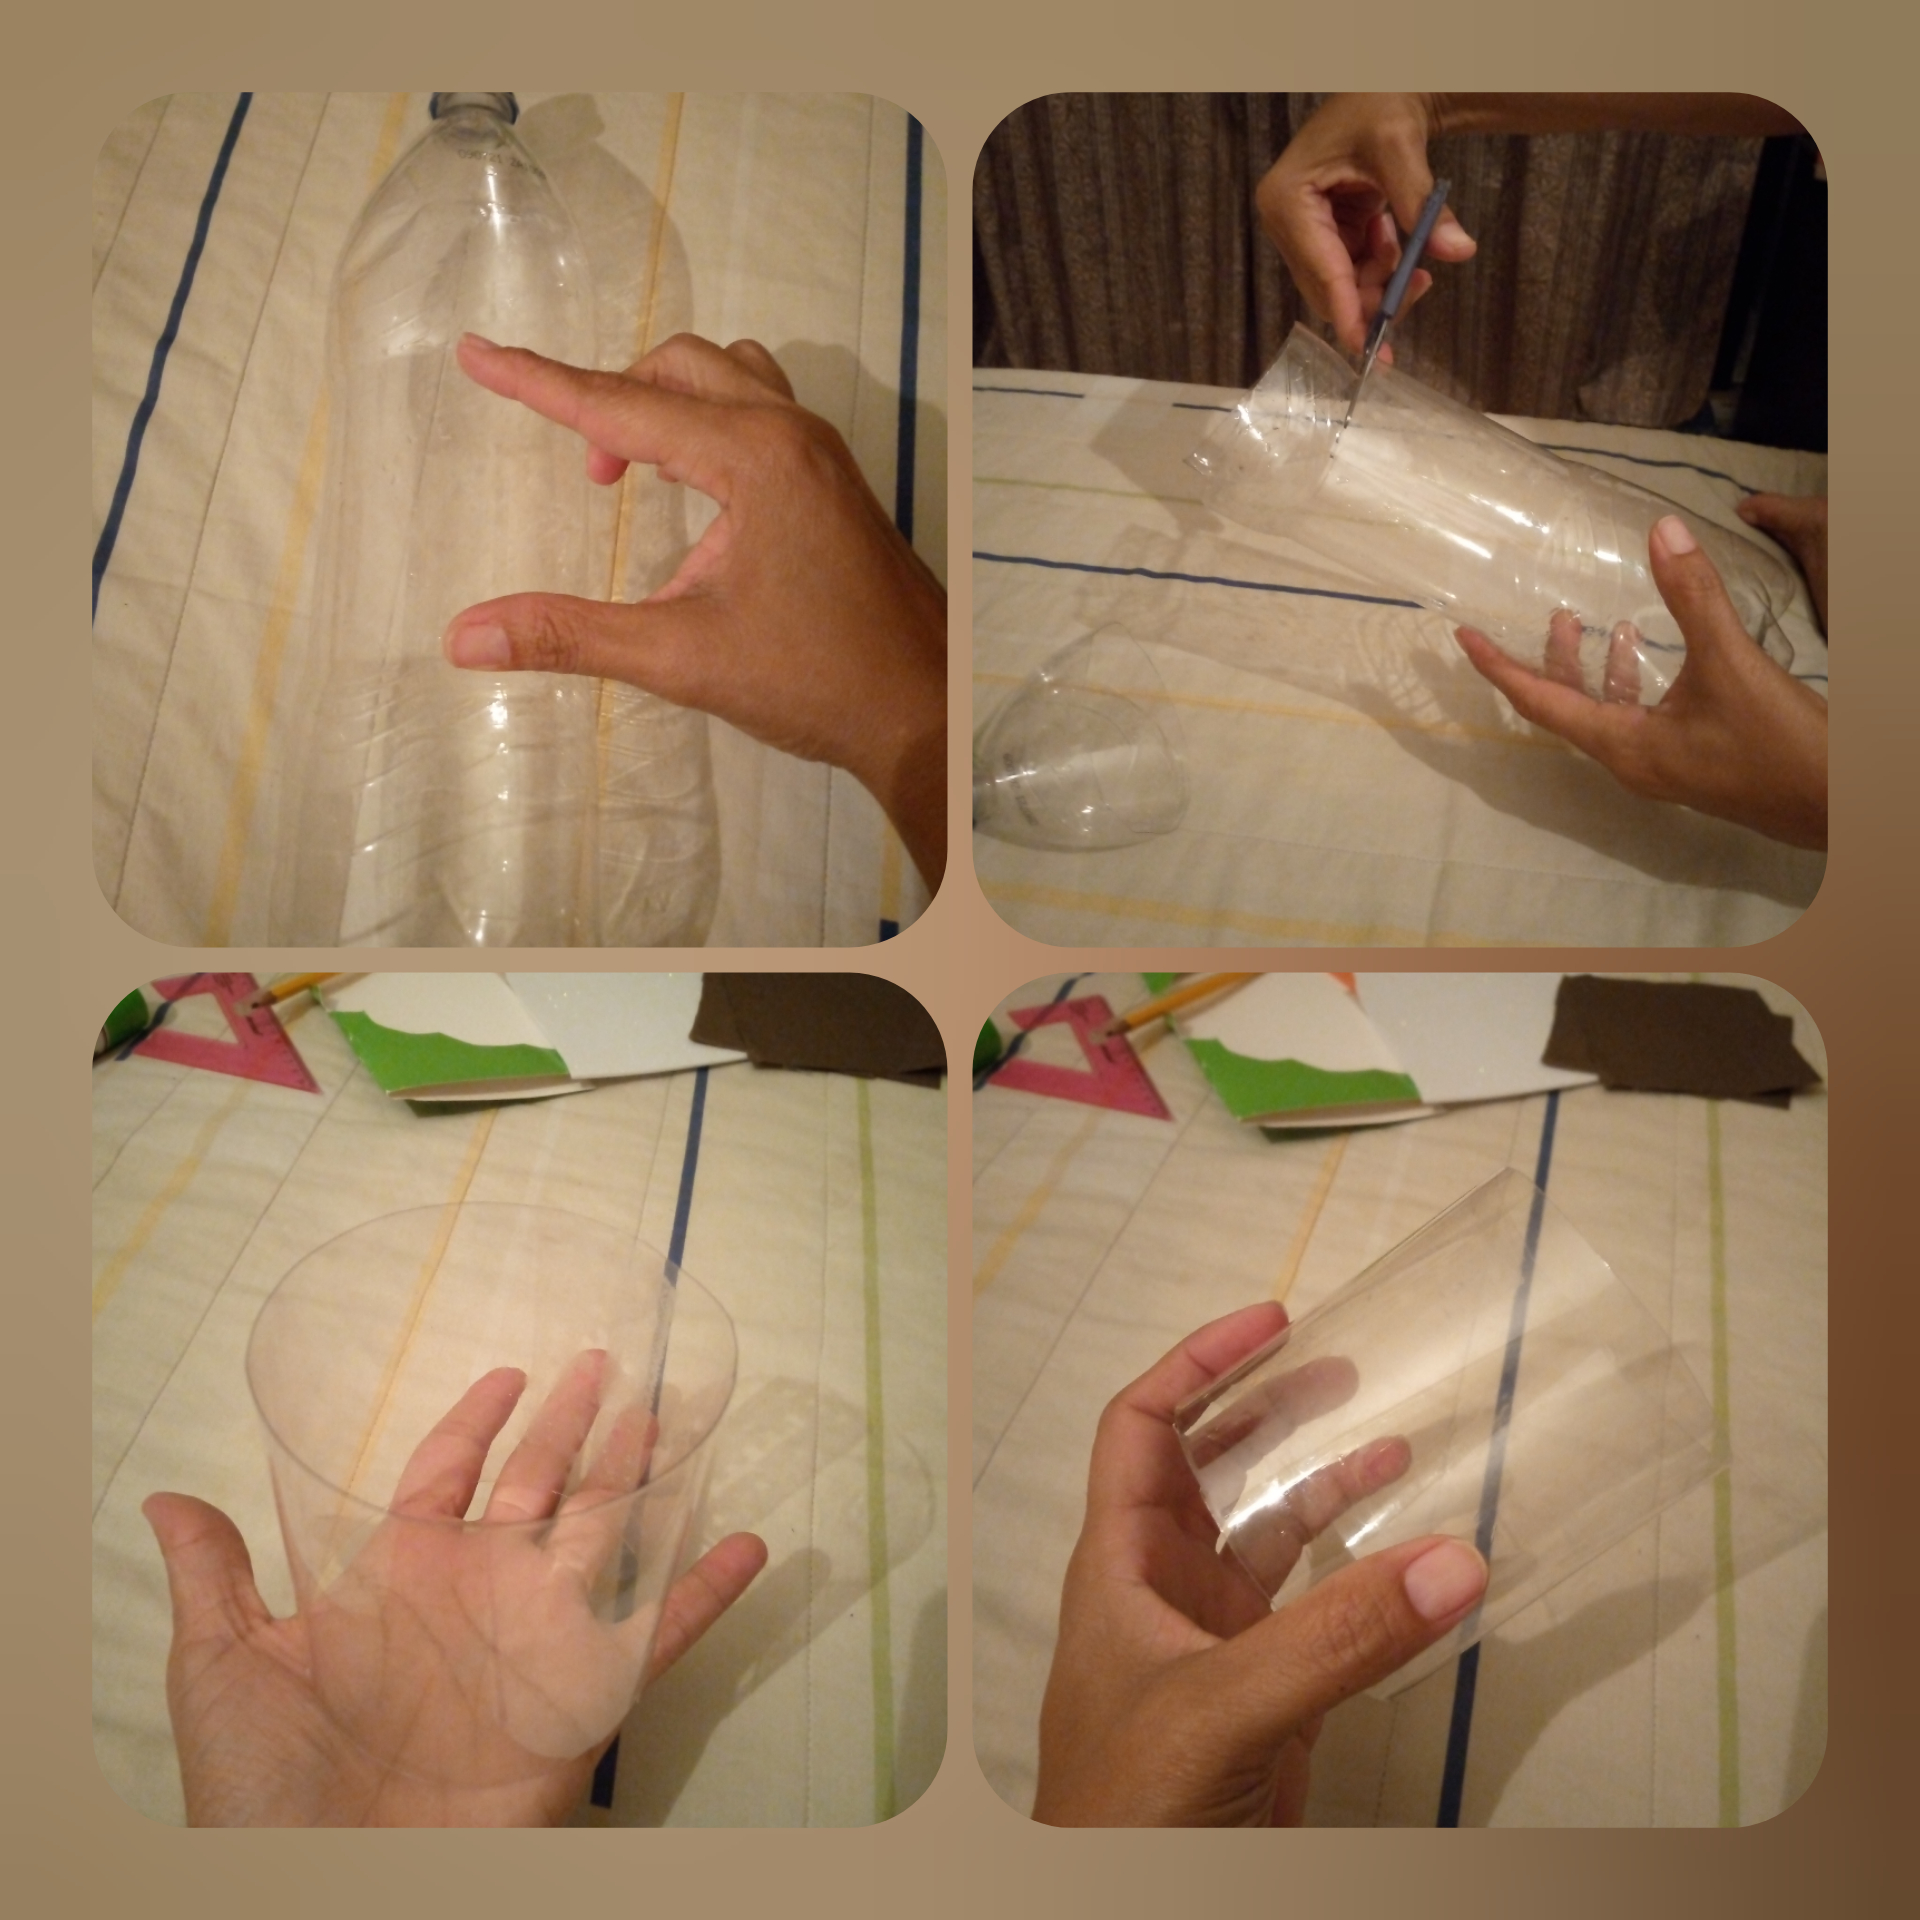
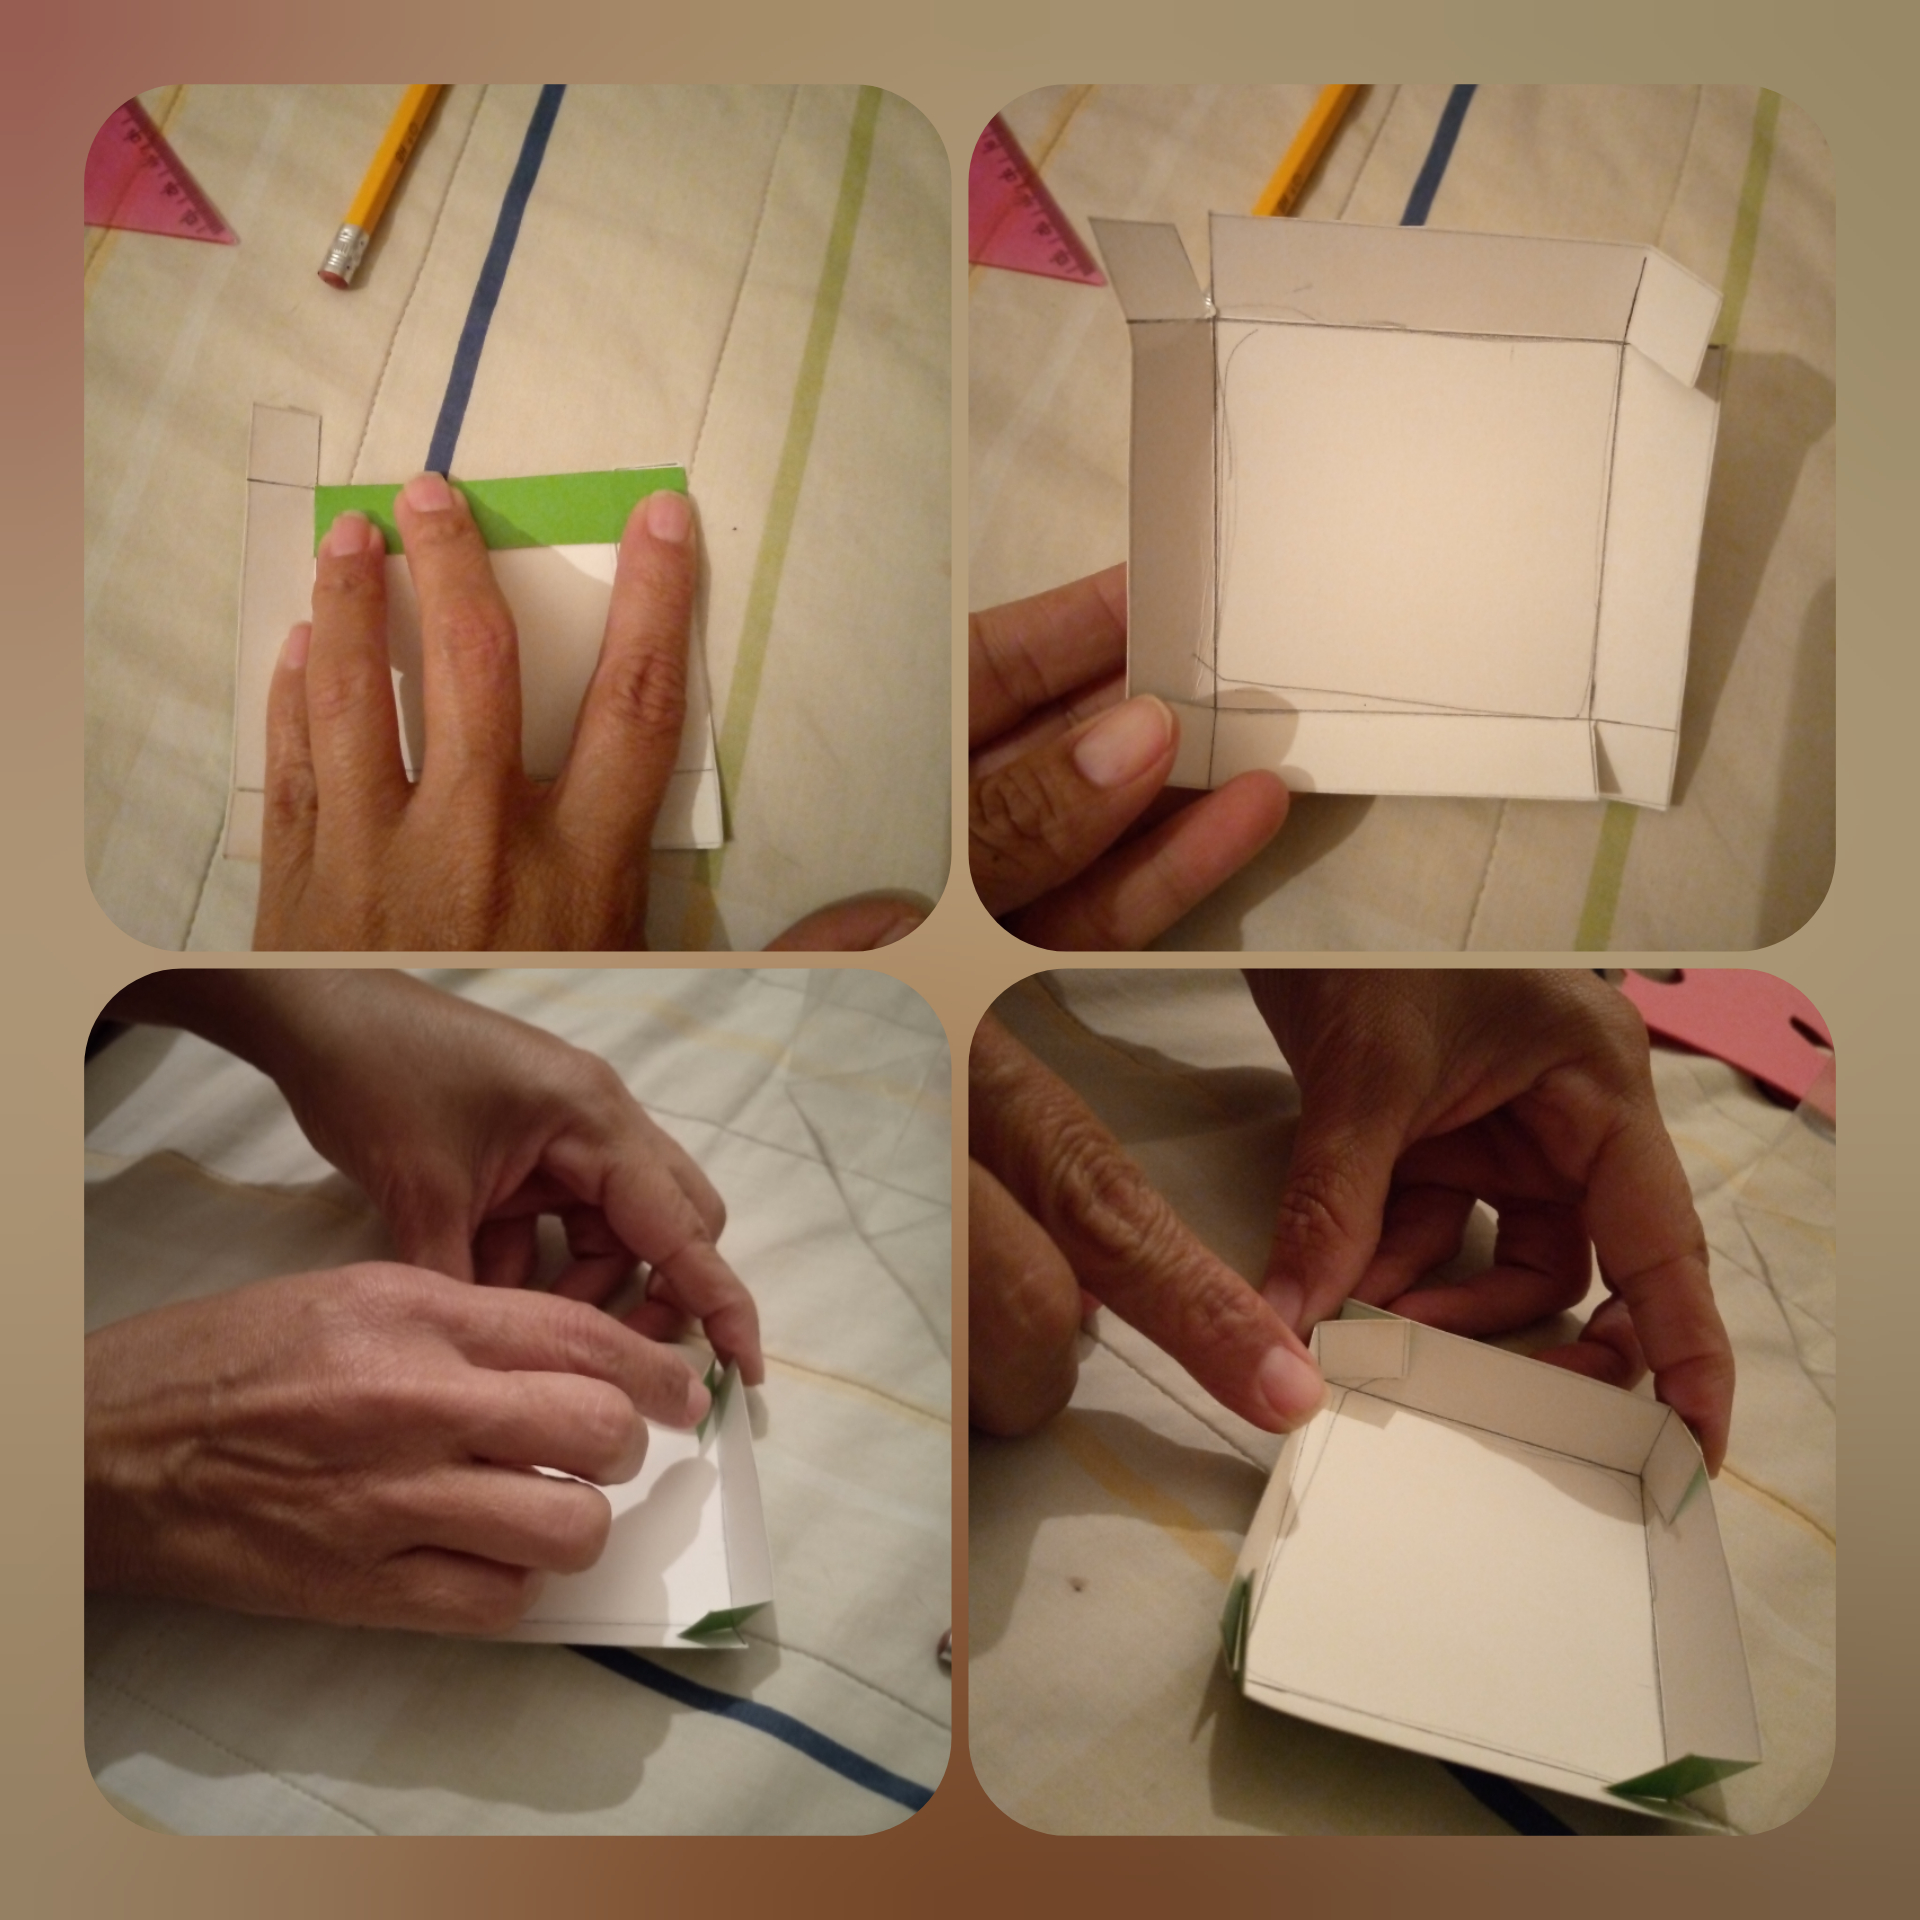
•Doblar por ambos lados, luego unir en el medio y doblar los otros dos lados formando un cuadrado.
• Fold on both sides, then join in the middle and fold the other two sides into a square.
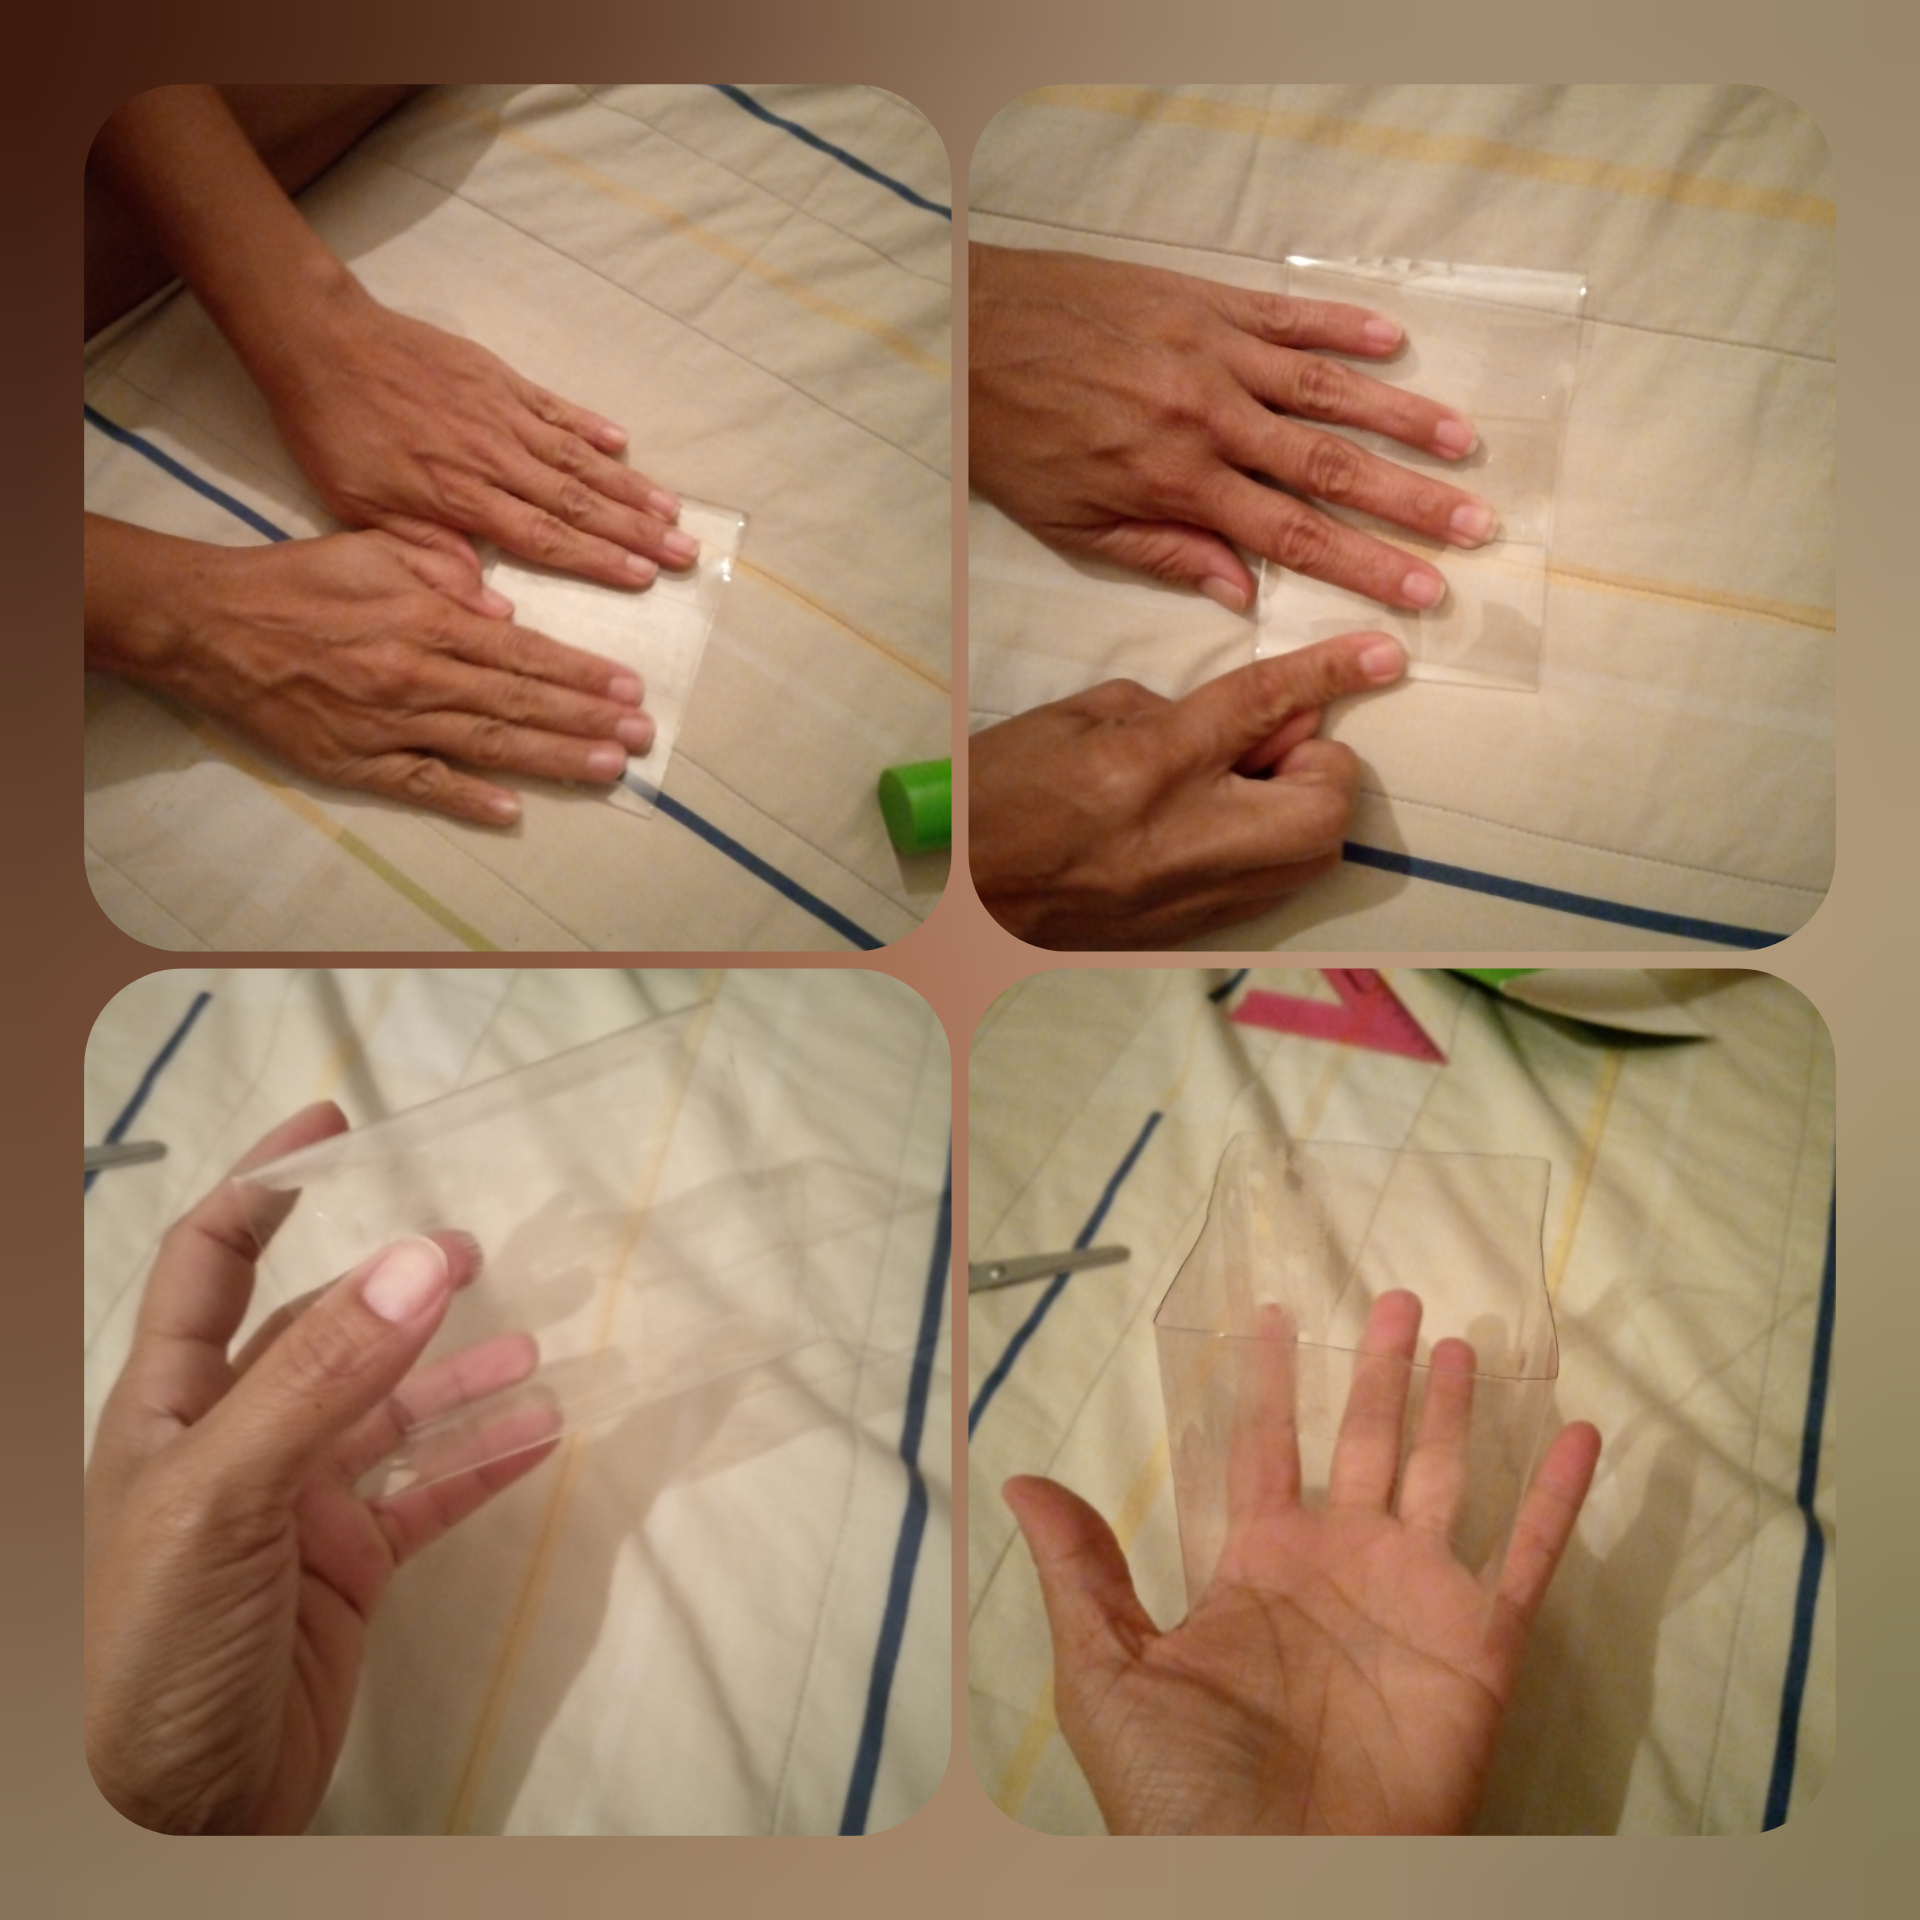
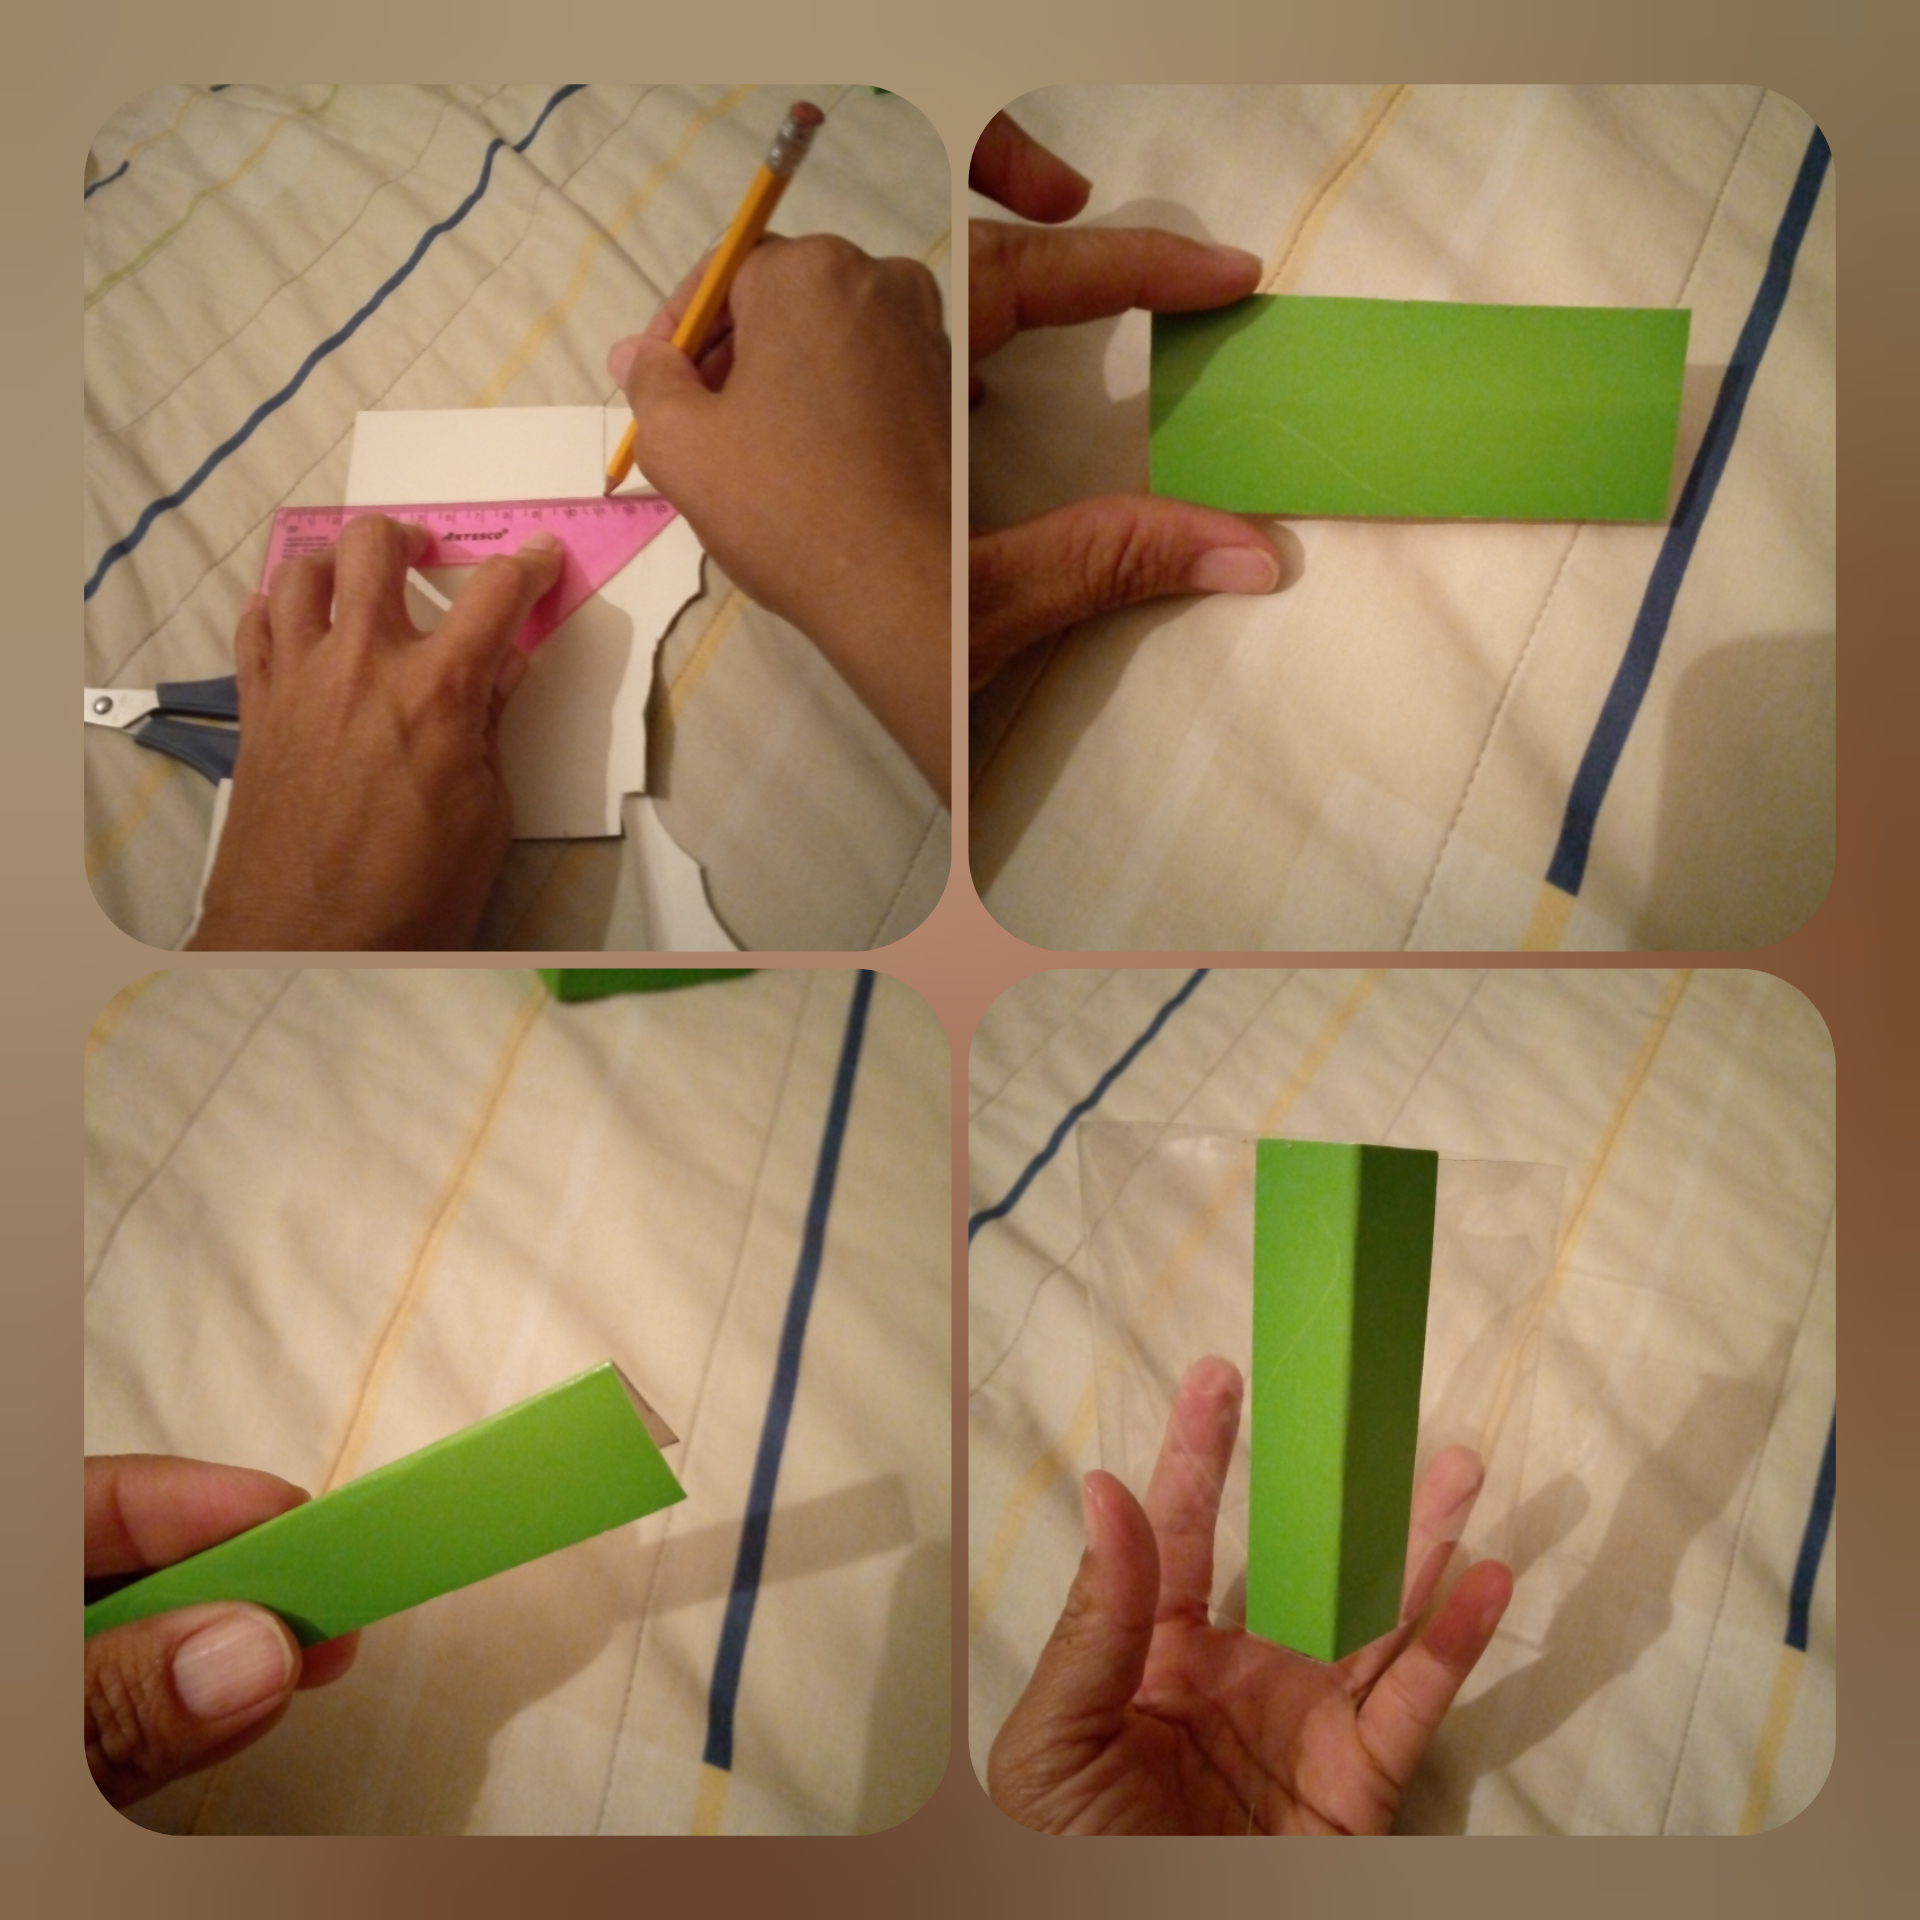
Coloque el cuadrado encima de la cartulina y marque los cuatro lados, con ayuda de una regla coloque un centímetro y medio de más y corte una pestaña de cada lado.
• Place the square on top of the cardboard and mark the four sides, with the help of a ruler, place an extra centimeter and a half and cut a tab on each side.

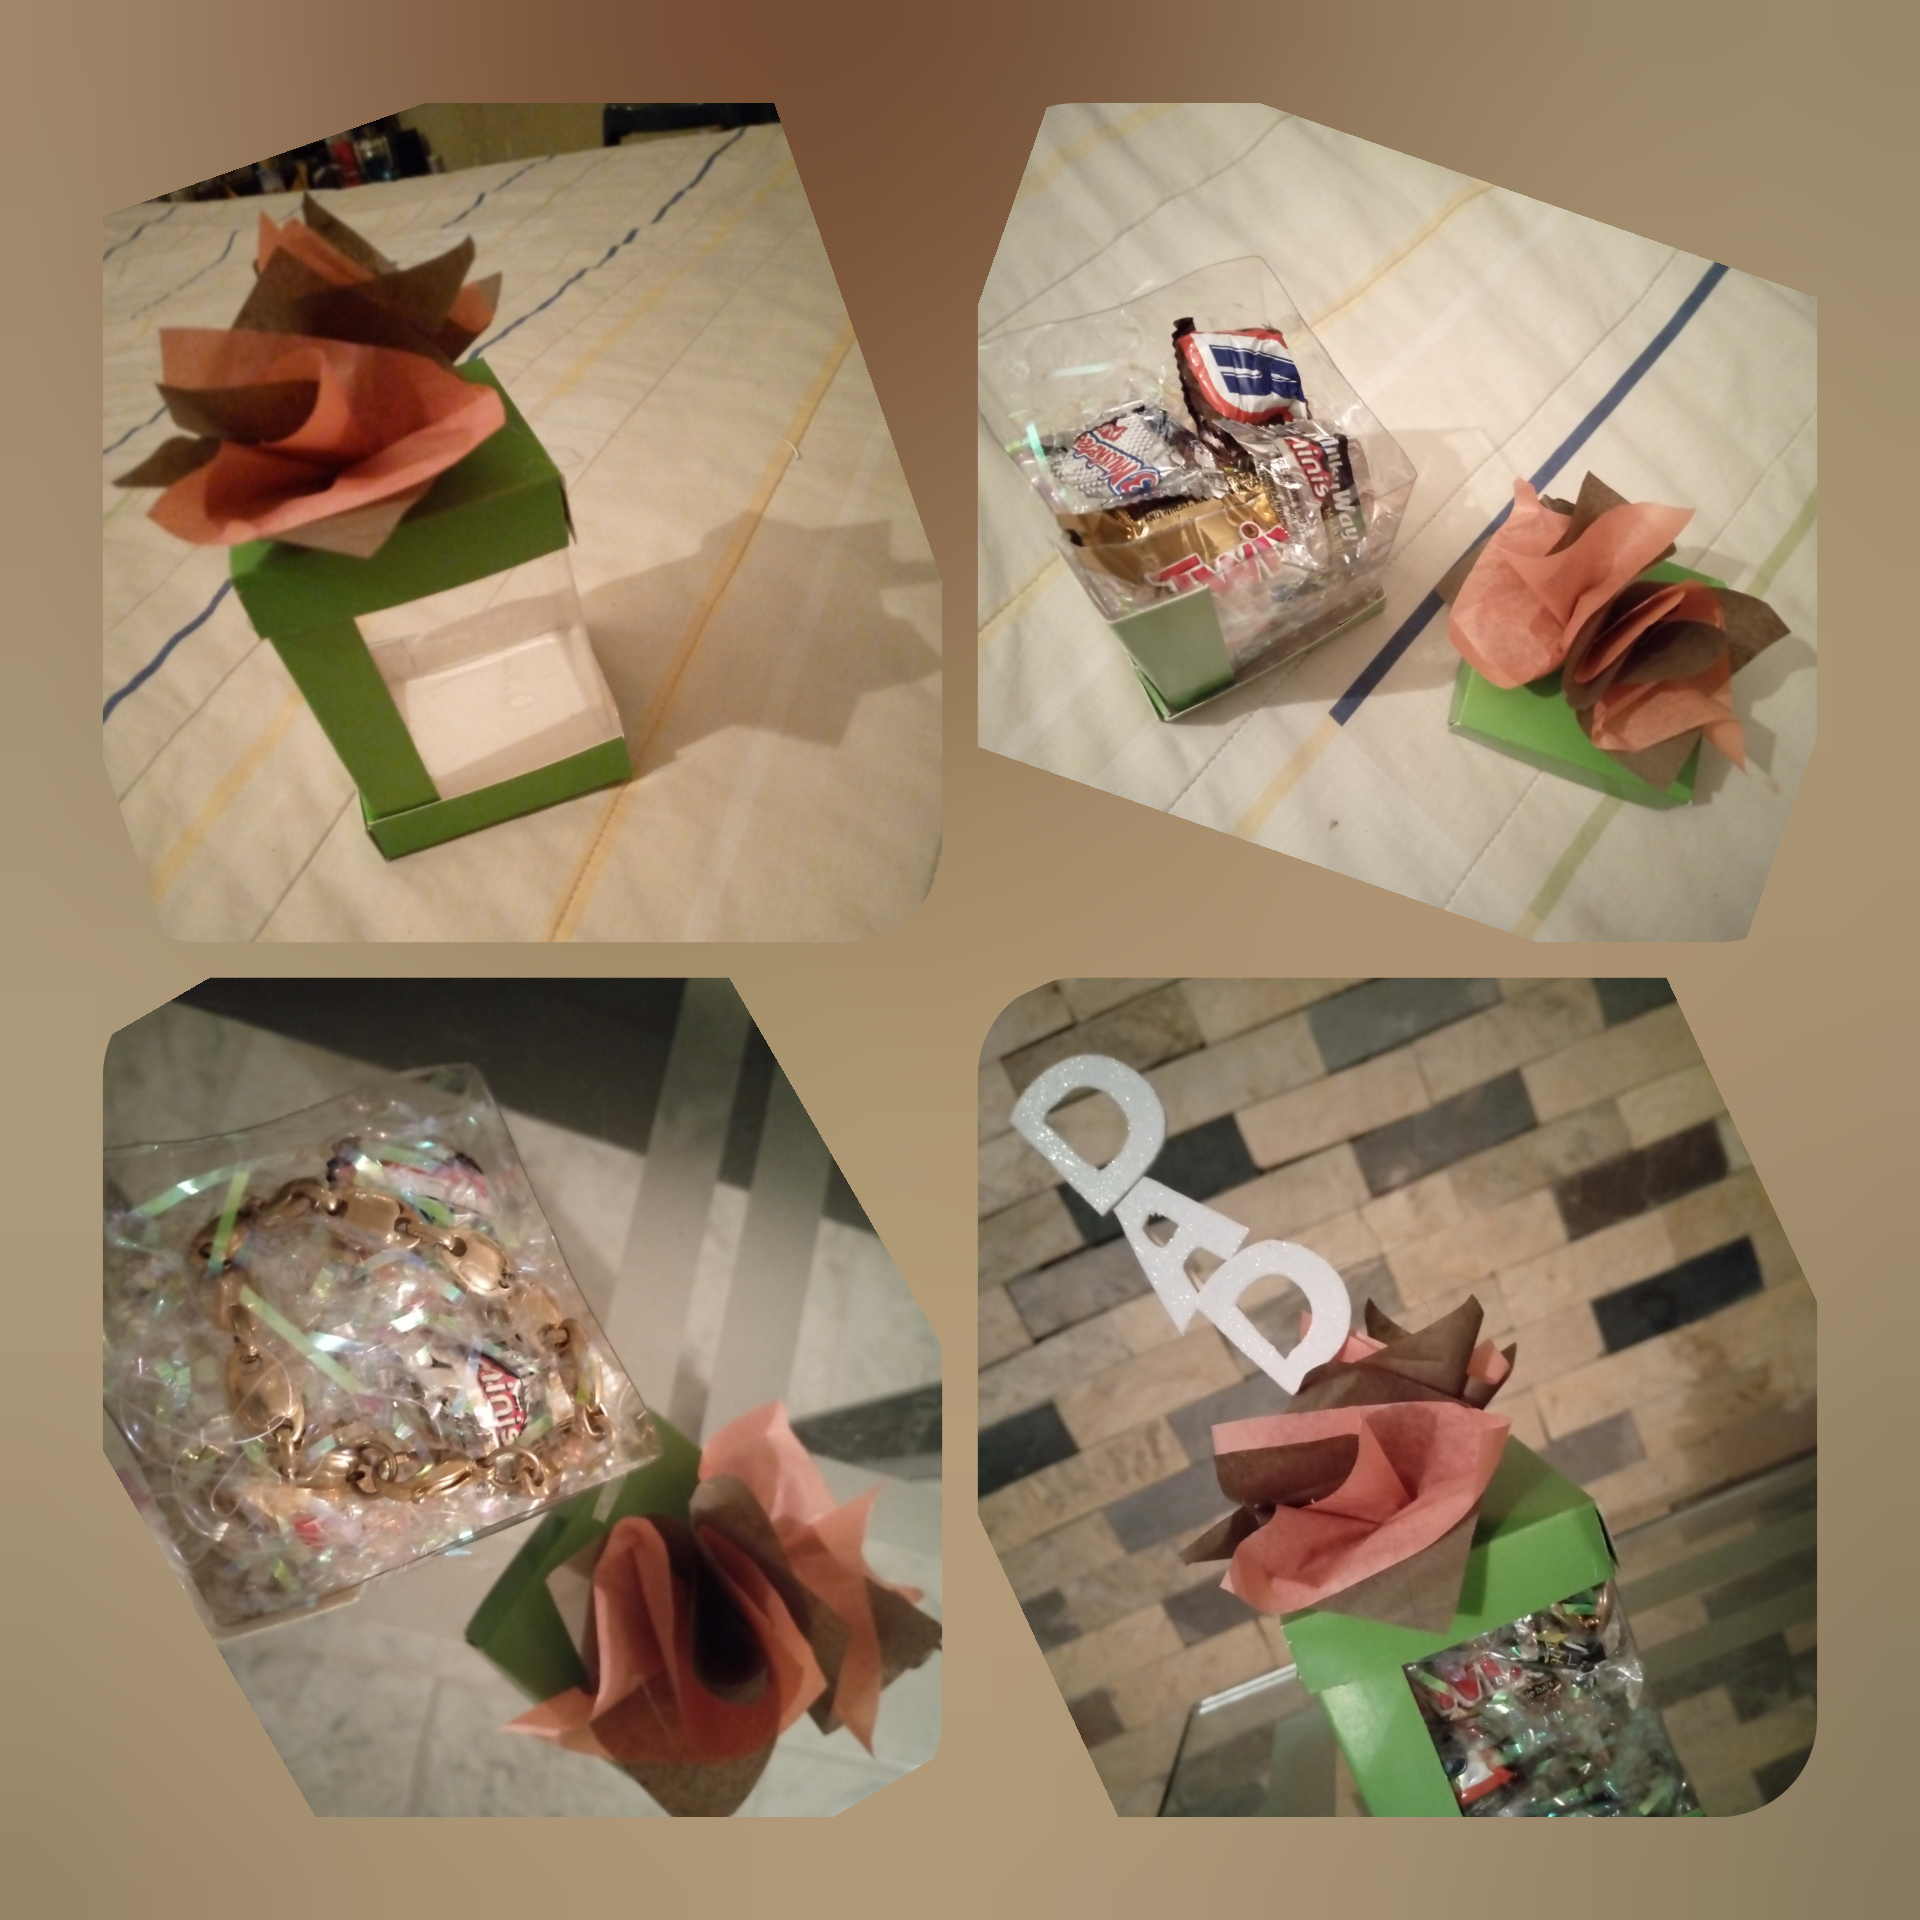
•Luego doble cada lado dejando las pestañas del lado dentro y pegue formando una tapa para la parte de abajo de la cajita. Haga otra tapa para la parte de arriba.
• Then fold each side leaving the side tabs inside and glue to form a lid for the bottom of the box. Make another lid for the top.
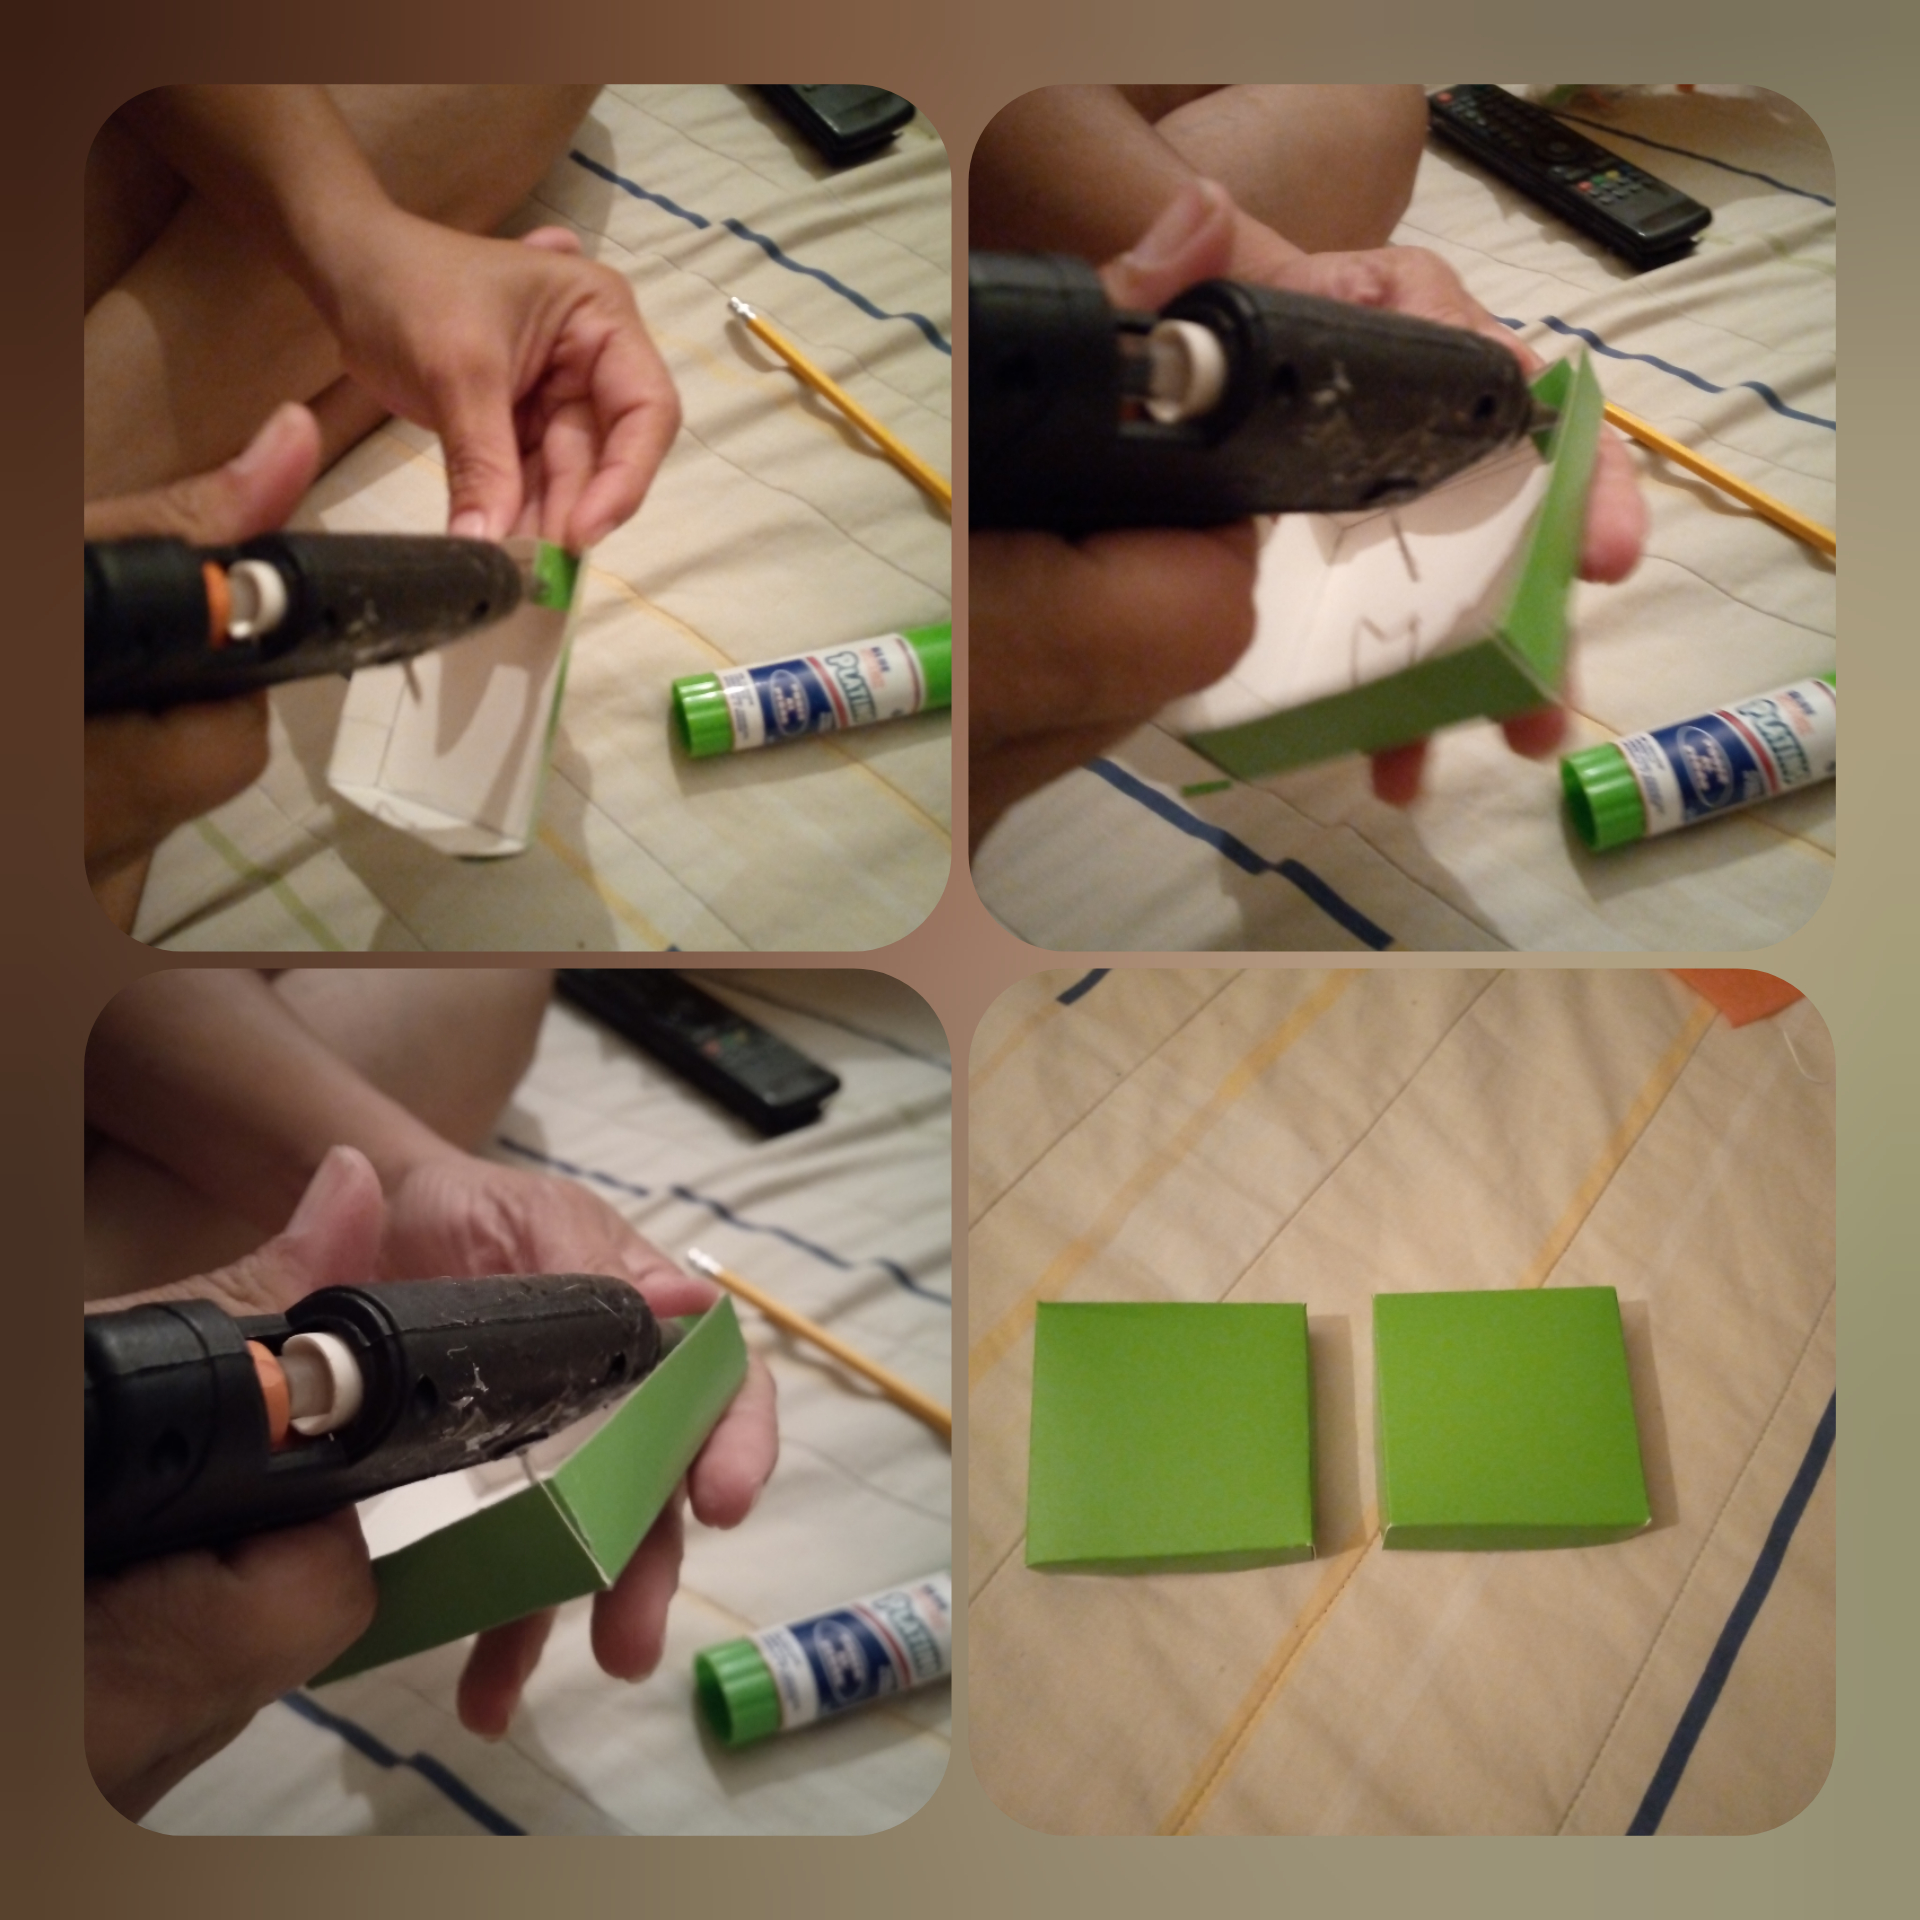
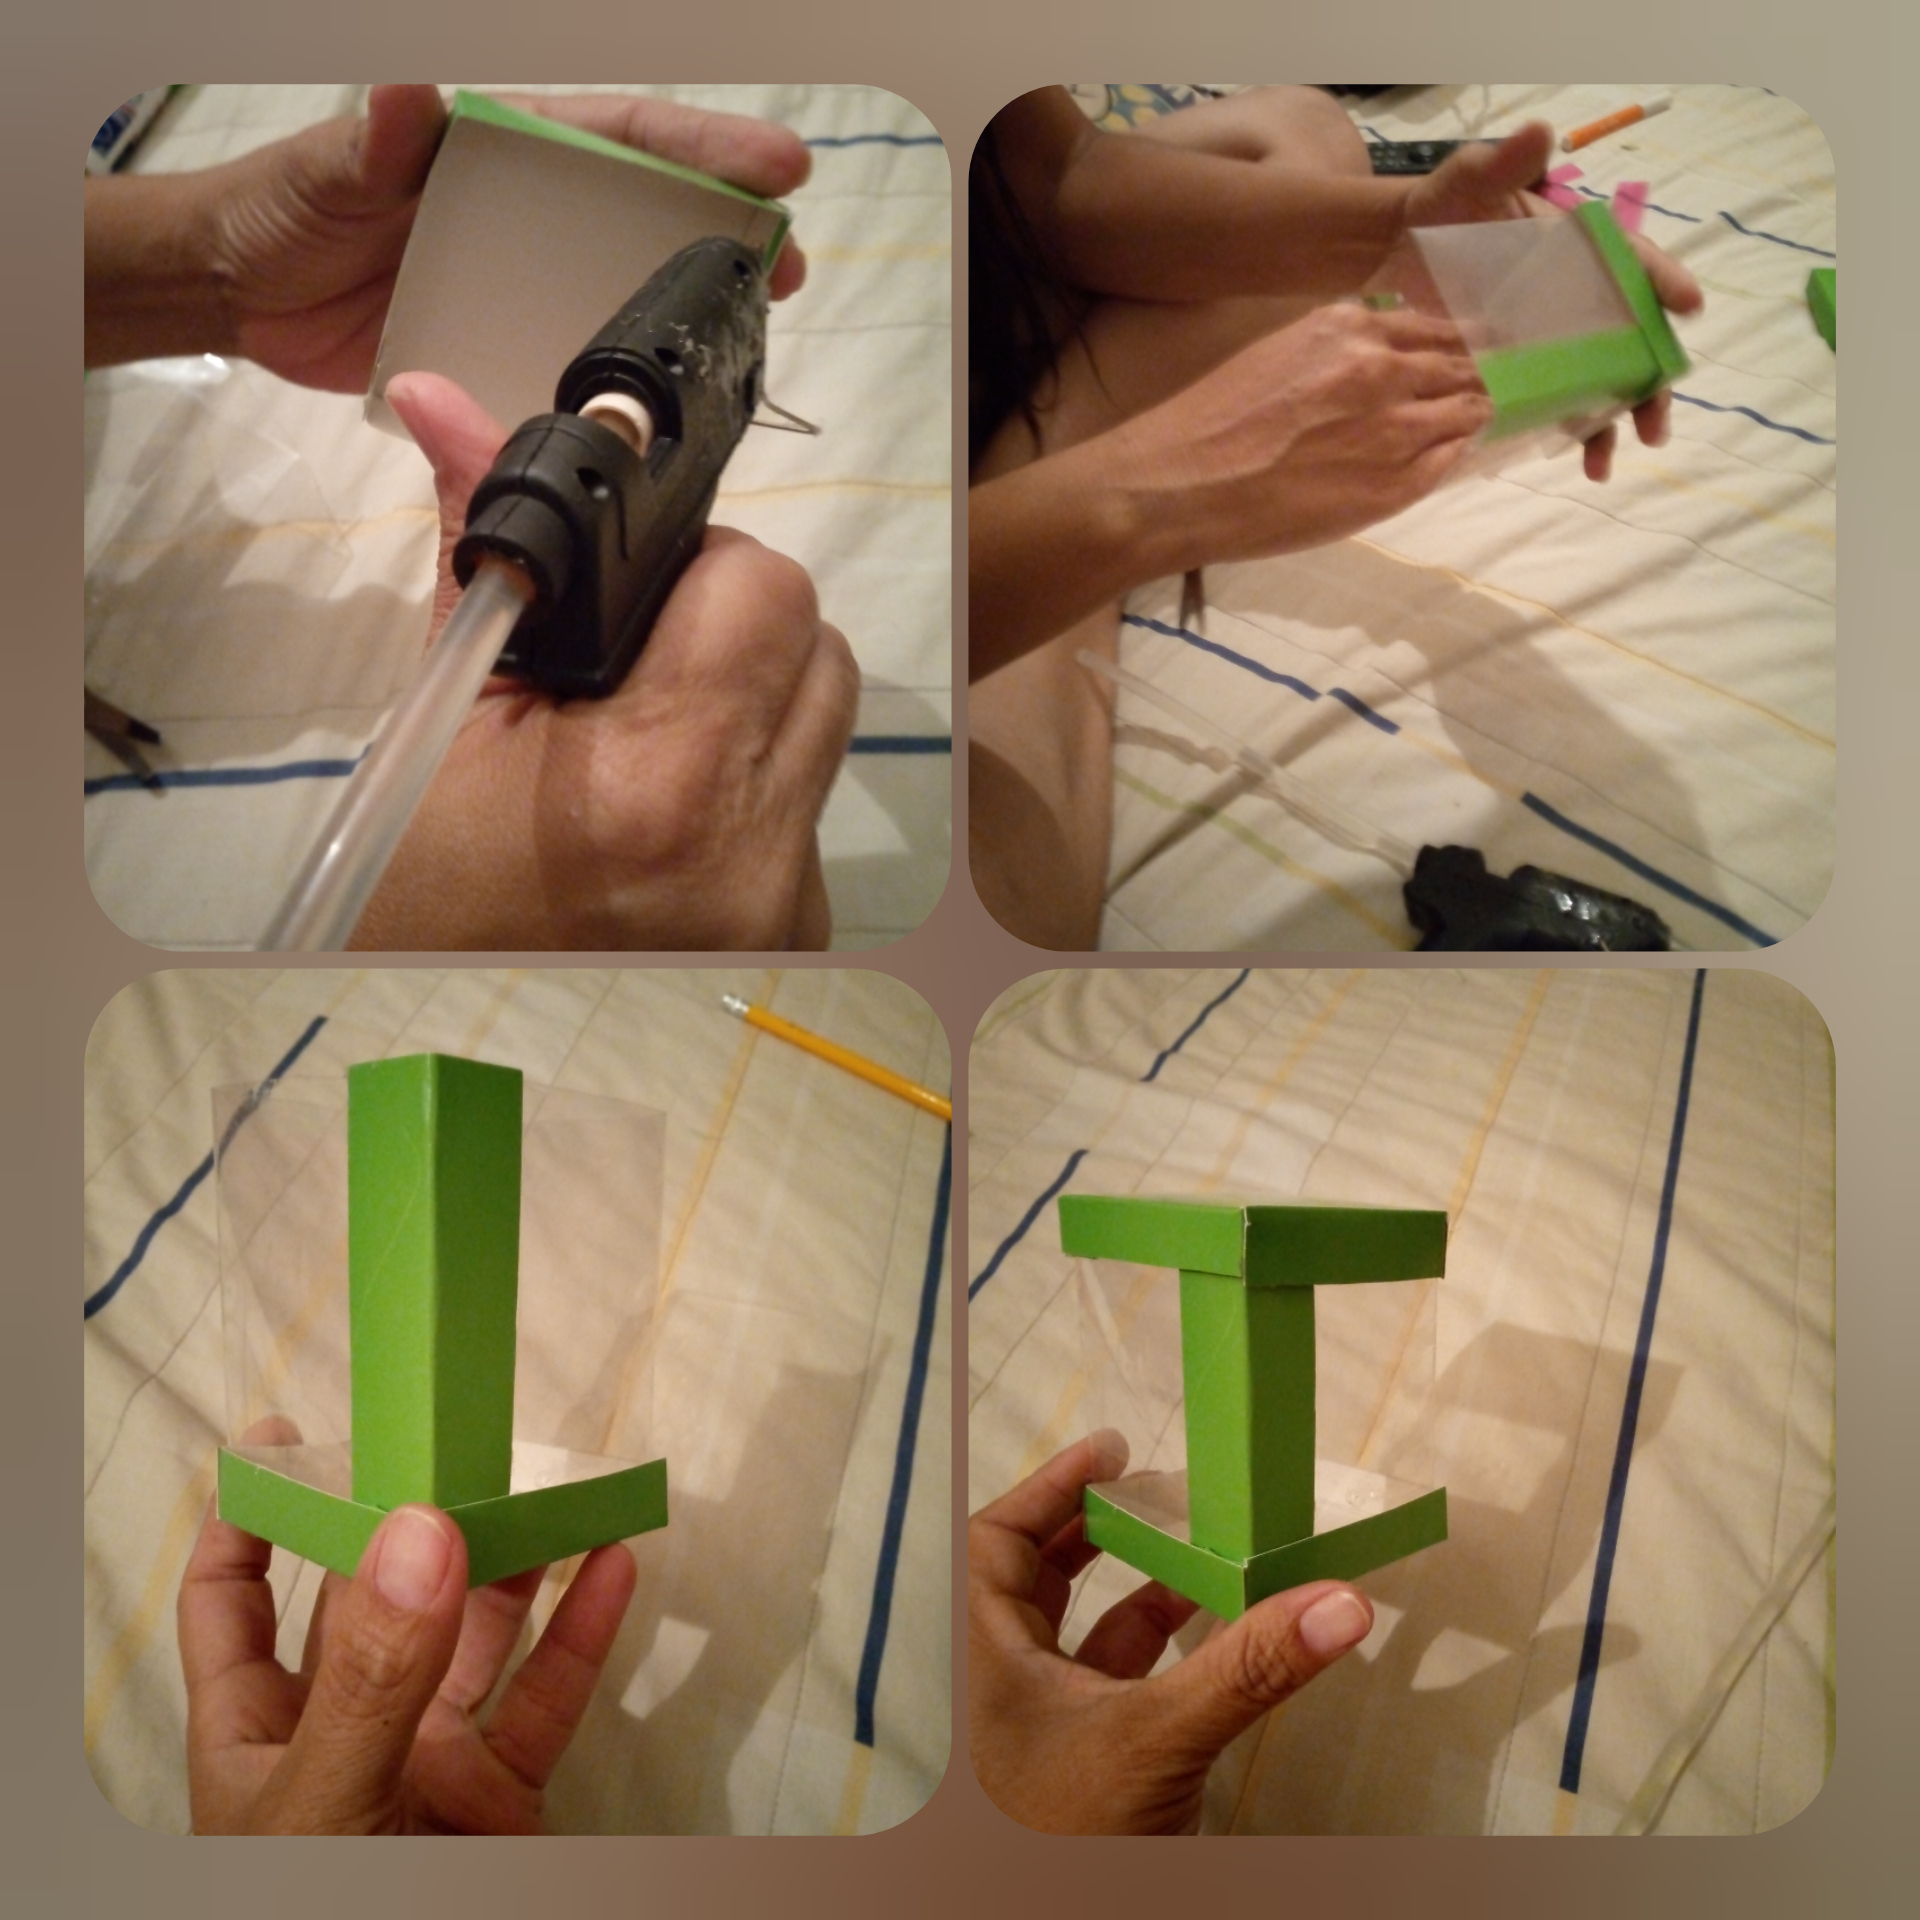
• Corta un trozo de cartón, dóblalo por la mitad y pégalo a la caja por uno de sus lados.
Pegue solo la tapa inferior con silicona.
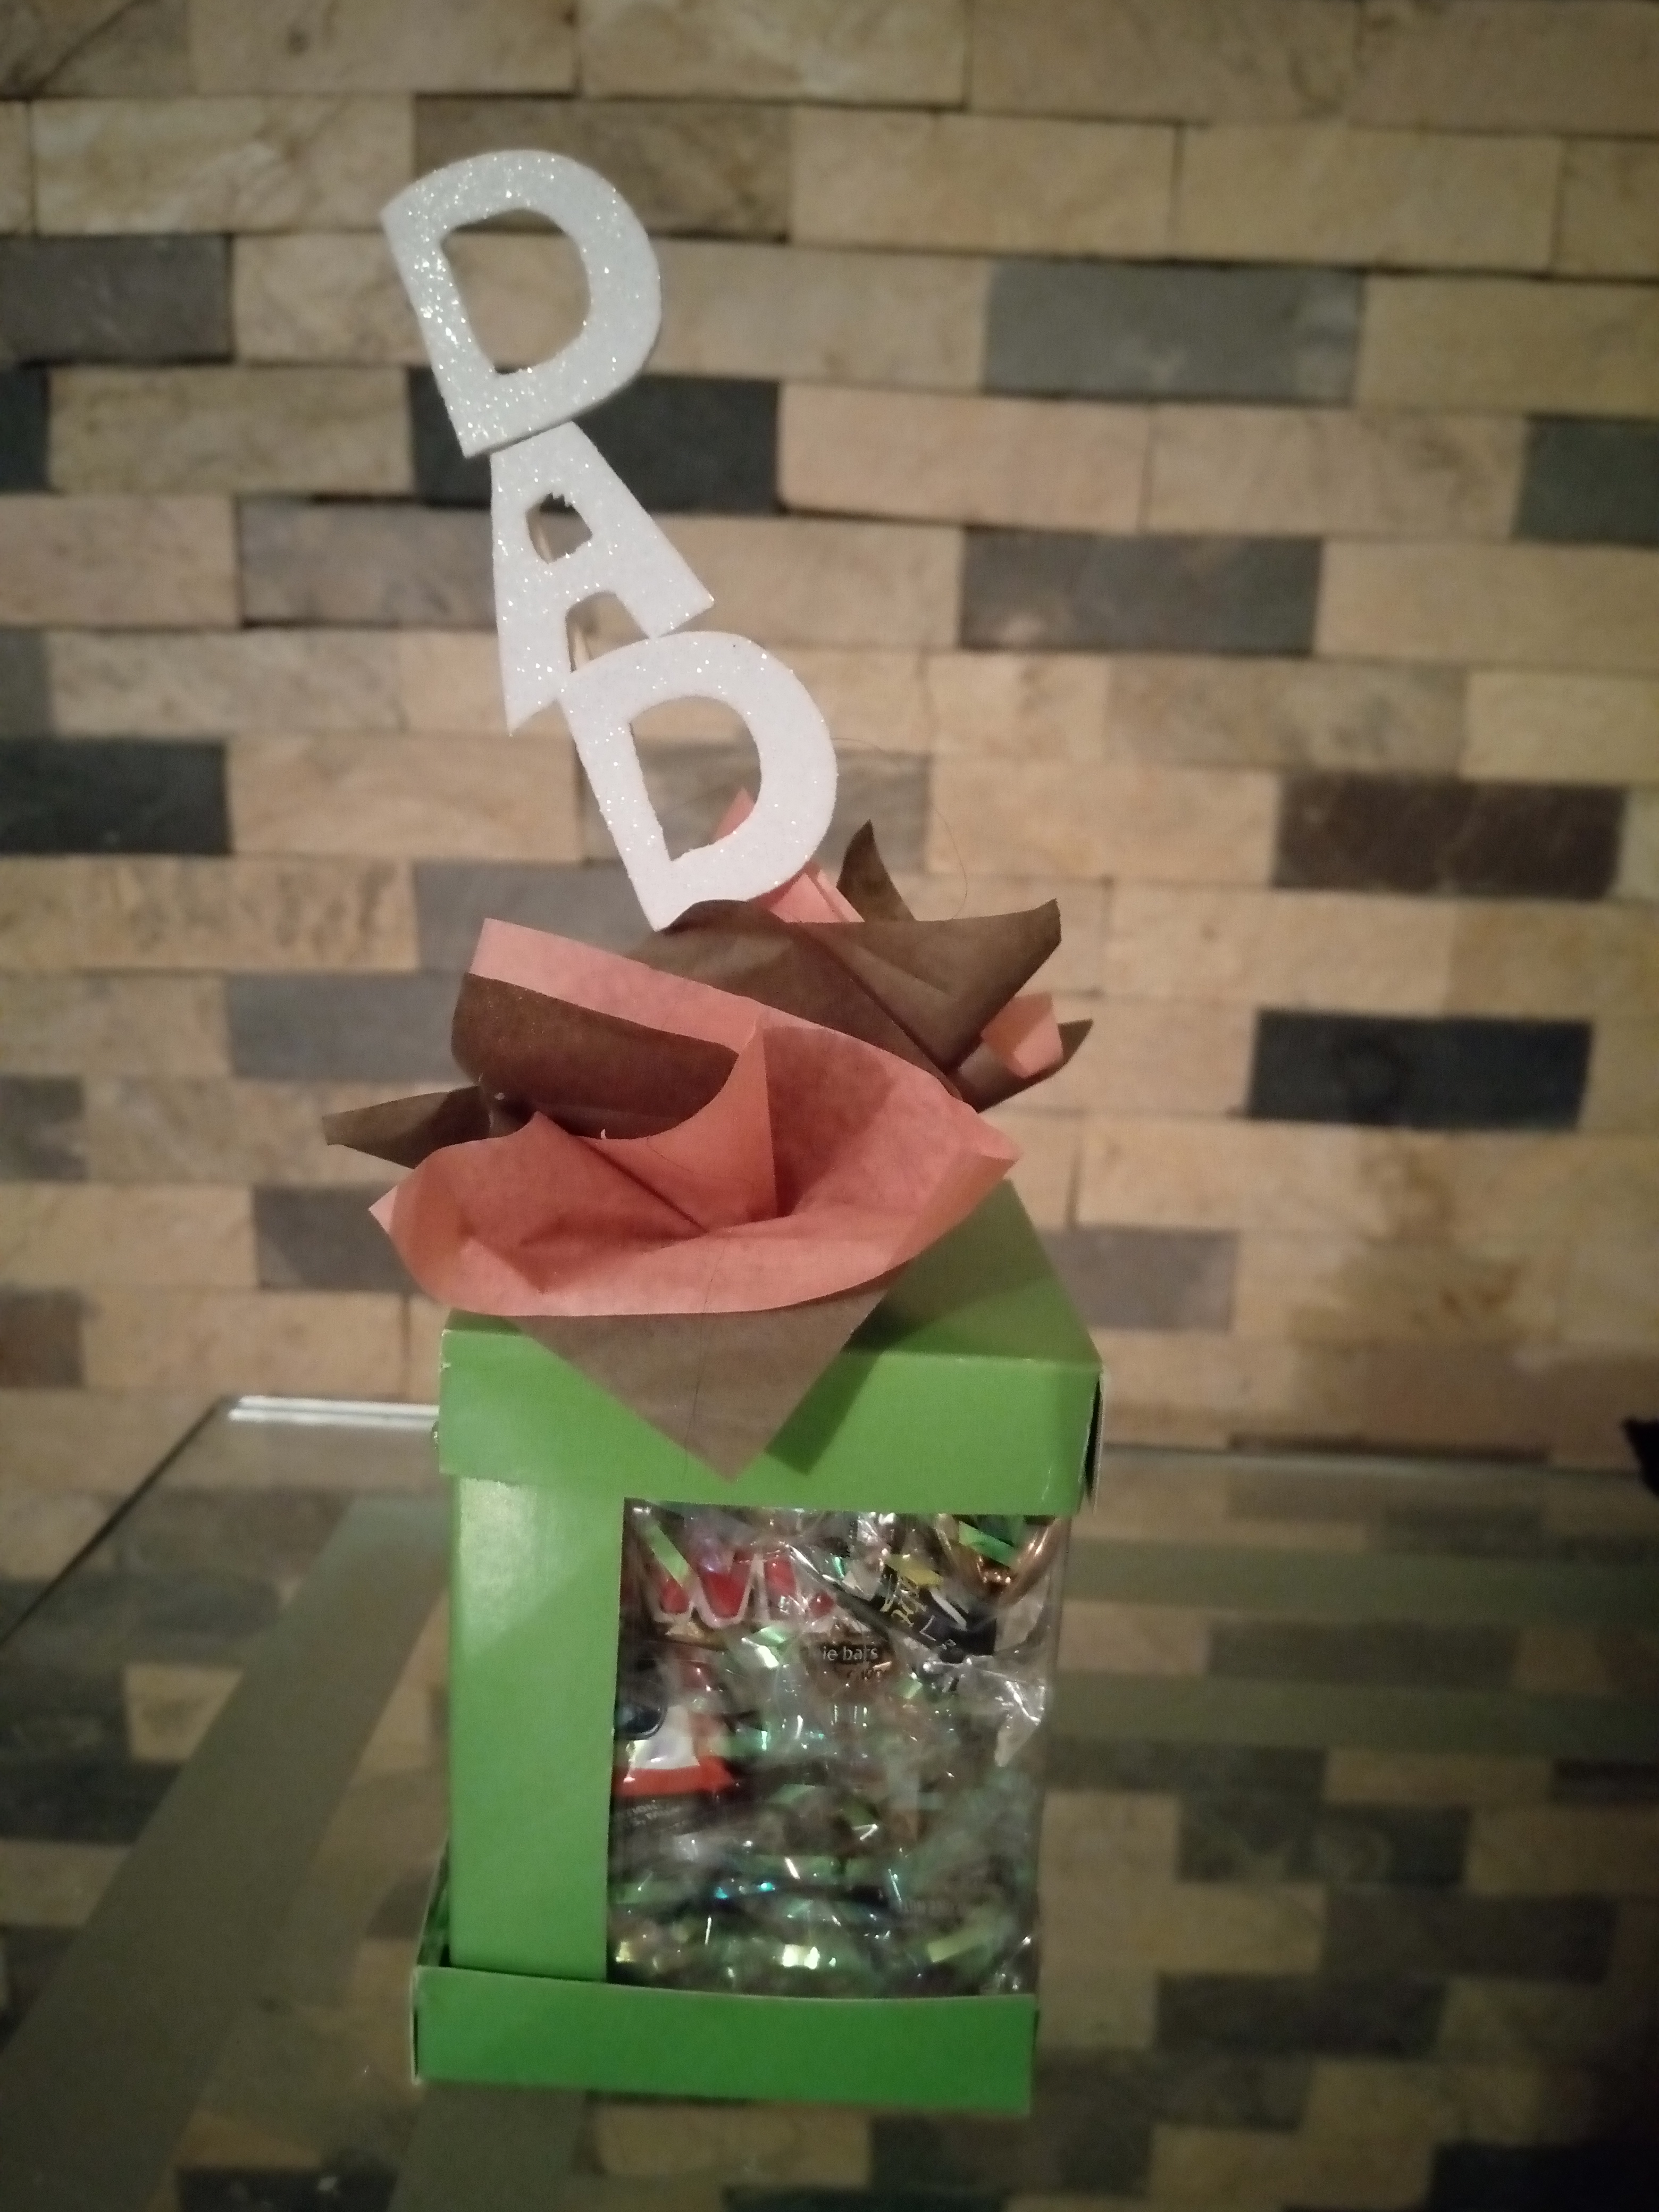
Corta el papel de seda en cuadrados y decora la tapa superior.
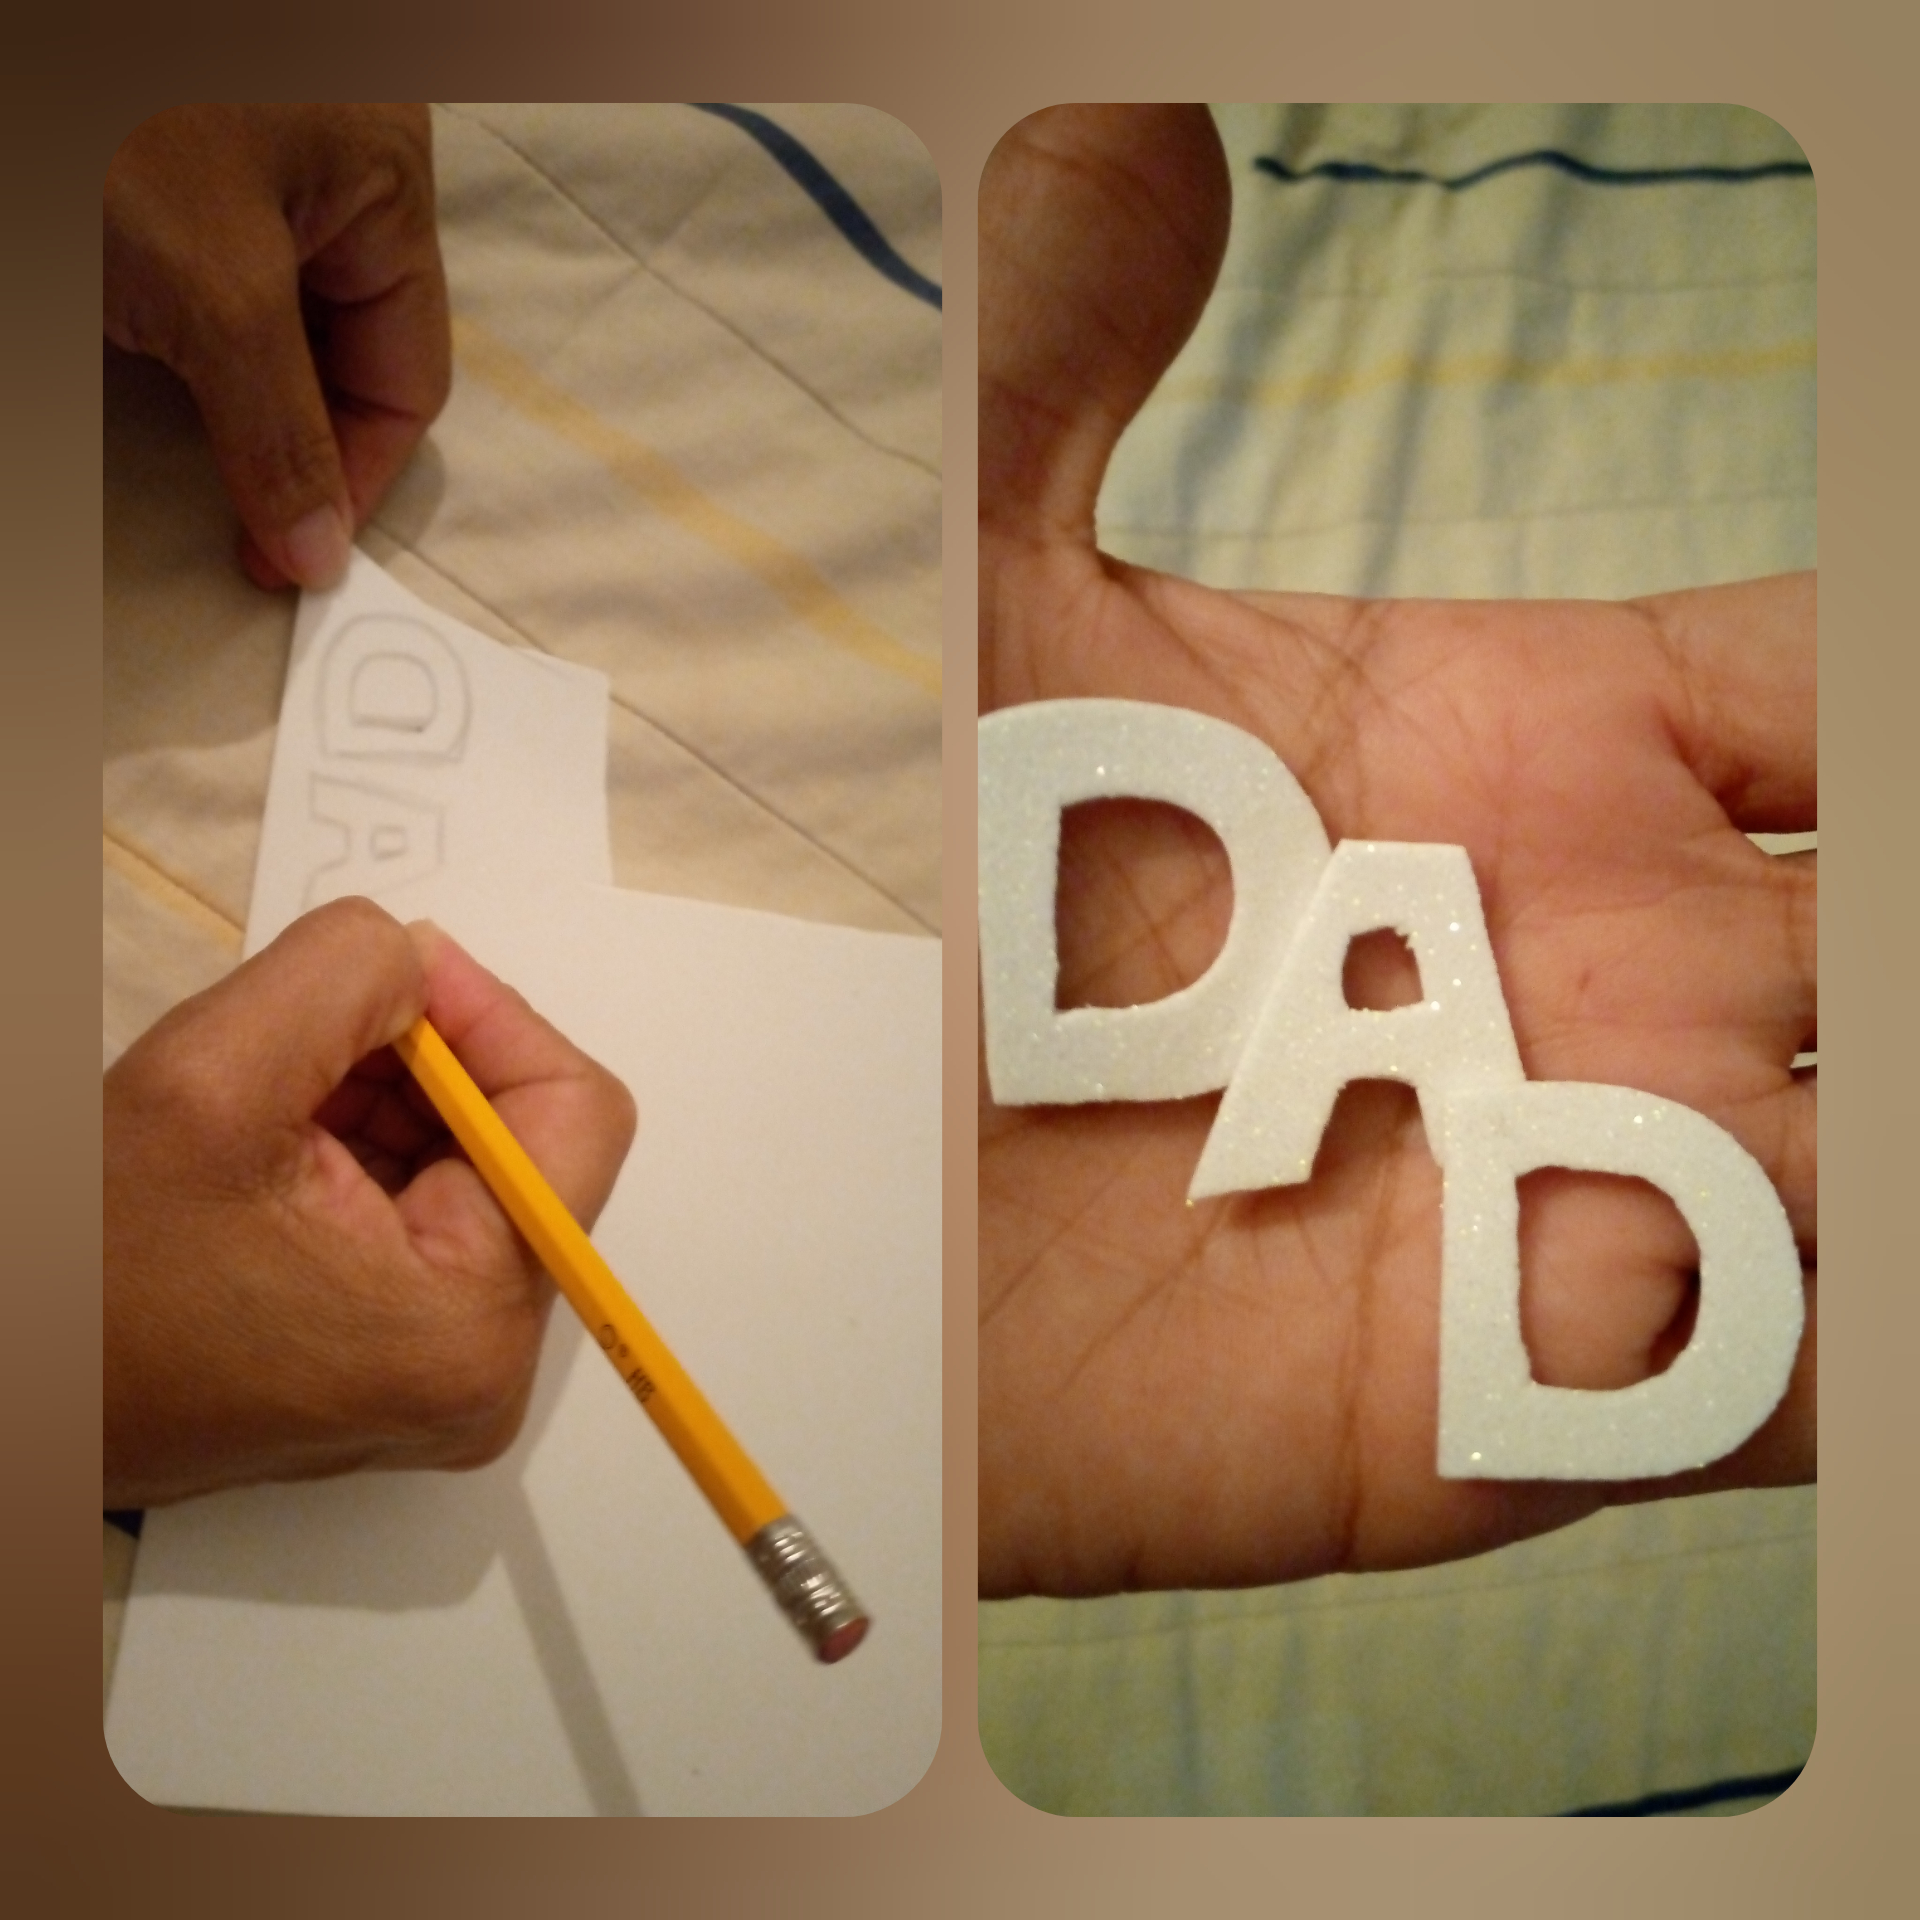
Haz las letras en el foami y recórtalas para decorar.
• Cut a piece of cardboard, fold it in the middle and glue it to the box on one of its sides.
Glue only the bottom cap with silicone.
Cut the tissue paper into squares and decorate the top lid.
Make the letters in the foami and cut out for decoration.
Rellene la cajita con papelillos, dulces y su obsequo.
Fill the box with papers, sweets and your gift.
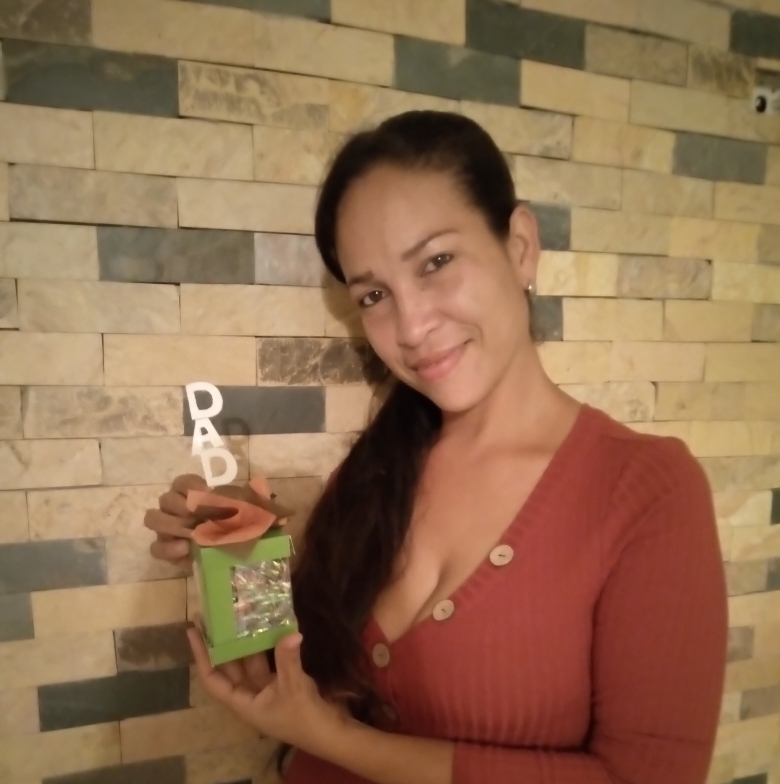
Es una hermosa cajita práctica y sencilla de realizar, espero les guste y puedan hacerla.
It is a beautiful practical and simple box to make, I hope you like it and can make it.
Invito a @yohaale, @mariaudhr a participar
I invite @yohaale, @mariaudhr to participate
Your post has been curated by us! Received 20.00% upvote from @opb. Do consider delegate to us to help support our project.
Do join our discord channel to give us feedback, https://discord.gg/bwb2ENt
* This bot is upvoting based on the criteria : 1. Not plagiarised, 2. Persistent previous quality posts, 3. Active engagement with other usersDo upvote this commment if you 💚 our service :)
Buen trabajo 👍
Explicas muy bien el proceso, es fácil de seguir este tutorial además la creación esta perfecta para sorprender a papá en su día, gracias por fomentar el reciclaje.