

Greetings friends and visitors... Welcome
Today we will learn more about Medibang tools and how we can use the clipping and folder layers, as well as the magic wand tool.
I have been working with Medibang for three years, so I completely forgot about Photoshop and Corel Draw. Everything I normally did with those programs and even separately, I ended up doing it all together but in Medibang, the only disadvantage is that it is a pixel based program, so the images will always pixelate a little, what I can recommend is that you work with a fairly large canvas, that minimizes the pixelation a little.
Ok, let's go with the small tutorial, very simple for you to know some functions.

Saludos amigos y visitantes... Bienvenidos
Hoy conoceremos más herramientas de Medibang y cómo podemos usar las capas recorte y carpetas, así como la herramienta varita mágica.
Tengo tres años trabajando con Medibang, de tal manera que olvidé por completo Photoshop y Corel Draw. Todo lo que normalmente hacía con esos programas y hasta por separado, terminé haciéndolo todo junto pero en Medibang, la única desventaja es, que es un programa a base de pixeles, por lo cual las imágenes siempre se pixelaran un poco, lo que puedo recomendarte es, que trabajes con un lienzo bastante grande, eso minimiza un poco el pixelado.
Ok, vamos con el pequeño tutorial, muy sencillo para que conozcas unas funciones.
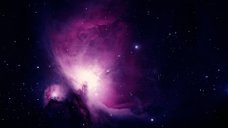
Imagen de fondo / Background image
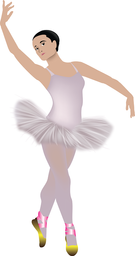
Bailarina / Ballerina - Dancer
Paso a paso. / Step by Step
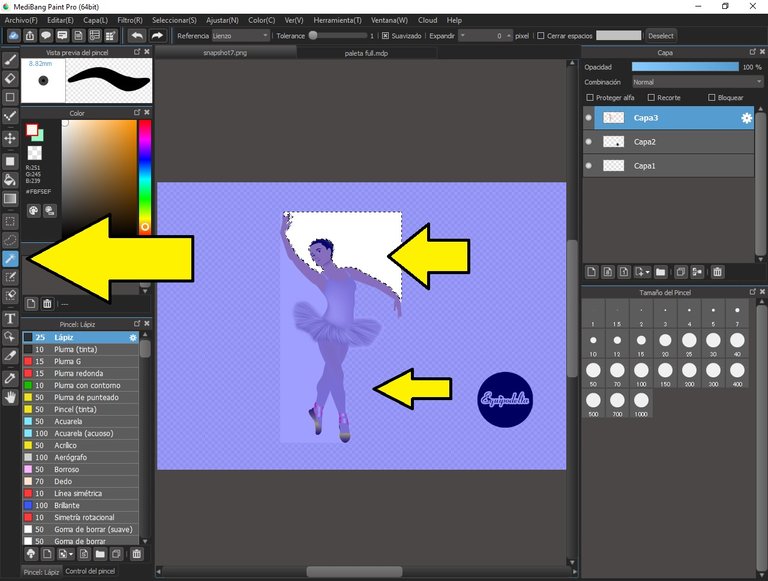
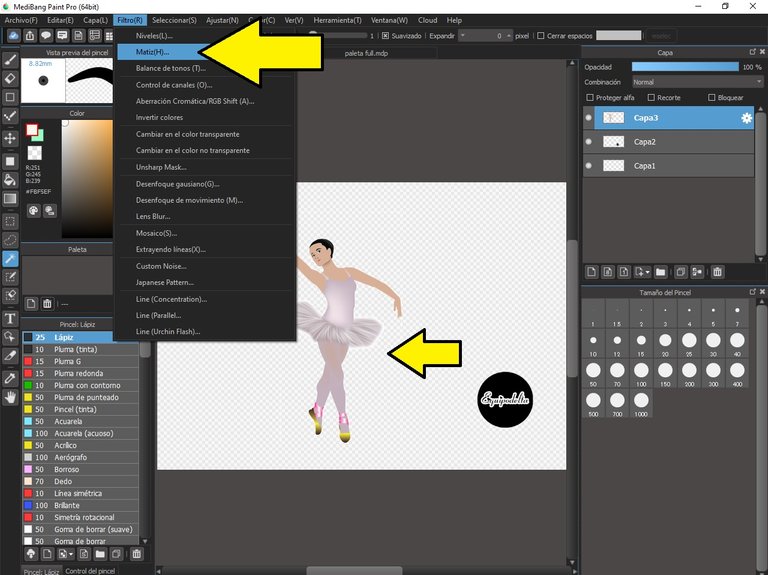
Using the Magic Wand tool: The first thing to do is to open our workspace and paste our image, in this case I used a ballerina, if the image has a flat background, as in the case of mine which has a white background color, we can proceed to use the tool, select Magic Wand and then click on the background, then delete with the Del key on the keyboard. This tool only works effectively on flat backgrounds, that is, on uniform colors.
We remove the option that is formed from the selection in Select / Remove selection.
Uso de la herramienta Varita Mágica: Lo primero que haremos es abrir nuestro espacio de trabajo y pegar nuestra imagen, en este caso usé una bailarina, si la imagen tiene un fondo plano, como en el caso de la mía que tiene un color blanco de fondo, podemos proceder a usar la herramienta, seleccionamos Varita Mágica y luego haremos clic sobre el fondo, seguidamente borramos con la tecla del teclado Supr. Esta herramienta solo funciona eficazmente en fondos planos, es decir, en colores uniformes.
Quitamos la opción que se forma de la selección en Seleccionar / Quitar selección.
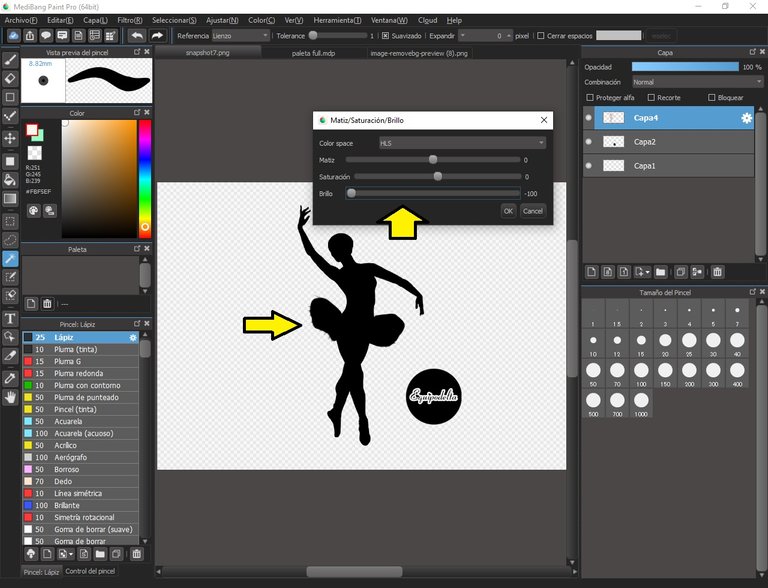
In the upper toolbar, we select the Filter option and then Hue, then in the brightness option, we move the bar until we get our image to change color completely to black and press Ok.
En la barra de herramientas superior, seleccionamos la opción Filtro y luego Matiz, luego en la opción brillo, movemos la barra hasta lograr que nuestra imagen cambie de color totalmente a negro y presionamos Ok.
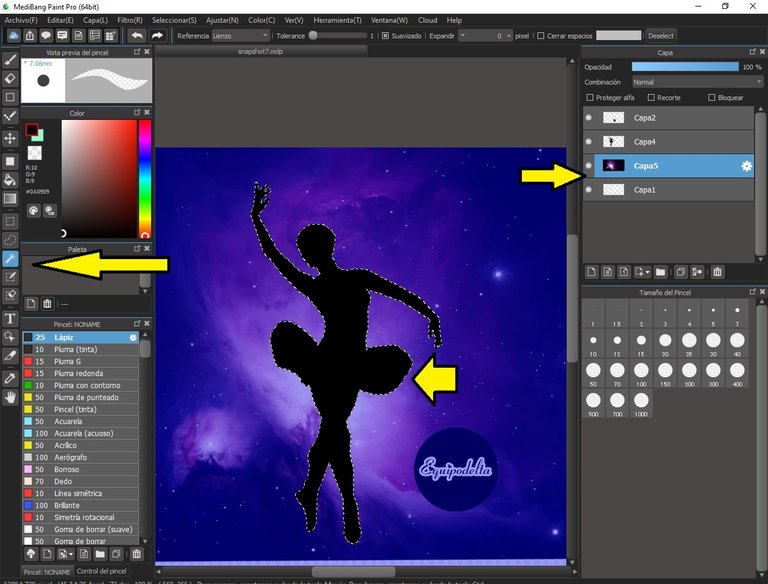
Place our background image on a lower layer than the dancer layer. With the Magic Wand tool, we select the ballerina, keeping in mind that we are on the background layer and press the shortcuts Ctrl+X to cut the image.
Hide the background layer and with the shortcut Ctrol+C we expose the background image that we cut out.

Colocamos nuestra imagen de fondo en una capa inferior a la capa de la bailarina. Con la herramienta Varita Mágica, seleccionamos la bailarina, teniendo en cuenta que estamos sobre la capa de fondo y presionamos los atajos Ctrl+X para cortar la imagen.
Ocultamos la capa de fondo y con el atajo Ctrol+C dejamos al descubierto la imagen del fondo que recortamos.
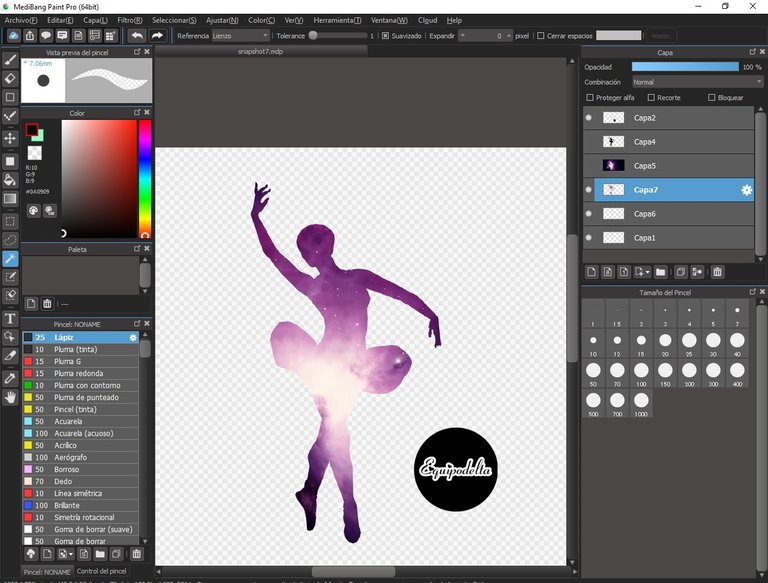
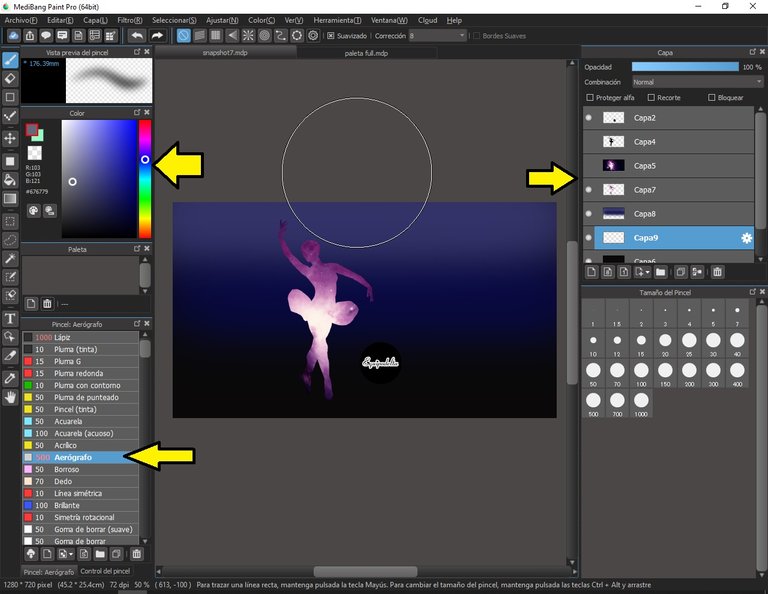
En una capa inferior a todas, colocamos el fondo base, yo usé el color negro, luego con el pincel Aerógrafo aplique detalles en degradado de color, en una capa nueva.
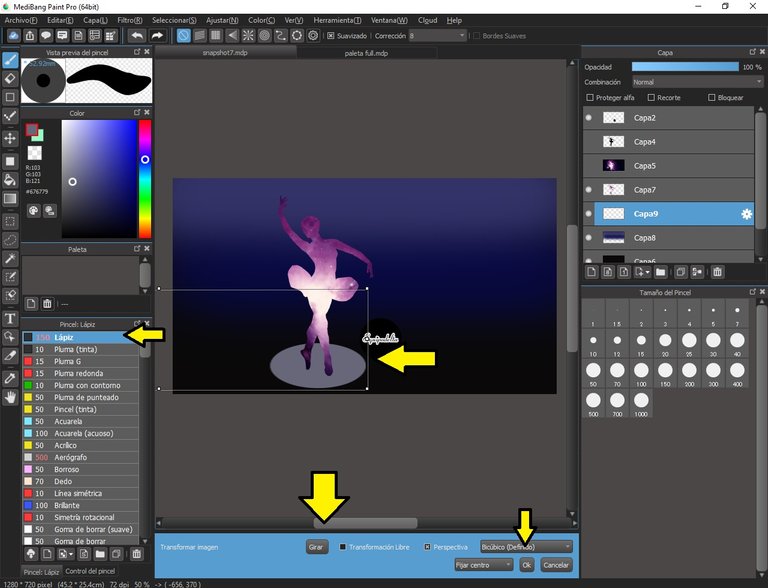
Abrimos otra capa y con el pincel lápiz ajustado a un tamaño grande, colocamos un punto, modificamos la forma del punto con el atajo Ctrl+T selecciónando la imagen, luego en las esquinas ajustamos en forma de óvalo y presionamos OK.
In a layer lower than all, we place the base background, I used the black color, then with the Airbrush brush apply details in color gradient, in a new layer.
Open another layer and with the pencil brush set to a large size, place a dot, modify the shape of the dot with the shortcut Ctrl+T selecting the image, then in the corners adjust in the shape of an oval and press OK.
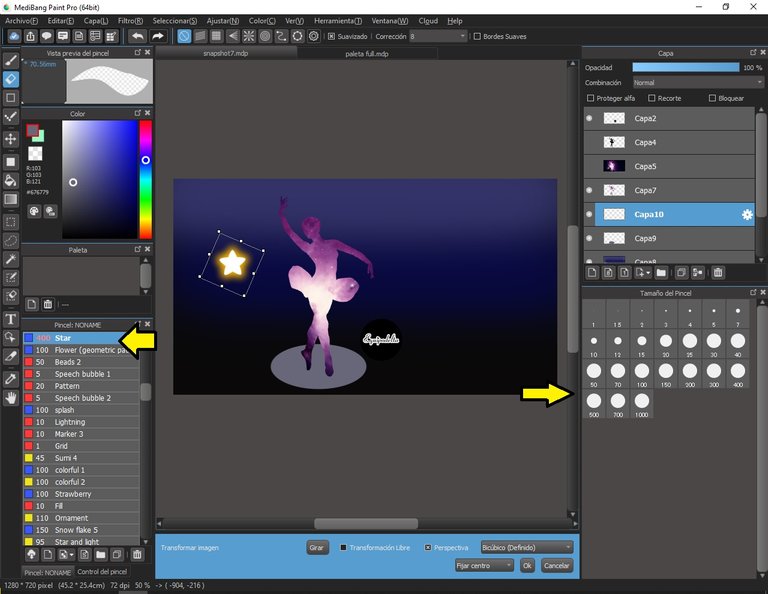
Usamos el pincel descargable de Medibang Star, en una capa nueva colocamos una estrella, copiamos (Cotrl+c) y luego pegamos (Ctrl+V) repetimos este paso las veces que sea necesario, ajusta el tamaño de algunas estrellas.
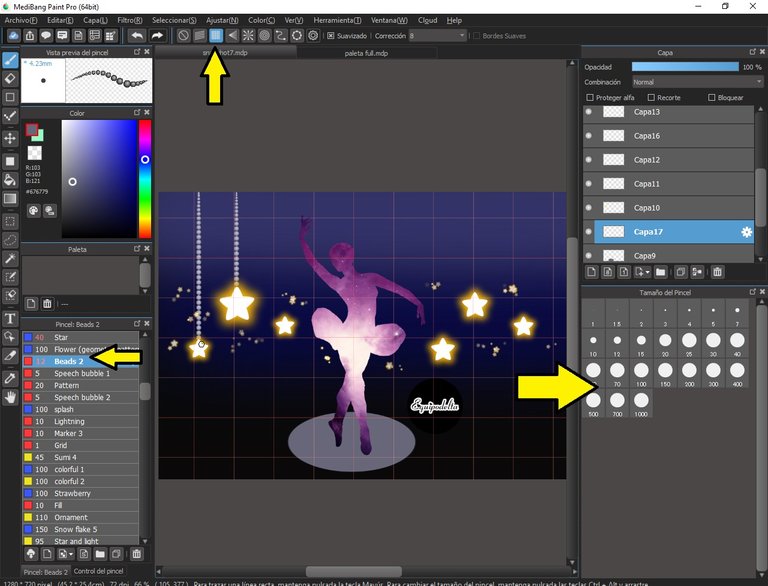
Abre una capa inferior a todas las estrellas, en la barra de herramientas superior selecciona la opción Entrecruzado, te ayudará a crear líneas perfectas. Con el pincel Breads 2 ajustalo a un tamaño pequeño y crea unas líneas como si las estrellas estuvieran colgando del cielo. Repite este paso solo en las estrellas grandes.
We use the downloadable Medibang Star brush, in a new layer place a star, copy (Cotrl+c) and then paste (Ctrl+V) repeat this step as many times as necessary, adjust the size of some stars.
Open a layer below all the stars, in the upper toolbar select the Crosshatch option, it will help you to create perfect lines. With the Breads 2 brush set it to a small size and create lines as if the stars were hanging from the sky. Repeat this step only on the big stars.
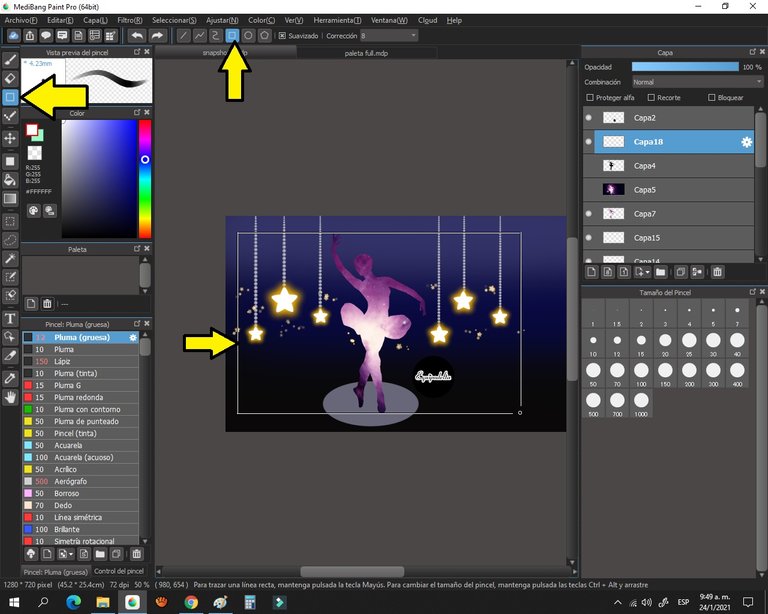
Me gusta colocarles marcos a mis diseños, es opcional, pero conoce la herramienta Figuras Geométricas Rectángulo: Sirve para que hagas esta figura geométrica de forma perfecta, elige el pincel de tu preferencia, haz clic en una sección de tu lienzo y arrastras hasta donde quieras el tamaño del mismo, luego sueltas y verás la imagen que has creado, recuerda que debes hacerlo en una capa nueva.
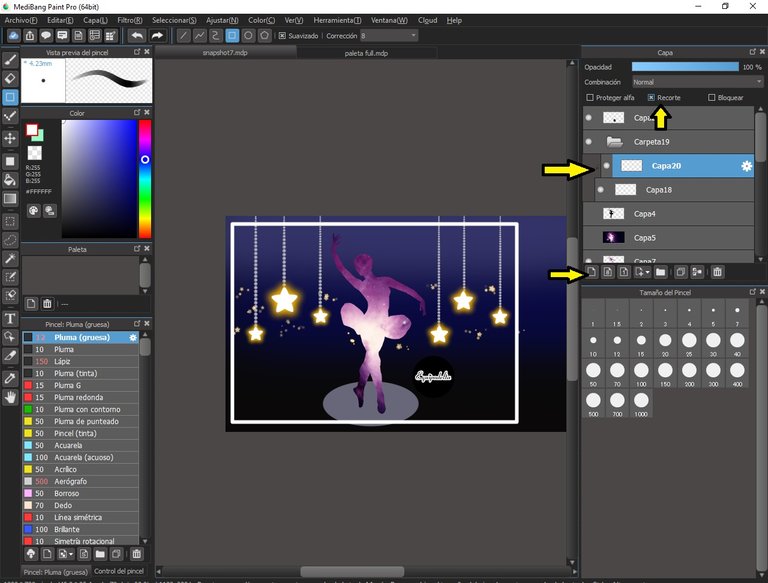
Conoce la función Carpeta (en la sección de capas): Esta función es para que solo trabajes con imágenes especificas y editar imágenes específicas sin interferir con el resto.
Abre una carpeta, la capa del rectángulo que creaste, arrástrala dentro de ella y abre una nueva capa, luego en la misma opción de capas, selecciona la opción Recorte.
La opción recorte: Nos permite trabajar con una imagen específica sin salirnos de los márgenes.
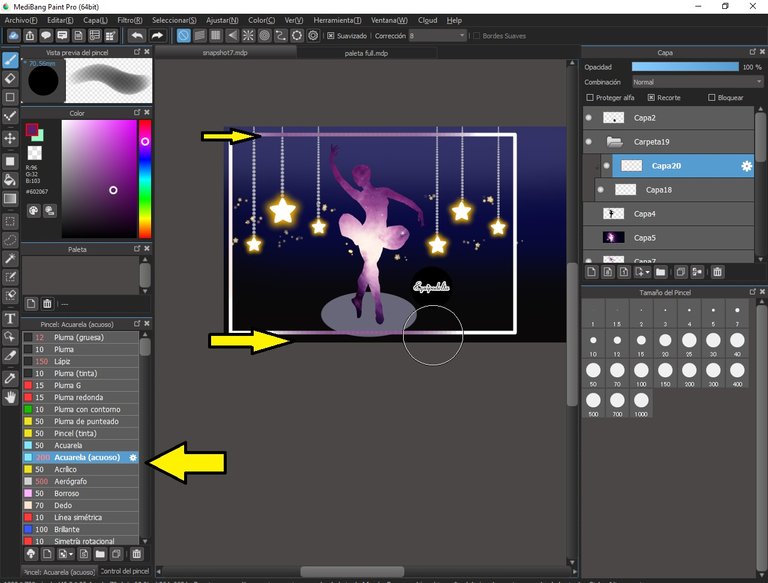
Selecciona el pincel de tu preferencia, yo usé el pincel Acuarelas, luego selecciona el color de tu preferencia, yo tomé muestra de los colores de las estrellas y la bailarina, en la capa nueva que creaste, pinta sobre la misma, no tengas miedo, no te saldrás de la línea.
I like to put frames to my designs, it is optional, but know the tool Geometric Figures Rectangle: It is used to make this geometric figure perfectly, choose the brush of your choice, click on a section of your canvas and drag to where you want the size of it, then release and you will see the image you have created, remember that you must do it in a new layer.
Know the Folder function (in the layers section): This function is for you to work only with specific images and edit specific images without interfering with the rest.
Open a folder, the rectangle layer you created, drag it into it and open a new layer, then in the same layers option, select the Crop option.
The Crop option: Allows us to work with a specific image without leaving the margins.
Select the brush of your preference, I used the Watercolor brush, then select the color of your preference, I took a sample of the colors of the stars and the ballerina, in the new layer you created, paint over it, don't be afraid, you won't go out of the line.
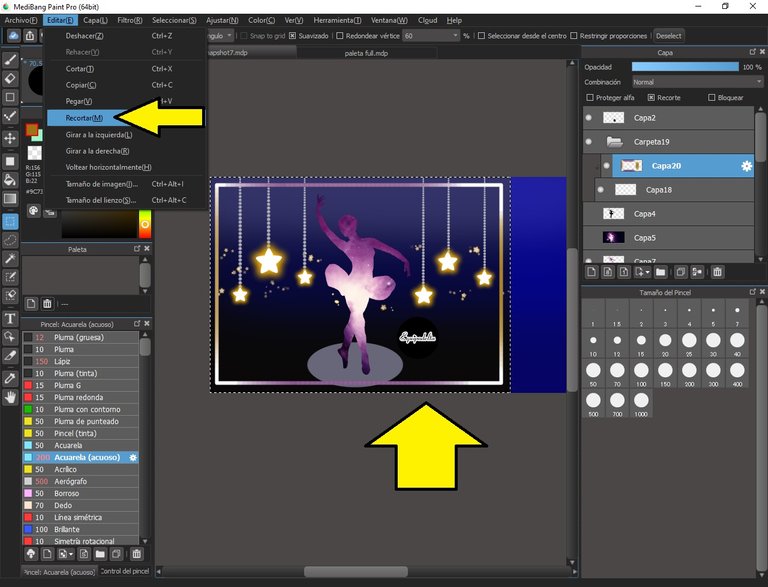
Para culminar, ajusta el espacio de la imagen, selecciona arrastrando el ratón por el área que vas a cortar, y en la barra de herramientas superior, borra el espacio con la opción Cortar.
Listo, hoy conocimos nuevas formas de edición, espero sea de tu utilidad.
To finish, adjust the spacing of the image, select by dragging the mouse over the area to be cut, and in the upper toolbar, delete the space with the Cut option.
That's it, today we have learned new ways of editing, I hope it will be useful for you.
Detalles Técnicos / Technical Details
Program: MediBang Paint Pro.
Graphics tablet: Huion (Usb Pen Tablet). Model 420.
Used Medibang brushes:
- Star.
- Acuarela.
- Breads 2.
- Lápiz.
- Aerógrafo.
Used Medibang tools:
- Texto.
- Borrador.
- Figuras geométricas (rectángulo)
- Ajuste entrecruzado.
- Varita mágica.
- Herramienta capas: Carpeta y recorte.
Corrector de idioma / traductor
Mi canal Youtube, tiene un montón de tutoriales muy útiles para ti.
My Youtube channel, has a lot of very useful tutorials for you.
![]() 👉
👉 ![]() 👉
👉 ![]() 👉
👉  👉
👉 ![]() 👉
👉 
Congratulations, your post has been upvoted by @dsc-r2cornell, which is the curating account for @R2cornell's Discord Community.
Enhorabuena, su "post" ha sido "up-voted" por @dsc-r2cornell, que es la "cuenta curating" de la Comunidad de la Discordia de @R2cornell.