Hello friends of hive happy start of the week today I want to show you my latest work which is part of the creative recycling challenge. This event has been devised by @jennyzer and which I think is great to promote art with recycling material. In our homes sometimes we have many things that we waste and that by giving them a new use we can obtain incredible things. My work for this challenge is a tutorial on how to make a miniature Iron Man helmet. I chose the helmet from the first Iron Man movie because it is the classic of all the marvel movies where we first saw the armor. I did it as always using soda cans but it can also be done with paper or cardboard. I hope you like it.
Hola amigos de hive feliz inicio de semana hoy quiero mostrarles mi ultimo trabajo el cual forma parte del desafio creativo de reciclaje. Este evento ha sido ideado por @jennyzer y el cual me parece grandioso para fomentar el arte con material de reciclaje. En nuestros hogares a veces contamos con muchas cosas que desperdiciamos y que dandoles un nuevo uso podemos obtener cosas increibles. Mi trabajo para este desafio se trata de un tutorial de como hacer un casco en miniatura de Iron Man. Escogi el casco de la primera pelicula de Iron Man por ser el clasico de todas las peliculas de marvel donde vimos por primera vez la armadura. La hice como siempre usando latas de soda pero tambien se puede hacer con papel o cartulina. Espero les guste.
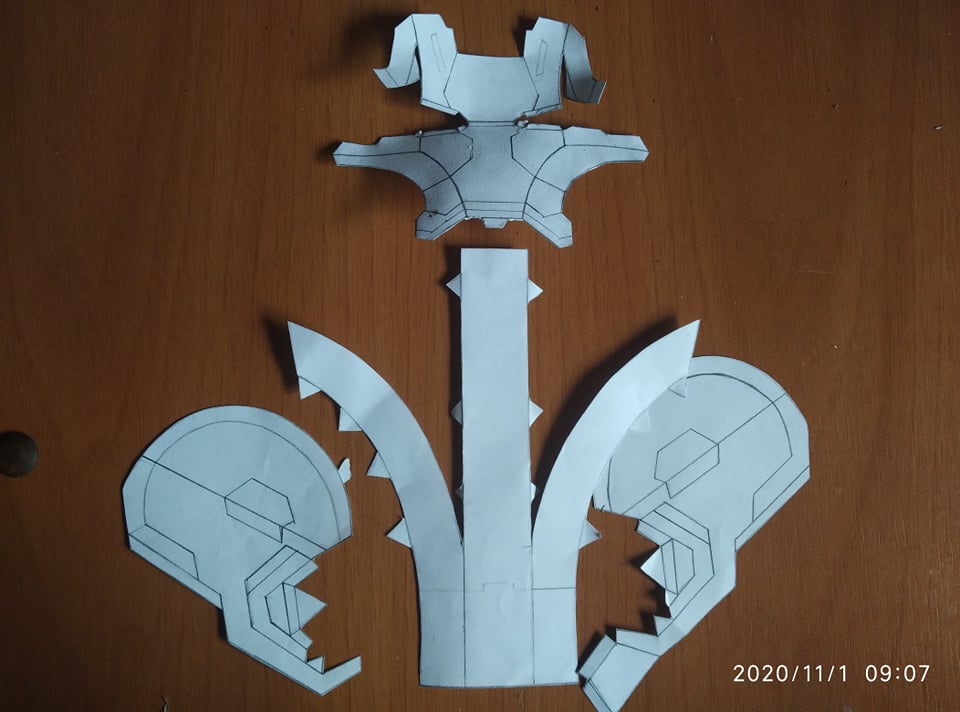
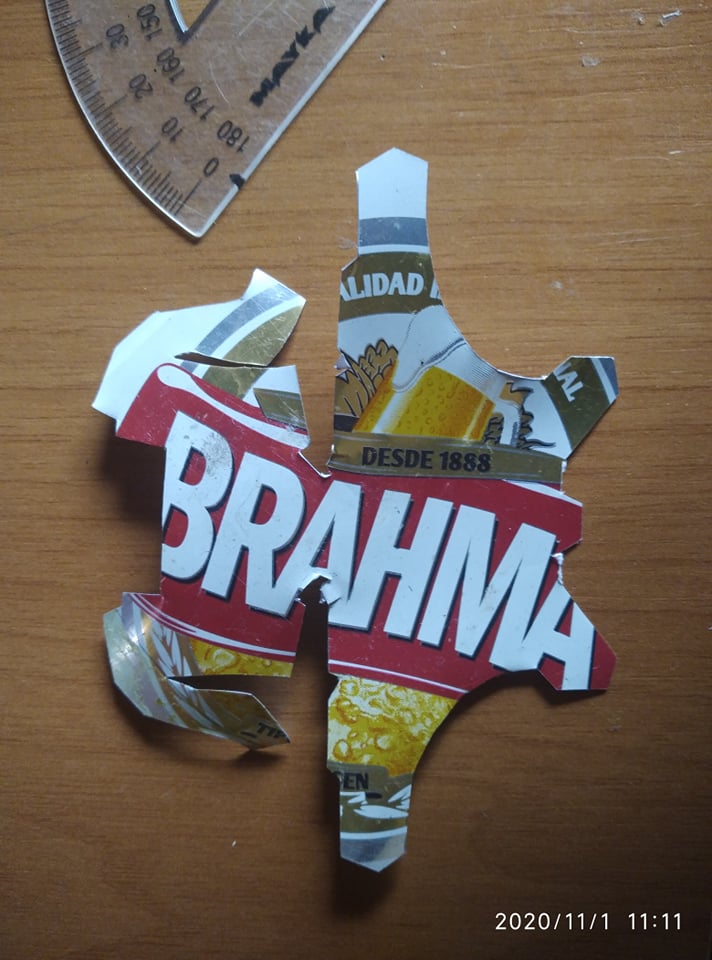
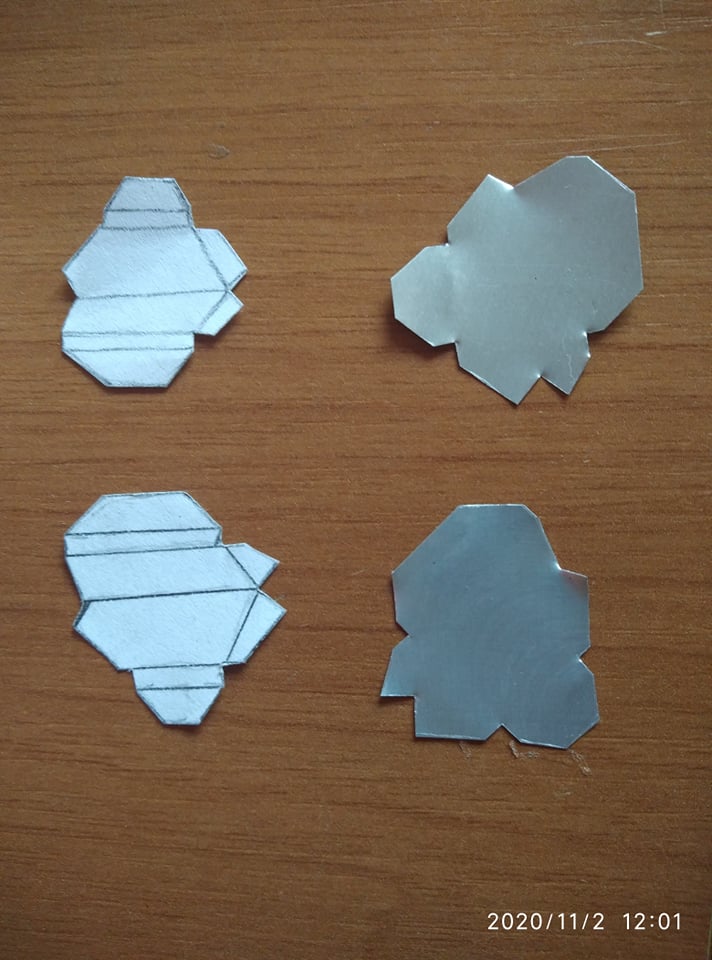
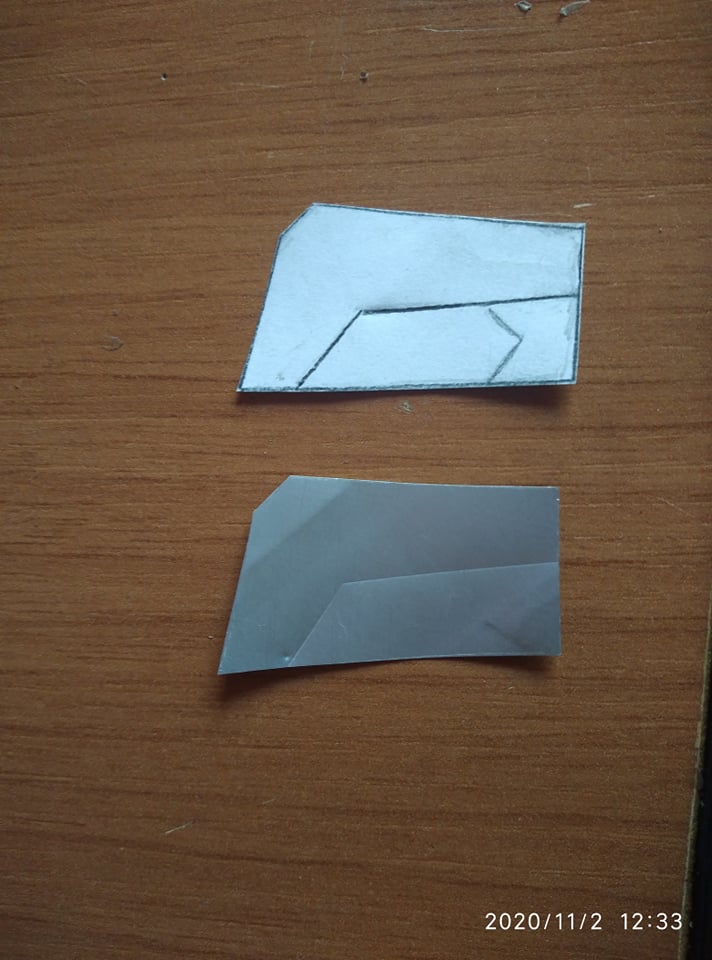
The first step is to have a pattern to cut the cans. On the internet there are many patterns, some even come in 3d and are handled with the Pepakura program, other patterns are very complicated since they seek to be the most exact, so I decided to use a simple one to be able to make it in miniature. Here you can see the drawings of the patterns. It consists of most of the helmet and face.
El primer paso es tener un patron para cortar las latas. En internet existen muchos patrones algunos incluso vienen para en 3d y se manejan con el programa Pepakura, otros patrones son muy complicados ya que buscan ser los mas exactos, asi que decidi usar uno sencillo para poderlo hacer en miniatura. Aqui pueden ver los dibujos de los patrones. Consta de la mayor parte del casco y el rostro.

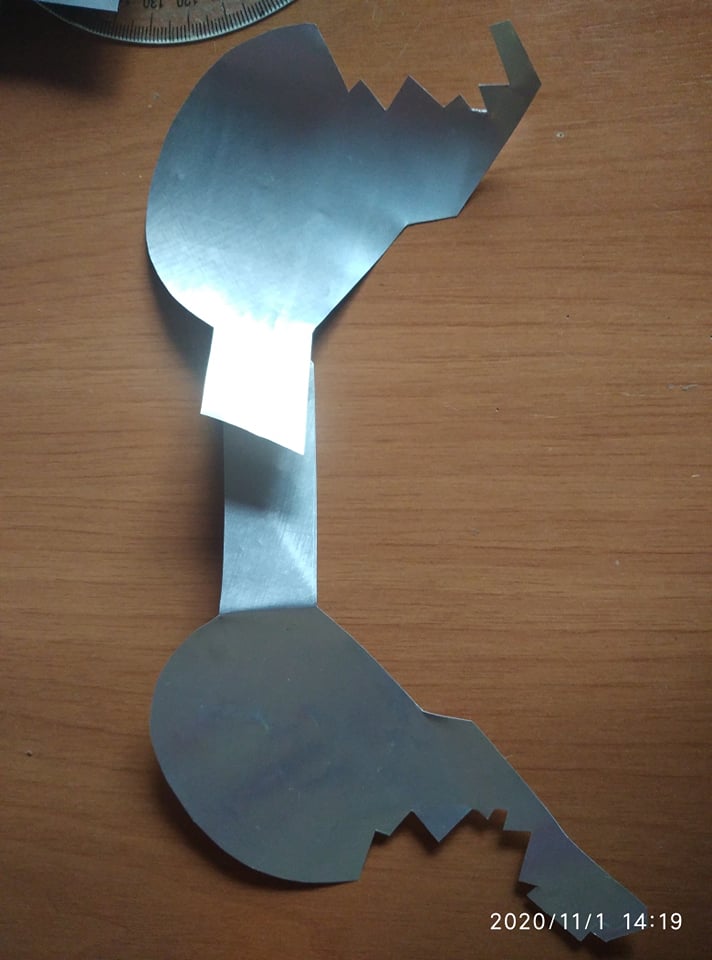
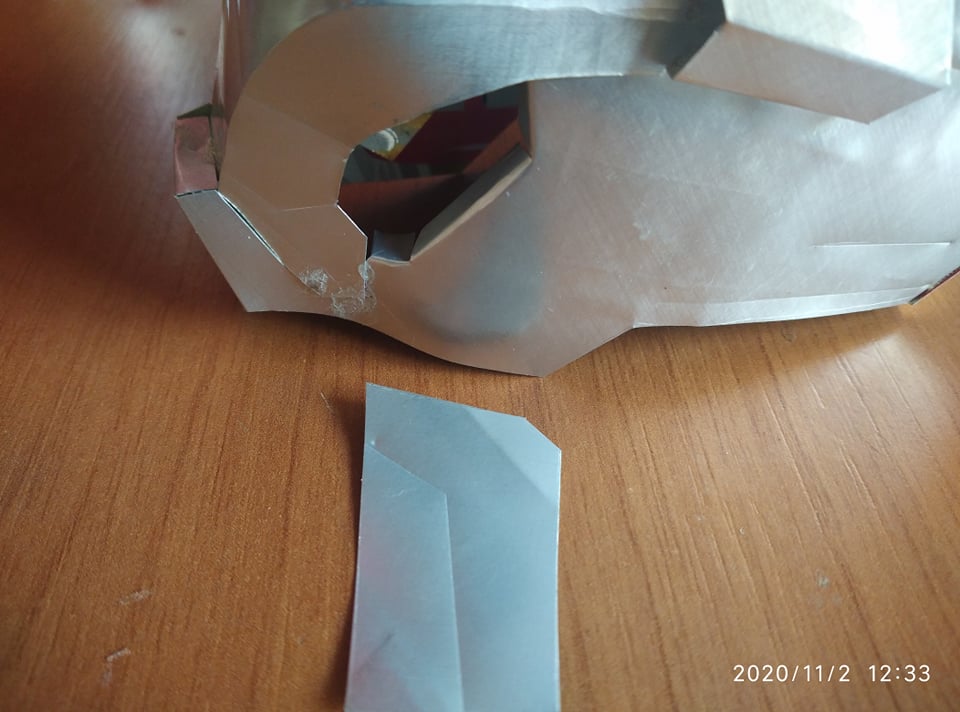
The process to cut the can is to stick the pattern on the can then with scissors or with a very sharp knife we make the cut. Once we have drawn the face with a used pen that does not have ink, we make the lines that the helmet has and that represents the assembly, we make the ones that go to the front and the back.
El proceso para cortar la lata es pegar el patron en la lata luego con unas tijeras o con una navaja bien afilada hacemos el corte. Una vez que hayamos sacado el rostr con un boligrafo usado que no tenga tinta hacemos las rayas que tiene el casco y que representa el esamblaje, hacemos las que van por la parte de enfrente y por detras.
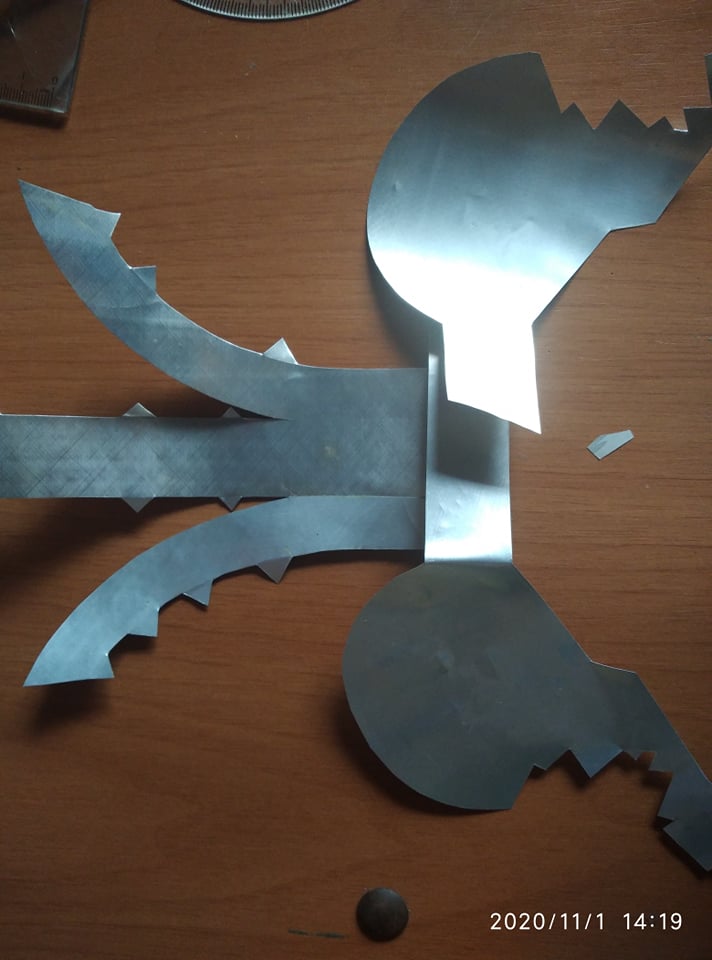
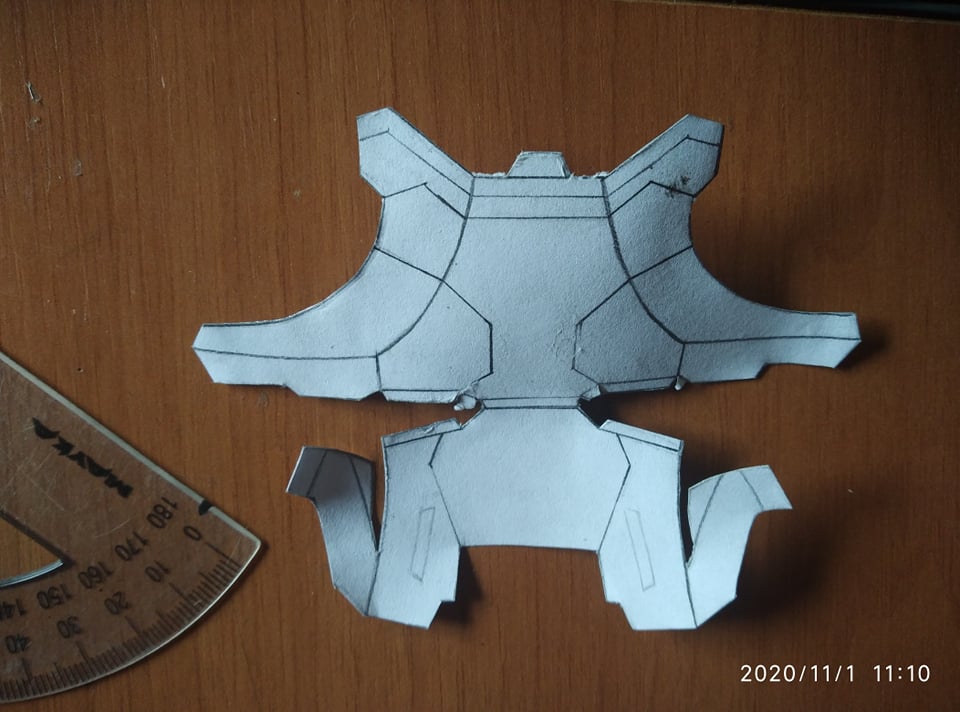
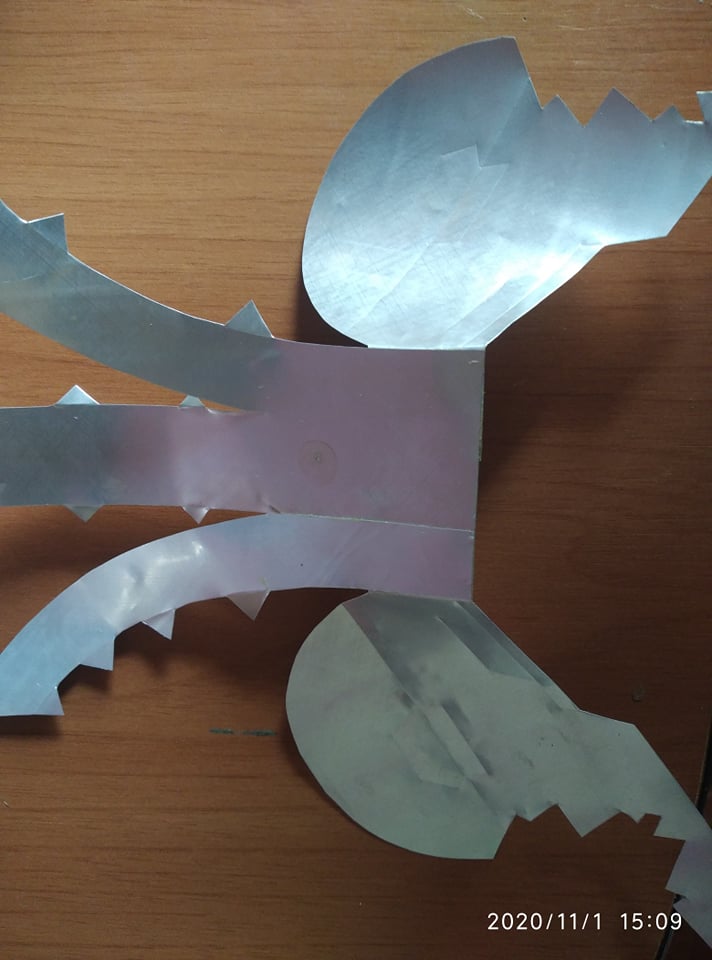
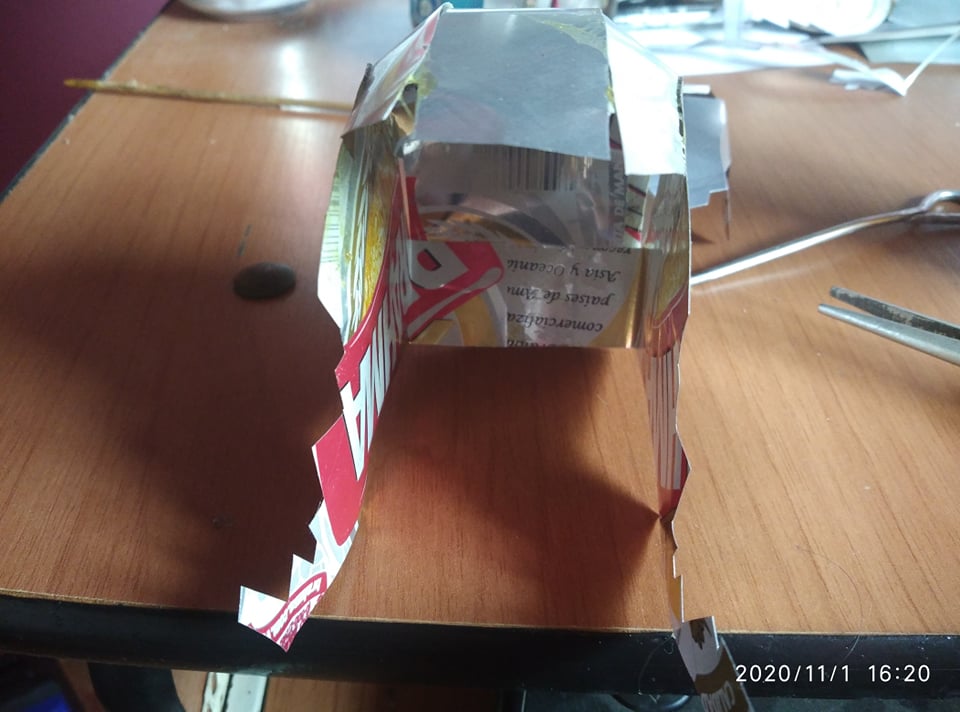
The next step is to cut out the part that covers the entire head, for that we also do the same previous steps until we get the patterns. When we have them ready we can start putting them together.
El paso siguiente es recortar la parte que cubre toda la cabeza para eso tambien hacemos los mismos pasos anteriores hasta sacar los patrones. Cuando mlos tengamos listos podemos comenzar a armarlos.
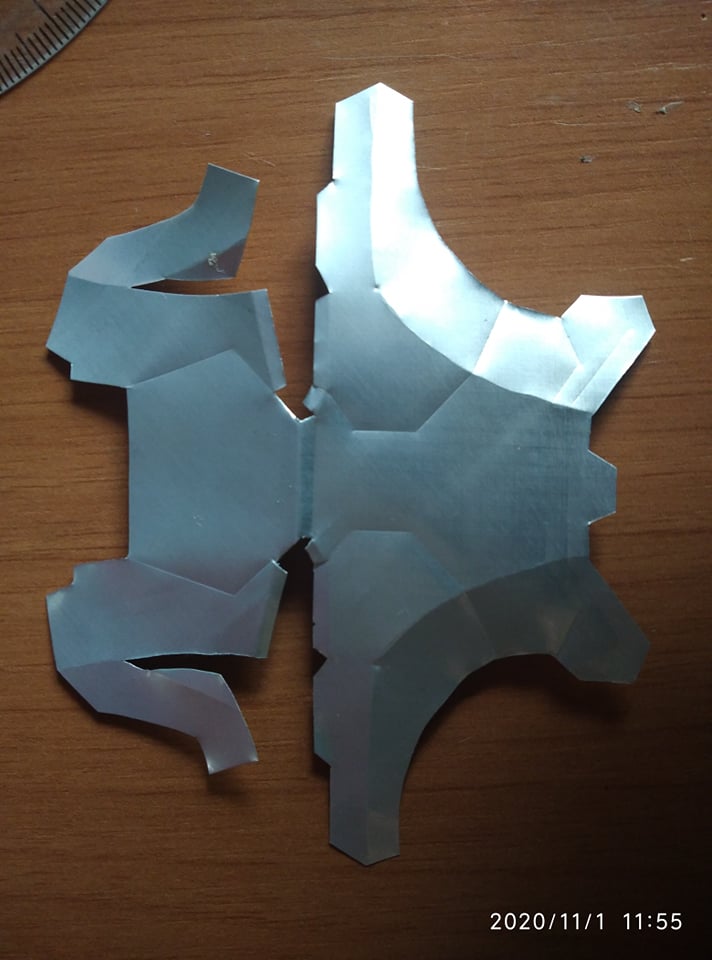
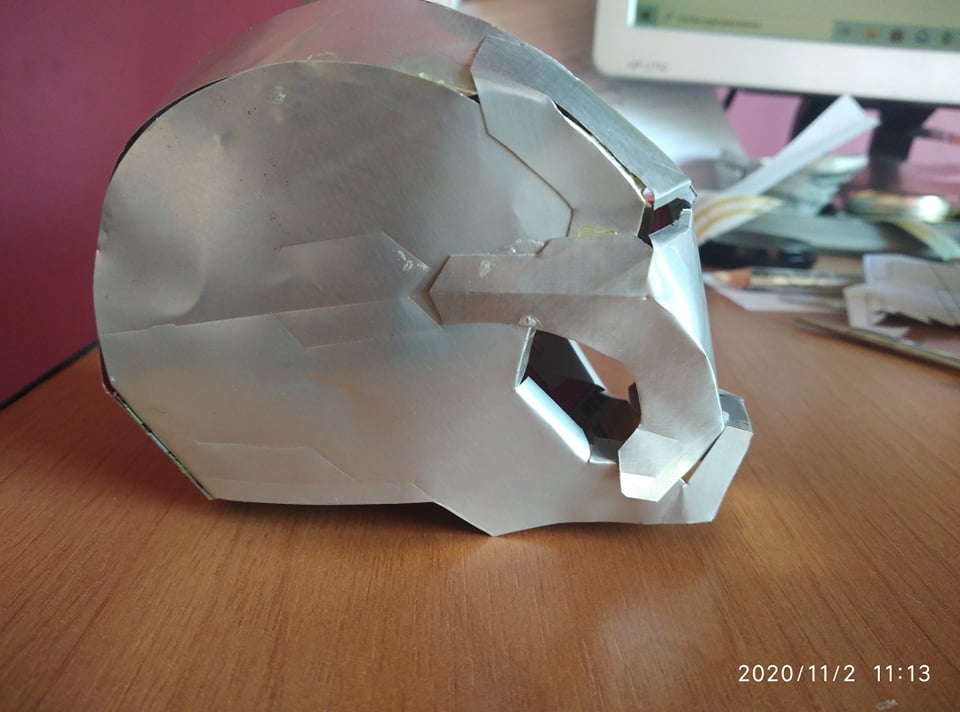
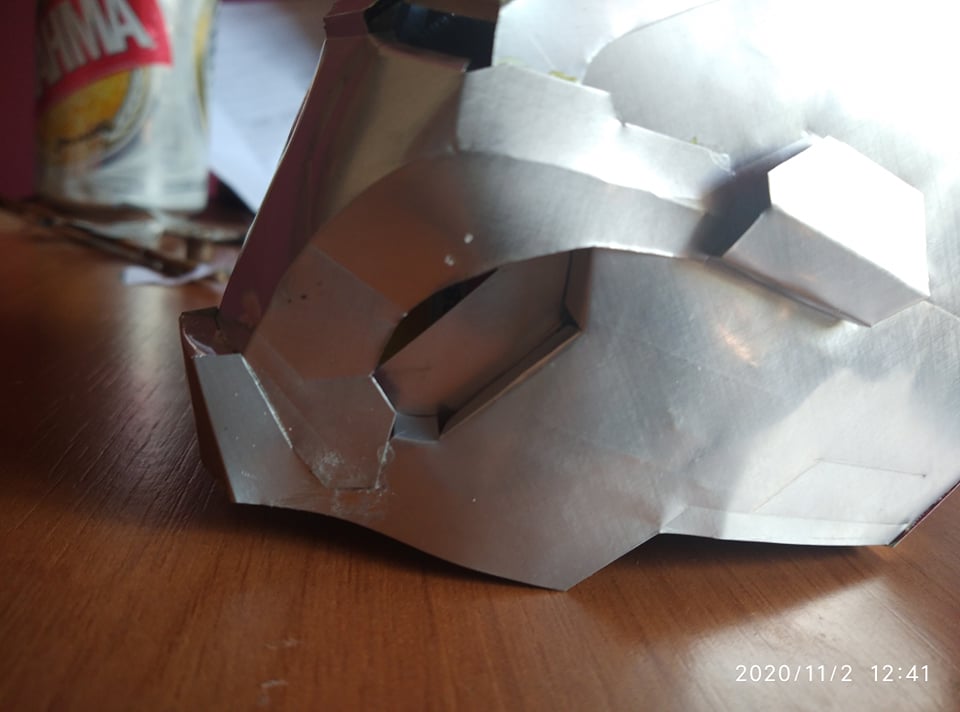
So we have the part of the helmet that covers the head when we begin to assemble it. We must use a good glue so that it is not damaged when we are gluing the parts. I usually use instant glue.
Asi nos queda la parte del casco que cubre la cabeza cuando comenzamos a armarla. Debemos usar un buen pegamento para que no se nos dañe cuando estemos pegando las partes. Yo suelo usar pegamento instantaneo.
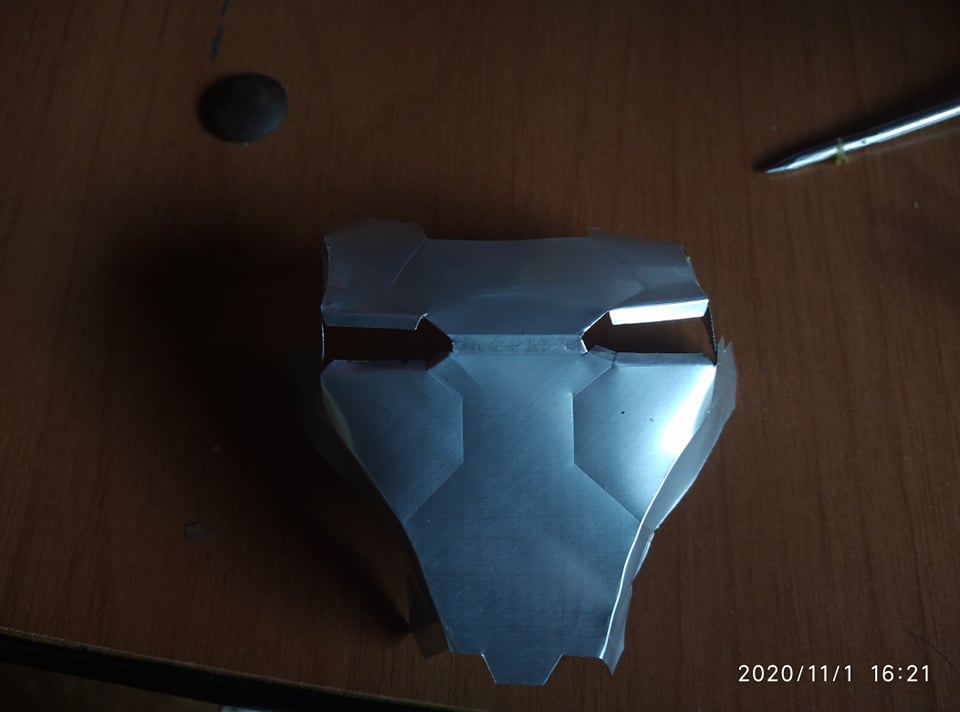
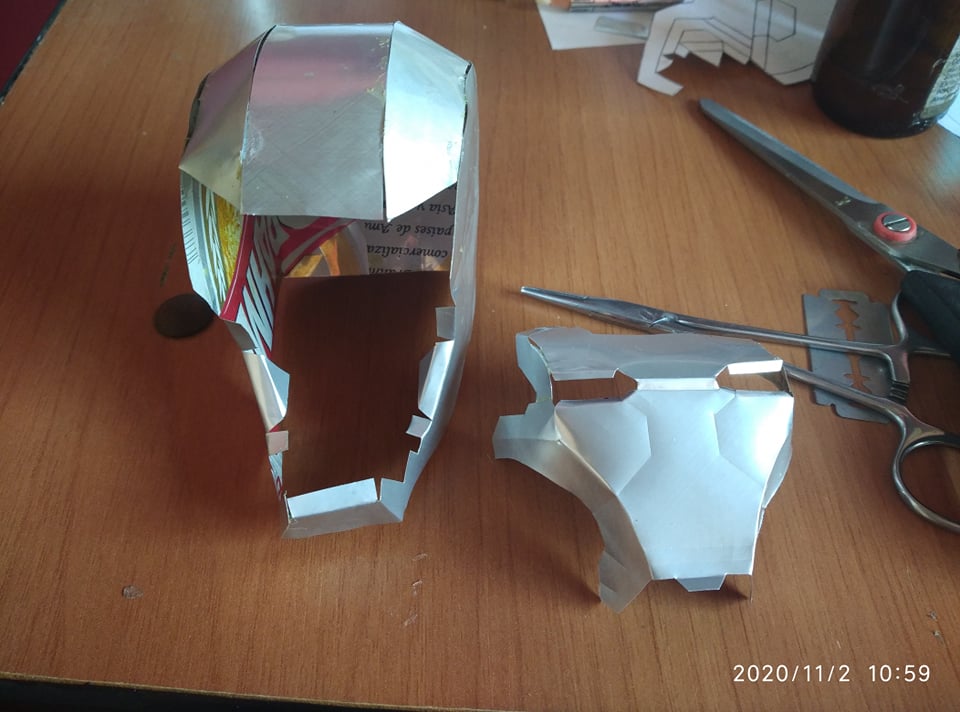
Then we assemble the face by joining its parts and then we proceed to join it to the rest of the helmet.
Despues ensablamos el rostro uniendo sus partes y luego procedemos a unirlo al resto del casco.
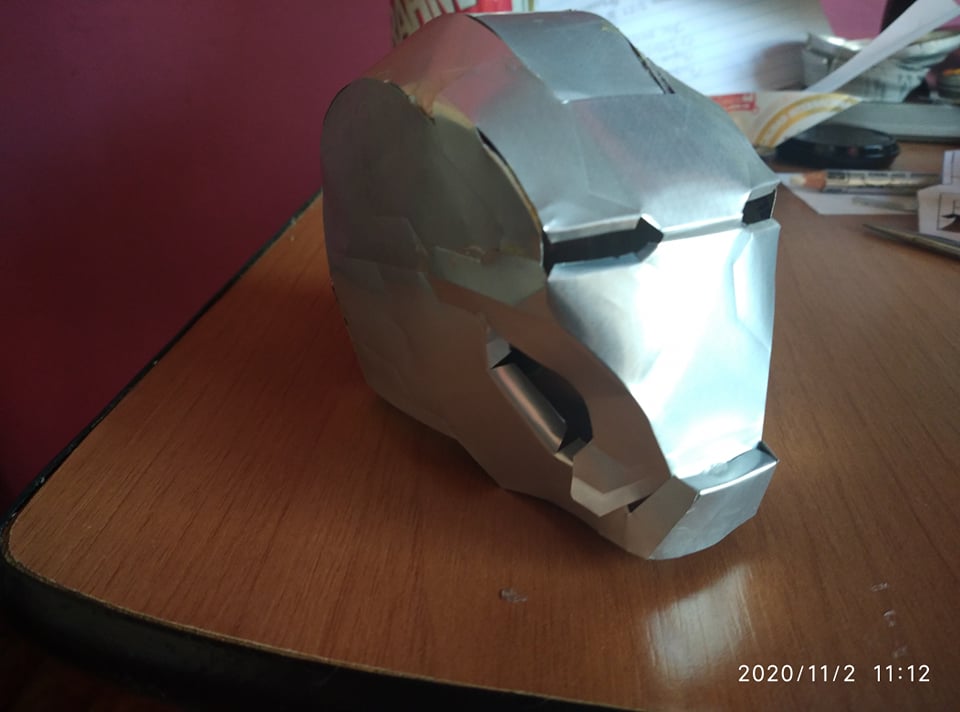
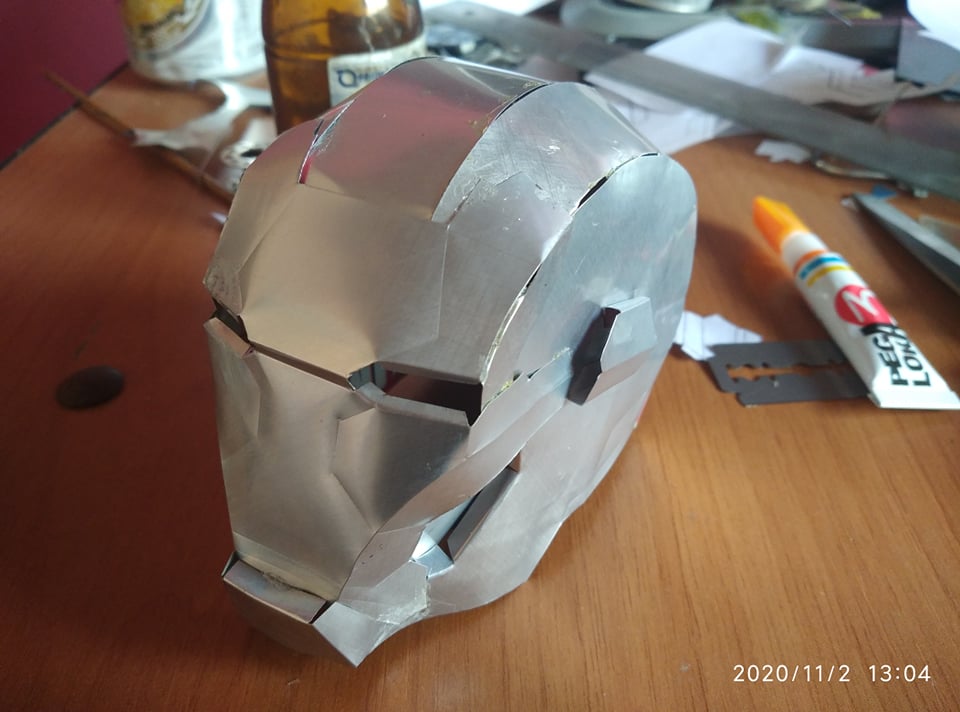
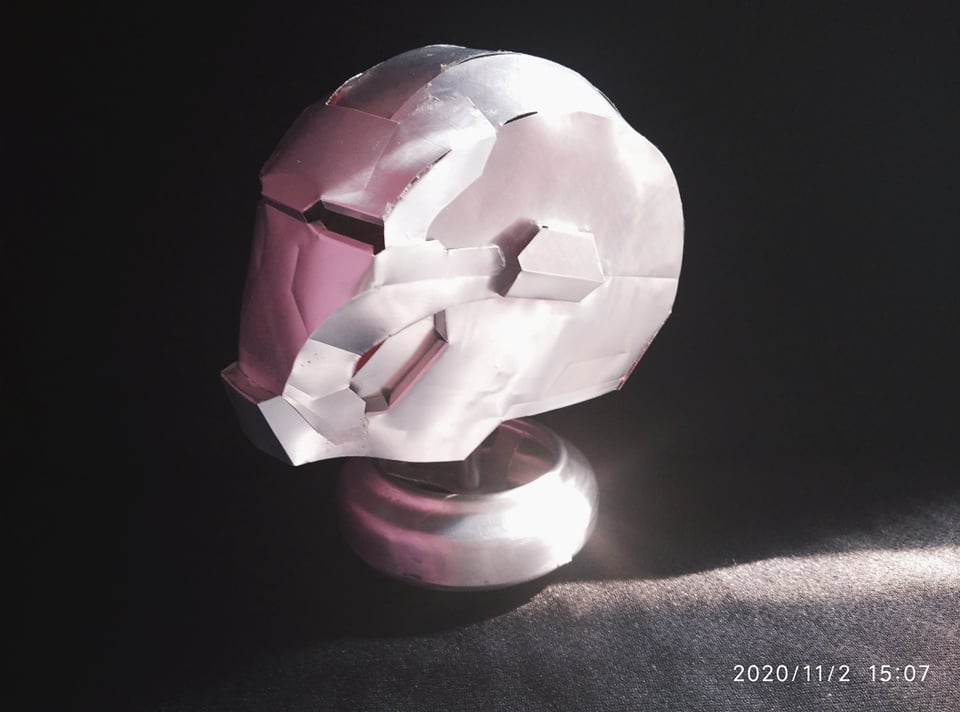
This is how it fits us. Can you see how it goes? It is great that moment when you see that things are going well. From here on, only small details are missing and we are done.
Asi es como nos queda. Pueden ver como va? es grandioso ese momento cuando observas que las cosas van saliendo bien. De aqui en adelante solo faltan pequeños detalles y habremos terminado.
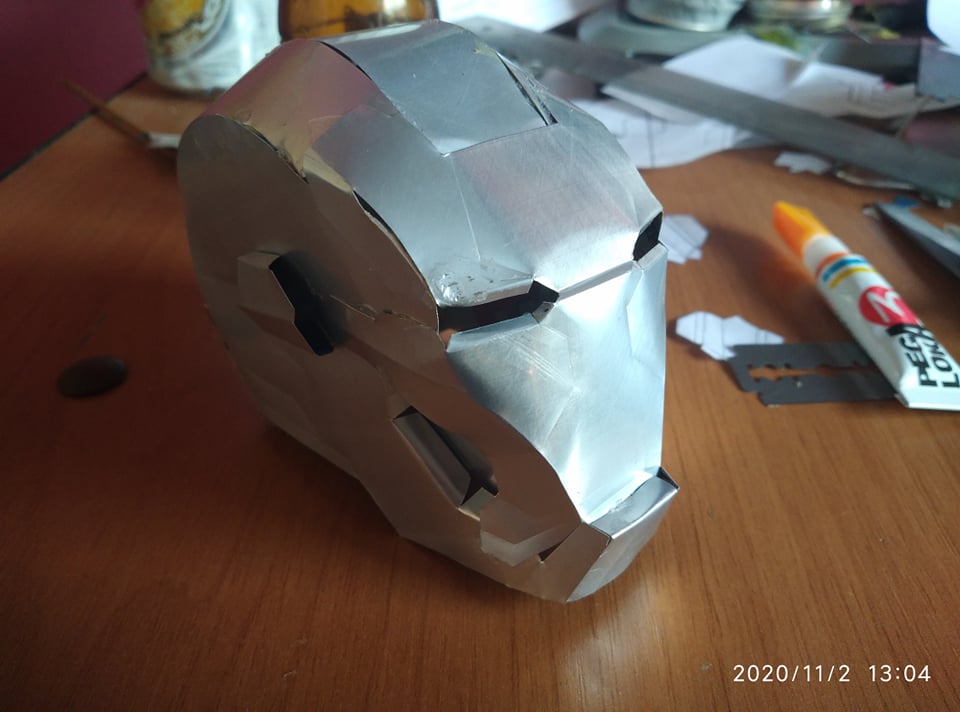
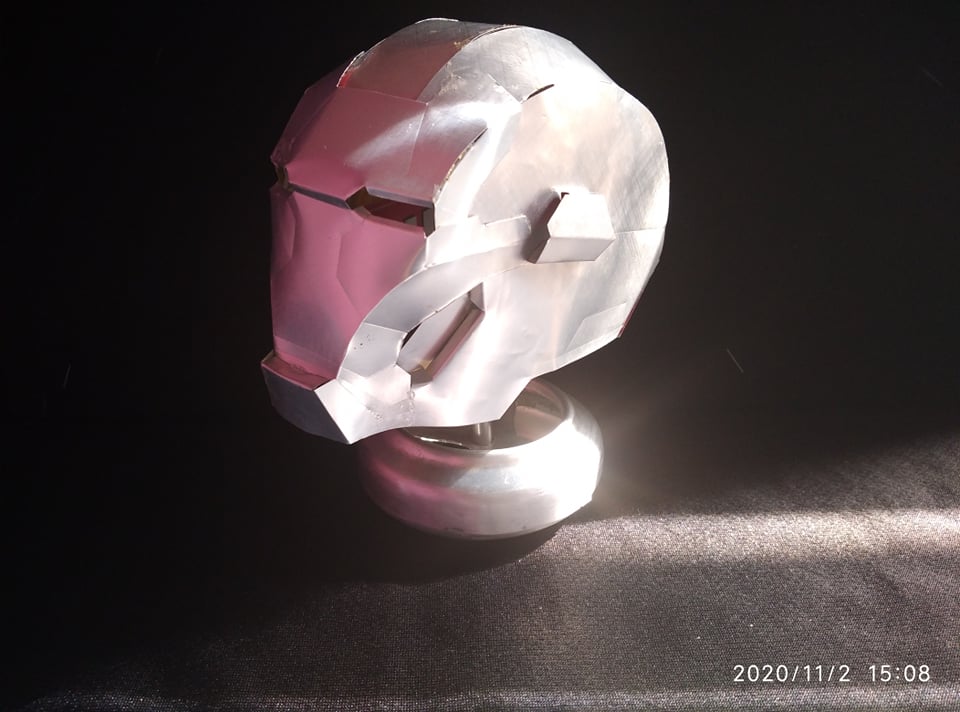
These little figures are hearing protectors. In the Mark 2 armor these protectors are circular and here I made a mistake, I made them of a more advanced design. However, I am fine hehehe as you can see they go at both ends, just to protect the ears.
Estas pequeñas figuras son los protectores auditivos. En la armadura Mark 2 estos protectores son circulares y aqui comti un error, los hice de un diseño mas avanzado. Sim embargo me quedo bien jejeje como pueden ver van en ambos extremos, justo para proteger los oídos.
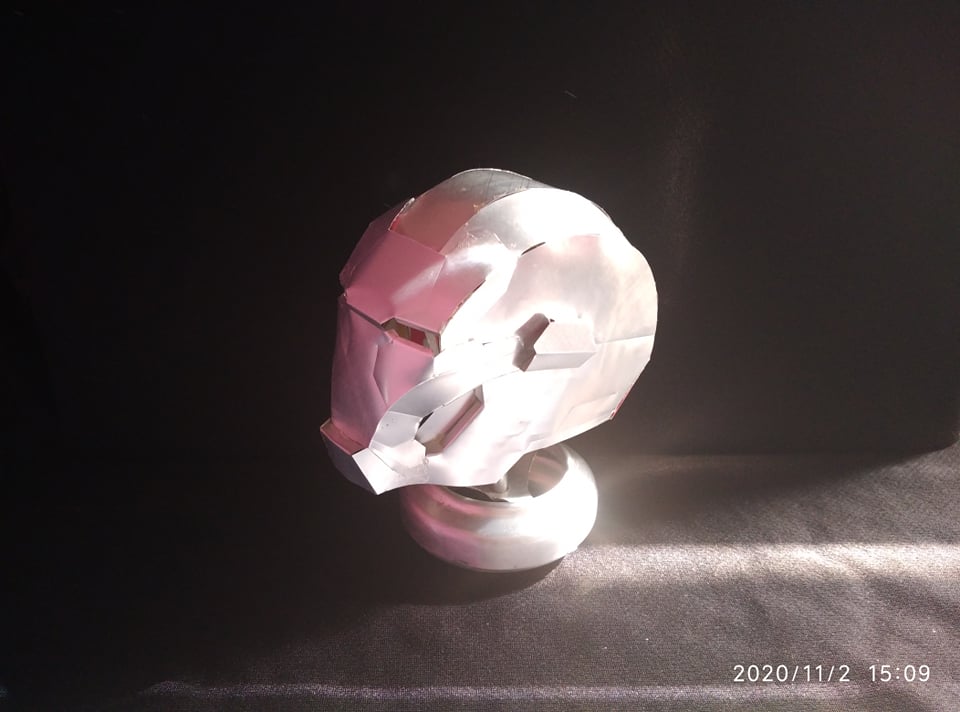
The last step in the details to finalize the construction of the helmet is to place this small sheet that covers that empty space in the jaw and goes on the inside. We cut two small pieces and then we glue them on the inside and that's how it looks.
El ultimo paso en los detalles para finalizar la consturccion del casco es colocar esta pequeña lamina que recubre ese espacio vacio en la mandibula y va por la parte interior. Cortamos dos pequeños retazos y luego los pegamos por la parte interna y asi nos queda.
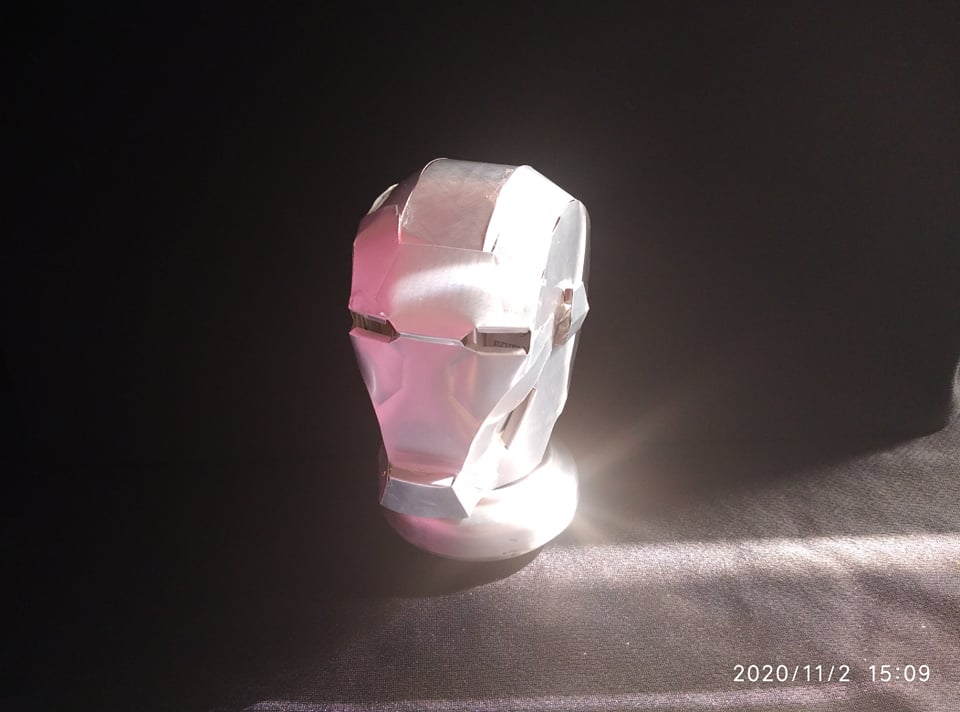
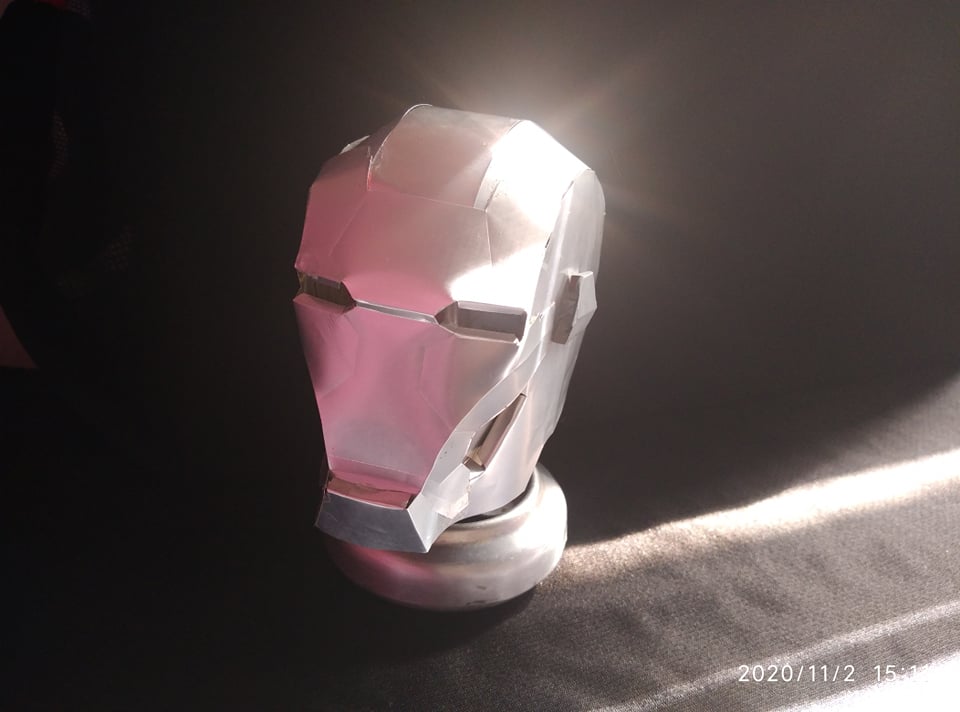
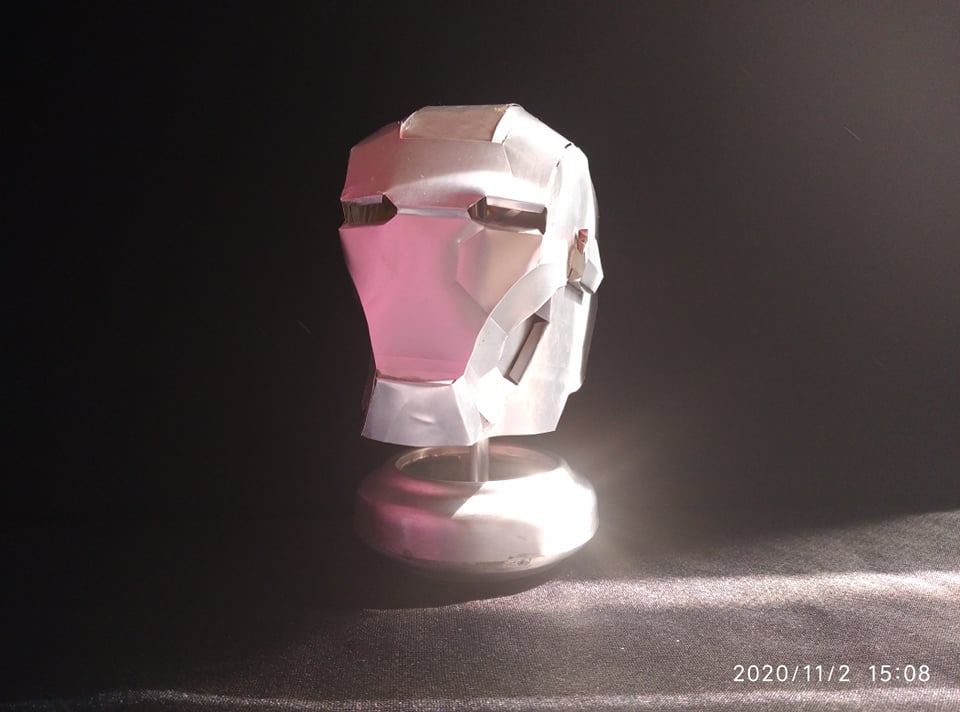
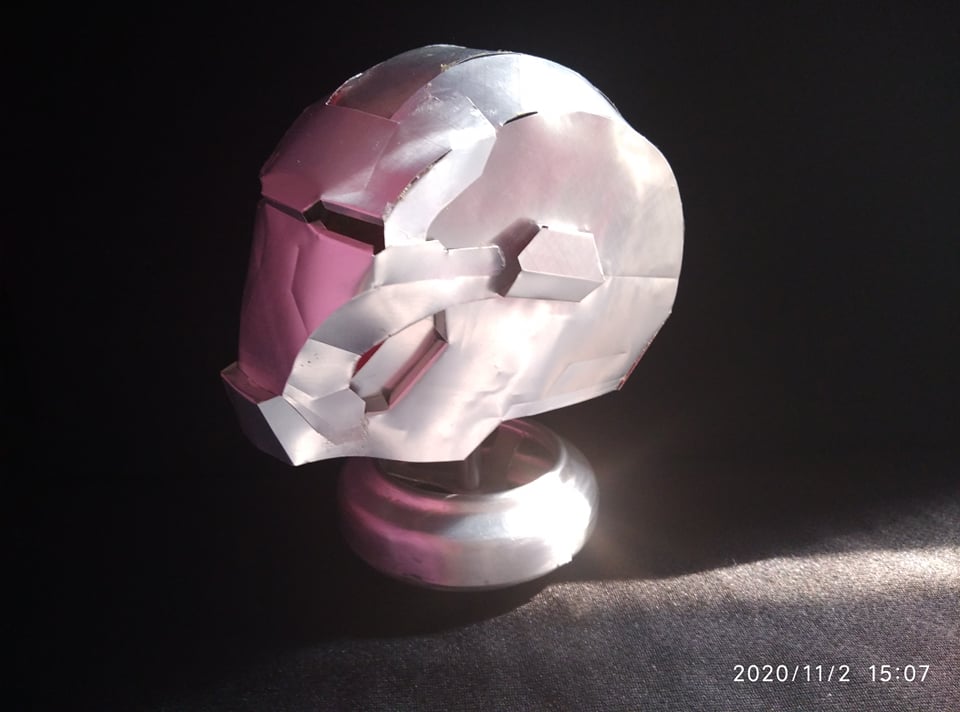
This is the final work. So we have our Iron Man Mark 2 helmet, the last step is to place a base, the design can be to our liking and the one that best suits the helmet. In this case I used the bases of the same can and I am perfect. The design of this helmet is very versatile because using this model we can make the other armor including War Machine, Iron Patrio and War Machine Punisher, which is one of the best designs out there. I hope you liked my tutorial and I hope that with the steps and my explanation you will be encouraged to do it, remember you can use paper or cardboard, using soda cans is dangerous because we can get hurt, you need to know how to handle very well. That's why I recommend doing it on paper, and you could paint it to your liking. I say goodbye wishing you have a very productive week. See you soon
Este es el trabajo final. Asi nos queda nuestro casco de Iron Man Mark 2, el ultimo paso es colocarle una base, el diseño puede ser a nuestro gusto y el que mejor se adapte al casco. En este case use las bases de la misma lata y me quedo perfecto. El diseño de este casco es muy versatil porque usando este modelo podemos hacer el de las otras armaduras incluyendo las de War Machine, Iron Patrio y War Machine Punisher que es uno de los mejores diseños que hay. Espero que les haya gustado mi tutorial y espero que con los pasos y mi explicacion se animen a hacerlo, recuerden pueden usar papel o cartulina, usar latas de soda es peligroso porque nos podemos herir, se necesita saber manipular muy bien. Por eso les recomiendo hacerlo en papel, y podrian pintarlo a su gusto. Me despido deseando que tengan una semana muy productiva. Hasta pronto.
Maneras creativas de reciclar, te felicito.
Gracias, y que bueno que te haya gustado.
Me encanta que usarás este material para tu creación, es sumamente innovador. Hiciste un grandioso trabajo.
Gracias por participar!
Gracias a ti por invitarme a participar, ha sido un gran placer.
Eres un buen artista, buena idea, buen trabajo. Por cierto, tengo tiempo que no veo esas latas a mis alrededores.
es dificil encontrarlas. Por ejemplo, estas de esta marca fue de una reunion que hubo hace mucho tiempo en mi casa, y en ese tiempo ya estaba comenzando a trabajar con latas. Recolecte todas las que pude y las guarde y con ellas es que he estado trabajando.
Que bien, me alegra que le saques provecho al máximo.
waooo! Excelente trabajo, se nota el esfuerzo que le pusiste. felicitaciones!
gracias y que bueno que te haya gustado :D
asi es, le puse mucho empeño para hacer mejor los detalles
Yo aquí si superar aún su muerte (y espero esto no sea un spoiler para nadie 😐) y tú traes ésta hermosa miniatura de su casco 😭😭 me ha encantado, es una total obra de arte 💕
Que bueno que te haya gustado. Y aun no la hemos superado. Era el alma de los vengadores :(