¡¡¡ Saludos queridos lectores y amigos !!!
Greetings dear readers and friends !!!
Bienvenidos sean todos nuevamente a mi rinconcito mágico, el día de hoy les traigo un proyecto de costura muy interesante y que represento un reto para mí, porque es la primera vez que lo hago. Además, para nosotras las chicas, es muy útil en esto tiempo que estamos viviendo donde al menos los venezolanos, debemos hacer rendir nuestro dinero.
Welcome all of you to my magic corner again, today I bring you a very interesting and challenging sewing project, because it is the first time I do it. Besides, for us girls, it is very useful in this time we are living where at least the Venezuelans, we must make our money work.
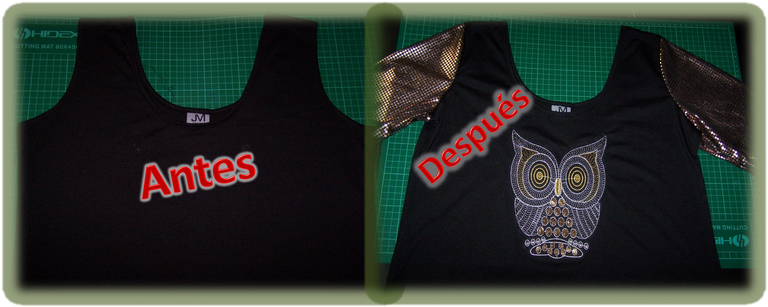

Se trata de la remodelación de una blusa, con muy pocos cambios transforme una simple y sencilla guarda camisa en una hermosa blusa manga corta que de seguro llamara la atención de tus amigas y conocidas. El proyecto me lo propuso la maestra de mi hija menos, según me dijo le regalaron la blusa y a ella no le llamaba la atención porque no tenía gracia.
This is the remodeling of a blouse, with very few changes transform a simple and plain shirt guard into a beautiful short-sleeved blouse that will surely attract the attention of your friends and acquaintances. The project was proposed to me by my daughter's teacher less, as she told me they gave her the blouse as a present and she didn't like it because it wasn't funny.
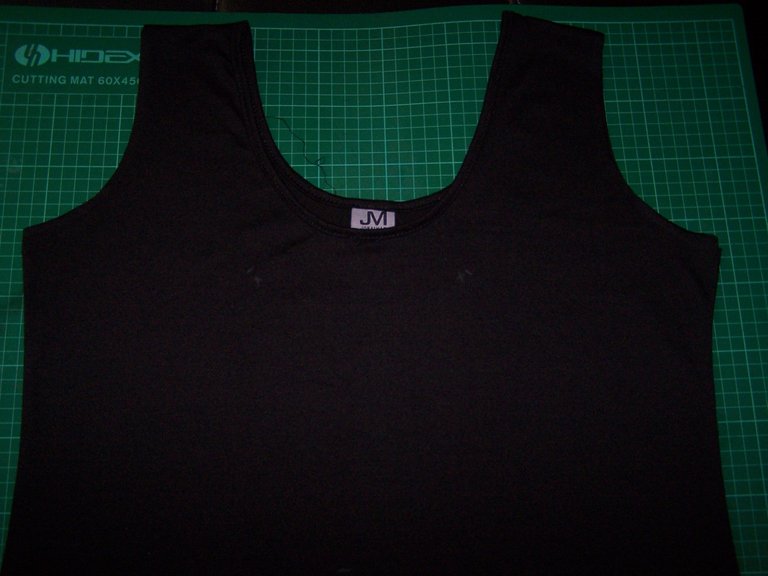
Por esa razón, me pidió que la transformara al ponerle mangas, en un principio le dije que no se podía, al menos, eso siempre me lo habían dicho. Esto se debe a que por lo general las camisas sin mangas, tienen el escote muy pronunciado en la sisa (por donde se mete los brazos). Esto no permite adaptarle unas mangas, por suerte, al revisar bien la blusa, no era el caso. Así que, me dispuse a realizar la transformación, ahora veamos entonces los materiales que me trajo la maestra y trataré de explicarle el proceso.
For that reason, she asked me to transform it by putting on sleeves, at first I told her that you could not, at least, that I had always been told. This is because sleeveless shirts usually have a very pronounced neckline in the armhole (where you put your arms). This does not allow to adapt some sleeves, fortunately, when checking the blouse, it was not the case. So, I set out to make the transformation, now let's see then the materials that the teacher brought me and I will try to explain the process.
Paso 1:
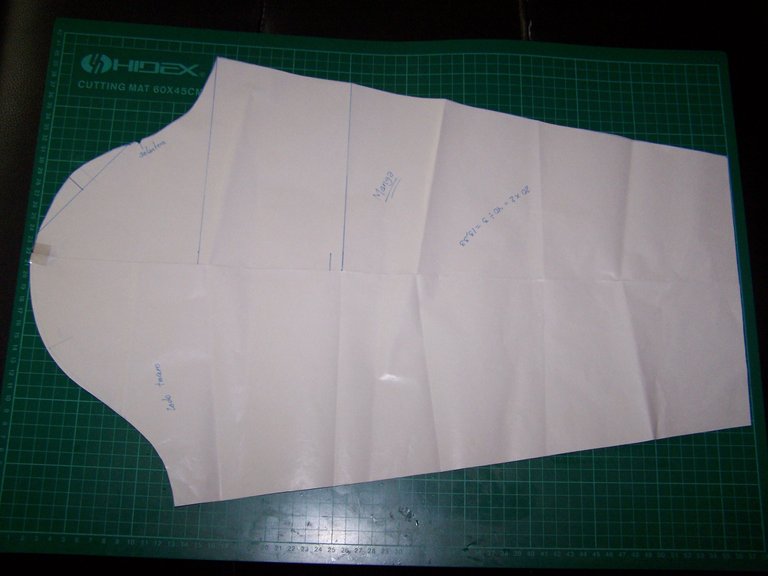
Lo primero que debo aclarar es que se debe realizar un patrón de la manga para esta blusa, no podemos tomar cualquier manga de otra blusa y copiarlo, porque tiene medidas específicas. Este punto resulto un reto para mí, porque nunca había realizado un patrón de manga, como les he comentado, siempre uso los patrones que traen las revistas de costura. Pero, realmente hoy eso no es un problema porque existe YouTube... jajajaja ... en la internet hay cualquier cantidad de videos que te muestran cómo hacerlo. Solo basta con navegar un poco y buscar uno que te guste la explicación, porque debo resaltar que hay varias técnicas para realizarlo. Lo siguiente, fue seguir paso a paso las instrucciones y en un dos por tres tenía el patrón de mi manga, no se asusten, no es ciencia de cohete.
Step 1:
The first thing I must clarify is that a sleeve pattern must be made for this blouse, we cannot take any sleeve from another blouse and copy it, because it has specific measurements. This point was a challenge for me, because I had never made a sleeve pattern, as I said, I always use the patterns that sewing magazines bring. But, really today that is not a problem because there is YouTube... hahaha ... on the internet there are any number of videos that show you how to do it. You just have to surf a little bit and look for one that you like the explanation, because I must emphasize that there are several techniques to do it. The next thing, was to follow step by step the instructions and in a two by three I had the pattern of my sleeve, don't be scared, it's not rocket science.
Paso 2:
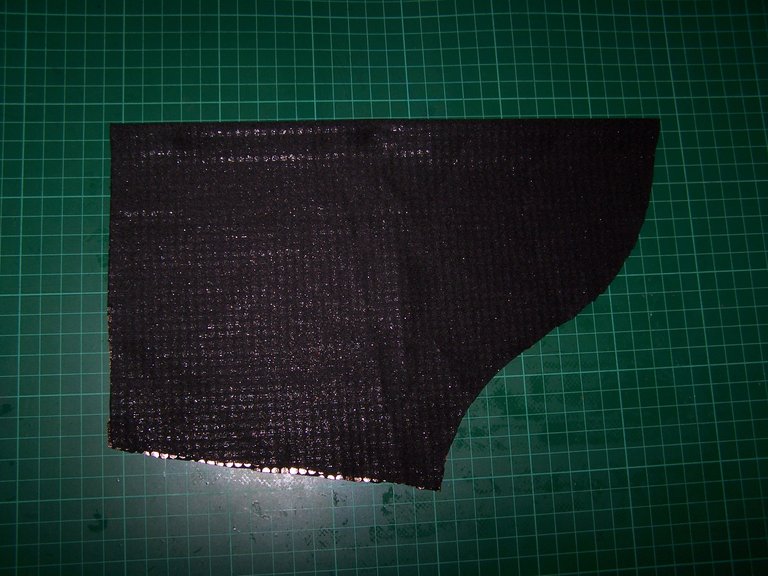
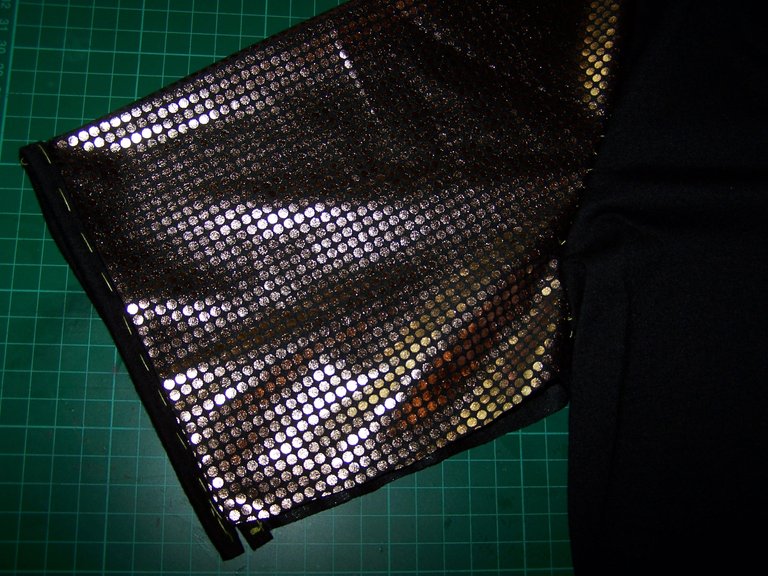
Como realice el patrón de una manga larga, simplemente decidí el largo que necesitaba y doble el exceso para poder cortar la manga en la tela. En este caso estaba usando una tela elástica, pero que estira más en un sentido que en el otro, si ese es su caso, debe tener la precaución, de colocar la parte que es menos elástica en el sentido del largo de la manga.
Step 2:
As I made the pattern for a long sleeve, I simply decided on the length I needed and folded the excess so I could cut the sleeve into the fabric. In this case I was using an elastic fabric, but that stretches more in one direction than the other, if that is your case, you must be careful, to place the part that is less elastic in the sense of the length of the sleeve.

Luego de marcada la manga en la tela lo siguiente es cortarla, en mi caso particular el patrón que realice, establece una parte delantera y una trasera. Por ello, se debe estar pendiente de realizar una pequeña marca indicando que corresponde al delantero, para no equivocarse.
After marking the sleeve on the fabric the next thing to do is to cut it, in my particular case the pattern I make, establish a front and a back. Therefore, you should be aware of making a small mark indicating that corresponds to the front, not to make a mistake.
Paso 3:
Ahora tocaba fijar las mangas a la blusa, pero antes debía preparar la blusa para ello, como tenía un pequeño sesgo en el borde de la sisa, se lo descocí, pero no lo descarte, lo guardé para usarlo en el borde de la manga. Además, descosí un poco la costura que une la parte delantera, de la trasera de la blusa, que queda a la altura de la axila.
Step 3:
Now it was time to fix the sleeves to the blouse, but first I had to prepare the blouse for this, as it had a small bias on the edge of the armhole, I unbuckled it, but I didn't discard it, I kept it to wear on the edge of the sleeve. I also unseamed the seam that joins the front to the back of the blouse, which is at armpit level.
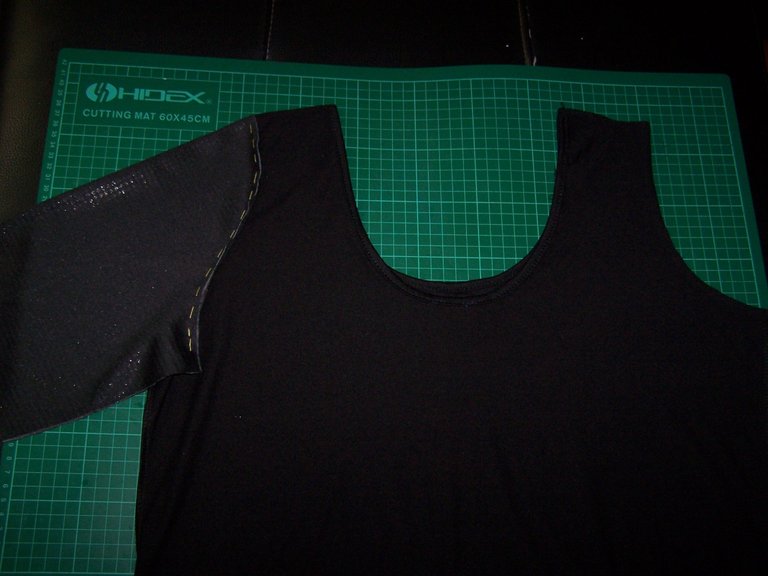
Ya estábamos listos para iniciar el pegado de la manga, lo primero es doblarla por la mitad y marcar el centro en la parte más alta de la curva. Ese centro, lo vamos a hacer coincidir, con la costura a la altura del hombro e iniciamos la basta a partir de ese punto hasta la axila en el lado frontal de la sisa y luego hacemos lo mismo pero en le parte trasera de la sisa. Ese mismo proceso lo hacemos en la otra manga y finalmente le pasamos costura con la máquina de coser y rematamos la costura.
We were ready to start punching the sleeve, the first thing is to fold it in half and mark the center at the top of the curve. That center, we will make it coincide, with the seam at shoulder level and we start the coarse from that point to the armpit on the front side of the armhole and then we do the same but in the back of the armhole. We do the same process on the other sleeve and finally we sew it with the sewing machine and finish it off.
Paso 4:
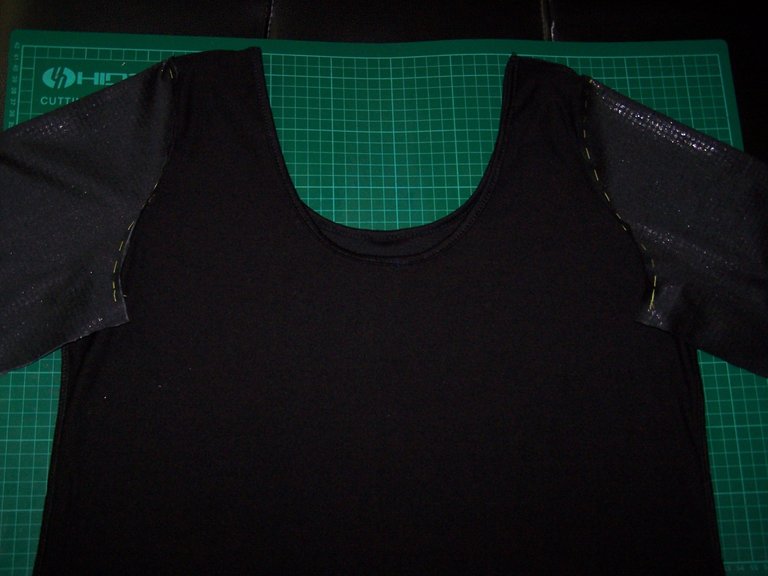
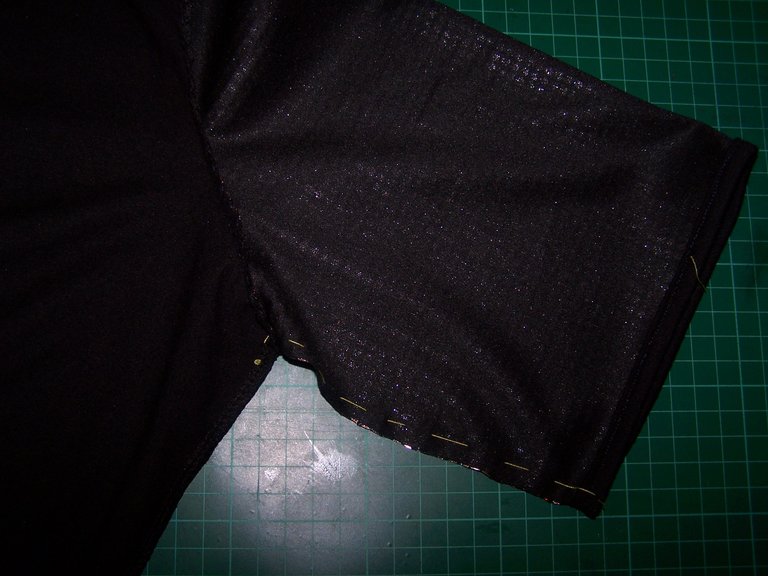
Ahora debemos cerrar las mangas, pero antes, debemos colocar el sesgo en el ruedo de la manga, recuerdan que habíamos reservado el que le quitamos al borde de la sisa, es el momento de usarlo. Como siempre lo basteamos y luego le pasamos la costura definitiva con la máquina.
Step 4:
Now we must close the sleeves, but first, we must place the bias in the sleeve ring, remember that we had reserved the one we took off at the edge of the armhole, it's time to use it. As always, we just put it on and then we pass the final stitching with the machine.
We are ready to close the sleeve, the first thing is to match the edges of the sleeve, we can help us by fixing the sides of the fabric with pins. We must check well, that we match everything very well so that there are no wrinkles in the seam and we can join the inside of the sleeve, including what we had previously unsewn. After that, we only need to machine stitch the sleeves and our blouse is transformed from armhole sleeve to short sleeve.
Paso 5:
Como detalle final, la maestra había comprado una linda aplicación de un búho, bordado en tonos metalizados, que combinaba con la tela de la manga, que como pudieron observar en las imágenes era negra con puntos dorados. Para pegar la aplicación simplemente basteamos la aplicación, en el lugar donde la queremos ubicar. Luego, le pasamos con mucho cuidado la costura a máquina por todo el borde, teniendo en cuenta usar un hilo de color lo más similar al color de la tela.
Step 5:
As a final detail, the teacher had bought a nice application of an owl, embroidered in metallic tones, which matched the fabric of the sleeve, which as you could see in the images was black with gold stitches. To paste the application we simply had to place it in the place where we wanted to place it. Then, we carefully machine stitch the entire edge, taking into account to use a thread color as similar as possible to the color of the fabric.
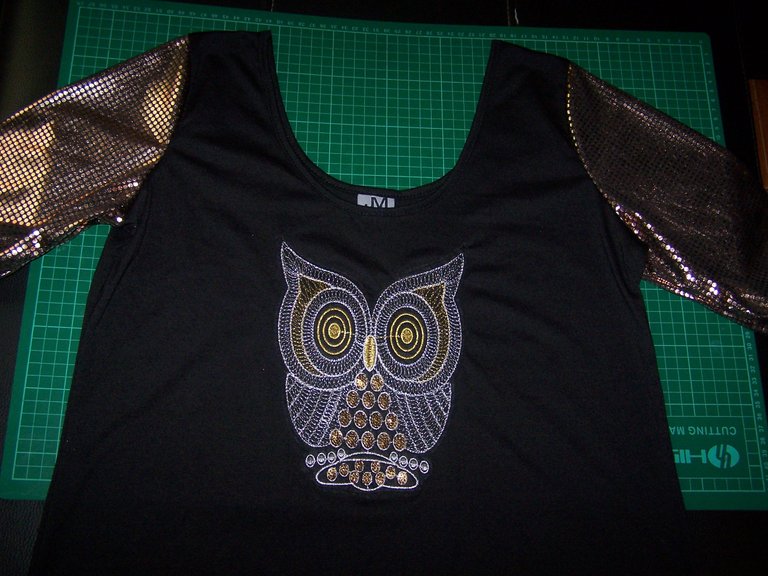
Well, we've already transformed our blouse, it now has nice short sleeves that match the application and our simple original blouse is now a thing of the past. I hope you liked the transformation that I did on this occasion and encourage you to look for that blouse you no longer use because, you do not like and give it a new life. Well, I say goodbye and remember to take care of yourself and your loved ones by complying with bio-security standards.
Contenido y fotografías de mi propiedad intelectual
Información Técnica
| Cámara | Pentax * istDL |
|---|---|
| Lente | * Pentax 18-55 |
| Iluminación | Luz Natural |
| Locación | Barcelona, Estado Anzoátegui, Venezuela |
Content and photographs of my intellectual property
Technical information
| Camera | Pentax * istDL |
|---|---|
| Lens | * Pentax 18-55 |
| Lighting | Natural Light |
| Location | Barcelona, Anzoátegui State, Venezuela |


FACEBOOK
https://www.facebook.com/Francy.Rossi.Rios.Rosas/posts/10223938208265697
TWITTER:
Gran trabajo.
excelente tutorial para modificar prendas de vestir. me recuerda a mi época de comegato, cuando le pegaba cosas rockeras a las franelas negras, un gran saludo.
Congratulations, your post has been upvoted by @dsc-r2cornell, which is the curating account for @R2cornell's Discord Community.
Enhorabuena, su "post" ha sido "up-voted" por @dsc-r2cornell, que es la "cuenta curating" de la Comunidad de la Discordia de @R2cornell.
Excelente trabajo
Congratulations @francyrios75! You have completed the following achievement on the Hive blockchain and have been rewarded with new badge(s) :
You can view your badges on your board And compare to others on the Ranking
If you no longer want to receive notifications, reply to this comment with the word
STOPDo not miss the last post from @hivebuzz: