
Son muchos los usuarios que están comenzando en Hiveblog en estos tiempos, de los cuales gran cantidad de ellos no tienen la mas mínima idea de como comenzar a realizar su primer post, muchos cometemos errores al escribir nuestra primera publicación por el desconocimiento de muchas cosas en ese momento (etiquetas, Markdoms, tamaño de la imágenes), una de las imágenes mas importantes es la portada de nuestro post que normalmente es la primera imagen que se encuentra en nuestra publicación, esa imagen representara nuestro post.
Hoy explicare el procedimiento que utilizo para realizar esta portada mediante el software photoshop. empecemos nuestro tutorial.
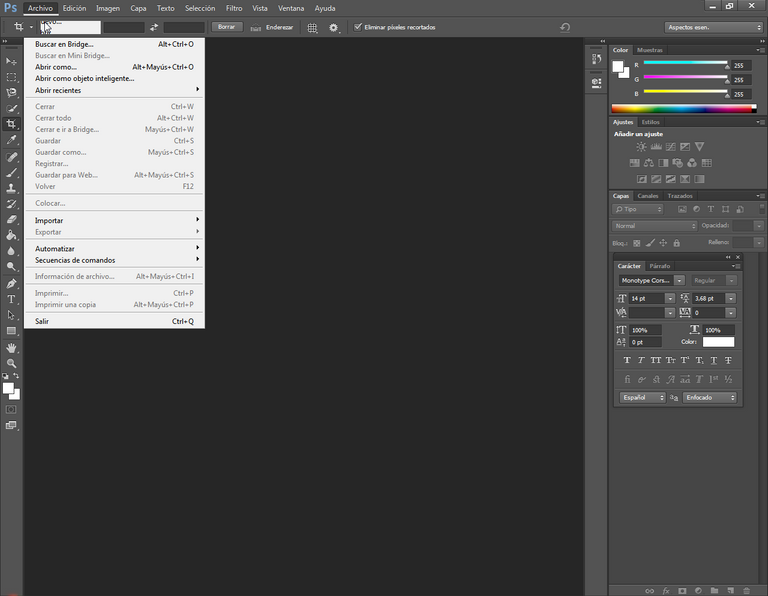
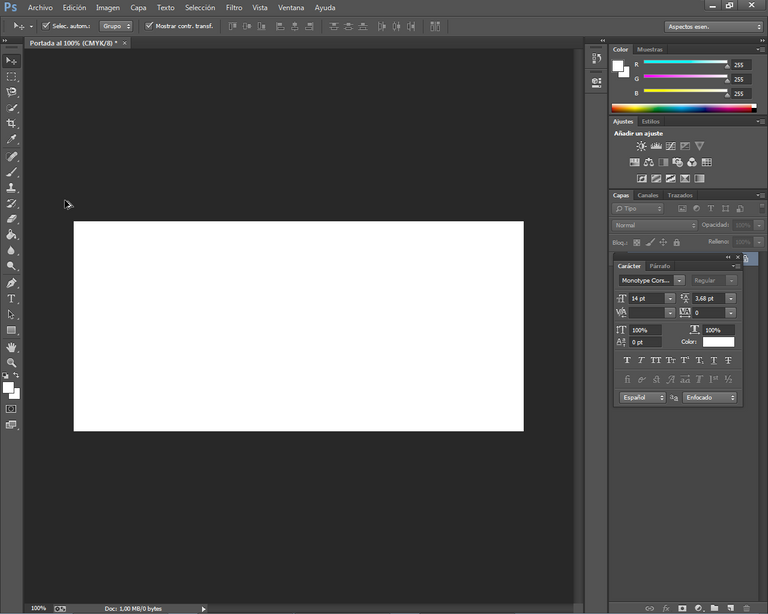
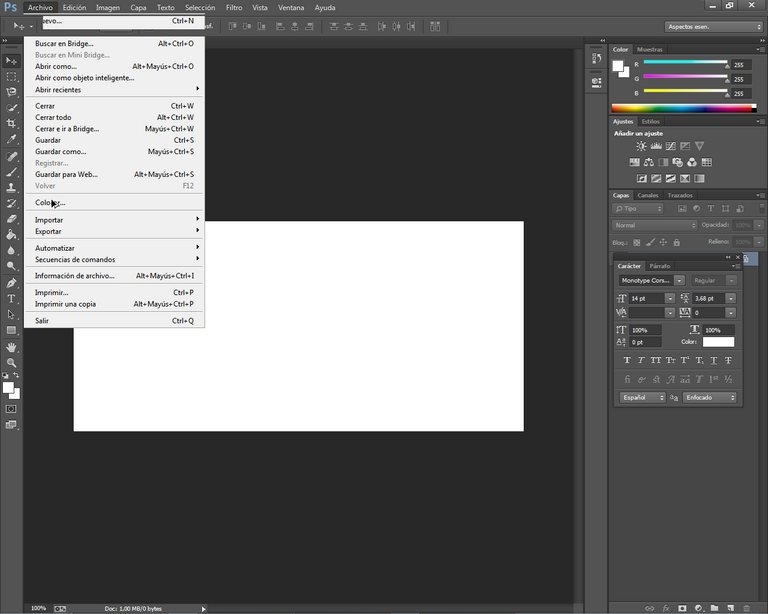
Lo primero seria abrir nuestro programa de edición en este caso sera el Software Adobe Photoshop, y vamos al menú archivo y creamos un nuevo lienzo de tamaño 750 pixeles de ancho por 350 pixeles de alto, este tamaño a mi me funciona muy bien. trabajamos a 300 pp y modo de color RGB.
There are many users who are starting in Hiveblog in these times, of which many of them do not have the slightest idea of how to start making their first post, many of us make mistakes when writing our first post due to the lack of knowledge of many things at that time (tags, Markdoms, image size), one of the most important images is the cover of our post which is usually the first image that is in our publication, that image will represent our post.
Today I will explain the procedure I use to make this cover using photoshop software. let's start our tutorial.
The first thing would be to open our editing program in this case will be the Adobe Photoshop software, and go to the file menu and create a new canvas size 750 pixels wide by 350 pixels high, this size works very well for me. we work at 300 pp and RGB color mode.

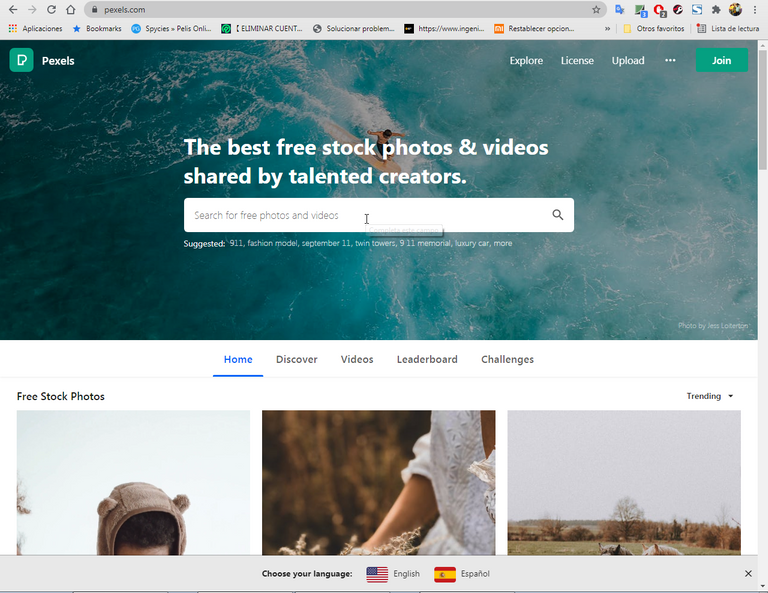
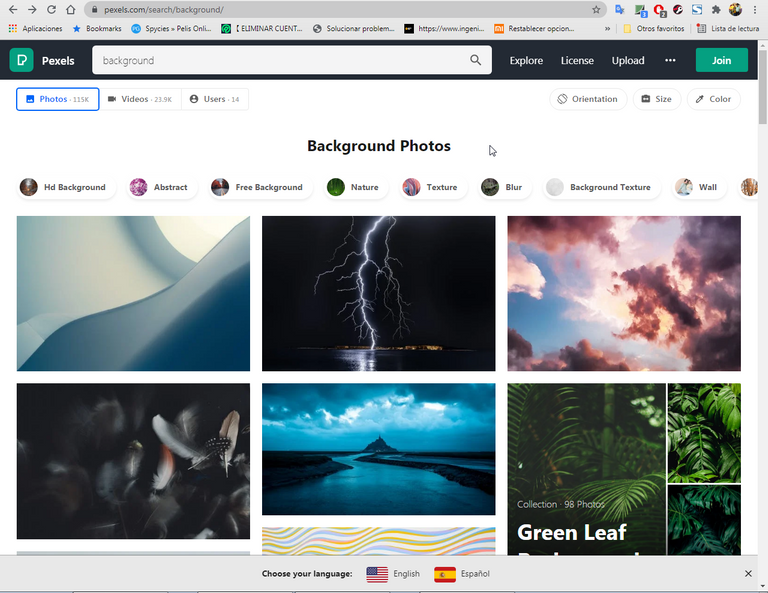
Ahora en en este paso colocamos nuestra imagen que queremos que sea nuestro fondo, en mi caso busque una imagen de fondo en www.pexel.com que dispone de una gran cantidad de imágenes libre de licencia y podemos usar sin ningún tipo de problema y no infringiremos la ley de copyright.
Now in this step we place our image that we want to be our background, in my case I looked for a background image in www.pexel.com that has a lot of license free images and we can use without any problem and we will not infringe the copyright law.
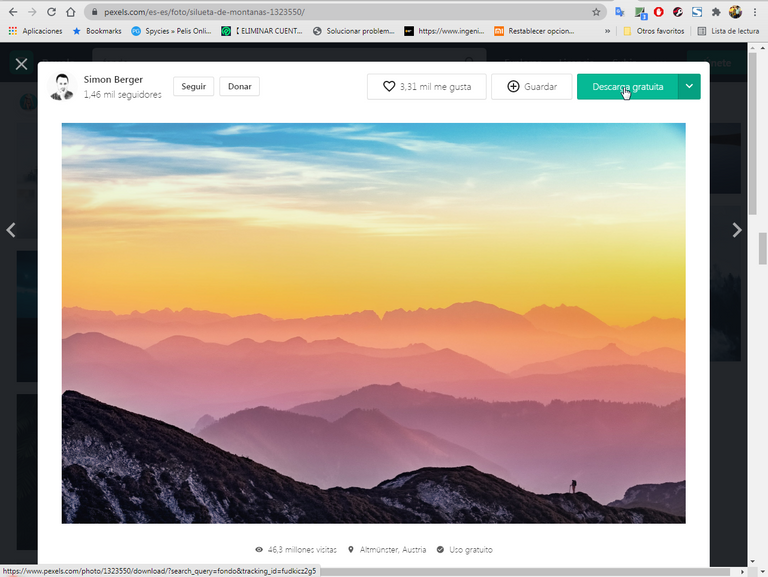
Una vez seleccionada la imagen la descargamos a nuestro computador siempre verificando que sea de libre de licencia.
Once the image is selected we download it to our computer always verifying that it is license free.
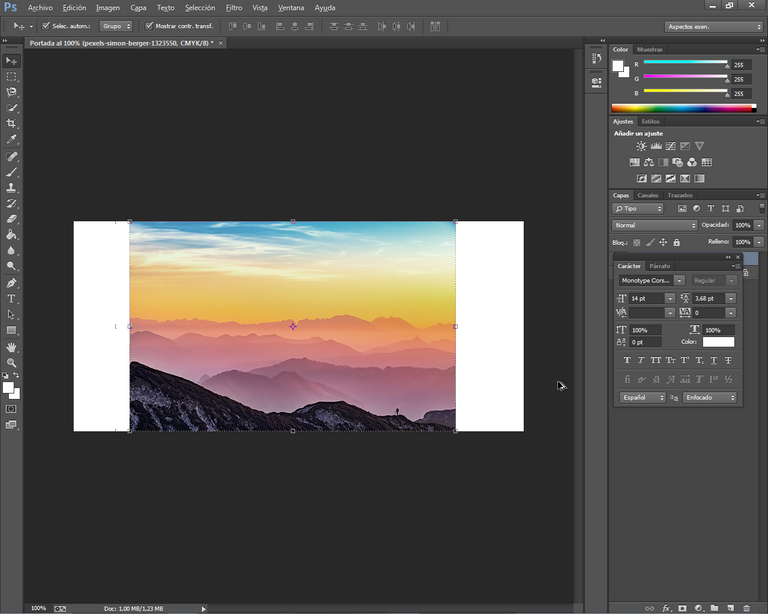
Desde el photoshop nos vamos a la pestaña archivo y buscamos colocar y presionamos clic, así de esta manera colocaremos nuestra imagen en el lienzo, si es de nuestra preferencia la ampliamos para cubrir el lienzo cuidando de hacerlo proporcionalmente y no se descuadre la imagen.
From photoshop we go to the file tab and look for place and click, in this way we will place our image on the canvas, if it is of our preference we enlarge it to cover the canvas taking care to do it proportionally and not to disarrange the image.

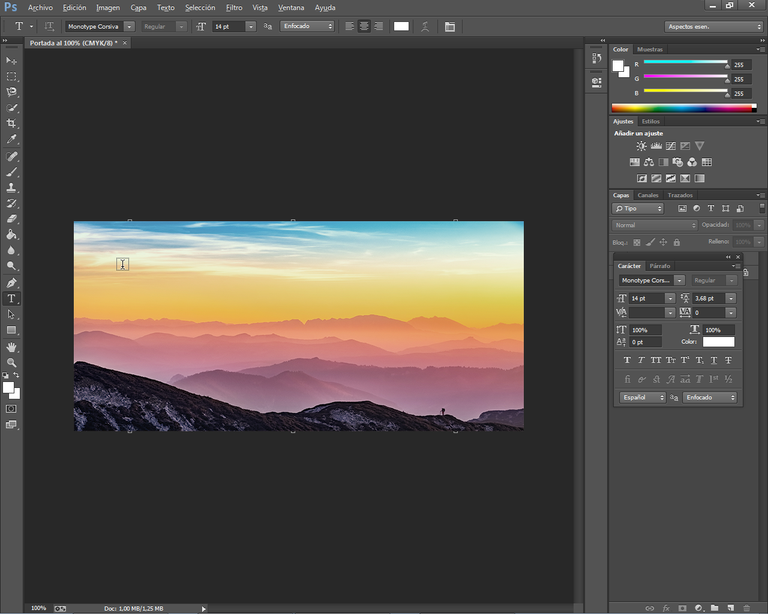
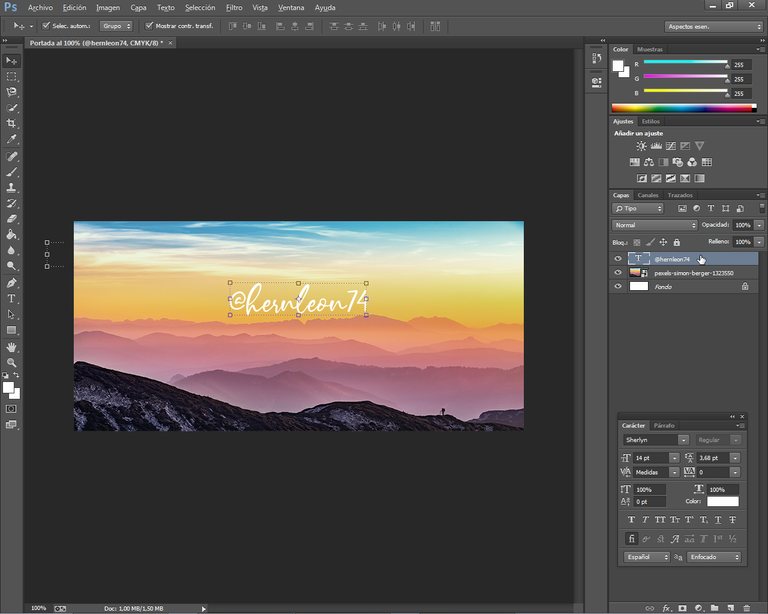
En este paso empezamos a colocar el texto que deseamos que contenga nuestra portada, por ejemplo el titulo y nombre del autor del post, para eso seleccionamos la herramienta texto escogemos el tipo de fuente, el tamaño y color, en mi caso escribí mi usuario.
In this step we begin to place the text that we want to contain our cover, for example the title and name of the author of the post, for that we select the text tool choose the font type, size and color, in my case I wrote my user.
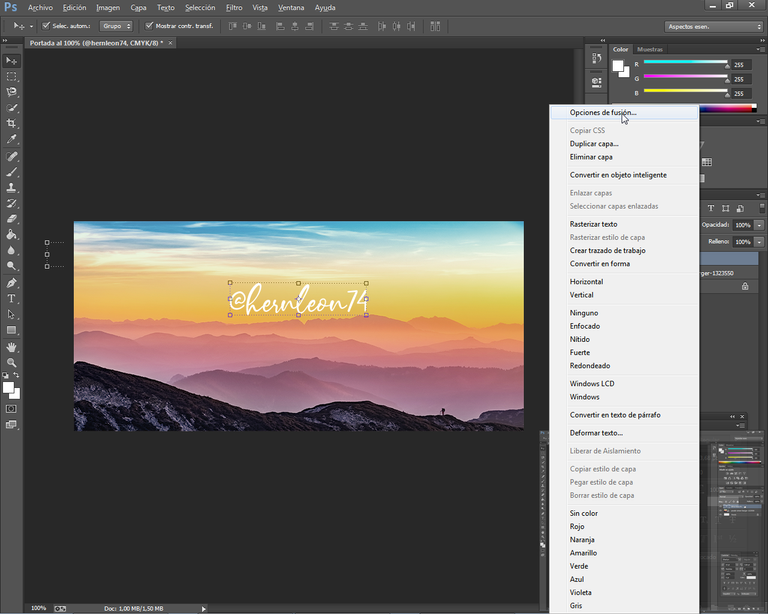
Ahora vamos a seleccionar la capa que contiene el texto con el nombre de usuario y hacemos clic en el botón derecho del mouse y se despliega un menú donde seleccionamos opciones de fusión que es la primera que aparece.
Now let's select the layer containing the text with the user name and click on the right mouse button and a menu appears where we select blending options, which is the first one that appears.
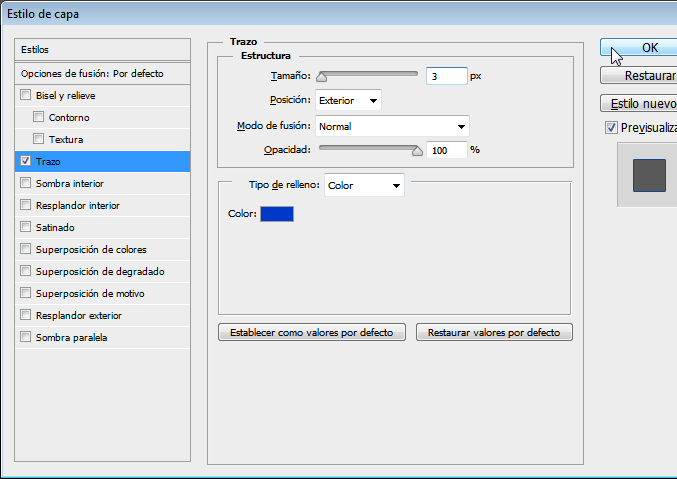
Seleccionamos trazo y escojamos el color de nuestra preferencia para el borde de la letra, en mi caso sera el azul. damos ok y estará listo el texto, lo ubicamos en una buena posición y procedemos a escribir el otro texto.
We select stroke and choose the color of our preference for the border of the letter, in my case it will be blue. We give ok and the text will be ready, we place it in a good position and proceed to write the other text.
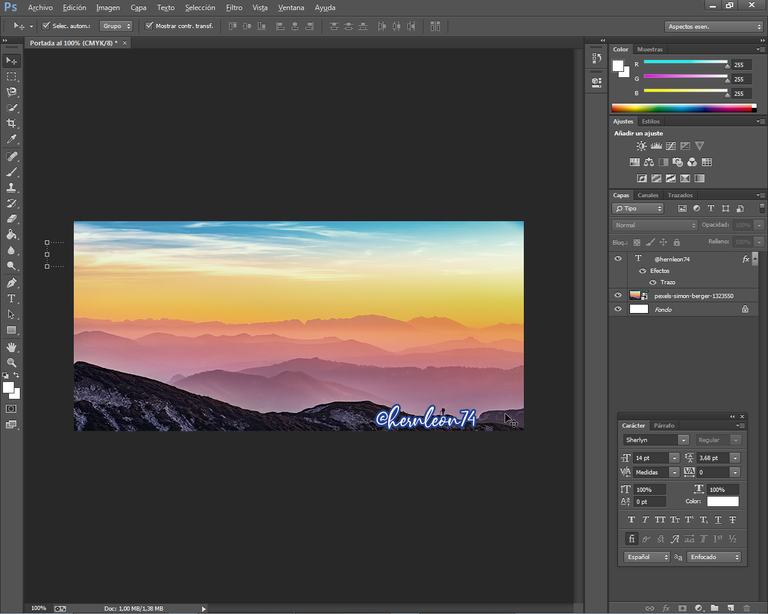
De la misma manera colocamos el titulo en color amarillo y trazo de color negro, realizamos el mismo procedimiento que con el nombre de usuario.
In the same way we place the title in yellow color and black stroke, we perform the same procedure as with the user name.
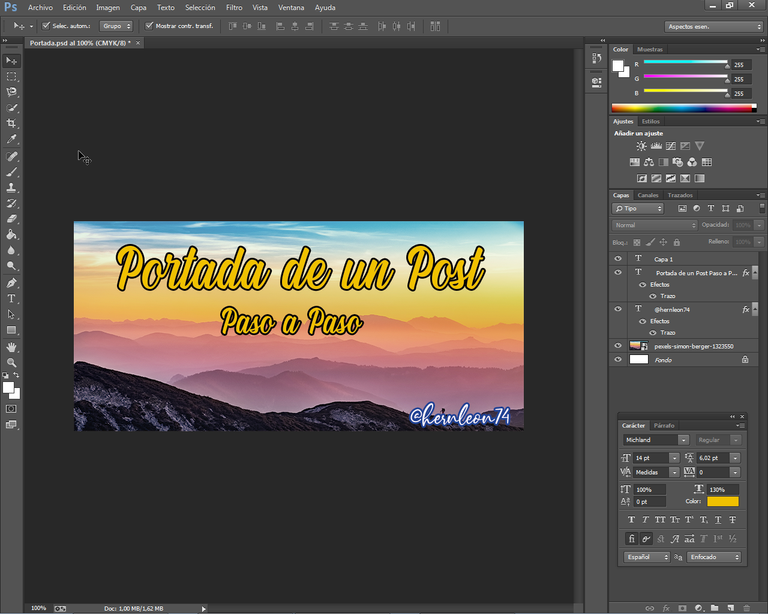
Ya una vez terminado de dar el formato al texto se puede dar por terminado el diseño, solo queda es guardar el trabajo.
Once you have finished formatting the text you can finish the design, the only thing left to do is to save the work.

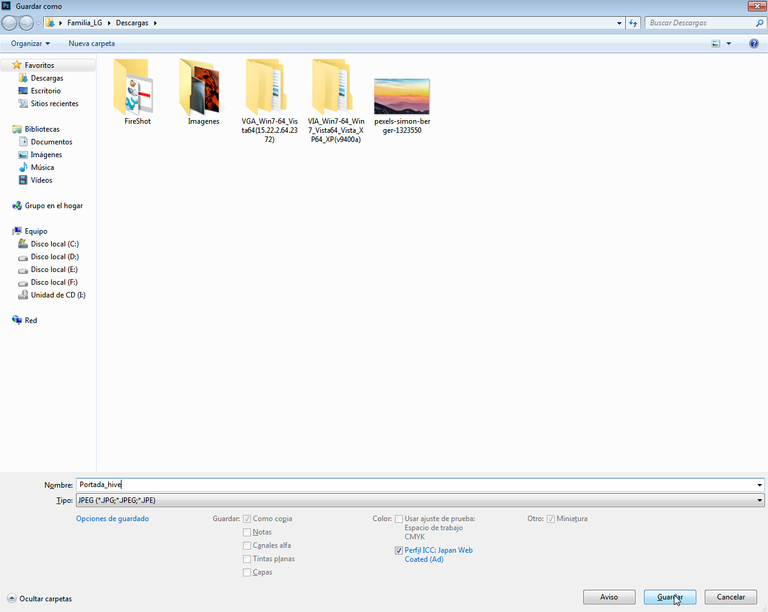
Para guardar el trabajo vamos a la pestaña Archivo y seleccionamos Guardar Como..., nos preguntara donde queremos guardar y en que tipo de archivo
To save the work we go to the File tab and select Save As..., it will ask us where we want to save and in which file type.

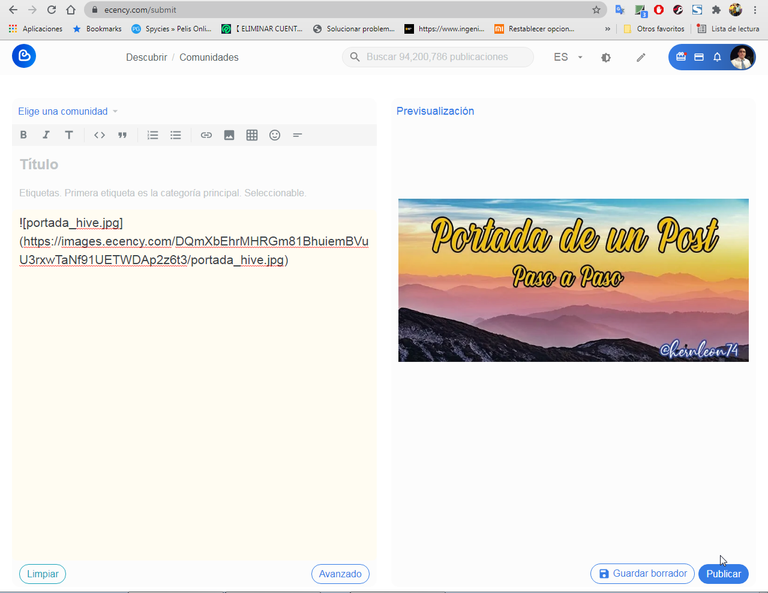
Y ya tenemos terminada nuestra portada para nuestras publicaciones de una manera sencilla, en este caso se diseño con Photoshop pero puede usarse cualquier programa de diseño o también se puede usar un procesador de texto como Word u otro. En otro post explicare como trabajar en word.
Un punto importante es que todas las imágenes deben de tener el mismo ancho
And now we have finished our cover for our publications in a simple way, in this case it was designed with Photoshop but you can use any design program or you can also use a word processor like Word or another. In another post I will explain how to work in Word.
An important point is that all images must have the same width.


Congratulations @hernleon74! You have completed the following achievement on the Hive blockchain and have been rewarded with new badge(s) :
Your next target is to reach 3000 upvotes.
You can view your badges on your board and compare yourself to others in the Ranking
If you no longer want to receive notifications, reply to this comment with the word
STOPTo support your work, I also upvoted your post!
Check out the last post from @hivebuzz: