Hello everyone!Today I'm going to show you how to make a fade starting from guide number one in a quick and easy way.
¡Hola que tal a todos! el día de hoy les voy a enseñar a cómo hacer un desvanecido iniciando desde la guía número uno de manera fácil y rápida.
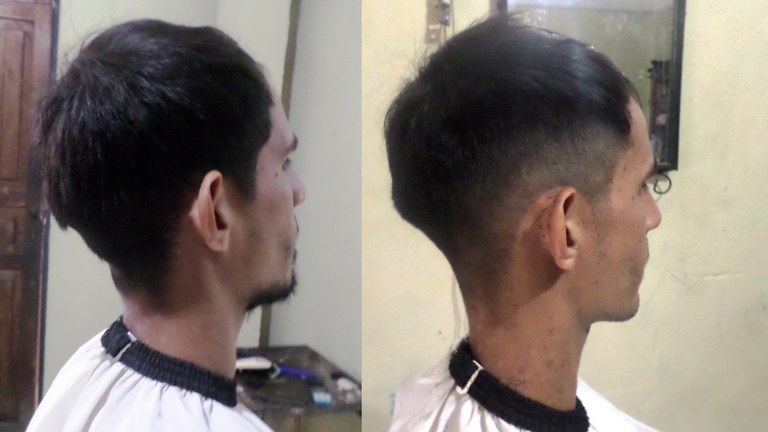
The first thing we are going to do is to make our first mark with the guide number 1 with the lever upwards, usually this mark starts from the middle of the head and at the back leaving a drop so that it does not look too straight and also looks better.
Lo primero que vamos a realizar es nuestra primera marca con la guía número 1 con la palanca hacia arriba, por lo general, ésta marca comienza desde la mitad de la cabeza y en la parte de atrás dejando una caída para que no se vea muy recto y también quede mejor.
Then, we take the guide number 2 also leaving the lever upwards and mark above the line already made another one of approximately 2 centimeters, make sure that these lines are well marked so that later it will not be difficult to erase them, very important: use a comb to clean the area where we pass the machine and see better those small details to leave the cut as impeccable as possible.

Luego, tomamos la guía número 2 igualmente dejando la palanca hacia arriba y marcamos por encima de la línea ya hecha otra de aproximadamente 2 centímetros, asegúrate de que estén bien marcadas estas líneas para que luego no nos cueste borrarlas, muy importante: utilizar un peine para ir limpiando la zona en donde pasamos la máquina y ver mejor esos pequeños detalles para dejar el corte lo más impecable posible.
Now, we take the guide number 1.5 to eliminate our first line, we are going to raise it only 1 centimeter, so we do not raise the lines of the cut so much and the fading is better, we always use the technique of "muñequeo" or as it is also known "cuchareo", since this technique will help us a lot to not create lines. Next, we fit the guide number 1 to the machine with the lever at ¼ without lowering it completely and thus we finish erasing the first line better.
Ahora, tomamos la guía número 1.5 para eliminar nuestra primera línea, esta la vamos a subir tan solo 1 centímetro, así no subimos tanto las líneas del corte y se nos vea el desvanecido mejor, siempre utilizamos la técnica de muñequeo o como también se conoce cuchareo, ya que, esta técnica nos va a ayudar mucho a no crear líneas. Seguidamente, encajamos la guía número 1 a la máquina con la palanca en ¼ sin bajarla completamente y así terminamos de borrar mejor la primera línea.

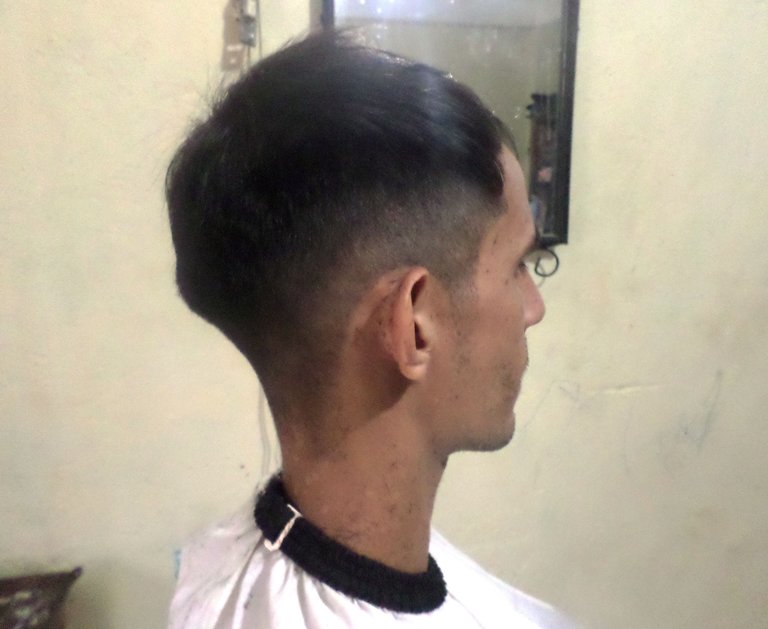
Once finished we go to the top, there is a technique called machine on comb, it is to support the comb between the fade, in this case the guide number 2 and the top of the hair in order to join them and finish with the fade. Finally, we will take our razor to make the contour or the edges of the hair, in this case I made a classic contour, with the thick sideburn and the square back, this will always depend on how is the taste of our client.
Una vez concluido nos vamos hacia la parte superior, existe una técnica que se llama máquina sobre peine, se trata de apoyar el peine entre el desvanecido, en este caso la guía numero 2 y la parte superior del cabello para así unirlos y terminar con el desvanecido. Por último, tomaremos nuestra navaja para realizar el contorno o las orillas del cabello, en este caso hice un contorno clásico, con la patilla gruesa y la parte trasera cuadrada, esto siempre va a depender de cómo sea el gusto de nuestro cliente.
Well, this is how I finished this classic haircut (faded), very practical to learn when we are starting as barbers. In this job you should never give up, barbering is not easy, it requires a lot of effort but with practice everything is possible and with the passing of the days you will see the fruits.
Y bien, así he finalizado este corte de cabello clásico (desvanecido), muy práctico para aprender cuando estamos iniciando como barberos. En este trabajo nunca hay que rendirse, la barbería no es fácil, requiere de mucho esfuerzo pero con práctica todo se puede y con el paso de los días se ven los frutos.