Saludos mis amigos, Dios bendiga sus vidas esperando siempre se encuentren bien.
Greetings my friends, God bless your lives hoping you are always well.

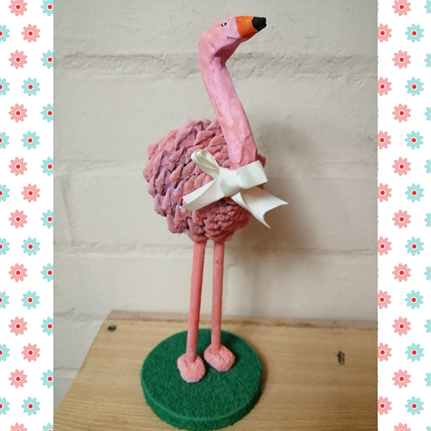
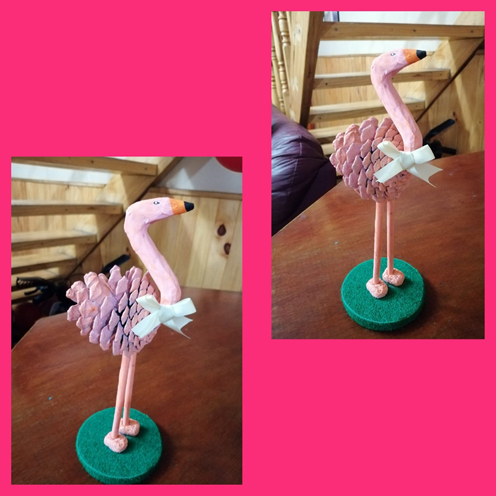
Hoy les traigo unos hermosos flamencos decorativos, son muy fáciles de hacer y bastante hermosos.
Today I bring you some beautiful decorative flamingos, they are very easy to make and quite beautiful.
Esperando siempre a que te animes a recrear cada cosa aprendida, y si puede ser con material de reciclaje creo que te hará sentir muchísimo mejor, es una forma de aportar con nuestro planeta y su cuidado.
Always waiting for you to be encouraged to recreate each thing learned, and if it can be with recycling material I think it will make you feel much better, it is a way to contribute to our planet and its care .
MATERIALES
MATERIALS
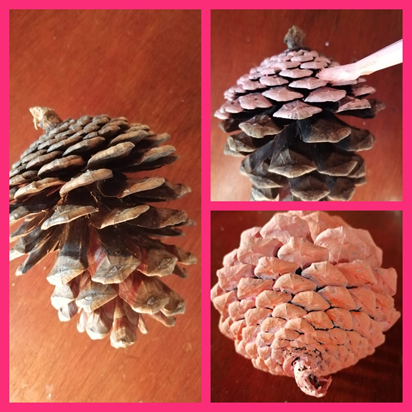
1. Un pino.
1. A pine.
2. Papel de aluminio.
2. Aluminum foil.
3. Papel periódico.
3. Newsprint.
4. Pistola y barra de silicon.
4. Gun and silicone bar.
5. Brochetas (palos de altura).
5. Skewers (tall sticks).
6. Cartón.
6. Cardboard.
7. Goma eva.
7. Eva rubber.
8. Pinceles.
8. Brushes.
9. Cinta.
9. Tape.
10. Pegamento blanco.
10. White glue .
PASOS A SEGUIR
STEPS TO FOLLOW
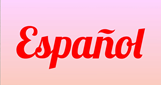
• Primer paso: Con una brocheta o palo de altura y un trozo de periódico tomamos por la punta del papel y enrollamos hasta hacer unos palos de periódico. Estas serían las piernas. Luego tomamos dos cuadros de papel aluminio (medida al gusto) y los arrugaremos para hacer las patas, es necesario irle dando la forma deseada. Una vez listas las piernas y patas del flamenco con una brocheta abrimos unos pequeños orificios en cada pata y en cada palo de periódico introducimos unas brochetas para darle soporte al flamenco. Como último paso en este primer proceso procedemos a pegar las piernas de las patas.
• First step: With a skewer or stick of height and a piece of newspaper we take by the end of the paper and we roll up to make some newspaper sticks. These would be the legs. then we take two squares of aluminum foil (measure to taste) and we will crumple them to make the legs, it is necessary to give it the desired shape. Once the legs and legs of the flamingo are ready with a skewer, we open some small holes in each leg and in each stick of newspaper we insert some skewers to support the flamingo. As the last step in this first process we proceed to glue the legs of the legs.
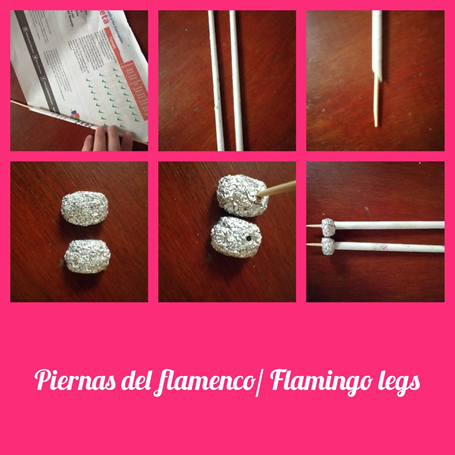
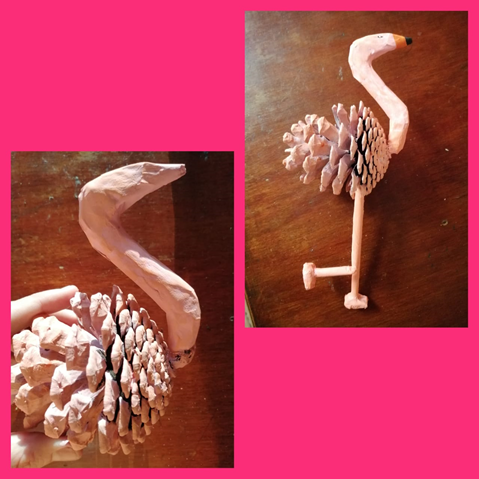
• Segundo paso: Tomamos papel de aluminio y realizamos el torso del flamenco, esto es algo que debemos hacer poco a poco hasta que vaya tomando forma. Luego de tener la forma deseada con cinta de papel forramos nuestra figura, esto ayudara a darle dureza a la pieza y con trozos de periódico y un poco de pegamento blanco sellamos el torso. Una vez seco lo pintamos.
• Second step: We take aluminum foil and make the flamenco torso, this is something that we must do little by little until it takes shape. After having the desired shape with paper tape we cover our figure, this will help to give the piece hardness and with pieces of newspaper and a little white glue we seal the torso. Once dry we paint it.
• Tercer paso: Pintamos el pino, yo use rosa y naranja los mismos colores usados en el resto del flamenco. Una vez secas todas las piezas realizamos el armado.
• Third step: We painted the pine, I used pink and orange of the same colors that are used in the rest of the flamingo. Once all the pieces are dry, we carry out the assembly.
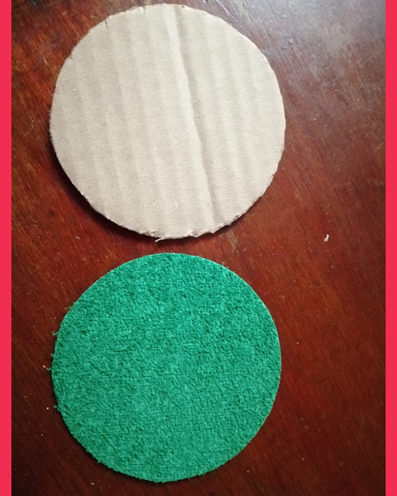
• Cuarto paso: Para finalizar recortamos 3 círculos de cartón (medida al gusto), y con goma eva los forramos esta sería la base donde va en flamenco.
• Fourth step: To finish we cut out 3 cardboard circles (measure to taste), and with eva rubber we cover them, this would be the base where it goes in flamenco.
Quedándonos este hermosos resultado.
Keeping this beautiful result.
Todas las fotos son de mi autoria/ All photos are my authorship
Hasta un próximo post, me despido con amor @jayoxaju 😍
Until a next post, I say goodbye with love @jayoxaju😍

Hermoso trabajo, te felicito!
Hola @giocondina, gracias amiga. Un fuerte abrazo.
¡Felicidades! Esta publicación obtuvo upvote y fue compartido por @la-colmena, un proyecto de Curación Manual para la comunidad hispana de Hive que cuenta con el respaldo de @curie.
Si te gusta el trabajo que hacemos, te invitamos a darle tu voto a este comentario y a votar como testigo por Curie.
Si quieres saber más sobre nuestro proyecto, acompáñanos en Discord: La Colmena.
@la-colmena gracias por el apoyo.