Un saludo a todos. Hoy quiero enseñarte a crear texto con textura o piel de peluche en Adobe Illustrator 2020, te invito para que sigas este mini tutorial y el paso a paso para que sepas como hacerlo por si en algún momento necesitas a hacer algo parecido.
Greetings to all. Today I want to teach you how to create text with texture or fur in Adobe Illustrator 2020, I invite you to follow this mini tutorial and the step by step so you know how to do it in case you ever need to do something similar.
Programa utilizado: Adobe Illustrator 2020/ Program used: Adobe Illustrator 2020.

PASO 1 / STEP 1
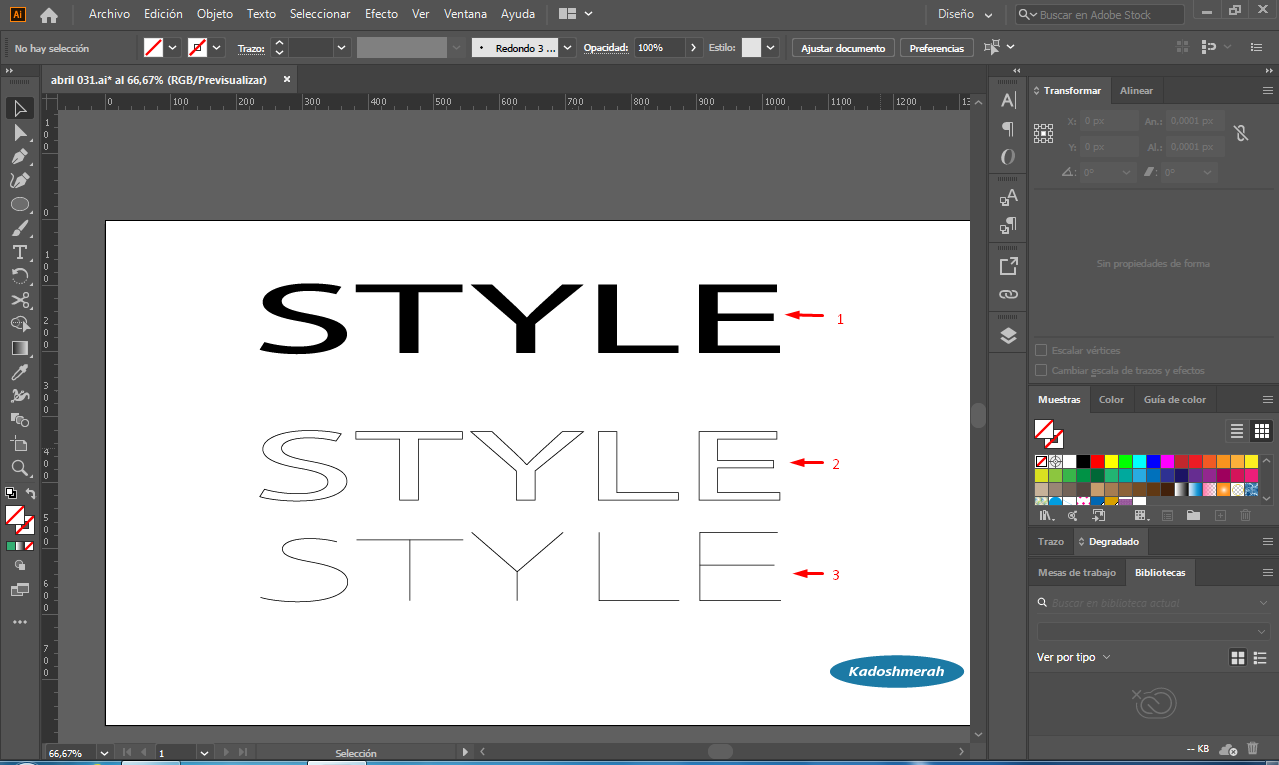
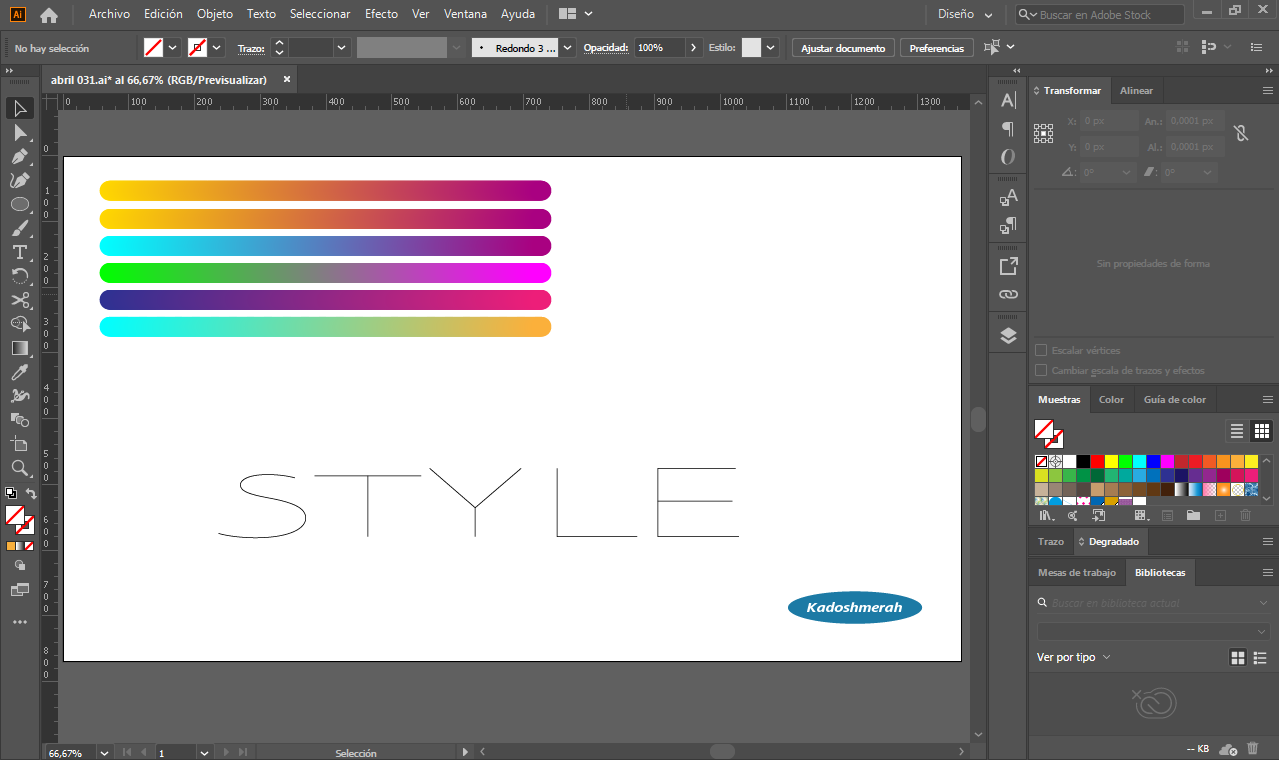
Lo primero que vamos a hacer es crear un texto para este ejemplo usare la palabra style y luego que la hayamos escrito expandimos su apariencia (1) luego de expandirlo, le quitamos el relleno (2) y con la herramienta cuchilla eliminamos algunas líneas del texto quedándonos solo con el esqueleto de las letras (3) y es con esta estructura con la cual vamos a trabajar hoy.
The first thing we are going to do is create a text for this example using the word style and after we have written it we expand its appearance (1) after expanding it, we remove the filling (2) and with the knife tool we remove some lines of text leaving only the skeleton of the letters (3) and it is with this structure that we are going to work today.
PASO 2/ STEP 2
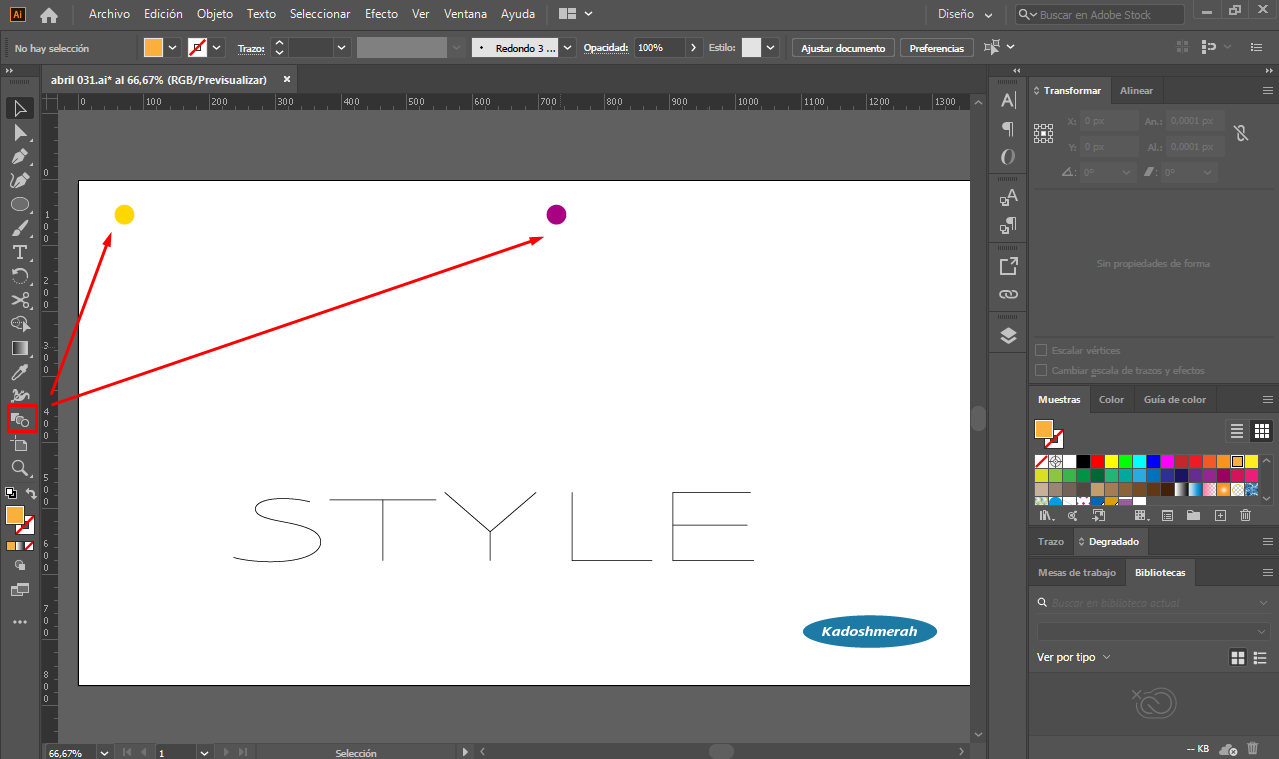
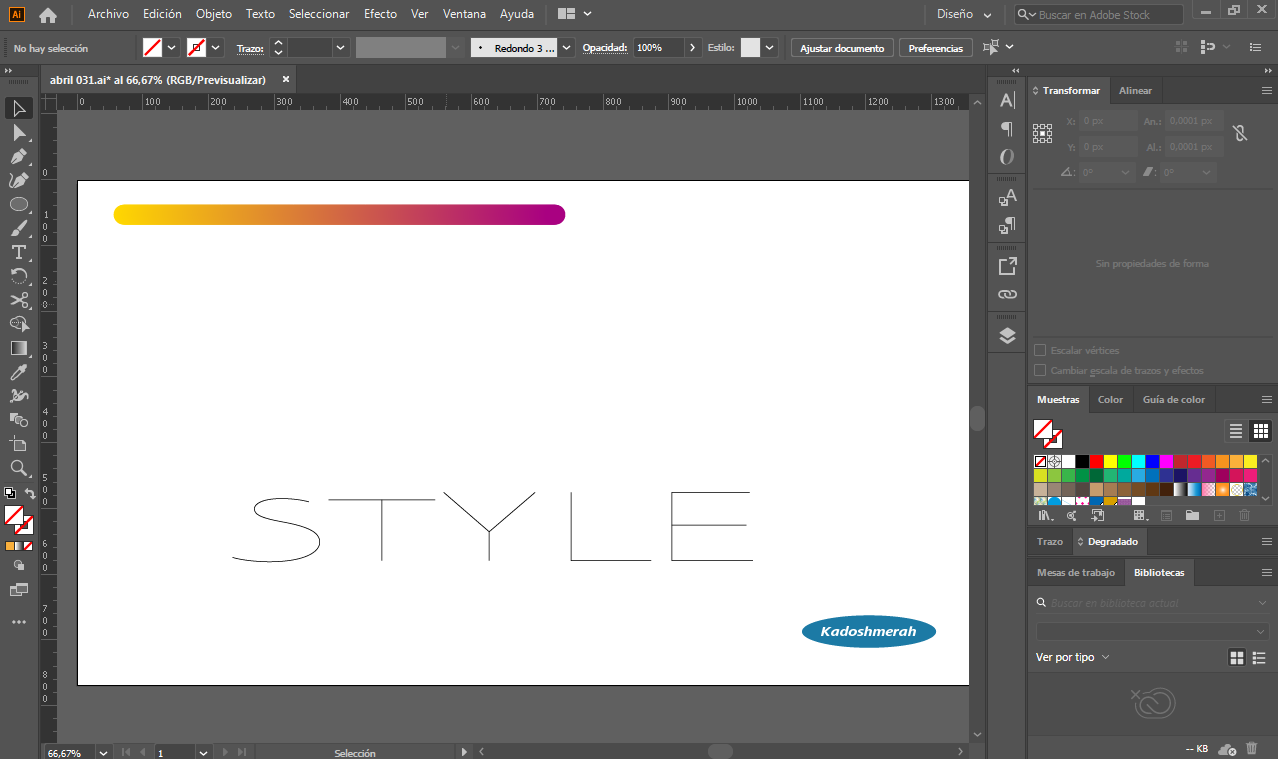
Vamos a crear una paleta de colores con la herramienta fusión. Para ello hacemos dos círculos a los cuales les damos color, y con la herramienta fusión creamos esta transición de color. Y luego hacemos otras transiciones con otros colores.
Let's create a color palette with the Fusion tool. To do this we make two circles to which we give color, and with the fusion tool we create this color transition. And then we make other transitions with other colors.
PASO 3/ STEP 3
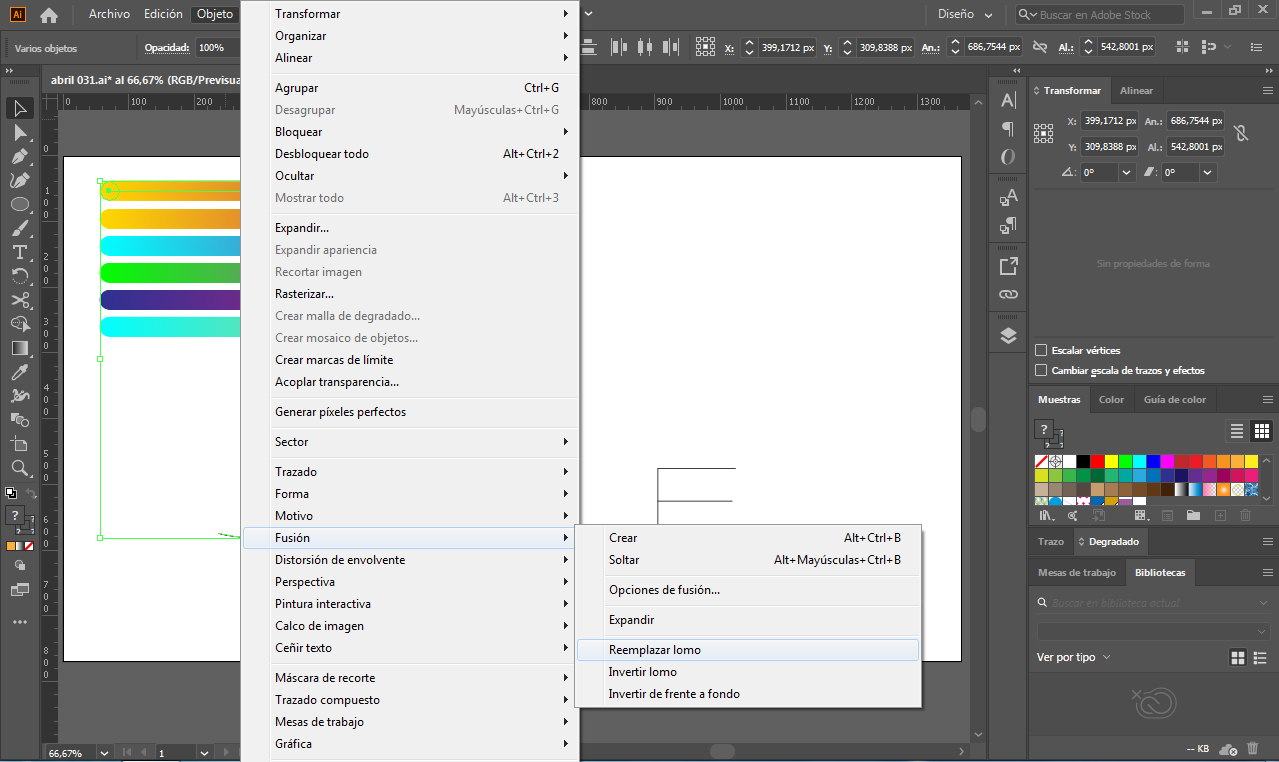
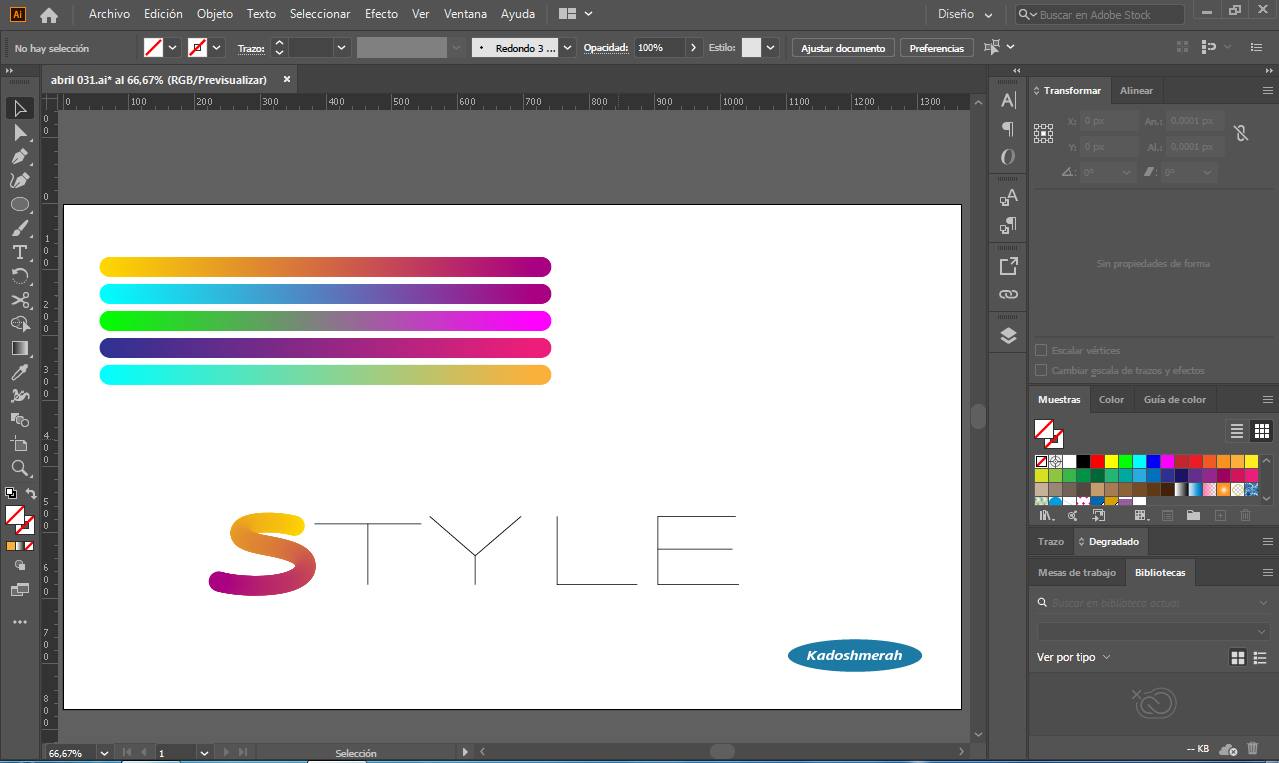
Lo que vamos a hacer ahora, es seleccionar una transición de color y una línea de las letras, y nos vamos al menú objeto>fusión>reemplazar trazo o lomo. Y así vamos a ir haciendo en cada una de las partes de cada letra e ir variando también los colores.
What we are going to do now, is to select a color transition and a line of the letters, and we go to the menu object>merge>replace stroke or spine. And that's how we're going to do each part of each letter and vary the colours as well.
PASO 4/ STEP 4
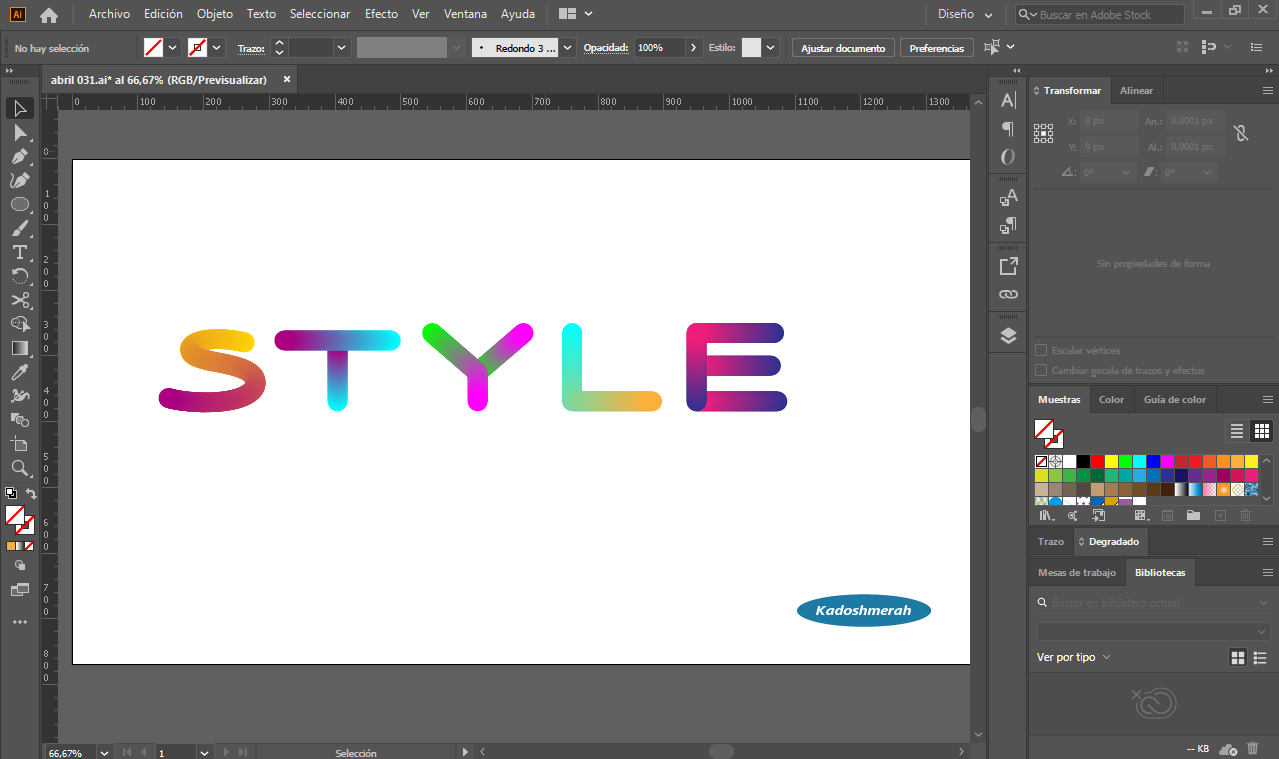
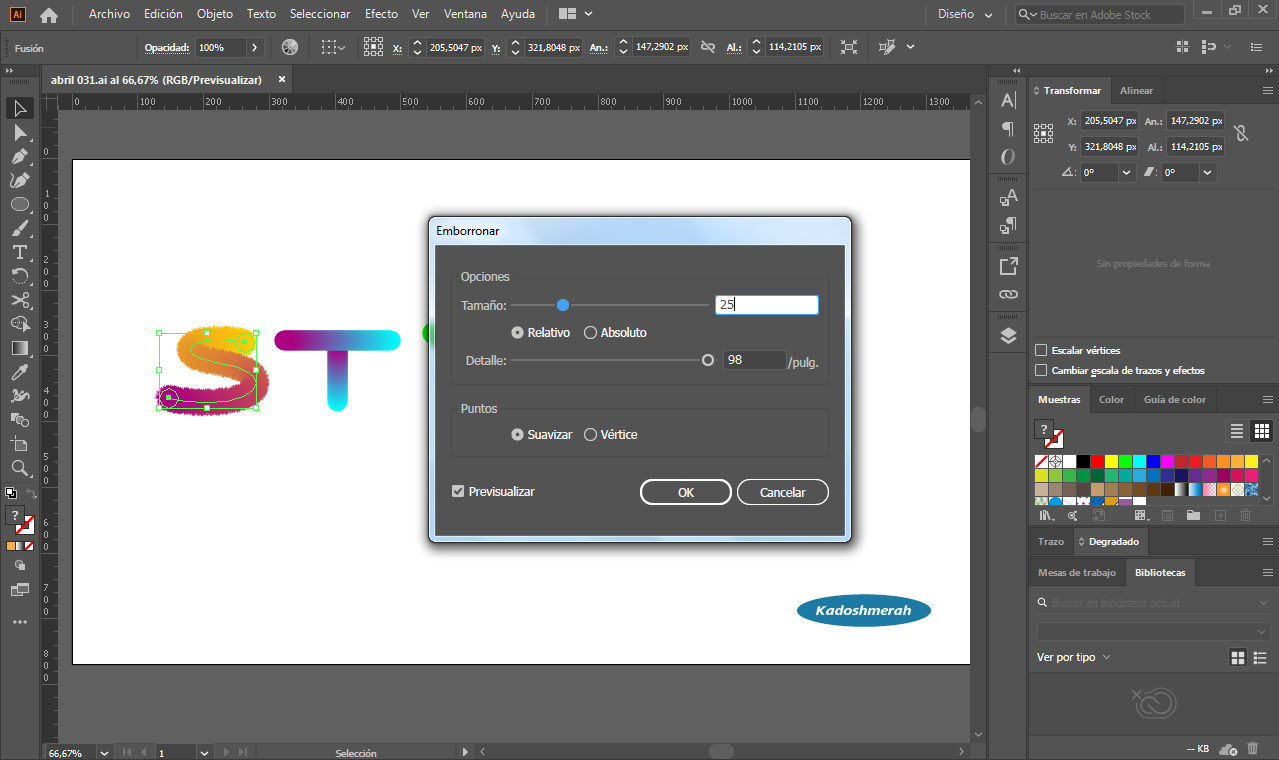
Ahora vamos a aplicar nuestro efecto de piel de peluche a cada letra. Para ello nos vamos al menú efecto >transformar >emborronar y establecemos los valores de la imagen siguiente.
Now let's apply our stuffed animal effect to each letter. To do this, go to the menu effect >transform >blur and set the values in the image below.
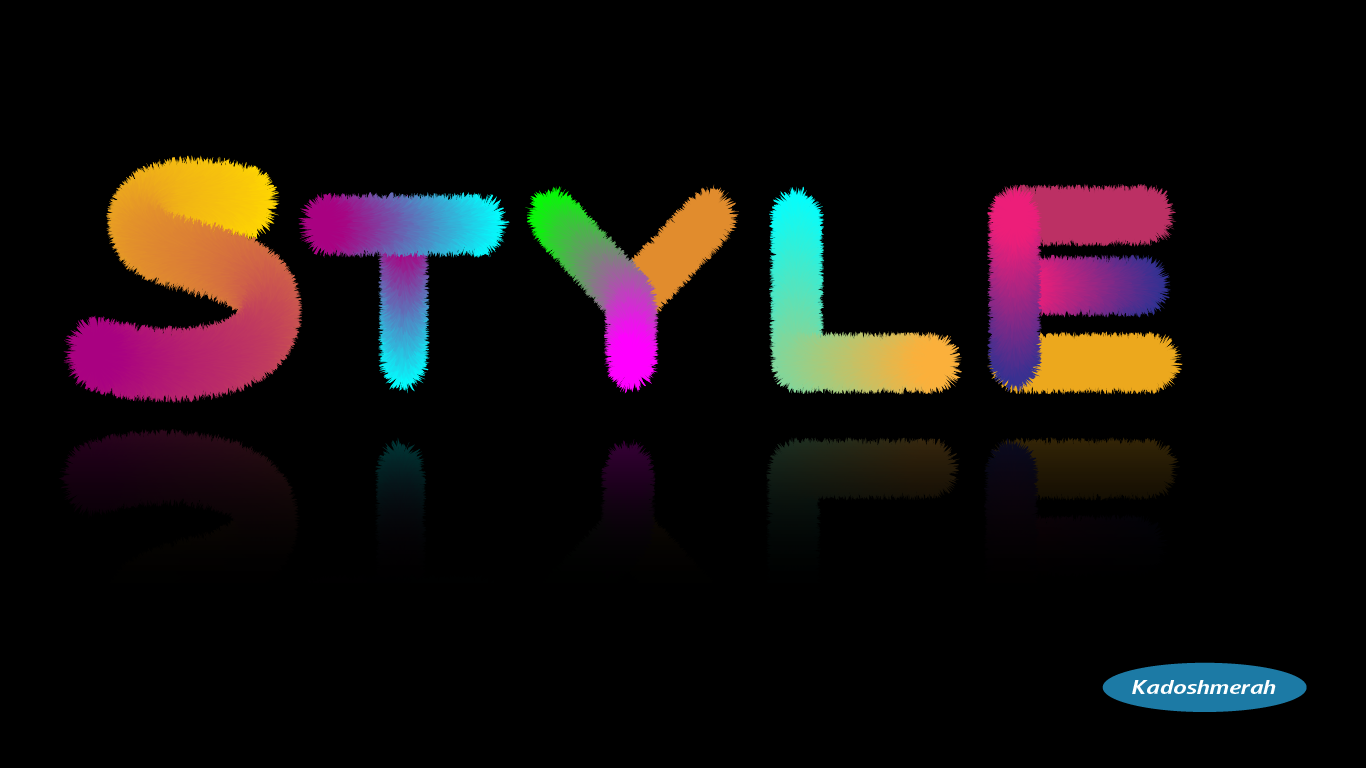
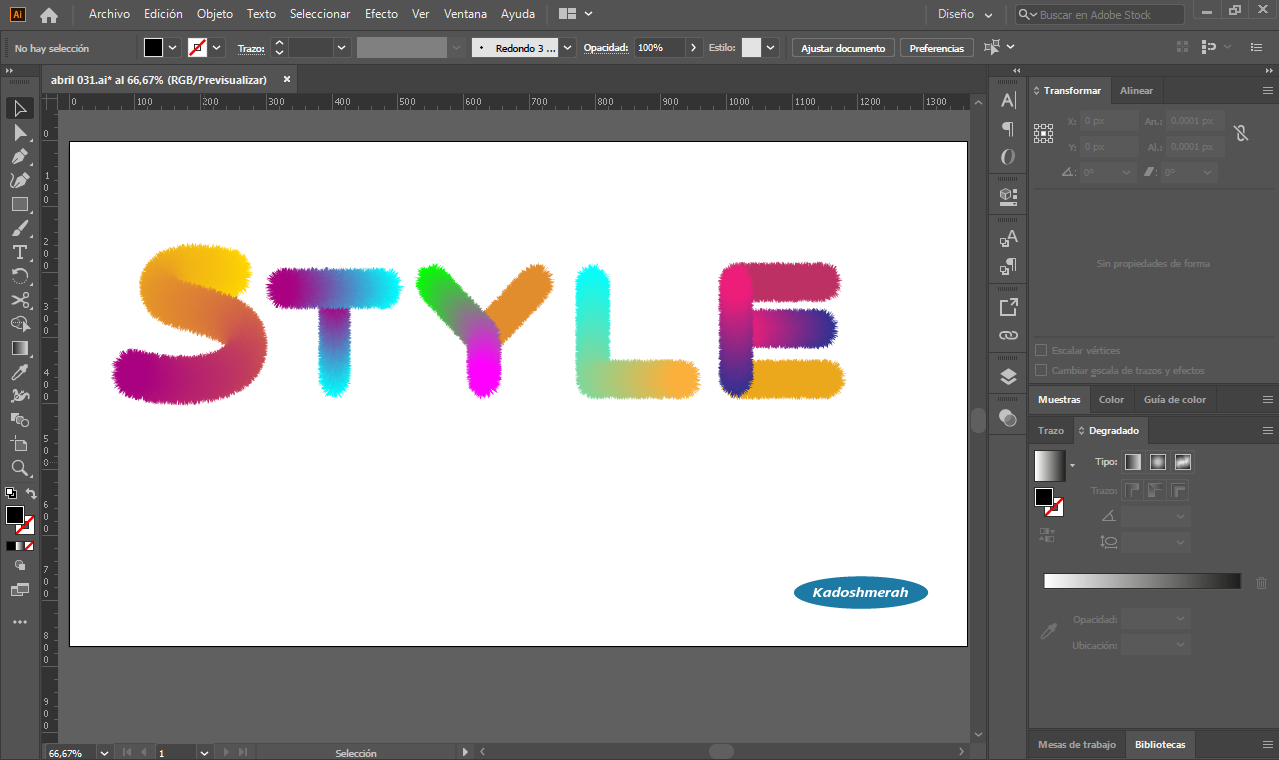
Quedándonos algo así.
By staying something like this.
Por ultimo establecemos un fondo y un reflejo para nuestra presentación, esperando que te haya gustado, me despido por hoy hasta una nueva oportunidad.
Finally we establish a background and a reflection for our presentation, hoping that you liked it, I say goodbye for today until a new opportunity.

Soy kadoshmenorah y hasta una próxima oportunidad y no olvides dejar tus comentarios acá abajo.

Un saludo a todos. Hoy quiero enseñarte a crear texto con textura o piel de peluche en Adobe Illustrator 2020, te invito para que sigas este mini tutorial y el paso a paso para que sepas como hacerlo por si en algún momento necesitas a hacer algo parecido.
Greetings to all. Today I want to teach you how to create text with texture or fur in Adobe Illustrator 2020, I invite you to follow this mini tutorial and the step by step so you know how to do it in case you ever need to do something similar.
Programa utilizado: Adobe Illustrator 2020/ Program used: Adobe Illustrator 2020.
Lo primero que vamos a hacer es crear un texto para este ejemplo usare la palabra style y luego que la hayamos escrito expandimos su apariencia (1) luego de expandirlo, le quitamos el relleno (2) y con la herramienta cuchilla eliminamos algunas líneas del texto quedándonos solo con el esqueleto de las letras (3) y es con esta estructura con la cual vamos a trabajar hoy.
The first thing we are going to do is create a text for this example using the word style and after we have written it we expand its appearance (1) after expanding it, we remove the filling (2) and with the knife tool we remove some lines of text leaving only the skeleton of the letters (3) and it is with this structure that we are going to work today.
Vamos a crear una paleta de colores con la herramienta fusión. Para ello hacemos dos círculos a los cuales les damos color, y con la herramienta fusión creamos esta transición de color. Y luego hacemos otras transiciones con otros colores.
Let's create a color palette with the Fusion tool. To do this we make two circles to which we give color, and with the fusion tool we create this color transition. And then we make other transitions with other colors.
Lo que vamos a hacer ahora, es seleccionar una transición de color y una línea de las letras, y nos vamos al menú objeto>fusión>reemplazar trazo o lomo. Y así vamos a ir haciendo en cada una de las partes de cada letra e ir variando también los colores.
What we are going to do now, is to select a color transition and a line of the letters, and we go to the menu object>merge>replace stroke or spine. And that's how we're going to do each part of each letter and vary the colours as well.
Ahora vamos a aplicar nuestro efecto de piel de peluche a cada letra. Para ello nos vamos al menú efecto >transformar >emborronar y establecemos los valores de la imagen siguiente.
Now let's apply our stuffed animal effect to each letter. To do this, go to the menu effect >transform >blur and set the values in the image below.
Quedándonos algo así.
By staying something like this.
Por ultimo establecemos un fondo y un reflejo para nuestra presentación, esperando que te haya gustado, me despido por hoy hasta una nueva oportunidad.
Finally we establish a background and a reflection for our presentation, hoping that you liked it, I say goodbye for today until a new opportunity.
Soy kadoshmenorah y hasta una próxima oportunidad y no olvides dejar tus comentarios acá abajo.
Gracias por compartir tu contenido con la comunidad de El Arca (@elarca), el mismo ha sido votado por nuestra iniciativa de curación artística @stellae. Si deseas puedes delegar HP al proyecto: Delegate 25 HP Delegate 50 HP Delegate 100 HP Delegate 250HP Delegate 500HP
Gracias
Es fascinante lo que se puede hacer.
Excelente, como siempre!
Un abrazo
Gracias. Saludos
Su post ha sido valorado por @ramonycajal
Gracias por apreciar y valorar este contenido @ramonycajal. Saludos
You got voted by @curationkiwi thanks to kadoshmenorah! This bot is managed by KiwiJuce3 and run by Rishi556, you can check both of them out there. To receive upvotes on your own posts, you need to join the Kiwi Co. Discord and go to the room named #CurationKiwi. Submit your post there using the command "!upvote (post link)" to receive upvotes on your post. CurationKiwi is currently supported by donations from users like you, so feel free to leave an upvote on our posts or comments to support us!
We have also recently added a new whitelist feature for those who would like to support CurationKiwi even more! If you would like to receive upvotes more than 2x greater than the normal upvote, all you need to do is delegate 50 SP to @CurationKiwi using this link.