
Hola mis lindas abejas 🐝 del panal, he vuelto luego de varios días sin computadora, bueno aún sigo sin la mía. Solo que desempolve mi vieja computadora portátil para no dejar de mostrar mis proyectos de costura.
Espero su semana terminé relajada y con calma, descansando un poco de tanta información del mundo que nos abruma por completo.
Hello my beautiful bees 🐝 from the hive, I'm back after several days without a computer, well I'm still without mine. I just dust off my old laptop to keep showing off my sewing projects.
I'm waiting for your week to end relaxed and calm, resting a bit of so much information from the world that it overwhelms us completely.

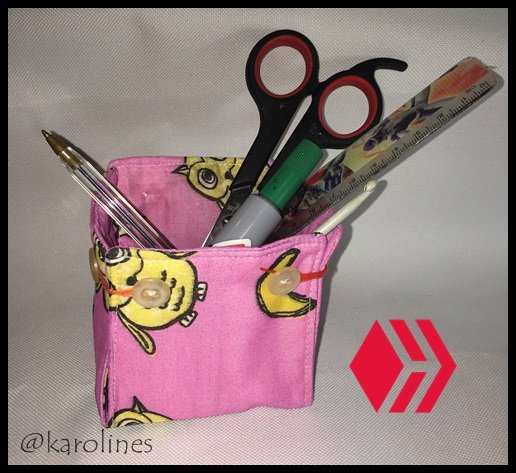
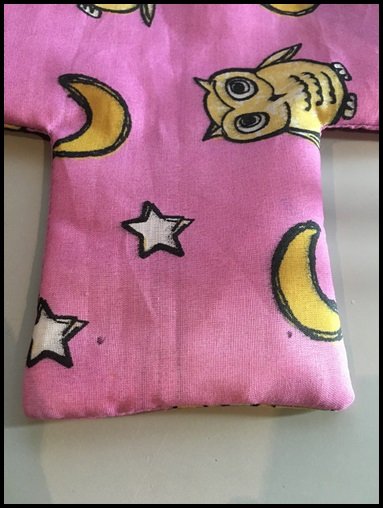
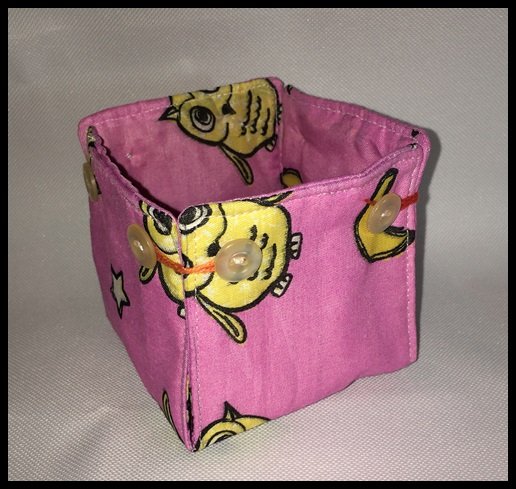
Yo gracias a Dios he tenido suficiente trabajo en mí maquina de coser y me he mantenido bastante ocupada en cuarentena y hoy he querido mostrarle un organizador fabricado en tela.
Lo estaba necesitando porque mi taller esta muy pero muy desordenado últimamente y en ocasiones no logro encontrar las cosas más pequeñas como: botones, cintas y broches.
Es por ello que decidí ocuparme en sacar un organizador pequeño que pueda tener a la mano para organizar las pequeñas cosas escurridizas.
Planeo realizar muchos más de diferentes tamaños, ya que al poder realizarlos con tela se me hace mucho más sencillo.
I thank God I've had enough work on my sewing machine and I've kept myself pretty busy in quarantine and today I wanted to show you a fabric organizer.
I was needing it because my workshop is very, very messy lately and sometimes I can't find the smallest things like: buttons, ribbons and pins.
That's why I decided to get a small organizer that I can keep on hand to organize the little things that are elusive.
I plan to make many more of different sizes, since being able to make them with fabric makes them much easier.

| |
| |
| |
| |
|
| |
|
| |
| |
| |
| |
|
| |
|
Patrones
Moulds
 |  |
|---|

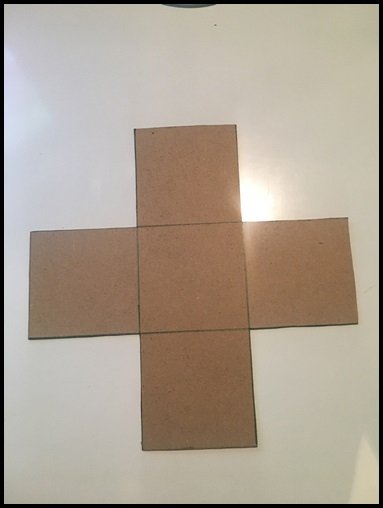
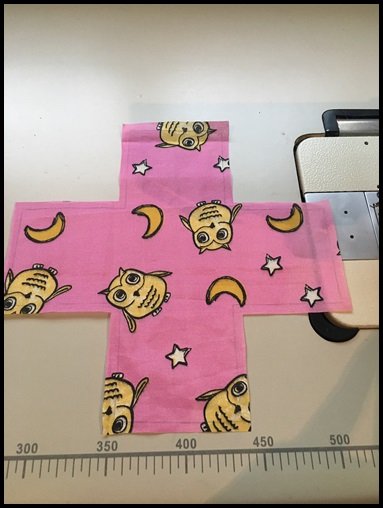
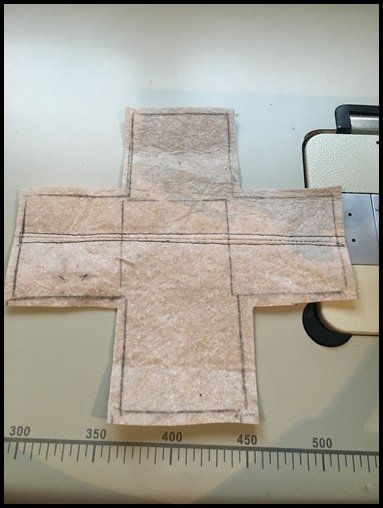
Como corresponde lo primero que debemos hacer es transferir el molde a las telas.
En esta ocasión necesitamos dos piezas de tela estampada y una de tela gruesa.
Recuerden que siempre al recortar debemos dejar medio centímetro o un centímetro para poder coser con más facilidad.
As it should be, the first thing we have to do is transfer the mould to the fabrics.
This time we need two pieces of printed fabric and one of thick fabric.
Remember that when we cut out we must always leave half a centimeter or a centimeter so that we can sew more easily.
 |  |  |
|---|
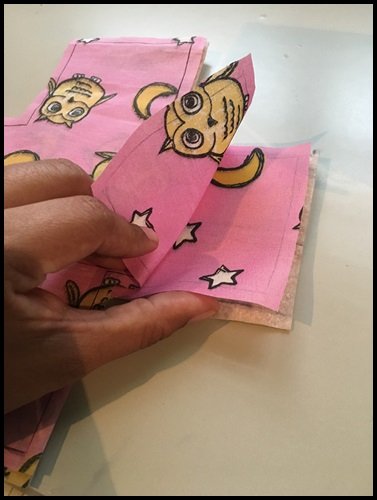
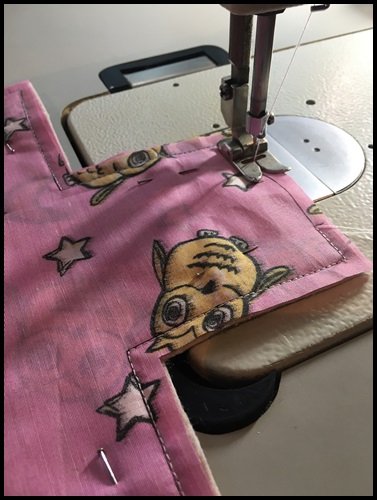
Para continuar posicionamos las dos telas estampadas frente con frente y debajo la tela más gruesa.
Con ayuda de los alfileres los sujetamos para que en el momento de coser no se nos rueden las piezas.
En este paso es muy importante recordar que debemos dejar una abertura que nos servirá para dar vuelta a la pieza.
To continue we position the two printed fabrics front to front and underneath the thicker fabric.
With the help of the pins we hold them so that at the moment of sewing the pieces do not roll.
In this step it is very important to remember that we must leave an opening that will serve to turn the piece.
 |  |  |
|---|
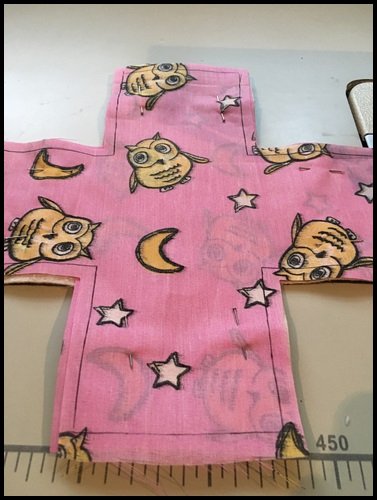
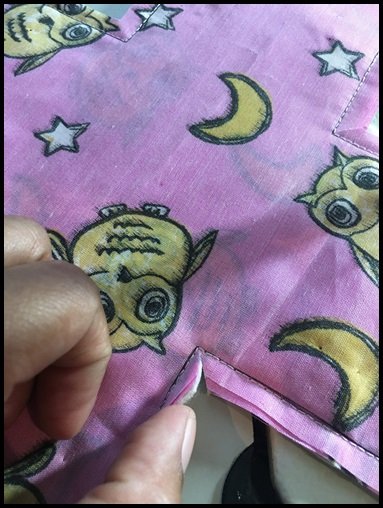
Al terminar de coser por todo el contorno de nuestra pieza y antes de dar vuelta debemos hacer pequeños cortes en las esquinas.
Con mucho cuidado de no cortar la costura que ya hemos realizado. Este proceso nos ayudará a que la pieza quede con un mejor acabado en el momento de darle vuelta.
Ya cuando hemos realizado este paso solo debemos dar vuelta a la pieza.
When we finish sewing all around our piece and before turning, we must make small cuts in the corners.
Be very careful not to cut the seam that we have already made. This process will help us to give the piece a better finish when turning it over.
Once we have done this step, we only have to turn the piece over.
 |  |
|---|
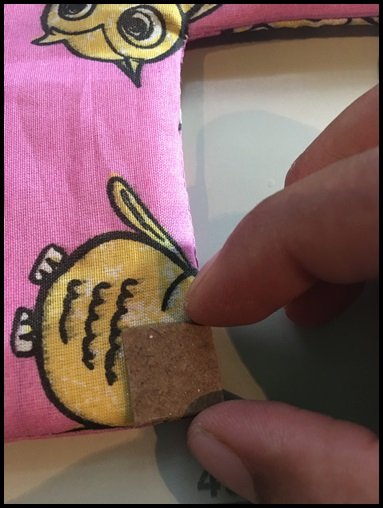
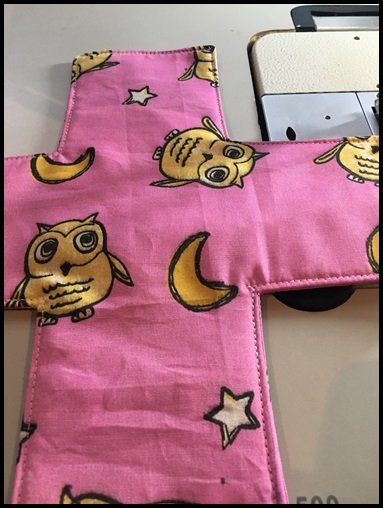
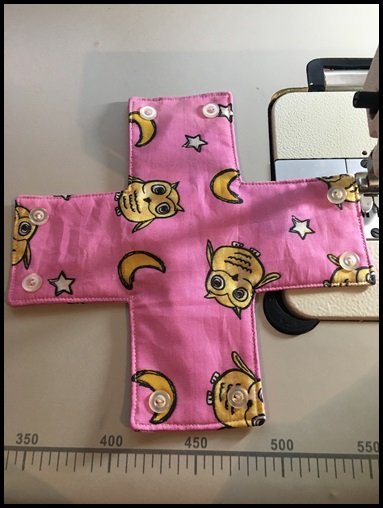
Cuando hemos volteado la pieza debemos marcar en cada esquina los puntos donde coseremos los botones que nos servirán para unir el organizador.
Yo me he ayudado realizando un pequeño cuadro de cartón que mide 1cm X 1cm. Me parece mejor realizarlo de este modo, ya que nos ayuda a que todos los botones queden en perfecta sincronía.
When we have turned the piece over, we must mark on each corner the points where we will sew the buttons that will serve to join the organizer.
I have helped myself by making a small cardboard square that measures 1cm X 1cm. I think it's better to do it this way, because it helps us to have all the buttons in perfect sync.
 |  |
|---|
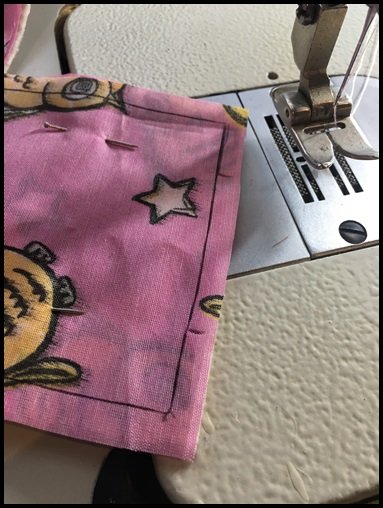
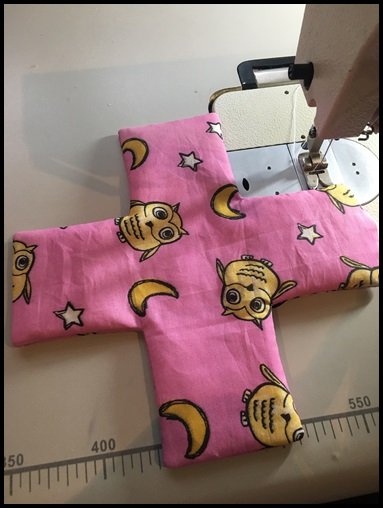
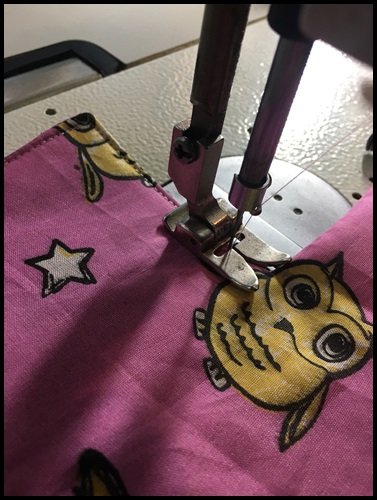
Continuamos y lo siguiente que corresponde es coser por todo el contorno de la pieza para pisar y dar el acabado finar.
El grosor de la costura lo elegimos a gusto, a mí me gusta que quede bien delgado y muy cerca de la orilla.
We continue and the next thing that corresponds is to sew along the entire contour of the piece to step and give the final finish.
We choose the thickness of the seam to our liking, I like it to be very thin and very close to the edge.
 |  |
|---|
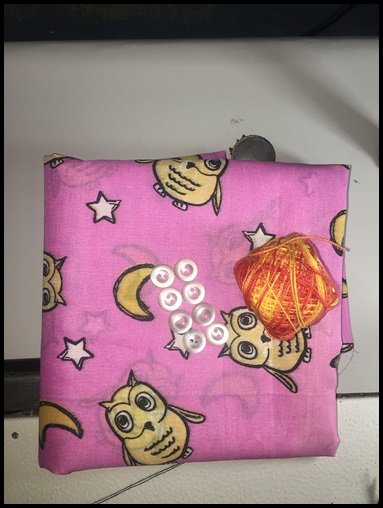
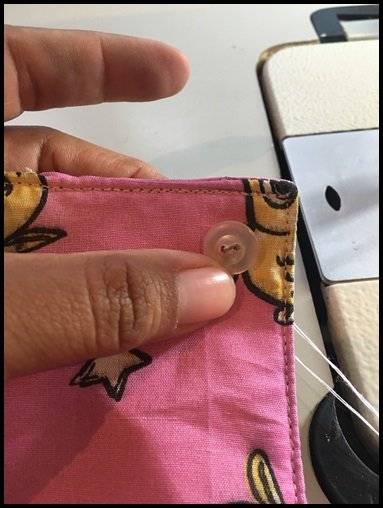
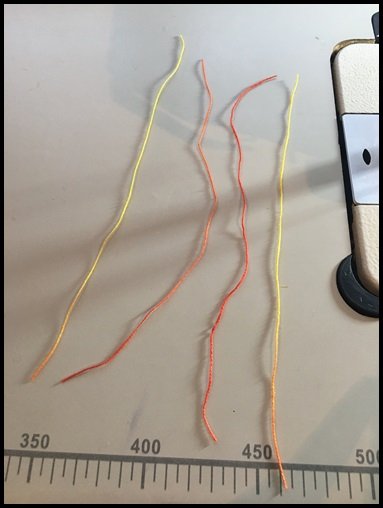
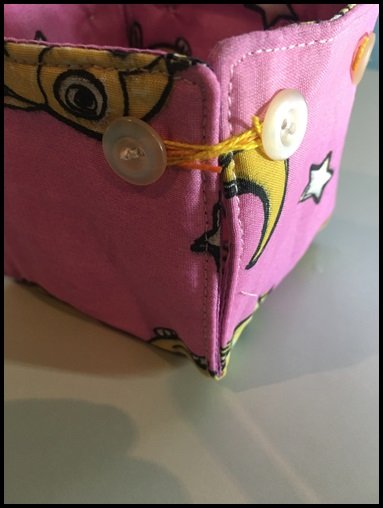
Con ayuda de hilo y aguja vamos a coser los botones en las marcas que y tenemos. En total son ocho botones que nos servirán de ajustadores para armar el organizador.
Y con la ayuda de los cordones solo debemos unir cada punta para que nos quede listo.
With the help of thread and needle we will sew the buttons in the marks that and we have. In total there are eight buttons that will serve as adjusters to assemble the organizer.
And with the help of the laces we only have to join each point so that it is ready.
 |  |
|---|
 |  |
|---|


Soporte fotográfico de mi autoría, editado en PhotoScape - Canva
Photographic support of my authorship, edited in PhotoScape - Canva
Congratulations @karolines!
You raised your level and are now a Minnow!
Do not miss the last post from @hivebuzz:
Un artículo muy útil en el taller para tener las herramientas a la mano, te quedó muy lindo.
Felicitaciones amiga por tu nuevo logro en nuestra querida colmena, que continúen los éxitos.
Un abrazo.
Gracias mi amor por tus palabras. Saludos.