¡¡Hola usuarios de Hive!! ✨ ✨, como lo mencione en la publicación anterior, les estaré enseñando a realizar una chemise desde cero 😉, y el día de hoy corresponde a la confección de la prenda 👏, espero disfruten del post así que comencemos 😏.
Hello Hive users!! ✨ ✨, as I mentioned in the previous post, I will be teaching you how to make a chemise from scratch 😉, and today corresponds to the making of the garment 👏, I hope you enjoy the post so let's start 😏.

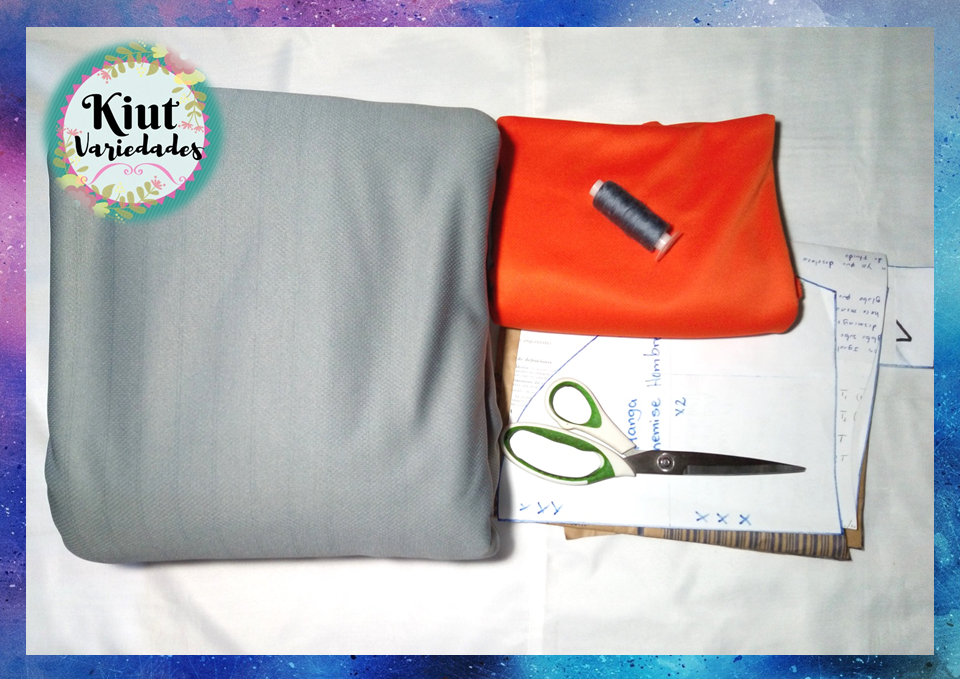
🧵 MATERIALES || MATERIALS 🧵
- Tela Piquet (la tela atlética también funciona, de hecho es la que yo estaré utilizando, usare dos colores, pero eso es totalmente opcional).
- Entretela.
- Patrones.
- Botones.
- Hilo y Tijeras.
- Máquina de coser y aguja.
- Piquet fabric (athletic fabric also works, in fact it is what I will be using, I will use two colors, but that is totally optional).
- Interlining.
- Patterns.
- Buttons.
- Thread and Scissors.
- Sewing machine and needle.
🧵 MANOS A LA OBRA || LET’S DO IT 🧵
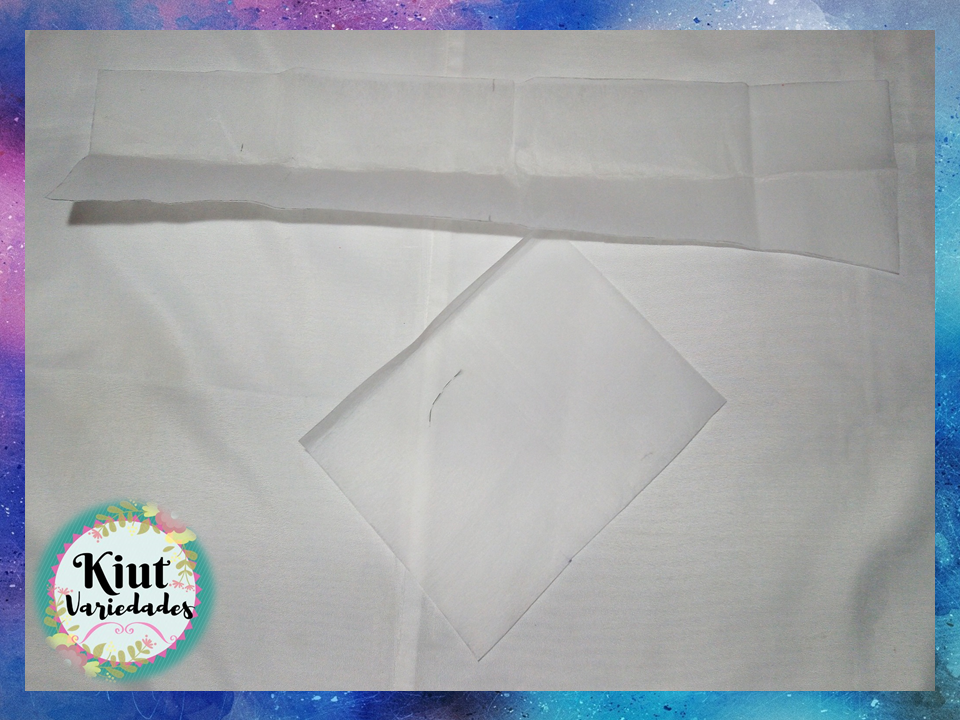
Lo primero que haremos será cortar las piezas correspondientes señaladas en los patrones, al final debemos tener las siguientes piezas:
- 1 pieza Delantera y 1 Posterior (espalda).
- 2 Mangas.
- 1 Tapa Costura.
- 3 piezas del Cuello (2 en tela y 1 en entretela).
- 2 Aletillas (1 en tela y 1 en entretela).
- 2 Puños.
The first thing we will do is cut the corresponding pieces indicated in the patterns, at the end we must have the following pieces:
- 1 Front piece and 1 Rear (back).
- 2 Sleeves.
- 1 Cover Sewing.
- 3 Neck pieces (2 in fabric and 1 in interfacing).
- 2 Fins (1 in fabric and 1 in interlining).
- 2 cuffs.

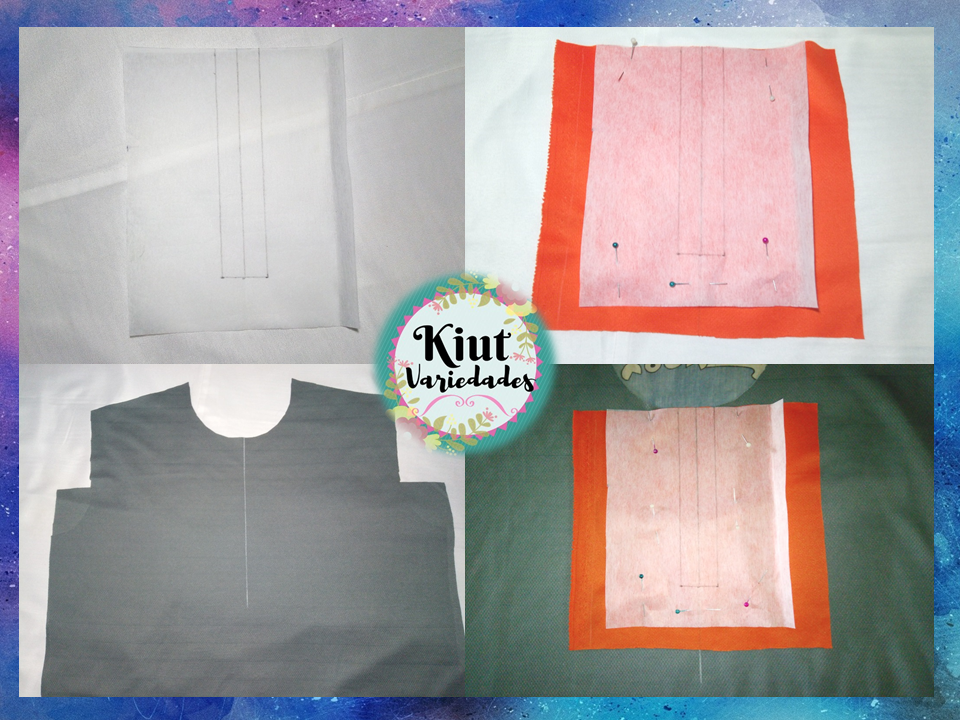
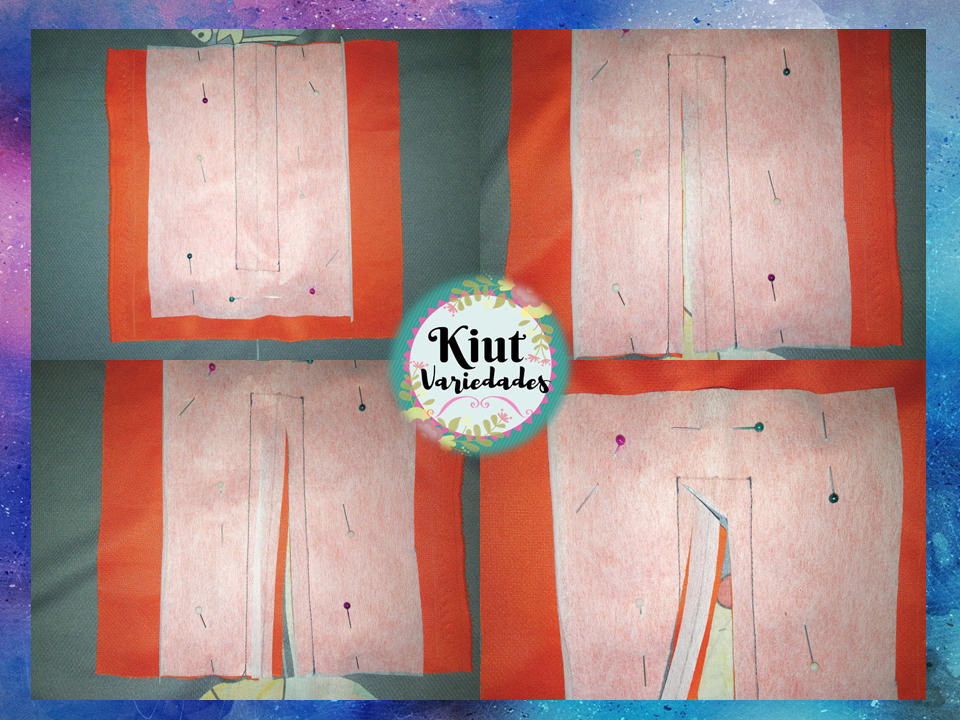
Si tu entretela es de pega (que es la ideal) lo que procedería sería entretelar la aletilla y una de las piezas del cuello. En la aletilla dibujaremos el rectángulo de abertura que se encuentra en el patrón, al mismo tiempo tomaremos la pieza delantera y dibujaremos una línea que vaya por todo el centro de la pieza, esto nos servirá para ubicar la aletilla.
If your interlining is glue (which is ideal), what would proceed would be to interweave the winglet and one of the neck pieces. In the winglet we will draw the opening rectangle that is in the pattern, at the same time we will take the front piece and draw a line that goes through the center of the piece, this will help us to locate the winglet.
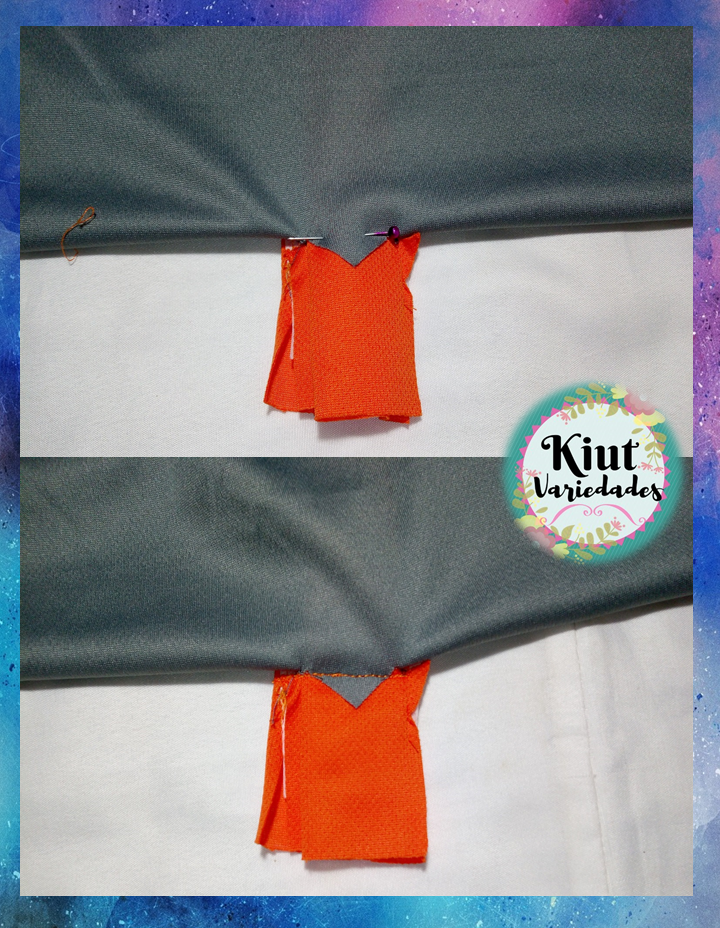
Sujetamos la aletilla al delantero y vamos a coser por las líneas laterales del rectángulo que esta dibujado, es importante cuidar que al momento de coser ambas líneas queden exactamente del mismo largo. Una vez cosido vamos a cortar a ½ cm de estas costura hasta llegar a 2cm aproximadamente antes del final de las líneas, allí cortaremos en diagonal teniendo precaución de no cortar la costura que acabamos de hacer. Luego terminaremos de cortar la aletilla, pero asegurándonos de que sea solo la aletilla y no la pieza delantera.
We hold the winglet to the front and we are going to sew along the side lines of the rectangle that is drawn, it is important to take care that when sewing both lines are exactly the same length. Once sewn we are going to cut ½ cm from these seams until we reach approximately 2cm before the end of the lines, there we will cut diagonally, taking care not to cut the seam we have just made. Then we will finish cutting the winglet, but making sure that it is only the winglet and not the front piece.
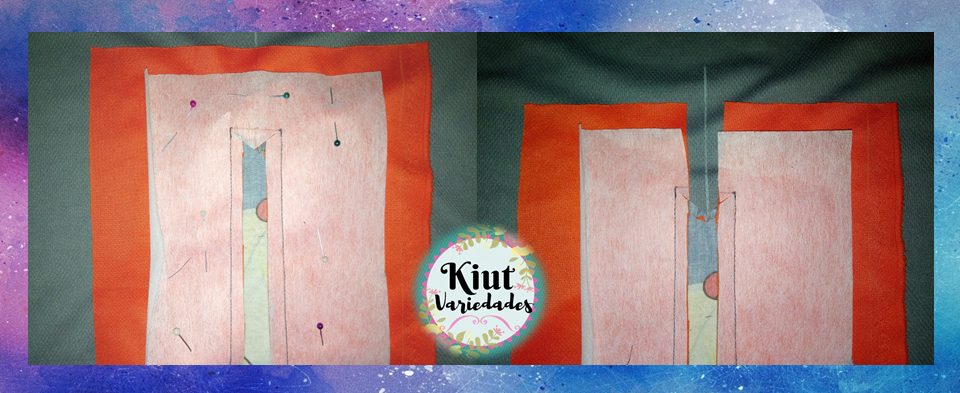
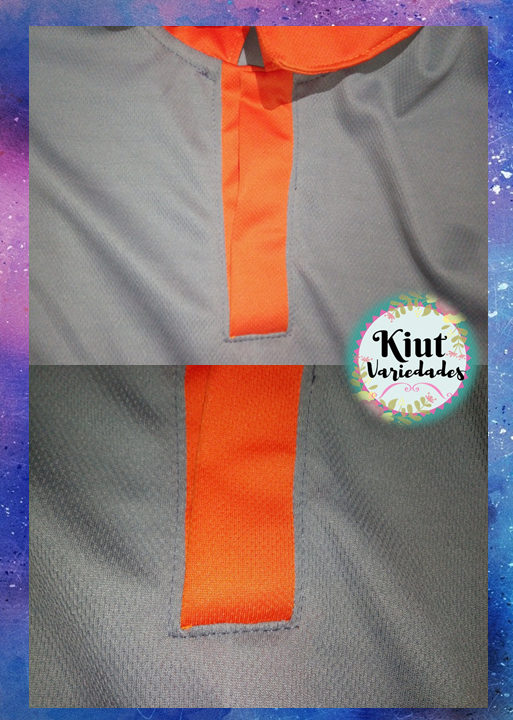
Doblamos ½ cm en los extremos de la aletilla y medimos desde la costura 3cm, realizamos un pequeño piquete para marcar y doblamos por allí. Una vez doblado vamos a coser por los extremos dejando en la parte superior unos 8 cm aproximadamente sin coser. Luego introduciremos las aletilla dentro de la abertura, primero la izquierda y luego la derecha (si fuese una chemise de mujer, primero se introduce la aletilla derecha y luego la izquierda).
We fold ½ cm at the ends of the winglet and we measure 3cm from the seam, we make a small notch to mark and we fold there. Once folded, we are going to sew at the ends, leaving approximately 8 cm at the top without sewing. Then we will introduce the flaps inside the opening, first the left and then the right (if it were a women's chemise, the right flap is inserted first and then the left).
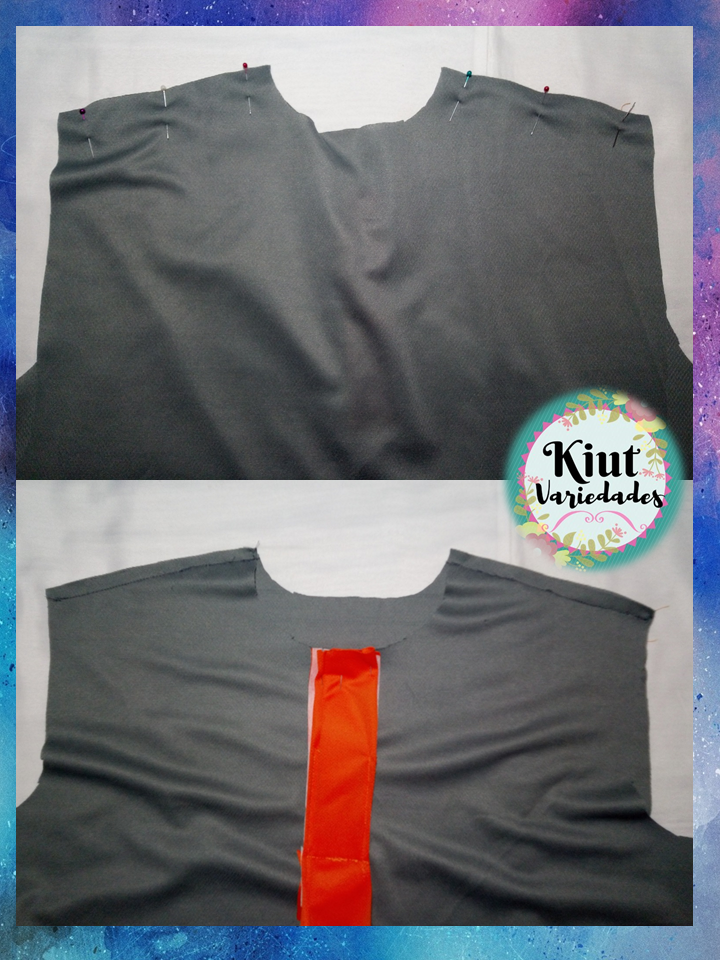
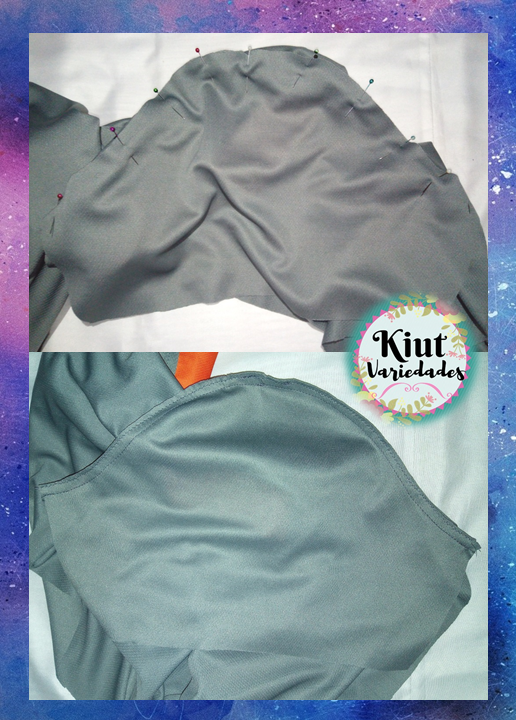
Nos aseguramos que la aletilla haya quedado bien y la sujetamos brevemente con un alfiler, para coser en la parte interna, así como se muestra en la imagen. Ahora nos pasaremos a los hombros, tomamos la pieza de la espalda y la unimos por los hombros a la pieza delantera.
We make sure that the winglet has been well and we hold it briefly with a pin, to sew on the internal part, as shown in the image. Now we will move to the shoulders, take the piece from the back and join it at the shoulders to the front piece.
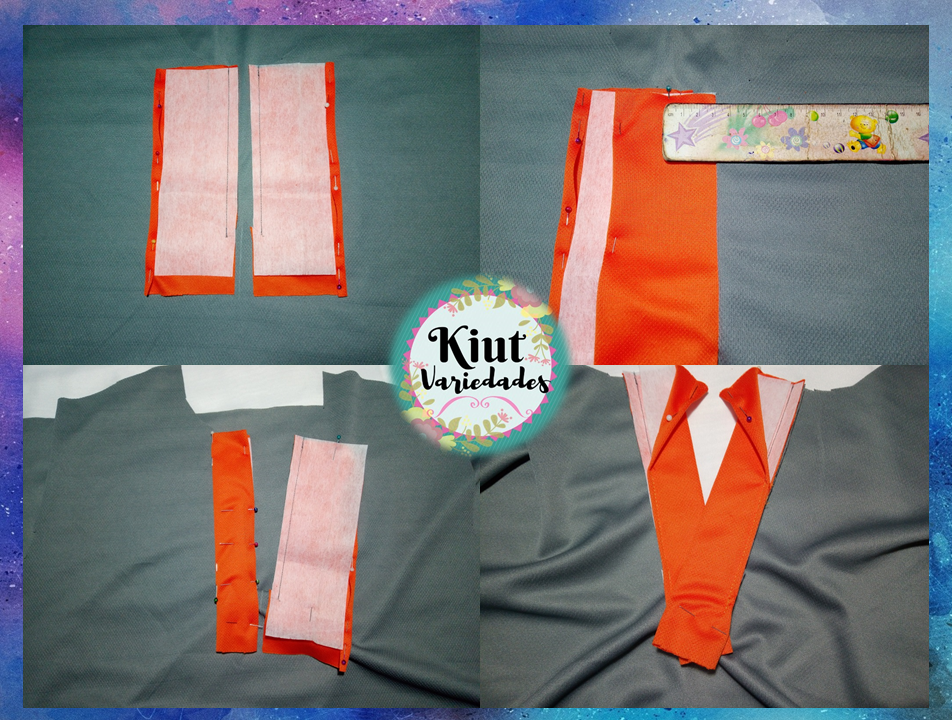
Continuamos con el cuello, tomamos las piezas del cuello y enfrentando los derechos de tela, coseremos por todo el contorno del mismo, excepto en la parte curva del mismo, pues por allí coseremos a la chemise. Una vez listo, cortaremos un poco las esquinas para que al dar la vuelta las puntas del cuello queden perfectas, luego haremos una costura de asentamiento nuevamente por todo el contorno que acabamos de coser, lo más cercana al borde que podamos.
We continue with the neck, we take the pieces of the neck and facing the fabric rights, we will sew all around it, except in the curved part of it, because there we will sew the chemise. Once ready, we will cut the corners a little so that when turning the ends of the neck are perfect, then we will make a settlement seam again around the contour that we have just sewn, as close to the edge as we can.

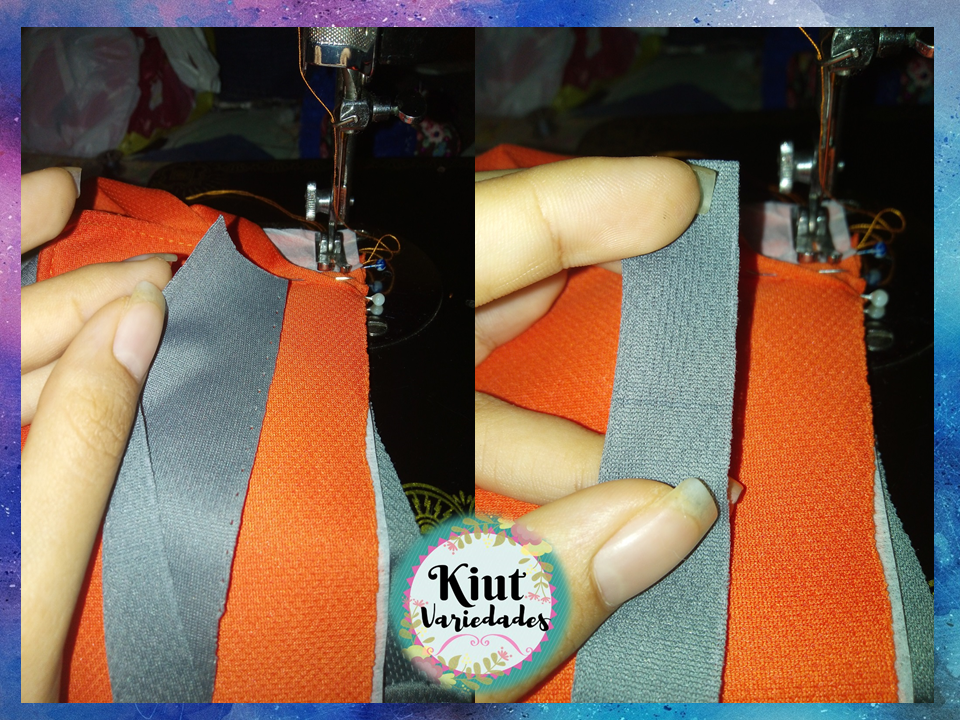
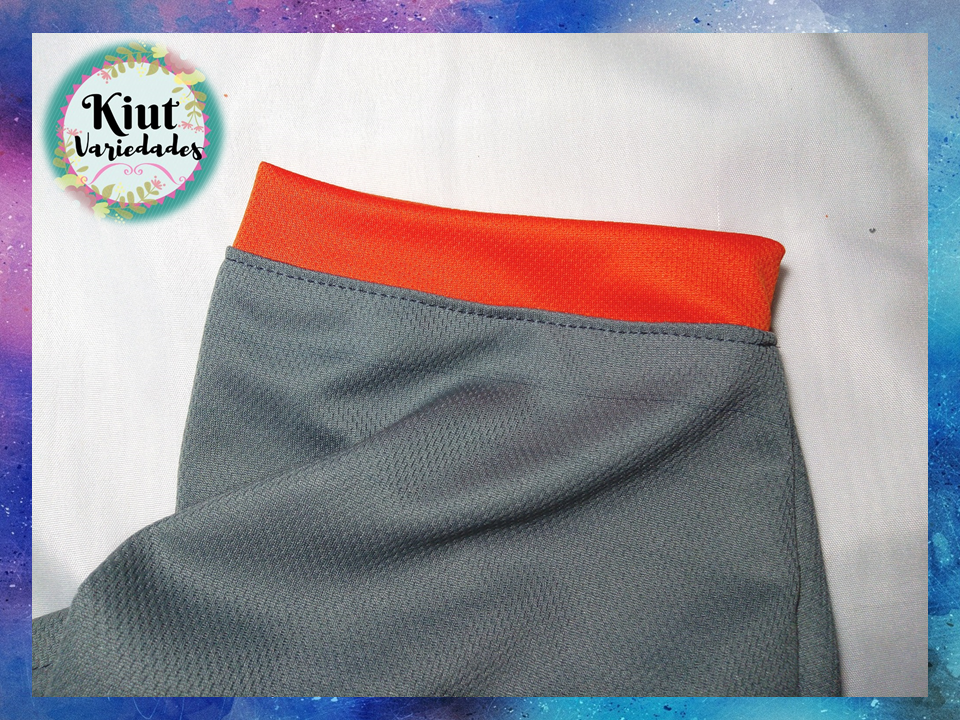
Marcamos el centro del cuello y el centro de la espalda. Abrimos la aletilla, y colocamos el cuello a 1,5cm de la marca central de la aletilla, doblamos la misma cubriendo el cuello y cosemos.
We mark the center of the neck and the center of the back. We open the winglet, and place the collar 1.5cm from the central mark of the winglet, fold it covering the neck and sew.
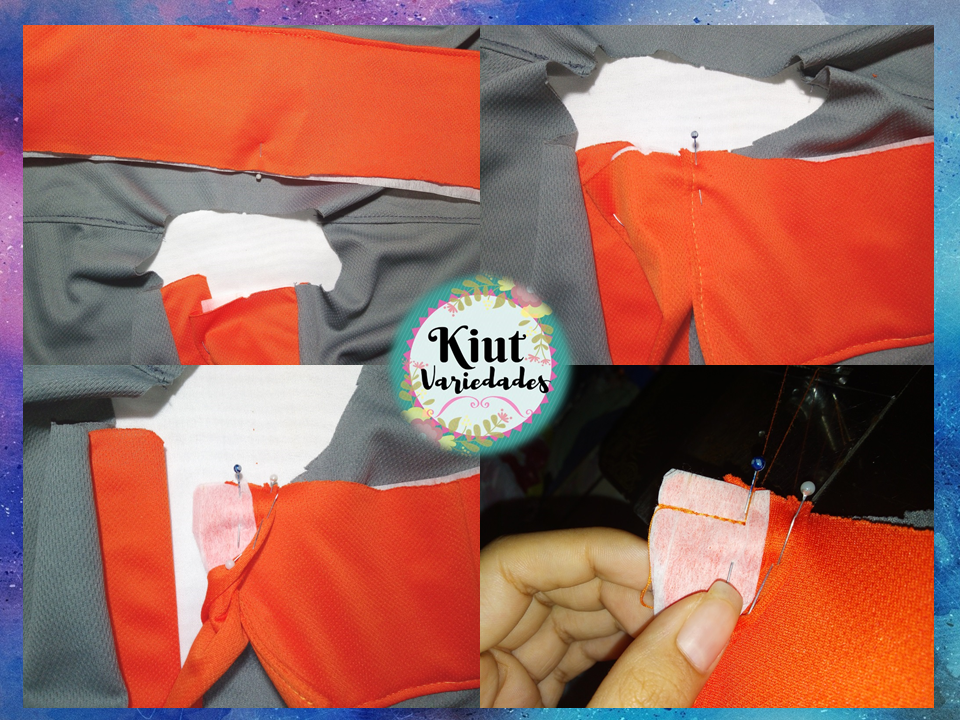
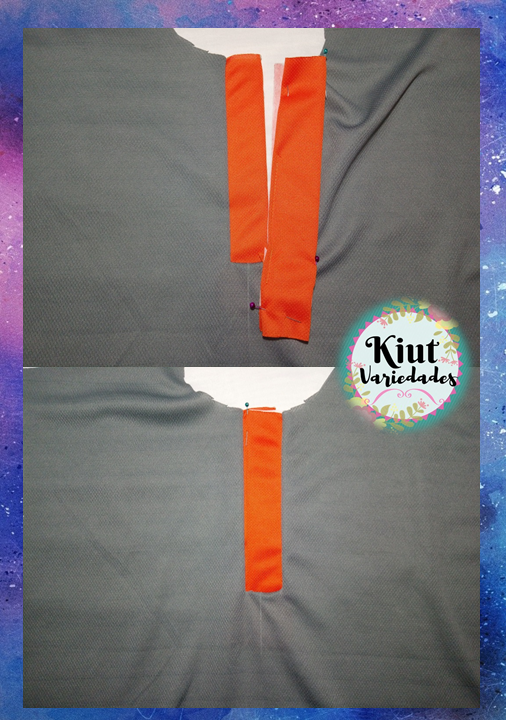
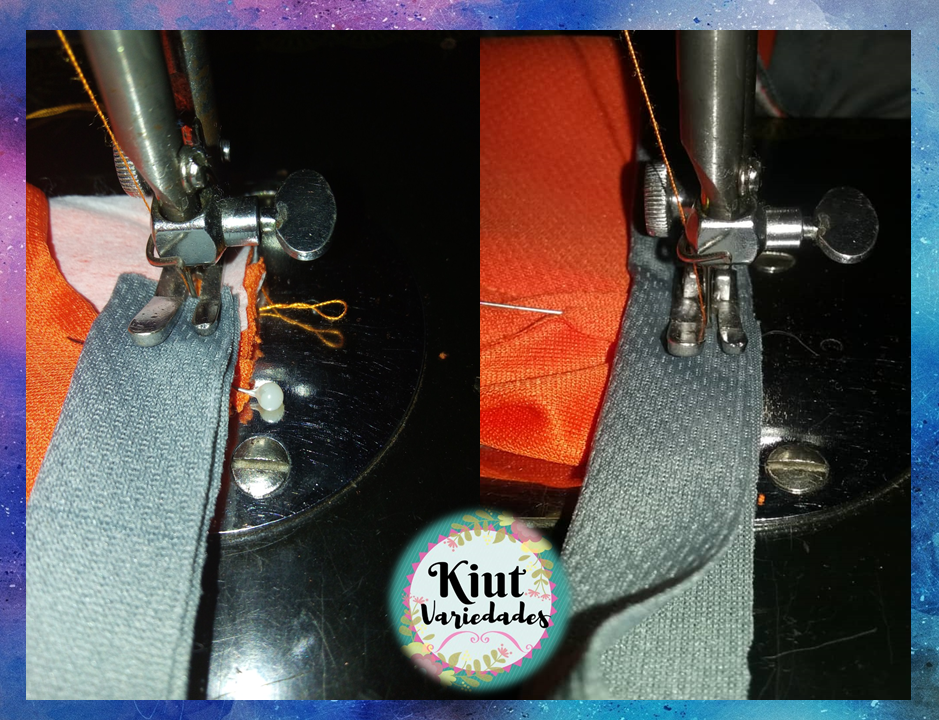
En lo que comencemos a coser parte del cuello paramos, pues allí comenzaremos a coser el tapa costura también, el cual debe estar doblado a la mitad. Coseremos todo el cuello asegurándonos de unir el tapa costura, el cuello y la chemise. Cuando lleguemos al otro extremo haremos lo mismo, doblamos la aletilla cubriendo el cuello, y un poco antes de que terminemos de coser el cuello, cortamos el tapa costura, y seguimos cosiendo hasta el final.
As we start to sew part of the neck we stop, because there we will begin to sew the seam cover as well, which must be folded in half. We will sew the entire neck making sure to join the top seam, the neck and the chemise. When we get to the other end we will do the same, we fold the winglet covering the neck, and a little before we finish sewing the neck, we cut the cover seam, and we continue sewing until the end.
NOTA: Mientras cosemos, debemos asegurarnos de que las marcas del centro de la espalda y el centro del cuello deben coincidir.
NOTE: While sewing, we need to make sure that the marks in the center of the back and the center of the neck must match.
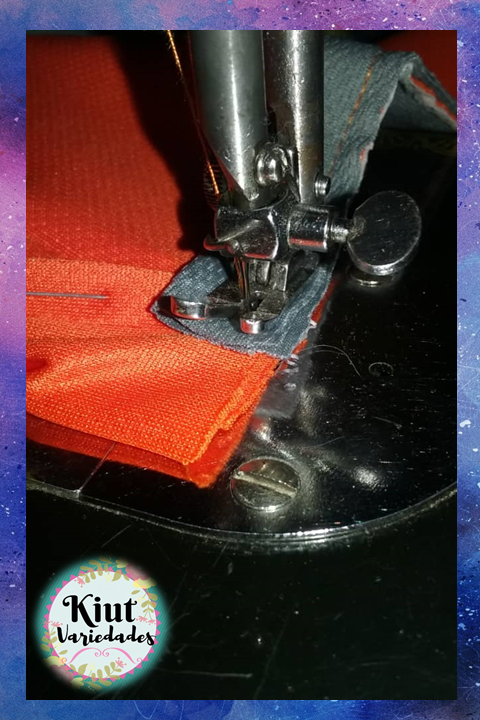
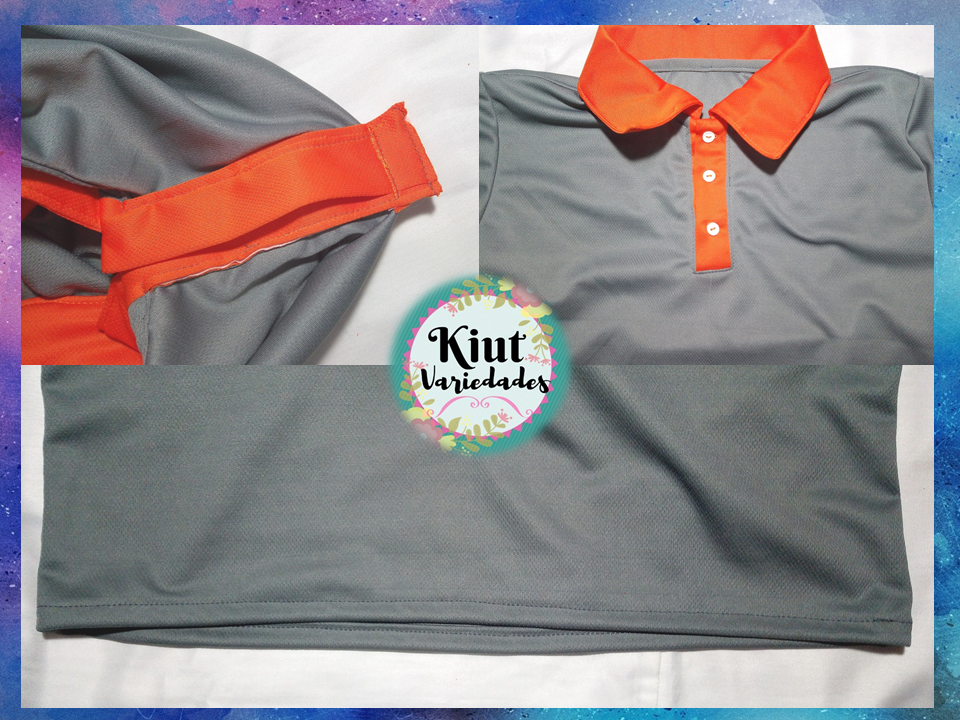
Cortamos un poco las esquinas de la aletilla, así como cualquier sobrante de tela, y damos la vuelta, de esta forma la aletilla habrá quedado totalmente cerrada. Terminamos de coser el tapa costura, de manera de terminar de cubrir la costura del cuello, y además coseremos por todo el borde de la aletilla, para dar el acabado final.
We cut a little the corners of the winglet, as well as any excess fabric, and turn it over, in this way the winglet will have been completely closed. We finish sewing the seam cover, in order to finish covering the neck seam, and we will also sew all over the edge of the winglet, to give the final finish.
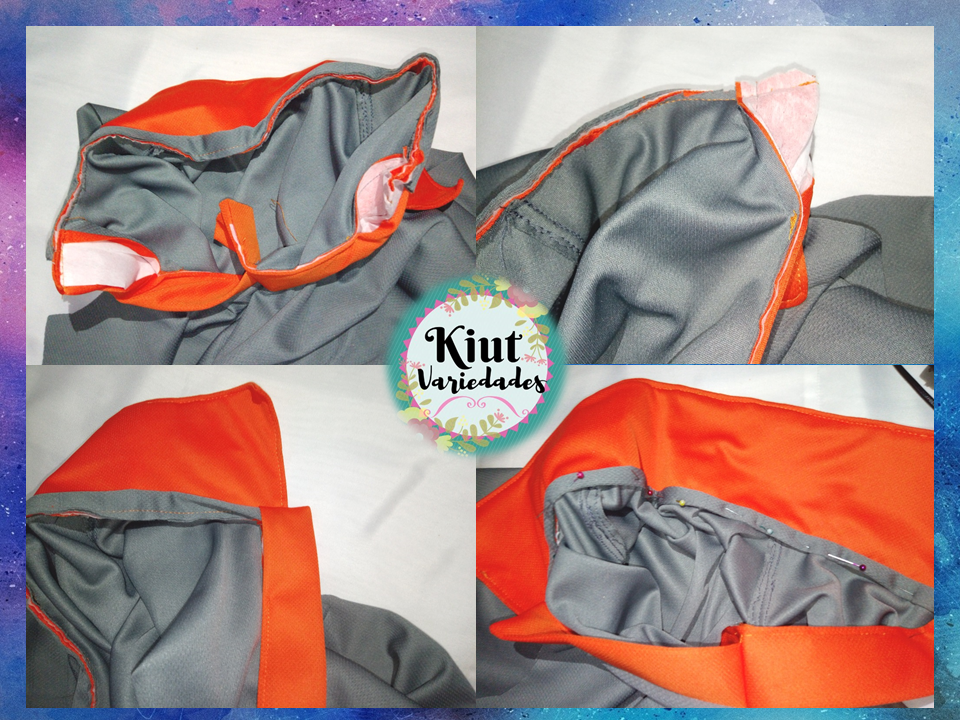
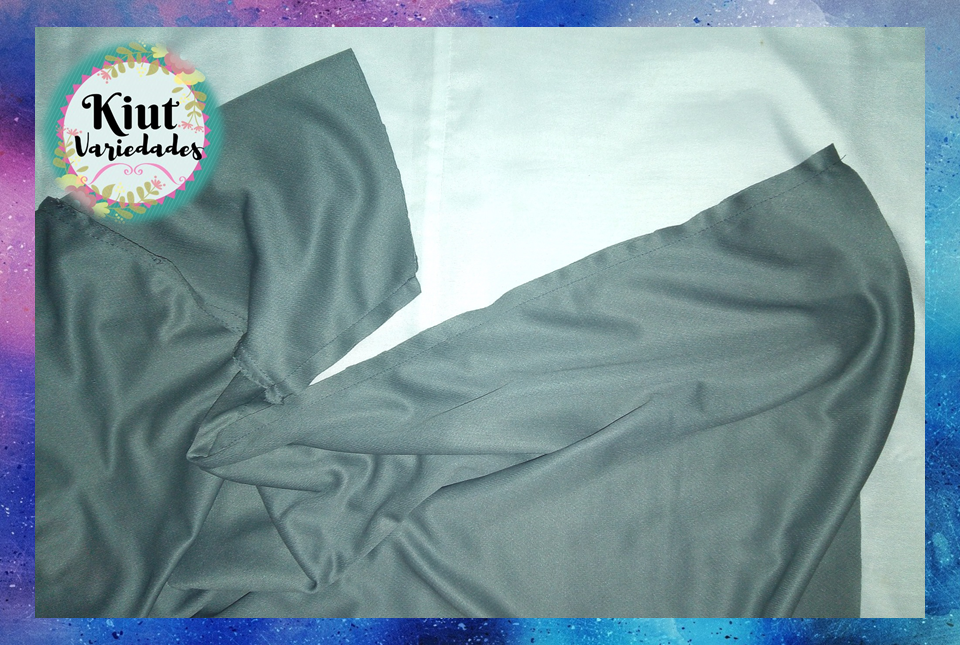
Cosemos ahora las mangas, y luego cosemos los costados de la prenda, asegurándonos que la costura de la sisa quede perfectamente alineada.
Now we sew the sleeves, and then we sew the sides of the garment, making sure that the seam of the armhole is perfectly aligned.
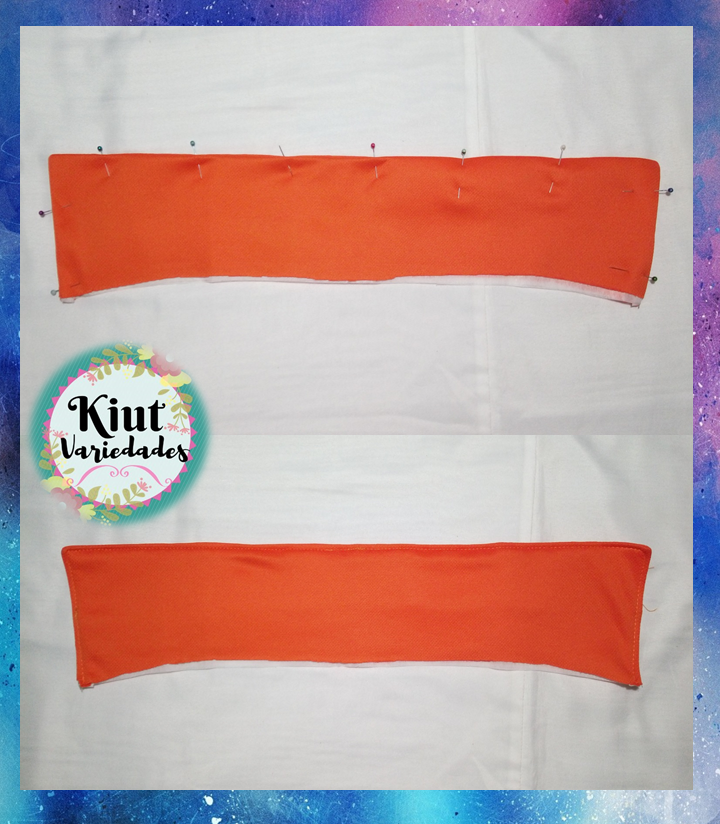
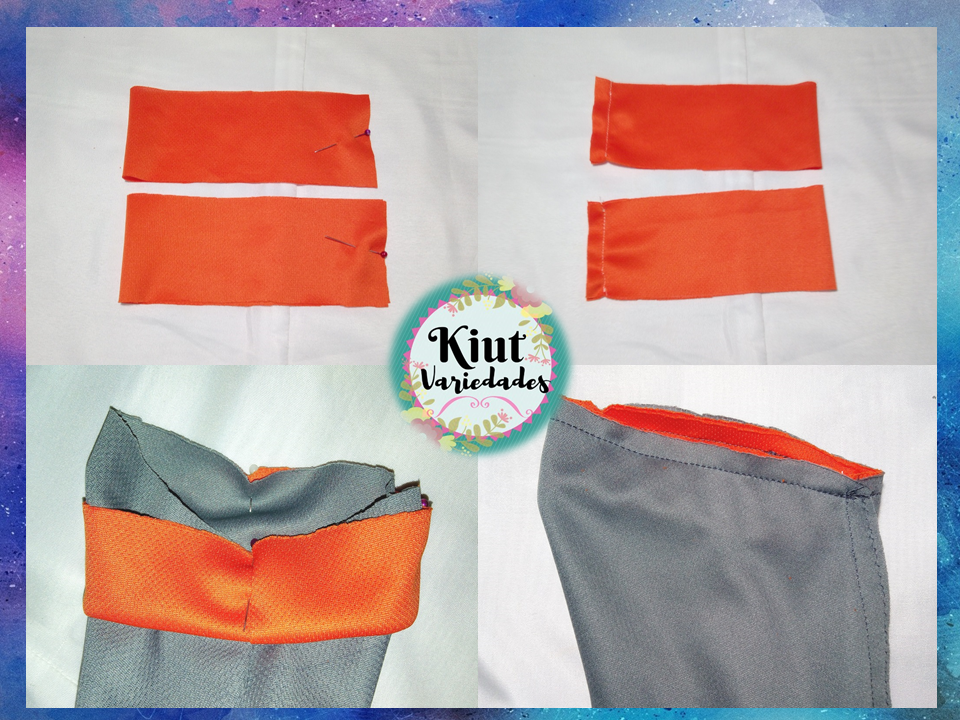
Tomamos los puños y los doblamos enfrentando el derecho de la tela, y cosemos formado un círculo. Doblamos a la mitad formando una tira que vamos a coser a la manga, alineando la costura del puño con la costura de la manga y recordando al momento de coser, que debemos estirar un poco, ya que el puño es más pequeño que la manga. Una vez cosido, haremos una costura de asentamiento por la parte externa.
We take the cuffs and fold them facing the right side of the fabric, and we sew in a circle. We fold in half to form a strip that we are going to sew to the sleeve, aligning the seam of the cuff with the seam of the sleeve and remembering when sewing, that we must stretch a little, since the cuff is smaller than the sleeve. Once sewn, we will make a settlement seam on the outside.
Los últimos detalles consisten en cortar el excedente de la aletilla, hacer el ruedo de la prenda, y coser los botones con sus ojales, el primer ojal de la prenda va en horizontal y los demás en vertical, y la separación entre ellos cambiara dependiendo de la cantidad de botones que se utilicen, en mi caso fueron 3 botones y tenían una separación de 5 cm.
The last details consist of cutting the surplus of the flap, making the garment hem, and sewing the buttons with their buttonholes, the first buttonhole of the garment goes horizontally and the others vertically, and the separation between them will change depending on the number of buttons used, in my case it was 3 buttons and they had a separation of 5 cm.
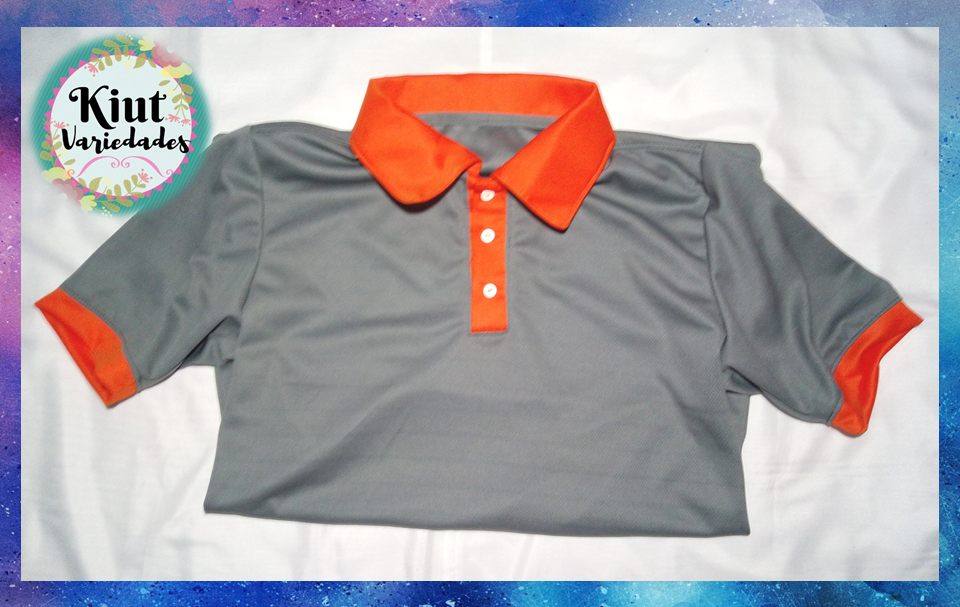


Te invitamos igual que siempre a que intentes este proyecto por tu cuenta y nos cuentes en los comentarios 👇 como es tu experiencia, además te exhortamos a que si lo deseas comiences a emprender tu propio negocio y este proyecto puede ser el inicio.
As always, we invite you to try this project on your own and tell us in the comments 👇 as is your experience, we also urge you to start your own business if you wish and this project can be the beginning.

Síguenos en todas nuestras redes sociales… || Follow us on all our social networks ...
Facebook:KiutVariedades
Instagram:@Kiut_variedades
Twitter:@Kiut_variedades
Excelente tus explicaciones. Si las llego hacer, les incorporaría tejido...Gracias pro compartir
Muchas gracias a ti por tu comentario, si lo realizas no olvides compartirlo con nosotras.
Wow me gusto como explicaste todo, eres toda una costurera de calidad, te quedo excelente!
Muchisimas gracias, lo hice con el mayor detalle posible. Me contenta que haya sido de tu agrado
Me gusta la forma de enseñar y el paso a paso gracias tratare de realizarla
Me contenta que haya sido de tu agrado, si la realizas no olvides compartir el resultado con nosotras.
Excelentes como siempre tus explicaciones. Saludos!
Gracias @irenenavarroart se hace el trabajo con cariño
Sus explicaciones son tan claras, que incentivan a cualquiera a realizar sus creaciones.
Gracias @jennyzer la idea es que cualquier persona la pueda entender e intente realizarla