¡Hola queridos usuarios de Hive ✨💕! Llegó la hora de reciclar.
Hi dear Hive users ✨💕! It's time to recycle.
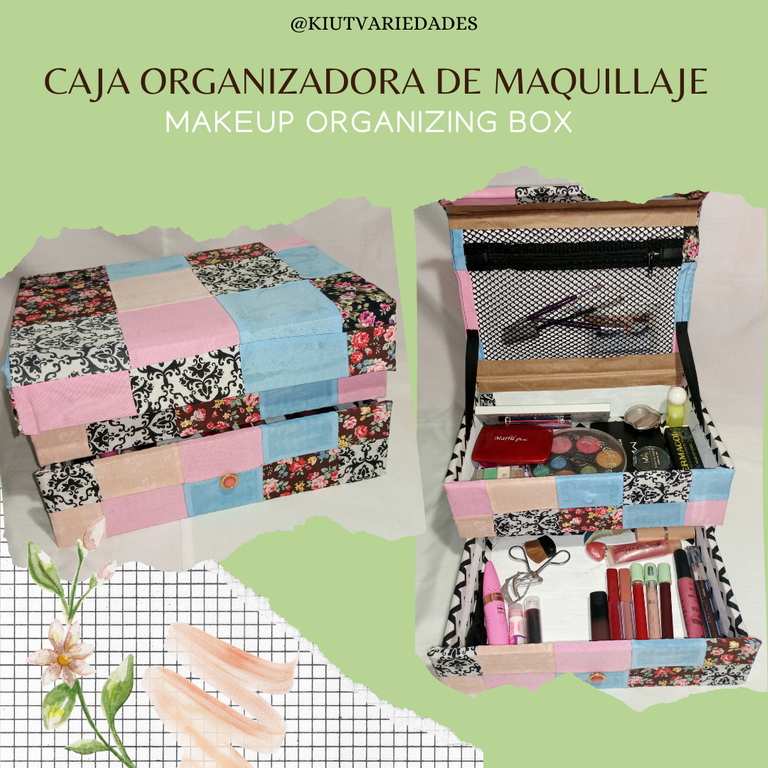
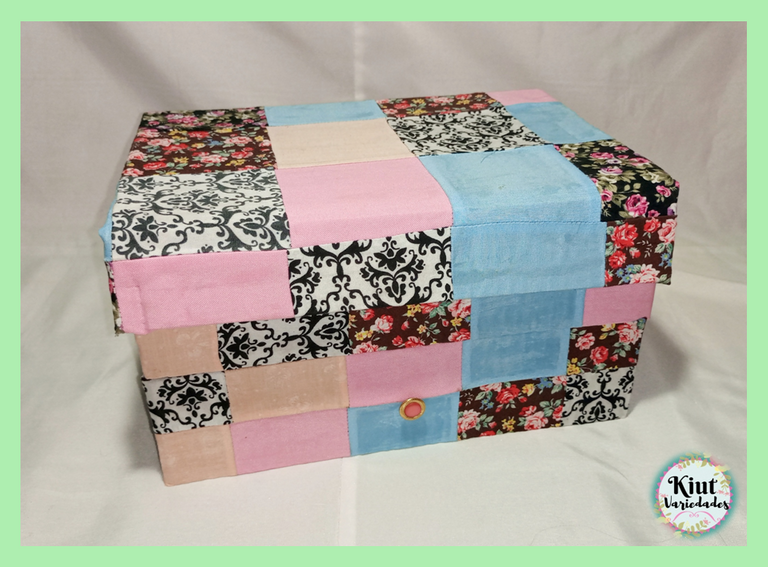
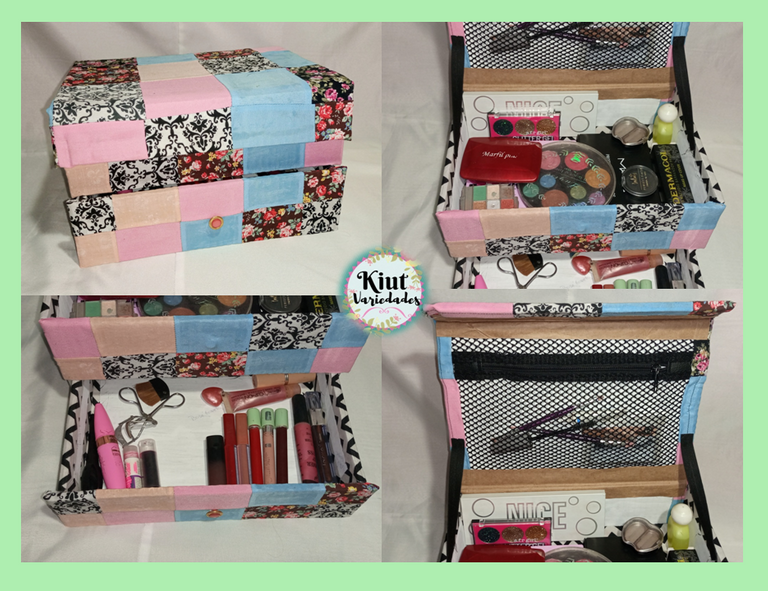
Para nadie es un secreto que la industria petrolera es la mayor contaminante a nivel mundial, lo que quizá muchos no sepan es que la industria textil es la segunda más contaminante, detrás de cada nueva prenda que sale al mercado hay una gran cantidad de residuos que están siendo arrojados al medio ambiente. El día de hoy, y con motivo de la 9na edición del Reciclaje Creativo Challenge propuesto por @jennyzer, les traigo esta caja organizadora de maquillaje hecha en cartón y forrada con retazos de tela, porque yo personalmente pienso que hasta el más mínimo trozo de tela puede ser utilizado en grandes proyectos, así que no digo nada más y vamos a comenzar.
It's no secret that the oil industry is the biggest polluter worldwide, what many may not know is that the textile industry is the second most polluting, behind every new garment that comes to market there is a lot of waste being thrown into the environment. Today, and on the occasion of the 9th edition of the Creative Recycling Challenge proposed by @jennyzer, I bring you this makeup organizer box made of cardboard and lined with fabric scraps, because I personally think that even the smallest piece of fabric can be used in great projects, so I say no more and let's get started.
Click here for more information about the challenge.

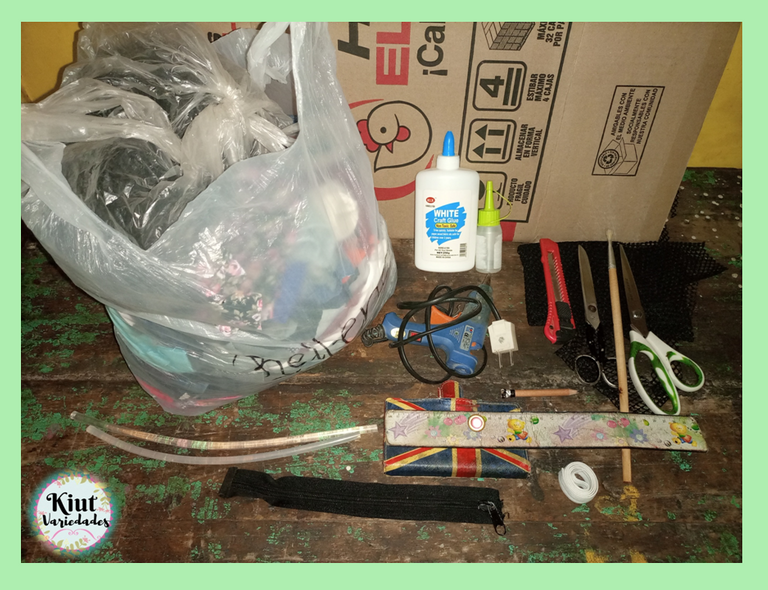
♻️♻️ MATERIALES || MATERIALS ♻️♻️
- Carton.
- Retazos de Tela.
- Un retazo de tela de malla
- 1 botón y 1 imán (en mi caso utilice un antiguo forro de teléfono tipo agenda).
- Pega y Silicón (frio o caliente).
- Pincel.
- Pintura.
- Regla y Tijera de papel.
- Cúter.
- Tijera de Tela e Hilo.
- Máquina de coser o aguja.
- Lápiz o marcador.
- 1 cierre de aproximadamente 20cm.
- Cinta o Goma elástica.
- Papel Craft (que es el mismo papel de las pacas de harina de maíz).
- Cardboard.
- Fabric scraps.
- A piece of mesh fabric
- 1 button and 1 magnet (in my case I used an old phone book liner).
- Glue and Silicone (hot or cold).
- Paintbrush.
- Paint.
- Ruler and paper scissors.
- Cutter.
- Fabric scissors and thread.
- Sewing machine or needle.
- Pencil or marker.
- 1 zipper of approximately 20cm.
- Tape or rubber band.
- Craft paper (which is the same paper used for cornmeal bales).
♻️♻️ VAMOS A RECICLAR || LET'S RECYCLE ♻️♻️
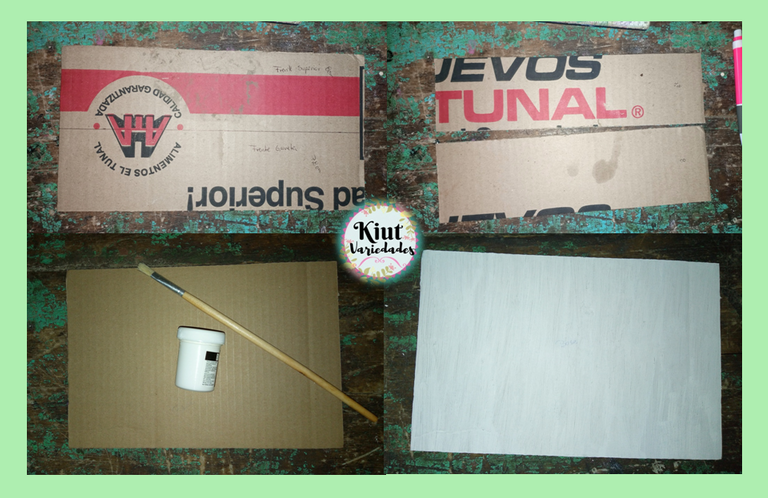
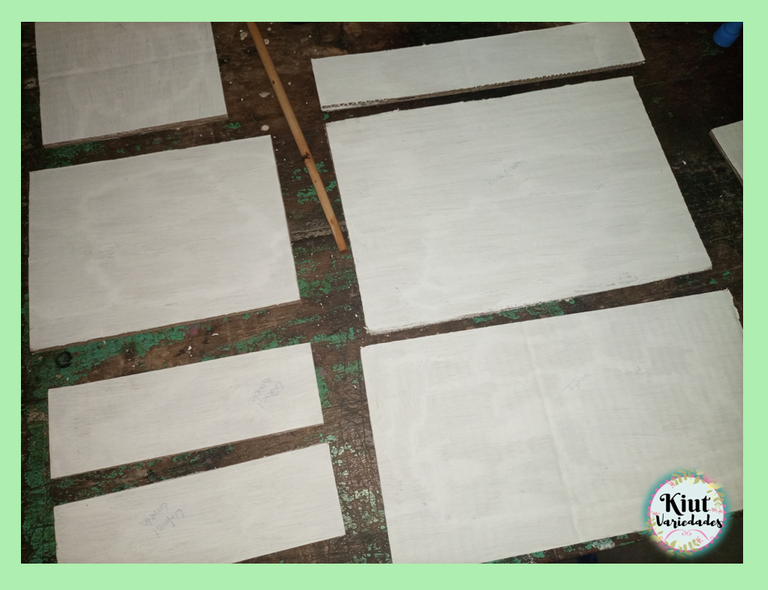
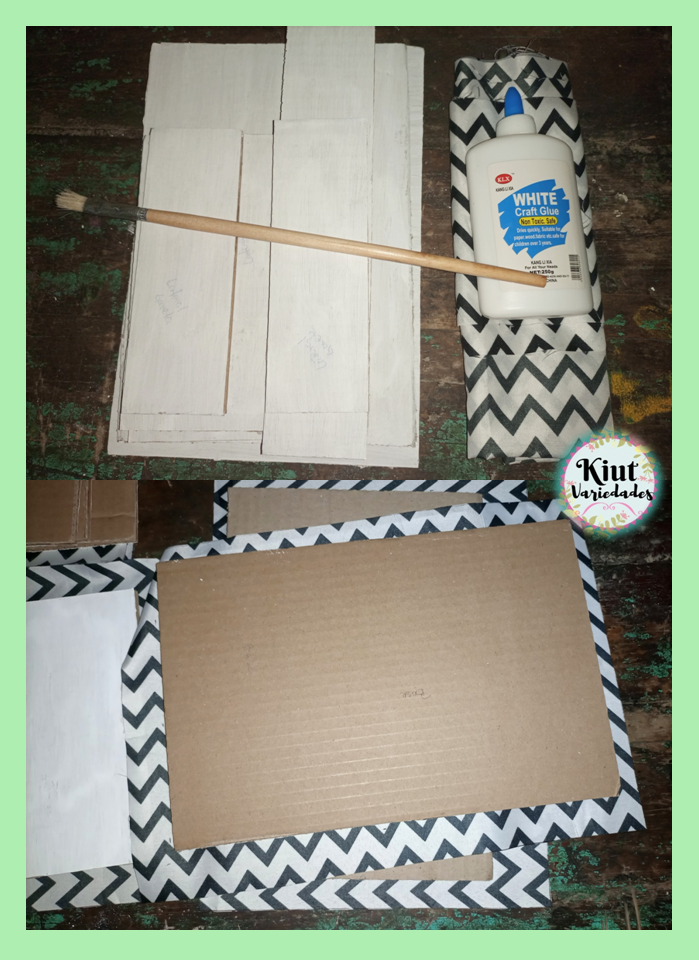
Comenzamos cortando todas las piezas de cartón que vamos a necesitar, es importante destacar que cada una de las piezas las corte en cartón doble para hacer mi caja organizadora lo más resistente posible.
We start by cutting all the pieces of cardboard that we will need, it is important to note that each of the pieces are cut in double cardboard to make my organizer box as resistant as possible.
| PIEZA / PART | Ancho / Width | Largo / Length |
|---|---|---|
| BASE | 30 cm | 20 cm |
| TAPA SUPERIOR / TOP COVER | 30 cm | 20 cm |
| CIERRE TAPA SUPERIOR/ TOP COVER CLOSURE | 30 cm | 5 cm |
| LATERALES CAJA / CASING SIDES (x2) | 19,2 cm | 15 cm |
| FRENTE/ FRONT | 30 cm | 15,8 cm |
| TAPA TRASERA/ REAR COVER | 30 cm | 15 cm |
| SEPARADOR/ SEPARATOR | 28,4 cm | 19,2 |
| BASE DE GAVETA / BOX BASE | 28,3 cm | 19 cm |
| TAPA TRASERA GAVETA/ REAR DRAWER COVER | 28,3 cm | 6 cm |
| LATERALES GAVETA / DRAWER SIDES (x2) | 18,2 cm | 6 cm |

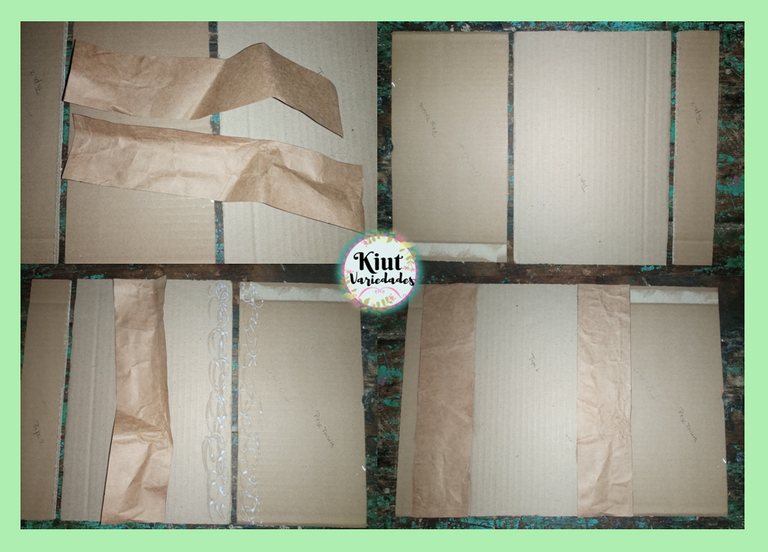
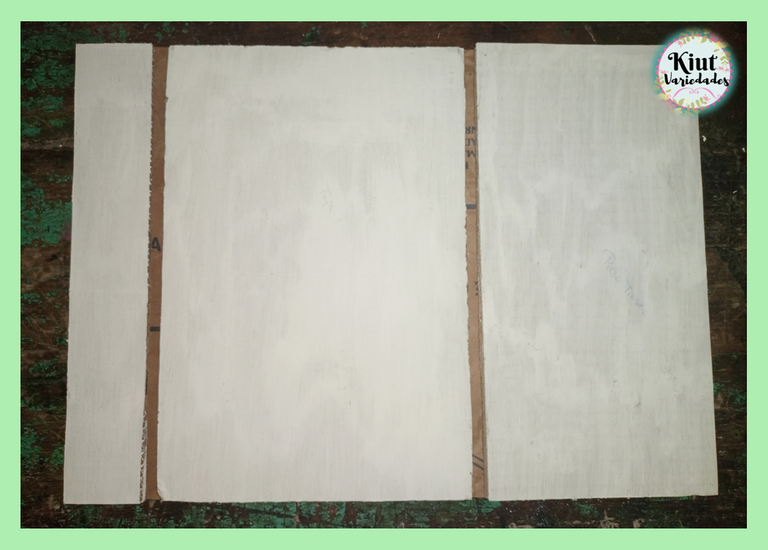
Lo siguiente que hice fue unir las piezas de cartón para formar el cartón doble que les mencione anteriormente, no obstante, la pieza del frente antes de hacerla doble primero hay que cortarla en dos, una parte medirá 8cm de largo y la otra 7.8, la primera irá en la parte superior de la caja y la segunda será el frente de la gaveta. Posteriormente pinte una cara de todas las piezas que acabamos de cortar, la otra cara del cartón la deje sin color pues esa será la que vamos a forrar con tela.
The next thing I did was to join the pieces of cardboard to form the double cardboard that I mentioned before, however, the front piece before making it double first you have to cut it in two, one part will measure 8cm long and the other 7.8, the first will go on top of the box and the second will be the front of the drawer. Then paint one side of all the pieces that we just cut, the other side of the cardboard leave it without color because that will be the one we are going to cover with fabric.
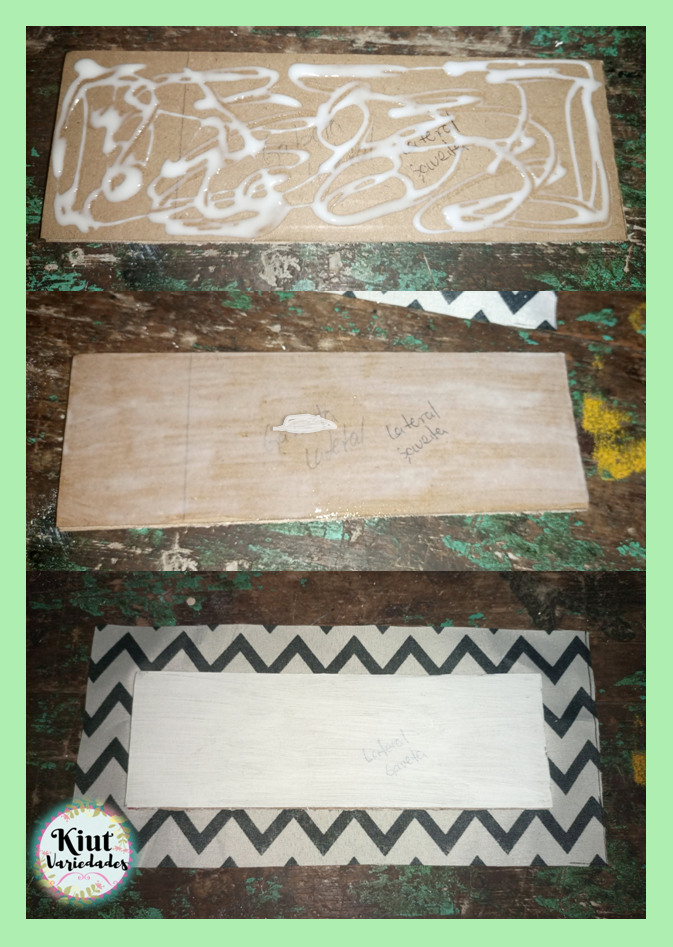
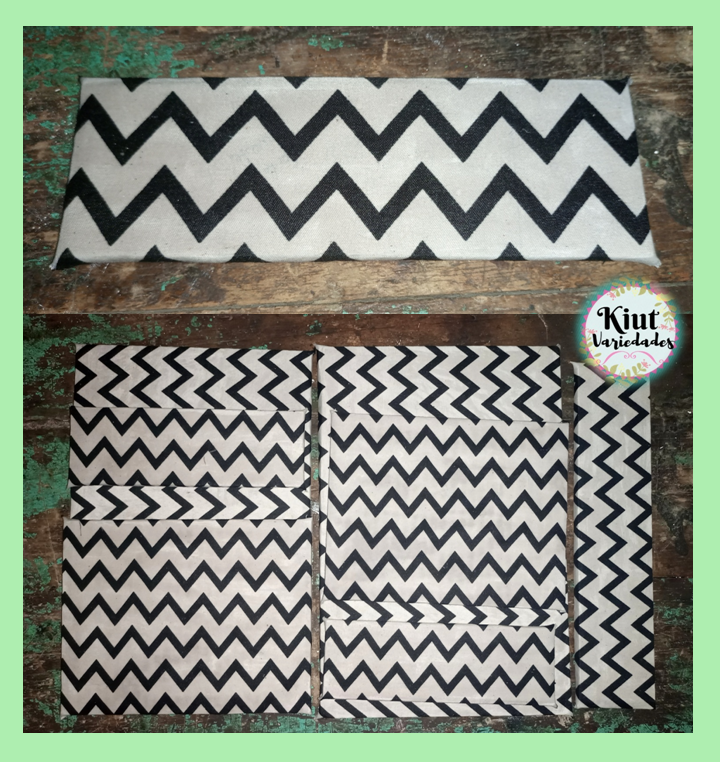
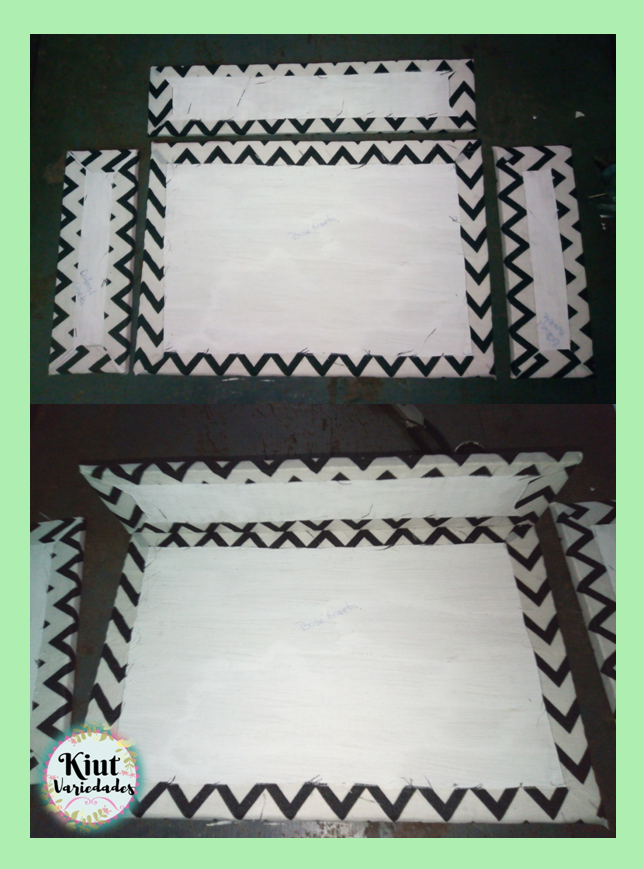
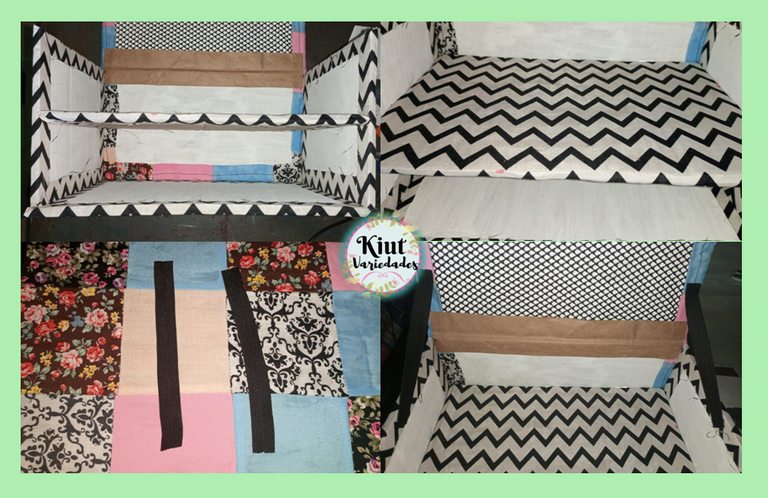
Tome la pieza de la base (de la caja y la gaveta), los laterales (de la caja y la gaveta), el separador y la pieza trasera de la gaveta y los forre con un trozo de tela medianamente grande que tenía guardado. Para forrar el cartón con la tela, debemos cortar las piezas de tela dejando un margen considerado, luego aplicaremos pega al cartón y lo esparciremos muy bien con el pincel, pegamos el cartón a la tela centrándolo en la misma y nos aseguramos de sacar cualquier arruga que se pueda formar en la tela. Cortamos las esquinas de la tela y luego aplicamos pega directamente en la tela y pegamos estirando muy bien, primero los laterales del ancho y luego lo del largo.
Take the base piece (of the box and the drawer), the sides (of the box and the drawer), the separator and the back piece of the drawer and line them with a medium-sized piece of fabric that I had saved. To line the cardboard with the fabric, we must cut the pieces of fabric leaving a considered margin, then we will apply glue to the cardboard and spread it very well with the brush, we glue the cardboard to the fabric centering it on the fabric and we make sure to remove any wrinkles that may form in the fabric. We cut the corners of the fabric and then apply glue directly on the fabric and glue stretching very well, first the sides of the width and then the length.
Cortamos dos tira de papel craft que tengan el mismo ancho de la caja, estas tiras nos servirán de “bisagras” para unir la pieza trasera de la caja, la tapa superior y el cierre de la tapa, obviamente cuando estemos uniendo estas piezas debemos dejar una separación entre ellas para que las mismas se puedan doblar.
We cut two strips of craft paper that have the same width of the box, these strips will serve as "hinges" to join the back piece of the box, the top lid and the lid closure, obviously when we are joining these pieces we must leave a gap between them so that they can be folded.
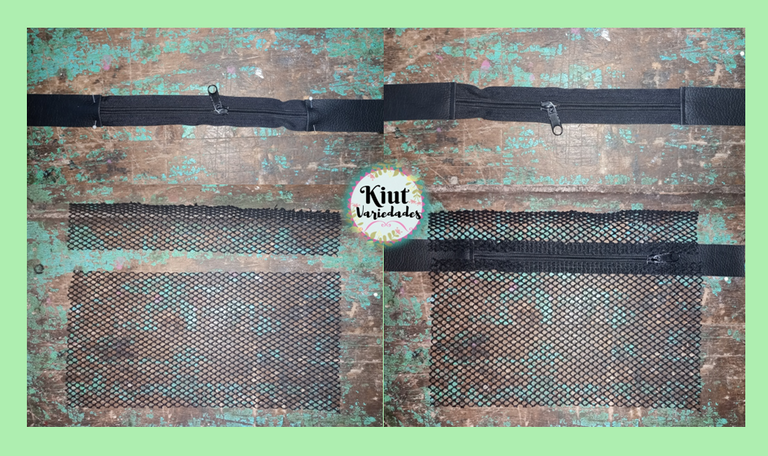
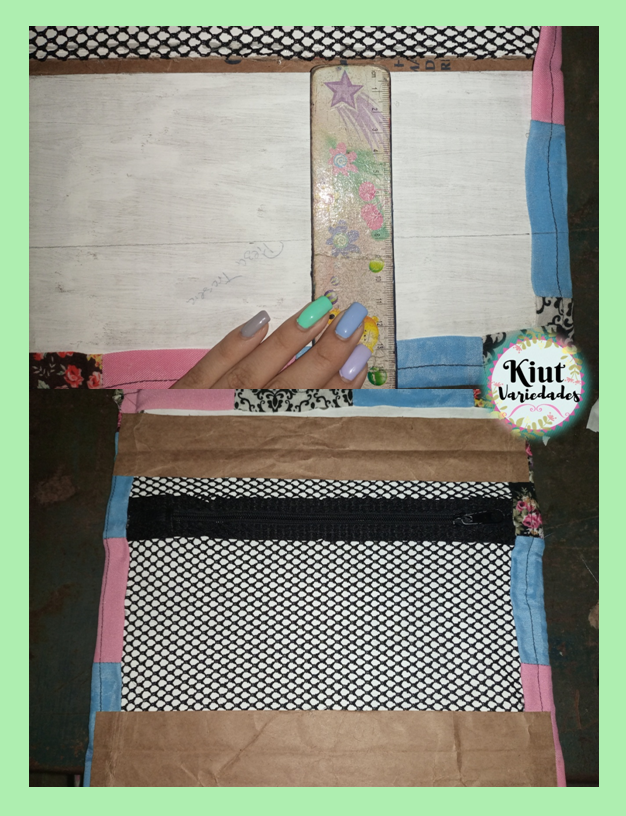
En la tapa superior irá un bolsillo con cierre, para hacer este bolsillo lo primero que hice fue coser en los extremos del cierre unas tiras de tela (cualquier retazo de tela sirve) y luego cosí el cierre a la tela de malla. Esta pieza de malla luego la pegue con silicón a la tapa.
To make this pocket, the first thing I did was to sew some strips of fabric on the ends of the zipper (any piece of fabric will do) and then I sewed the zipper to the mesh fabric. I then glued this piece of mesh to the lid with silicone.
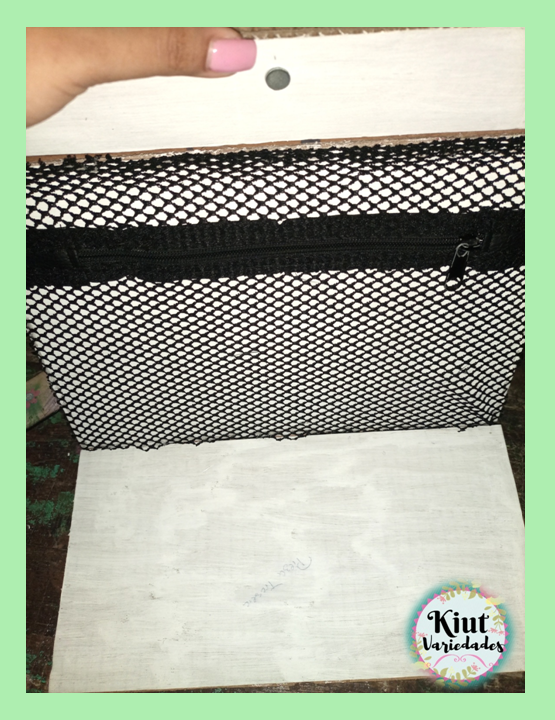
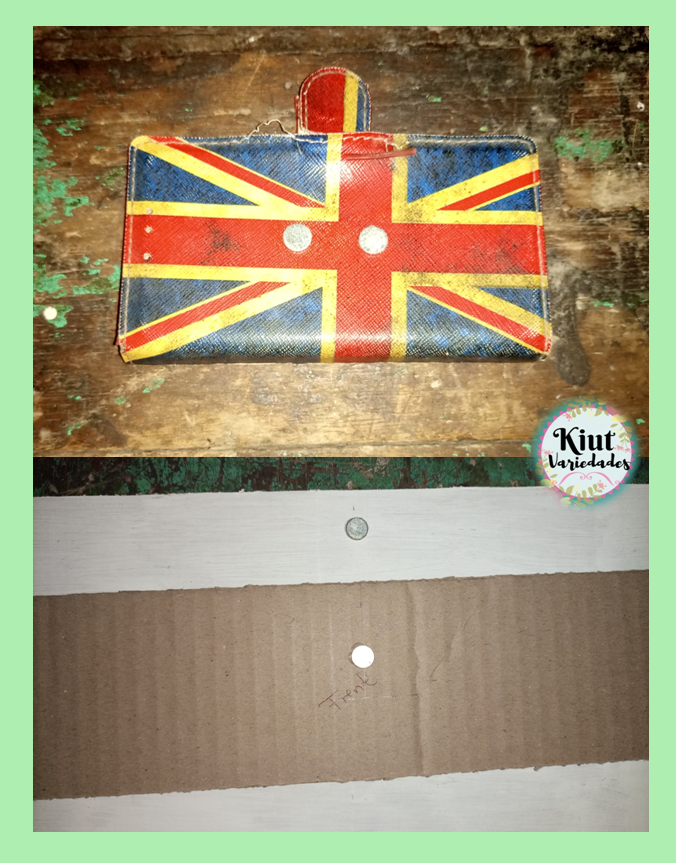
Tome el antiguo forro de teléfono y le saque el imán el cual luego pegue (lo más centrado posible) en el cierre de la tapa superior y en el frente superior de la caja, para pegarlo en este ultimo calcule aproximadamente donde llegaría el imán cuando se cerrara la caja.
Take the old phone liner and remove the magnet which I then glued (as centered as possible) on the closure of the top cover and the top front of the box, to paste it in the latter calculate approximately where the magnet would reach when the box is closed.
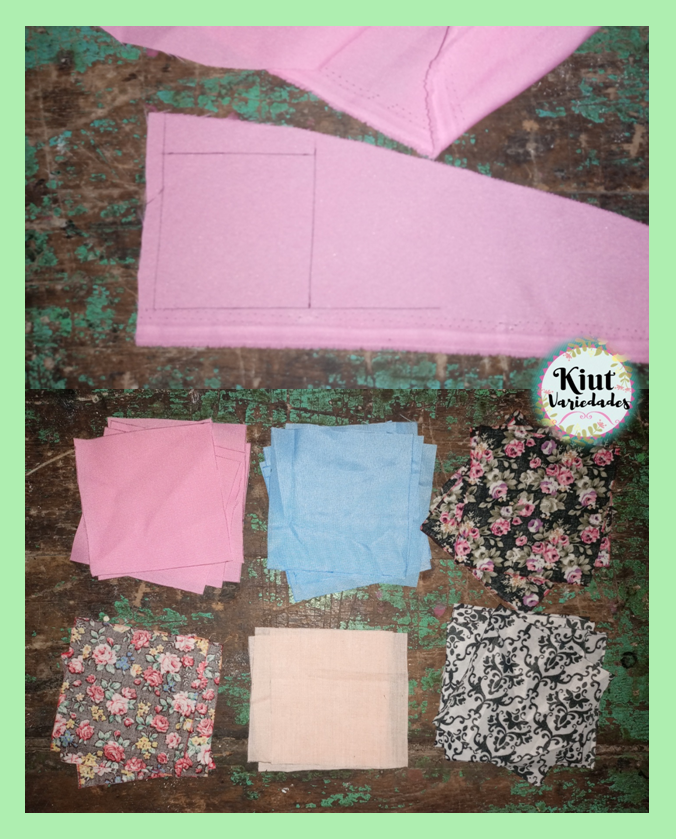
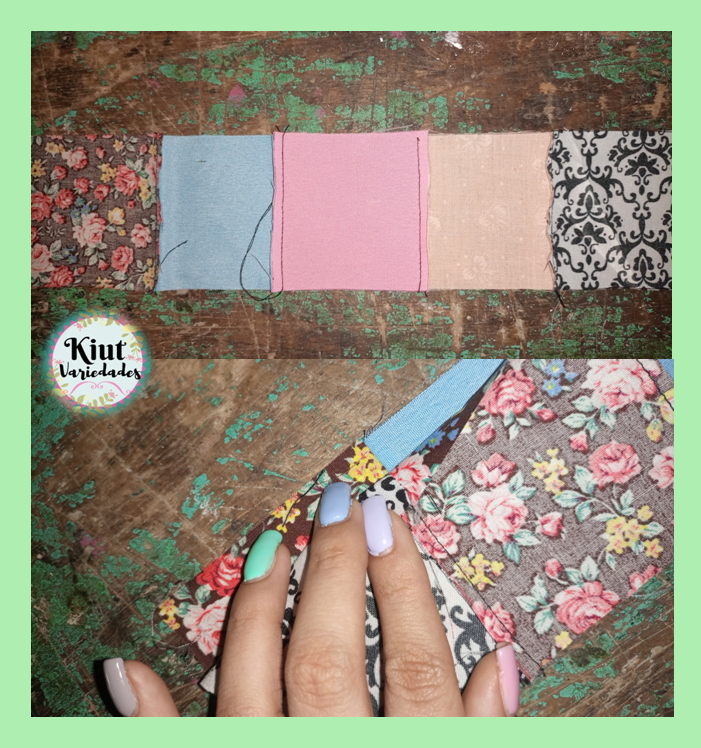
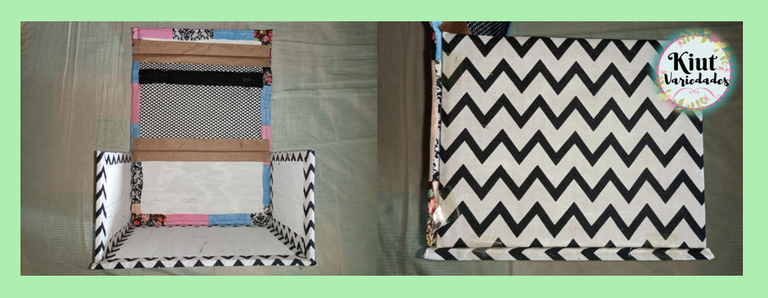
Para forrar las piezas que faltan (que son el frente y la unión de tapa y parte trasera de la caja) vamos a realizar una técnica muy famosa llamada patchwork, esta técnica consiste en la creación de piezas textiles que se forman a partir de la unión de pequeños trozos de diferentes telas. Para esto, vamos a cortar de los retazos de tela que tengamos cuadrados de 10x10 cm (o si tus retazos son muy pequeños puedes cortar cuadrados mas pequeños, pero mientras más pequeños obviamente necesitaras mas).
To line the missing pieces (which are the front and the union of the lid and back of the box) we are going to use a very famous technique called patchwork, this technique consists of creating textile pieces that are formed from the union of small pieces of different fabrics. For this we are going to cut from the fabric scraps that we have squares of 10x10 cm (or if your scraps are very small you can cut smaller squares, but the smaller you will obviously need more).
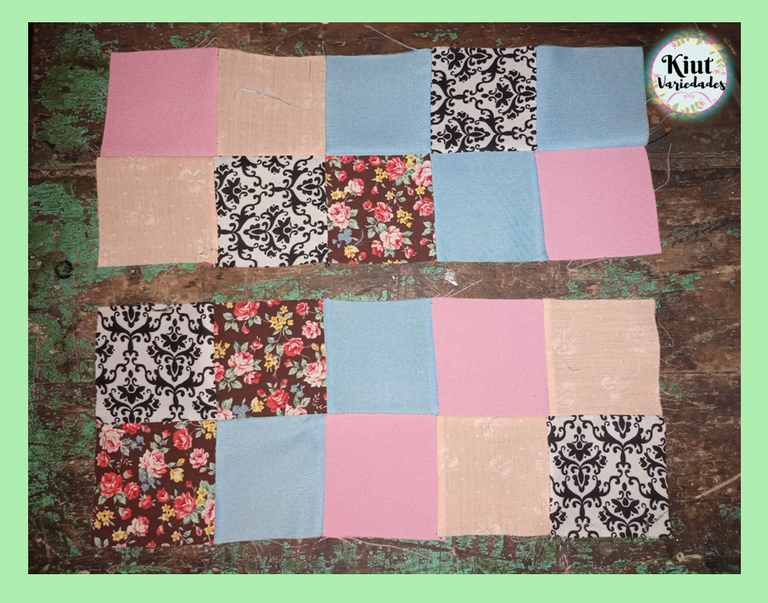
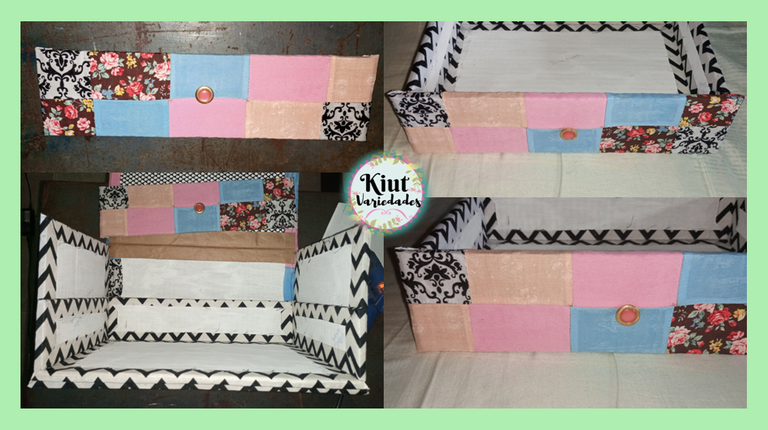
Con todos los cuadrados cortados, debemos formar nuestro mosaico de telas para saber cómo más o menos queremos que queden (o si prefieres el estilo totalmente libre, entonces te saltas esta parte), y vamos a comenzar a unir los cuadrados en pareja, y luego estas parejas las uniremos a otras.
With all the squares cut, we should form our fabric mosaic to know how we more or less want them to look (or if you prefer the totally free style, then you skip this part), and we will start joining the squares in pairs, and then these pairs we will join them to others.
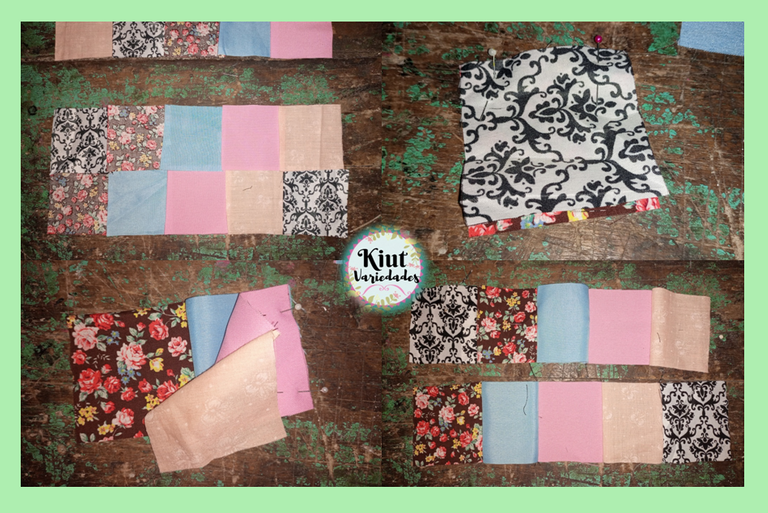
De esta manera se formaran tiras, estas hay que plancharlas, si la primera costura la planchamos hacia la derecha, la segunda debe ir hacia la izquierda y en la tira que sabemos que ira arriba de la que acabamos de planchar, debemos hacerlo de manera contraria, de esta forma cuando unamos las tiras no se formaran bultos de tela en las uniones.
In this way strips will be formed, these must be ironed, if the first seam is ironed to the right, the second must go to the left and in the strip that we know will go above the one we have just ironed, we must do it in the opposite way, in this way when we join the strips there will be no lumps of fabric in the joints.
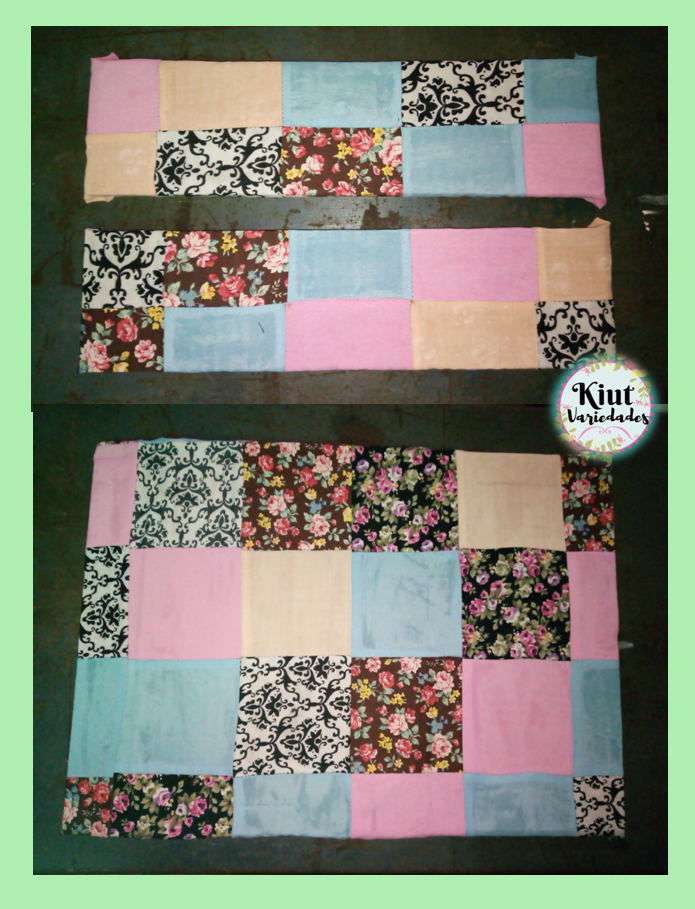
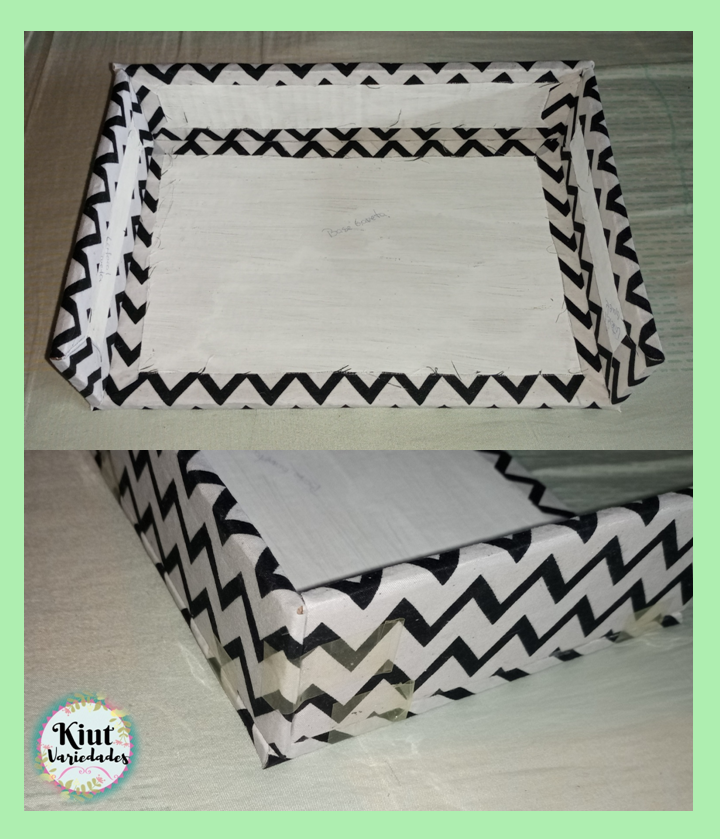
Con nuestras piezas de tela ya formadas en patchwork, procedemos a forrar las piezas de cartón faltantes, de la misma forma que hicimos con las anteriores. Cabe destacar, que en la pieza que forrara la parte trasera y tapa de la caja, hice un ruedo por toda la orilla, pues ya que la tapa será algo muy visible y en constante movimiento, de esta forma la tela no se deshilara.
With our pieces of fabric already formed in patchwork, we proceed to line the missing pieces of cardboard, in the same way we did with the previous ones. It is worth mentioning that in the piece that will line the back and lid of the box, I made a roll all around the edge, since the lid will be something very visible and in constant movement, this way the fabric will not fray.
Lo último que hice antes de comenzar el armado de la caja fue medir desde la parte superior de la pieza trasera 8cm y trazar una línea (lo mismo hice en los laterales) y luego corté otras dos tiras de papel craft que pegue nuevamente en la unión de la pieza trasera con la tapa, de esta forma dicha unión ya no es visible.
The last thing I did before starting to assemble the box was to measure from the top of the back piece 8cm and draw a line (I did the same on the sides) and then cut two more strips of craft paper that I glued again at the junction of the back piece with the lid, so that the junction is no longer visible.
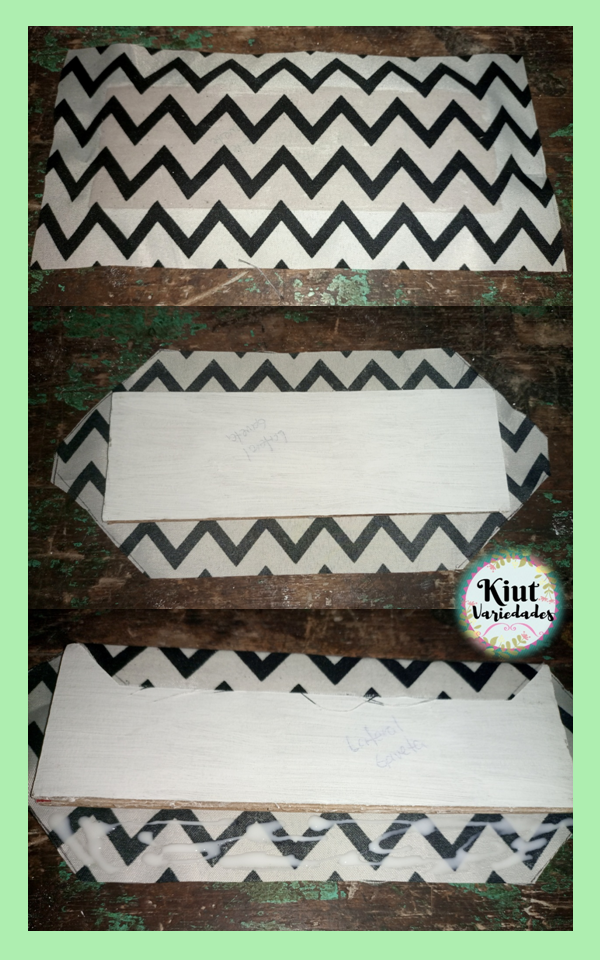
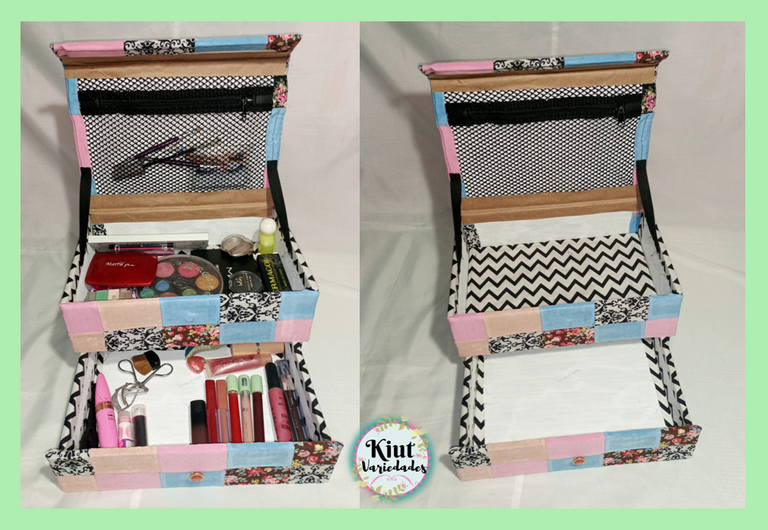
Ahora sí, con todas las piezas forradas y listas es momento de armar. Lo primero de arme fue la gaveta, sobre la base de la misma pegue primero la pieza trasera y luego los laterales, para evitar que las piezas se movieran, me ayude de cinta adhesiva que obviamente luego retire. La caja la comencé armando de la misma forma que la gaveta.
Now, with all the pieces lined and ready, it's time to assemble. The first thing to assemble was the drawer, on the base of the drawer I glued first the back piece and then the sides, to prevent the pieces from moving, I used adhesive tape that obviously I removed later. I started assembling the box in the same way as the drawer.
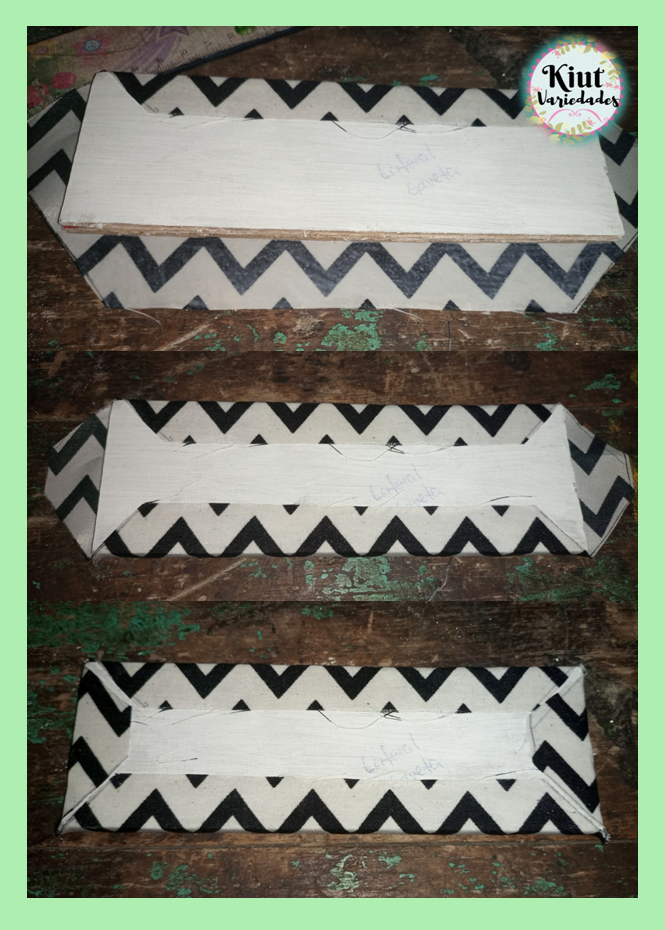
En la tapa frontal de la gaveta pegamos el botón (centrado), después introduje la gaveta en la caja pero sin llegar al fondo y pegue la pieza frontal, haciéndolo de esta forma nos aseguramos que la tapa frontal de la gaveta que perfectamente alienada con los bordes de a caja.
On the front cover of the drawer we glued the button (centered), then I inserted the drawer in the box but without reaching the bottom and glued the front piece, doing it this way we ensure that the front cover of the drawer that perfectly aligned with the edges of the box.
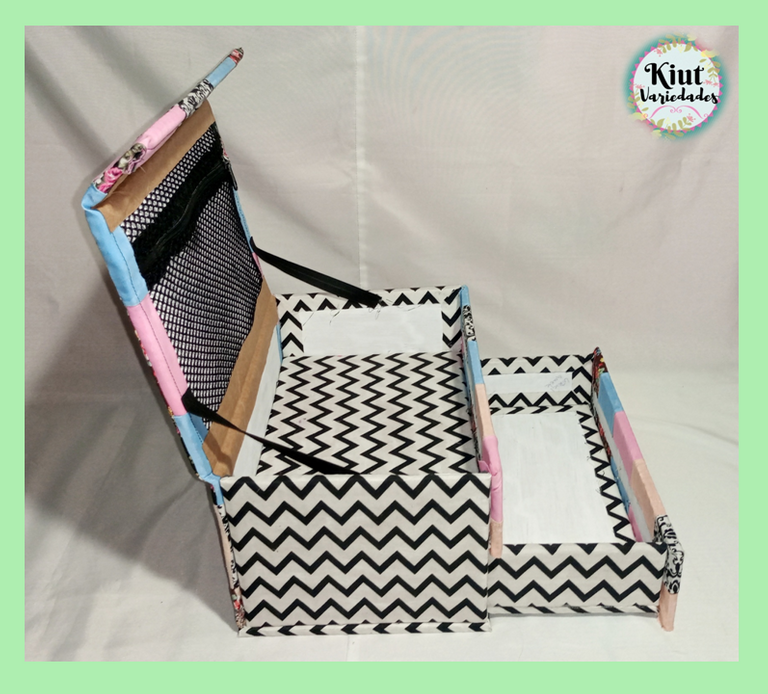
Seguidamente se pega el separador justo en la línea que trazamos anteriormente, y luego se pega a pieza frontal superior formando así el cajón superior. Por último pegamos la cinta o elástico que va a sostener a tapa cuando se encuentre abierta.
Next we glue the separator right on the line we drew previously, and then we glue it to the upper front piece, thus forming the upper drawer. Finally we glue the ribbon or elastic that will hold the lid when it is open.
Te invito igual que siempre a que intentes este proyecto por tu cuenta y me cuentes en los comentarios 👇 como es tu experiencia, de igual forma apoya esta linda iniciativa y únete al challenge 💕♻️.
I invite you as always to try this project on your own and tell me in the comments 👇 how is your experience, likewise support this beautiful initiative and join the challenge 💕♻️.


Síguenos en todas nuestras redes sociales… || Follow us on all our social networks ...
Facebook:KiutVariedades
Instagram:@Kiut_variedades
Twitter:@Kiut_variedades
Me has dejado sin palabras, que gran proyecto de reciclaje quiero uno para mi, el acabado es perfecto se puede notar que le dedicaste tiempo y esfuerzo. Increíble participación.
Pd: Me encanta tu felino.
Jajajajajaja me encanto tu posdata 😂💕. Me alegra mucho que te guste, la verdad me la pase super bien haciéndola, y lo mejor e todo es que tiene demasiado espacio para guardar todo.