“Al final, no son los años los que cuentan en tu vida, es la vida en tus años”.
— Abraham Lincoln.
"In the end, it's not the years that count in your life, it's the life in your years."
— Abraham Lincoln.
El pasado jueves 13 de agosto festejé mi cumpleaños número 23. A pesar de estar confinada en mi hogar tuve un día bastante agradable, pues mi abuela se encargó de consentirme con un desayuno y almuerzo delicioso (ella sabe que el mejor regalo de cumpleaños para mí es una comida deliciosa elaborada con mucho cariño). De la respectiva torta de cumpleaños me encargué yo, y básicamente ese fue el regalo de cumpleaños de mí para mí.
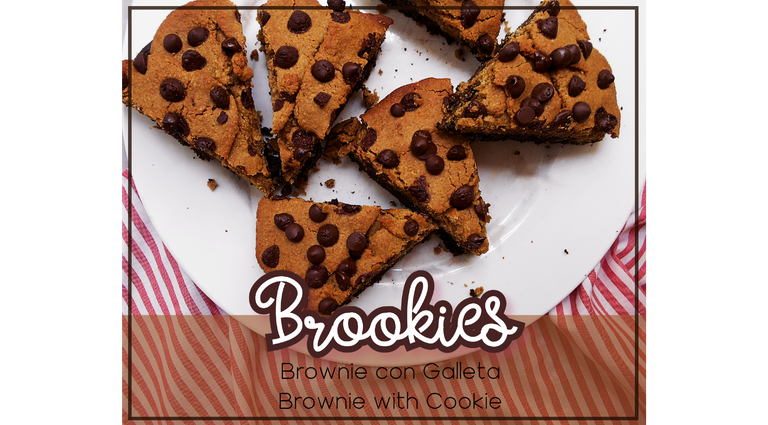
En esta oportunidad quise elaborar algo distinto a la típica torta de cumpleaños y en una versión saludable obviamente y como yo amo el chocolate preparé un delicioso Brookie: brownie con galleta por encima. De todos los postres en versión saludable que he preparado hasta el momento este ha sido mi favorito, y créanme que cualquier persona que lo pruebe jamás pensaría que es completamente saludable pues no contiene azúcar ni harinas refinadas. A continuación les comparto esta increíble receta la cual se divide en dos partes (Parte 1: elaboración del brownie, Parte 2: elaboración de la galleta).
Last Thursday, August 13, I celebrated my 23rd birthday. Despite being confined to my home, I had a pretty nice day, as my grandmother pampered me with a delicious breakfast and lunch (she knows that the best birthday gift for me is a delicious meal prepared with a lot of love). I took care of the respective birthday cake, and basically that was my birthday present to me.
This time I wanted to make something different from the typical birthday cake and in a healthy version obviously and since I love chocolate I made a delicious Brookie: brownie with cookie on top. Of all the healthy versions I've made so far this has been my favorite, and believe me anyone who's tried it would never think it was completely healthy because it contains no sugar or refined flours. Here is this amazing recipe which is divided into two parts (Part 1: making the brownie, Part 2: making the cookie).
.png)
INGREDIENTES | INGREDIENTS
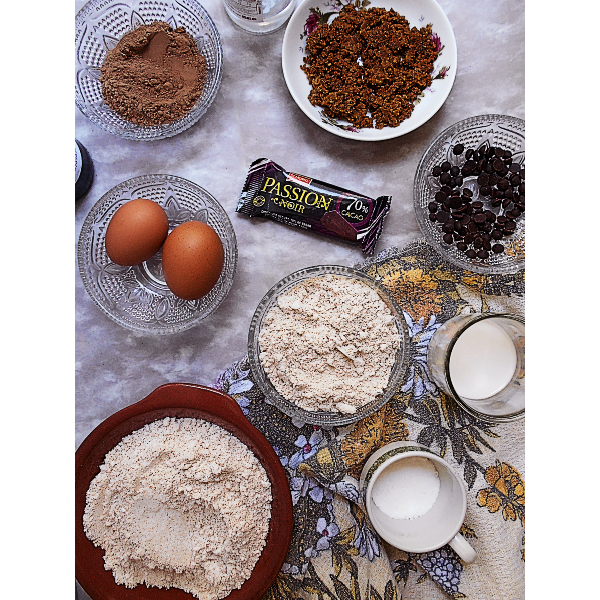
PARA EL BROWNIE
✔ 80 gramos de harina de avena
✔ 25 gramos de cacao en polvo sin azúcar
✔ 2 huevos
✔ 2 cucharadas de aceite de coco
✔ 3 cucharadas de leche de coco
✔ 2 cucharadas de extracto de estevia
✔ 1 cucharadita de polvo para hornear
✔ 1 cucharadita de extracto de vainilla
✔ Una pizca de sal
✔ 1 cucharadita de café -opcional-
FOR THE BROWNIE
✔ 80 grams of oat flour
✔ 25 grams of unsweetened cocoa powder
✔ 2 eggs
✔ 2 tablespoons of coconut oil
✔ 3 tablespoons of coconut milk
✔ 2 tablespoons of stevia extract
✔ 1 teaspoon baking powder
✔ 1 teaspoon vanilla extract
✔ A pinch of salt
✔ 1 teaspoon of coffee -optional-
PARA LA GALLETA
✔ 160 gramos de harina de avena
✔ 3 cucharadas de aceite de coco
✔ 3 cucharadas de Panela Molida (caña de azúcar), conocido en otros países como: panela, piloncillo, rapadura,chancaca…
✔ 60 mL de leche de coco
✔ 1 cucharadita de polvo para hornear
✔ Chispas de chocolate oscuro sin azúcar
FOR THE COOKIE
✔ 160 grams of oat flour
✔ 3 tablespoons of coconut oil
✔ 3 tablespoons of Panela (sugar cane), known in other countries as: panela, piloncillo, rapadura, chancaca ...
✔ 60 mL of coconut milk
✔ 1 teaspoon of baking powder
✔ Sugar-free dark chocolate chips
PROCEDIMIENTO | PROCEDURE
« B R O W N I E »
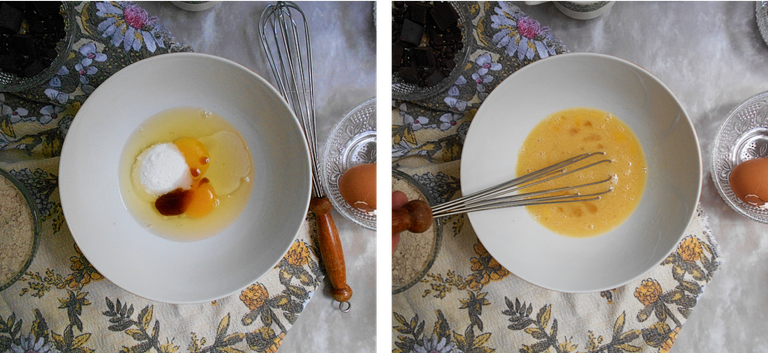
➮PASO 1: Mezclar primero la estevia con todos los ingredientes líquidos: aceite y leche de coco, huevos, vainilla.
➮STEP 1: First mix the stevia with all the liquid ingredients: oil and coconut milk, eggs, vanilla.
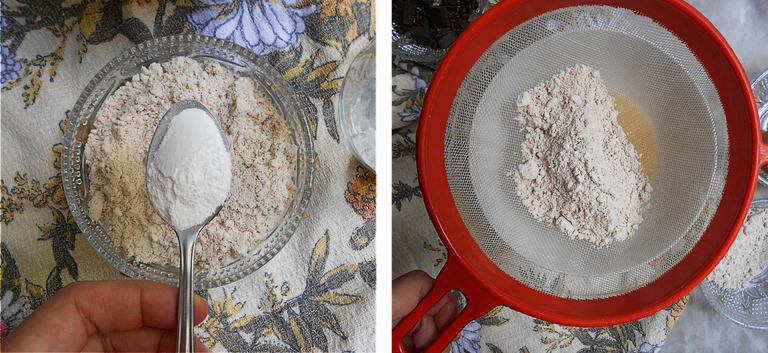
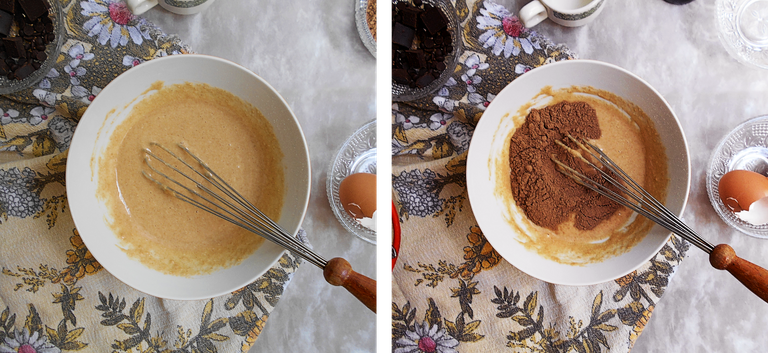
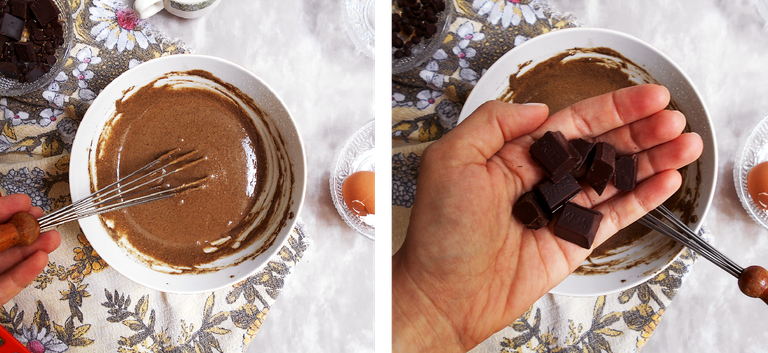
➮PASO 2: En un recipiente a parte mezclar la harina de avena con el polvo para hornear, luego vamos a cernir estos ingredientes secos sobre la mezcla líquida. Mezclaremos todo muy bien hasta que no queden grumos y añadiremos el cacao en polvo hasta obtener una mezcla densa. Yo añadí unos trozos de chocolate oscuro 70% cacao, pero esto es algo completamente opcional.
➮STEP 2: In a separate bowl mix the oatmeal with the baking powder, then sift these dry ingredients into the liquid mixture. We will mix everything very well until there are no lumps left and we will add the cocoa powder until we obtain a dense mixture. I added a few pieces of dark chocolate 70% cocoa, but this is completely optional.
« G A L L E T A »
« C O O K I E »
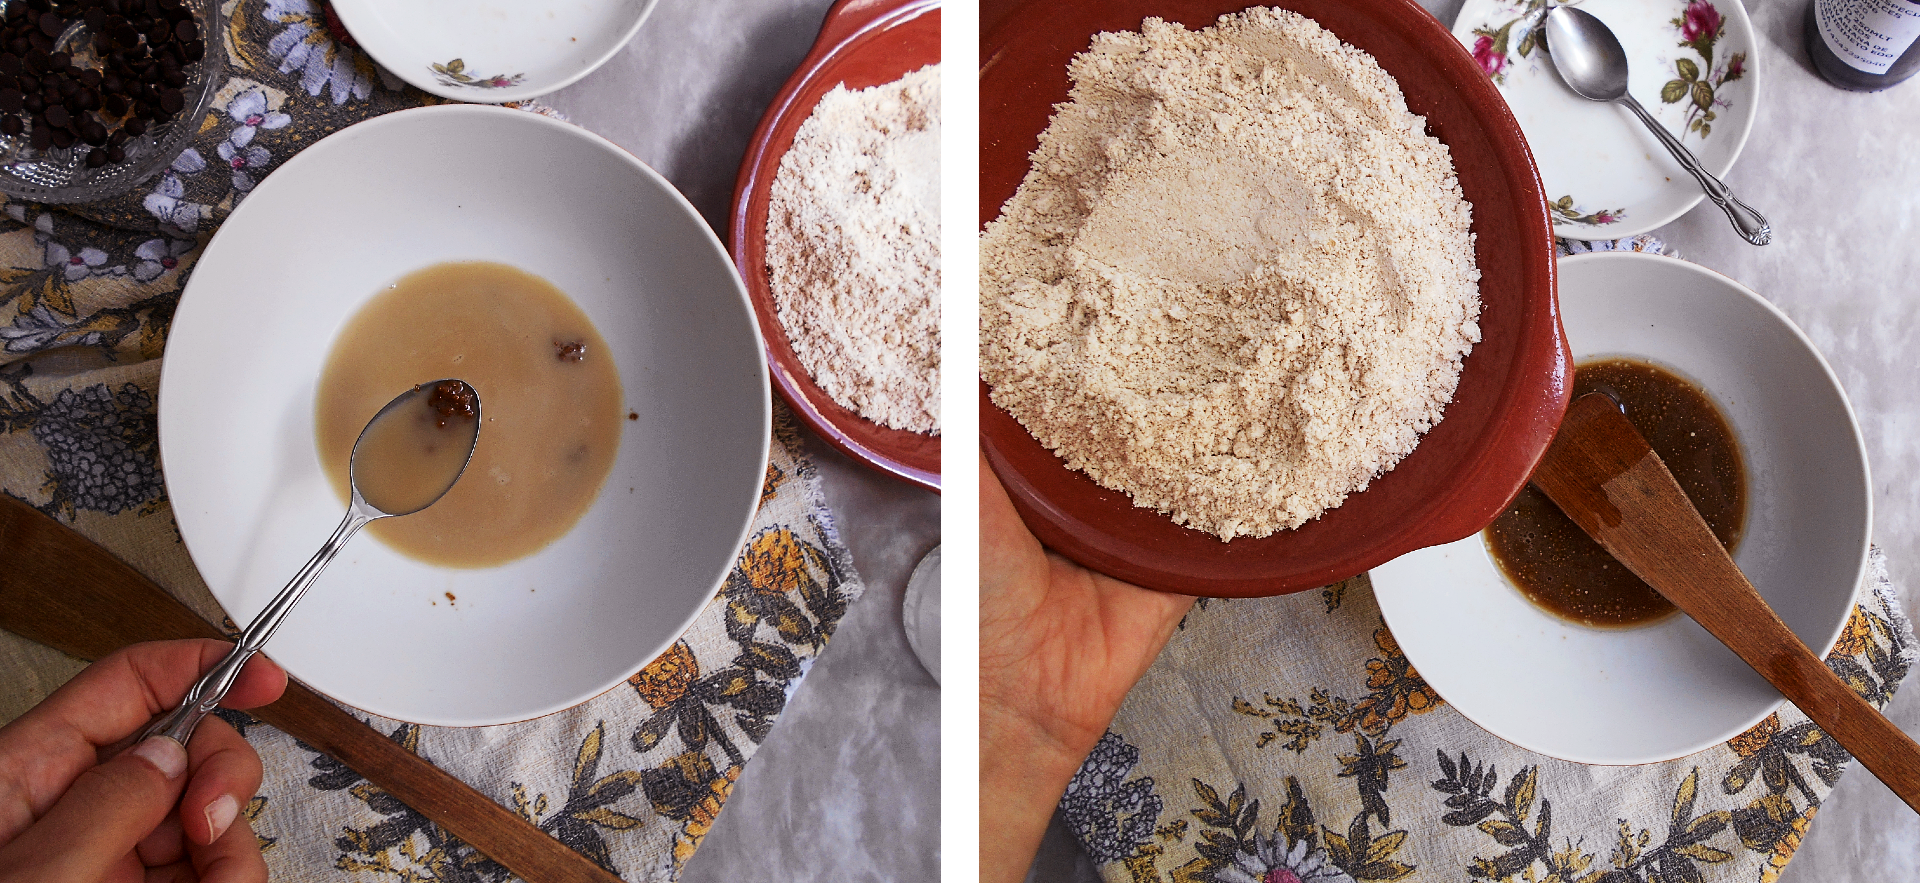
➮PASO 3: Mezclaremos primero la leche de coco tibia con el aceite y disolveremos la panela molida. Cuando la panela esté completamente disuelta añadiremos los ingredientes sólidos (avena molida + polvo para hornear).
➮STEP 3: We will mix first the warm coconut milk with the oil and we will dissolve the ground panela. When the panela is completely dissolved we will add the solid ingredients (ground oats + powder to bake).
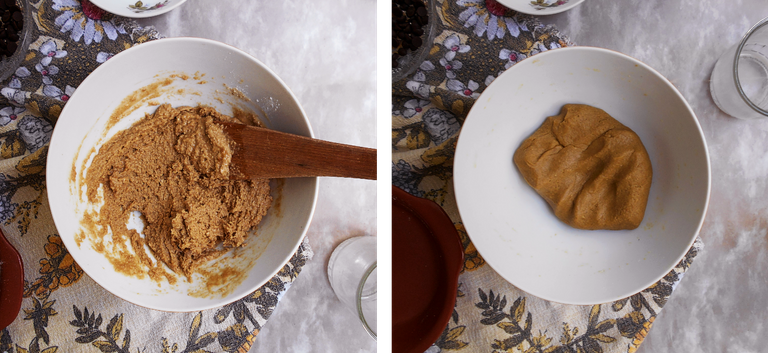
➮PASO 4: Con ayuda de una paleta mezclaremos hasta integrar todos los ingredientes, luego procederemos a amasar con mucha paciencia hasta obtener una masa muy suave y para nada pegajosa. Cuando comiences a amasar, la mezcla se pegará mucho a tus manos y pensarás que no existe manera de lograr una masa no pegajosa, así que amasa con mucha paciencia y amor.
➮STEP 4: With the help of a paddle we will mix until all the ingredients are integrated, then we will proceed to knead with a lot of patience until we obtain a very soft and not at all sticky dough. When you start kneading, the mixture will stick very much to your hands and you will think that there is no way to achieve a non-sticky dough, so knead with much patience and love.
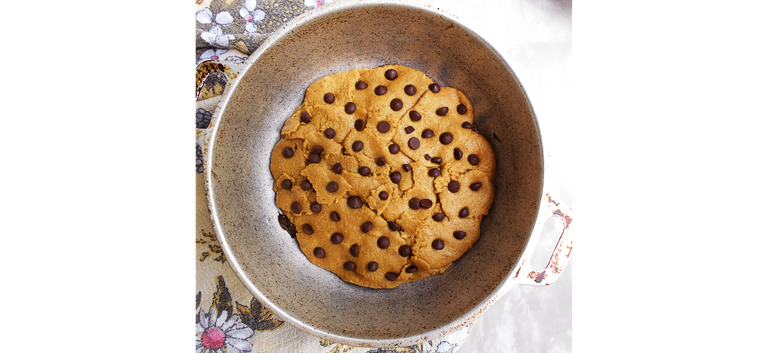
➮PASO 5: Coloca la mezcla del brownie en un recipiente previamente engrasado o cubierto en su superficie con papel para hornear. Toma porciones de la mezcla de galleta, aplástalas y colócalas encima de la mezcla del brownie hasta cubrirlo por completo. Sugerencia: presiona ligeramente las porciones de galleta para que se adhieran mejor unas a otras y así evitar que se desmoronen al momento de cortar los pedazos.
Por último, añade una buena cantidad de chispas de chocolate. Hornea a 180 °C durante unos 30 minutos aproximadamente o hasta que la galleta comience a dorarse. Recuerda que este es un tiempo aproximado que varía de acuerdo a cada horno, así que te recomiendo que vayas chequeando tu Brookie cuando cumpla 15 minutos en el horno. No te olvides realizar la prueba del palillo para comprobar si la mezcla del brownie está cocinada.
➮STEP 5: Place the brownie mixture in a greased or paper-top pan. Take portions of the cookie mixture, crush them and place them on top of the brownie mixture until completely covered. Tip: Press slightly on the cookie portions to make them stick to each other better and to prevent them from falling apart when the pieces are cut.
Finally, add a good amount of chocolate chips. Bake at 180°C for about 30 minutes or until the cookie begins to brown. Remember that this is an approximate time that varies according to the oven, so I recommend that you check your Brookie when it is 15 minutes old in the oven. Don't forget to do the stick test to see if the brownie mix is cooked.
RESULTADOS | RESULTS
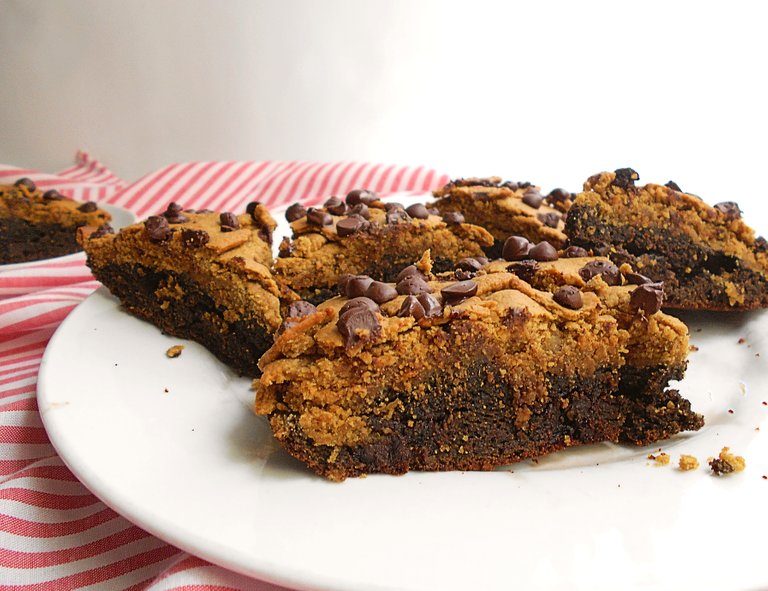
Lo que más me gustó de esta preparación fue la suavidad de la galleta y la mezcla de textura del bizcocho con la galleta. Le paso un dato: si guardas en la nevera y esperas al día siguiente, los sabores se intensifican y la textura es aún más increíble todavía.
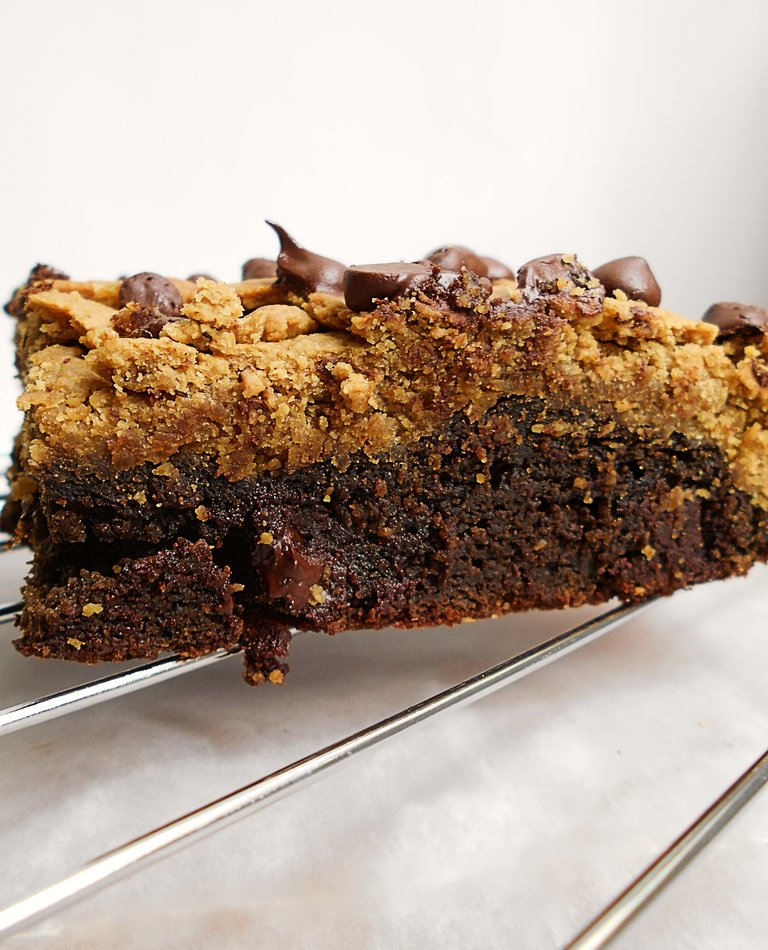
Te recomiendo que al sacar del horno el Brookie esperes a que se enfríe por completo para evitar que la galleta se quiebre al cortar las porciones individuales. Espero que hayas disfrutado de esta receta…¡nos leemos pronto!
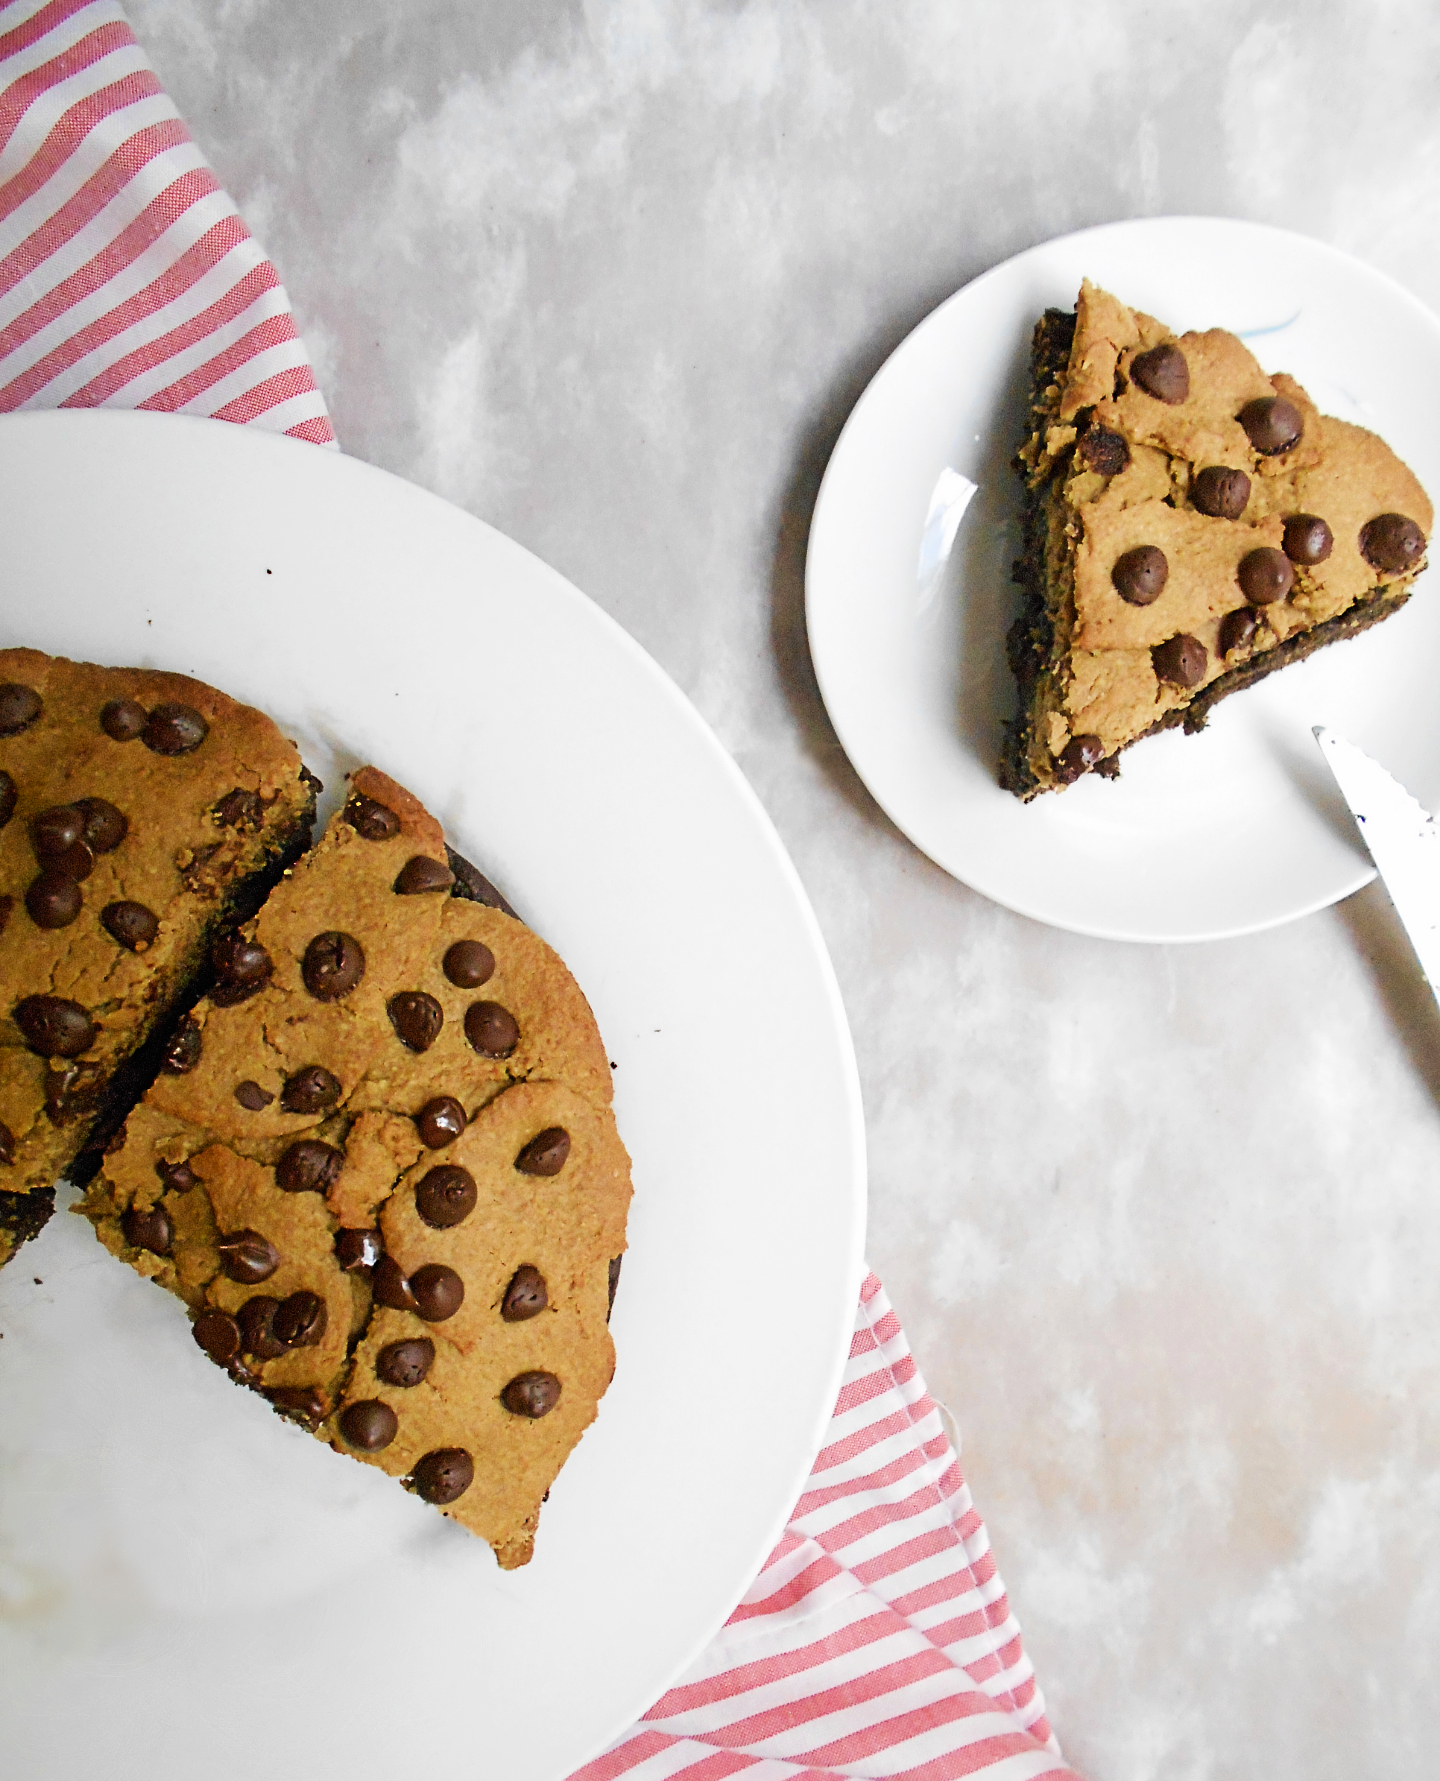
I recommend that when you take the Brookie out of the oven you wait for it to cool down completely to prevent the cookie from breaking when you cut the individual portions. I hope you enjoyed this recipe... we'll be reading it soon!
✎ Edición por | Edition by: @maryed, Pixlr Photo Editor.
✂ Separador | Separator: pngtree

Estimada Maried, en primer lugar felicidades por tu cumpleaños, tu vigésima tercera vuelta al sol.
Luego no puedo más que también felicitarte por tu receta, es espectacular, y si sabe como se ve... huuummm
Probaremos apenas tenga la receta, seguro que a mis hijas les va a encantar (y a mí también).
¡Bienvenido a mi Blog, @fjjrg!😊
Muchas gracias por tus felicitaciones y por tomarte el tiempo para leer y comentar esta publicación, lo valoro mucho.
Créeme cuando te digo que sabe muchísimo mejor de lo que se ve, jeje😍...cualquier cosa que tenga chocolate nunca podrá salir mal.
Saludos y un fuerte abrazo😊
eso se ve delicioso, tengo que intentar hacerlas algún día. Gracias por compartir!
Seguro te quedará genial, ¡gracias por comentar! Saludos.
Amo el chocolate y todas las recetas que lo incluyan jajaj. Se ve delicioso, gracias por compartir amiga. Saludos!
Siempre he dicho que cualquier receta que lleve una buena cantidad de chocolate jamás podrá salir mal jajaja. Gracias por comentar, amiga...saludos!
Comienzo con: ¡Feliz Cumpleaños bella! @maryed espero hayas pasado un lindo día, saludos y éxitos para ti.
Yo también acostumbro a hacer mi torta. Me encantan los postres y más hacerlos. Este que hiciste se ve riquísimo y además el bonus es que no tiene un gramo de culpa. ¡Me encanta!
Abrazos.
Posted using Dapplr
¡Muchas gracias, amiga!💕
Hay personas que se medio burlan de mí cuando les comento que acostumbro a hacerme mis propias tortas de cumpleaños, me dicen: "qué triste"...pero yo no opino así, a mí más bien me parece un bonito autoregalo, un gusto que nos merecemos😊.
Gracias por comentar. Saludos y abrazos gigantes para ti💕
¡De nada amiga! 💛
Que se burlen, mientras tanto nosotras disfrutamos preparándolas jaja. Exacto que se venga todo lo que nos merecemos.
Abracitos.
Posted using Dapplr
Preparándolas y degustándolas jajaja😝
Congratulations, your post has been upvoted by @dsc-r2cornell, which is the curating account for @R2cornell's Discord Community.
Thanks!😊
¡Feliz Cumpleaños preciosa! 😃 ¡Que tengas un lindo dia!🙌
¡Muchas gracias!😊
Saludos.
¡FELICIDADES!
Que cumplas muchos años más @maryed
Me encanta tu manera de presentar tus platillos, tan simple y elegante, todo se ve realmente delicioso.
¡Muchas gracias, Jenny!💕
Me alegra mucho saber que te gusten mis publicaciones. Siempre he pensado que en la sencillez está la elegancia😊
Saludos, Jenny...y un fuerte abrazo para ti!
Feliz cumpleaños Mary 💙🥳 un poquito atrasado pero se nota que la pasaste muy bien y eso es lo importante. La receta se ve uff, demás de buena y súper ingeniosa.👏
¡Gracias, Cris!💜 sí, a pesar de la cuarentena la pasé bonito...es increíble como detalles tan mínimos nos hacen sentir felices y agradecidos!😊
Gracias por comentar. Abrazos enormes, para ti!
Me enamoré de esta receta!!! Maryedcita 💚
Yo sabía que te iba a gustar, Marialecita💜