Siempre he querido explorar más a nivel de edición fotográfica, mi equipo anterior no me lo permitía y hasta ahora es que he podido iniciar a tomar algunas clases de expertos, youtube está lleno de ellos y es gratis, la fotografía artística es un área espectacular que me gusta muchísimo para entretenerme y disfrutar.
I've always wanted to explore more on a photo editing level, my previous equipment didn't allow me to do it and until now I've been able to start taking some expert classes, youtube is full of them and it's free, artistic photography is a spectacular area that I like a lot to entertain myself and enjoy.
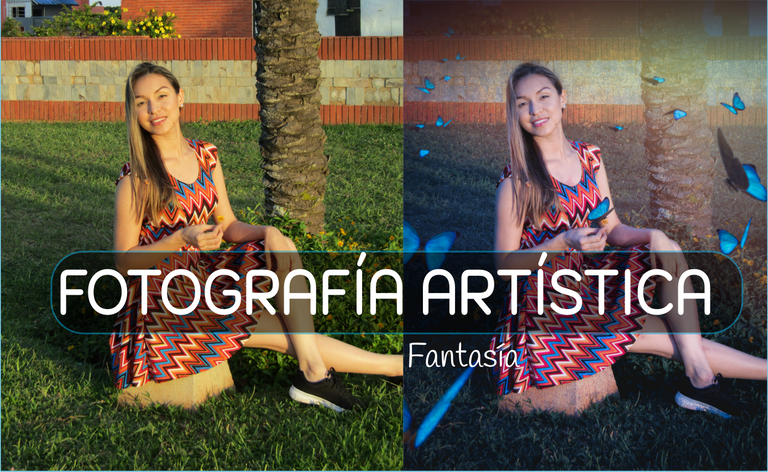
En este post les comparto el proceso de realización de una fotografía al estilo artístico modo fantasía, tomé una de mis fotografías para este trabajo.
QuoteIn this post I share with you the process of making a fantasy style photography, I took one of my photography for this work.
Si quieres hacer este proceso con algunas de tus fotografías sería genial, créeme que es muy sencillo. Al final del post te dejaré un link de video de donde me inspiré, sin embargo, tuve que hacer cambios por el estilo de mi fotografía y lo que quería obtener, más que todo a nivel de tonalidades. Ahora sí, veamos cómo es el proceso.
If you want to do this process with some of your photography it would be great, believe me it is very simple. At the end of the post I'll leave you a video link where I was inspired, however, I had to make changes for the style of my photography and what I wanted to get, mostly at the level of tonalities. Now, let's see how the editing process went.
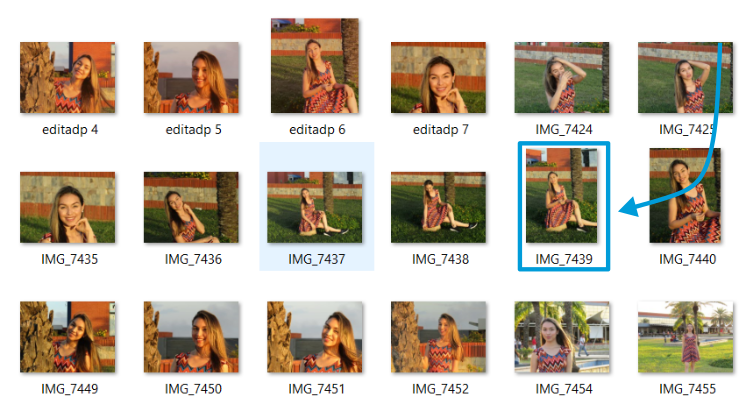
Paso 1: Escoger la fotografía
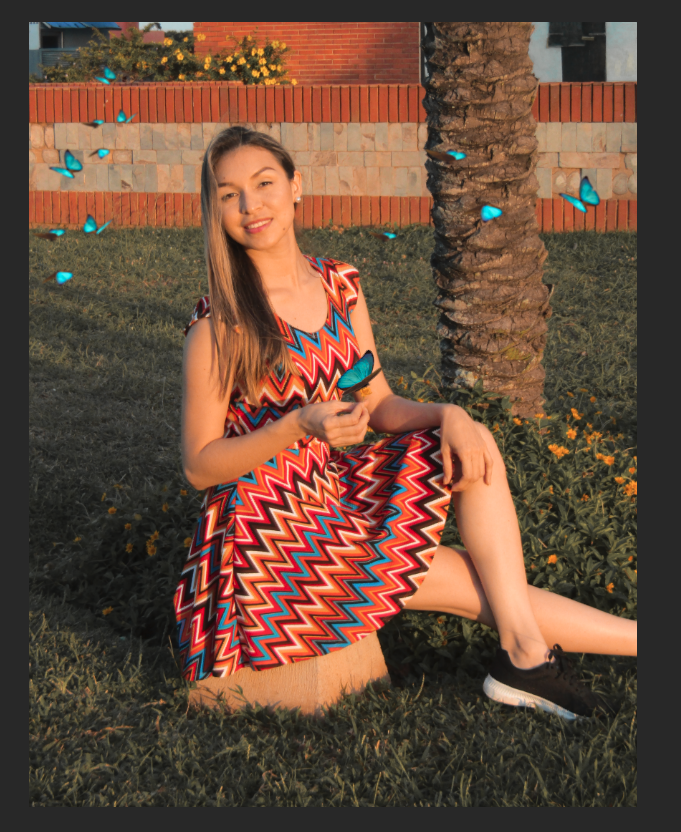
El primer paso es ubicar una fotografía e imaginar como la quieres hacer para que sepas que elementos extras debes buscar, en este caso yo utilicé una fotografía que me tomé en un jardín, estoy sosteniendo una pequeña flor en la mano y me pareció que la idea de las mariposas era espectacular.
Step 1: Choosing the photography:
The first step is to locate a photography and imagine how you want to do it so you know what extra elements you should look for, in this case I used a photography I took in a garden, I'm holding a small flower in my hand and I thought the idea of the butterflies was spectacular.
Paso 2: Buscar recursos
Busqué algunas mariposas en pixabay, también ubiqué un atardecer intenso para usarlo como luz, y una textura de pared para darle un poco de relieve. Busca los elementos necesarios según lo que se te ocurra hacer. Después de esta primera edición, tengo un montón de ideas escritas, seguramente te pasará igual.
Step 2: Find resources
I looked for some butterflies in pixabay, I also placed a intense sunset to use as a light, and a wall texture to give it some relief. Look for the necessary elements according to what you can think of. After this first edition, I have a lot of ideas written down, you will probably feel the same way.
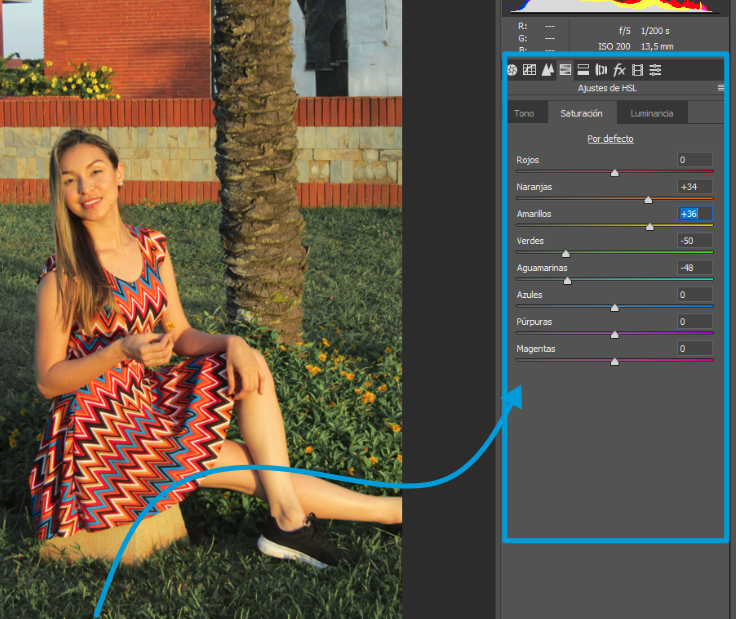
Paso 3: Empezar la edición de colores
Lleva la fotografía a fotoshop, escoge el tamaño en que quieres trabajar, duplica la capa, ve a filtro de cámara Row y ahí empieza a variar la saturación, en mi caso bajé la intensidad de los colores verdes, subí un poco el anaranjado y amarillo.
Step 3: Start color editing
Take the photo to Photoshop, choose the size you want to work with, duplicate the layer, go to the camera Row filter and there the saturation starts to vary, in my case I lowered the intensity of the green colors, I raised a little the orange and yellow.
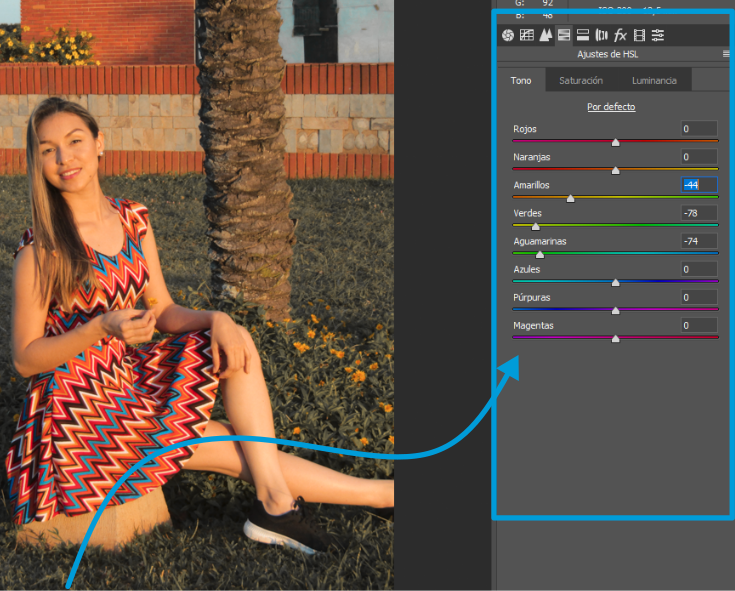
En la sección de tonos coloqué el amarillo más anaranjado y bajé el tono de los verdes, quedaron con un tono muy bonito, como gris.
In the tone section I moved the yellow color to the orange tone and lowered the tone of the greens, they were left with a very nice tone, like gray.
Paso 4: Colocación de elementos
Empecé a incluir las mariposas, las extraje por separado y las llevé a Photoshop, cada mariposa en una capa, de esta manera fue mucho más fácil el proceso. Coloqué un grupo de mariposas de fondo con un desenfoque gaussiano de 2, a medida que se hacían más grandes aumenté el desenfoque, la idea es poder dar mayor profundidad a la imagen mediante estos elementos.
Step 4: Positioning of elements
I started to include the butterflies, extracted them separately and took them to Photoshop, each butterfly in a layer, this way the process was much easier. I placed a group of butterflies in the background with a Gaussian blur of 2, as they got bigger I increased the blur, the idea is to be able to give more depth to the image through these elements.

Paso 5: Efectos finales
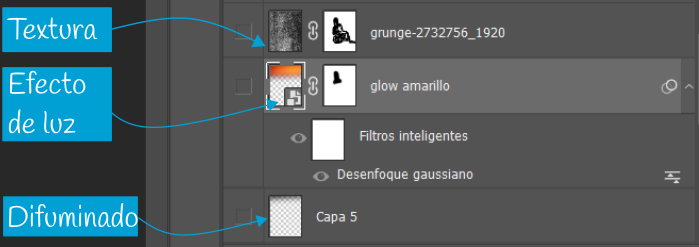
Hice un difuminado en la parte superior de mi fotografía para darle más oscuridad, para ello añadí una capa y con un pincel negro realicé una franja en la parte superior y desenfoqué la capa.
Después añadí el efecto de luz con el atardecer, para ello llevé la imagen del atardecer, la coloqué en la parte superior de la fotografía, la dejé en modo drama. Después agregué una marca de capa y con el pincel en color negro limpié el rostro y cuerpo.
Apliqué la textura dejando la en modo subexponer color con intensidad del 30%, realicé el mismo proceso anterior con la mascara de capa para limpiar la imagen, solo quería el efecto para el fondo.
Step 5: Final effects
I made a blur on the top of my picture to give it more darkness, for that I added a layer and with a black brush I made a stripe on the top and blurred the layer.
Then I added the light effect with the sunset, for this I took the image of the sunset, placed it on the top of the photography, left it in drama mode. Then I added a layer mark and with the black brush I cleaned the face and body.
I applied the texture leaving it in underexposed color mode with 30% intensity, I did the same process as before with the layer mask to clean the image, I just wanted the effect for the background.
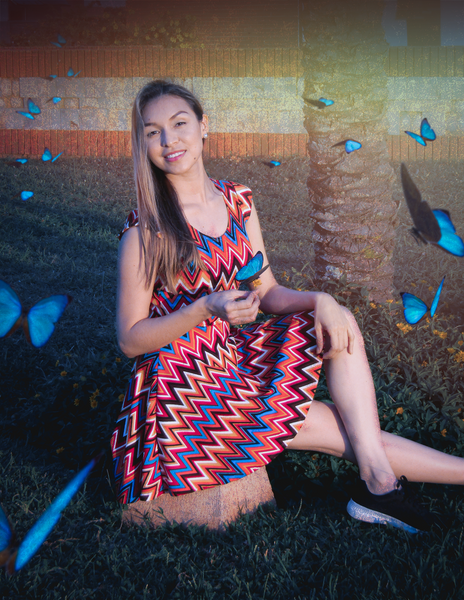
Generé la imagen con todas las capas que tenía, y fui a dar los últimos retoques mediante filtro de cámara Row donde hice tendencia hacia los azules, añadí un poco de saturación y efecto de viñeta, para finalmente quedar de esta manera.
I generated the image with all the layers that I had, and I went to give the last touches by means of camera Row filter where I made tendency towards the blue ones, I added a little bit of saturation and vignette effect, to finally be this way.
Programa utilizado: Photoshop
Fotografía propia
Editada por: Sam Giset
Recursos externos citados arriba
En este video hay un paso a paso, de ahí fue que me inspiré.
Uno de mis lemas es que todos somos creativos, si es de las ediciones que te gustaría hacer inténtalo y mencioname para ver el resultado.
One of my mottos is that we are all creative, if it is one of the editions you would like to do try it and mention me to see the result.
¡Hasta el próximo post!
¡See you soon!
I did this translation with the help of Deepl, sorry my English is not perfect. 🙃
SOBRE MI: SAM GISET
Apasionada por los viajes, la tecnología y el desarrollo del ser.
Ambajadora de Appics
Otras redes:
3speak.online| Instagram| Facebook | Youtube Vlog | Youtube Blockchain
Aprende en la mejor casa: https://hive.blog/@votovzla

Únete a la comunidad Venezolana: https://hive.blog/trending/hive-186377#

Curador: @Mariale07
Muchas gracias!!
excelente que estés ampliando tus caminos, que explores tus habilidades y aquello que te causa intriga. Saludos
Gracias Miguel, me agrada leer este comentario de alguien como tu que hace trabajos super hermosos. 😊