
Español
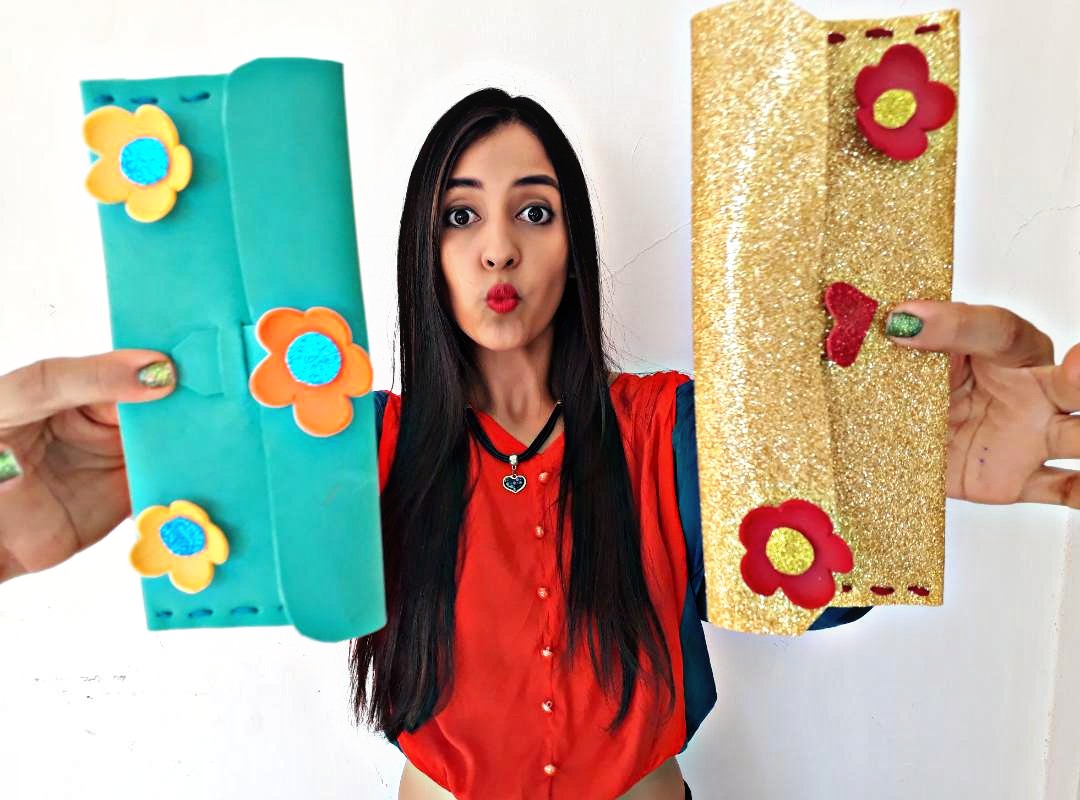
Hola queridos amigos! En esta nueva oportunidad les traigo un divertidísimo paso a paso en donde les mostrare cómo realizar una hermosa cartera de cartón muy fácil hacer, utilizando cartón que es un material reciclable y muy fácil de conseguir. Así que, los invito a este hermoso y divertido trayecto, ideal y perfecto para el desarrollo de la creatividad de los niños. Además es una idea perfecta para pasar un rato agradable con nuestros pequeños en casa, ya que, pueden ir, de a poco, desarrollando su ingenio y acercándose un poco más al trabajo artístico.
English
Hello dear friends! In this new opportunity, I bring you a hilarious step by step where I will show you how to make a beautiful cardboard purse very easy to make, using cardboard that is a recyclable material and very easy to get. So, I invite you to this beautiful and fun journey, ideal and perfect for the development of children's creativity. It is also a perfect idea to spend a pleasant time with our little ones at home, since, they can go, little by little, developing their ingenuity and getting a little closer to artistic work.
¿Qué están esperando?
Esta sencilla técnica nos permite fabricar una cartera de cartón donde podemos llevar nuestras cosas preferidas como maquillajes, monedero, accesorios, golosinas, entre otras cosas más. Antes de comenzar no olvidemos lavarnos nuestras manos.
What are they waiting for?
This simple technique allows us to make a cardboard portfolio where we can carry our favorite things like makeup, purse, accessories, sweets, among other things. Before we start, let's not forget to wash our hands.
[Materiales | Materials]
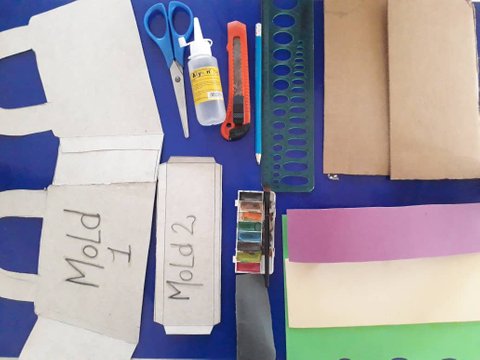
Para hacer esta hermosa cartera de carton necesitaremos:
- Cartón.
- Moldes.
- Foami o goma eva.
- Regla.
- Lápiz.
- Tijera.
- Cuter.
- Lija.
- Pegamento.
- Pintura de acuerela.
To make this beautiful cardboard purse we will need:
- Paperboard.
- Molds
- Foamy or eva foam.
- Rule.
- Pencil.
- Scissors.
- Cuter.
- Sandpaper.
- Glue.
- Acuerela painting.
Procedimiento (paso a paso)
Process (step by step)
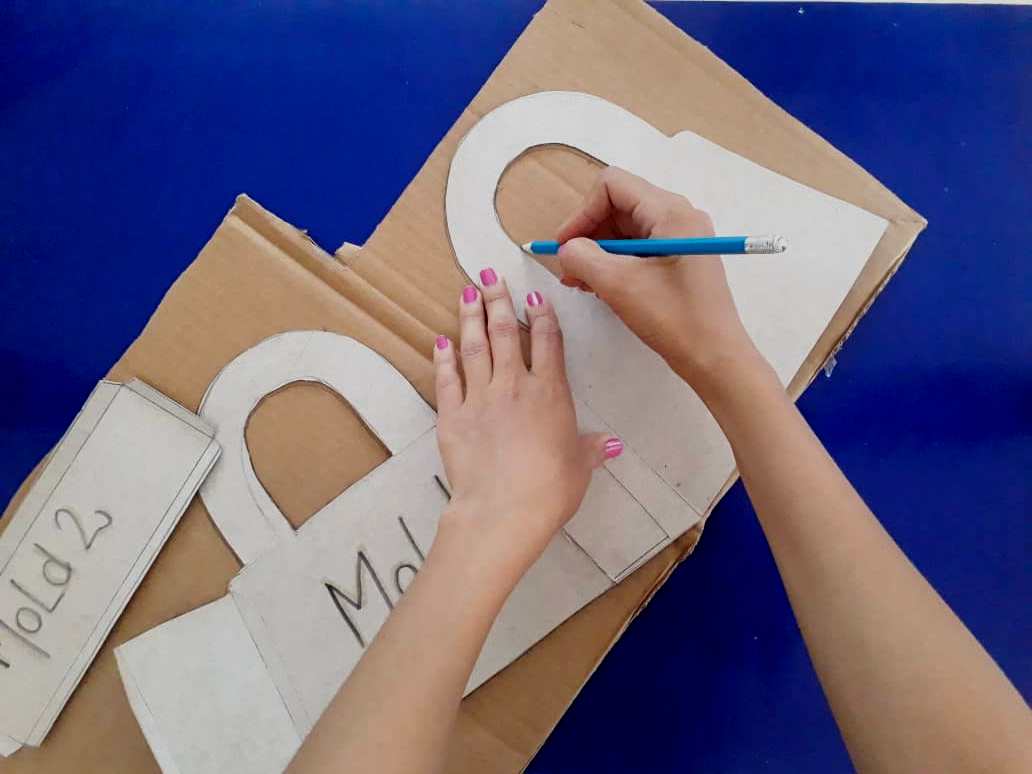
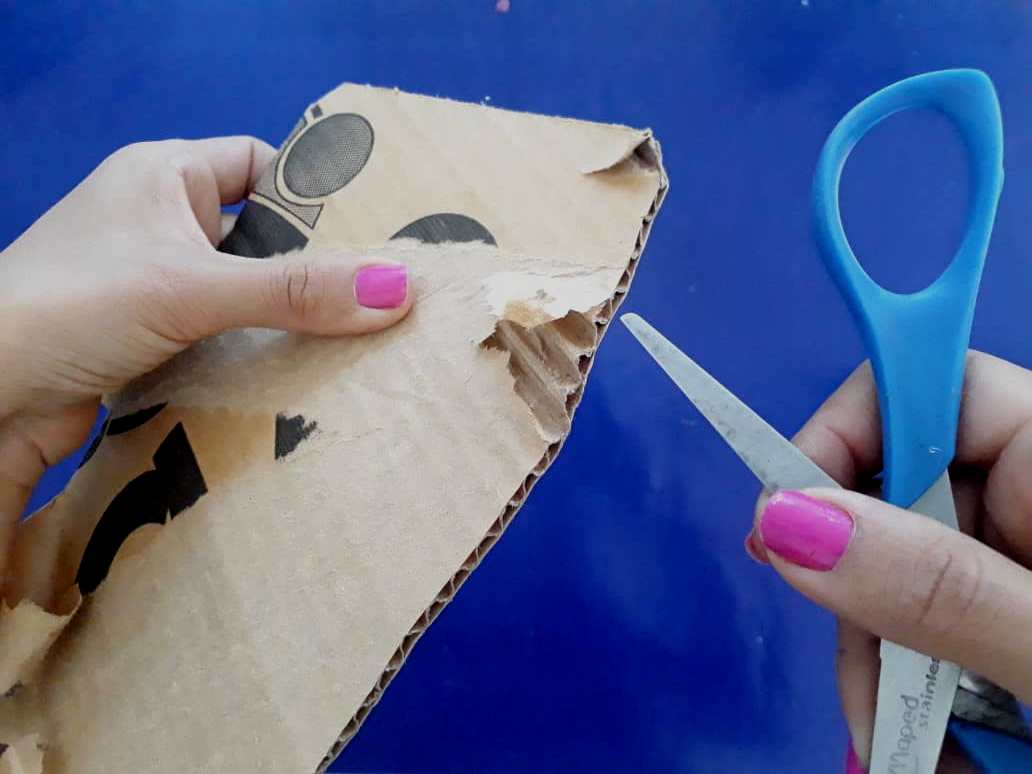
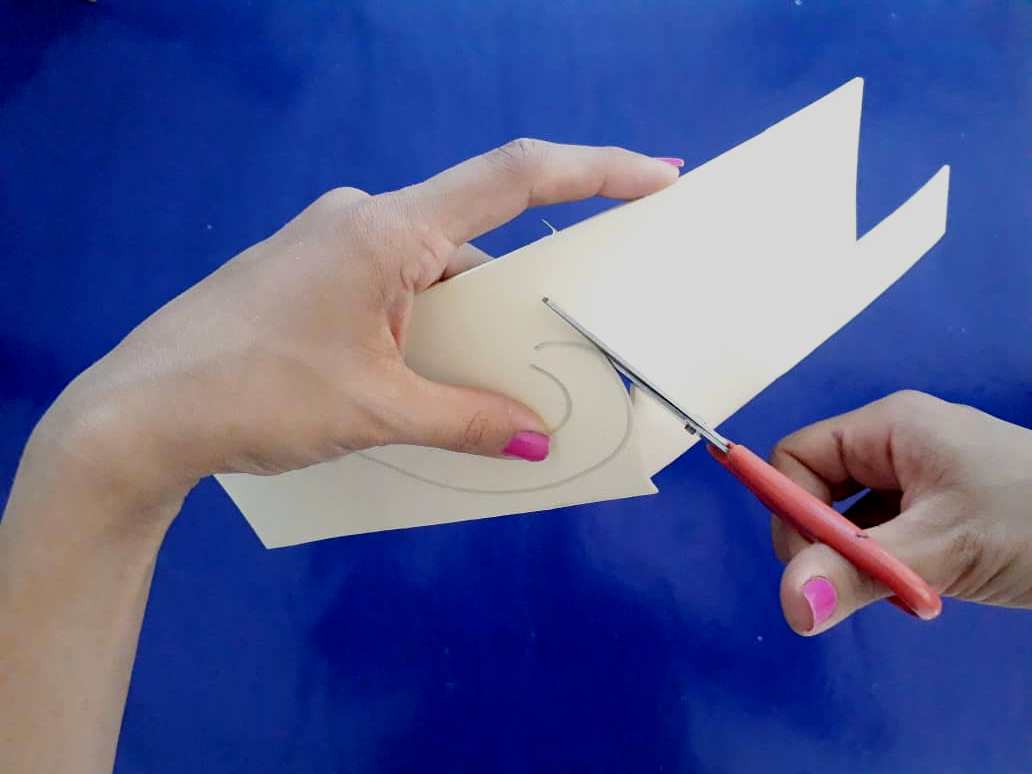
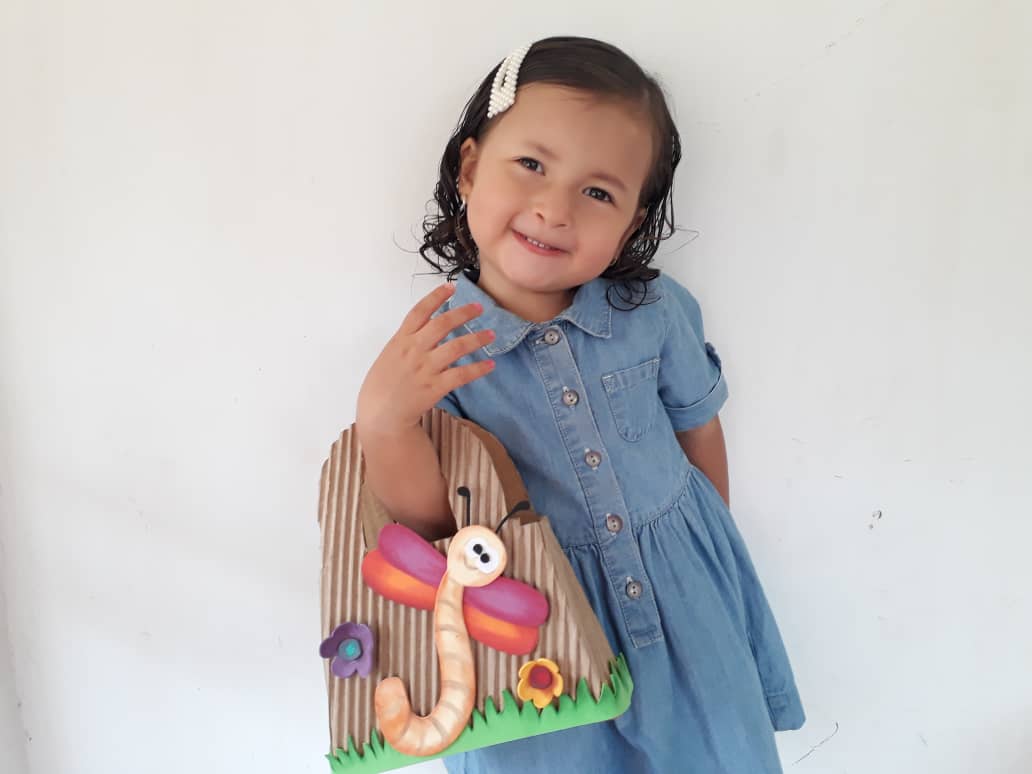
Primero, transferimos y recortamos los moldes al cartón. Debemos recortar con mucho cuidado para mantener sus medidas intactas y evitar accidentes con la tijera. Dichos moldes serán el cuerpo y la base de la cartera.
First, we transfer and cut the molds to the cardboard. We must cut with great care to keep its measurements intact and avoid accidents with the scissors. These molds will be the body and the base of the purse.
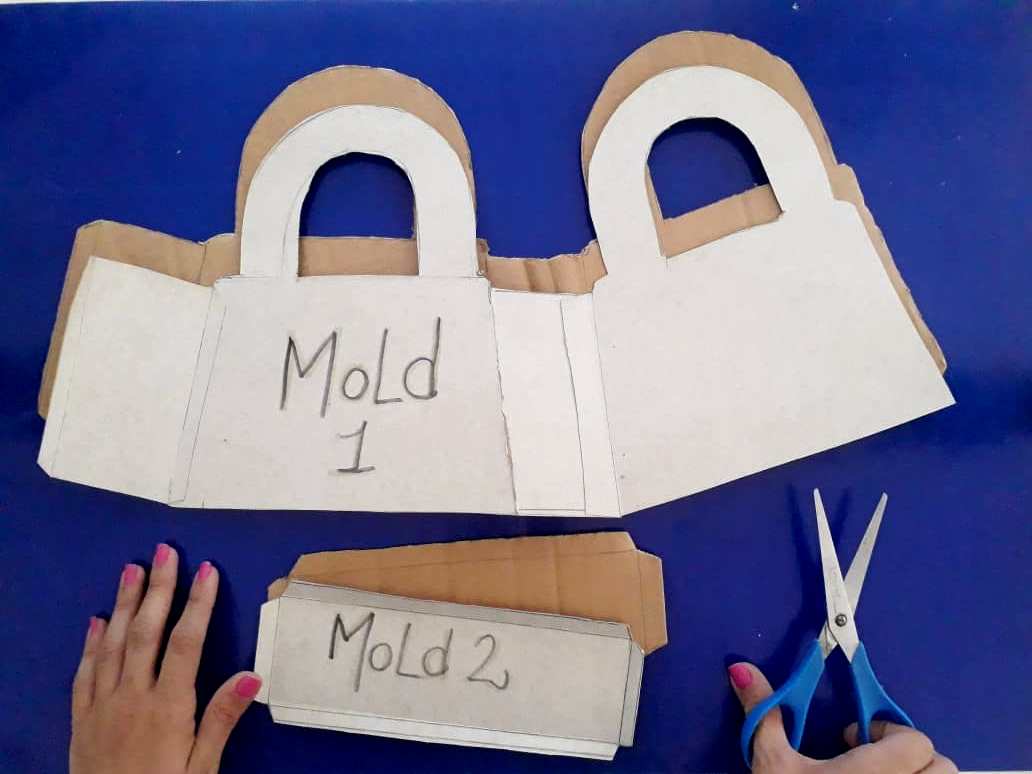
Con la ayuda de la tijera levantamos la capa superior de los moldes de cartón (cuerpo y base). Y quitamos el exceso de cartón utilizando una lija. Esto hará que el cartón sea corrugado y le daremos un mejor acabo a nuestra cartera.
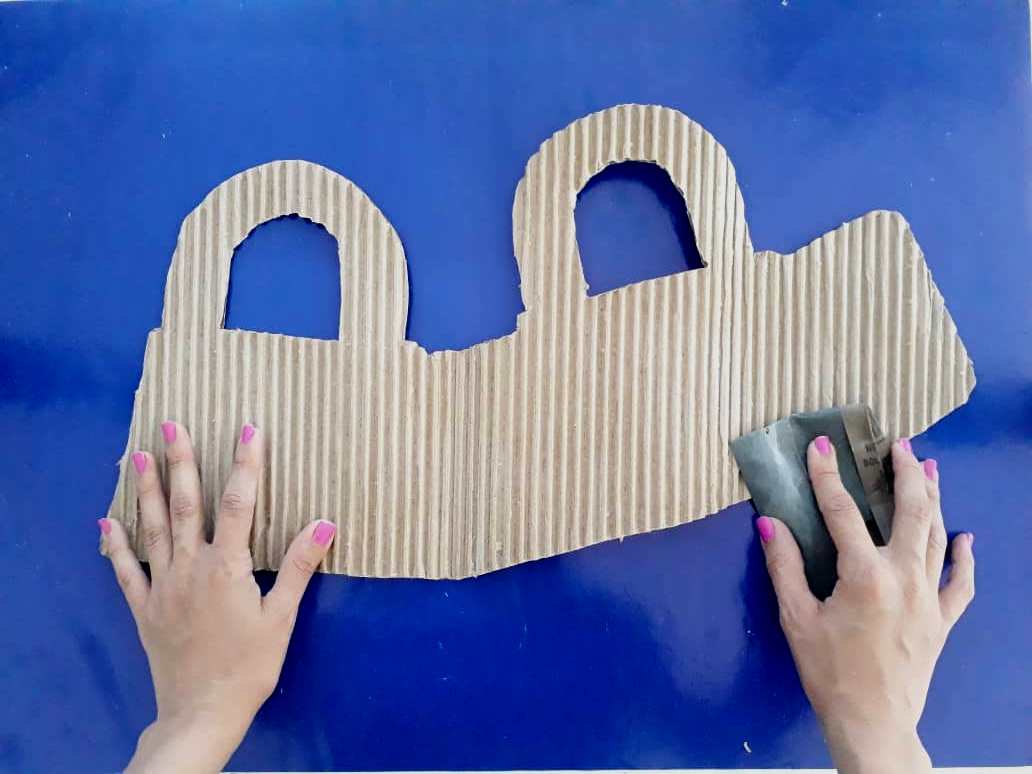
With the help of the scissors, we lift the upper layer of the cardboard molds (body and base). And we remove the excess cardboard using sandpaper. This will make the cardboard corrugated and we will give a better finish to our
purse.
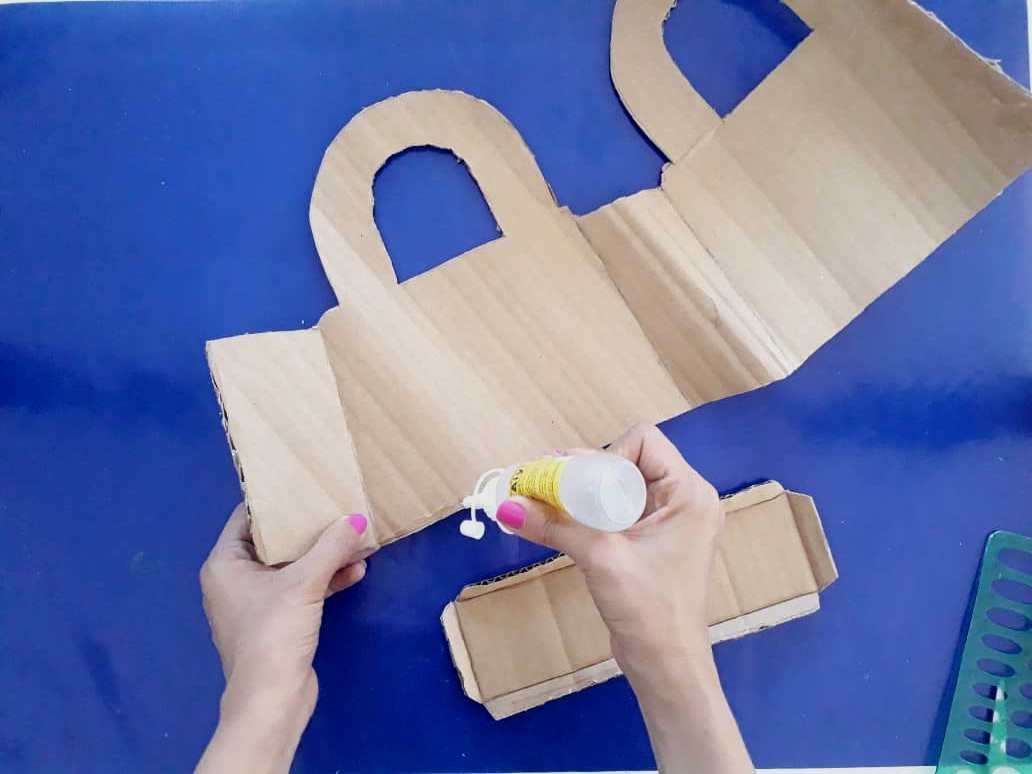
Ahora, unimos la base con el cuerpo de nuestra cartera utilizando pegamento. Debemos hacer presión para asegurarnos que la cartera quede bien pegada.
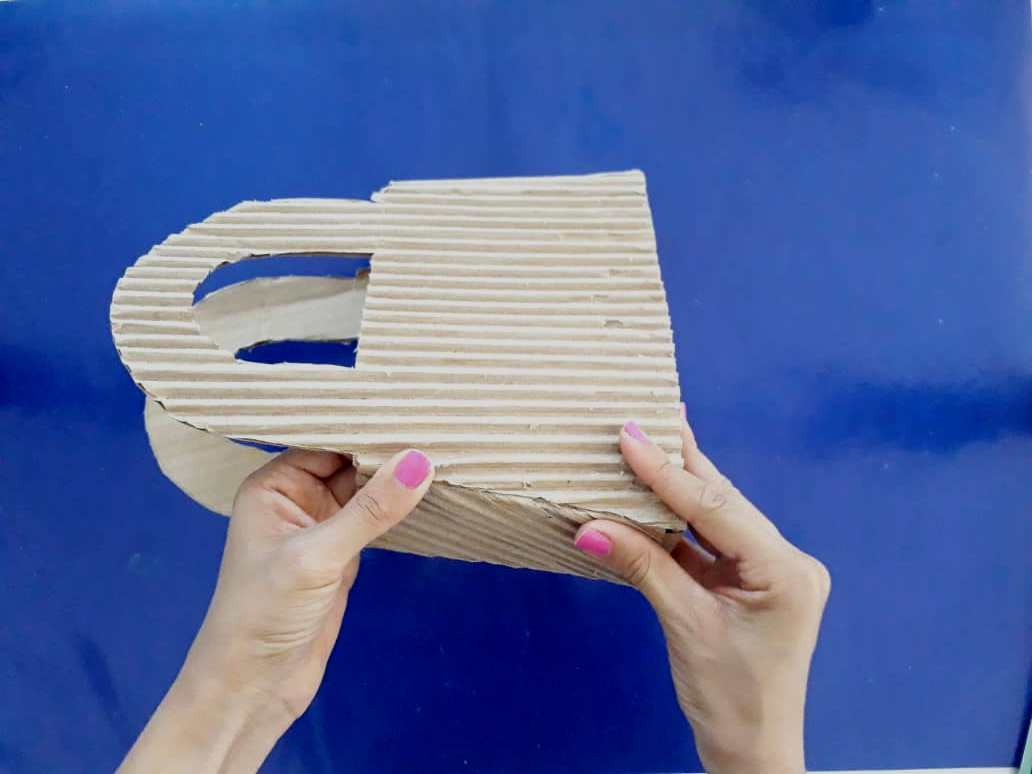
Now we attach the base to the body of our purse using glue. We must put pressure to make sure that the purse is well attached.
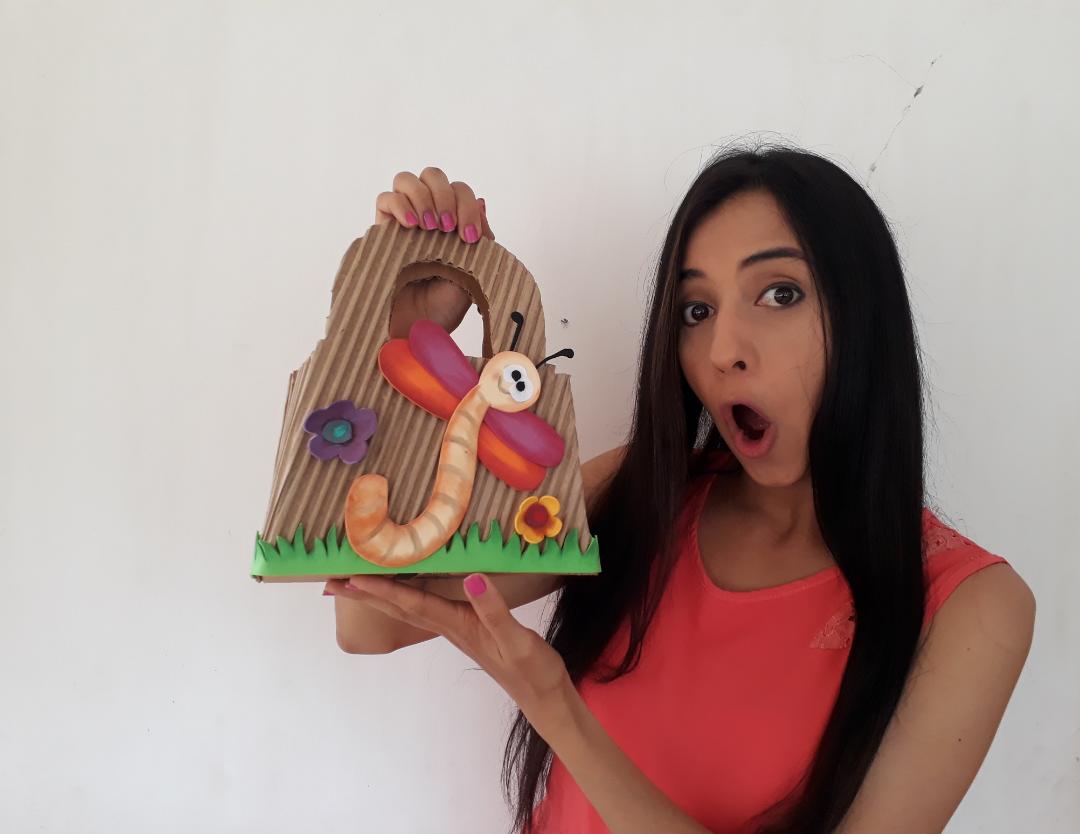
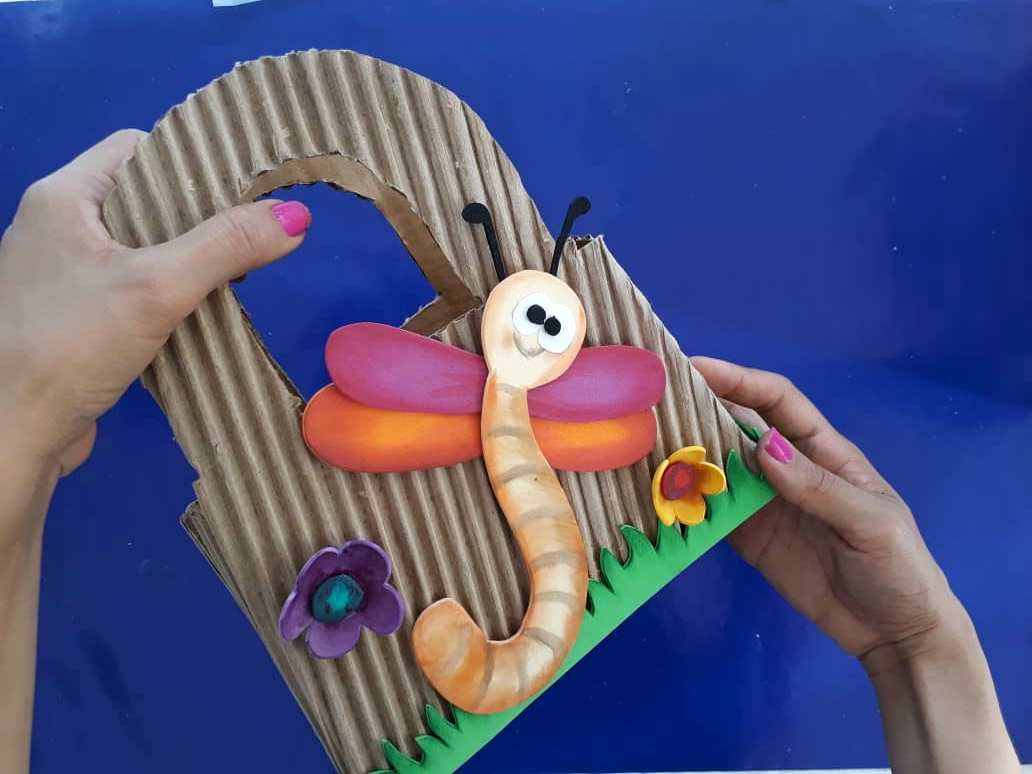
Luego, dibujamos y recortamos una hermosa libélula y otros detalles más hechos de foami para decorar nuestra cartera.
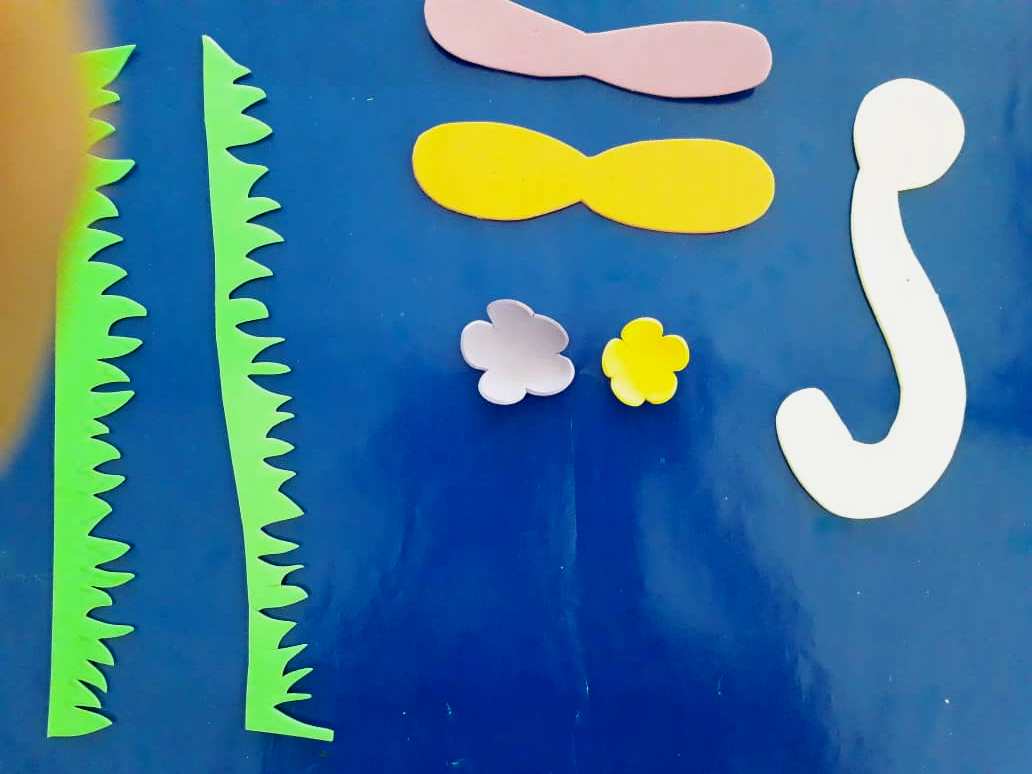
Then, we draw and cut out a beautiful dragonfly and other more details made of foamy to decorate our purse.
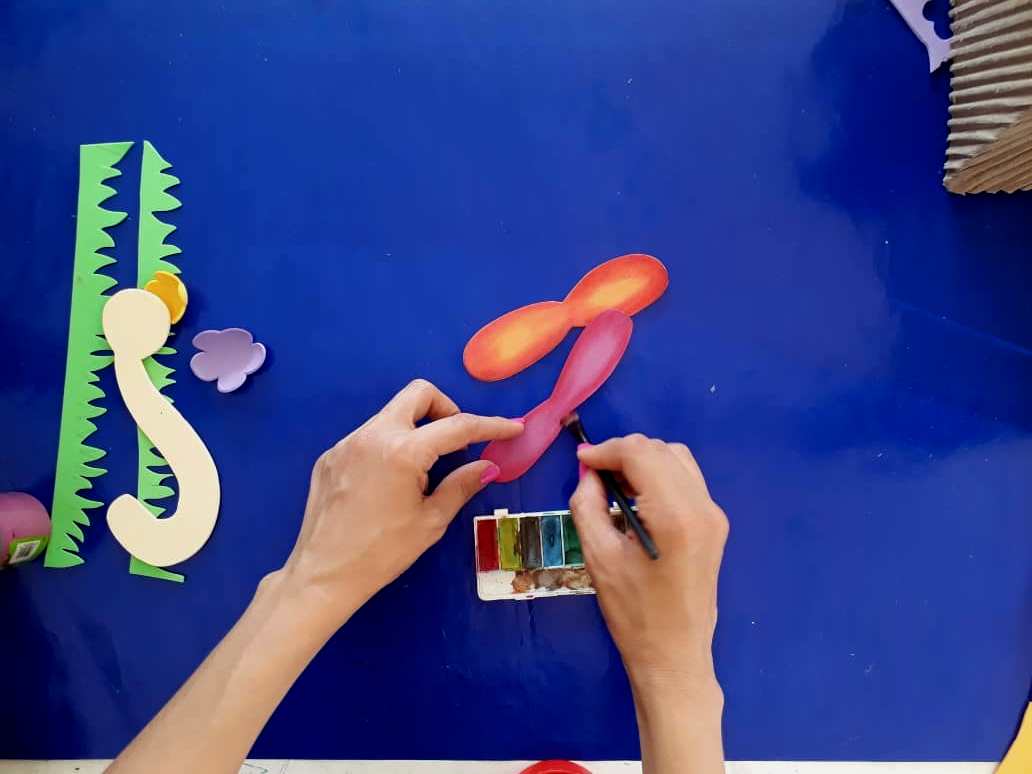
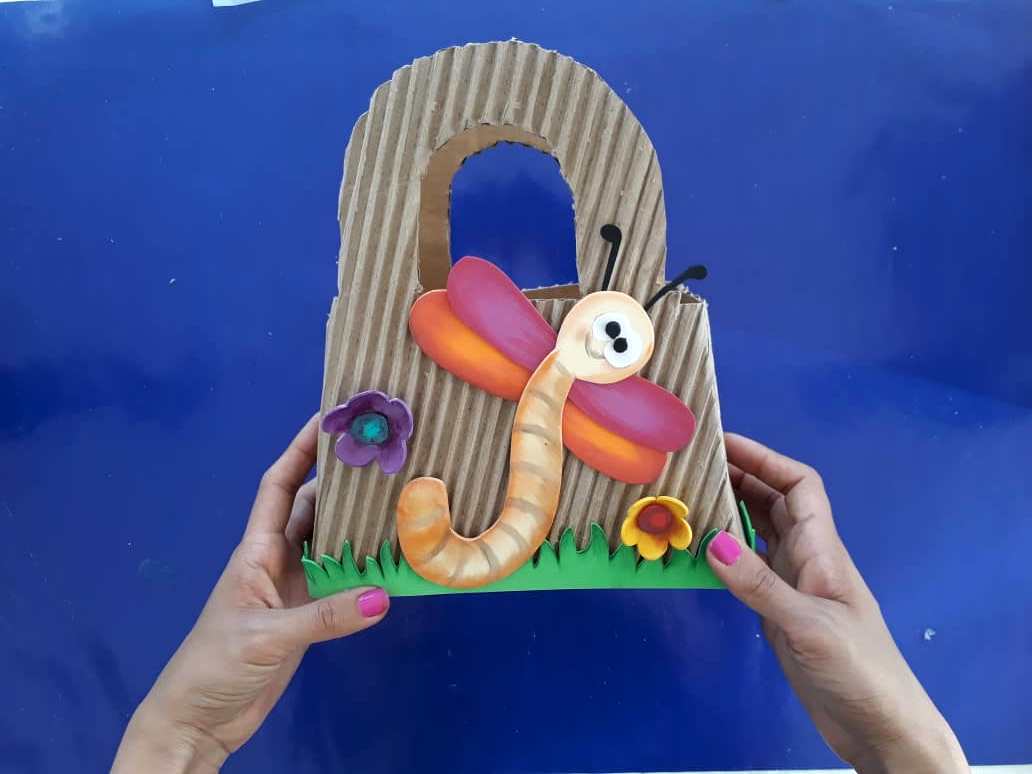
Para darle un mejor acabado a nuestra libélula aplicamos un poco de pintura de acuarela y así definimos sus detalles. Luego la unimos utilizando pegamento.

To give a better finish to our dragonfly we apply a little watercolor paint and thus define its details. Then we join it using glue.
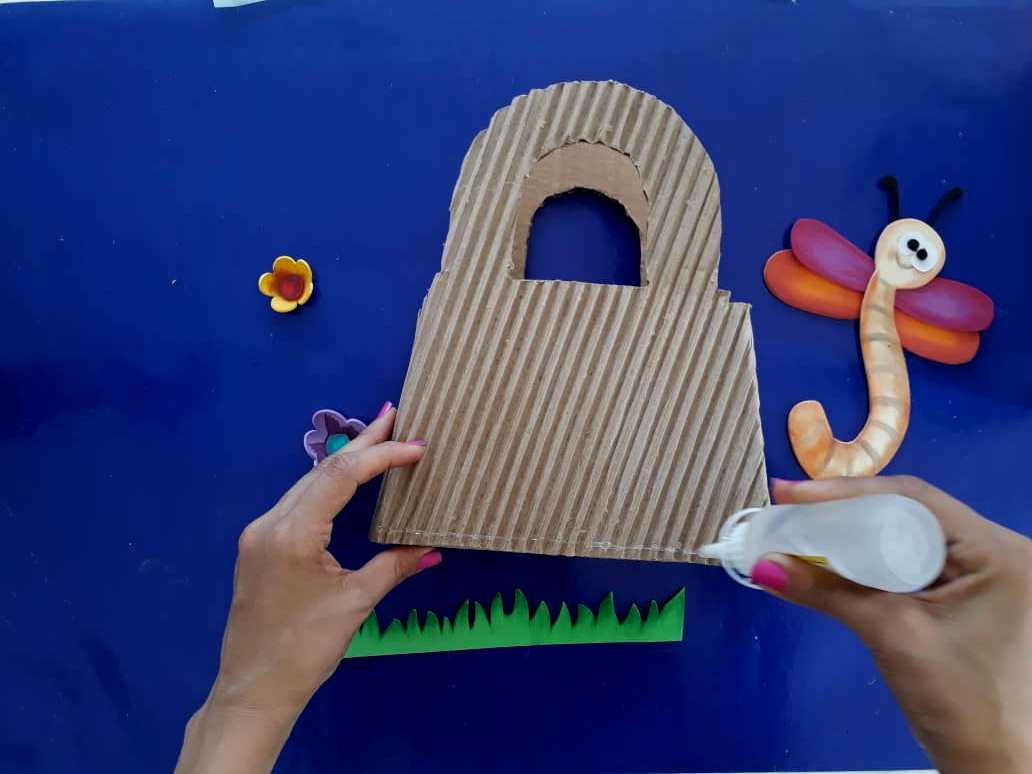
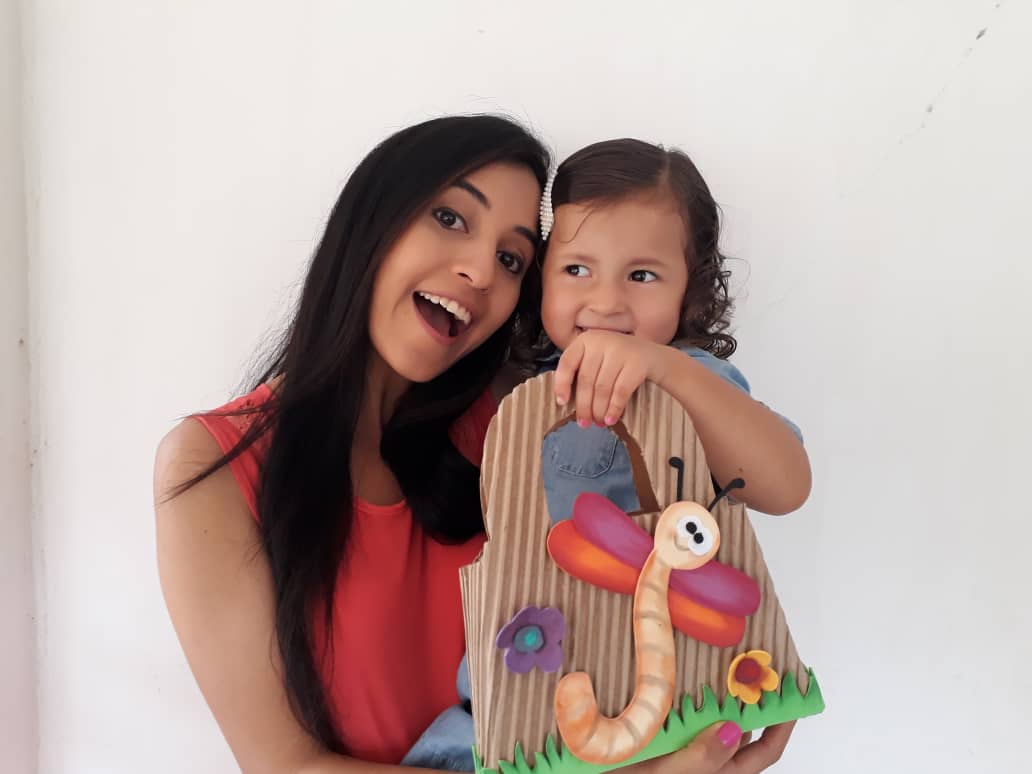
Finalmente decoramos nuestra cartera dejando volar nuestra imaginación. En este caso utilizamos la libélula utilizada anteriormente.
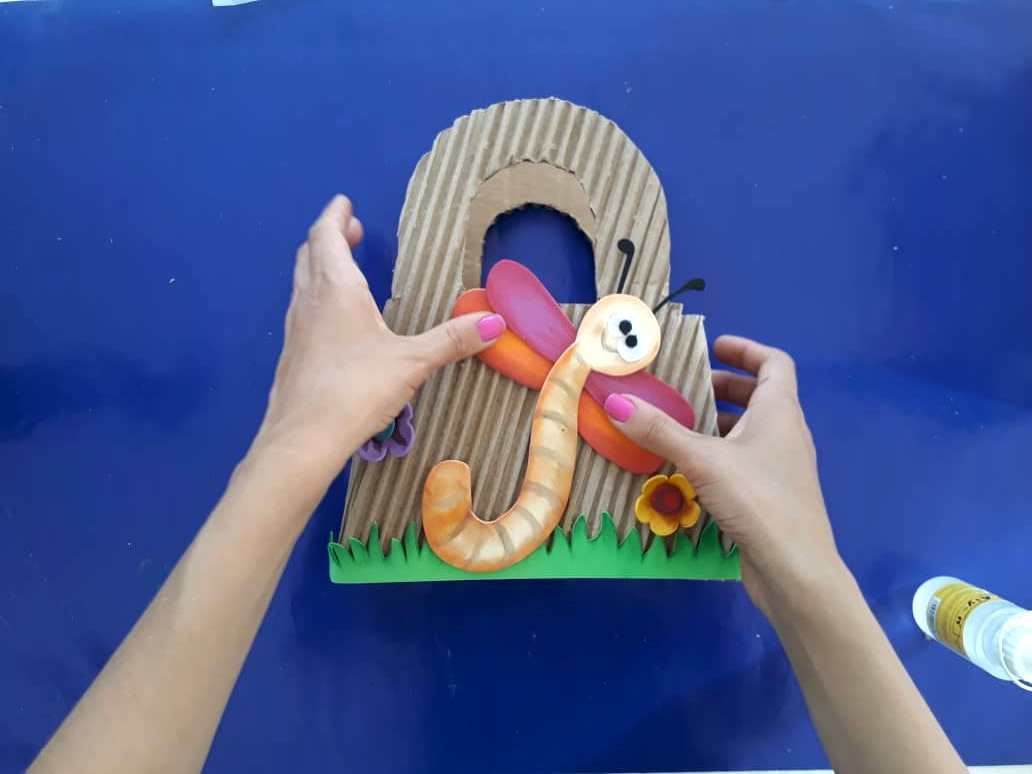
Finally, we decorate our portfolio letting our imagination run wild. In this case, we use the dragonfly used previously.


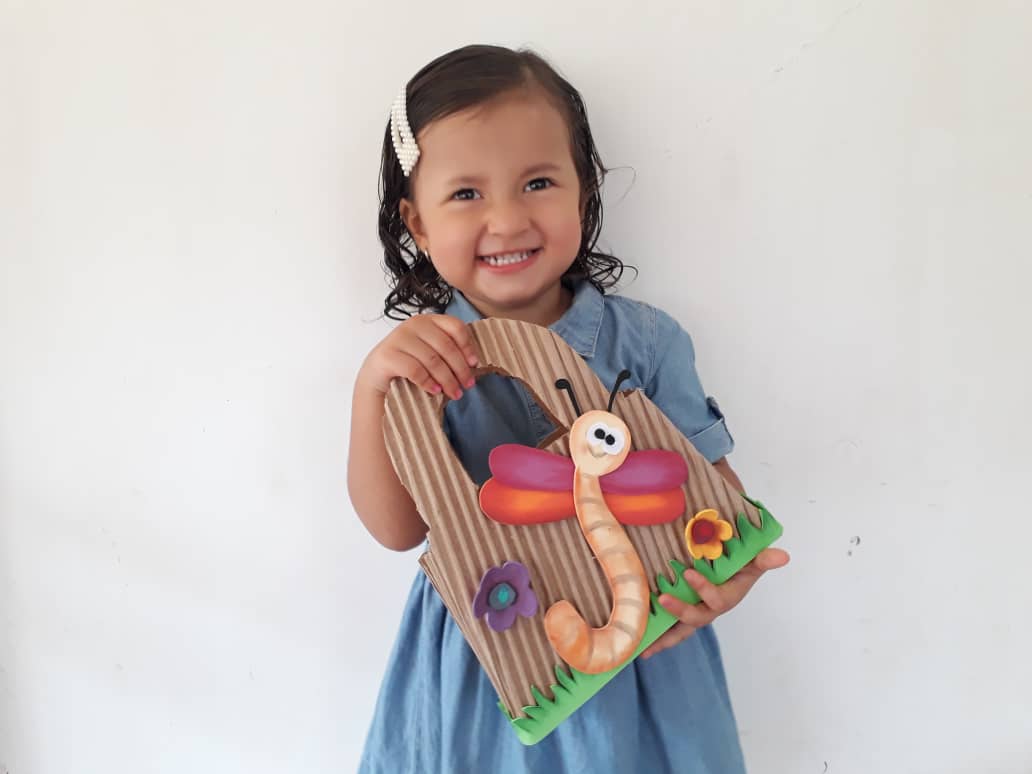
Gracias por acompañar y espero que lo hayan disfrutado. 🍎
Thanks for joining and I hope you enjoyed it.🍎
Clic para ver trabajos anteriores | Click to see previous works
.jpg)


First off, this is a beautiful post. Really. You are something really great and different for the Blockchain. Please feel free to tag me in any post of yours. This is great with so many moms at home and crafts are fun in general. Your so fun and artsy for kids. I think its great that you show these cool crafts. Awesome. You should be a teacher.
I'm so glad you like my job. I also have fun with my daughter doing these beautiful things, although she has destroyed my final work several times hahaha. Thanks for the support my friend really.
ALSO!!! Look for weekly #creativecoin contest that honestly, I think youd win. Look this is one, check it out.
Thank you very much I will look for you without a doubt. Thanks for the info
My #posh
Te quedó bella, amiga!
Gracias querida amiga saludos.
Congratulations @saracampero! You have completed the following achievement on the Hive blockchain and have been rewarded with new badge(s) :
You can view your badges on your board And compare to others on the Ranking
If you no longer want to receive notifications, reply to this comment with the word
STOPDo not miss the last post from @hivebuzz:
Support the HiveBuzz project. Vote for our proposal!
Thnks bot..
You are very welcome, still not a bot though 😉
cheers, liz
Te salió muy tierno este bichito. Muy pintoresco.
Jaja Gracias espero que lo hayas disfrutado. Saludos...
Pretty creative work from you again @saracampero. Anybody can make like this creative work in their freedom time. Cardboard purse very suitable to kids I think. They really prefer for it. Step by step process very easy to understand and then make it.
If it is ideal for our girls, anyone can do it as a gift. So we avoid spending money.
Gracias por tu constante apoyo Eres un sol.. Gracias
me encantó tu post, esta bien bonito para hacerlos de cotillón en la fiesta de mi sobrina, gracias por compartir.
Muchas gracias amiga. Que bueno que te haya gustado y si para eso servirá perfectamente
You are so creative dear 😊😍
Gracias amiga. Espero que te haya gustado. Saludos...
Enhorabuena, su "post" ha sido "up-voted" por @dsc-r2cornell, que es la "cuenta curating" de la Comunidad de la Discordia de @R2cornell.
Gracias por el apoyo. Saludos
Haces cosas simplemente geniales y con cosas fáciles de conseguir vale! Eres una chica además de hermosa llena de creatividad!
Gracias amigo me alegra que te guste mi trabajo. Saludos
Bello trabajo y bellas fotos...
This post earned a total payout of 10.932$ and 5.466$ worth of author reward that was liquified using @likwid.
Learn more.
Thanks for your @likwid services. I would like to see that one of these days you will visit my blog.