Since building our original home in UpState New York back in 1980, the front porch has seen more activity than any other part of our home. Whether it is just @farm-mom and myself sipping our morning coffee or just relaxing, or whether family and friends are visiting, the front porch is where we hang. It's a comfortable space, with lots of chairs, couches, and tables. Many times, its covered roof has shielded us from the elements. THE PARTY MUST GO ON!
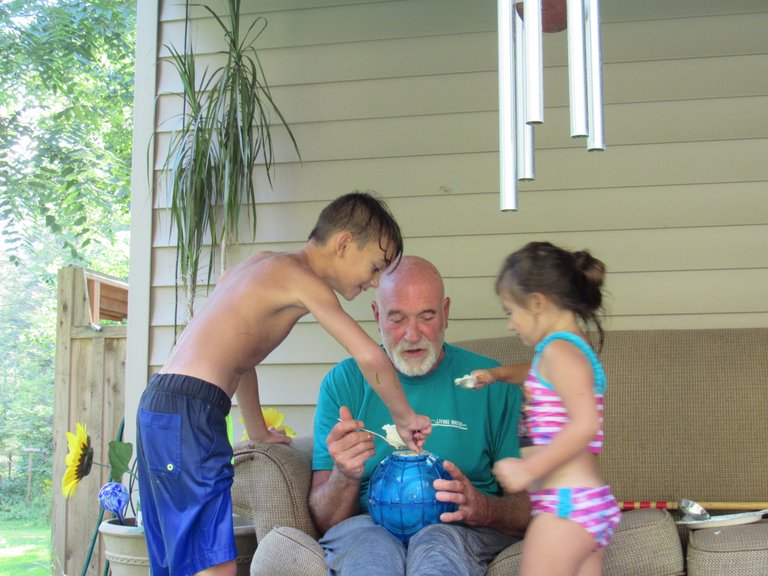
It's one of my favorite places to park my gluteus maximus, with the fridge being right around the corner how can you blame me. Here, I'm devouring some icecream straight from our icecream ball, with a couple of our grandchildren.
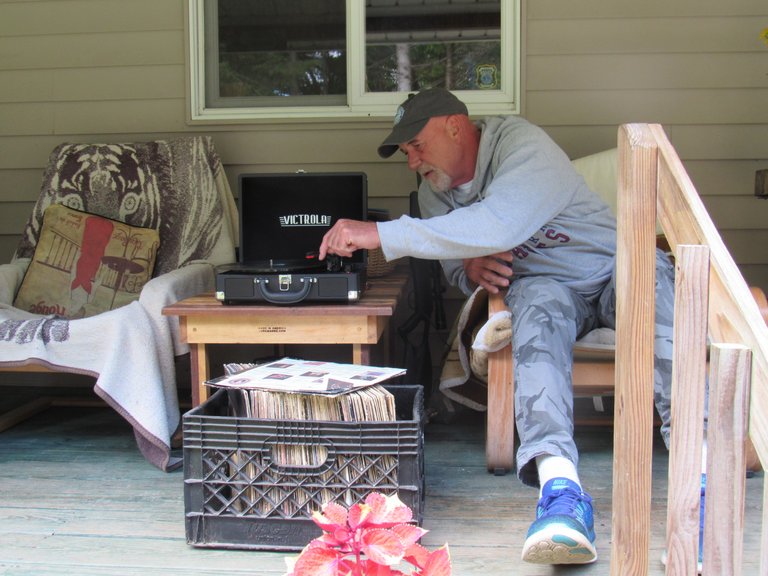
Yup, that's the gadget @jlsplatts turned us onto.
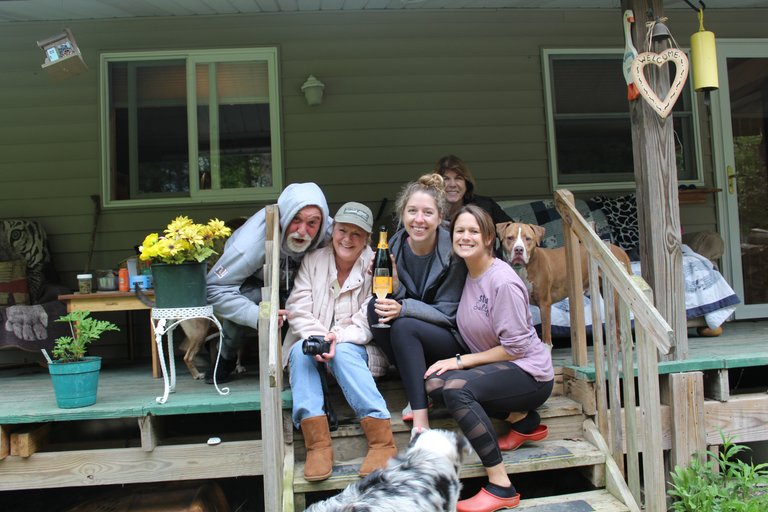
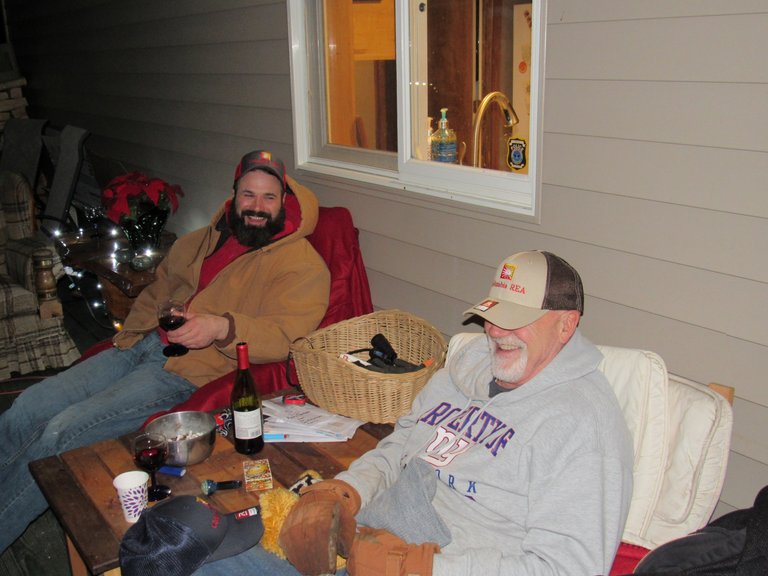
A little celebration is always in line when your best friends' daughter just graduated at the top of her class and is now a full-fledged Veterinary.
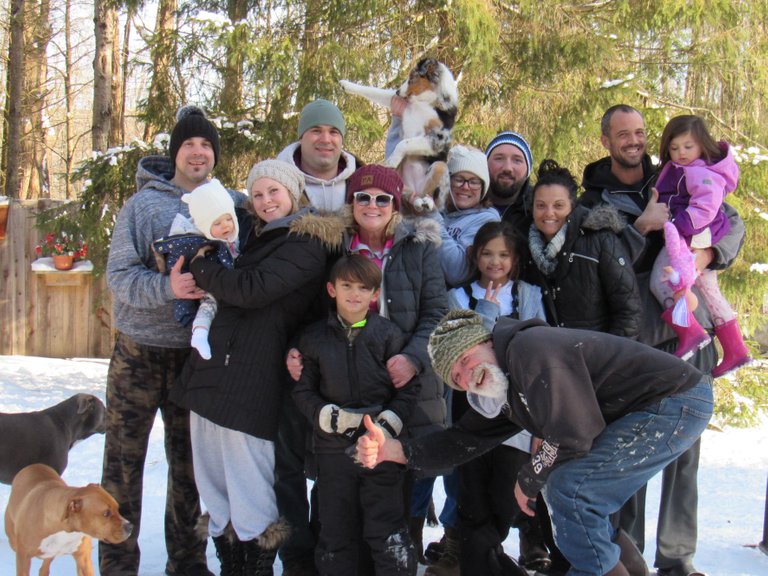
Just some happy family members hanging out.
Where you ask, the FRONT PORCH of course!

Just a group shot with everybody in the picture. And where did I set up the camera, the FRONT PORCH of course, and they all bet I wouldn't be able to get in the picture before the timer went off.
Whether with a crowd or just enjoying some solitude, the FRONT PORCH is the place to be!
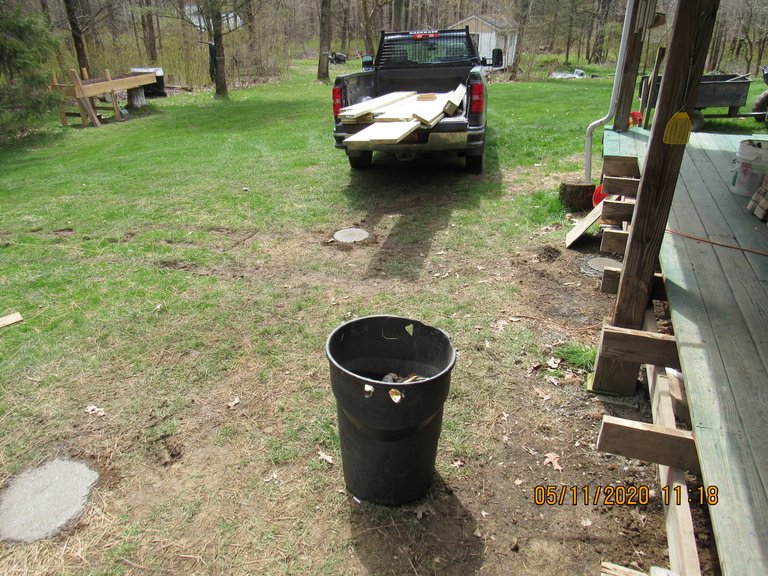
Enough with the rationale, for expanding the FRONT PORCH. Let's get this project started.
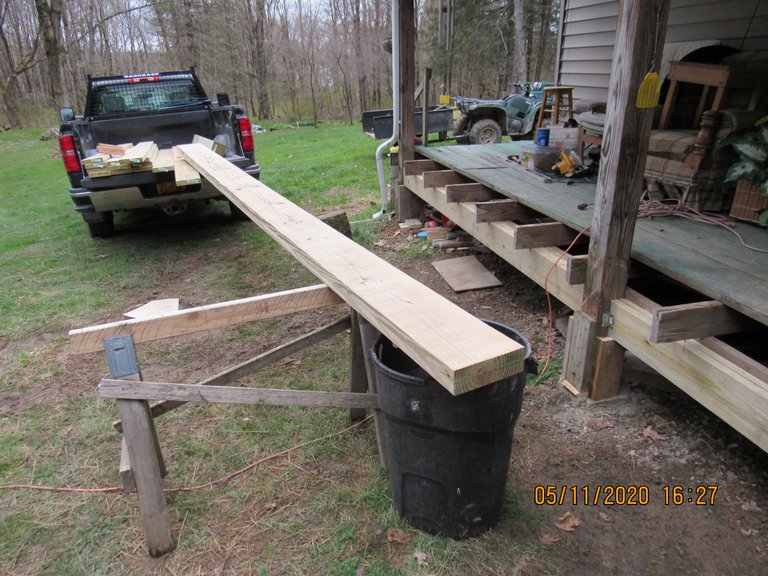
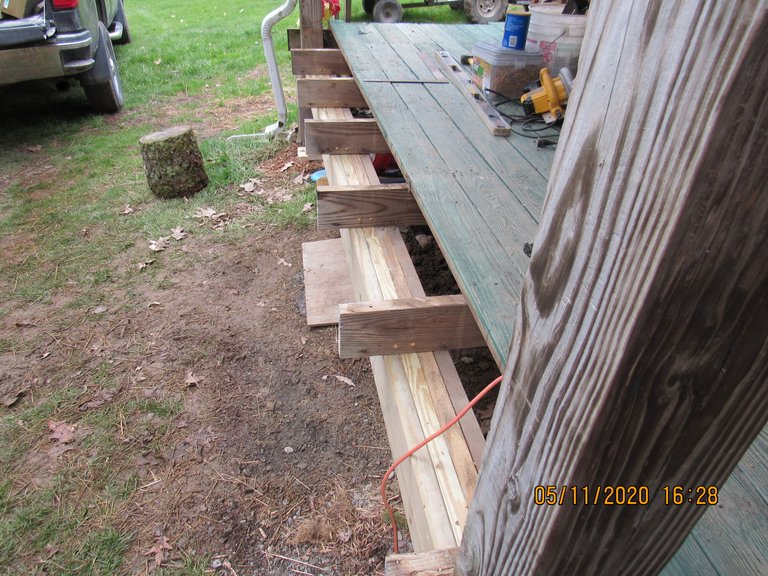
The first step was to remove the first few floorboards which would expose the end of the floor joists.
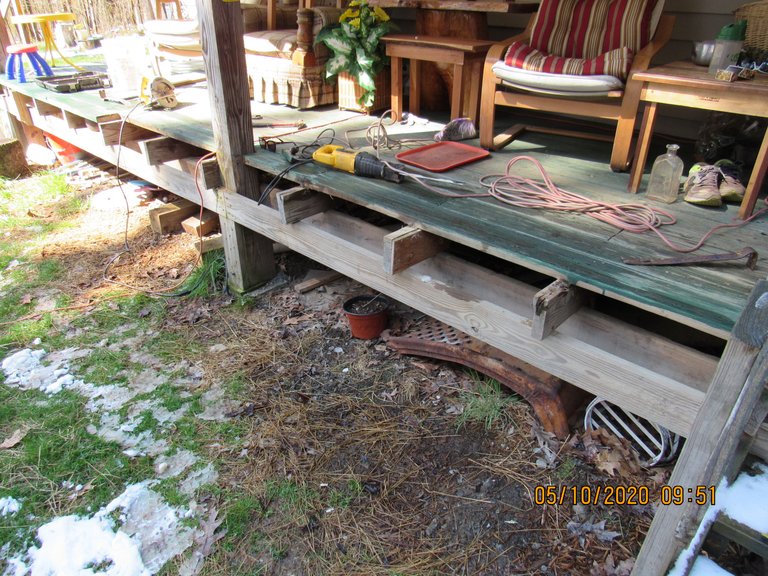
Originally the length of the new deck was going to stop where you see the floorboards cut back, but we decided to make the deck a little longer.
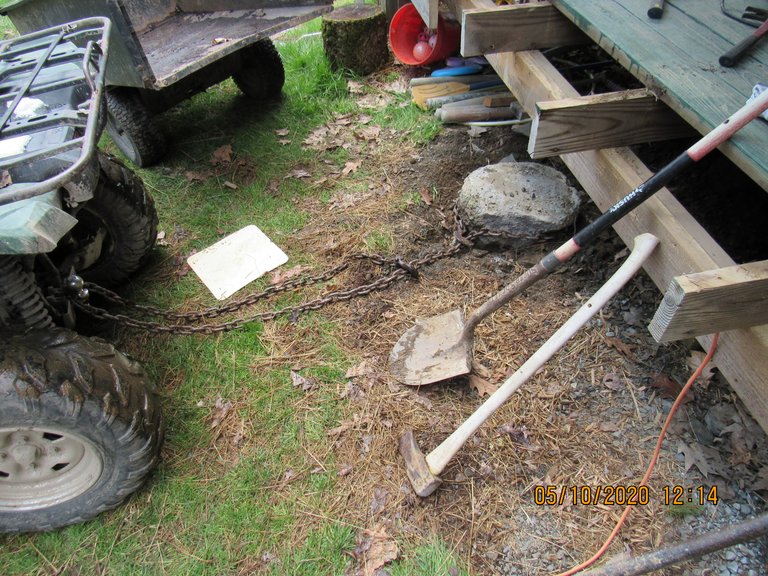
This old footing had to be removed, it was right smack in the way.
I was hoping to bury it under the new part of the deck, but it just wasn't going to happen. A little tug with the four-wheeler and it was gone.
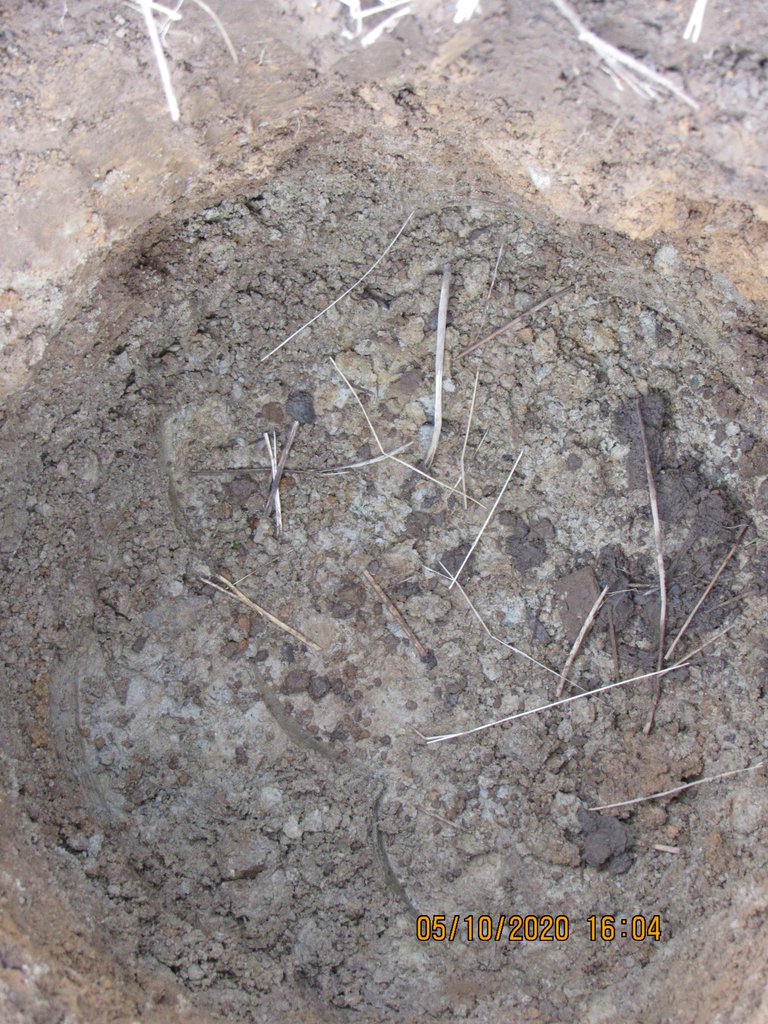
Digging the footing holes for the new columns is never an easy task, but once you hit hardpan, that grayish looking soil, you have reached paydirt.
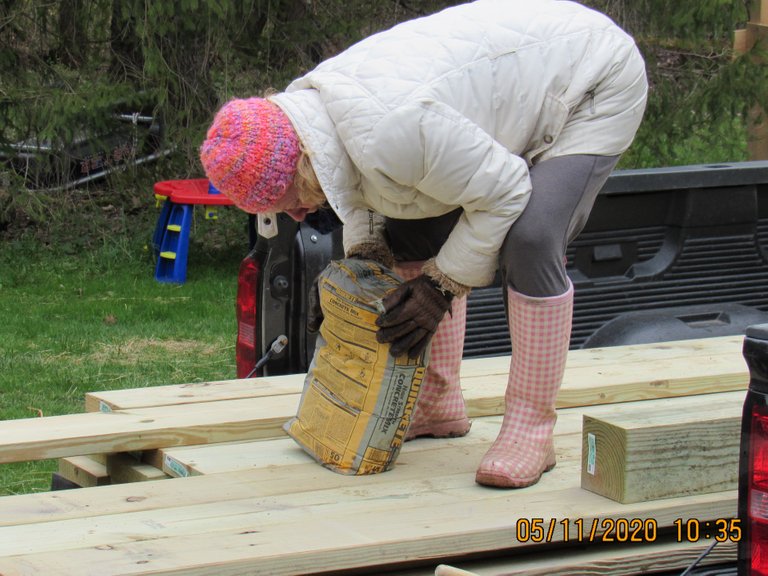
Nothing like a little free labor. I think that bag of concrete weighs as much as my helper.
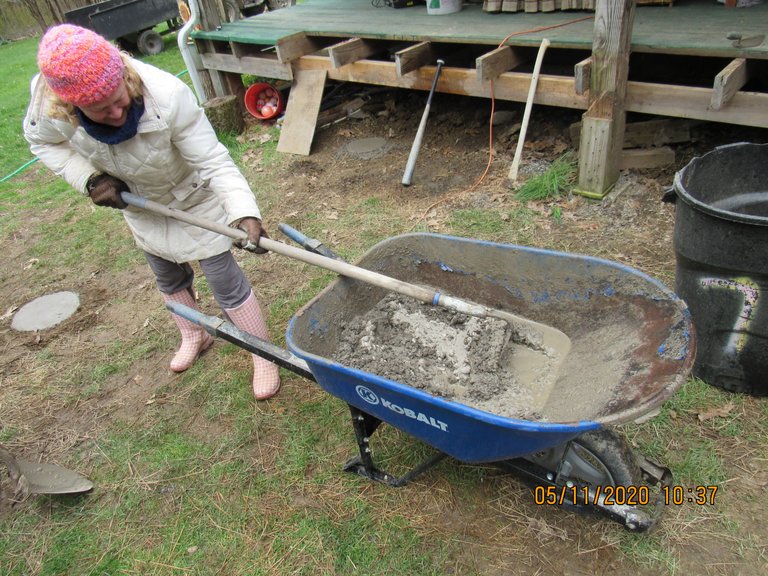
It's not as easy as it looks, is it my friend? Now, don't wear yourself out, it's going to be a long day!
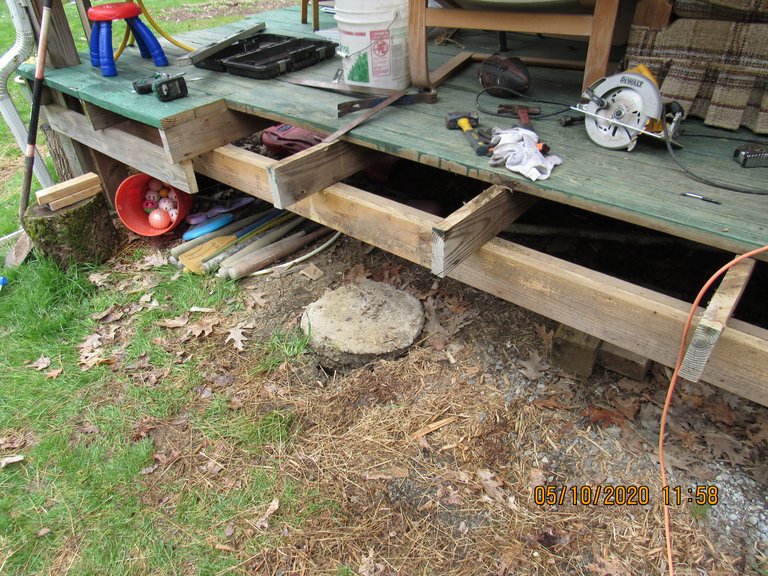
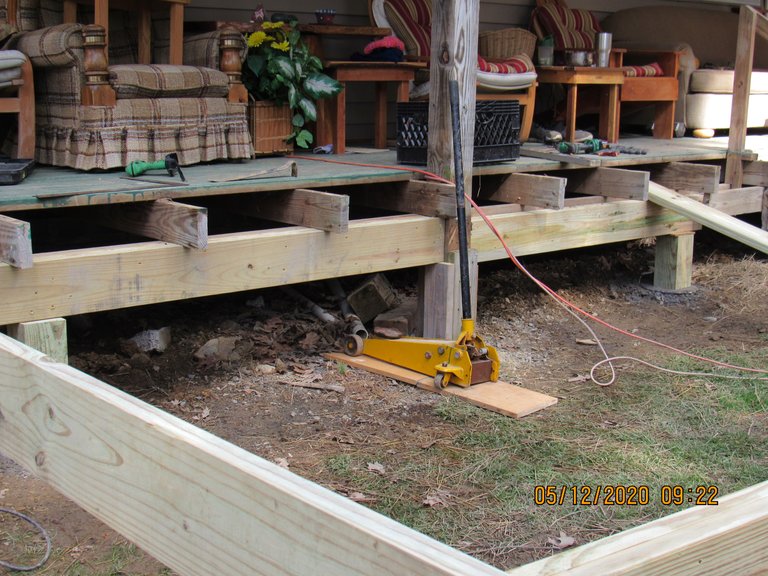
Footings dug and poured. ✔ Next up, we would beef up the floor girder you see at the edge of the existing porch.
Some additional 2" x 8" x 16' boards should do the trick.
New floor girder in place. ✔
By the following morning, the footings had cured and it was time to start laying the wood.
After placing the columns on the footings, the double 2" x 12" x 16-foot main girder would be hoisted into its resting place. That piece of lumber was a little heavy.
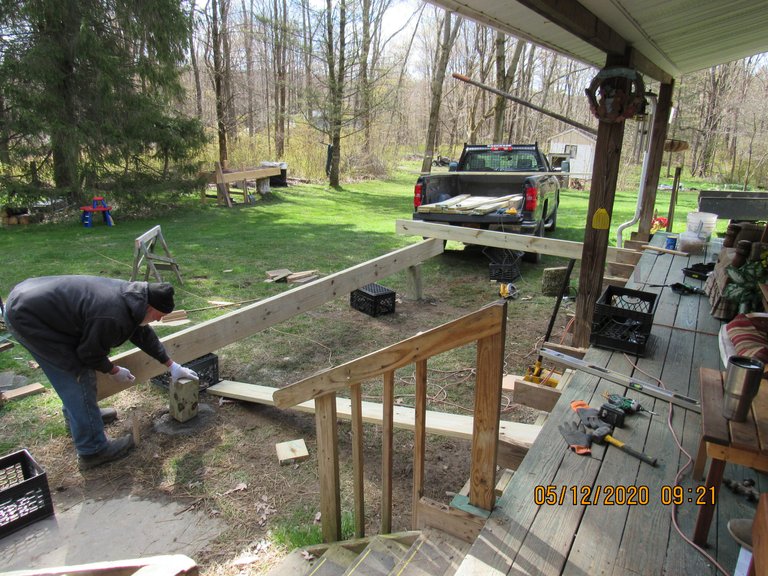
Main girder installed. ✔
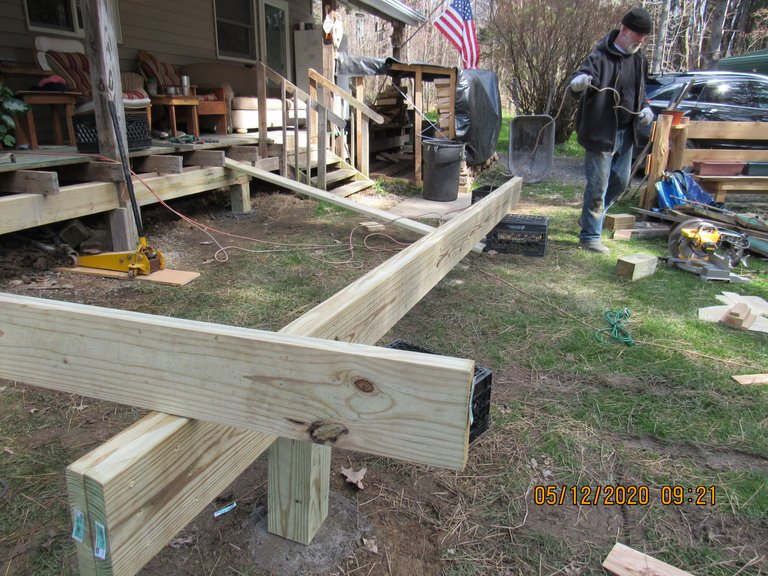
The next part of this project I was not looking forward to. I needed to lift the column you see next to the jack. Over the years the footing had settled about an inch or so. The column holds up the roof over the porch. Correcting the problem now, with the new girder in and exposed, would make that possible. It went better than anticipated.
Column adjusted. ✔
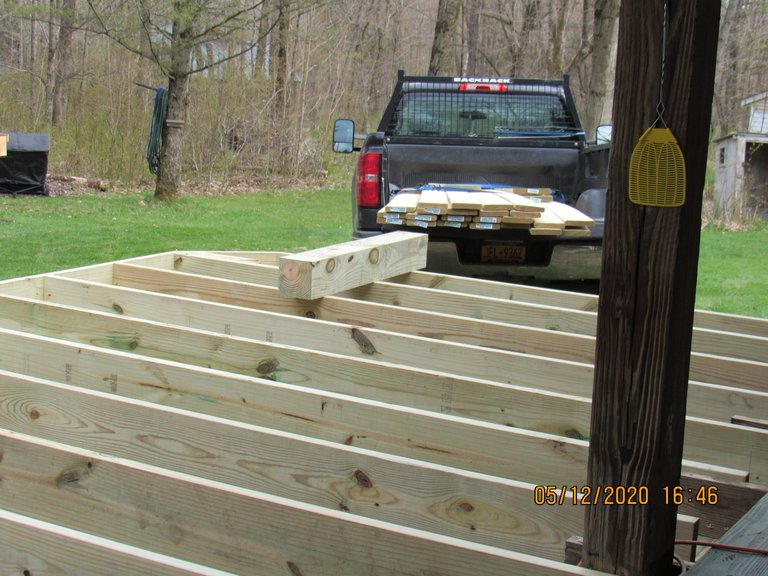
Installing the floor joists is always a breeze, and with these being right in my wheelhouse, it didn't take but a few hours.

Moving right along.
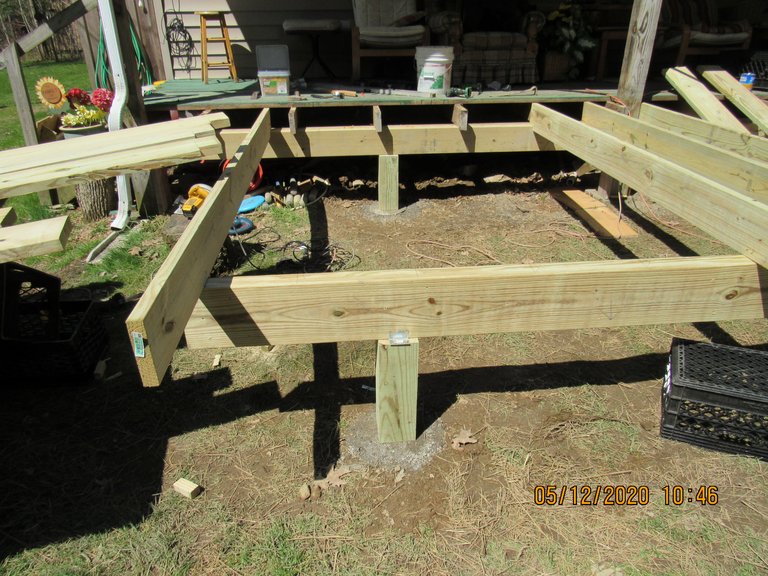
Floor joists installed. ✔
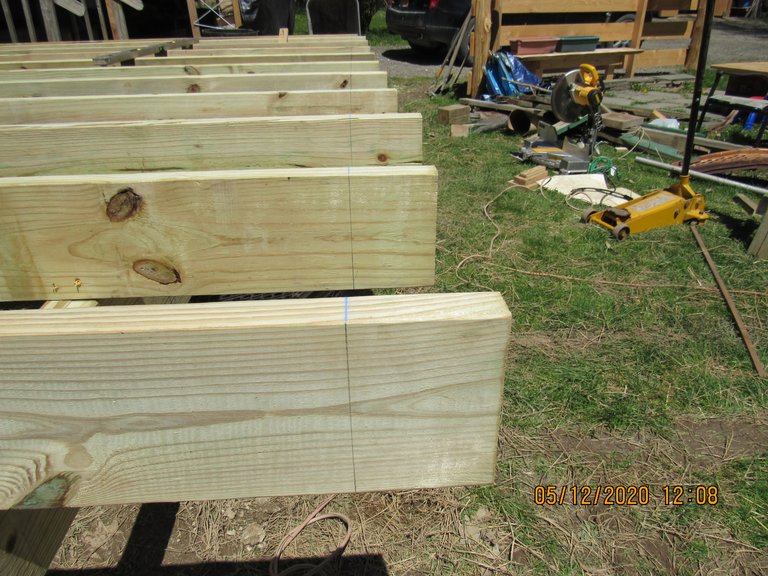
A lot of folks cut the joists prior to installing them.
I like to snap a line on the floor joists and square that line down the side of the joists.
By cutting them in this fashion, you are guaranteed that they will all be exactly the same length.
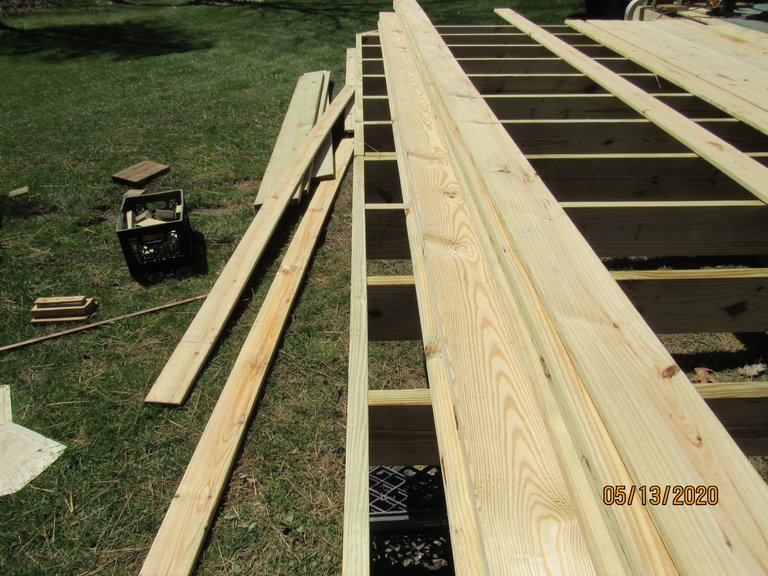
After cutting all of the tails of the joists, they are capped with the rim joist. The rim joist is simply the joist that runs perpendicular to the others.
Rim joists installed. ✔
You can see in this picture just how straight the rim joist is.
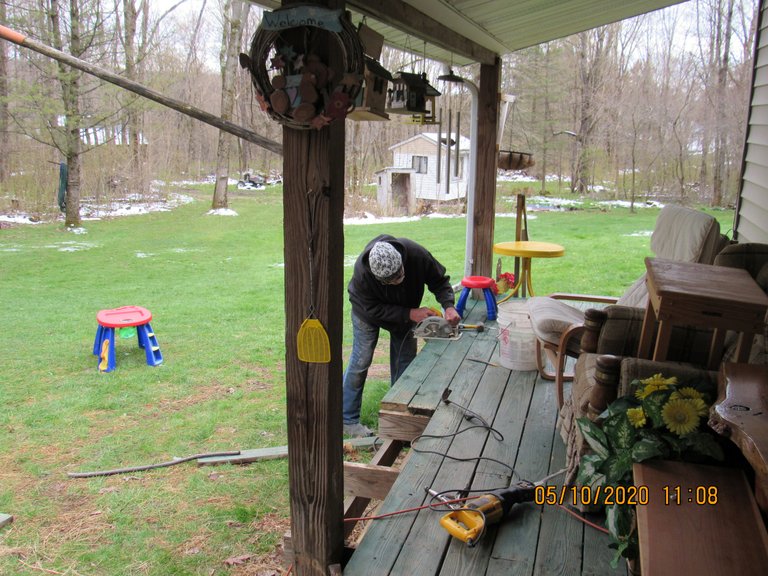
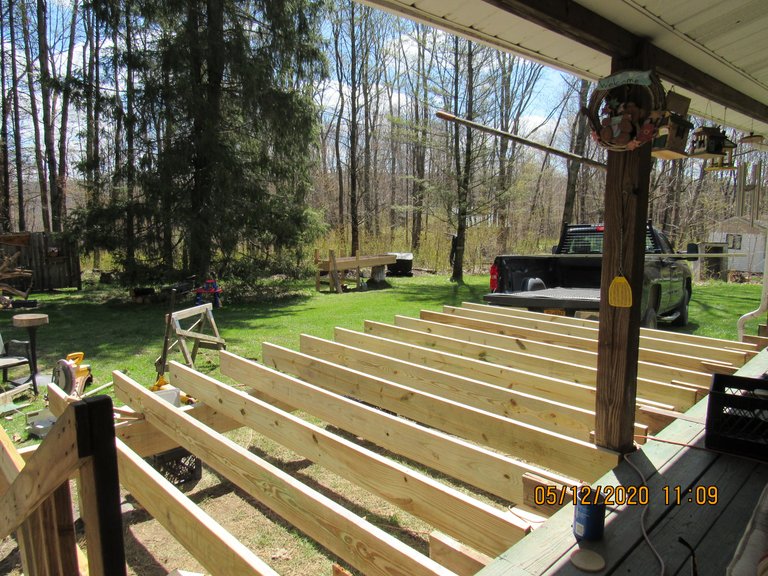
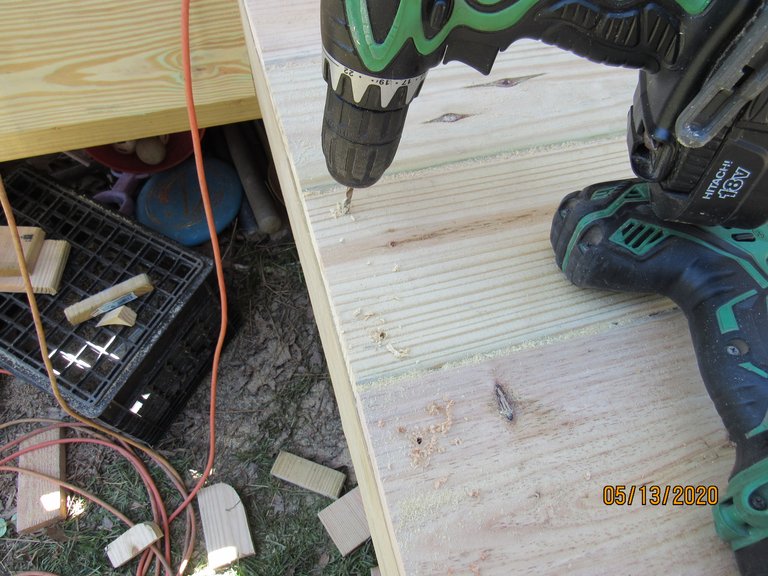
After laying the floorboards on the platform it was time to install them. Many folks nail the floorboards, do yourself a favor, and install them using exterior wood screws. Fasten the decking with screws and walk away forever, nail them and it's only a matter of time before you're going around with a hammer in hand, pounding the nail heads back into the wood.
Floorboards installed. ✔
When I fasten the floorboards, I don't cut them to size either. It's best to snap a line and then cut to that. Doing this will guarantee a nice straight edge.
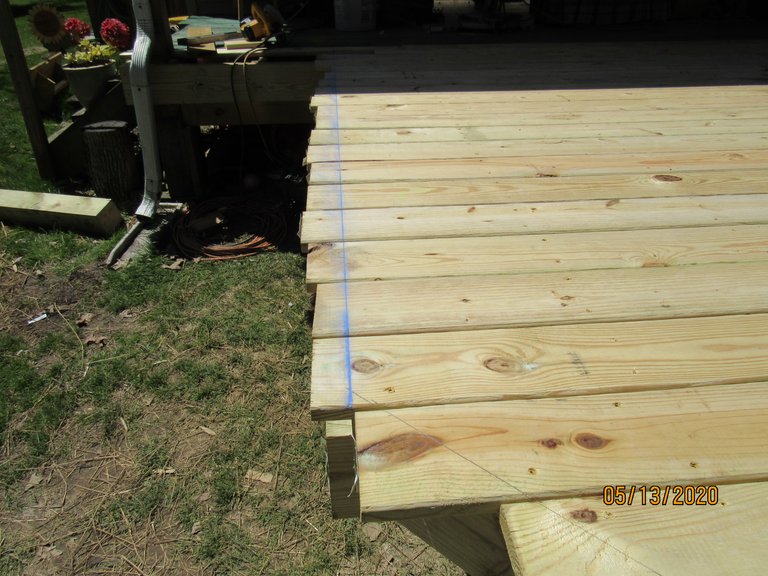
I will also wait to screw the flooring to the outside joists. After the flooring is cut to the snapline, pilot holes are drilled and then the edges of the floorboards are secured with screws. The pilot holes will keep the wood from splitting.
Floorboards installed. ✔
You can see that I cut the corners of the deck back. Doing this makes it a little safer and also adds some character to the shape of the deck.
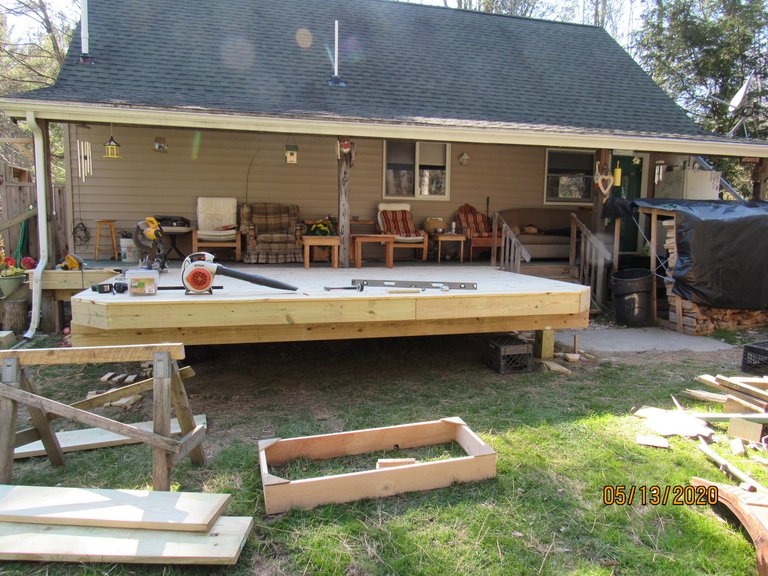
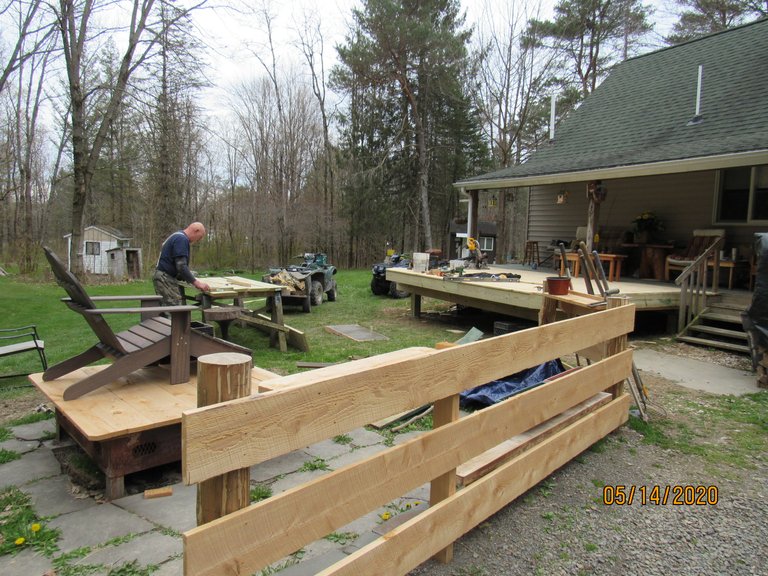
I like stairs, I like to save steps, and I like direct routes. With that in mind, three sets of stairs will be fabricated and installed on the new deck.
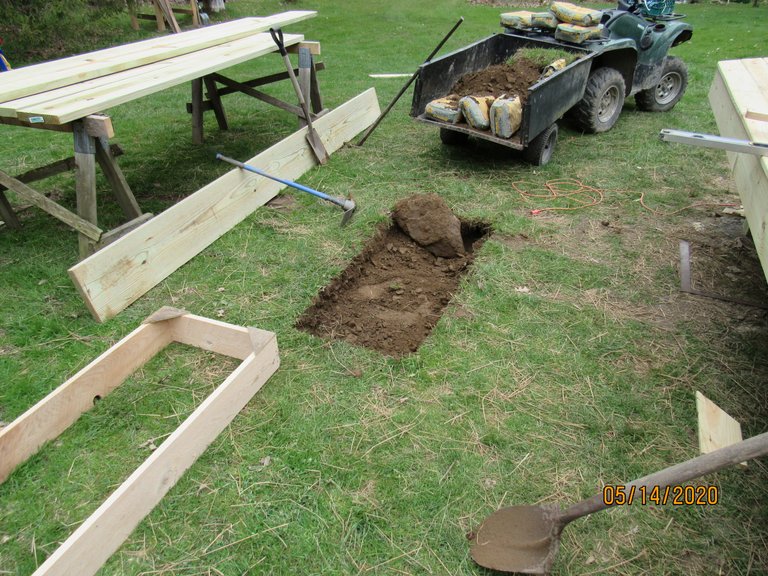
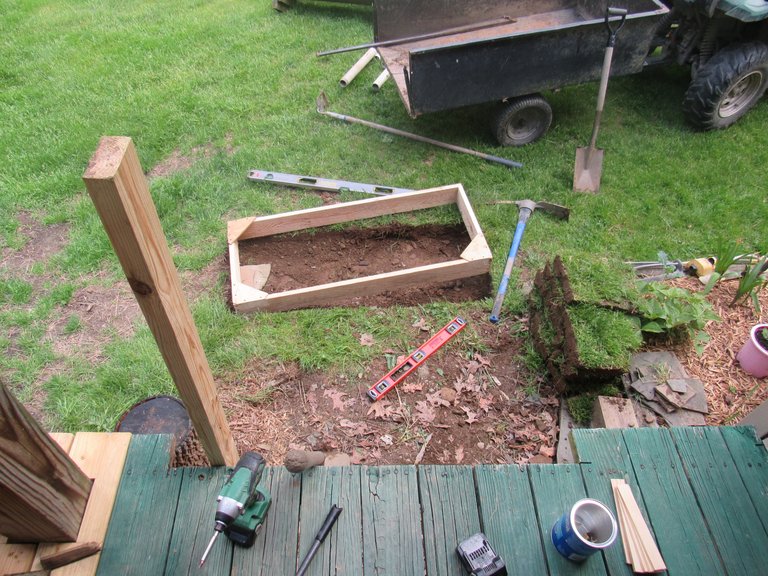
With the form for the concrete pad positioned for the stairs to land on, the next step will be to fill it with concrete. Making sure that the form is level on all four sides is critical.
The cement pad must be positioned perfectly in order for the seat cut made on the stair stringers to contact the pad along the entire run.
I placed some wire mesh in the concrete to strengthen the pad.
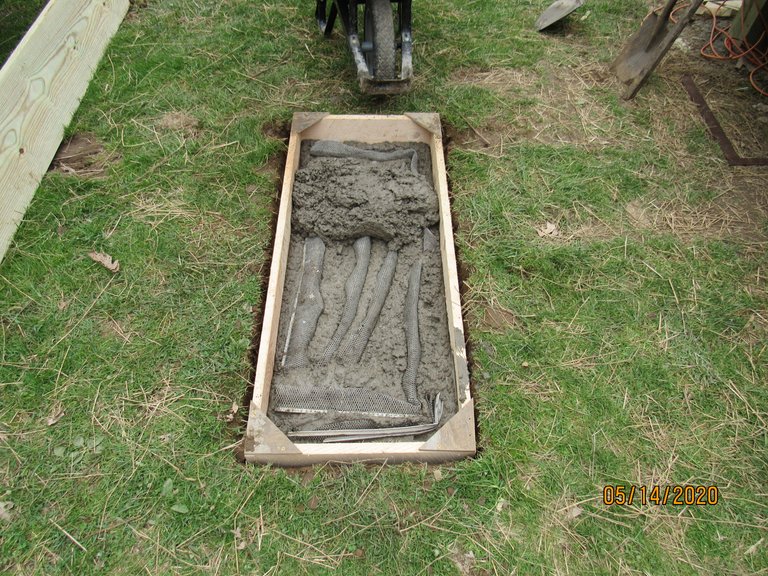
The pad is then screened off with a piece of wood. Using the longer wooden sides of the form as a guide, another piece of lumber is moved back and forth over the pad. Screening the concrete ensures a level smooth pad.
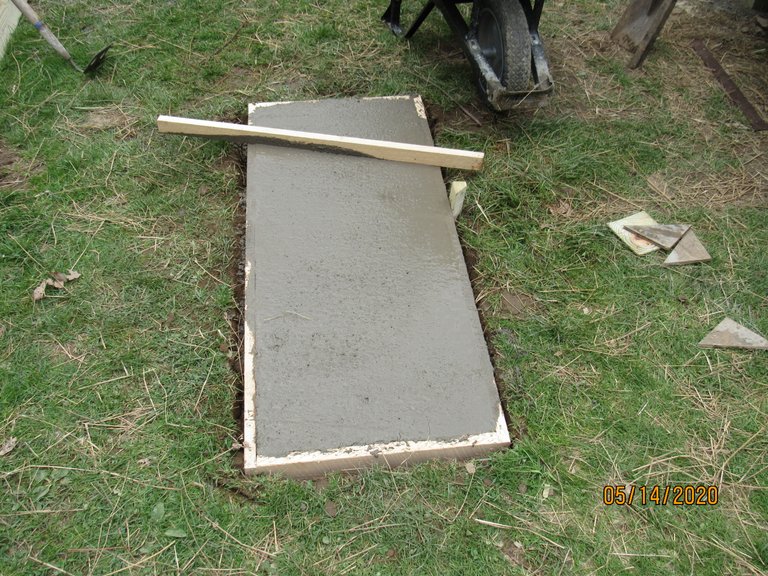
Concrete pad poured and screened. ✔
Next up, constructing the stairs.
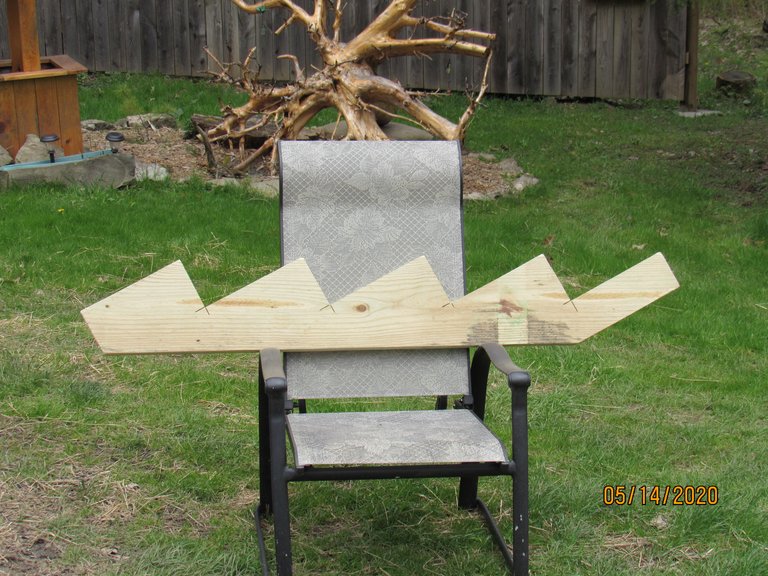
With the first stringer cut, I used it as a pattern to fabricate the other stringers. With a rise of 5 1/2 inches and a run of 11", this set of stairs will be very easy to climb.
The type of staircase I built here is called a closed staircase. As can be seen from this picture the treads of the stairs butt up against an outside stringer, thus the name closed staircase.
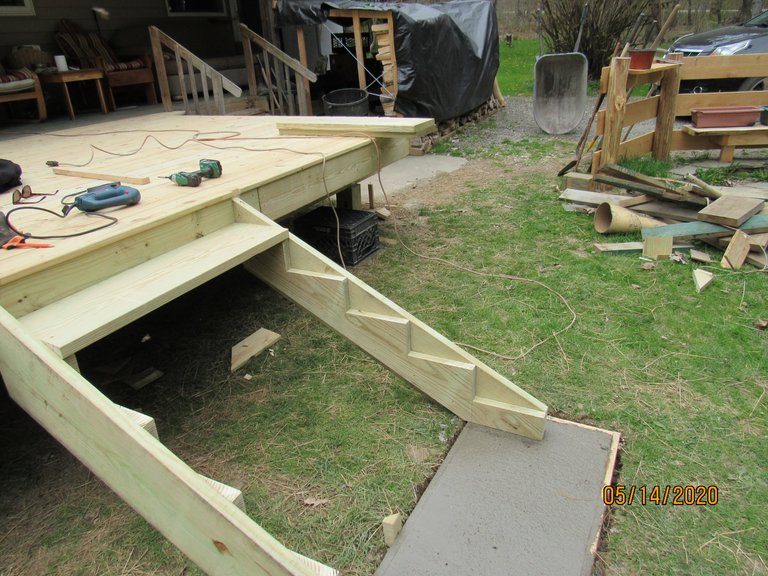
With this set of stairs having a tread larger than 36", I also placed a cut out stringer in the middle of the staircase for additional support. With staircases that are not as wide, the middle stringer isn't necessary.
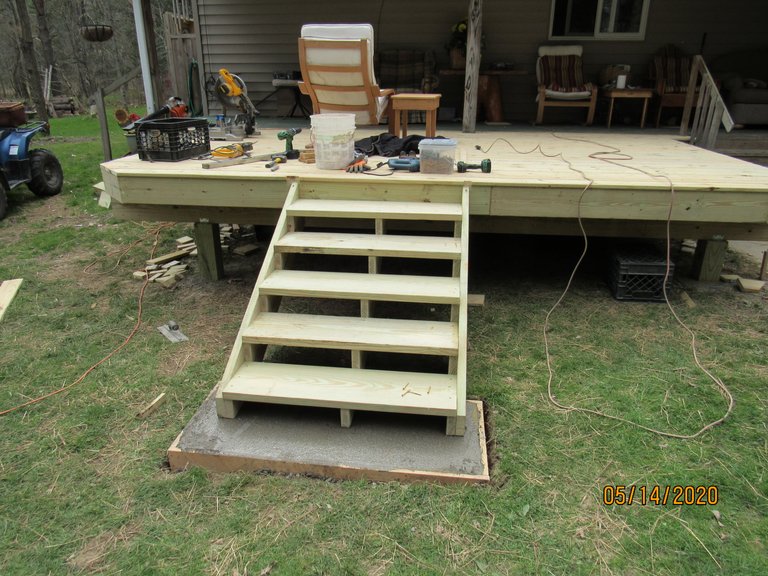
The staircase that was constructed and installed at the end of the deck will have the same rise and run as the first set.
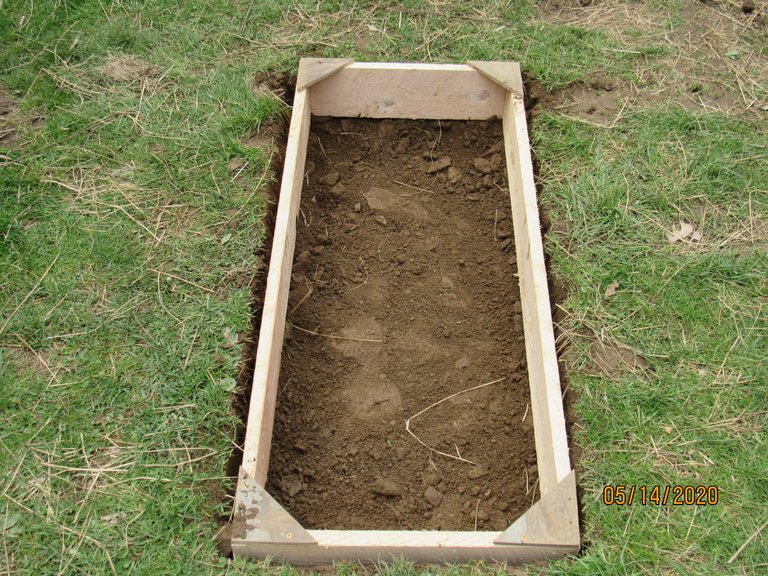
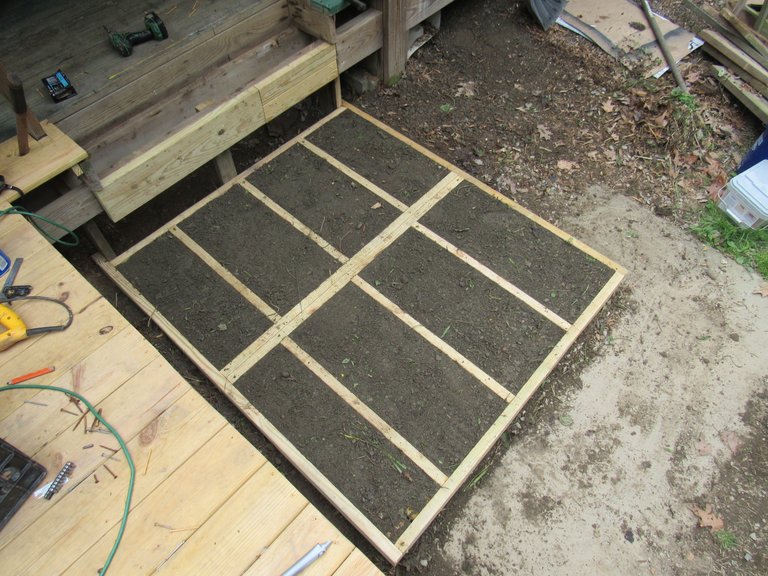
The third set of stairs will come off of the main deck and this set of stairs will land on a wooden platform.
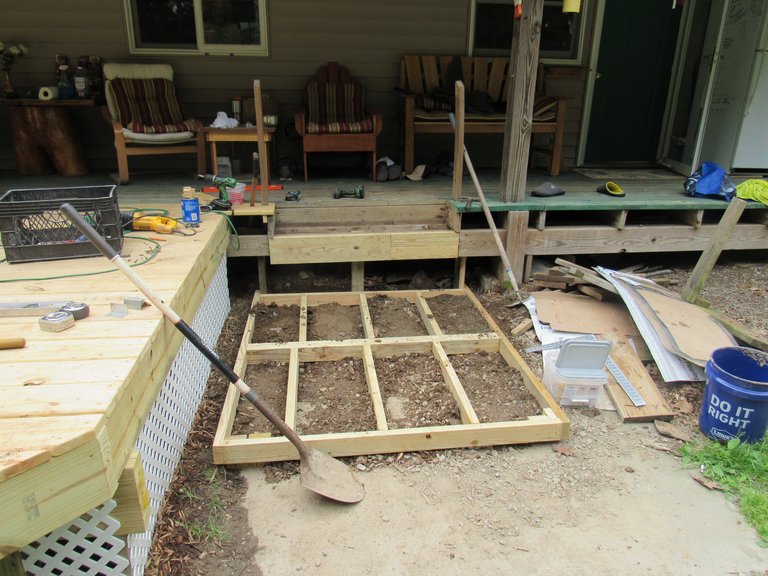
The pockets in the framing for the platform were filled with dirt, which will help to stabilize the platform!
With the front edge of the wooden platform landing on a massive piece of bluestone and the rear edge of the platform secured and hanging from the existing structure, no footing holes were required. 😁
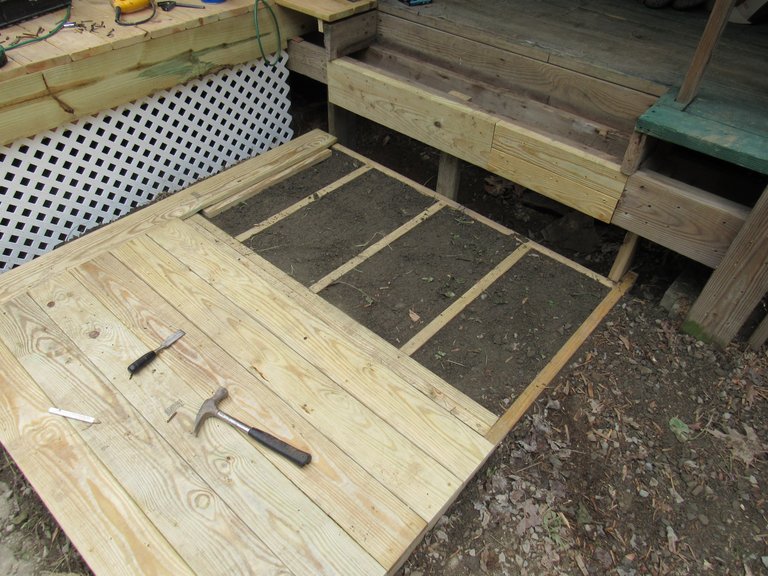
With the decking to the platform almost completely installed, this project is quickly coming to an end.
We didn't put any handrail system on the right side of the deck. Since the deck is only a couple of feet off of the ground, on this side, it makes a great place to have a seat.
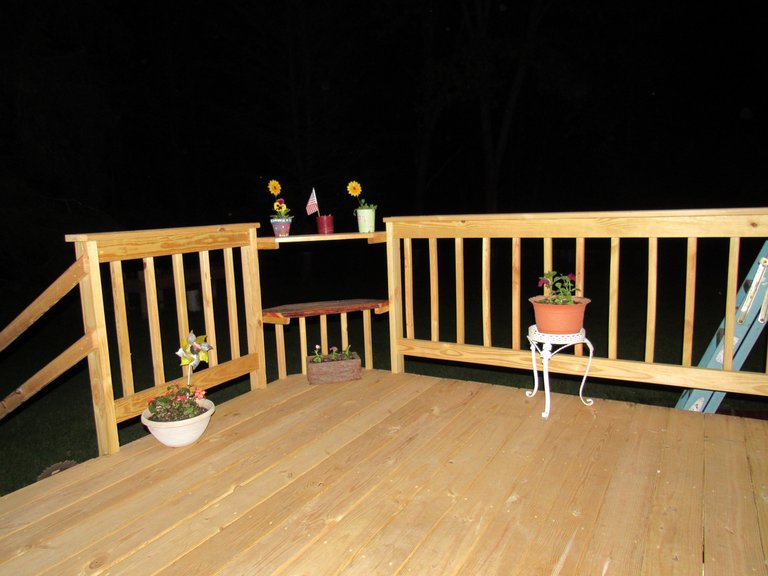
I got a little creative with the remaining handrail system, building a few shelves right in the railing system. After closing in the bottom of the new deck with vinyl lattice it was time to move some furniture onto the new porch.
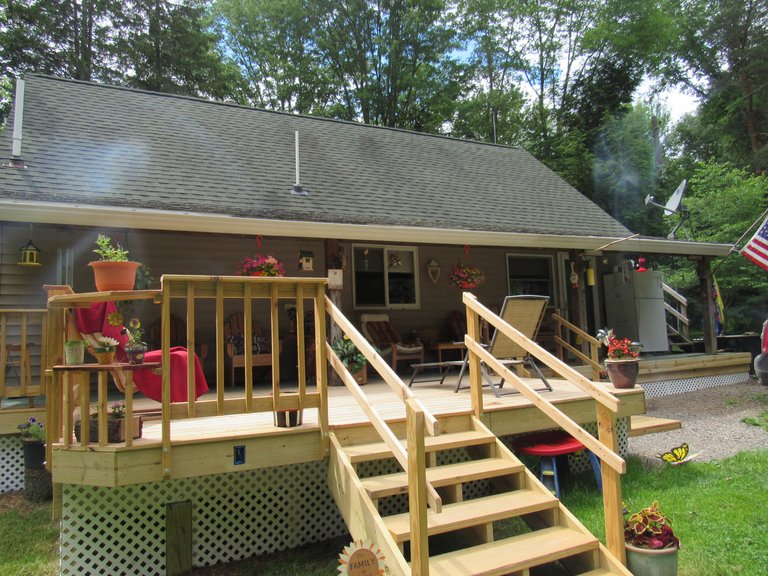
BUILD IT AND THEY WILL COME!
After completing this project, we asked ourselves, "Why didn't we do this years ago"?
Stay safe, stay happy, and stay busy!
Thank you for sharing this amazing post on HIVE!
Your content got selected by our fellow curator @deepu7 & you just received a little thank you via an upvote from our non-profit curation initiative!
You will be featured in one of our recurring curation compilations and on our pinterest boards! Both are aiming to offer you a stage to widen your audience within and outside of the DIY scene of hive.
Join the official DIYHub community on HIVE and show us more of your amazing work and feel free to connect with us and other DIYers via our discord server: https://discord.io/diyhub!
If you want to support our goal to motivate other DIY/art/music/homesteading/... creators just delegate to us and earn 100% of your curation rewards!
Stay creative & hive on!
Thanks for your support, it is greatly appreciated.
Phenomenal craftsmanship @thebigsweed! The deck looks really great! We always gather in the summer on my moms deck. Just a great space to sit your butt, kick back, and relax. Congrats on all the hard work, I’m sure you’ll all enjoy it for years to come.
Thanks, man. It has already come into play as we just recently had all of the family up for a few days.
Stay safe.
What a project!!
To enhance and improve the already perfect hang out spot must make you excited for the end of winter and COVID.
Man I wanna come visit and sit on that deck now ...
Hi thebigsweed,
Visit curiehive.com or join the Curie Discord community to learn more.
Thanks for your continued support @curie.
❤😍👍👌😘✔✔✔✔
👀 look how beautiful!!!
Looks really nice. I built our decks within the last year and it is one of the best things we have done on the farm! Added a couple hundred sqft to our living space. I've just been lagging on getting the railing up. I like the corner seat in the railing!
Thanks for the compliment. I hear you when you say you added a couple hundred sqft of living space.
We spend so much time outside on the deck it passes as a room!
Thanks for stoping in!
You do good work @thebigsweed, I may need you to come down and help me with my new place ha ha ha.
BTW... I've spent years down here, sometimes working in concrete and as a mason's helper. Post upvoted and reblogged
btw
I believe that term is SCREED, where you drag across the top of wet cement to get it level.
Screed has three meanings in building construction:
a flat board (screed board, floating screed) or a purpose-made aluminium tool used to smooth and "true" materials like concrete, stucco and plaster after they have been placed on a surface or to assist in flattening
Screed
Good to hear from you @jerrytsuseer. I stand corrected, thanks. For years I have been using the word screened.
working as a mason is not easy, how's your back. good luck with the new house.
Love watching how and why you work on projects! They are always so lovely when finished. :)) Great front porch!
Thanks for stopping in, it's always good to hear from you. If there is anyone who would appreciate a construction project it would be you. You guys have been going at it for some time now and it must feel good to have so much of the work done. Pretty soon you guys will be able to sit back a little and enjoy all of your hard work.