Cordiales saludos
Comandos que trataremos en esta publicación: echo, cat, head, tail, wc, help, touch.
Redireccionando la salida estandar
Podemos redireccionar la salida de un comando a un archivo de texto.
A continuación la salida estandar del comando echo, nos muestra la palabra "Título" en nuestra terminal.
$ echo "Titulo"
Titulo
Para redireccionar esta salida utilizaremos el signo >. Si el archivo no existe lo crea y si existe lo sobrescribe. Ulizaremos el comando cat para ver el contenido del archivo.
$ echo "Titulo" > documento.txt
$ cat documento.txt
Titulo
Aquí nos damos cuenta que se sobrescribe el archivo documento.txt con la palabra Titulo2.
$ echo "Titulo2" > documento.txt
$ cat documento.txt
Titulo2
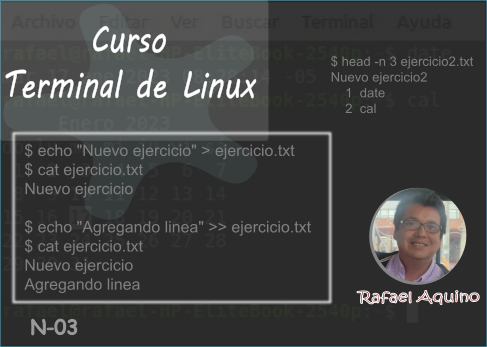
Si deseamos escribir al final del archivo sin borrar el contenido de archivo utilizaremos el >>.
$ echo "Nuevo ejercicio" > ejercicio.txt
$ cat ejercicio.txt
Nuevo ejercicio

$ echo "Agregando linea" >> ejercicio.txt
$ cat ejercicio.txt
Nuevo ejercicio
Agregando linea
También podemos usar >> para redireccionar la salida y crear un nuevo archivo.
$ echo "Nuevo ejercicio2" >> ejercicio2.txt
$ cat ejercicio2.txt
Nuevo ejercicio2
Comando cat
Muestra el contenido de un archivo.
Comando head
Para este ejercicio redireccioné la salida del comando history a un nuevo archivo llamado ejercicio2.txt y con cat mostré su contenido.
$ history >> ejercicio2.txt
$ cat ejercicio2.txt
Nuevo ejercicio2
    1  date
    2  cal
    3  pwd
    4  echo "Hola Mundo"
    5  whatis echo
    6  whatis pwd
    7  which pwd
    8  which echo
    9  ls
   10  ls -al
   11  cal -A 2
   12  cal -B 2
   13  history
   14  history > comandos.txt
   15  cat history.txt
   16  cat comandos.txt
   17  git status
   18  git add comandos.txt
   19  git commit -m "Agregando archivo comandos.txt"
   20  git push
   21  history
   22  echo "Titulo" > documento.txt
   23  cat documento.txt
   24  echo "Titulo2" > documento.txt
   25  cat documento.txt
   26  echo "Titulo"
   27  echo "Nuevo ejercicio" >> ejercicio.txt
   28  cat ejercicio.txt
   29  rm ejercicio.txt
   30  ls
   31  echo "Nuevo ejercicio" > ejercicio.txt
   32  cat ejercicio.txt
   33  echo "Agregando linea" >> ejercicio.txt
   34  cat ejercicio.txt
   35  echo "Nuevo ejercicio2" >> ejercicio2.txt
   36  cat ejercicio2.txt
   37  ls
   38  head comandos.txt
   39  tail comandos.txt
   40  hystory
   41  history
   42  history >> ejercicio2.txt
El comando head nos muestra las 10 primeras lineas del archivo
$ head ejercicio2.txt
Nuevo ejercicio2
    1  date
    2  cal
    3  pwd
    4  echo "Hola Mundo"
    5  whatis echo
    6  whatis pwd
    7  which pwd
    8  which echo
    9  ls
El comando tail nos muestra las 10 últimas lineas
$ tail ejercicio2.txt
   33  echo "Agregando linea" >> ejercicio.txt
   34  cat ejercicio.txt
   35  echo "Nuevo ejercicio2" >> ejercicio2.txt
   36  cat ejercicio2.txt
   37  ls
   38  head comandos.txt
   39  tail comandos.txt
   40  hystory
   41  history
   42  history >> ejercicio2.txt
Limitando head. Agregando la opción -n y el argumento 3 a head nos muestra las tres (3) primeras lineas. Podemos cambiar el número de acuerdo a la cantidad de lineas que queramos mostrar.
$ head -n 3 ejercicio2.txt
Nuevo ejercicio2
    1  date
    2  cal
Limitando tail. Agregando la opción -n y el argumento 5 a head nos muestra las cinco (5) últimas lineas. Podemos cambiar el número de acuerdo a la cantidad de lineas que queramos mostrar.
$ tail -n 5 ejercicio2.txt
   38  head comandos.txt
   39  tail comandos.txt
   40  hystory
   41  history
   42  history >> ejercicio2.txt
Comando wc
Muestra la cantidad de líneas, palabras y byte de un archivo. En el siguiente ejercicios wc -l ejercicio2.txt nos arroja 43 lineas y wc -w ejercicio2.txt nos arroja 144 palabras.
$ whatis wc
wc (1)               - print newline, word, and byte counts for each file

$ wc -l ejercicio2.txt
43 ejercicio2.txt

$ wc -w ejercicio2.txt
144 ejercicio2.txt
help: Este comando nos ofrece ayuda de cualquier comando dando una referencia de su uso.
$ wc --help
Usage: wc [OPTION]... [FILE]...
  or:  wc [OPTION]... --files0-from=F
Print newline, word, and byte counts for each FILE, and a total line if
more than one FILE is specified.  A word is a non-zero-length sequence of
characters delimited by white space.

With no FILE, or when FILE is -, read standard input.

The options below may be used to select which counts are printed, always in
the following order: newline, word, character, byte, maximum line length.
  -c, --bytes            print the byte counts
  -m, --chars            print the character counts
  -l, --lines            print the newline counts
      --files0-from=F    read input from the files specified by
                           NUL-terminated names in file F;
                           If F is - then read names from standard input
  -L, --max-line-length  print the maximum display width
  -w, --words            print the word counts
      --help     display this help and exit
      --version  output version information and exit

GNU coreutils online help: <https://www.gnu.org/software/coreutils/>
Report wc translation bugs to <https://translationproject.org/team/>
Full documentation at: <https://www.gnu.org/software/coreutils/wc>
or available locally via: info '(coreutils) wc invocation'
Comando touch
Crea un archivo vacio
$ touch archivo_vacio.txt
$ cat archivo_vacio.txt
$
Un atajo interesante para crear un archivo vacio!
$ > holamundo.txt
$ cat holamundo.txt
$
Comando exit
Nos permite cerrar la terminal. Como la terminal es una ventana la podemos cerrar en la X (Close - cerrar que está en la esquina superior derecha). Observación: Podemos cerrar esta terminal que estamos usando por ahora, pero más adelante en opciones más avanzadas no tendremos (close - cerrar).
$ exit

Git
Git es una herramientas de control de versiones, que todos debemos conocer. Git trabaja o actúa desde nuestro computador para llevar el registro y progreso de nuestros proyectos. Git nos permitirá subir nuestros proyectos a github o a gitlab. En esta oportunidad usé gitlab para registrar todos los comandos de este curso. Puedes entrar al Repositorio de comandos en este link: https://gitlab.com/btcsiraquino/linux_curso
Queda a continuación de tu parte investigar acerca de:
- Git
- Github
- Gitlab
Ejecuté el comando history para listar todos los comandos ejecutados.
$ history
    1  date
    2  cal
    3  pwd
    4  echo "Hola Mundo"
    5  whatis echo
    6  whatis pwd
    7  which pwd
    8  which echo
    9  ls
   10  ls -al
   11  cal -A 2
   12  cal -B 2
   13  history
Para crear el repositorio de comando. Redireccioné la salida de history a un archivo de texto llamado comandos.txt. Con cat visualicé su contenido.
$ history > comandos.txt
 cat comandos.txt
    1  date
    2  cal
    3  pwd
    4  echo "Hola Mundo"
    5  whatis echo
    6  whatis pwd
    7  which pwd
    8  which echo
    9  ls
   10  ls -al
   11  cal -A 2
   12  cal -B 2
   13  history
   14  history > comandos.txt
Cloné el repositorio linux_curso.git que cree previamente en mi cuenta de gitlab. Es importante que te crees una cuenta en gitlab.
Por ser la primera vez que ves la serie de comandos que utilicé para subir el repositorio, no te abrumes. Lo importante aquí es que te des cuenta que todo lo realicé a través de la terminal y a medida que avancemos verás que es muy fácil hacerlo.
A continuación, toda la configuración e inicializando la conexión remota con el repositorio.
  $git clone https://gitlab.com/btcsiraquino/linux_curso.git
  $cd linux_curso/
  $git status
  $git switch -c main
  $touch README.md
  $git config user.name "Rafael Aquino"
  $git config user.email "[email protected]"
  $git status
  $git add .
  $git commit -m "inicializando"
  $git push -u origin main
Puedes percatarte que sí conoces una linea de todos los comandos que están a continuación. Creé un archivo vacio con touch: $touch README.md.
$touch README.md
A continuación, como subí el archivo comandos.txt al repositorio de gitlab.
rafa_elaquino@HP2:~/linux_curso$ git status
On branch main
Your branch is up to date with 'origin/main'.

Untracked files:
  (use "git add <file>..." to include in what will be committed)
        comandos.txt

nothing added to commit but untracked files present (use "git add" to track)

rafa_elaquino@HP2:~/linux_curso$ git add comandos.txt

rafa_elaquino@HP2:~/linux_curso$ git commit -m "Agregando archivo comandos.txt"

[main d2333a2] Agregando archivo comandos.txt
 1 file changed, 14 insertions(+)
 create mode 100644 comandos.txt
rafa_elaquino@HP2:~/linux_curso$ git push

Username for 'https://gitlab.com': btcsiraquino
Password for 'https://[email protected]':
Enumerating objects: 4, done.
Counting objects: 100% (4/4), done.
Delta compression using up to 4 threads
Compressing objects: 100% (3/3), done.
Writing objects: 100% (3/3), 468 bytes | 468.00 KiB/s, done.
Total 3 (delta 0), reused 0 (delta 0)
To https://gitlab.com/btcsiraquino/linux_curso.git
   062cac6..d2333a2  main -> main
rafa_elaquino@HP2:~/linux_curso$
#................................................................
# Esto fue lo que escribí
 14  history > comandos.txt
   15  cat history.txt
   16  cat comandos.txt
   17  git status
   18  git add comandos.txt
   19  git commit -m "Agregando archivo comandos.txt"
   20  git push
   21  history
Todos a practicar, incluyéndome! Nos vemos en la próxima publicación...
Bastante completo este tutorial amigo. La potencia que tiene la terminal de Linuxes enorme.
Has sido curado por @visualblock / You've been curated by @visualblock
Bienvenidas delegaciones / Delegations welcome
Encuentra nuestra comunidad aquí / Find our community here
Trail de Curación / Curation Trail
Gracias por pasar por aquí @alberto0607. Estoy muy entusiasmado con este nuevo curso, donde aprenderemos todos. Feliz día.
The rewards earned on this comment will go directly to the people( @visualblock ) sharing the post on Twitter as long as they are registered with @poshtoken. Sign up at https://hiveposh.com.