hi hivers! This time I want to share you another tutorial for animation. This time we are going to use the puppet tool. We are going to use After effects. This tool is amazing! You can animate anything with it.
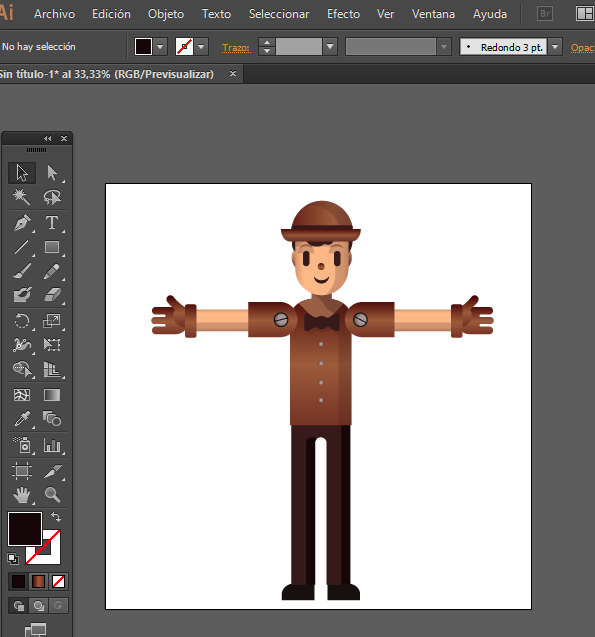
First we need an image to apply the effect. You can use any image with transparent background, any PNG or photoshop image. I've made this vector drawing of a doll on illustrator so we are going to animate it.
hola hivers! En esta ocasión quiero compartirles otro tutorial de animación. Esta vez usaremos la herramienta de marioneta. Vamos a utilizar After Effects. ¡Esta herramienta es asombrosa! Puedes animar cualquier cosa con esto.
Primero necesitamos una imagen para aplicar el efecto. Puedes utilizar cualquier imagen con fondo transparente, cualquier imagen PNG o de Photoshop. Hice este dibujo vectorial de una muñeca en Illustrator, así que lo vamos a animar.
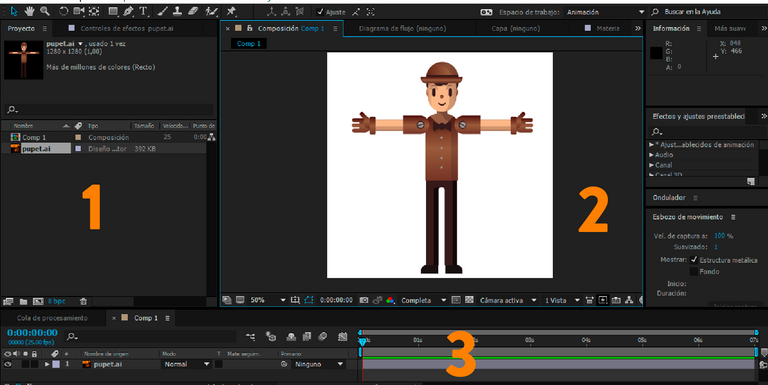
ok, I've created a new composition with white background on After Effects. You can set the size, how long will be the animation and color of background when you create it on the menu bar composition - new composition.
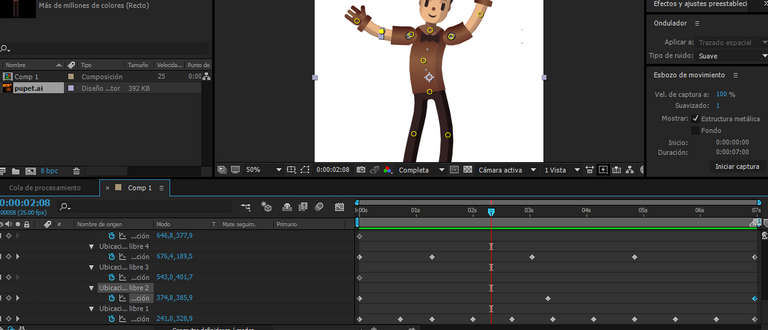
You can see that in the number 1 is a panel where you can drop new objects for using in the animation (like png, jpg, mp4, mp3 files). I've imported there the AI doll drawing, and then dragged and dropped it on the number 3 panel.
This panel represents the timeline, this is where the animation goes by through the time. You can mark here in which second or minute the animation begins and where it ends.
The panel number 2 is the visor where you can preview the animation, if you have a computer without a powerful graphic card, I recommend you to set the level of the preview detail to third or quarter, otherwise it will take so much time to process the preview.
ok, he creado una nueva composición con fondo blanco en After Effects. Puede establecer el tamaño, cuánto tiempo durará la animación y el color del fondo cuando lo cree en la composición de la barra de menú: nueva composición.
Puede ver que en el número 1 hay un panel donde puede colocar nuevos objetos para usar en la animación (como archivos png, jpg, mp4, mp3). Importé allí el dibujo de la muñeca de IA, y luego lo arrastré y solté en el panel número 3.
Este panel representa la línea de tiempo, aquí es donde pasa la animación a través del tiempo. Puede marcar aquí en qué segundo o minuto comienza la animación y dónde termina.
El panel número 2 es la visera donde puede obtener una vista previa de la animación, si tiene una computadora sin una tarjeta gráfica potente, le recomiendo que establezca el nivel de detalle de la vista previa en un tercio o un cuarto, de lo contrario tomará mucho tiempo procesarlo. la vista previa.
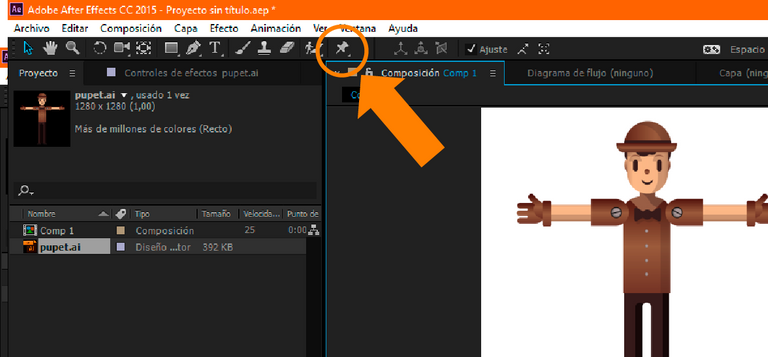
We are going to select the puppet too.
Seleccionaremos la herramienta marioneta.
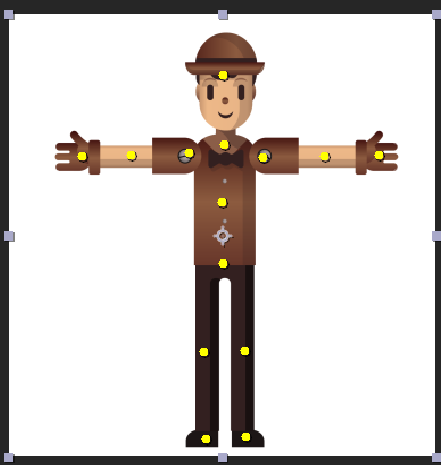
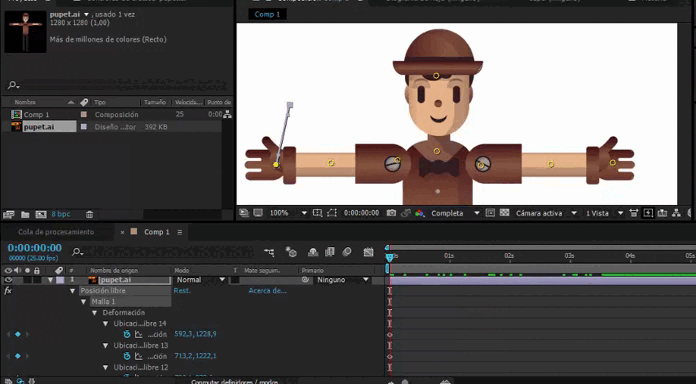
We are going to click on parts of the doll to create the joints with the puppet tool. You can see the yellow points there that are now the puppet handlers.
Vamos a hacer clic en partes del muñeco para crear las articulaciones con la herramienta títere. Puedes ver los puntos amarillos que ahora son los manipuladores de títeres.
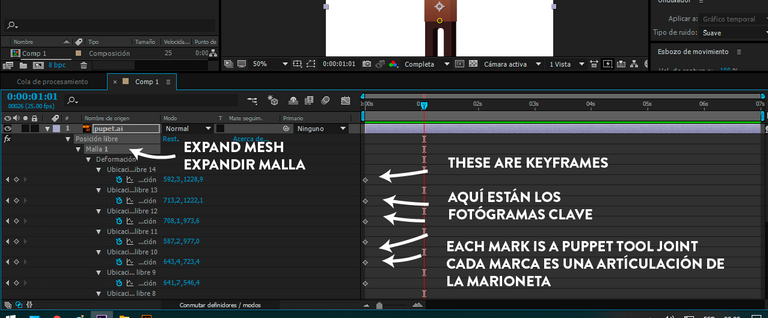
You can see if you expand the mesh effect you will see these marks in the timeline, these are the keyframes. This means that this is going to be the position of the puppet tool marks in this point of the time of the animation.
Puedes ver que si expande el efecto de malla verás estas marcas en la línea de tiempo, estos son los fotogramas clave. Esto significa que esta será la posición de las marcas de la herramienta títere en este momento de la animación.
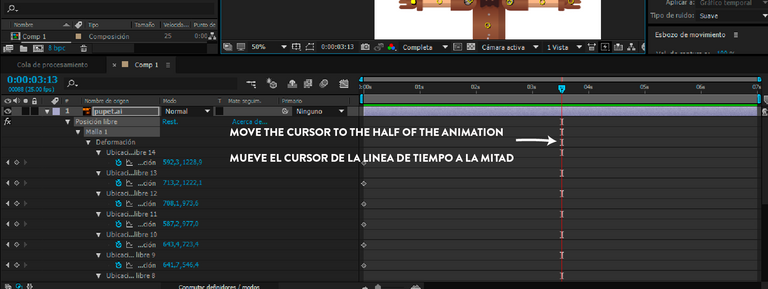
We have the starting position, we are going to move the time cursor to half of the animation.
Tenemos la posición inicial, vamos a mover el cursor de tiempo a la mitad de la animación.
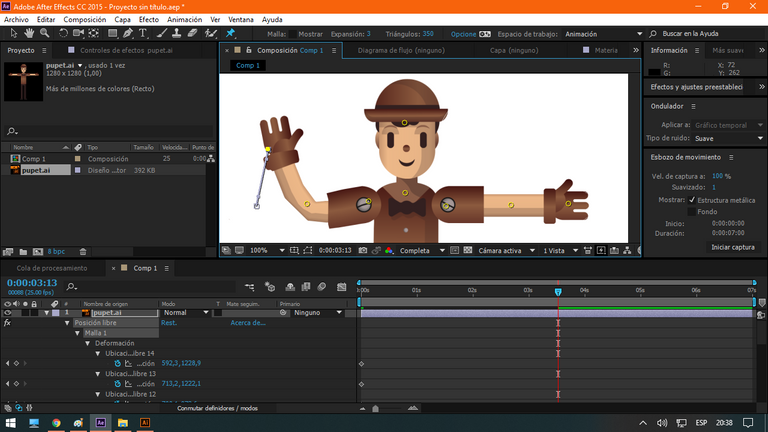
Be sure that now not all the keyframes are selected, just click on the timeline to deselect them. now we are going to select the first joint, the hand, and we are going to move it. Be careful to not create new joints when you click. We are going to move the joint.
Asegúrese de que ahora no todos los fotogramas clave estén seleccionados, simplemente puedes hacer clic en la línea de tiempo para deseleccionarlos. ahora vamos a seleccionar la primera articulación, la mano, y la vamos a mover. Ten cuidado de no crear nuevas marcas de marioneta cuando hagas clic. Vamos a mover la articulación.
if you press spacebar you can preview the animation.
puedes apretar la barra espaciadora para correr la animación.
you can add as many animation keyframes in the timeline as you want to, just move the time cursor and move the joints. You can also copy and paste keyframes with control+c and control+v, I use this to set the finish point the same as the first one, and create animation loops.
Puede agregar tantos fotogramas clave de animación en la línea de tiempo como desee, simplemente mueva el cursor de tiempo y mueva las articulaciones. También puede copiar y pegar fotogramas clave con control + cy control + v, lo uso para establecer el punto de finalización igual que el primero y crear bucles de animación.
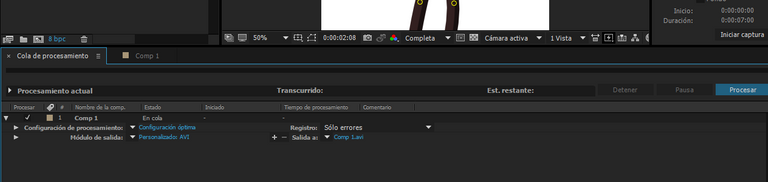
After you finished, you can go to composition - preprocess. This will lead you to a panel where you can export the animation. You can select formats like AVI or MOV. Keep in mind that this will create a raw file without compression, so it will be a huge file! I use loop animations of 5 seconds, and they weight like 1 giga. Later you can compress them to mp4 format using other software like formatfactory or Adobe Media Encoder. If you want to mint NFTS you are going to use MP4 so keep this in mind.
Una vez que haya terminado, puede ir a composición - preprocesar. Esto lo llevará a un panel donde puede exportar la animación. Puede seleccionar formatos como AVI o MOV. Tenga en cuenta que esto creará un archivo sin compresión, por lo que será un archivo pesado. Utilizo animaciones de bucle de 5 segundos y pesan cerca de 1 giga. Más tarde, puedes comprimirlos a formato mp4 utilizando otro software como formatfactory o Adobe Media Encoder. Si deseas crear NFTS, usarás formato MP4, así que ten esto en cuenta.
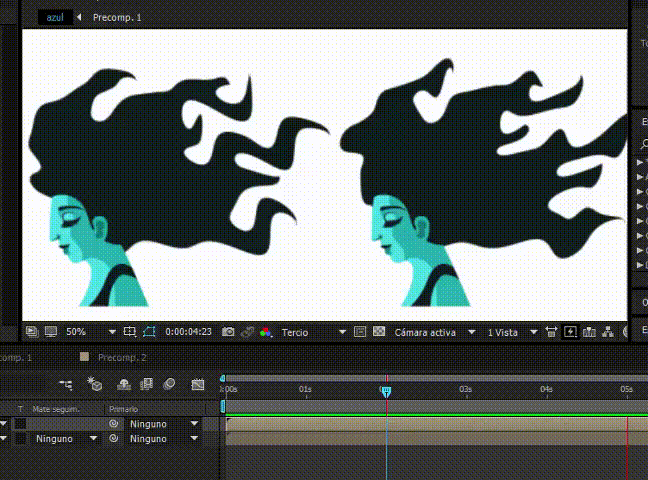
And this is the result after I've processed the file!
y este es el resultado luego de procesar la animación!

I hope that you liked it!
you can see my last post where I made a lesson about using the wave distort here too.
I hope that you liked it!
you can see my last post where I made a lesson about using the wave distort here too.
Espero te guste! puedes ver tambíen aquí un tutorial para usar la distorsión de ondas.
https://peakd.com/hive-156509/@delcarmat/how-to-animate-hair-animando-cabello-eng-esp
thanks! / gracias!