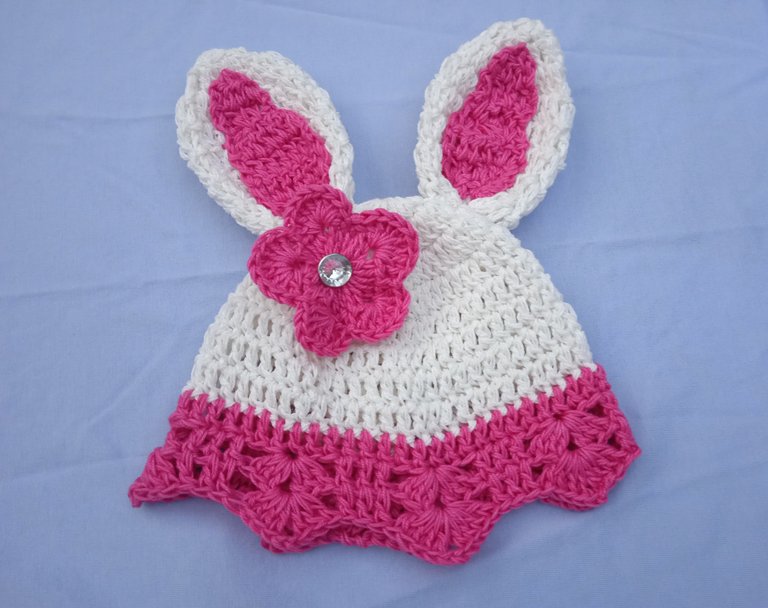
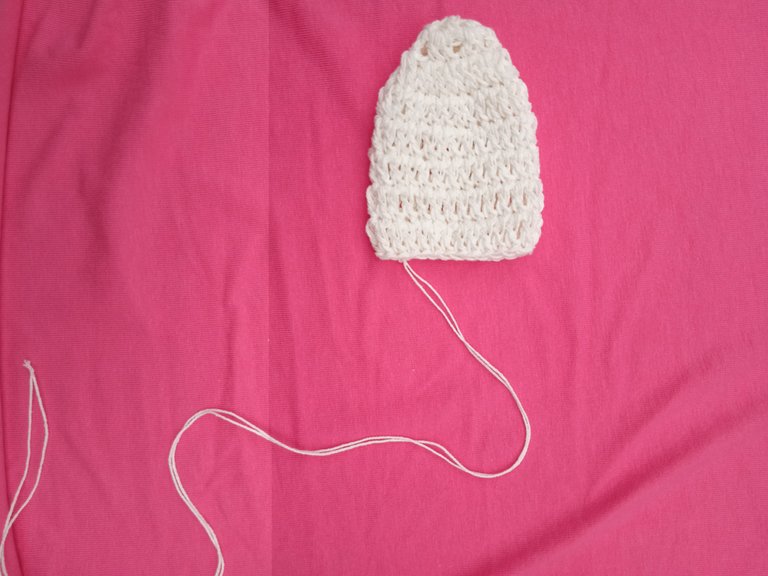
En esta ocasión quiero compartir con ustedes la elaboración de este precioso y coqueto gorro de conejita para un bebé de 0 a 2 meses de edad tejido a crochet, utilice 2 colores de hilo, ustedes pueden usar la combinación de su preferencia. Este gorrito es muy fácil de elaborar prácticamente este tejido utilizando un solo punto básico de tejido como es el punto alto o mejor conocido como vareta, así que no necesitas ser una experta en tejido para realizar este proyecto, solo prestarle un poco de atención y ganas de aprender.
On this occasion I want to share with you the elaboration of this beautiful and cute bunny hat for a baby from 0 to 2 months old crocheted, use 2 colors of thread, you can use the combination of your preference. This little hat is very easy to elaborate practically this fabric using only one basic knitting point as it is the high point or better known as the stick, so you do not need to be an expert in knitting to carry out this project, just pay a little attention and be willing to learn.

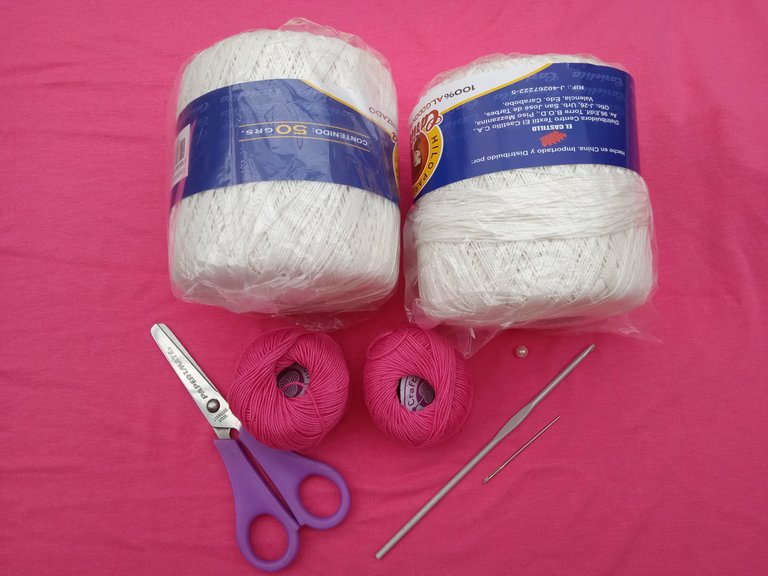
- Hilo color blanco y fucsia
- Aguja para tejer a crochet
- Tijera
- Aguja lanera
- Accesorio de bisutería
- White and fuchsia thread
- Crochet knitting needle
- Scissors
- Wool needle
- Jewelry accessory

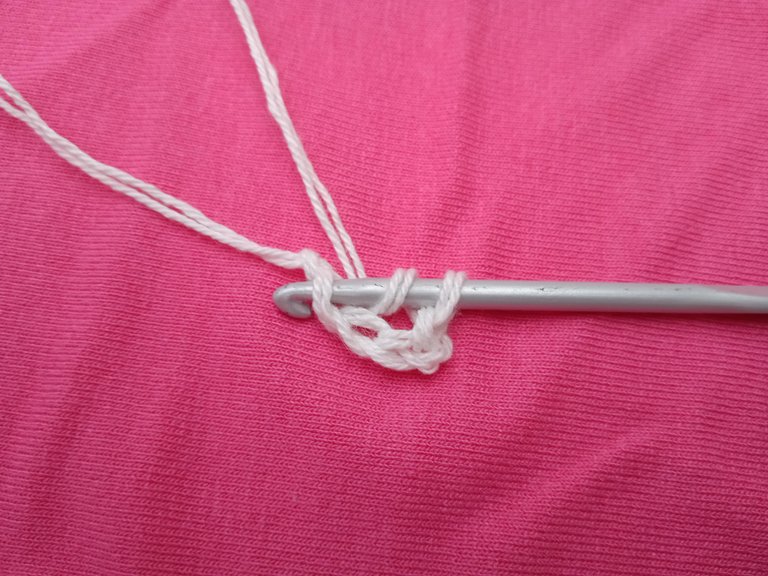
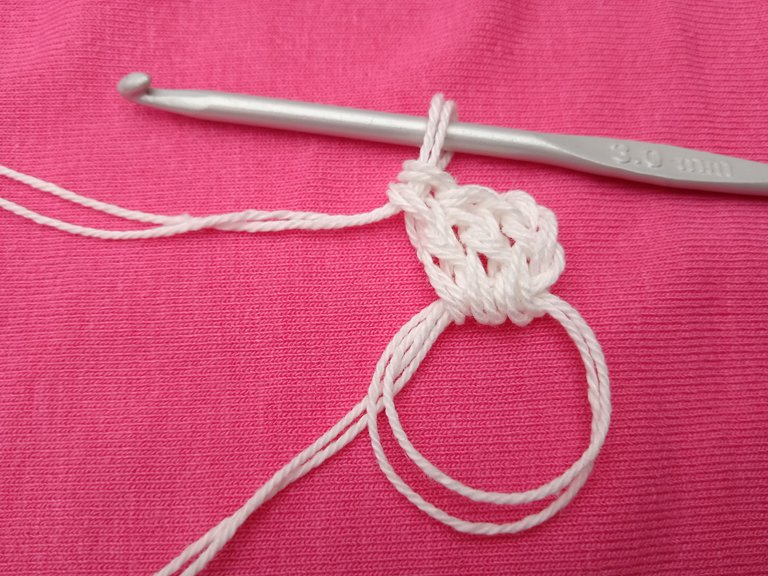
Para elaborar el gorrito comenzamos con una cadena de 4 puntos y en el primer punto que realizamos vamos hacer 17 puntos altos.
To elaborate the cap we start with a chain of 4 points and in the first point we make we are going to make 17 high points.
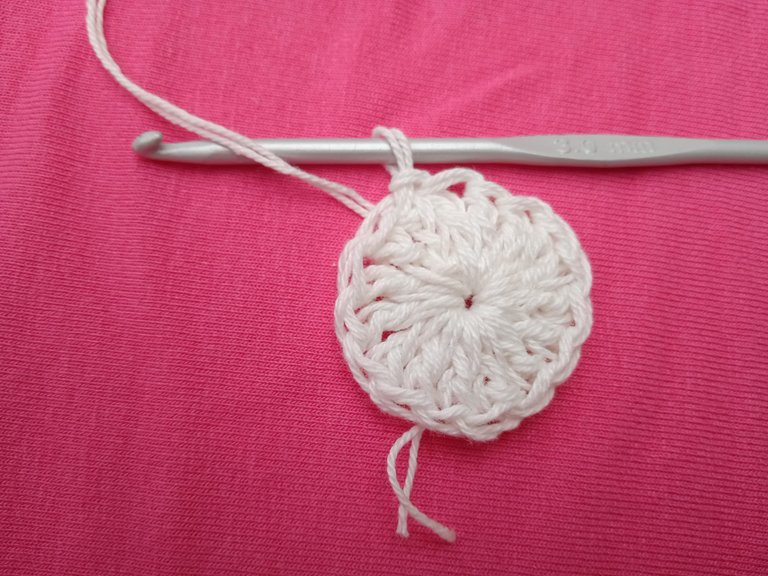
Para la 2da vuelta vamos a realizar 2 puntos altos en cada orificio de la cadena.
For the 2nd lap we will make 2 high points in each hole of the chain.
Para la 3era vuelta comenzamos con un aumento es decir dos puntos altos en el mismo orificio y luego un punto alto, repetimos hasta terminar la vuelta.
For the 3rd lap we start with a raise that is two high points in the same hole and then a high point, we repeat until we finish the lap.
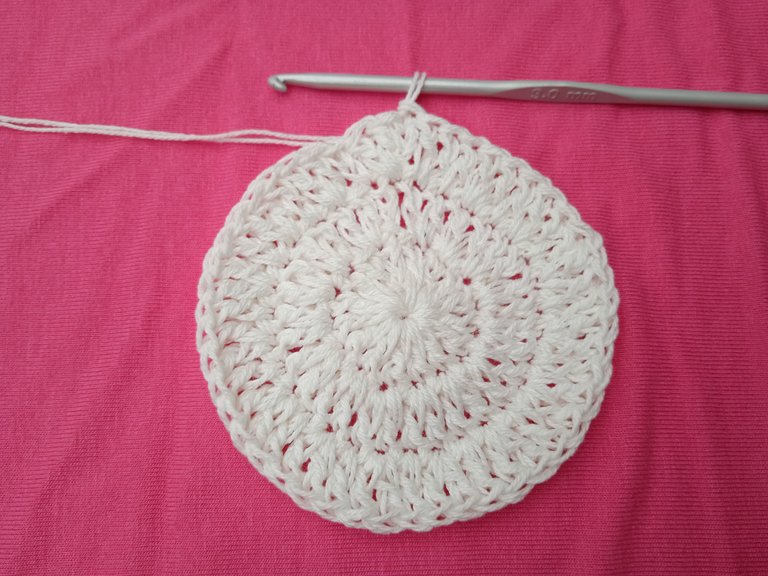
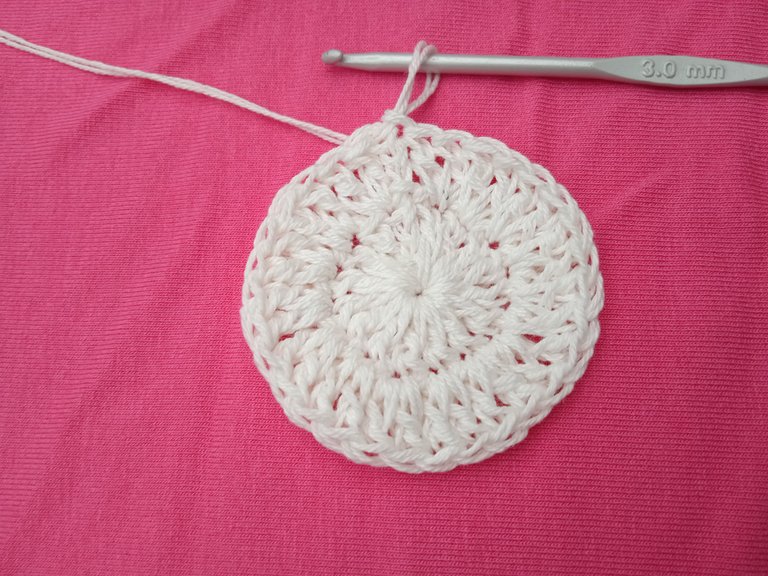
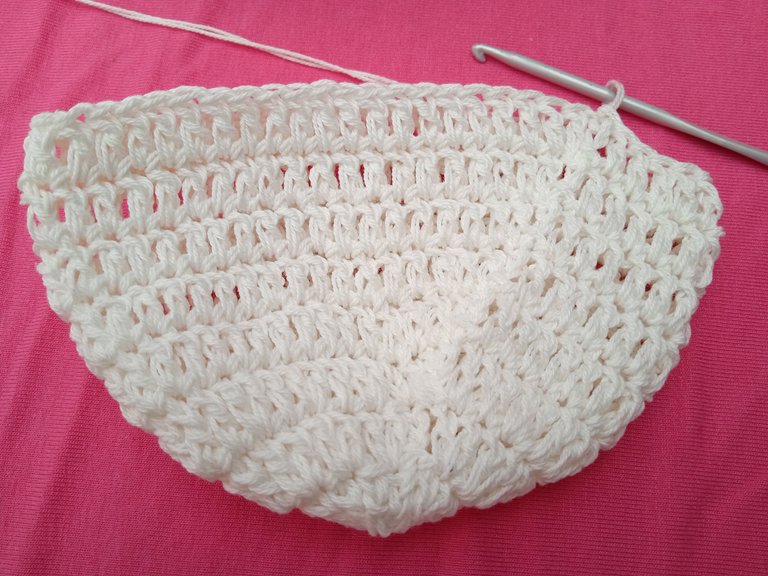
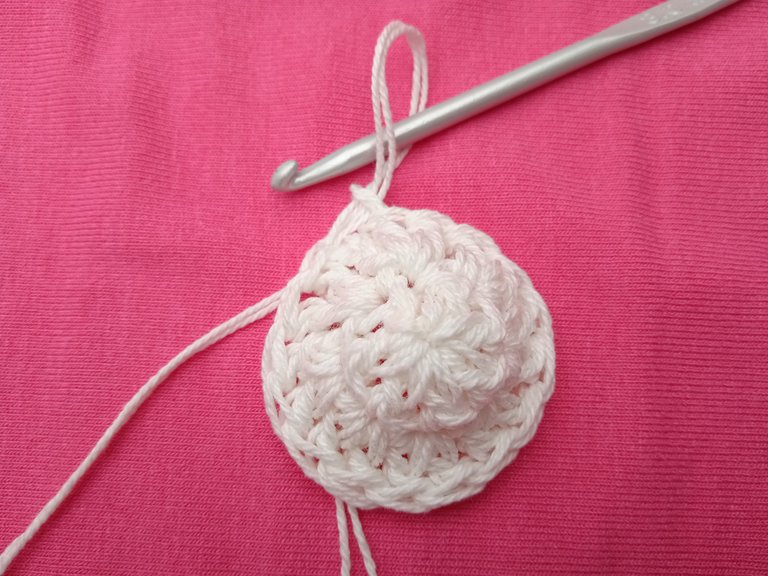
Para la 4ta vuelta realizamos un punto alto en cada orificio. Este mismo paso lo vamos a repetir hasta llegar a la vuelta numero 8.
For the 4th turn we made a high point in each hole. We will repeat this same step until we reach turn number 8.
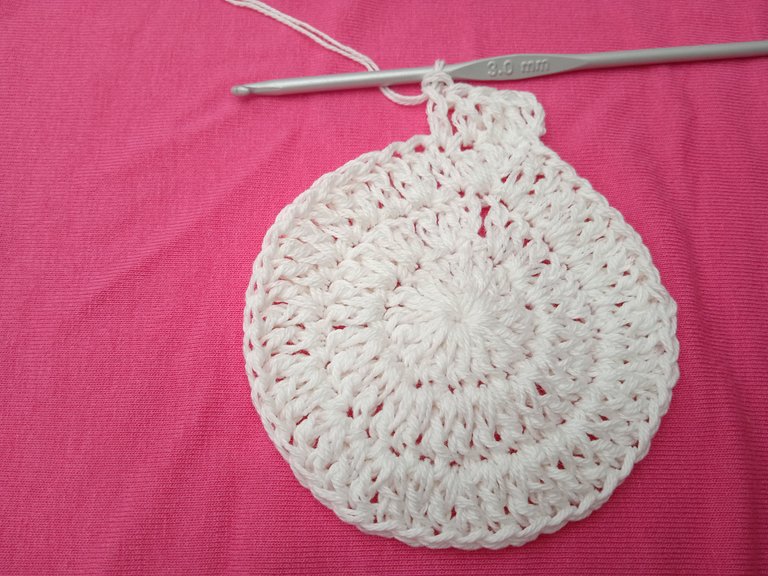
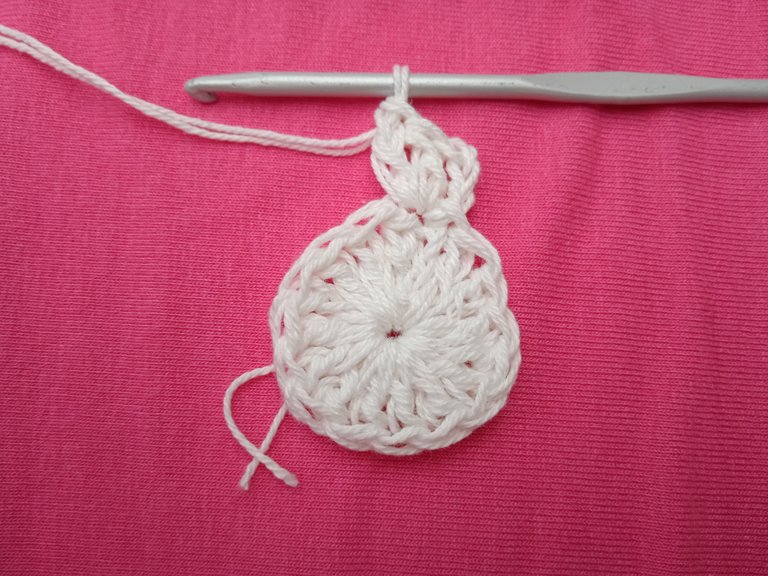
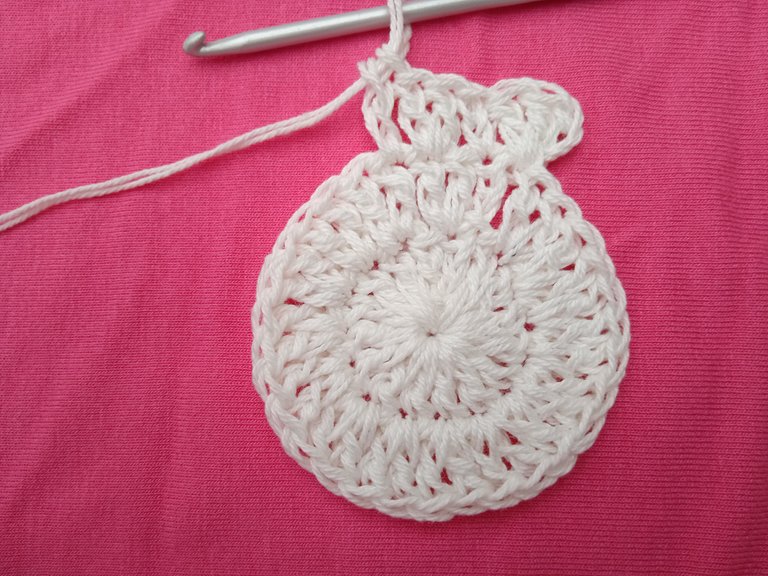
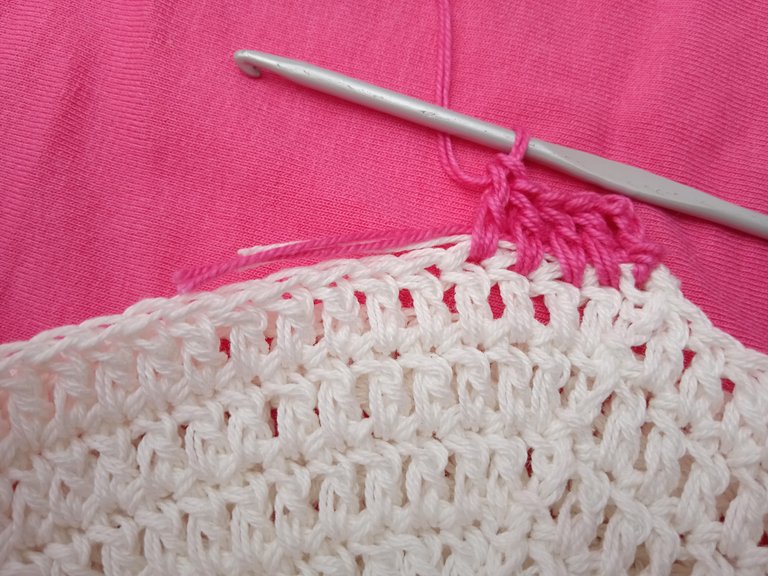
Para la vuelta numero 9 vamos a cambiar el color de hilo y repetimos un punto alto en cada orifico.
For lap number 9 we will change the thread color and repeat a high point in each hole.
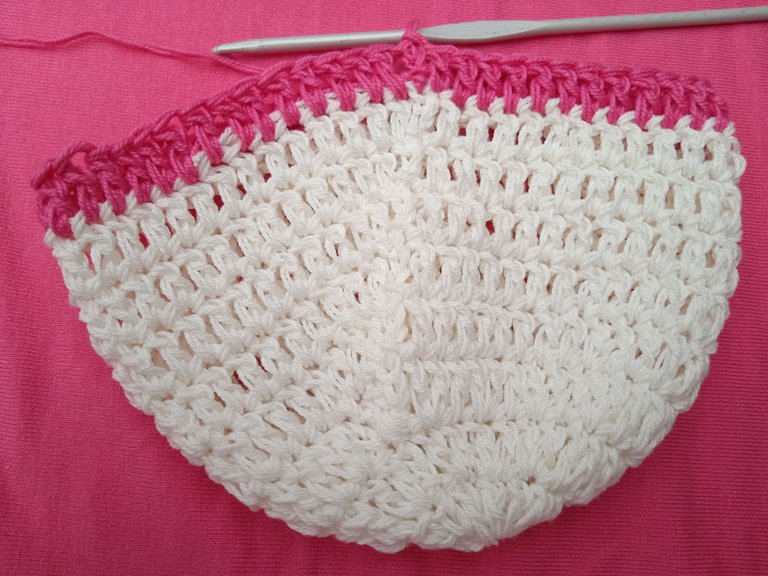
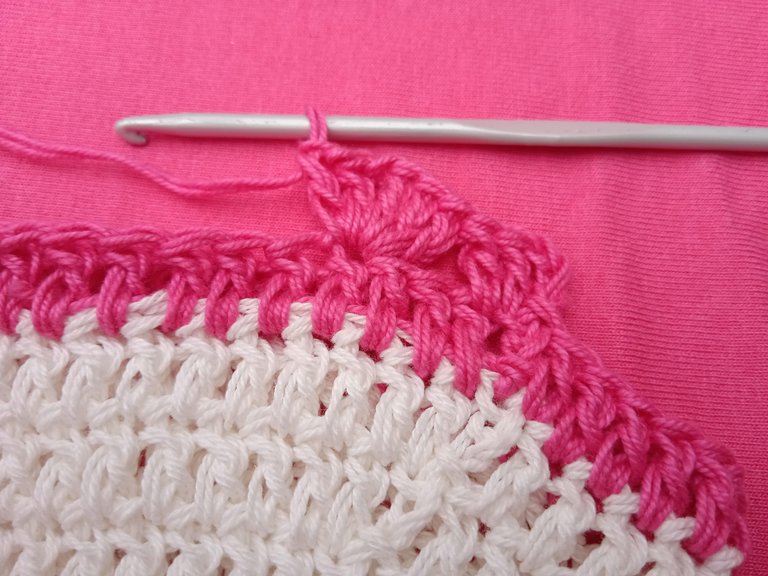
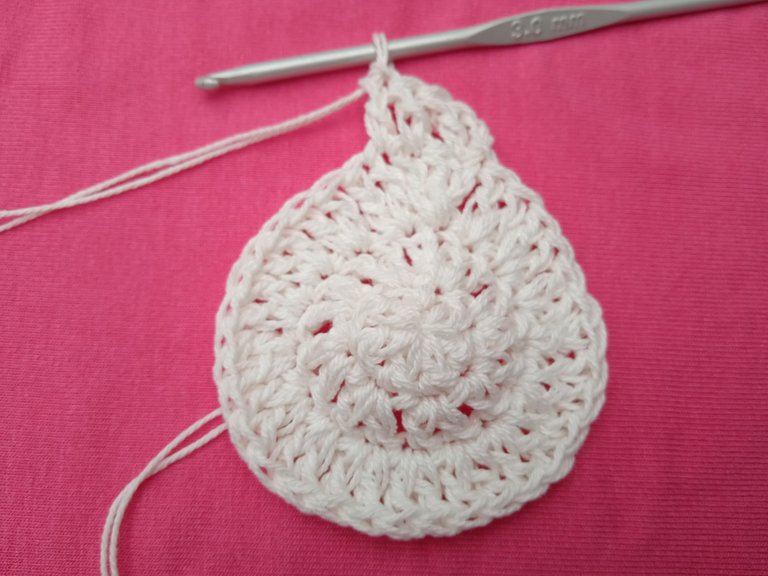
Para la ultima vuelta que sera la numero 10, realizamos un punto de fantasía de la siguiente manera 3 puntos altos, luego dejamos 3 orificios libres y en el siguiente hacemos 3 puntos una cadena y 3 puntos altos en el mismo orificio. Repetimos este paso hasta terminar la vuelta.
For the last round, which will be number 10, we make a fancy point in the following way 3 high points, then we leave 3 holes free and in the next one we make 3 points a chain and 3 high points in the same hole. We repeat this step until we finish the turn.
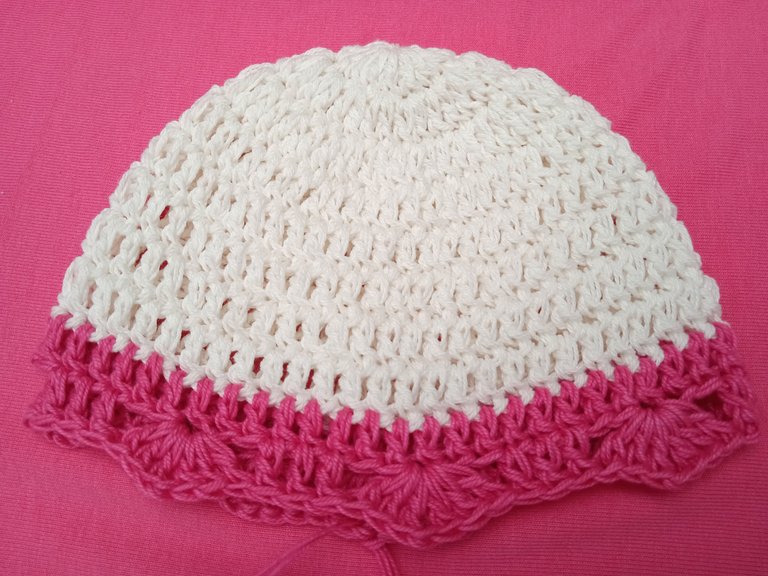
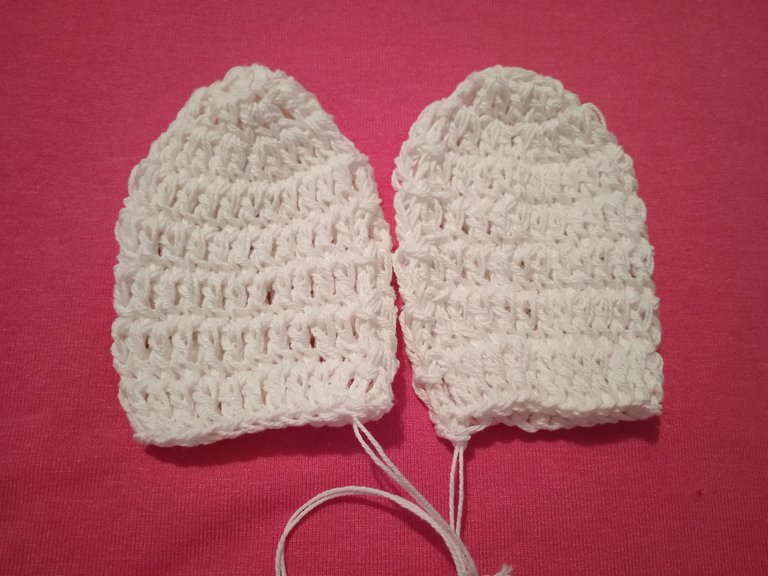
Listo el gorro de bebé 👶/ Ready the baby hat 👶
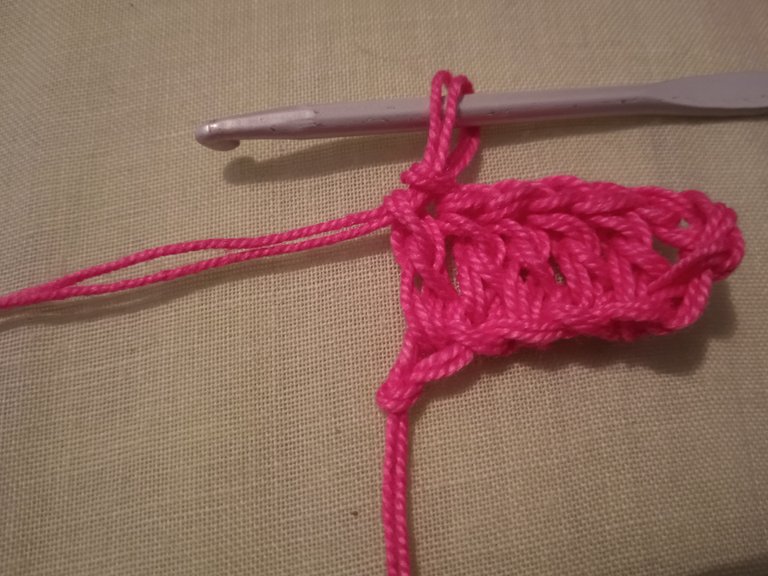
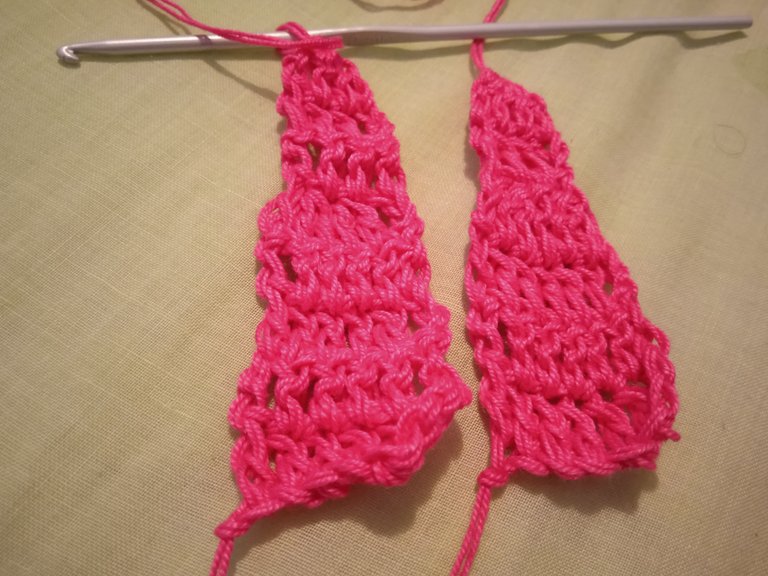
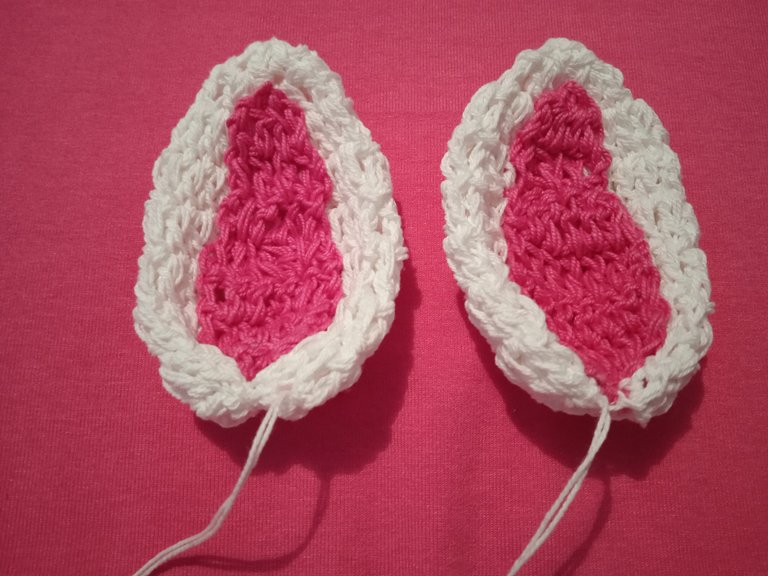
Para las orejas comenzamos con un anillo mágico y dentro de el vamos a realizar 6 puntos altos.
For the ears we start with a magic ring and inside it we will make 6 high points.
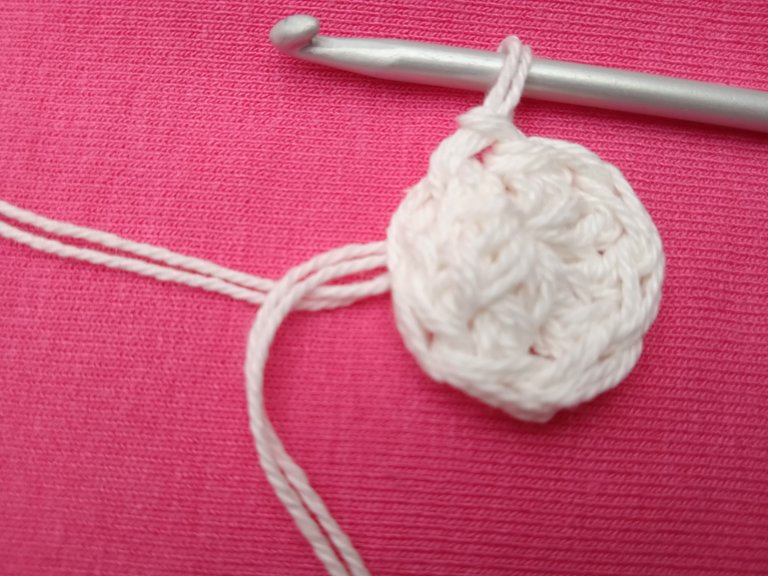
Para la segunda vuelta vamos hacer 2 puntos altos en cada orificio, es decir debes terminar la vuelta con 12 puntos altos.
For the second round we will make 2 high points in each hole, that is to say you must finish the round with 12 high points.
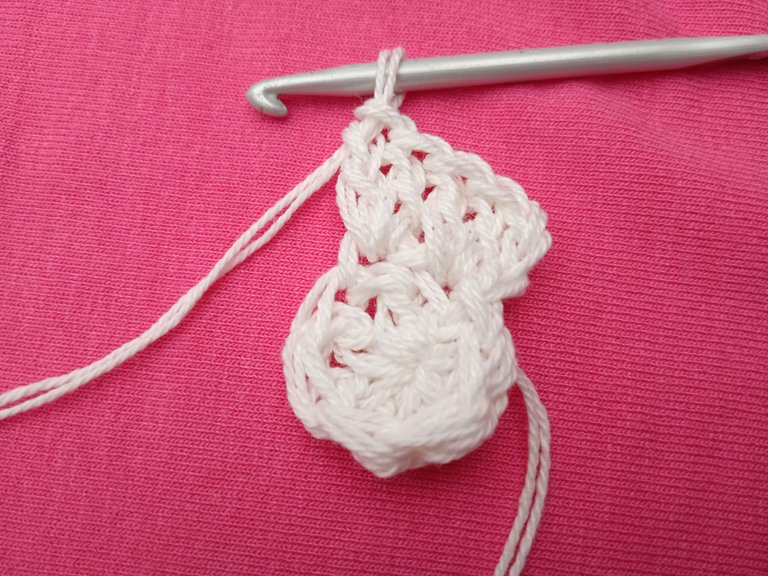
Para la 3era vuelta también debes realizar 2 puntos altos en cada orificio, debes terminar con 24 puntos.
For the 3rd round you must also make 2 high points in each hole, you must finish with 24 points.
Para la vuelta numero 4 y hasta la numero 8 debes realizar un punto alto en cada orificio hasta terminar la vuelta. Recuerda que son dos orificios, por lo tanto debes repetir estos mismos pasos para elaborar la otra.
For lap number 4 and up to number 8 you must make a high point in each hole until the end of the lap. Remember that there are two holes, so you must repeat these same steps to make the other one.
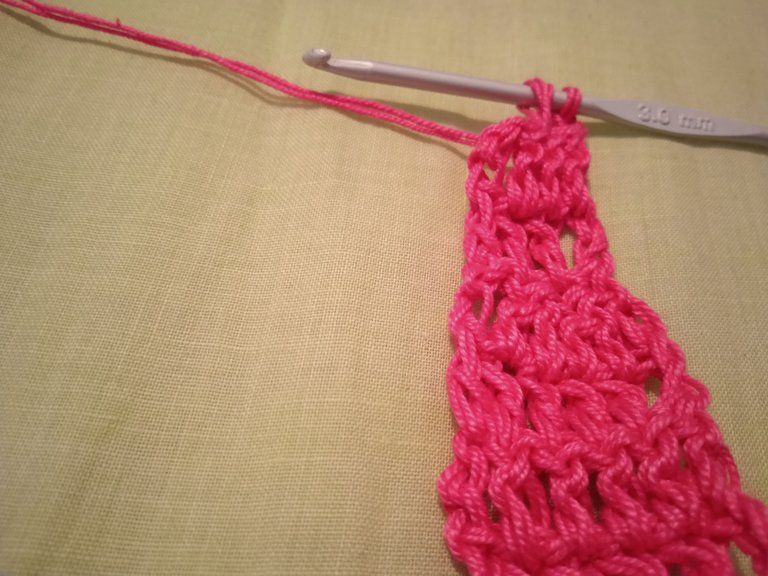
Para realizar la pieza que va dentro de las orejas realizamos una cadena de 6 puntos y luego en cada una de ellas hacemos puntos altos hasta la vuelta numero 5.
To make the piece that goes inside the ears we make a chain of 6 points and then in each one of them we make high points until the turn number 5.

Para la vuelta numero 6 vamos hacer dos disminuciones, debemos quedar con 4 puntos altos.
For lap number 6 we are going to make two decreases, we must stay with 4 high points.
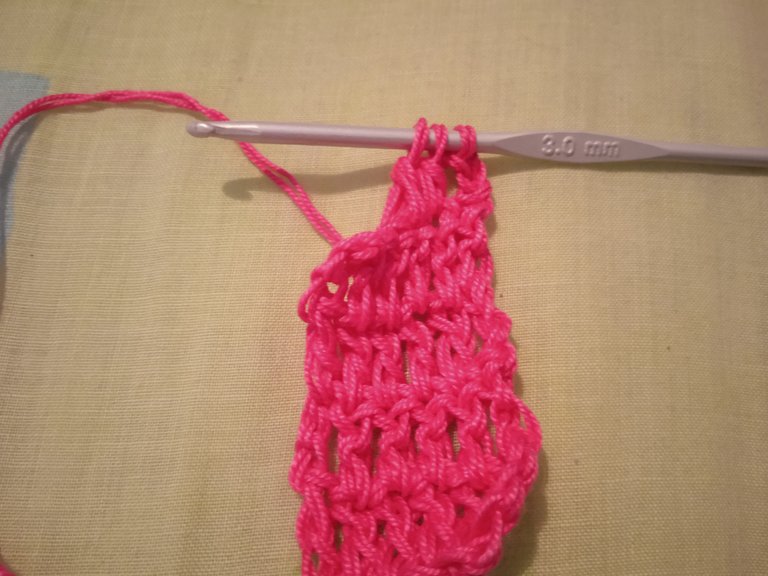
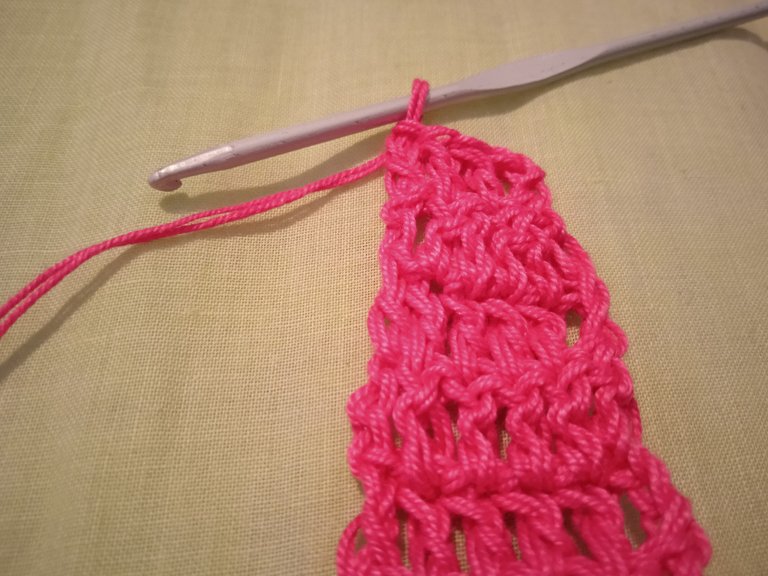
Para la vuelta numero 7, tomamos los 4 puntos altos y quedamos con uno solo, de esta manera elaboramos los dos centros de las orejas de la coneja.
For lap number 7, we took the 4 high points and we were left with only one, in this way we elaborated the two centers of the ears of the rabbit.
Ahora procedemos a coser los centros a las orejas con la aguja lanera.
Now we proceed to sew the centers to the ears with the wool needle.
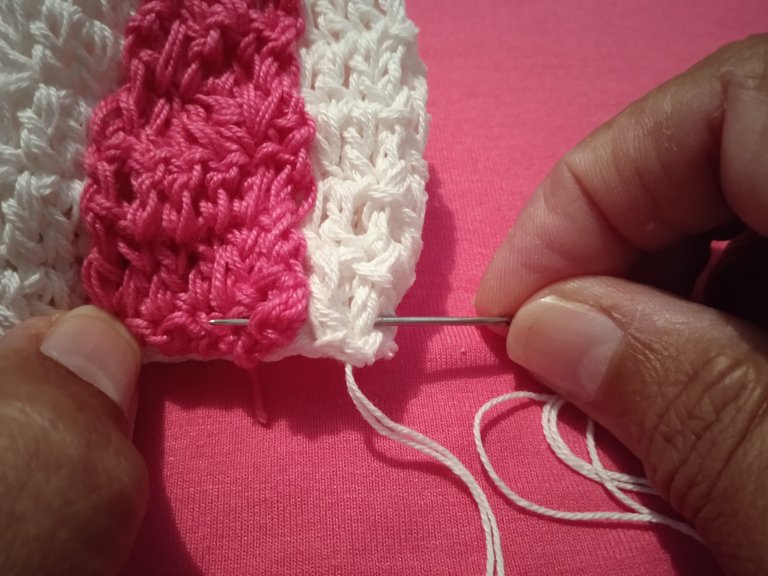

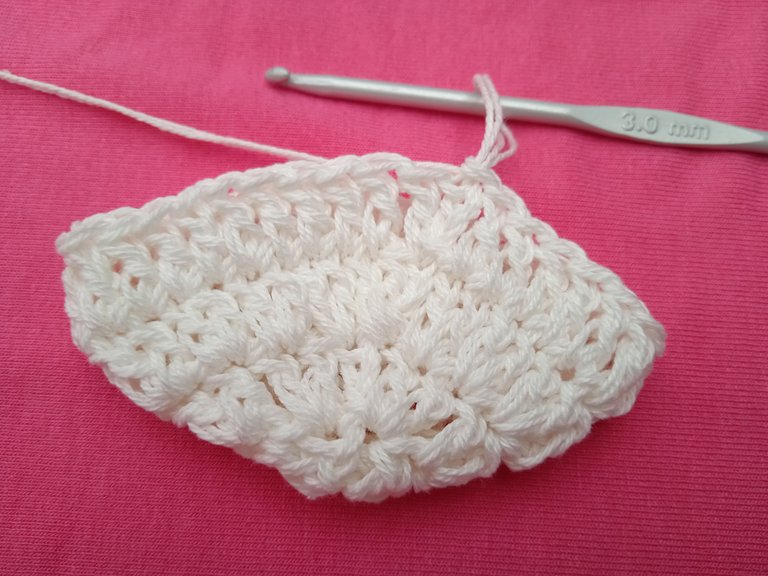
Luego en la parte inferior de la oreja cosemos de tal manera que luego podamos arruchar para darle un poco de forma a la oreja. Por ultimo pegamos las orejas al gorro utilizando como guía de inicio la segunda vuelta del gorro, cosemos muy bien tratando siempre de dar el mejor acabado.
Then on the lower part of the ear we sew in such a way that we can then wrinkle it into the shape of the ear. Finally we stick the ears to the hat using as a guide to start the second round of the hat, we sew very well always trying to give the best finish.

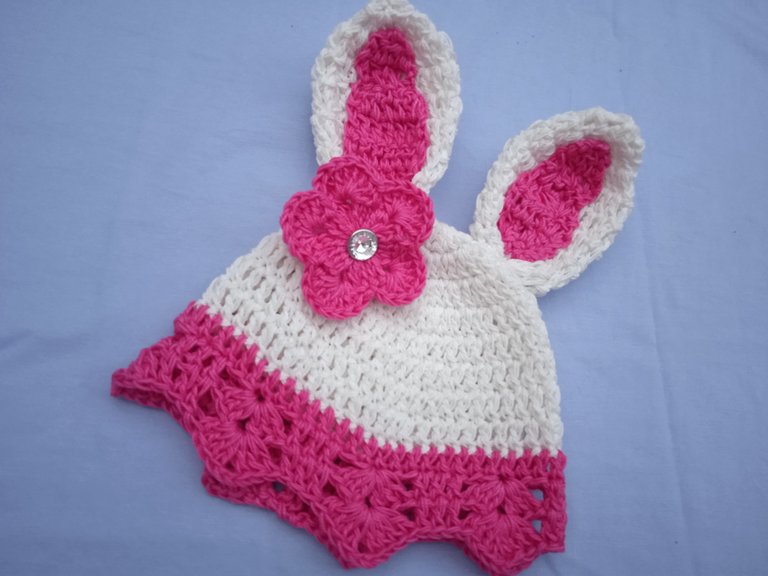
Para dar por finalizado este hermoso proyecto de tejido le colocamos una flor con un accesorio de bisutería que en post anteriores he realizado.
To end this beautiful project of fabric we put a flower with a jewelry accessory that I have done in previous posts.

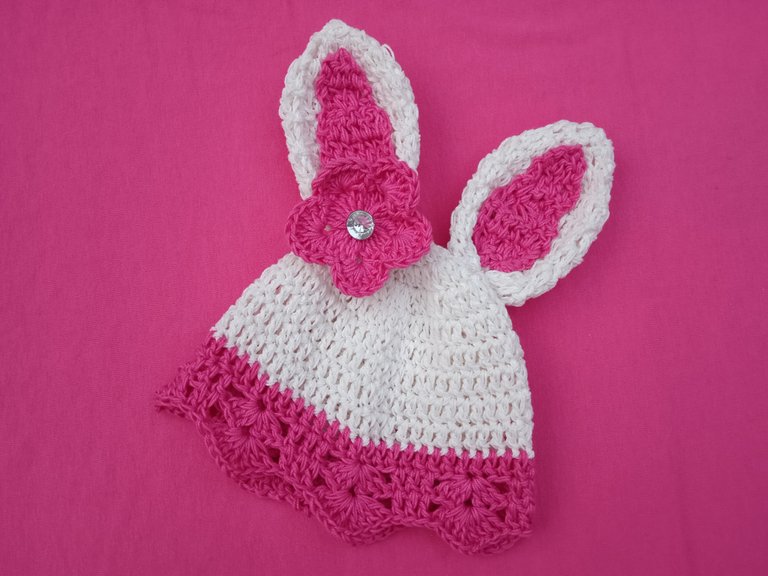
Listo este hermoso gorro de conejita 🐰/ Ready this beautiful bunny hat 🐰


Espero se animen a realizar este gorro de conejita tejido a crochet, no hay nada mas hermoso que realizar con nuestras manos la ropa o prendas que usaran nuestros hijos, nieto u otro bebe que este por llegar y ser parte de la familia.
I hope you dare to make this crocheted bunny hat, there is nothing more beautiful than making with our hands the clothes or garments that our children, grandchildren or other babies will wear and be part of the family.

| Pueden seguirme en 💙: | You can follow me on 💙: |
|---|---|
| eveyese1312 | |
| Discord | eveyese1312#6211 |
Todas las fotos son de mi propiedad y fueron tomadas con una Tablet Samsung GT-P62000L
Todas las fotos son de mi propiedad y fueron tomadas con una Tablet Samsung GT-P62000L
Buenas noches.., Ha quedado súper tierno. Las bebas se ven tan hermosa con este tipo de gorros. Saludos
Congratulations @eveyese1312! You have completed the following achievement on the Hive blockchain and have been rewarded with new badge(s) :
You can view your badges on your board and compare yourself to others in the Ranking
If you no longer want to receive notifications, reply to this comment with the word
STOPDo not miss the last post from @hivebuzz:
Me encanto este post. Recientemente publique fotos de conejitos bebes y cuando vi tu publicación me fascino. Exitos cariño.

Thank you for sharing this amazing post on HIVE!
Your content got selected by our fellow curator @stevenson7 & you just received a little thank you via an upvote from our non-profit curation initiative!
You will be featured in one of our recurring curation compilations and on our pinterest boards! Both are aiming to offer you a stage to widen your audience within and outside of the DIY scene of hive.
Join the official DIYHub community on HIVE and show us more of your amazing work and feel free to connect with us and other DIYers via our discord server!
If you want to support our goal to motivate other DIY/art/music/homesteading/... creators just delegate to us and earn 100% of your curation rewards!
Stay creative & hive on!