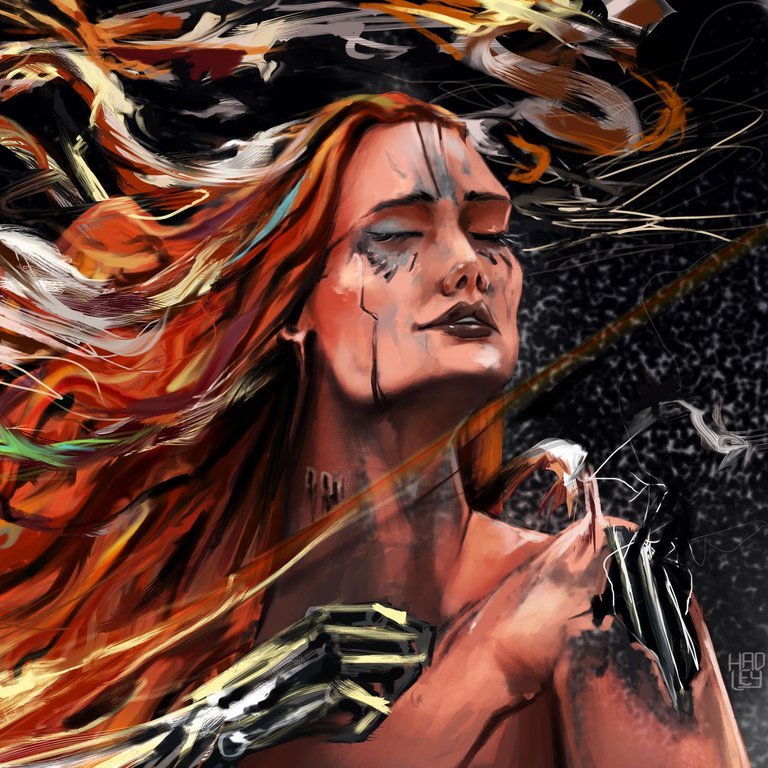
Blizzard is the beginning of a series of surrealistic androids, who are able to experience feelings and emotions, interacting with their environment in a peaceful and aesthetic way.
This is a collection that I started a few months ago, there are three pieces in total and one of them I already showed before (Empty Heartbeat) in these pieces stand out the strong strokes with a lot of texture and the almost excessive use of the finger tool to stretch the colors and achieve a very striking effect.
- Name : Blizzard
- Colection: Aesthetic androids
- Marketplace: Terra Virtua
- Price: Sold out
- Pieces: 4
- Direct Link: https://terravirtua.io/item/HADBZD100002

Tools:
- Gaomon S620
- Photoshop
- Brushes courtesy of Imad Awan: Download here
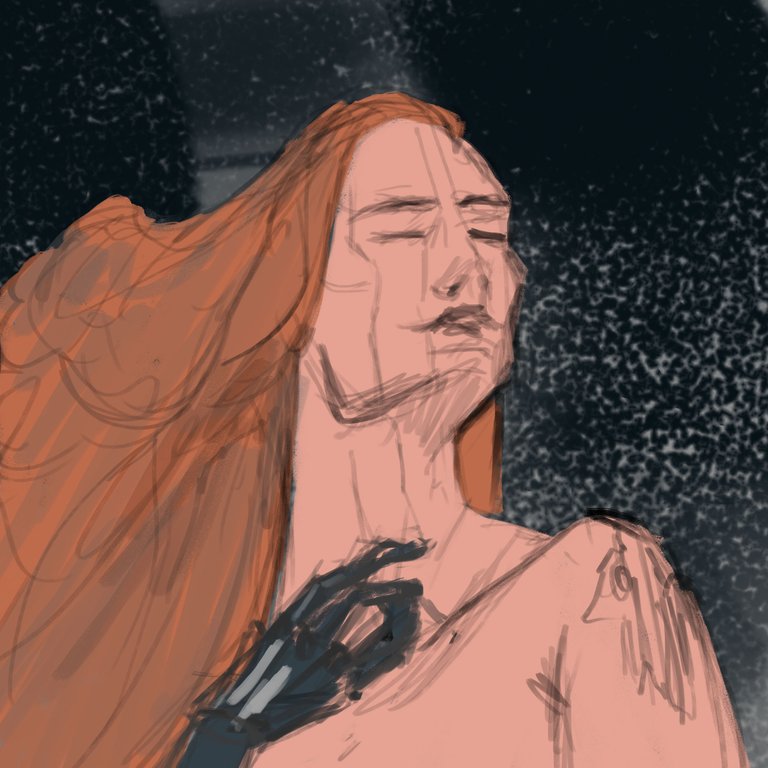
-Step 1:
I started the sketch without many complications, making all the strokes in a single layer, if something did not turn out well, I simply took the eraser and undo those lines, thus achieving a very fluid sketch and the truth, more fun to do.

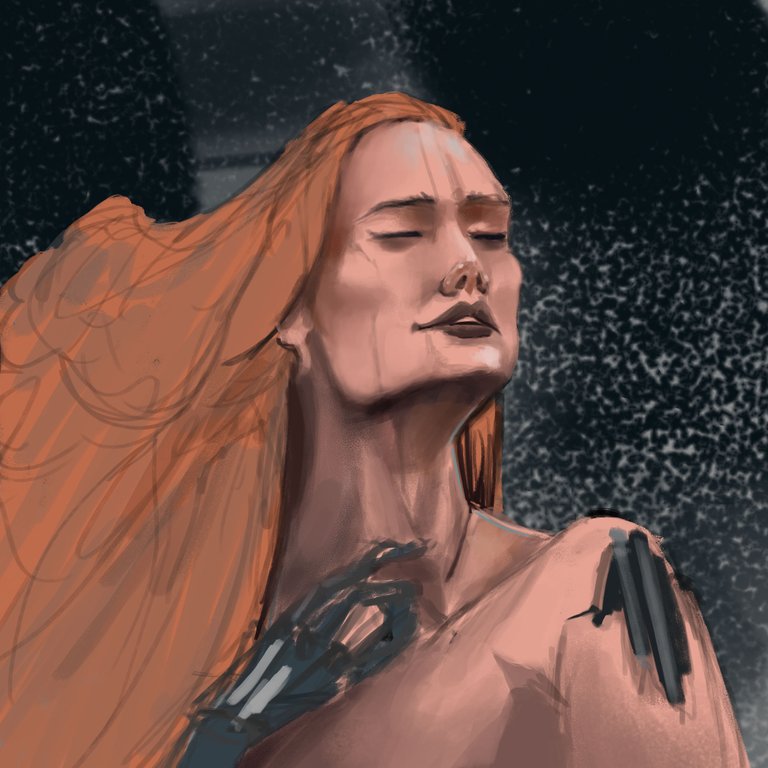
-Step 2:
In a new layer under the sketch, I started the solid color fill. Basically I used three tones: the skin, the hair and the hand. Also, I took a brush with texture and set its size to something exaggeratedly large, the canvas measured 6000px x 6000px, so the brush had to exceed its size to get the texture to be appreciated correctly, I think that brush measured 8000px, my pc was stuck for a while.
-Step 3:
It's time to detail the skin. I created a new layer on top of the previous ones, now I had 4 layers: the background, the base colors, the sketch and finally the detail layer, keep this in mind to explain something later.
In this new layer, I was painting and covering the sketch progressively, generating volume and defining more the factions of the face and giving the first strokes to the hair. Now remember the 4 layers I told you about? I went back to the layer of flat colors, once there I took a textured brush to erase some areas and since the background is gray I got that metal look without paint.
 |  |
|---|
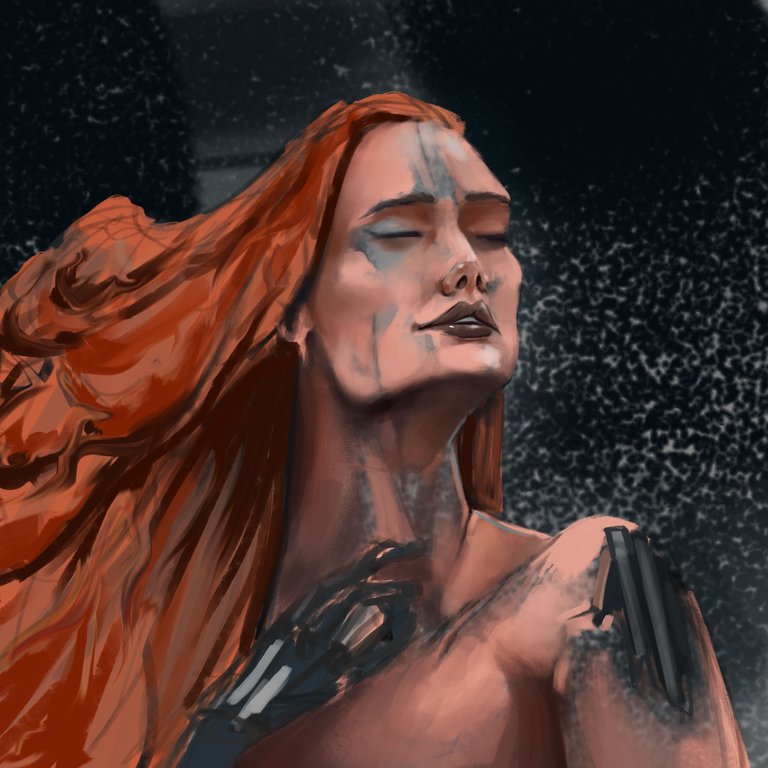
-Step 4:
And finally comes the most colorful part, here basically the process is to create a new layer, give a couple of strokes of different colors, then take the finger tool and use a brush with the texture of your liking, the result will be based on the colors you apply and the brush you use to stretch them. It is important to keep in mind that it is advisable to do this in several different layers, this way you will avoid damaging the previous strokes when stretching and shaping the new colors. And don't forget to play with the color adjustments to enhance the tones used, in my case I increased a little the contrast and saturation of the paint.
Tell me in the comments that you imagine when you see this illustration.

See you in a future post!
Thank You for Supporting My Artwork
▶️  |
| |
| |
| |
| |
| |
| |
| ◀️
◀️
TWITTER | RARIBLE | GHOSTMARKET | FOUNDATION |TERRA VIRTUA |NFT SHOWROOM | INSTAGRAM | FACEBOOK
⬆️ Follow ⬆️
Congratulations @hadley4! You have completed the following achievement on the Hive blockchain and have been rewarded with new badge(s) :
Your next target is to reach 52000 upvotes.
You can view your badges on your board and compare yourself to others in the Ranking
If you no longer want to receive notifications, reply to this comment with the word
STOPTo support your work, I also upvoted your post!
Check out the last post from @hivebuzz: