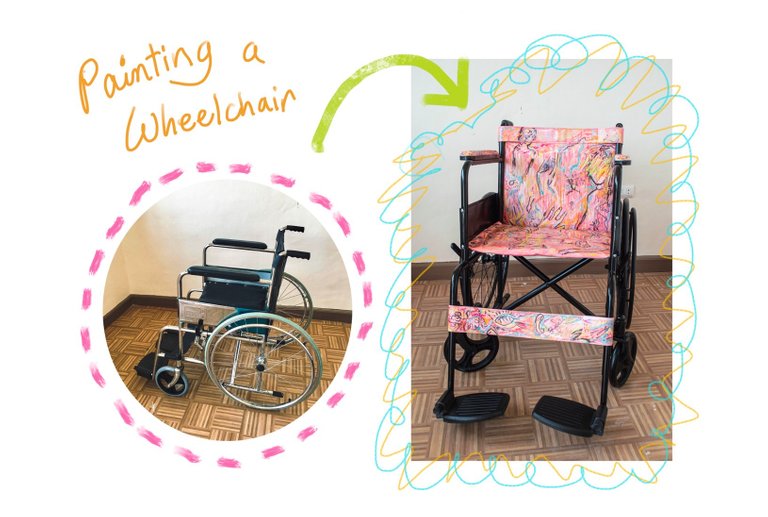
A few months back I wrote this post. I don't know if some of you have guessed it during that time, but yes, I painted a wheelchair!
As said there, this is something that I really wanted to do since 2018. I had a few months of preparation lol. Back in March, I did my research and bought this Leather paint and this is what I used for the art! :D
The Wheelchair
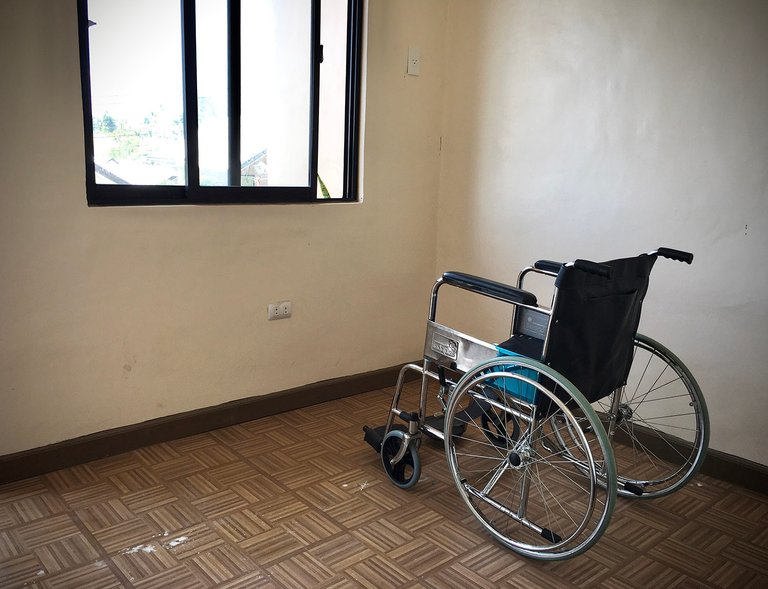
I bought this from a group who sells and rents medical supplies just in my city. I assume they work in the medical field as they were 'frontliners'. This is a seconhand wheelchair but was really in a great condition as they said it was only used a few times and I'm lucky I didn't have to buy a new one.
I've seen new ones being sold here (just the standard non-brand one) as well but it was still twice the price of this one that I bought even though this secondhand is branded. I've seen some cheaper ones which are being sold online but ships from Manila as well, but the shipping fee costs almost the same as the price of the wheelchair. Hahaha. So, I got so lucky being able to find this and bought it in a good price!
The Process
I'm not gonna talk about why I painted it or whatever yet cos the post is not about that so I'll just show the process. :D
1. Deglazing the leather
Normally, a leather would have some kind of top coat that protects it and before we can paint on it, we have to remove that coat first. Otherwise, you're just painting on the top coat and not on the leather itself and the paint won't stick to the material.
There were some deglazers being sold but they were quite expensive and I wasn't ready for that kind of investment yet cos I'm still experimenting so I just used Acetone, put it on a cotton and rubbed it on the leather to remove the top coat. :D Once it was removed, it was time to paint.
2. "Priming" the leather
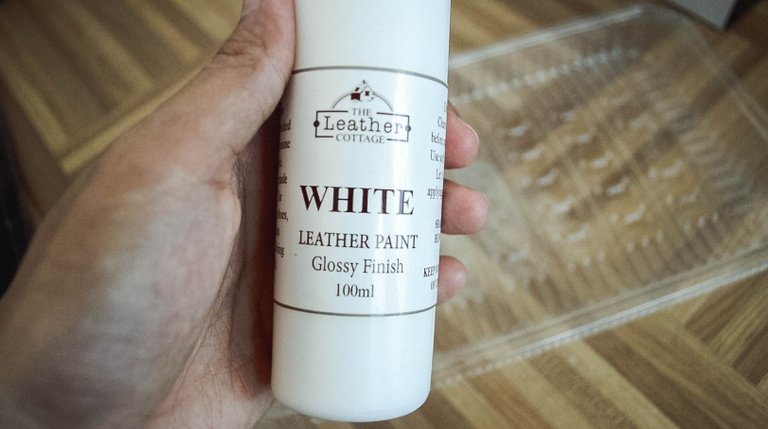
The leather was dark and I wanted to paint it all in white first before painting it with colors cos it will be so hard to paint on a black material especially when I want my painting to be light. I just used the white leather paint instead of an actual primer since I don't know if a primer exists and I bought lots of white paint for this purpose.
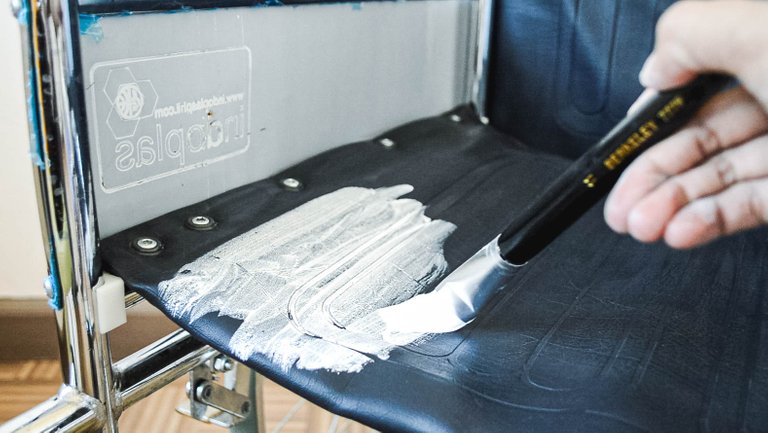
Yeah, that's the biggest/widest brush I have brought lol. The paint held on to the leather nicely tho, which was nice!
3. Painting
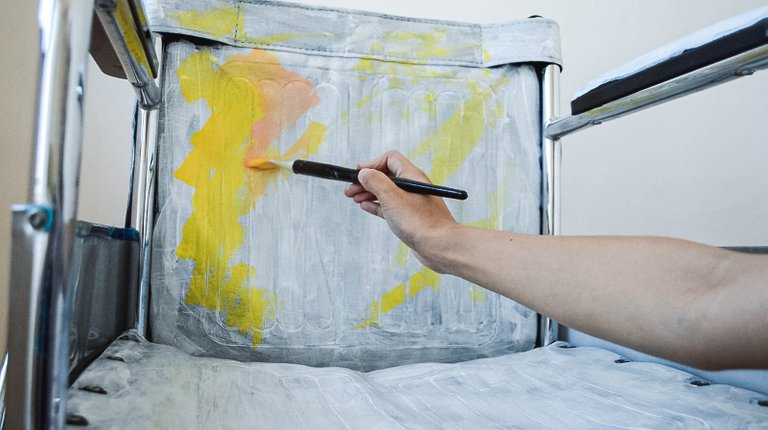
After a few layers of the white paint, I started putting in some colors. The paint that I'm using is not that opaque so I have to put on a LOT of layers but it was fun anyway, since each layer is a different color and it gave it some nice dimension or something.

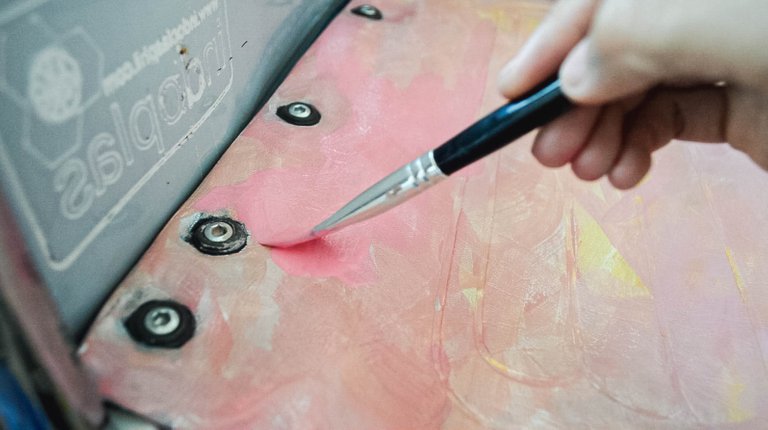
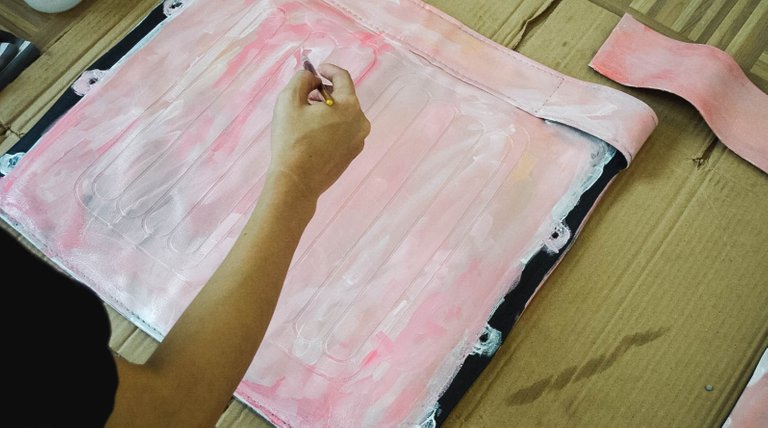
After a few hours, I realized it was hard to paint on a leather being assembled on the wheelchair so I just removed it and painted on the floor. Haha genius.
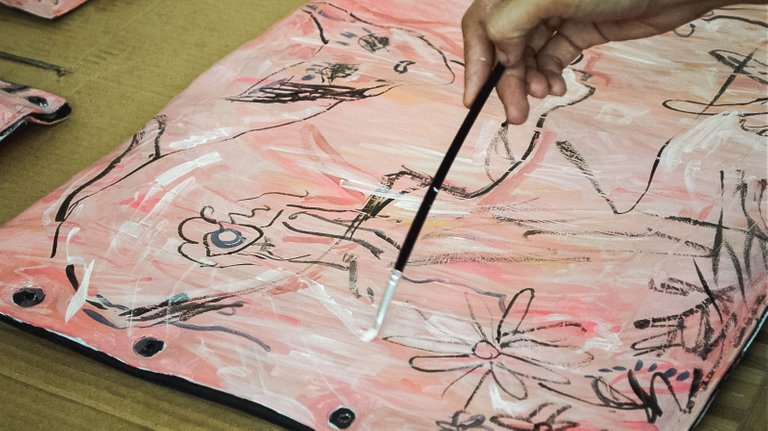
After painting the background, I started doodling. Literally anything that comes to my mind I just painted it there. It was so spontaneous. That being so random is part of my concept tho.
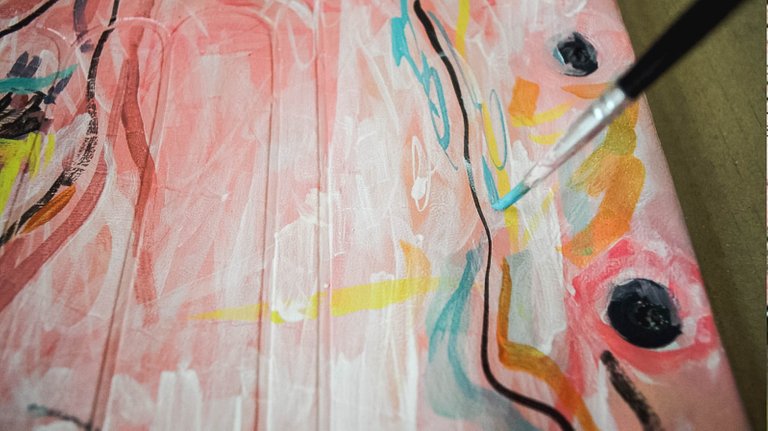
I felt so FREE when I was doing it. No worries, no anxieties, no stress, no whatsoever. Just being me and being free cos I wasn't afraid of mistakes. Like, I really didn't care how it would turn out but all I care about is being happy with what I'm doing.
4. Painting the skeleton
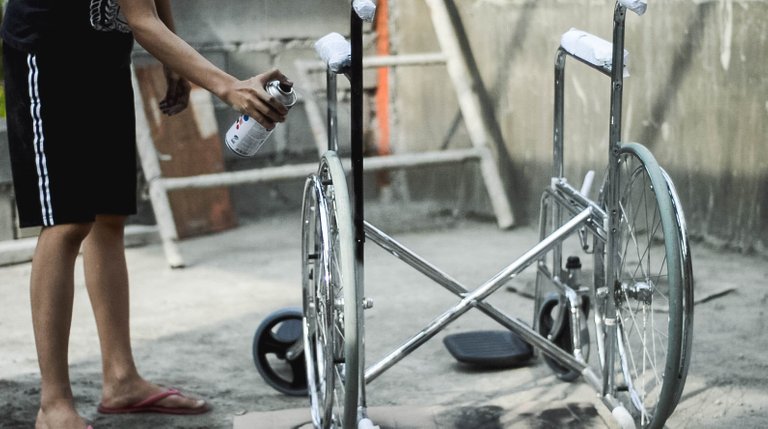
I felt the skeleton (or the metal part of the wheelchair) to be so boring if it looks just like metal so I decided to paint it black using spray paint. It took me quite a few trips to the store because I suck at estimating and I kept on running out of paint LOL. I painted everything, even the rubber part of the wheels. Surprisingly, the paint stuck on the rubber like glue even after a few rolls on the concrete haha.
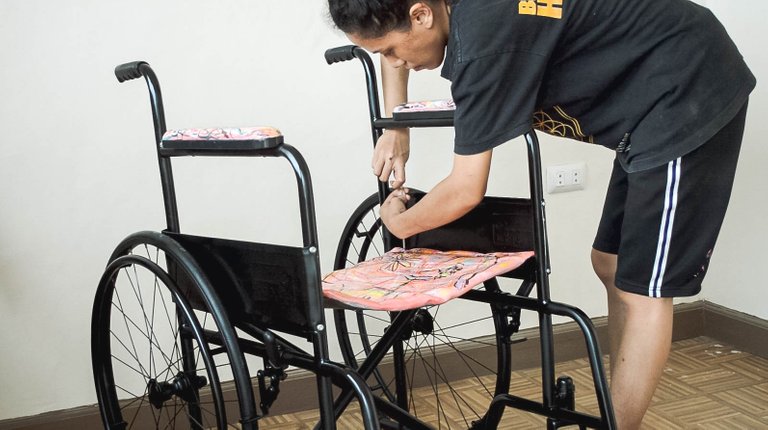
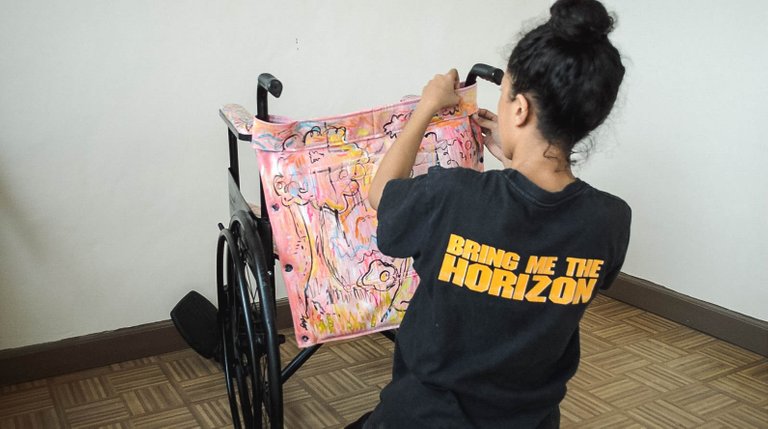
5. Assembling the leather
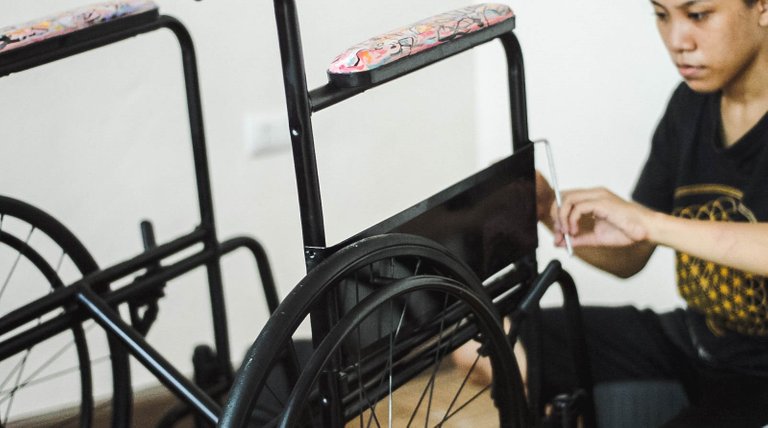
After I finished painting everything and letting it dry, it was time to put the leather back to where it belongs. I was so excited to see how they will look like together as I like black and pink! * - *
It also gave me an idea of how the wheelchair is assembled (kinda) so I'll have some reference in the future if ever I want to make a mini wheelchair or something similar, idk.
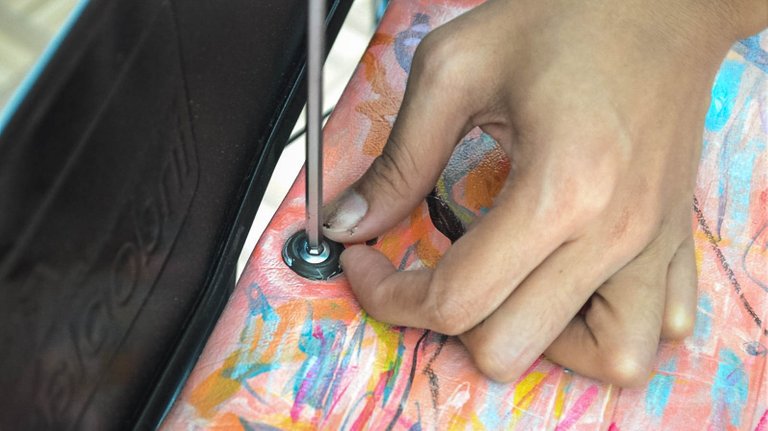
See, it's easier this way (removing the leather and painting) than trying to paint around those screws lol. Really a genius idea. XDDD
6. Finishing coat
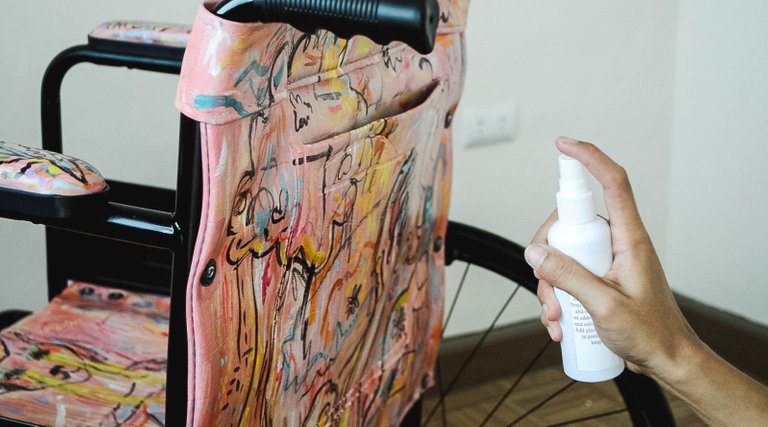
After assembly, I finished it with a top clear coat that I also bought from The Leather Cottage. It says it's for leather to stick or whatever, I don't know what this is made of but it smells like the same material found in a clear spray paint. I don't know lol but it definitely gave it a shine and protection!
And the result!
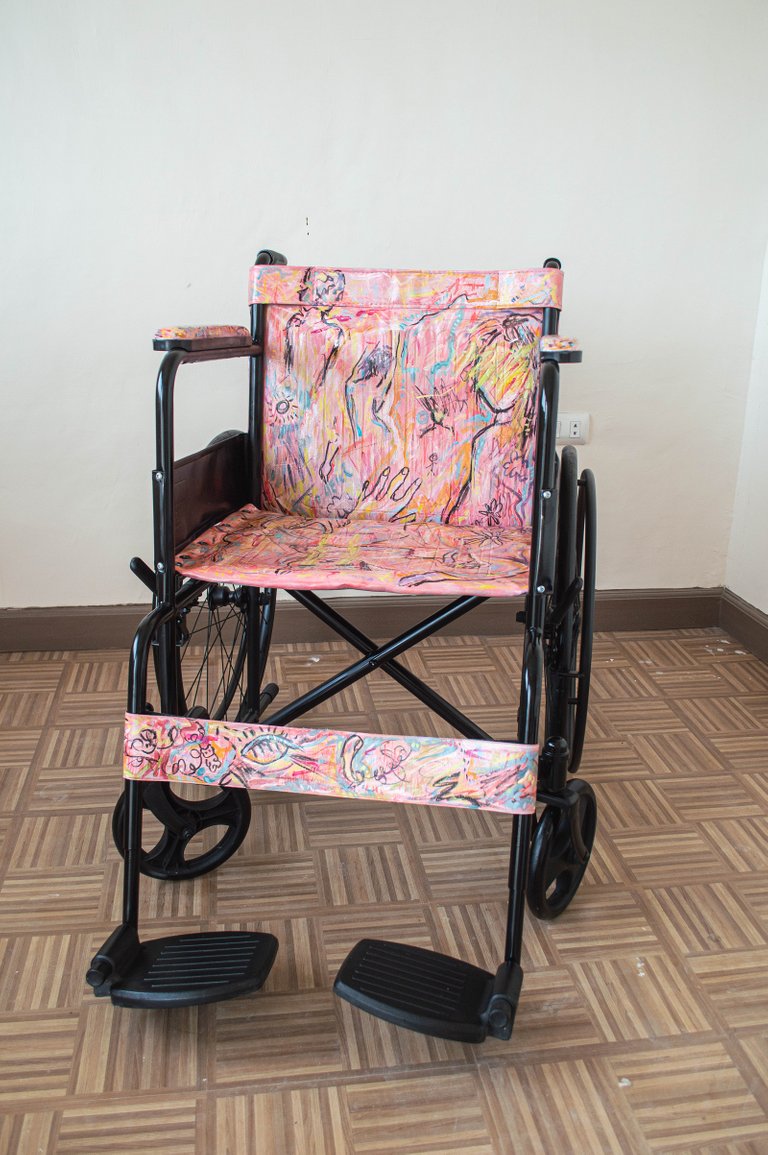
Wallaaahhh! It looks so cute and beautiful <3 I'm so proud of this work and really happy with the result. It looks badass haha and it is still functional! Like dayuumm imagine using this work of art that reminds you of being... yourself and keep on going on :o
It was a beautiful experience and I'll definitely try it again sometime in the future! I really love how it turned out! Next, I will post about the whole work together with the mannequin and how they mean to each other!
Thanks for stopping by!
a nice job, well done, although pink isnt my fave colour. looks very positive !
!tan
Thank you!
Seriously. What an awesome piece of practical art. It looks amazing and I can't wait for the post outlining the reasons behind it.
PS I love Black Pink too...especially the cute Thai one! lol ;-)
Thank you! Oh I said black and pink colors haha! I'm not a fan of Black Pink tho but it's amazing how they are famous and have amazing live performances :D
I know..I was just being silly ;-) with age, humour also revert back towards childhood! Have a great weekend :-)
Wow! You took the art to the next level girl! Really good job! I'm sure the colourful chair will brighten up someone's day and step away from boredom and anxiety while sitting on it! Congratulations! :)
Thank you so much! I'm thinking of giving this to someone [who needs it] but I have no one in mind yet. Maybe one day I will make up my mind of what to do with this haha but yeah hopefully it really brightens someone who sits on this.
You could try and go to hospital or any place with people with disabilities. I'm sure you will find plenty of guys there who would be happy having it :)
!BEER
View or trade
BEER.Hey @hiddenblade, here is a little bit of
BEERfrom @mcoinz79 for you. Enjoy it!Learn how to earn FREE BEER each day by staking your
BEER.!tan
Congratulations, @asimo You Successfully Trended The Post Shared By @hiddenblade.
You Utilized 1/3 Daily Summon Bot Calls.
TAN Current Market Price : 0.300 HIVE
@tipu curate
Thank you for sharing this amazing post on HIVE!
Your content got selected by our fellow curator @ashikstd & you just received a little thank you via an upvote from our non-profit curation initiative!
You will be featured in one of our recurring curation compilations and on our pinterest boards! Both are aiming to offer you a stage to widen your audience within and outside of the DIY scene of hive.
Join the official DIYHub community on HIVE and show us more of your amazing work and feel free to connect with us and other DIYers via our discord server: https://discord.io/diyhub!
If you want to support our goal to motivate other DIY/art/music/homesteading/... creators just delegate to us and earn 100% of your curation rewards!
Stay creative & hive on!
Congratulations @hiddenblade, You Earned 0.426 TAN & Curators Made 0.298 TAN.
Join CORE / VAULT Token Discord Channel or Trade TANGENT Token
TAN Current Market Price : 0.990 HIVE