Hi everyone, I am back after a few weeks break from posting. I have been learning the fundamentals in game development on Maya and 3DsMax while also doing some concept design on the side. Today I will share a recent apocalyptic style piece I made using a mix of photo bashing and digital painting.
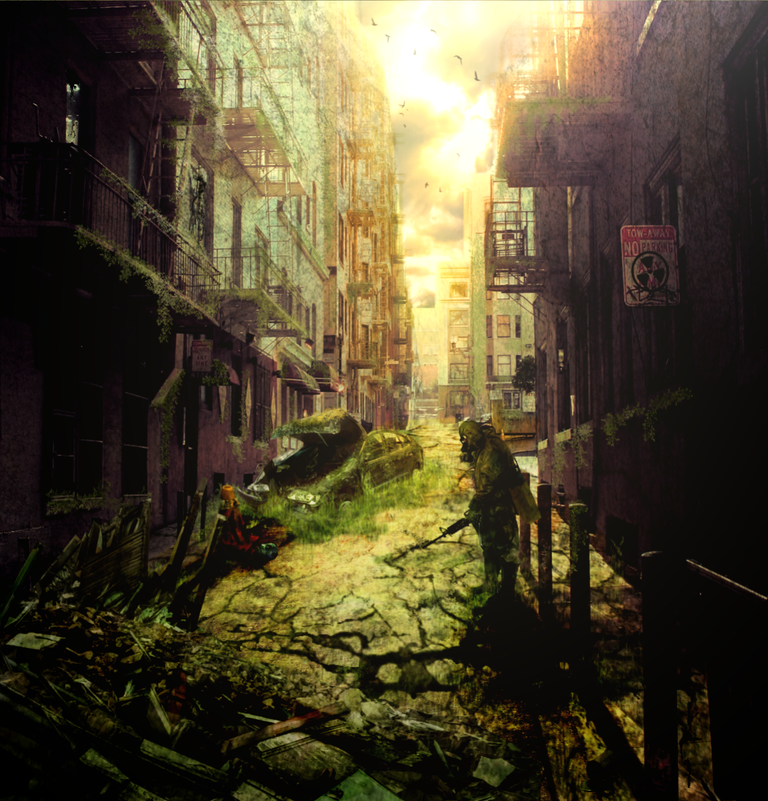
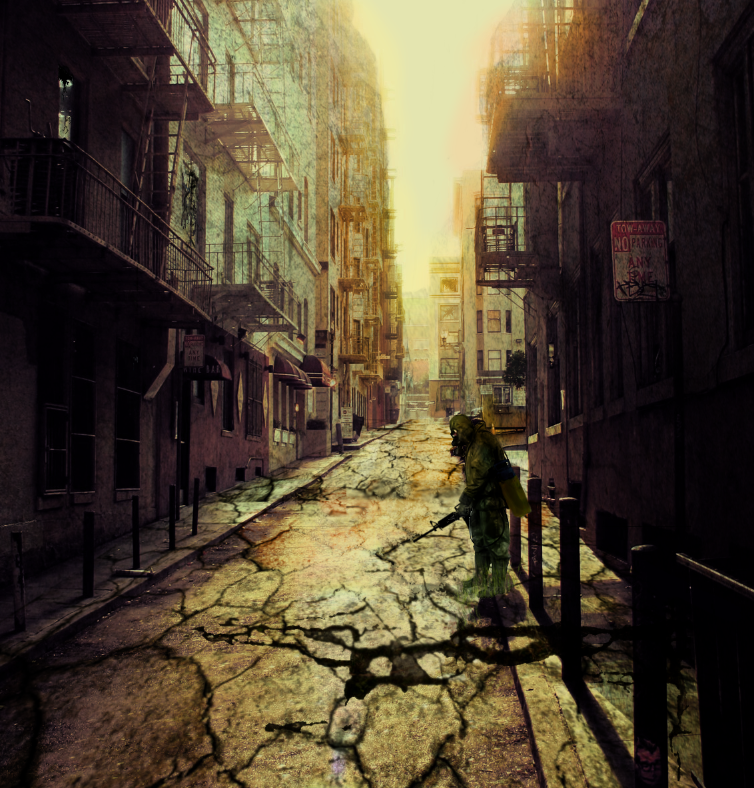
Final Result
Step 1
I first find an image of some city streets that would work well for the overall scene.
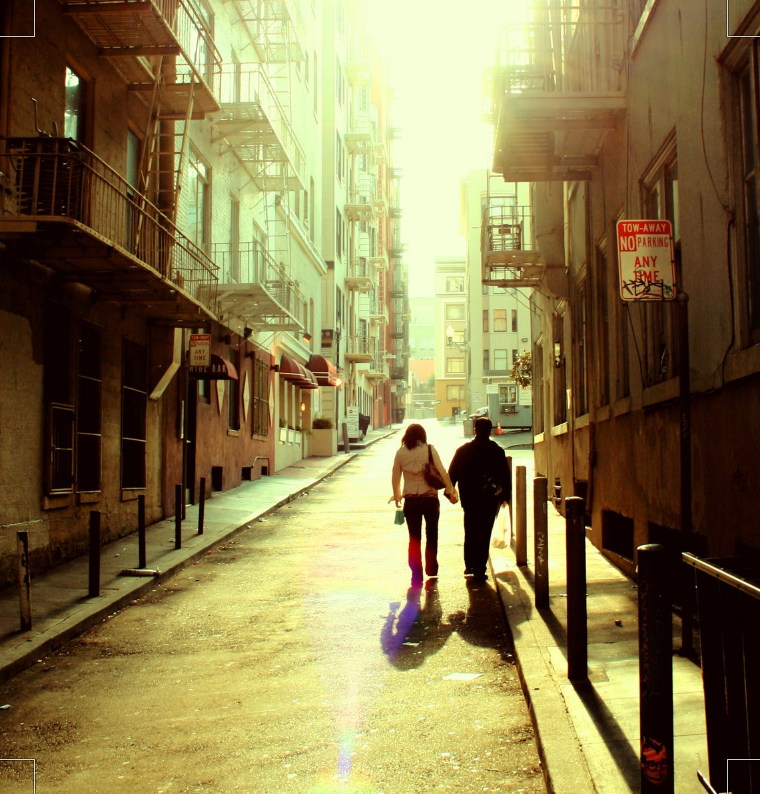
Source Image
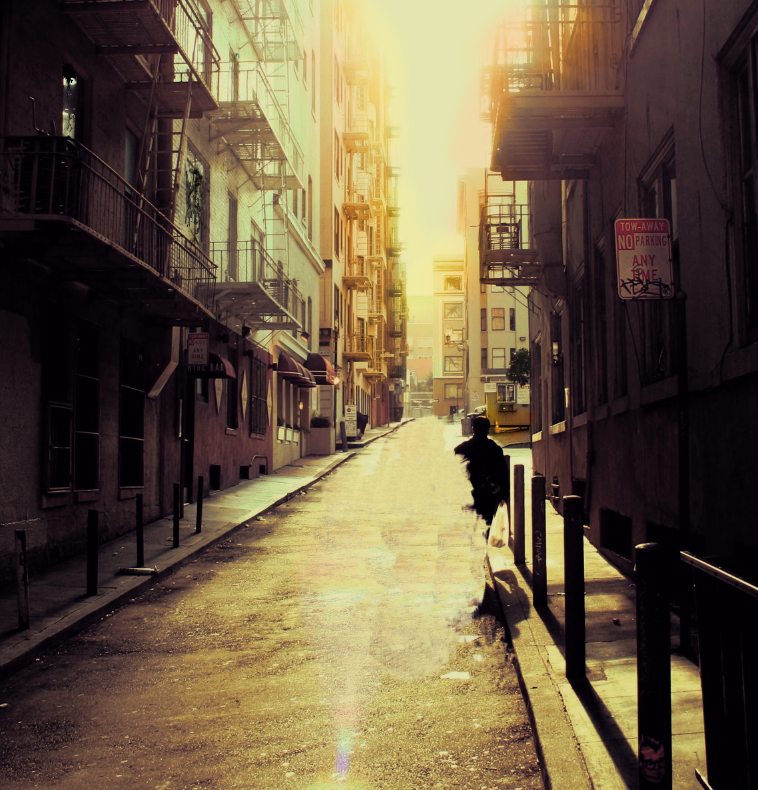
Step 2
I adjust the colour & contrast settings to match the mood I want to create. In this case I wanted more warm colours. I also remove all the parts of the image I don't need, in this case it is the people. I add small details with the paintbrush for cracked windows on the side and in the distance.
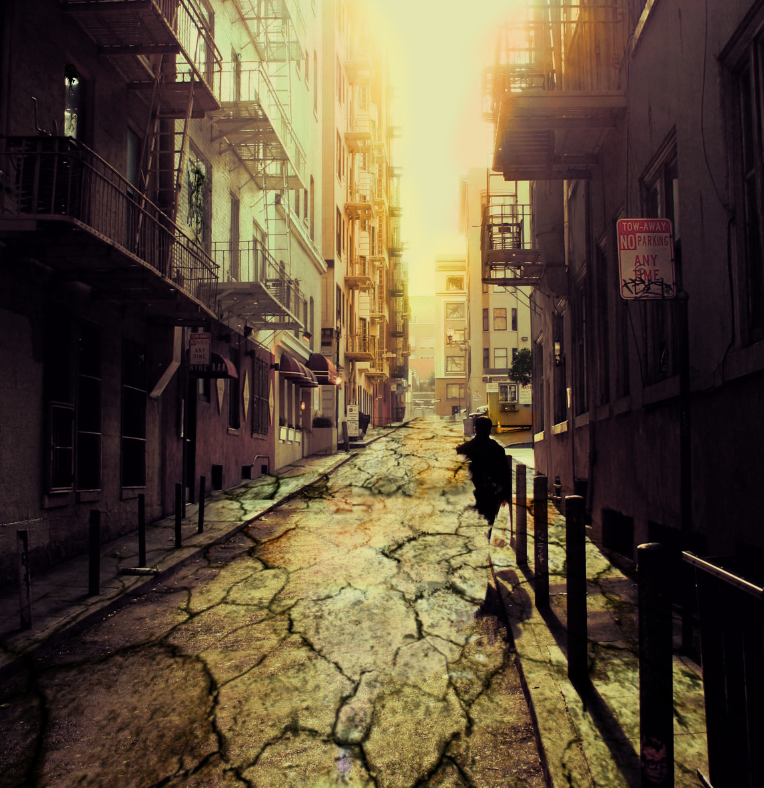
Step 3
I add a cracked floor texture by setting the layer to multiply and set the correct perspective using the perspective tool.
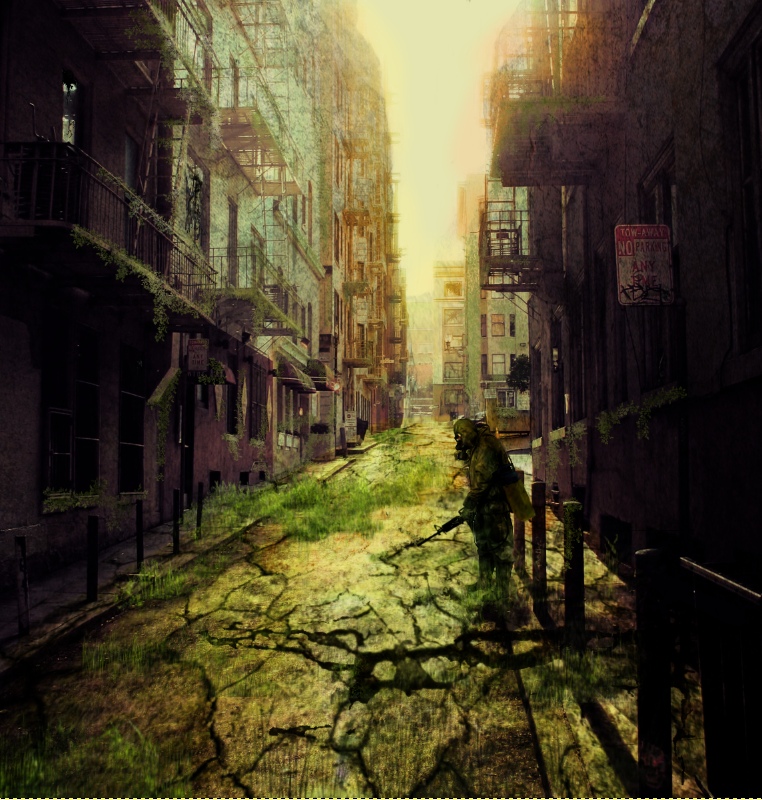
Step 4
I do the same thing with an image of cracked walls and place it over the buildings to create this overall effect. I also add a person in a hazmat suit with a gun to the scene and adjust the settings to match the scene.
Step 5
I add some grass textures and spread them around with the clone tool and use the brush with a foliage setting to decorate the sides of the buildings.
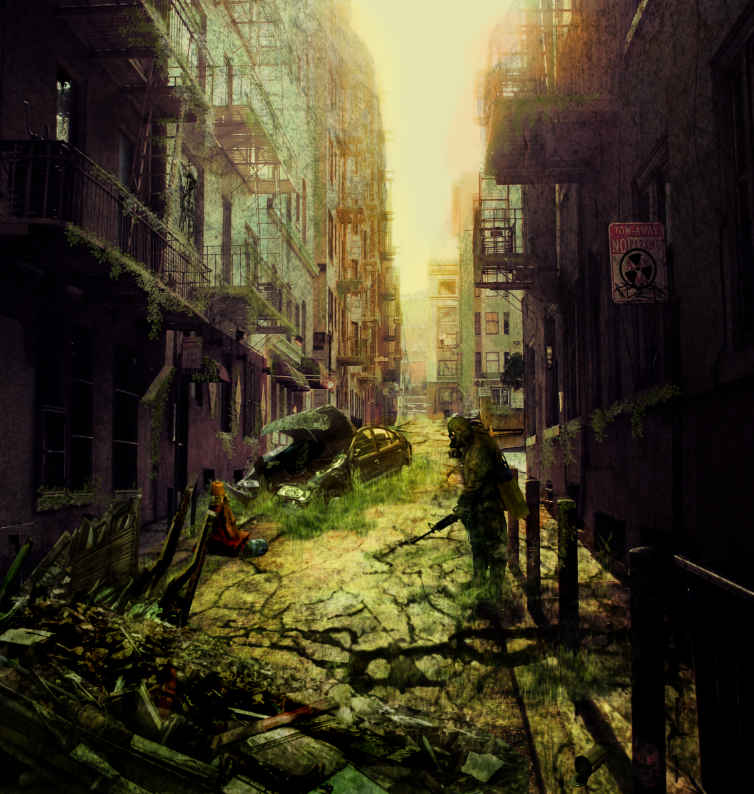
Step 6
I add some more small details to the scene such as debris from the building, a traffic cone and some cans lying around. I also include this crash car to add to the final composition. I use the burn and dodge tool to make certain parts that are meant to be in shadow dark while other parts in light brighter. This is quite an important step in achieving realism.
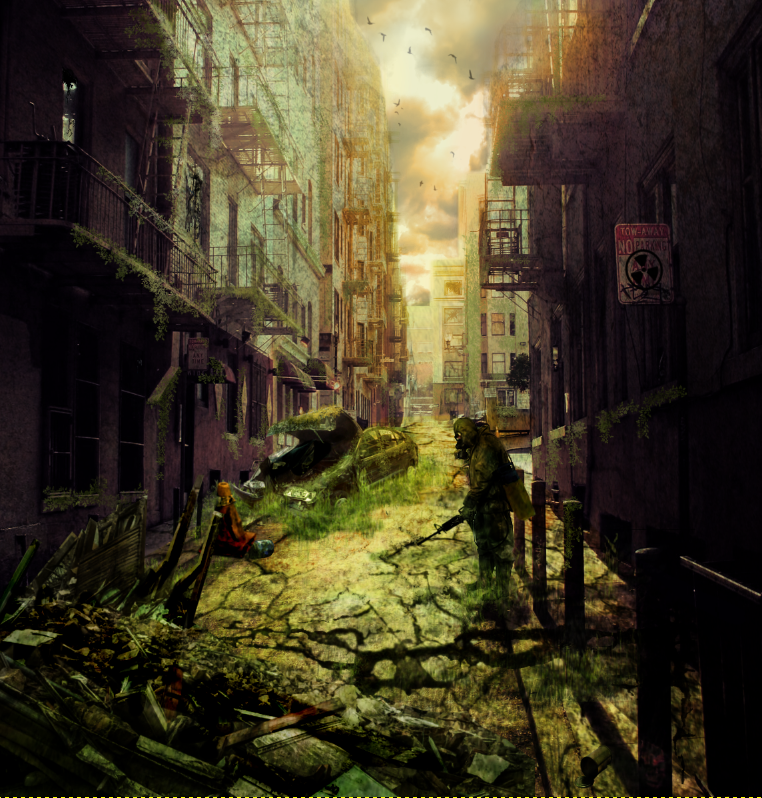
Step 7
This is almost the final step. I add black and white clouds to the scene and use a color mode on a brush to add some warm hues. I also add a few birds into the scene.
Step 8
The final step involved merging the layers into a flattened image and adjusting the final settings for the desired effect. I used a point light in the distance under lighting effects to achieve this final result that makes the image pop.

Wow, amazing! And so interesting to see, how you made it!
What? How? I love the progression. It looks like the environment is getting older.
Thanks, that was my intention :)
This post was shared and voted inside the discord by the curators team of discovery-it
Join our community! hive-193212
Discovery-it is also a Witness, vote for us here
Delegate to us for passive income. Check our 80% fee-back Program
Wooow, this is so good to my eyes, how did you do the gif in the final? i want to learn.
Thanks for sharing the process too
Thanks, I used GIPHY and copied the image address into the editor.
Thank you very muchh i will use it!
Waw this is really impressive! Love the process of creation !
Thanks
Whoooaaa now that's boss level right..... When I grow up I wanna be Iike you lol.... Nice one boss...... Guess I've found a mentor I love this sort of digital art
Haha thanks, I'm enjoying learning this kind of concept art :)
here I can see more of the predominance of yellow which has made it more Fascinating. nice work man
Thanks
Looks amazing👍😊
Thanks man :)
Awesome creation
A wonderful change!
Such an amazing post; @iansart
Appreciating