Resuming My 3D Artwork Projects for My Blog
Hello, OnChainArtists! This is my first post in this community, and I'll be picking up where I left off in my previous blog about modeling a diamond in Blender.
The contents of this blog were supposed to be included in the previous one, but the sudden death of this desktop computer denied me access to the materials I had prepared.
And now with my computer resurrected from death, I can resume this personal project and provide you this blog, before I go on and start working on the actual artwork that these diamonds are going to be a part of.
Watch the Magic
This video was created in response to some comments I received elsewhere, in social media land. Some refused to believe some things about the scene and the hardware I used.
They couldn't believe that it is so simple to set up, as well as render on a weak GPU for this kind of work. My more powerful GTX 1060 videocard was already showing signs of impending doom at the time, so I took it out of my machine and chucked in my old and trusty GTX 750 Ti card.
Although the 750 Ti has only about a third of the processing power of the 1060, this video is proof that it can still be used to render some computationally-heavy scenes, like this one.
The first two-and-a-half minutes show me setting up the scene for a render. If it bores you, you can skip it and go to 02:39 where the actual rendering begins.
Recording this video while Blender's viewport is doing some very heavy lifting during the render demonstration was made possible by the use of another screen recording software. In the past I relied solely on OBS and it never let me down. But this time it proved to be inadequate for recording the screen while the GPU and CPU were being used by the LuxCore renderer.
It prompted me to search for a screen recorder that was lightweight but equipped with all the goodies that OBS has. I found one named ShareX, it is free, open-source, and it performed the way I expected it.
So, it looks like I'll be making all my screen recordings with it. Plus, it also has many other things that might be of interest to all the other content creators here, so I guess it warrants a blog of its own.
Scene Breakdown
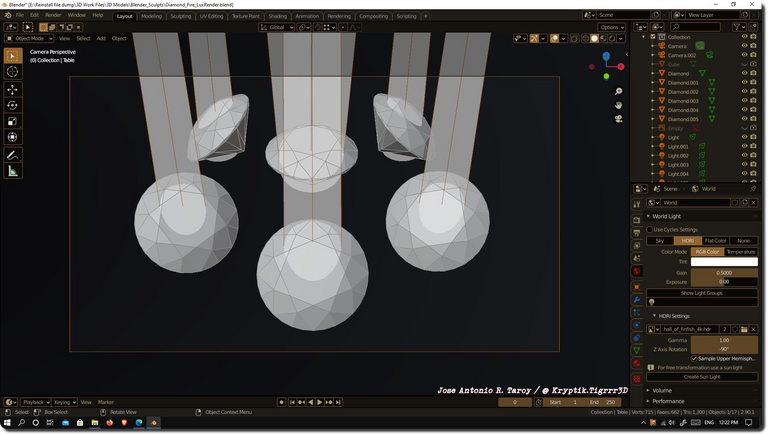
There isn't much to it. It's just a bunch of diamonds, some light-emitting meshes, an HDRI image for ambient lighting.
It also has six narrow-beam spotlights pointed at each diamond to create the prism effect of rainbow streaks of light emanating from each diamond.
This effect is called dispersion and it occurs when light enters a crystal and gets refracted. The refraction then disperses, or scatters the light into its individual spectral components.
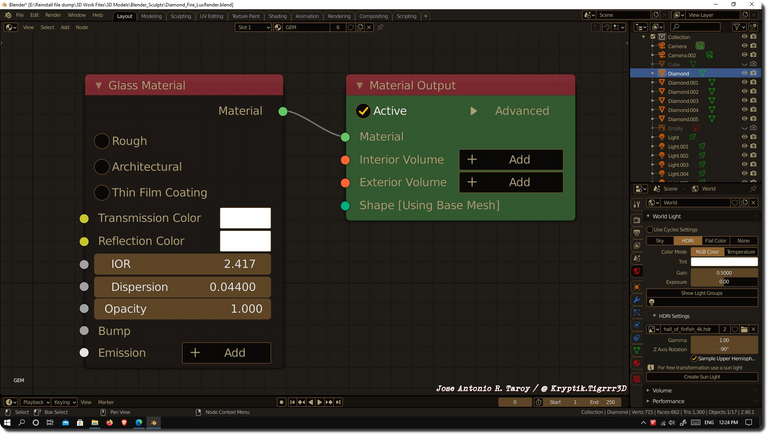
And this is the diamond shader. It is just a glass material with a diamond's IOR (index of refraction) and dispersion coefficient dialed in. However, this simple setup results in a diamond that looks too perfect.
In real life, only a few diamonds are perfect. Most will have some inclusions or imperfections in them, but for the purpose of this project that these diamonds will be a part of, this simple setting will suffice.
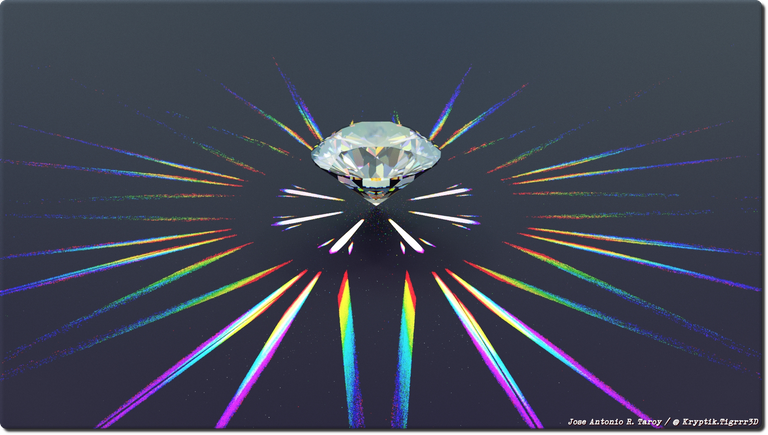
Test Renders of the Scene

After the viewport render demonstration in the video above, a full render was next in my to-do list. Since I had not done anything serious yet on this machine after its resurrection, it was necessary to do some more stress testing to make sure I can use it for content creation and work.
Besides, the LuxCore renderer used here is a new version and I wanted to test the new denoiser feature added to it, and see if this is what I will use to render the final iteration of this personal project. Suffice it to say I am very pleased with the outcome.
This is another test render I had to do again, and this time mandated by a video card driver update. It's quite noisy but I wasn't after a clean render, only the rendering performance of the GPU after the driver update.
I didn't see anything new or feel it's any faster than the previous version. So, it's all systems go, and there's nothing now to stop me from proceeding and completing the artwork. You'll see it maybe in the next blog, or after the one that follows this.
Who Who Who, Who Gives A Hoot?
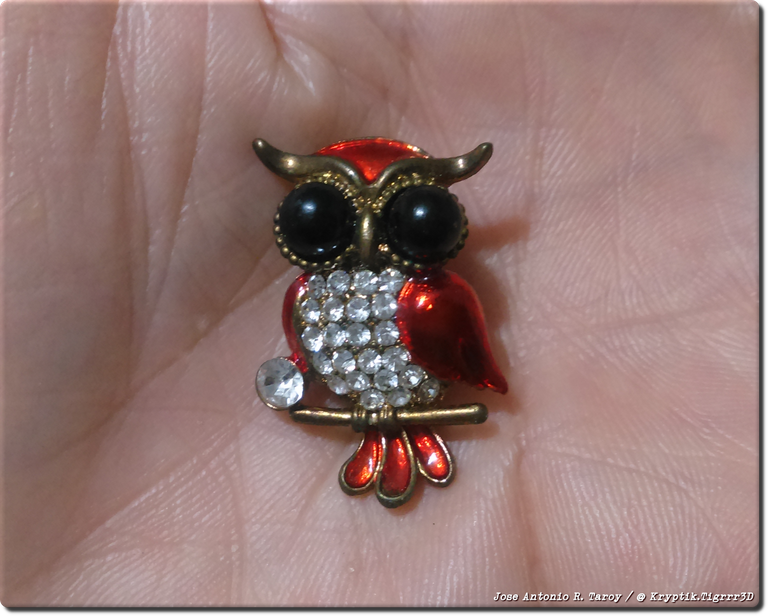
The picture shows what the artwork will be based on. It's simple and so easy to model, especially since half the work has already been done, with the modeling of the diamond.
I just hope the 3D model doesn't crash this computer again, like this blog's rendering demo scene did once. And I thought my computer was a goner again.
All those test renders overheated the CPU and crashed the system, and it refused to power up after several frantic power button-pushing. Good thing I remembered to switch off the PSU and switch it back on again. The next attempt to power on the PC was a successful one.
So now I have to be careful not to do too many test renders in rapid succession, and give each some time to let the CPU and GPU cool off for at least 5 minutes before I attempt another render.
Ok, so that's a wrap for this second installment of my CG diamond blog. Part 3 will wrap up the series with the final artwork featured in it, as well a video of how it is modeled.
Thank you for reading, and if you liked what you've read, please comment, upvote, and reblog.


You put a lot of work into this post! I hope it gets noticed a bit more!
Thank you, my friend. It seems like things aren't working well yet here since the hard fork.