(** Sorry for the re-post, but the cover of the other post didn't publish correctly and I can't let that happen.)
Tokenized this GIF Glitch artwork a few hours ago in NFT Showroom
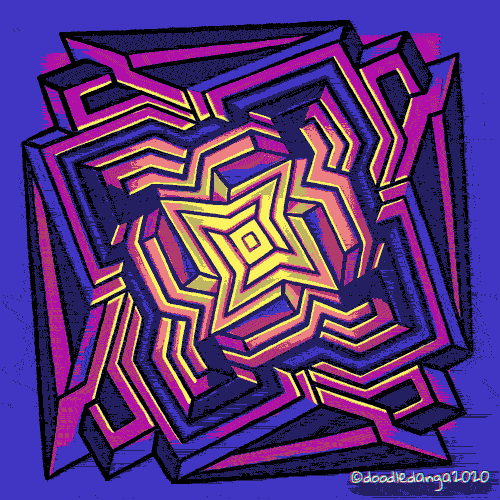
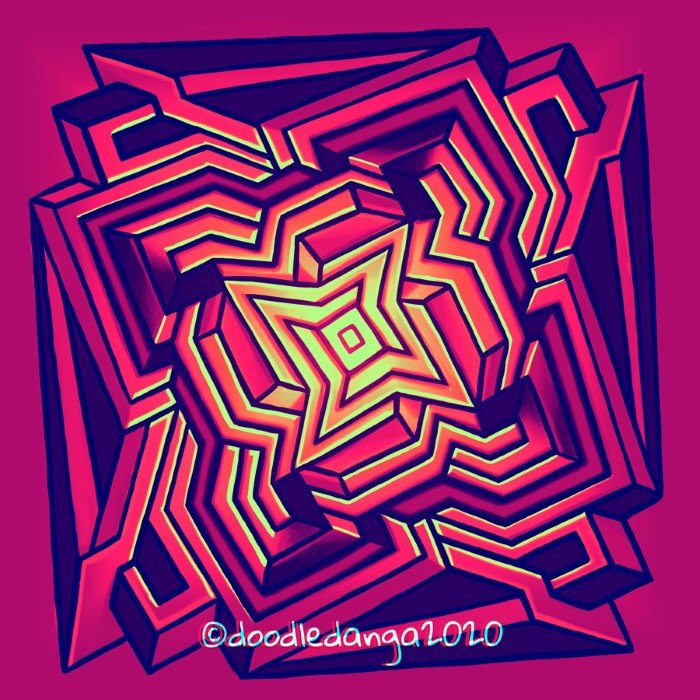
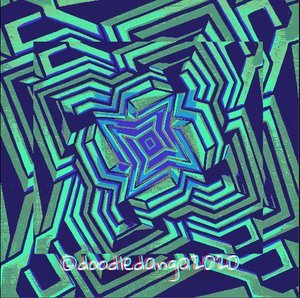
Psymmetry
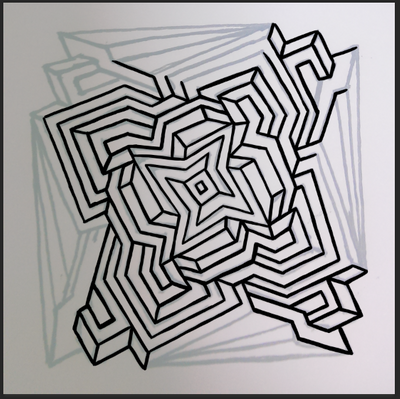
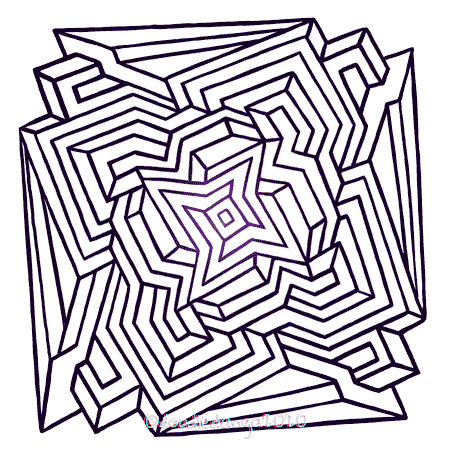
This is a psymmetrik (psy-symmetry) mandala I did on a sketchbook. It's based on "impossible" object drawings, a kind of drawings I started drawing a few years back, inspired by M. C. Escher's work. When I began making these drawings I was completely thrilled. I filled pages with them (I will show you in future posts). I call these psy-mmetrik, because I feel like they confuse the brain to a point where the illusion just makes you feel weird, and the lines kind of morph into the different possibilities.
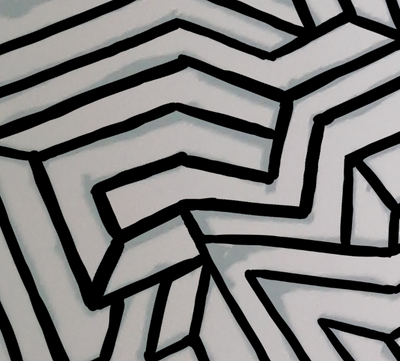
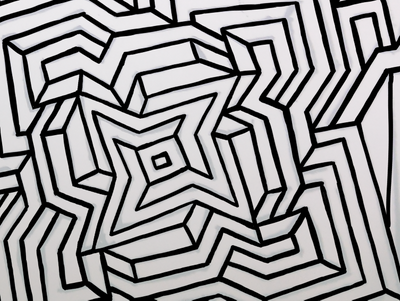
What's special about this kind of drawings is that they are objects that are impossible in "real" life. You'll notice that parts of the drawing don't correlate to each other if it were a 3D object. Your brain tries to make sense of what it sees in 3D, instead of what it really is, 2D artwork. As you move along the the lines of this object, you will notice that the "corners" (which aren't really corners, but look like them) you find can either be interpreted as "back corners" or "front corners", but the interpretations "cancel" each other out.
You can see what I mean in a Necker Cube (below):

source
Interpretations are ambiguous and can be seen like a cube in two different ways (in isometric perspective, which is actually not possible in real life because you would see further sides smaller on the back ends).
When I was a kid this was more fascinating, but you know.. as I grew older I became boring lol! But at a point last year, I started to wonder what would happen if I filled a whole page with it. I started filling white paper with them, and it was really satisfying. Now I had a whole new way of experimenting with mandalas. That's how this one was born..
Process
Sketch - I made the sketch in a notebook, it was quite small - about 3x3 Inches.
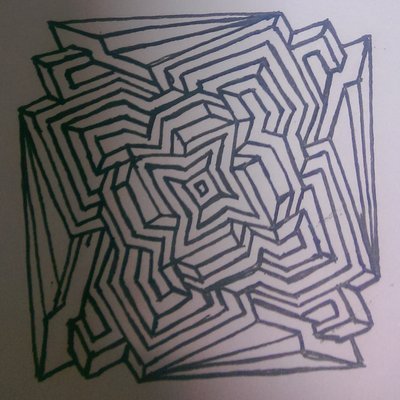
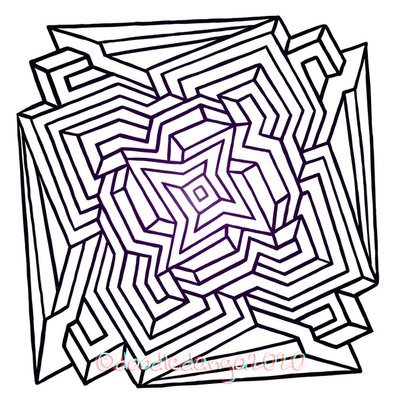
Two weeks ago, I found the sketch in my computer and decided to give it some life and digitally paint it - something which I don't usually do with this type of drawing. I usually use vectors for something with lines so straight.
I had to turn the canvas around a lot of times to be able to make the lines straight.

This was good practice for using the digital tablet pen (I own a Huion HS611). When I finished making all the lines in the drawing I then had to correct and polish every line because they were choppy, specially the longer ones on the edges of the drawinf. I didn't fix them 100% because I actually didn't want a completely "perfect" painting - because that would've actually defeated doing it this way in the first place.
Coloring
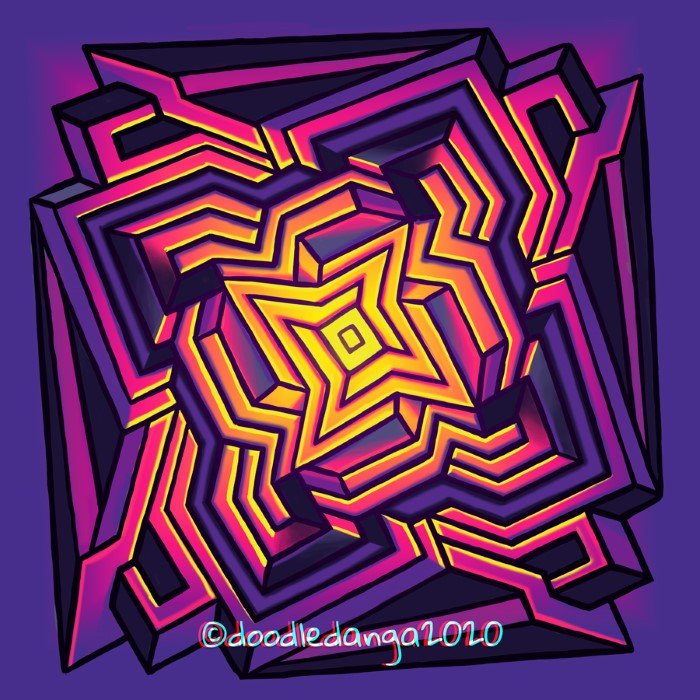
After painting the lines, I then started to color the image using a gradient in the background to suggest light coming from the center of the image.
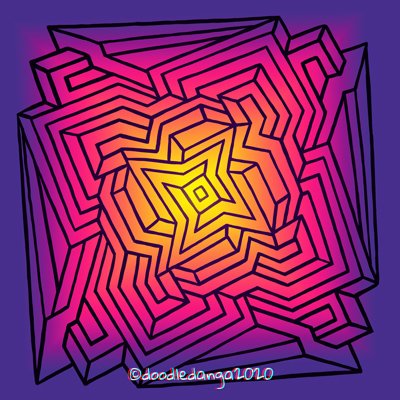
I finally painted shadows and highlights to suggest volume. This actually took away a little of the "impossible" effect, since I was forced to define the dips and bumps in the image. This was different where I did gradients, which gave some parts a curvy look, which is one of the ways impossible objects can be possible in "real life". Like this triangle:
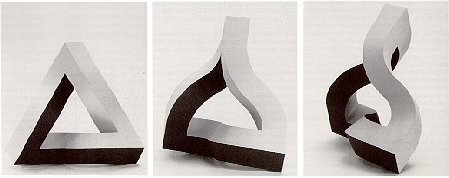
source
Creating the Animated GIF
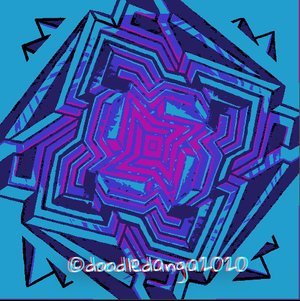
I edited the image 5 times to create different colored versions of the image. This way I could create a transition between the different colors to create evolution and movement.
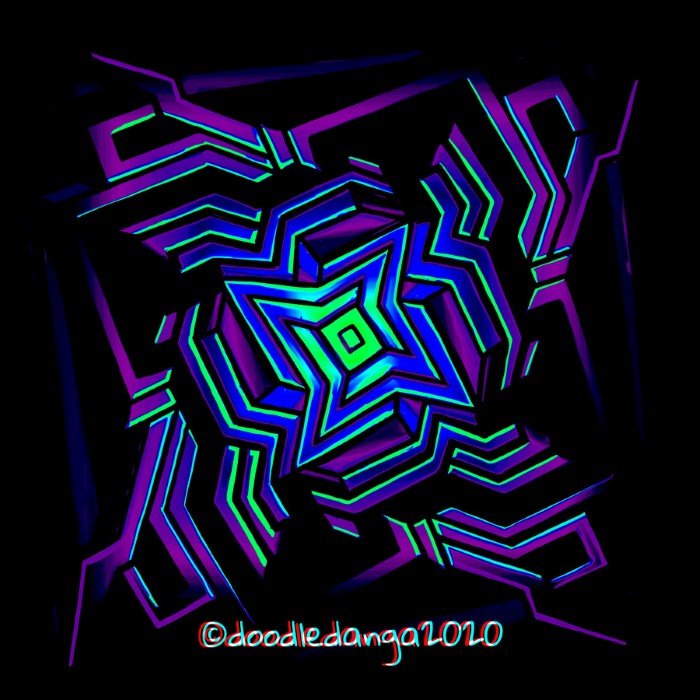
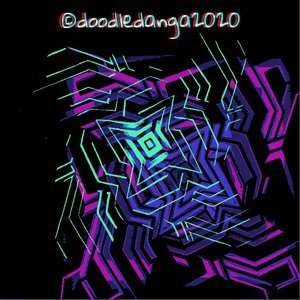
GLITCH-IT
Finally, I made cuts and edits in some of the frames to create the glitch distortion effect. I learned to do this from different youtube tuts and I think it's really fun. The effect is mostly created by making rectangular and square cuts and moving them to the side or upward as if they are display errors which some screens produce. Copies of the image are also made to display the moved image in only some of the RGB channels, causing a split in the image that looks sort of like the old red & blue 3D stuff (like the @doodledanga2020 watermark in the images in this post).
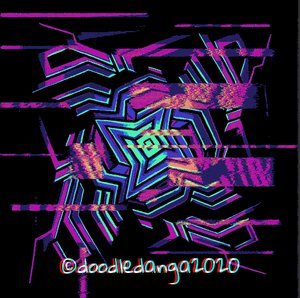
Last but not least, I added noise distortion to some of the frames. The pixelated GIF distortion also added to the image to convey that scratchy & glitchy effect I was looking for. I'll definitely use this technique again.
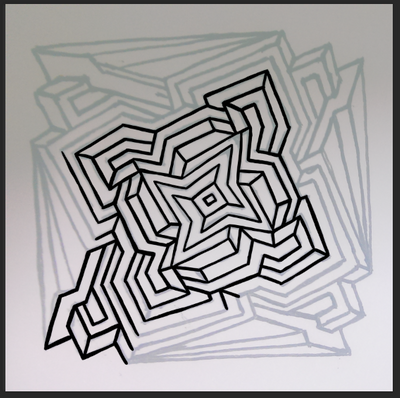
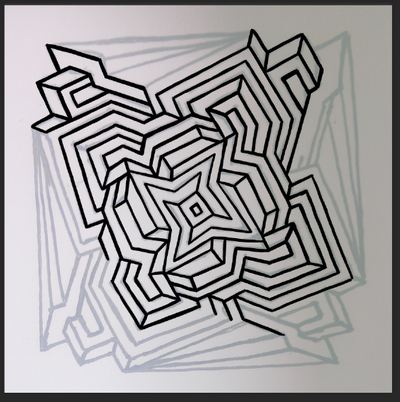
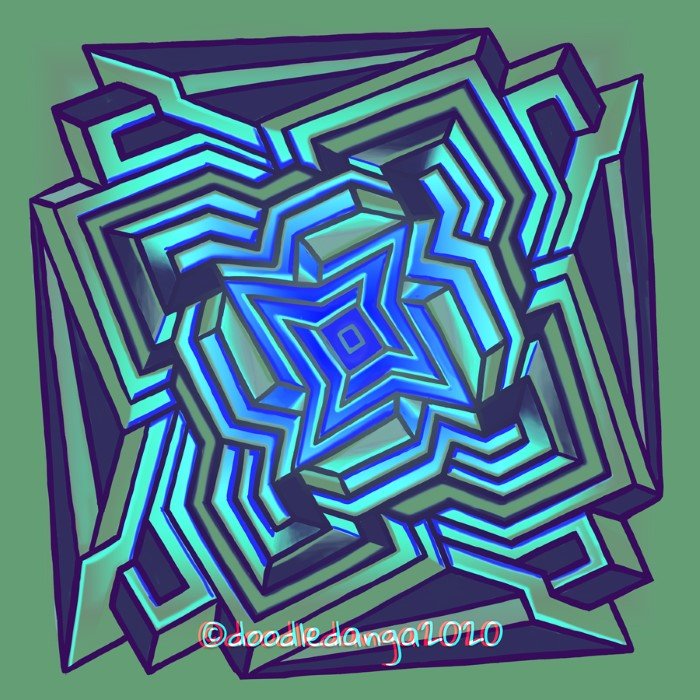
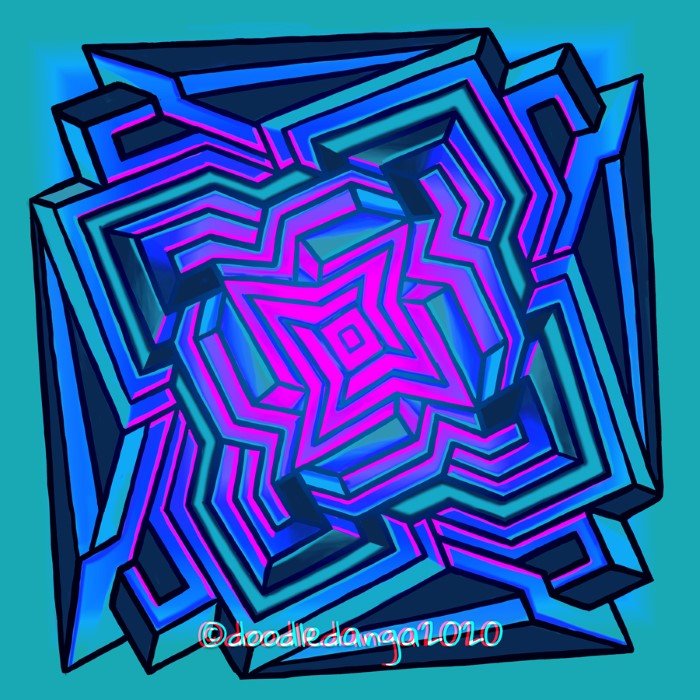
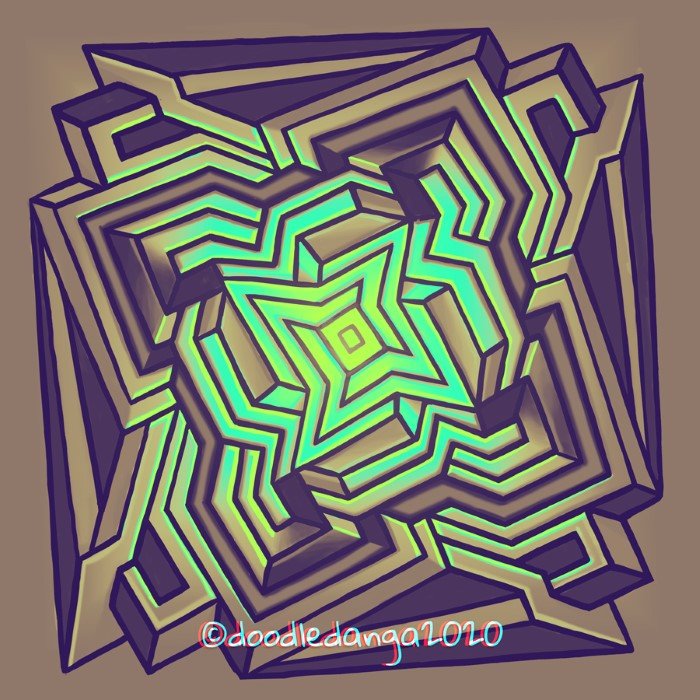
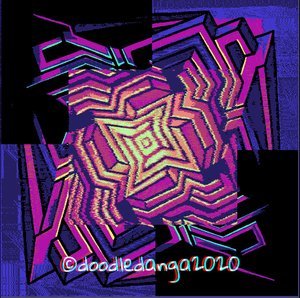
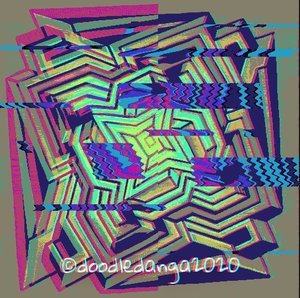
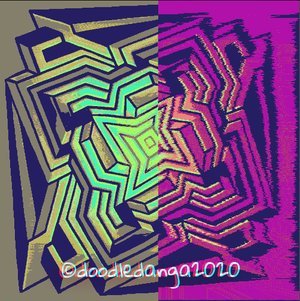
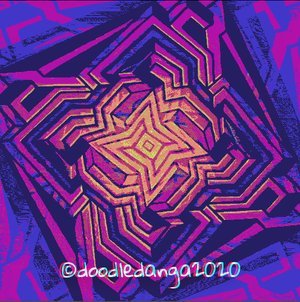
I included my favorite frames (stills) next so you can see some of the editing I made.


Please don't forget to upvote / follow me if you like my work. Feedback & suggestions are greatly appreciated and welcome, and will also help me to make my content better.
Please tell me what you like/dislike and also what you think I can improve or remove from my posts.
If you'd like to support my work, please:
Follow me on
Facebook
Instagram
Redbubble Shop
More of my art:
My old account @doodledanga
Vosque Atómico (Atomic Forest) (My Older Project - Facebook link)
Also visit my Atomic Forest Society6 Shop
I have graphics design, motion graphics & video-editing skills.
You can HIRE ME to create for something for you.
Check out that kind of work in my facebook page Rey C.
or my Behance Portfolio
.jpg)
Love the colors you used in this, @doodle.danga and there's just enough glitching to make it pop without making my eyes go crazy...lol! Nicely done, and to boost the signal a little bit...
@tipu curate
yeah glitches can sometimes make you go crazy epileptic! lol Thank you so much 😊
!discovery 30
amazing :)
This post was shared and voted inside the discord by the curators team of discovery-it
Join our community! hive-193212
Discovery-it is also a Witness, vote for us here
Delegate to us for passive income. Check our 80% fee-back Program
Congratulations @doodle.danga! You have completed the following achievement on the Hive blockchain and have been rewarded with new badge(s) :
You can view your badges on your board and compare yourself to others in the Ranking
If you no longer want to receive notifications, reply to this comment with the word
STOPDo not miss the last post from @hivebuzz: