Arte Digital | Digital Art
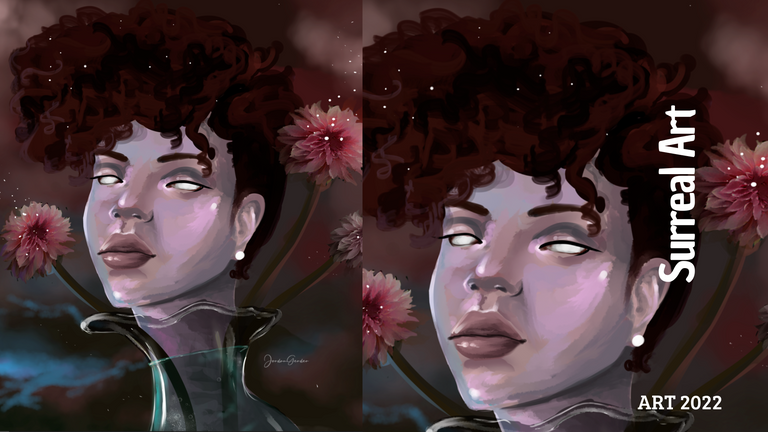
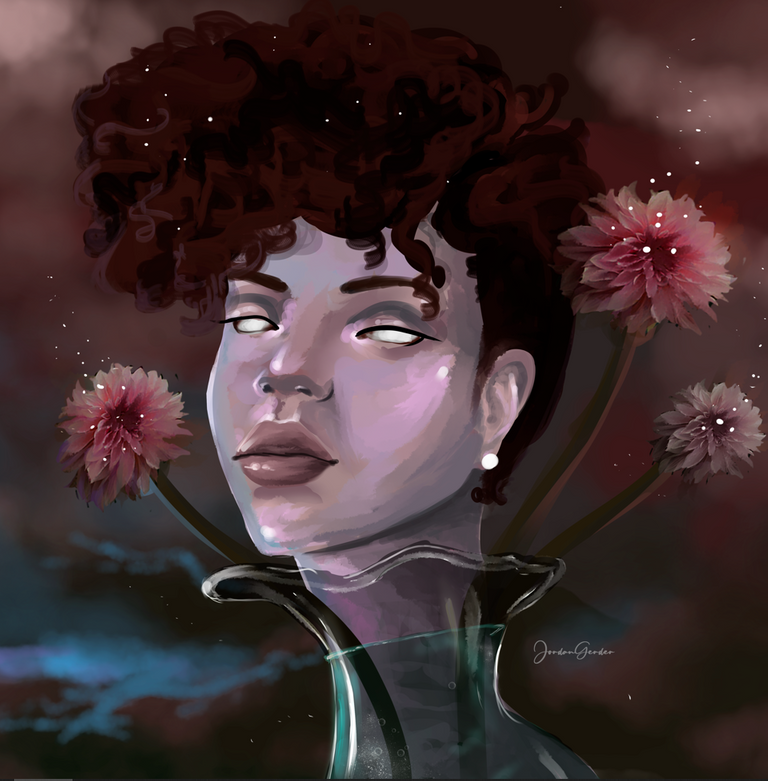
Saludos querida comunidad, presento un nuevo trabajo digital, hace algunos meses queria empezar con una coleccion de arte nft, y si la incie pero solo una obra cree, ahora me he decidido a crear el resto de las obras, serian almenos 4 obras de este tipo, se trata de un florero con vista a un cielo estrellado, el florero contiene distintos rostros y algunas rosas para complementar acompañame a ver el proceso de creacion...
Greetings dear community, I present a new digital work, a few months ago I wanted to start with an nft art collection, and if I started it but only one work created, now I have decided to create the rest of the works, there would be at least 4 works of this type, it is a vase with a view of a starry sky, the vase contains different faces and some roses to complement, come with me to see the creation process...
¡Espero te guste! | I hope you like!
Presentación del diseño | Desing presentación
Materiales | Materials
- Mini laptop
- Tableta Huion H950P
- Programa Adobe Photoshop 2019
- Mini laptop
- Huion H950P tablet
- Adobe Photoshop 2019 program

Proceso | Process
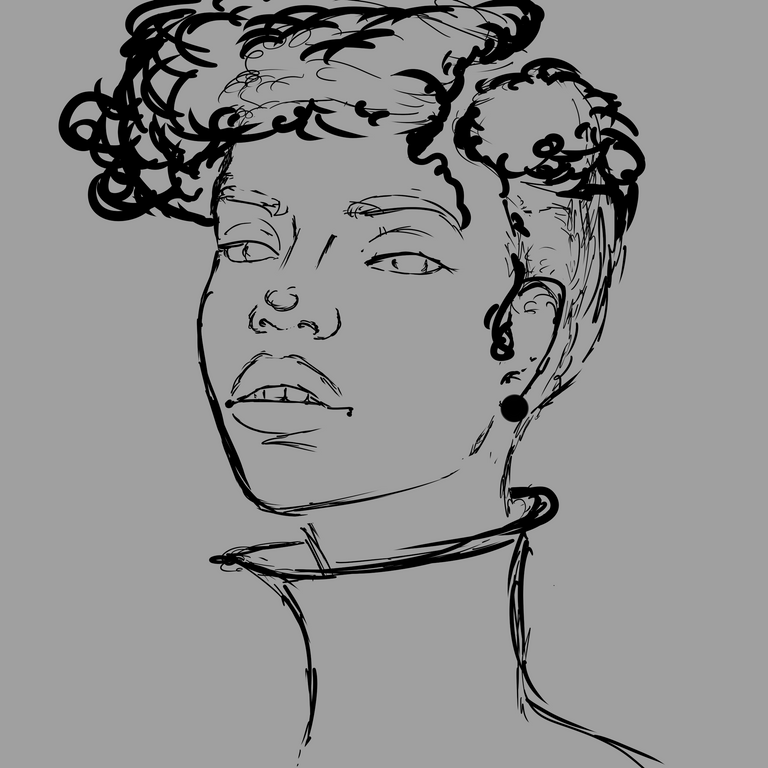
Primer paso: El boceto, es donde creamos la mayor parte de lo que queremos, despues tener lineas entendibles, continuamos al segundo paso:
First step: The sketch is where we create most of what we want, after having understandable lines, we continue to the second step:
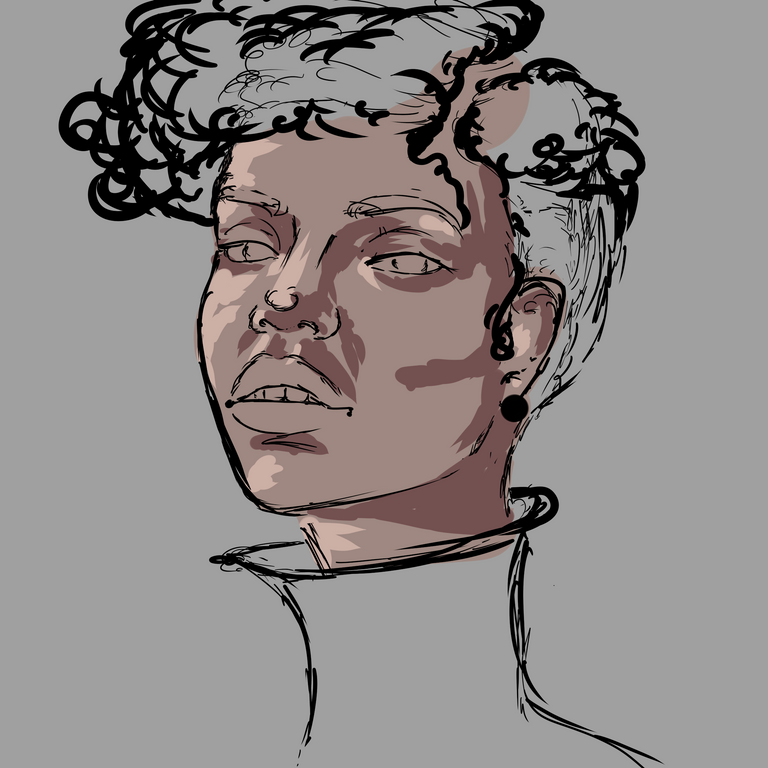
Segundo paso: colores base, Selecionamos algunas tonalidades un tono medio y adicional a este uno oscuro partiendo de la base y un claro partiendo de la misma base escogida anteriormente, y una tonalidad saturada para que sea mejor trabajada al piel al momento de mezclar las tonalidades.
Para este paso uso un pincel difuso, resulta mejor al momento de mezclar el color:
Second step: base colors, we select some shades a medium tone and in addition to this a dark one starting from the base and a light one starting from the same base chosen previously, and a saturated shade so that it is better worked to the skin when mixing the shades .
For this step I use a diffuse brush, it is better when mixing the color:
Tercer paso: una vez mezclamos todo el color de la piel es momento de detallar las otras partes de la ilustracion, en este paso quise aislarlo mas a lo fantasia y cambie los colores iniciales:
Third step: once we mix all the color of the skin it is time to detail the other parts of the illustration, in this step I wanted to isolate it more to the fantasy and change the initial colors:
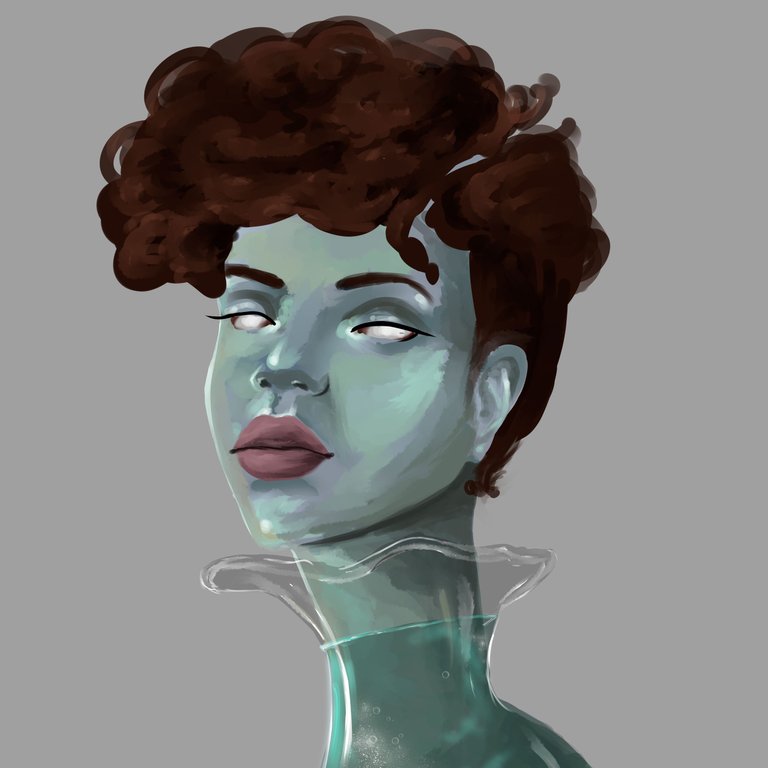
Paso cuatro: Tenia la idea de usar el mismo color acuamarin de la primera obra pero decidi varias los tonos y que sea el concepto en lo que coincidan,porfin tengo un pincel para hacer el cabello riso, estoy aprendido a usarlo no me juzgues jaja, creo que quedo hermoso:
Step four: I had the idea of using the same aquamarine color from the first work but I decided on several shades and let the concept coincide, finally I have a brush to make curly hair, I've learned to use it don't judge me haha, I think it's beautiful:
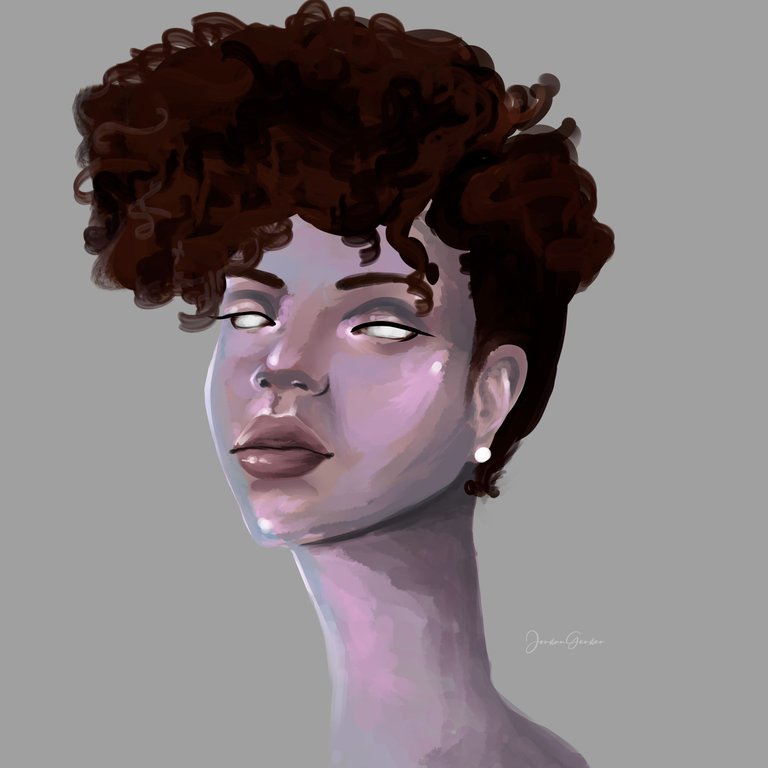
Ajusté detalles finales y así obtuve el fino resultado:
I adjusted final details and that was how I obtained the fine result
Espero te haya gustado lo he elaborado con cariño para ustedes, nos vemos en la próxima 😍
I hope you liked it, I have elaborated it with love for you, see you next time 😍
¿Cómo pintar la piel en Photoshop? (piel difusa) | How to paint skin in Photoshop? (fuzzy skin)

Presentación del diseño | Desing presentación
Materiales | Materials
- Mini laptop
- Tableta Huion H950P
- Programa Adobe Photoshop 2019
- Mini laptop
- Huion H950P tablet
- Adobe Photoshop 2019 program
Proceso | Process
Primer paso: El boceto, es donde creamos la mayor parte de lo que queremos, despues tener lineas entendibles, continuamos al segundo paso:
First step: The sketch is where we create most of what we want, after having understandable lines, we continue to the second step:
Segundo paso: colores base, Selecionamos algunas tonalidades un tono medio y adicional a este uno oscuro partiendo de la base y un claro partiendo de la misma base escogida anteriormente, y una tonalidad saturada para que sea mejor trabajada al piel al momento de mezclar las tonalidades.
Para este paso uso un pincel difuso, resulta mejor al momento de mezclar el color:
Second step: base colors, we select some shades a medium tone and in addition to this a dark one starting from the base and a light one starting from the same base chosen previously, and a saturated shade so that it is better worked to the skin when mixing the shades .
For this step I use a diffuse brush, it is better when mixing the color:
Tercer paso: una vez mezclamos todo el color de la piel es momento de detallar las otras partes de la ilustracion, en este paso quise aislarlo mas a lo fantasia y cambie los colores iniciales:
Third step: once we mix all the color of the skin it is time to detail the other parts of the illustration, in this step I wanted to isolate it more to the fantasy and change the initial colors:
Paso cuatro: Tenia la idea de usar el mismo color acuamarin de la primera obra pero decidi varias los tonos y que sea el concepto en lo que coincidan,porfin tengo un pincel para hacer el cabello riso, estoy aprendido a usarlo no me juzgues jaja, creo que quedo hermoso:
Step four: I had the idea of using the same aquamarine color from the first work but I decided on several shades and let the concept coincide, finally I have a brush to make curly hair, I've learned to use it don't judge me haha, I think it's beautiful:
Ajusté detalles finales y así obtuve el fino resultado:
I adjusted final details and that was how I obtained the fine result
Espero te haya gustado lo he elaborado con cariño para ustedes, nos vemos en la próxima 😍
I hope you liked it, I have elaborated it with love for you, see you next time 😍
¿Cómo pintar la piel en Photoshop? (piel difusa) | How to paint skin in Photoshop? (fuzzy skin)
Muchas gracias 😍
Amazing
thank you