*****English version*****
A couple of weeks ago I had an interesting conversation with @galenkp on his weekly Weekend-Engagement post. In that post, the theme was skills, where we were invited to comment on a skill we have or would like to have.
You can read that post by following this link:
https://peakd.com/hive-168869/@galenkp/weekend-engagement-topic-week-62-skills-you-have-or-want
In my case I commented that one of the skills I would like to have was to draw well, because although I am a sculptor, I am not very good at drawing. However, Galenkp recommended me the following:
Pick up a brush or pencil mate, you've got nothing to loose.
With this in mind, I set out to do a few drawings to practice. So that's what this post will be about, about my weekend of drawing and other things I did in my vegetable garden.
Normally I don't have much free time to sit and draw, however, this past Sunday it rained a lot here where I live, so I had nothing else to do except to be at home, something that I took advantage of to sit and draw to see how it all turned out. Normally in drawing one makes sketches before making the final drawing. In my case I made about 10 sketches and damaged three sheets of paper until I managed to make a decent drawing of something similar to an owl...
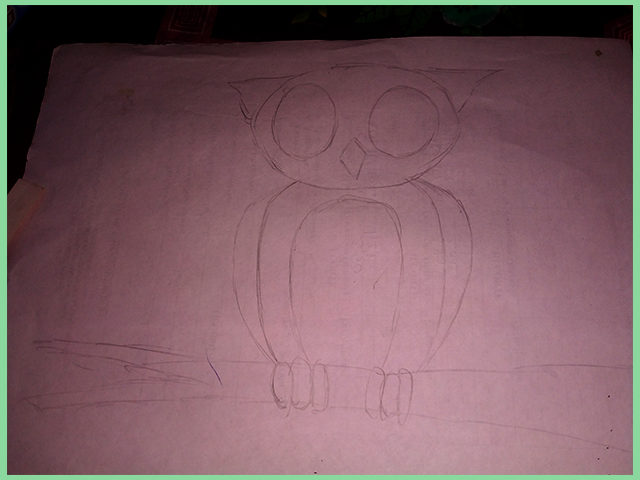
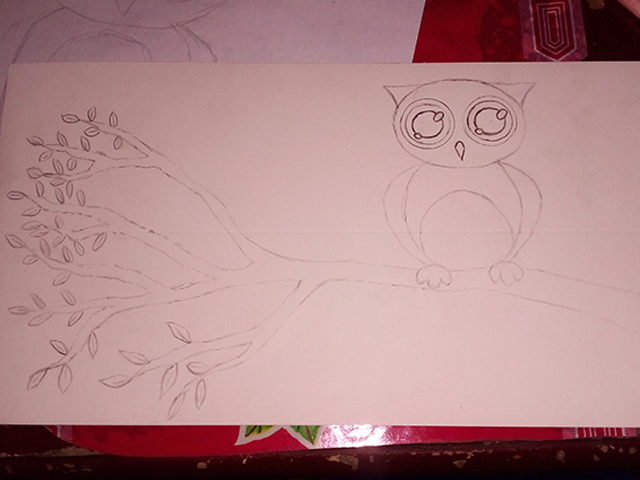
With an idea of what I planned to draw, I looked for a piece of soft cardboard and began to draw the picture with thin strokes so that there wouldn't be too many marks in case I had to erase it.
My idea was to make a branch and then draw the owl on this branch.
I confess that I helped myself with some circular objects to make the round shape of the eyes, but everything else was by hand. It looks easy to do after sharing just a couple of photos, but it took me quite a while to do that sketch, not to mention the number of times I had to erase.
Since I had a few watercolors that I used to paint another project I worked on, a cardboard King Ghidora, I looked for them and started mixing colors until I created a palette of colors suitable to give color to the drawing, so I began to paint without fear. After all, if I damaged it, I would have the opportunity to make another one...
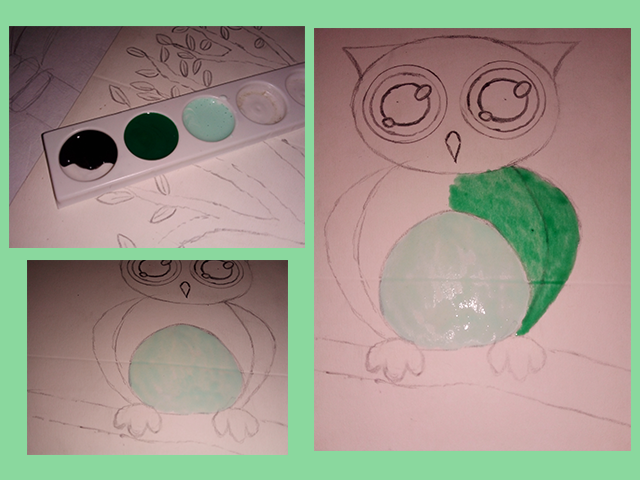
When you do this kind of experiments you should not be afraid to fail, only then you will realize if you can do something or not. With this in mind, I continued to paint my drawing VERY carefully...
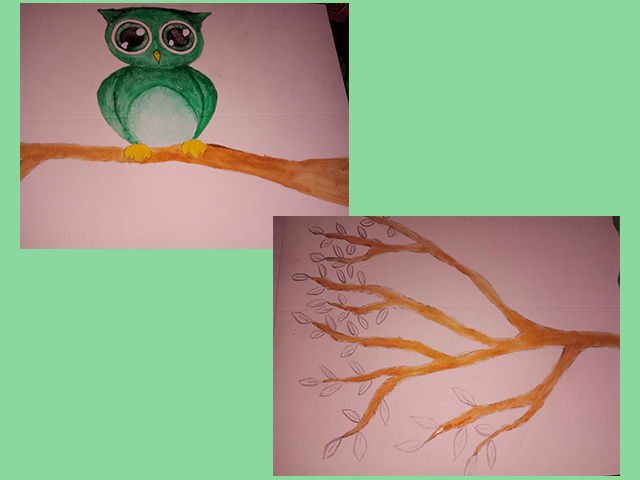
When painting the eyes, I noticed that I had used too much paint, so I took a piece of cloth and tried to remove some paint. In the image below you can see the result of having removed the paint, it was quite an interesting effect.
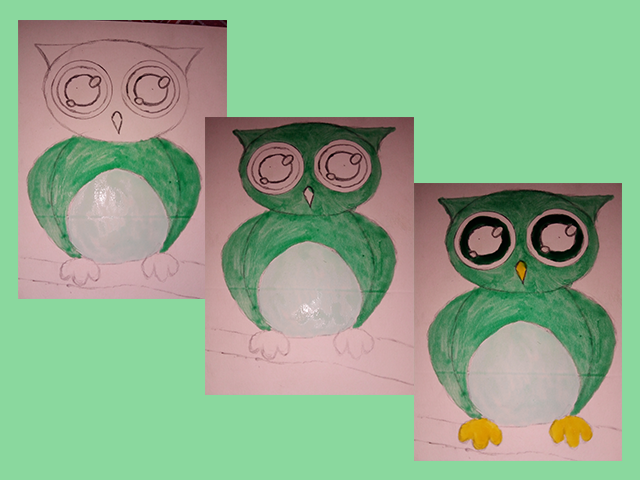
In the first one you can see the eyes with a lot of paint, in the middle one and the next one they are much clearer, after removing the paint. You can also see a gradient that I applied.

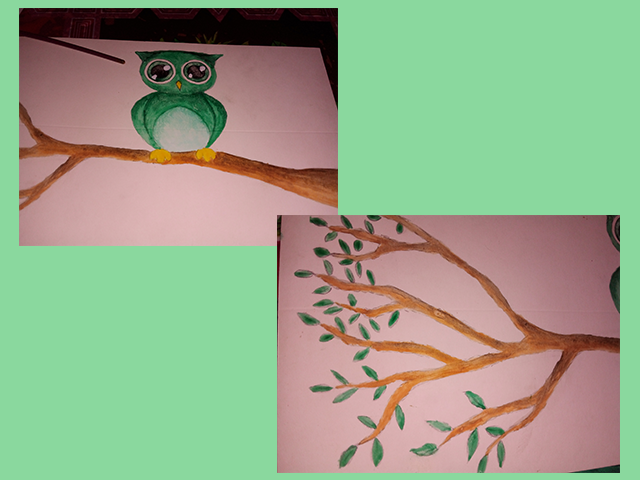
Here I resorted from some youtube video tutorials about some painting techniques and well, I practiced before on paper before doing it on the drawing I'm showing you. The final result of the owl was this:
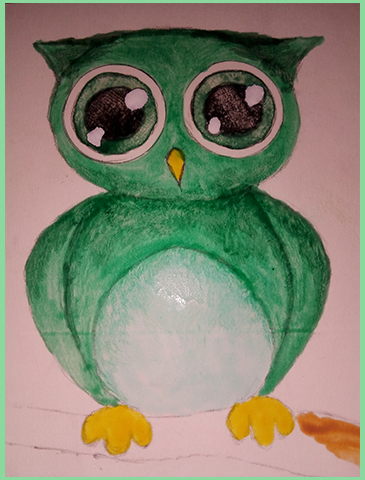
The next step was to paint the branch. For this I diluted the paint quite a bit and simply applied it carefully over the drawing, the stiff brush I had also helped a lot.
With the gradient technique I used on the owl, I tried to give a darker touch to the branch, to generate shadows. I used black diluted with water to apply it over the light brown of the branch. I also painted the leaves with the same green I painted the owl.
For the background I used a very light blue color which I applied with the brush in a messy way, without care. The only thing I took care of was not to stain the branch or the owl.
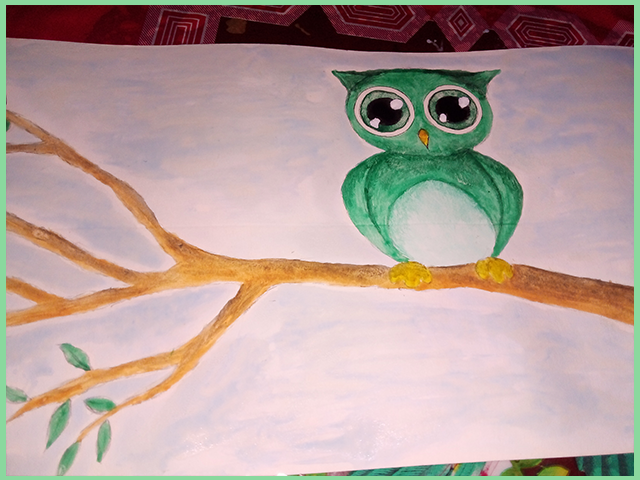
Then I applied some stronger blue to give more color to the background:
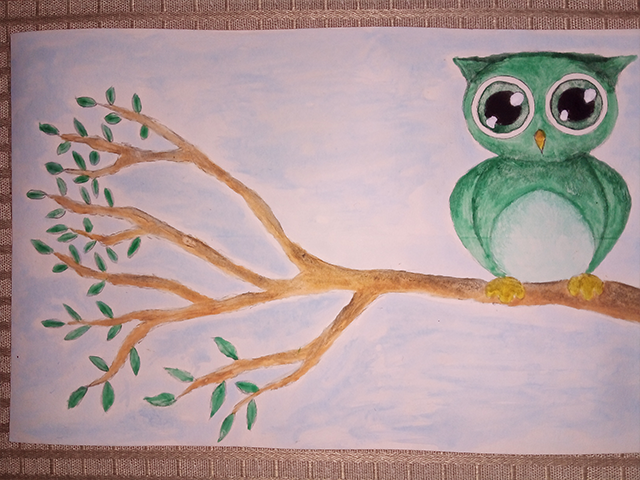
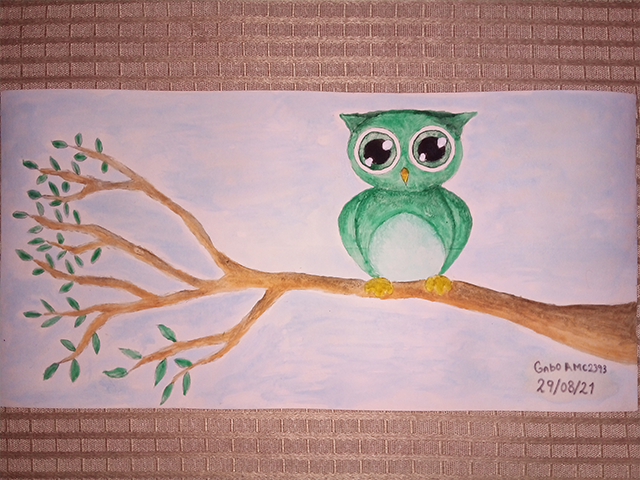
This is how my drawing was finally ready. I quite liked the result and I think it's just a matter of practice. The drawing is no big deal, even a child could do it, but the painting techniques give a little more life to the final result:
Well, the title of my post talks about seeds, not just drawing and painting, because I couldn't pass the opportunity to tell you about a couple of little things I did over the weekend in my garden.
As the planting cycle ends, another one comes, so I was sowing a few seeds. I use special trays to sow the seeds and get the little seedlings that I will later transplant into the ground.
Here you can see how I extracted seeds from a small wild tomato and then planted those seeds. These seeds need to be soaked for 24 hours to help the germination process.
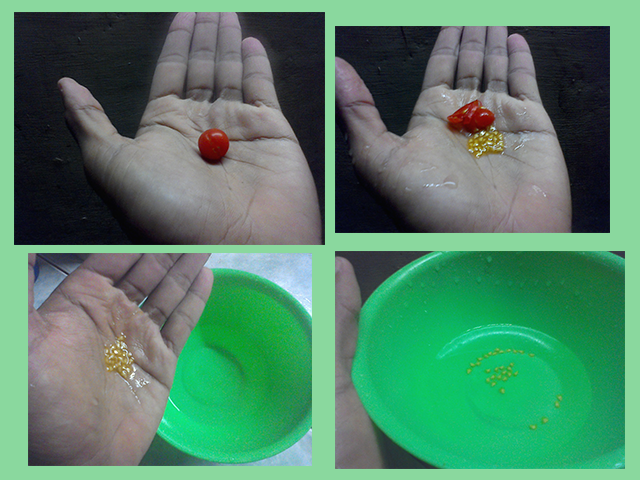
Below I show you a series of photos of how the seeds are sown in the germination trays:
I planted these seeds a few days before the weekend, precisely so that I could take care of them during the weekend, when I have more free time to work in the garden.
As you can see in the animation below, the seeds finally germinated. I have to wait a few more days to transplant them, so the seedlings will have more strength.
I also took advantage of this weekend to clear the weeds from the land and sow a few more peanut seeds for the next three-month planting cycle. We have to take advantage of the rains, which are good for planting.
Well folks, that's it as far as my weekend is concerned. I certainly did other things, but these are the ones that stood out the most and I wanted to share with you.
If you like to leave your thoughts on what I shared, you can do so below in the comments. I will be happy to read them all. Thanks for reading my post, I'll say goodbye then....
See you next time!
*****Versión en español*****
Hace un par de semanas tuve una conversación interesante con @galenkp en su publicación semanal del Weekend-Engagement. En esa publicación, la temática fue de las habilidades, donde se nos invitaba a comentar alguna habilidad que tuviéramos o nos que nos gustaría tener.
Puedes leer esa publicación siguiendo este enlace:
https://peakd.com/hive-168869/@galenkp/weekend-engagement-topic-week-62-skills-you-have-or-want
En mi caso yo comenté que una de las habilidades que me gustaría tener era la de dibujar bien, porque aunque soy escultor, el dibujo no se me da del todo bien. Sin embargo, el compañero Galenkp me recomendó lo siguiente:
Coge un pincel o un lápiz amigo, no tienes nada que perder.
Con esto en mente, me planteé hacer unos cuantos dibujos para practicar. Así que de eso tratará esta publicación, sobre mi fin de semana de dibujo y otras cosas que hice en mi huerto.
Normalmente no tengo demasiado tiempo libre para sentarme a dibujar, sin embargo, este domingo pasado llovió bastante por aquí en donde vivo, así que no tuve más nada que hacer salvo estar en casa, algo que aproveché para sentarme a dibujar a ver que tal salía todo. Normalmente en el dibujo uno hace bocetos antes de hacer el dibujo final. En mi caso yo hice como 10 bocetos y dañé tres hojas hasta que logré hacer un dibujo decente de algo similar a un buho...
Con una idea de lo que planeaba dibujar, busqué un trozo de cartulina blanda y comencé a plasmar el dibujo haciendo trazos finos para que no quedasen muchas marcas en caso de tener que borrar.
Mi idea era hacer una rama y luego dibujar al buho/lechuza sobre esta rama.
Confieso que me ayudé de algunos objetos circulares para hacer la forma redonda de los ojos, pero todo lo demás fue a pulso. Se ve fácil de hacer tras compartir solo un par de fotos, pero tardé bastante en hacer ese boceto, sin mencionar la cantidad de veces que tuve que borrar.
Como tenía unas cuantas acuarelas que usé para pintar otro proyecto en el que trabajé, un King Ghidora de cartón, las busqué y comencé a mezclar colores hasta crear una paleta de colores adecuada para darle color al dibujo, así que comencé a pintar sin miedo. Total, si lo dañaba tendría la oportunidad de hacer otro...
Cuando haces este tipo de experimentos no hay que tener miedo a fallar, solo así te darás cuenta de saber si puedes o no hacer algo. Con esto en mente, continué pintando con MUCHO cuidado mi dibujo...
Al pintar los ojos, noté que había usado demasiada pintura, así que tomé un trozo de tela y traté de quitarle pintura. En la imagen a continuación pueden ver el resultado de haberle quitado la pintura, quedó un efecto bastante interesante.
En la primera se ven los ojos con bastante pintura, en la del medio y la que le sigue se ven mucho más claros, tras quitarle pintura. También se ve un degradado que le apliqué.
Aquí recurrí de algunos video tutoriales de youtube sobre algunas técnicas de pintura y bueno, practiqué antes en papel antes de hacerlo en el dibujo que les estoy mostrando. El resultado final del buho fue este:
Lo siguiente fue pintar la rama. Para esto diluí bastante la pintura y simplemente fui aplicándola con cuidado sobre el dibujo, el pincel rígido que tenía también ayudó bastante.
Con la técnica de degradado que usé en el buho, intenté darle un toque más oscuro a la rama, para generar sombras. Usé negro diluido con agua para aplicarlo sobre el marrón claro de la rama. También pinté las hojas con el mismo verde que pinté al buho.
Para el fondo usé un color azul muy claro el cual apliqué con el pincel de manera desordenada, sin cuidado. Lo único que cuidé fue de no manchar a la rama o el buho.
Luego apliqué un poco de azul más fuerte para darle más color al fondo:
Finalmente así quedó listo mi dibujo. Me gustó bastante el resultado y creo que solo es cuestión de practicar. El dibujo no es nada del otro mundo, hasta un niño podría hacerlo, pero las técnicas de pintura le dan un poco más de vida y vista al resultado final:
Bueno, el título de mi publicación habla sobre semillas, no solo dibujo y pintura, porque no podía pasar la oportunidad de comentarles un par de cosillas que hice el fin de semana en mi huerto.
Al terminar el ciclo de siembra, llega otro, así que estuve sembrando unas cuantas semillas. Yo uso bandejas especiales para sembrar las semillas y obtener las pequeñas plántulas que posteriormente trasplantaré a la tierra.
Acá pueden observar cómo extraje semillas de un pequeño tomate silvestre para luego plantar esas semillas. Estas semillas hay que ponerlas en remojo durante 24 horas para ayudar el proceso de germinación.
A continuación les muestro una serie de fotos de cómo se siembran las semillas en las bandejas de germinación:
Estas semillas las planté días anteriores al fin de semana, precisamente para poder ocuparme de estas durante el fin de semana, cuando tengo más tiempo libre para trabajar en el huerto.
Como pueden ver en la animación acá abajo, las semillas finalmente germinaron. Debo esperar unos cuantos días más para poder trasplantarlas, así las plantulas tendrán más fuerza.
También aproveché este fin de semana de limpiar la maleza del terreno y sembrar otras cuantas semillas de maní para el próximo ciclo de siembra de tres meses. Hay que aprovechar las lluvias, que son buenas para las plantaciones.
Bien amigos, esto es todo en lo que respecta a mi fin de semana. Ciertamente hice otras cosas, pero estas son las que más destacaron y deseaba compartir con ustedes.
Si gustan dejar sus opiniones sobre lo que compartí, pueden hacerlo abajo en los comentarios. Yo estaré encantado de leerlos a todos. Gracias por leer mi publicación, me despido entonces...
¡Hasta la próxima!

Imagenes editadas con Photoshop
Traducido con DeepL
Photos edited with Photoshop
Translated with DeepL
Últimos tres post/Last three posts:
My second Power Up Day: September 2021 #HivePUD
Hawk-Wes Sculpture
Memories of old partners


Congratulations @gaboamc2393! You have completed the following achievement on the Hive blockchain and have been rewarded with new badge(s) :
Your next target is to reach 900 comments.
You can view your badges on your board and compare yourself to others in the Ranking
If you no longer want to receive notifications, reply to this comment with the word
STOPTo support your work, I also upvoted your post!
Check out the last post from @hivebuzz:
The rewards earned on this comment will go directly to the person sharing the post on Twitter as long as they are registered with @poshtoken. Sign up at https://hiveposh.com.
El dibujo te quedó muy hermoso, parece de cuentos infantiles, ciertamente es cuestión de práctica y cuando uno desea realizar algo debe hacerlo y dejar a un lado la procrastinación. ¡Lo chévere es que manejas muy bien el uso de los colores y la acuarela! a mi todavía me falta eso pero ahí voy, paso a paso.
Esos mini tomates son divinos, yo los uso para mis comidas, me gustó tanto que hice un post del tema en días pasados.
Genial, saber hacer, saber ser, saber estar.
Hola! Muchas muchas gracias por pasarte a leer mi publicación y sobre todo comentar. Yo normalmente no hago dibujos porque, según yo, no sé dibujar bien. Pero me sorprendió a mi mismo ver el resultado que logré, no pensé que pudiese hacer algo tan bonito sinceramente, al menos a mi me pareció bonito el dibujo.
Con respecto a estos tomates, son geniales, porque las plantas son resistentes a plagas y paren muchos tomates chiquitos, que tienen un sabor distinto a los otros, un poco más ácidos. Son geniales.
Saluditos amiga @yenmendt, muchos éxitos y bendiciones.
He hablado con varias personas que les gusta pero no se atreven porque piensan que les saldrá mal, ¿Por qué no intentar¡ ¿Que les puede pasar o que pueden perder? ¡Nada! no pasa nada, mas bien ganan mucho, les despejará la mente eso lo aseguro.
Un abrazo on line.
Hola, buen día. señorito ¡Me encanto tu dibujo! ,o sea elegiste un búho, me gusta todo de ellos, aunque nunca e visto uno.
sobre tu siembra puedo decirte que me recordaste cuando te enseñaban a sembrar y tenias que llevar tu plantica como tarea, te emocionaba ver la crecer era algo nuevo .
Dos post en uno 👏un abrazo mi estimado.
feliz fin.
Yo encantada como siempre con tus publicaciones @gaboamc2393 tus pasos a pasos son bien instructivos.
Y el Búho quedó bello.
Amante de tu creatividad siempre ¡sigue creando con mucho amor! se te multiplicara igual que esa siembra que tienes. Un abrazo
Yay! 🤗
Your content has been boosted with Ecency Points, by @gaboamc2393.
Use Ecency daily to boost your growth on platform!
Support Ecency
Vote for Proposal
Delegate HP and earn more
Saludos Gabo, primero, Me gusto tu dibujo, la acuarela, las tonalidades de verde que le hiciste, el brillo que le dibujaste a los ojos, esta todo super lindo, sobre todo por que estas atreviendote a hacer cosas nuevas y ya ves que eres un gran artista. segundo, hablando de tus plantas me encanta pues se ven bien productivas y con ganas de ser muy lindas y fructiferas. Gracias por compartir tu contenido de calidad con nosotros.
Genial el dibujo, muy detallado el buho, fue lo que mas me encanto del post honestamente :)
Thank you for sharing this amazing post on HIVE!
Your content got selected by our fellow curator @stevenson7 & you just received a little thank you via an upvote from our non-profit curation initiative!
You will be featured in one of our recurring curation compilations and on our pinterest boards! Both are aiming to offer you a stage to widen your audience within and outside of the DIY scene of hive.
Join the official DIYHub community on HIVE and show us more of your amazing work and feel free to connect with us and other DIYers via our discord server: https://discord.gg/mY5uCfQ !
If you want to support our goal to motivate other DIY/art/music/homesteading/... creators just delegate to us and earn 100% of your curation rewards!
Stay creative & hive on!
Thank you very much for the support, I appreciate it very much @diyhub and @stevenson7.