Hola mis amigos amantes de los juguetes.
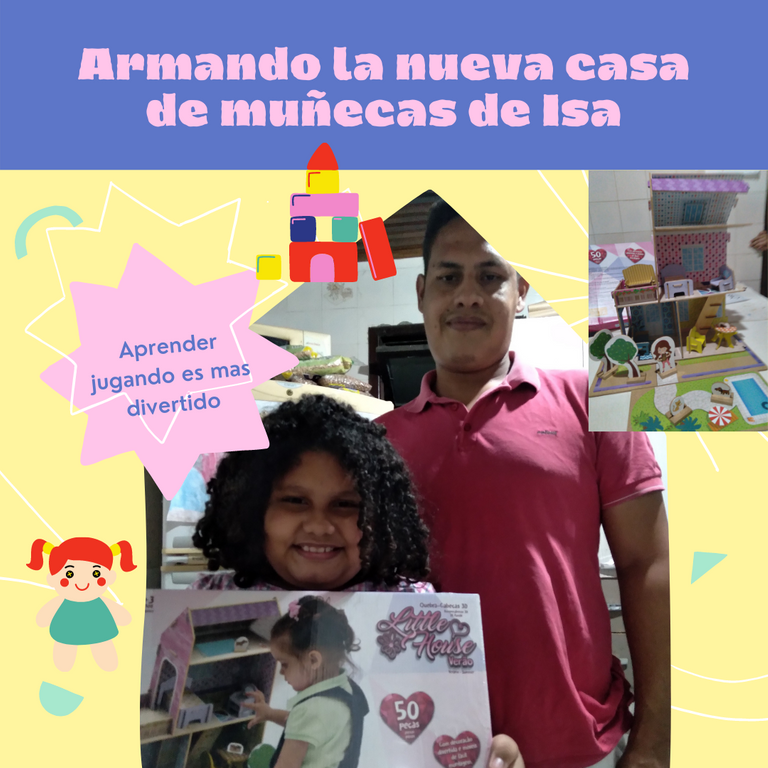
Hoy estoy visitando está comunidad para compartir con ustedes el juguete que compre para mi hija hace unos días.
Se trata de una Casita de muñecas que ella tenía tiempo pidiéndome que le comprara.
Ella ya se había olvidado de la Casita, pero yo no me olvide y espere tener el dinero para comprársela. Así que resultó ser una sorpresa.
Ella se puso muy feliz cuando abrió la caja y vio que era la Casita de muñecas que ella tanto quería ya que es perfecta para jugar con sus Polly Pocket.
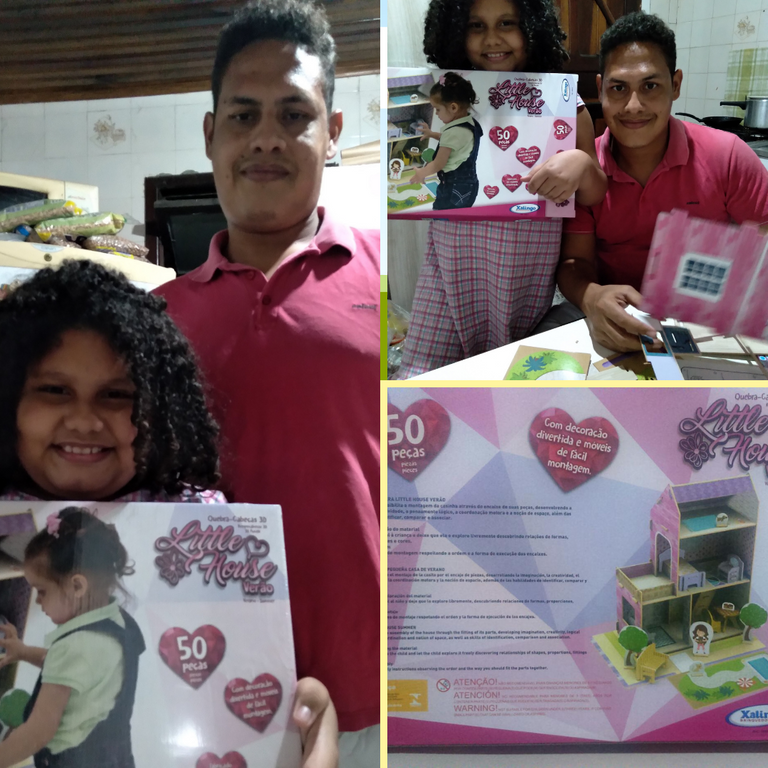
La casa viene desarmada y tuvimos que ponernos a armarla. Para ello primero revisamos las instrucciones para ver dónde va cada pieza. La Casita es de dos niveles hecha de material compuesto y fácil de armar lo que resultó muy divertido para la familia comenzar a unir las partes de la casa.
A continuación, van a poder apreciar por medio de las fotos como fue este procedimiento.
Lo primero que hicimos fue separar todas las piezas y hacer un reconocimiento de donde podía ir cada una.
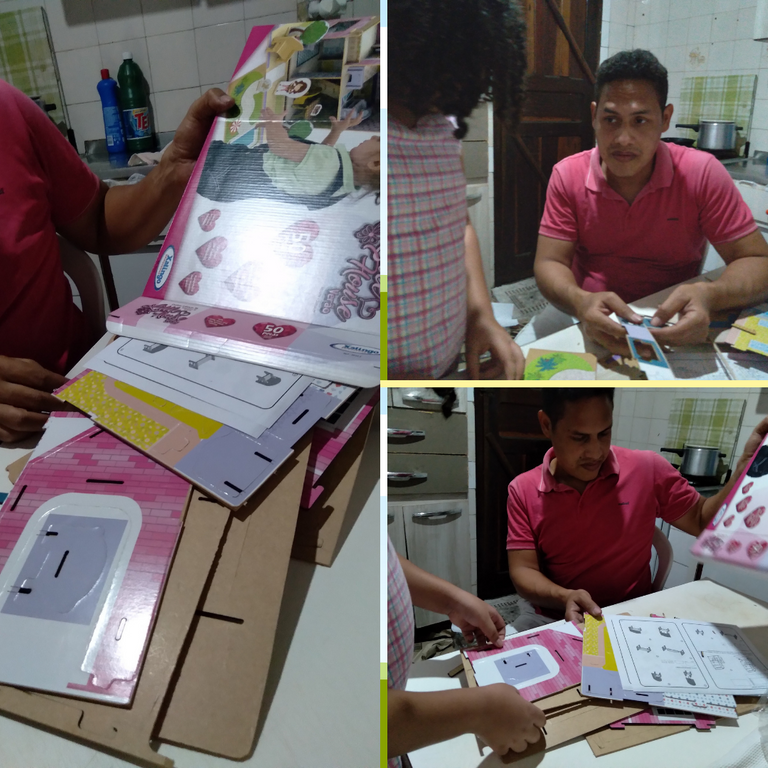
Ahora comenzamos por colocar en la mesa las partes grandes como el piso y las paredes y proceder a unirlos.
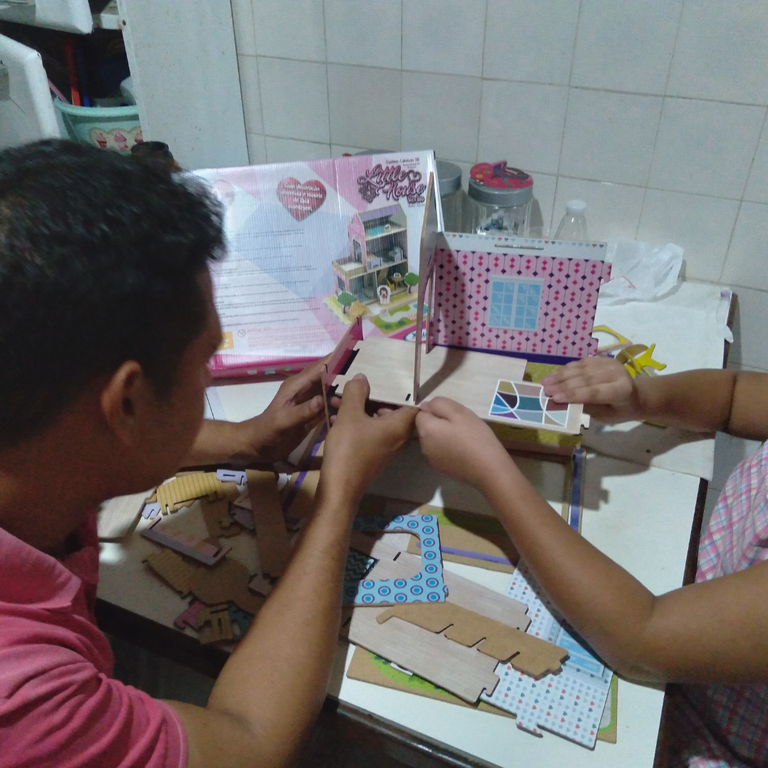
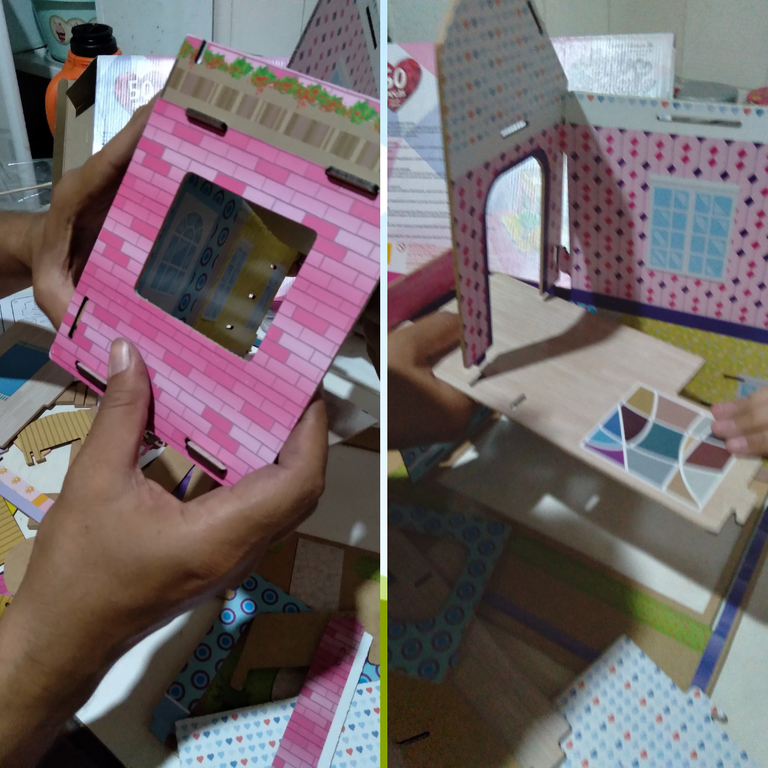
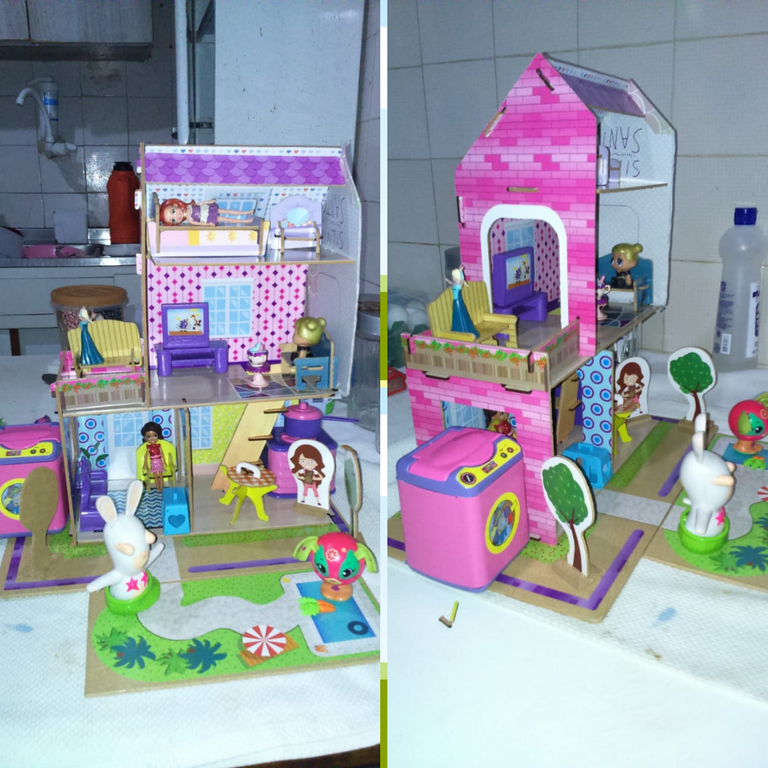
Después de unir los pisos con las paredes comenzamos a colocar el techo, las barandillas y la escalera.
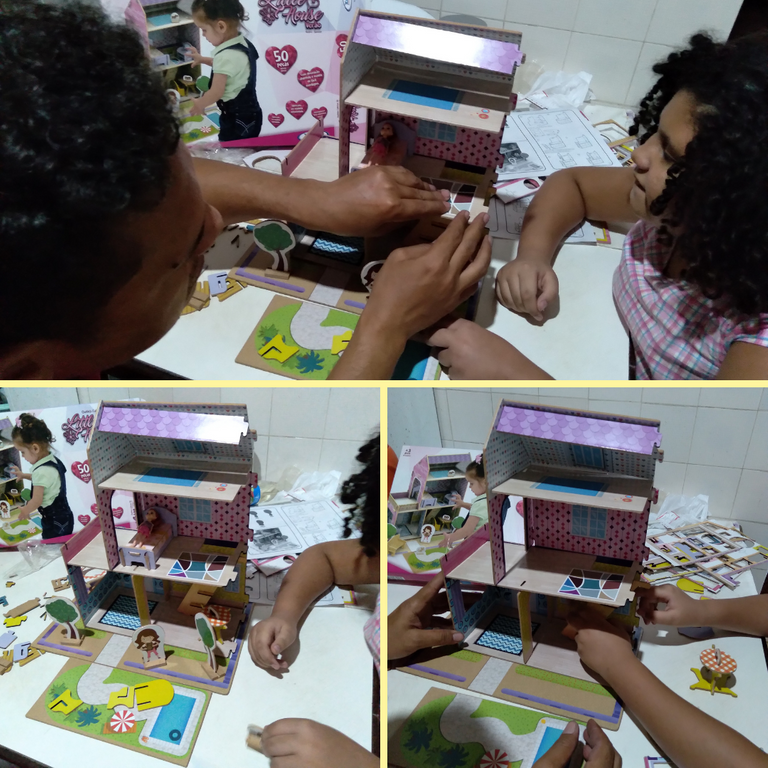
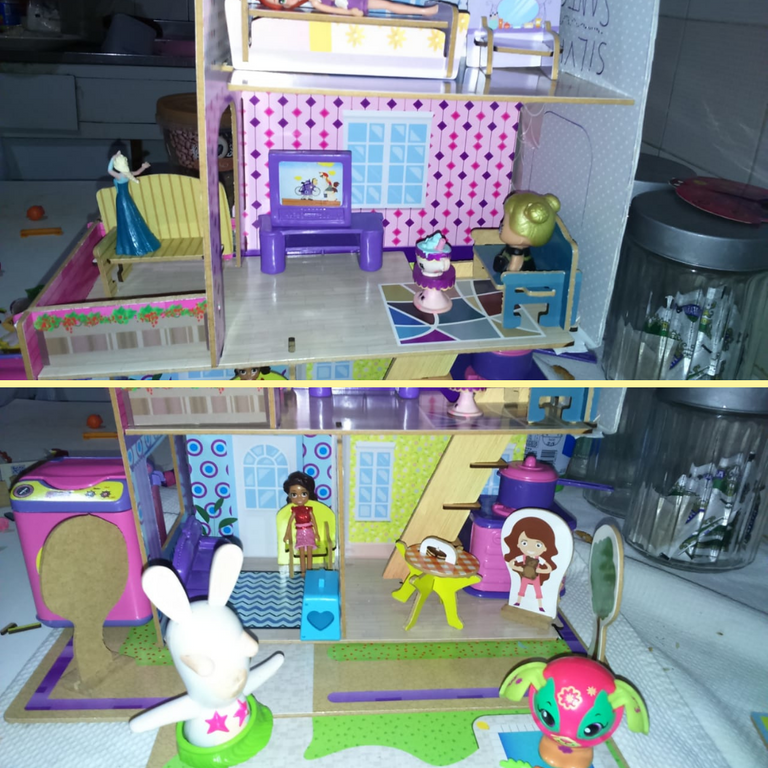
Cuando fueron colocadas todas las piezas grandes empezamos a colocar las pequeñas. Como árboles, cama, muebles, mascotas entre otros.
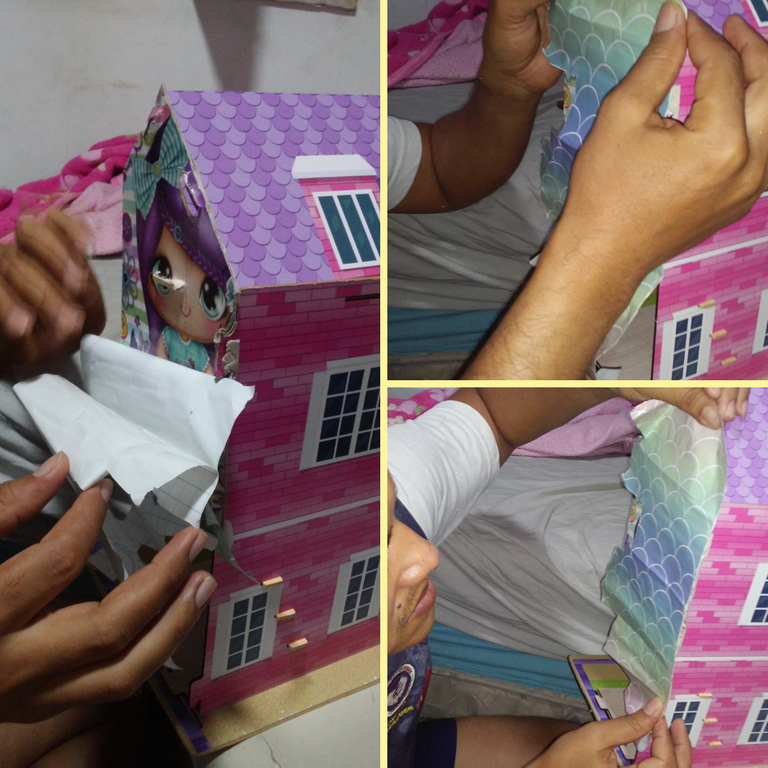
Tengo que comentarles que tuvimos un pequeño problema en el armado de la casa. Y fue que faltó una de las piezas principales de la casa. La parte lateral derecha. Ya colocamos el reclamo en la aplicación de Amazon que fue donde la compramos.
Esperamos que nos manden la parte que está faltando. Por el momento resolvimos fabricar una pieza con una pasta de cuaderno que es bastante dura y resistente.
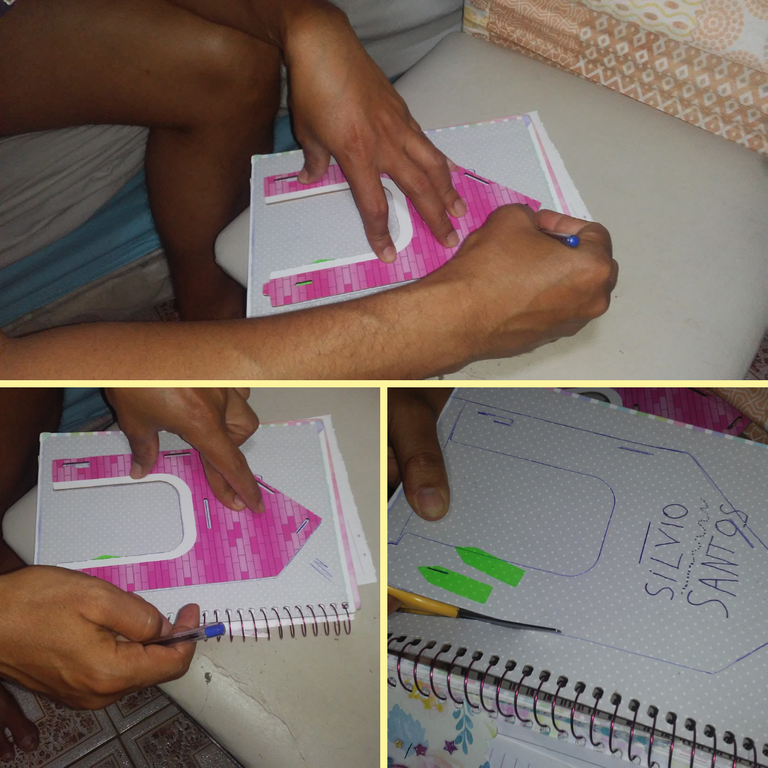
Para fabricar dicha pieza utilice el molde de la otra lateral, lo marque con un lapicero y recorte con una tijera. Abrí los huecos dónde calza con las otras piezas. Después procedí la forrarla con papel adherente y fijarla a la Casita como pueden ver en las imágenes.
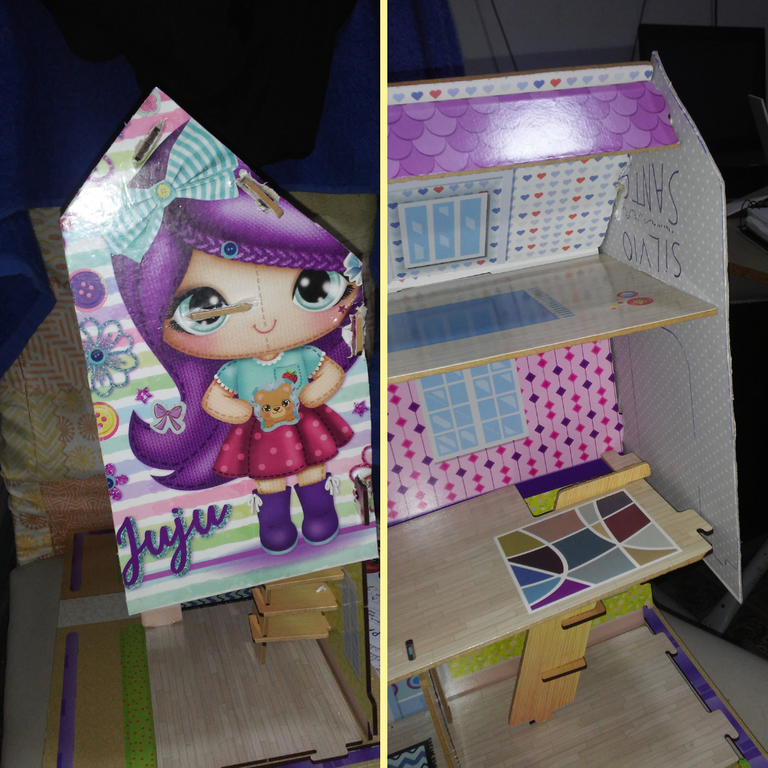

Y listo así quedó la Casita de muñecas con su nueva pieza fabricada por nosotros.
Lo más importante de todo es que hicimos un buen equipo de trabajo para poder armar la casa. Eso como siempre nos ayuda a interactuar más y a seguir fortaleciendo ese vínculo que debe existir entre Padre e hija.


Con respecto a la pieza que faltó, esperamos que no las envíen lo antes posible. De todas maneras, la que fabricamos quedo muy bonita y mi hija se sintió muy feliz por eso. Ahora ella tiene su añorada Casita de muñecas dónde podrá seguir soñando como niña y en mi caso me siento satisfecho como Padre porque veo que mi hija es feliz con lo poco que le podemos darle.
Bueno mis amigos está fue mi experiencia relacionada con los juguetes. Nos estamos leyendo en otro Post.
Las fotos fueron tomadas con mi teléfono Sony Xperia y Lg style.
Todas las imágenes fueron editadas en canva.

Hello my friends who love toys.
Today I am visiting this community to share with you the toy I bought for my daughter a few days ago.
It is a dollhouse that she had been asking me to buy for her for a long time.
She had already forgotten about it, but I didn't forget about it and I waited to have the money to buy it for her. So it turned out to be a surprise.
She was very happy when she opened the box and saw that it was the dollhouse she wanted so much because it is perfect to play with her Polly Pockets.
The house came unassembled and we had to put it together. To do this we first reviewed the instructions to see where each piece goes. The Casita is a two-level house made of composite material and easy to assemble so it was a lot of fun for the family to start putting the parts of the house together.
Below, you will be able to see through the pictures how this procedure went.
The first thing we did was to separate all the pieces and make a recognition of where each one could go. Now we started by placing on the table the big parts such as the floor and the walls and proceed to join them.
After joining the floors with the walls we started to place the ceiling, the railings and the staircase.
When all the big pieces were placed we started to place the small ones. Such as trees, bed, furniture, pets and others.
I have to tell you that we had a small problem in the assembly of the house. And it was that one of the main pieces of the house was missing. The right side part. We have already placed the claim in the Amazon application which is where we bought it.
We are waiting for them to send us the missing part. For the moment we decided to make a piece with a notebook paste that is quite hard and resistant.
To make this piece I used the mold from the other side, marked it with a pencil and cut it out with scissors. I opened the holes where it fits with the other pieces. Then I proceeded to line it with adhesive paper and attach it to the Casita as you can see in the pictures.
And that's how the dollhouse looked with its new piece made by us.
The most important thing of all is that we made a good working team to assemble the house. That as always helps us to interact more and to continue strengthening the bond that should exist between father and daughter.
Regarding the missing piece, we hope that they are not sent as soon as possible. Anyway, the one we made was very nice and my daughter was very happy about it. Now she has her longed dollhouse where she can continue dreaming as a child and in my case I feel satisfied as a father because I see that my daughter is happy with the little we can give her.
Well my friends, this was my experience related to toys. We are reading each other in another post.
The pictures were taken with my Sony Xperia phone and Lg style.
All images were edited in canva.
Translated with www.DeepL.com/Translator (free version)

Me imagino la emoción de Isabella.
Excelente que le compraran su anhelada casita, y la mejor parte fue que resolviste al fabricarle la pieza faltante.
Te felicito @rocaxel
que emoción, me imagino la felicidad de Isa, gritando y brincando por toda la casa, recuerdo su risa, te felicito por ser tan buen papá. saludos.
Congratulations, your post has been upvoted by @dsc-r2cornell, which is the curating account for @R2cornell's Discord Community.
Hasta yo me emociono! qué divertido! saludos mi querida tocaya.
Si. Saludos.