1850's terrace house v's family of 5
A new throne!
Following on from the installation of the new central heating and high pressure water system we were now in a position to rip out the old bathroom and install our new shiny one. We decided to go with a more traditional look and feel to the bathroom. What was installed was, lets say, not our taste. The bathroom was an internal room, as in it had no external light source. Somewhere along the road 2 windows had been installed in the bathroom to try and combat this. Thew were pretty terrible too. One was into a bedroom, this meant that whenever you turned on the light in the bathroom the occupant was disturbed by the light, and the noise? I am sure you know that single pane glass is not a good sound insulator!
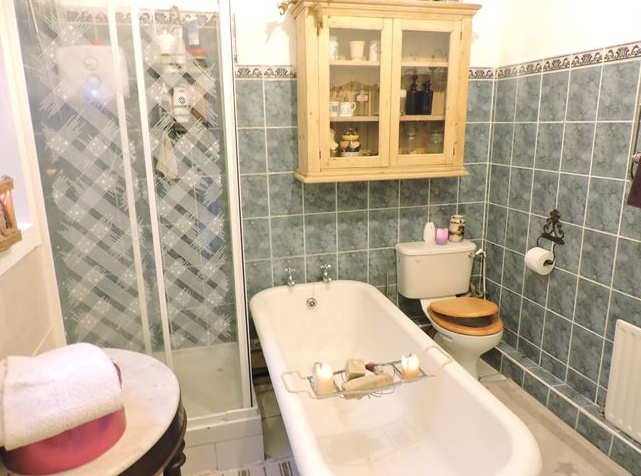
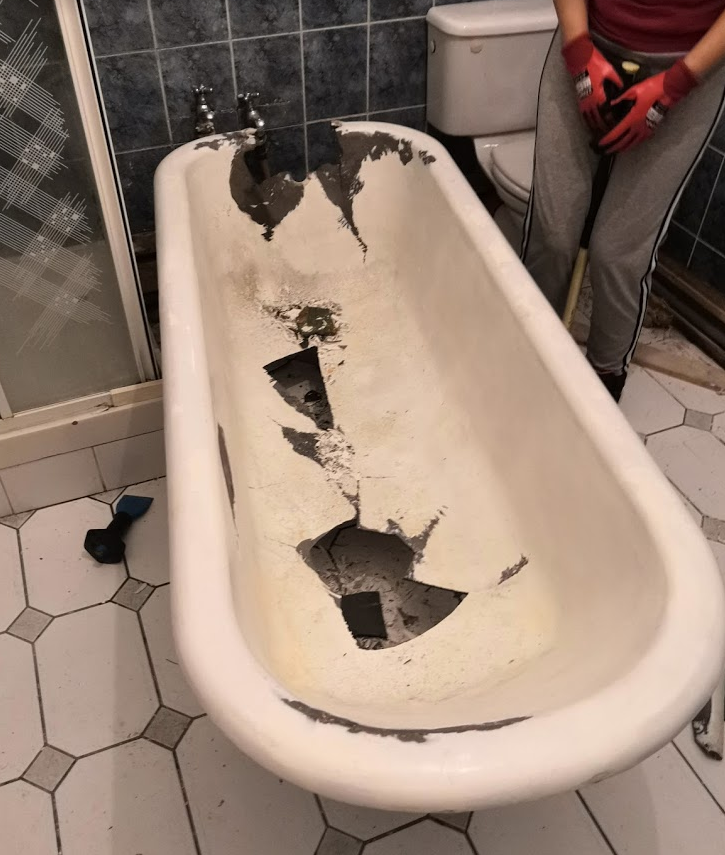
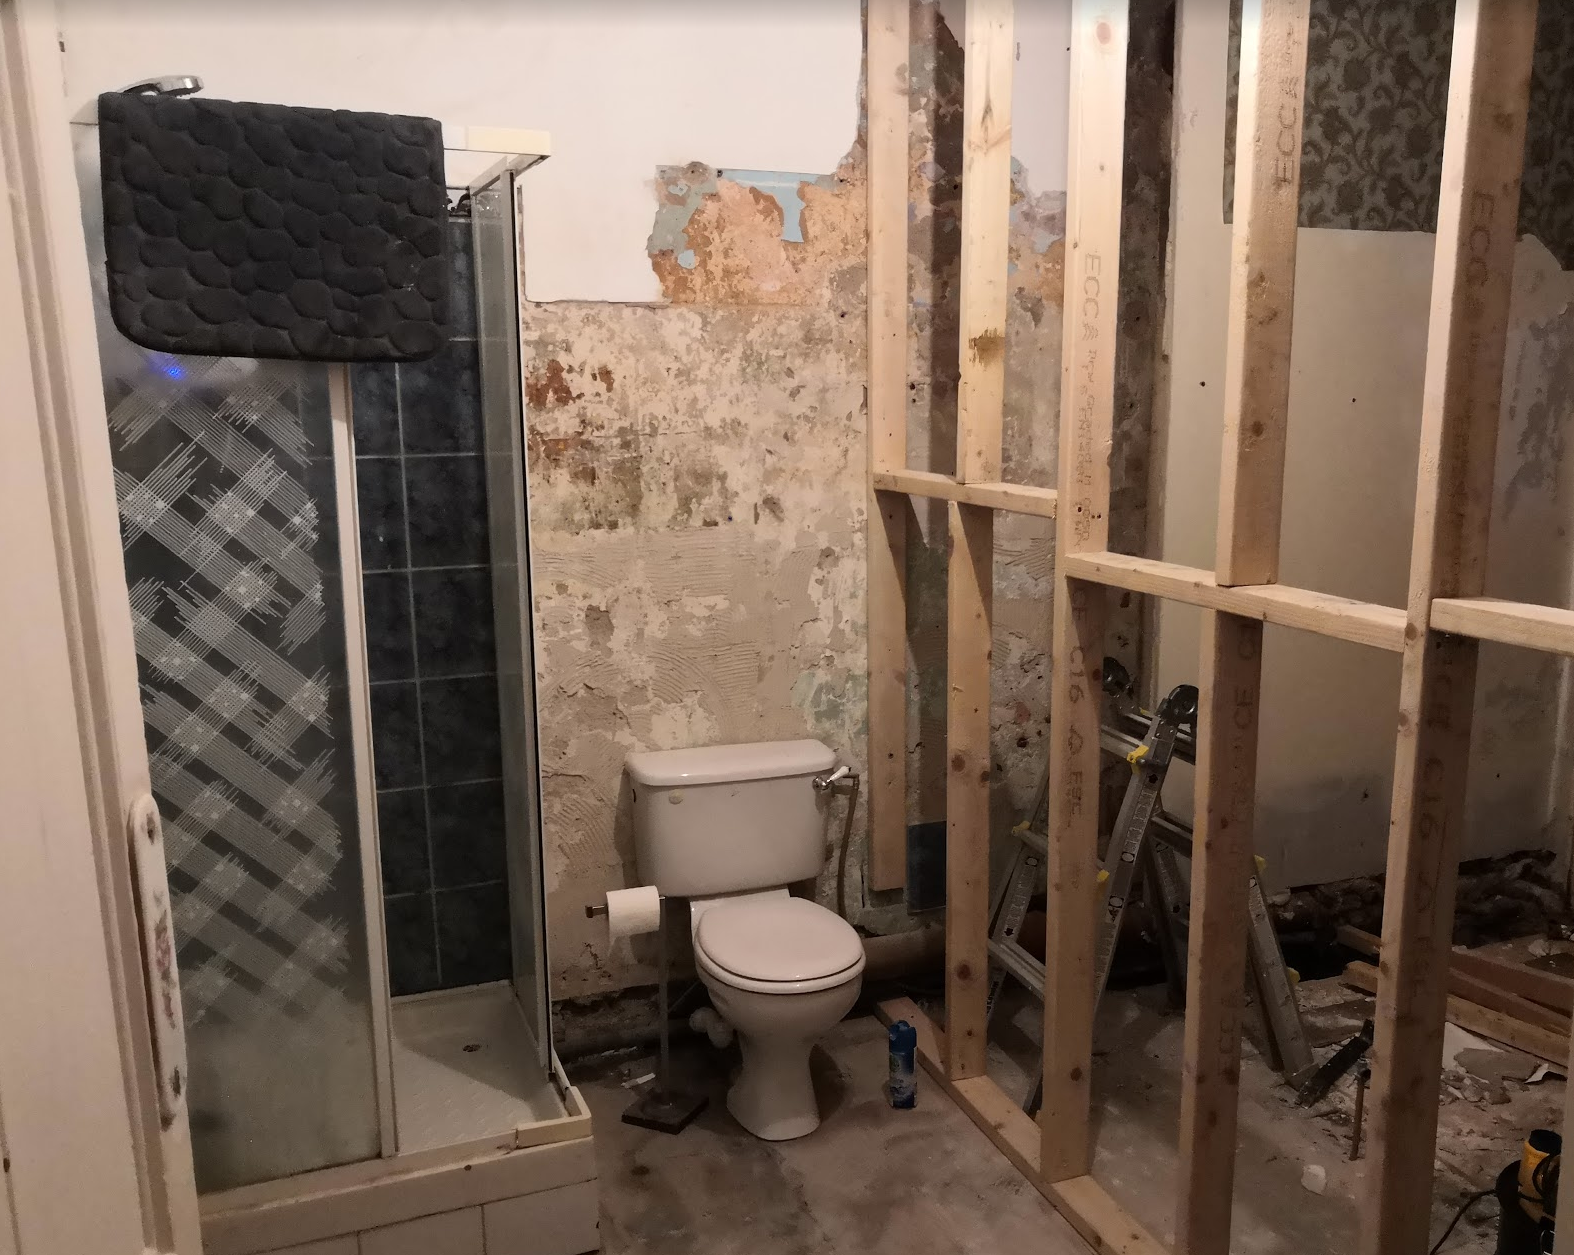
This was the bathroom that was installed. I don't know how it looks so bright and in decent condition because it was nowhere near this shape when we got hold of it. The Cast Iron bath that was installed was wrecked. The previous owners had hand painted the inside of the bath. It had paint peeling, lots of enamel chipped away, so much so that it was dangerous. The shower was an electrical pumped shower. The mains power that was feeding the shower was exposed and how someone didn't get fried in it I will never know. There were also a number of bulkheads, you can just see the one under the radiator and behind the toilet. We didn't want to keep this "design feature" either. So we had a knackered bath, faeces blocked toilet, electrical risk shower, windows into bedroom and hall and a crappy sink (out of shot). First things first was to smash up the bath so we could remove it. It was not feasible to remove it in 1 piece, that coupled with the fact that the restoration on the bath would probably have cost as much as a new one and simply getting it out of the room would have involved taking additional stud walls down, it just made more sense to SMASH THAT SUCKER UP!

The reason we had to be careful was that the water was still being fed to the bath! There were no shutoff valves to the taps so they had to stay intact.
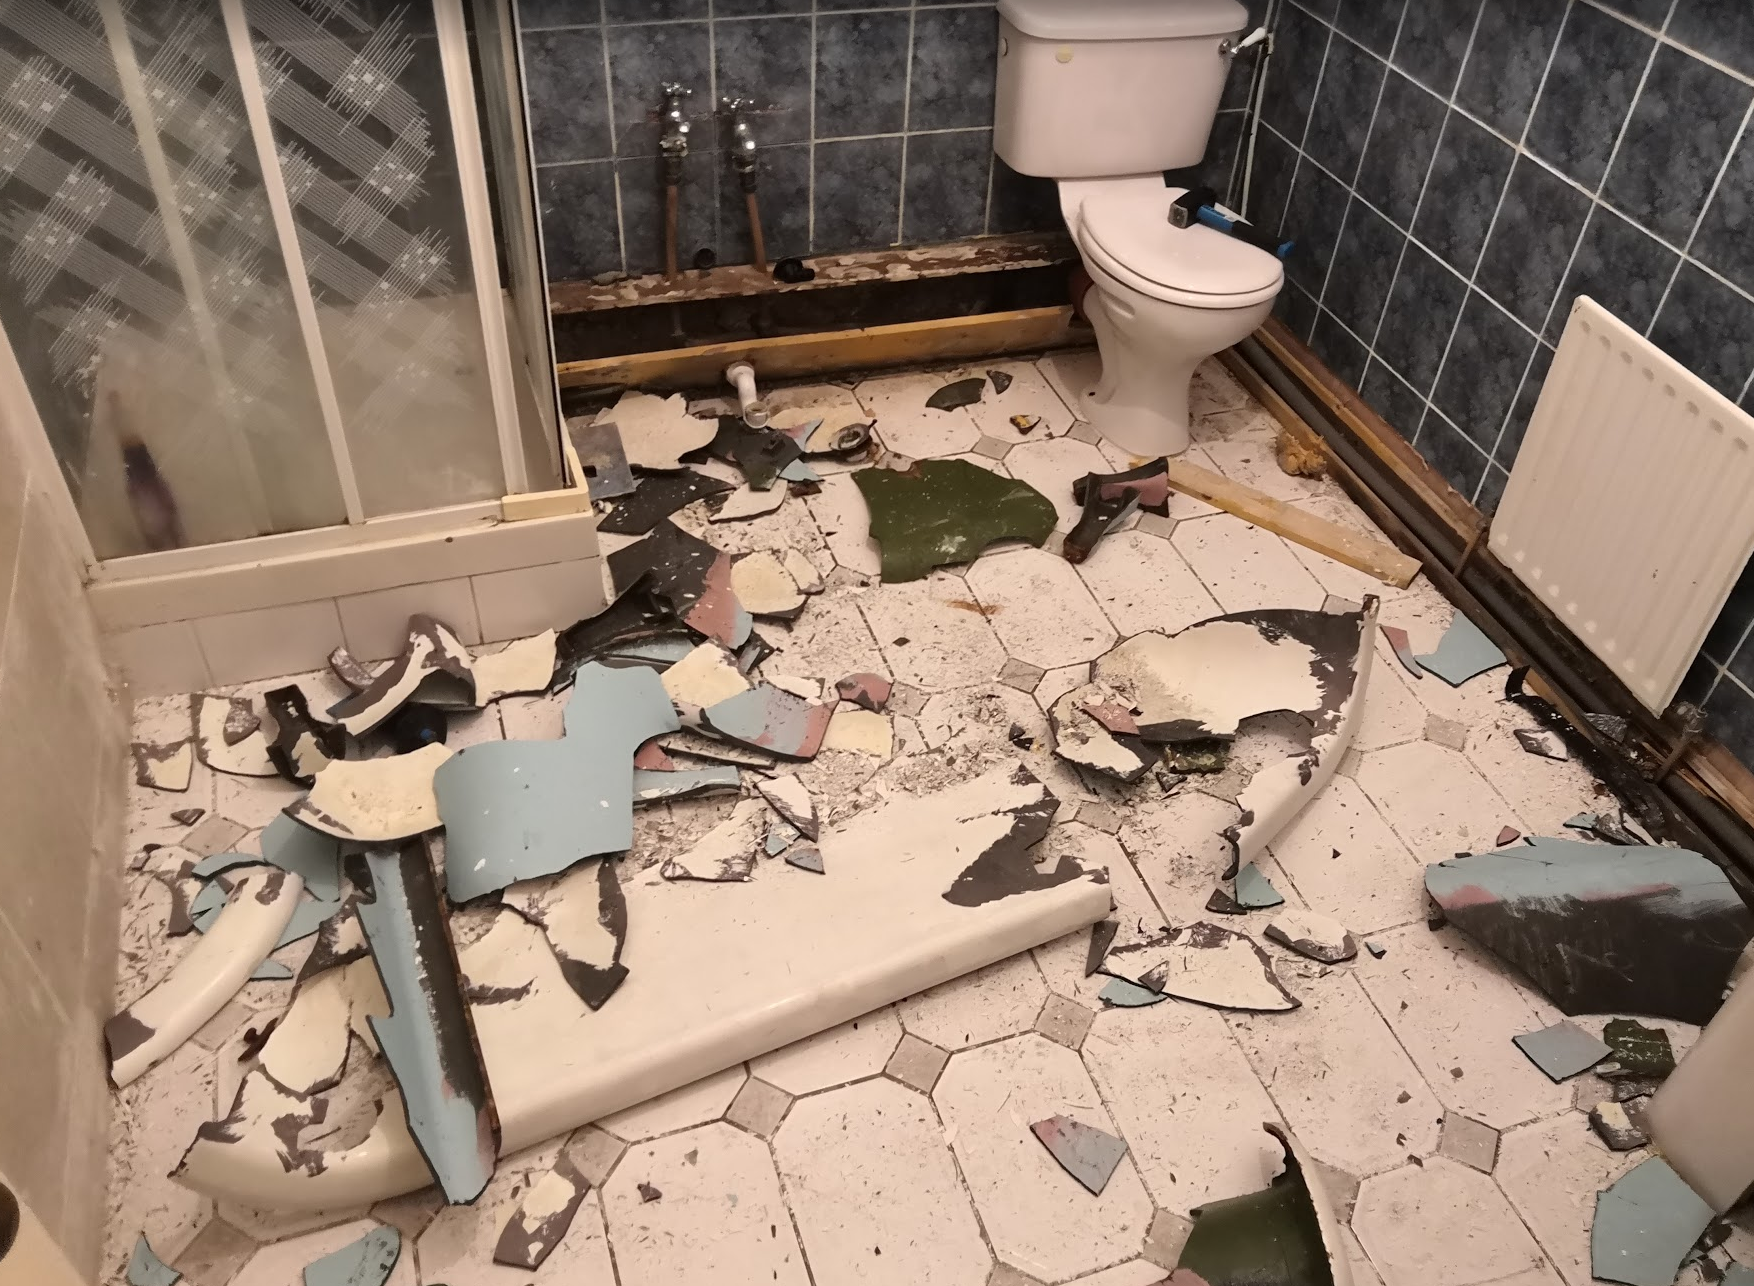
You might also just be able to see the heavily blackened wood on the right hand side near the radiator... That is wet rot! There was a leak in the feed and return to the sink. Thankfully we were removing this whole area and we replaced any rotten timbers with new pressure treated solid timber.
You can just see one of the 2 windows in shot now, this was into the bedroom, at this point we had also capped the taps on the bath and radiator so we could remove and scrap them too. The bedroom that the bathroom had been cut out of had been reduced to such a small size that you could no longer fit a decent sized 4" bed into. So that meant we had to remove the wall! We had to extend the waste pipe from the toilet so we still had a working toilet too. I mean, we don't do things by half here! So down came the wall and a new stud wall went up!
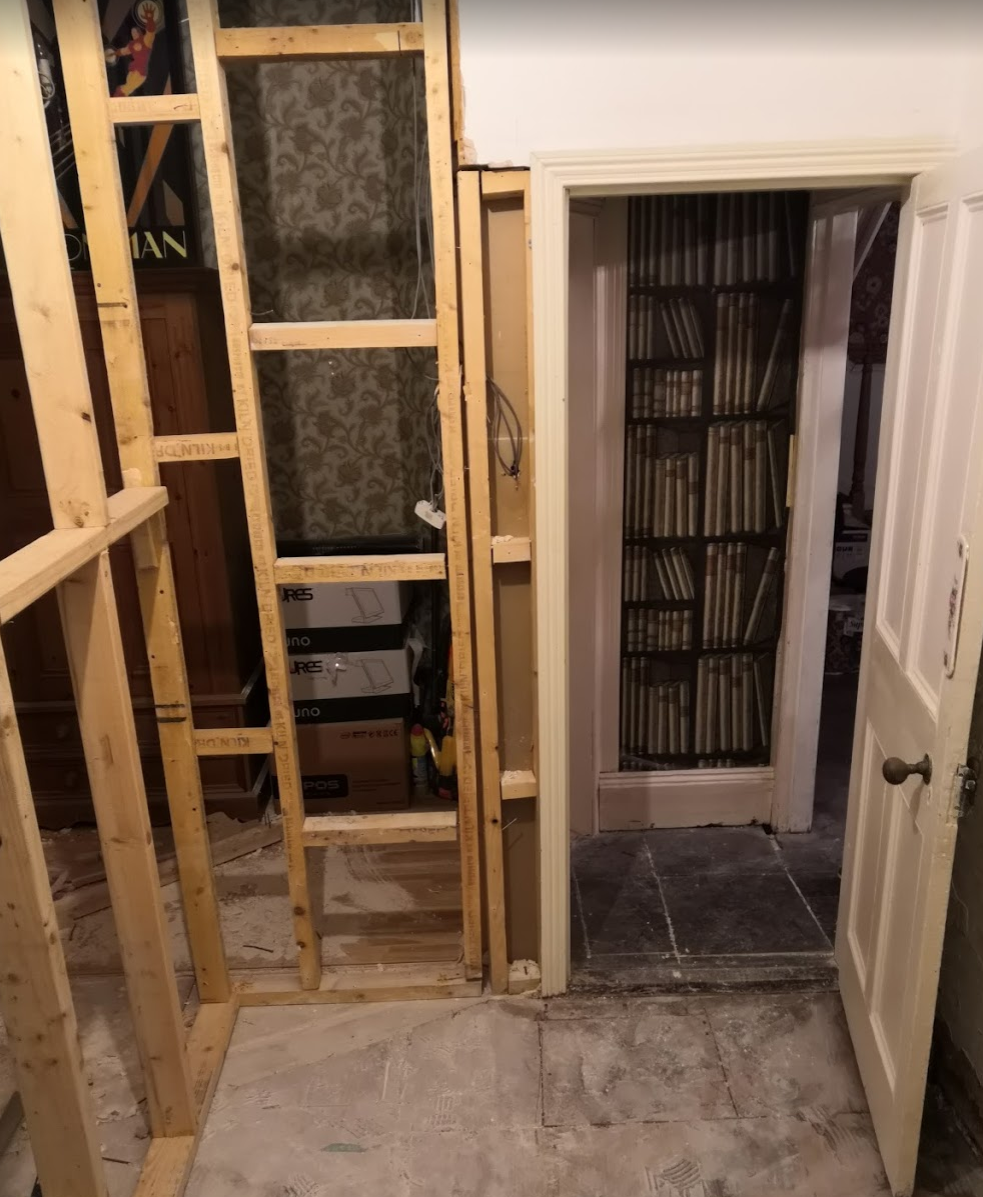
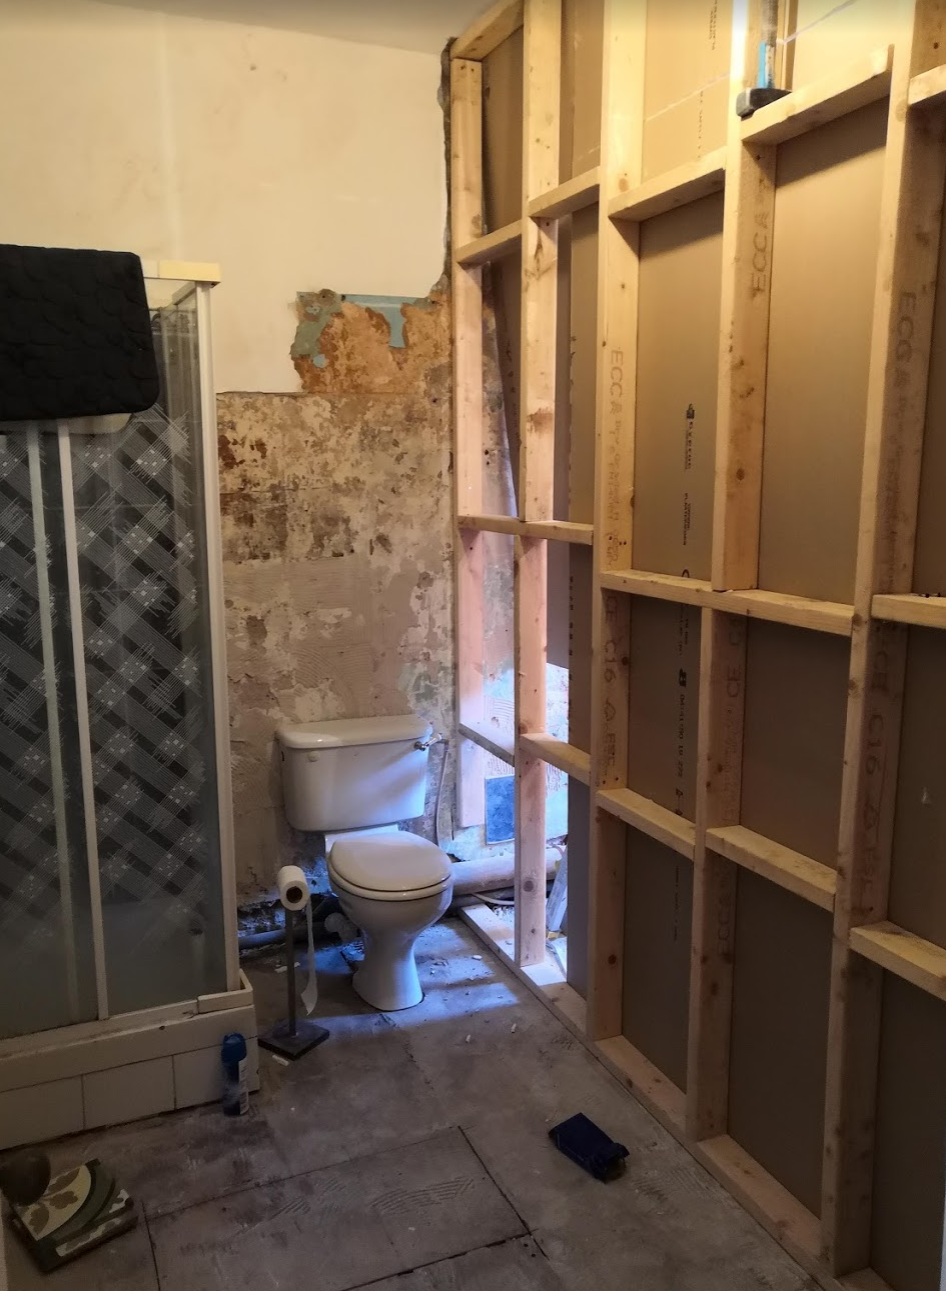
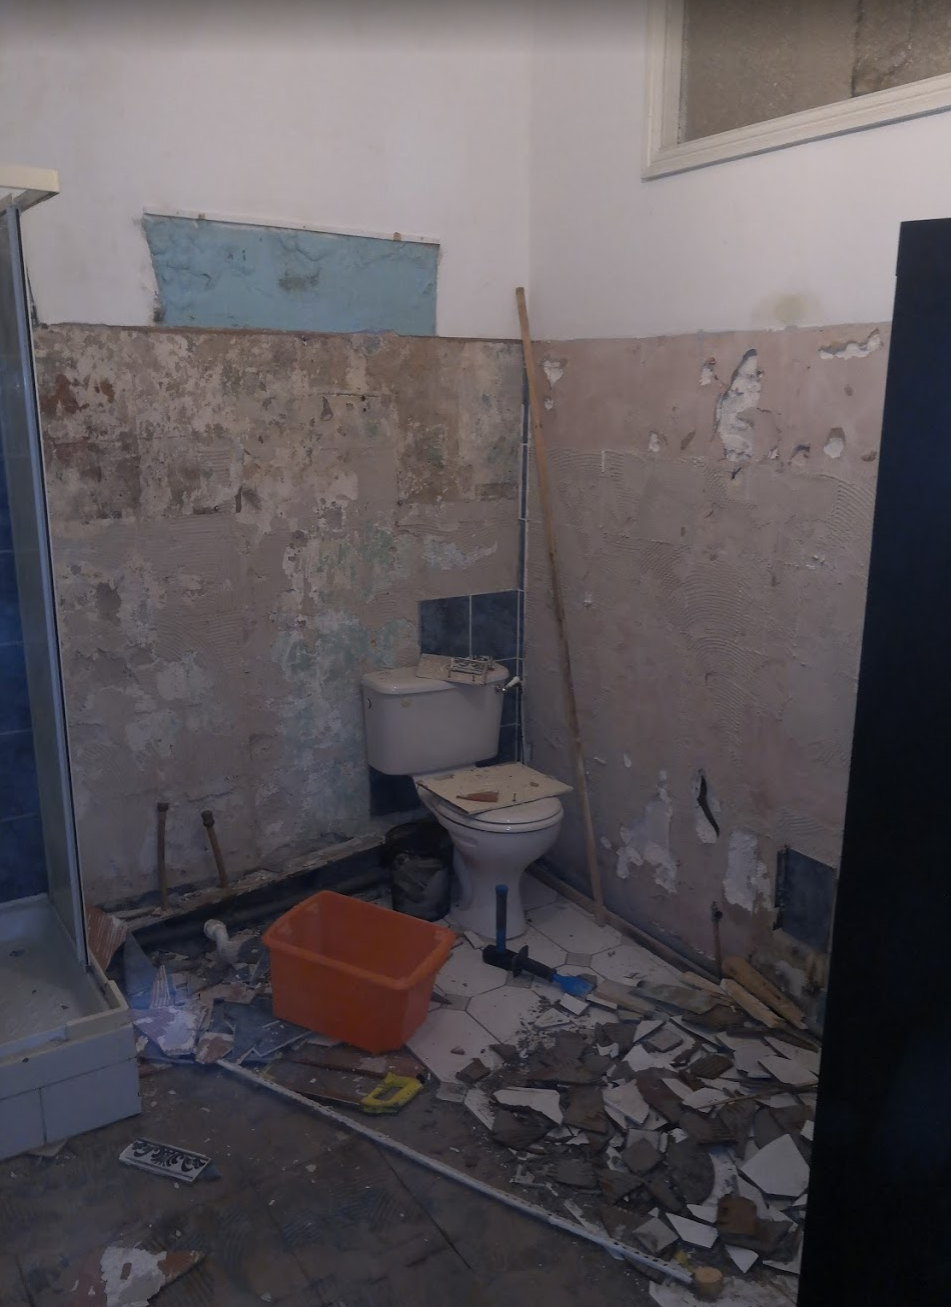
This was getting close to one of the lowest points we had in the renovation. We had a, lets just say "airy" bathroom now. With no wall between the bedroom and the bathroom we had to move AA Ron to another room for the duration of the build. Pretty soon we were going to have to remove the shower and toilet from the room too and this meant that our only working toilet and sink was in a lean to at the back of the house. We were also now in November! It was starting to get a bit chilly!
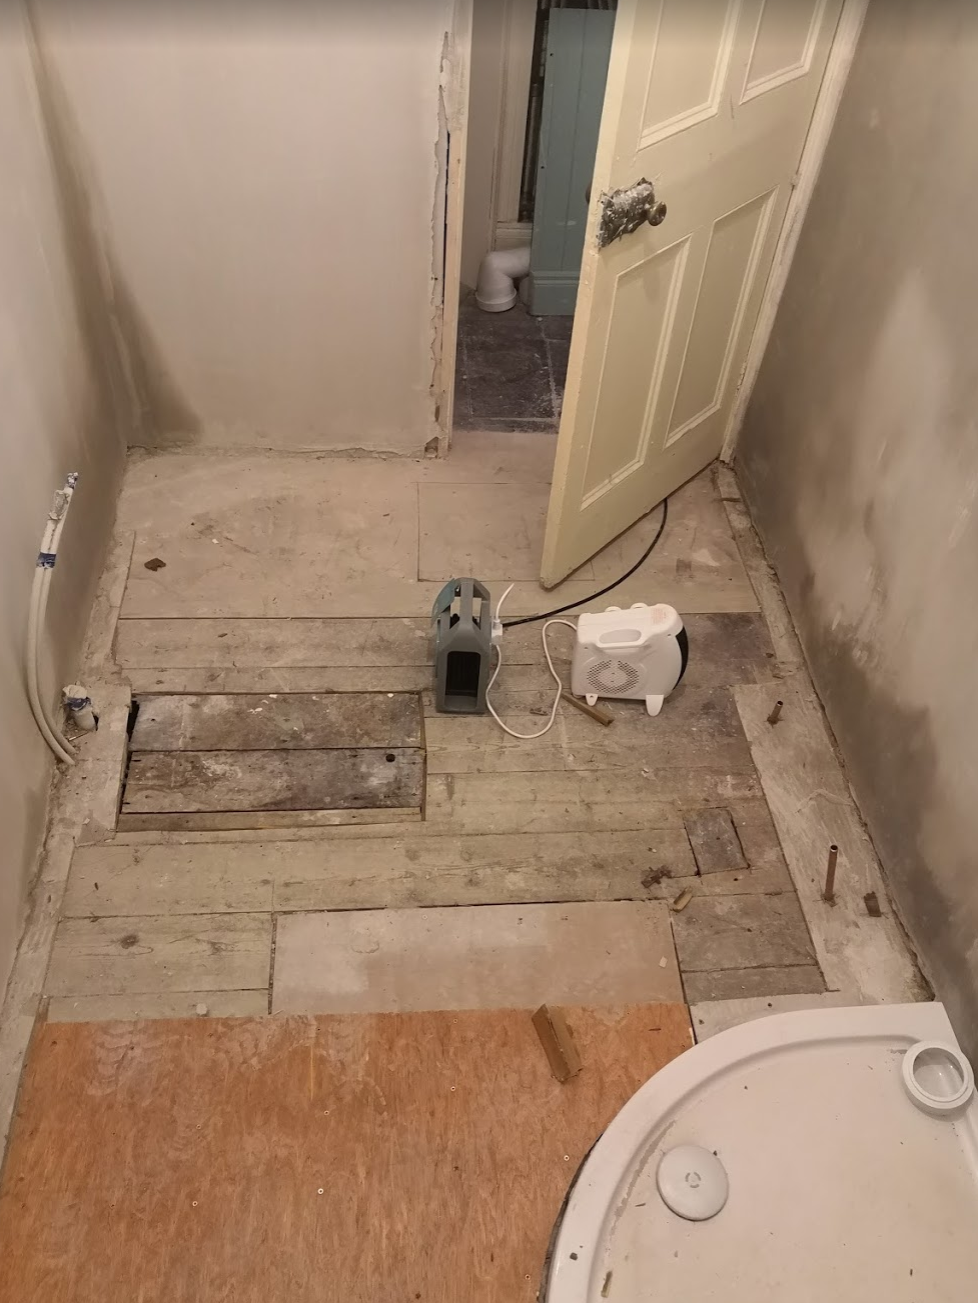
We slabbed out the walls and had them plastered shortly afterward but not before we removed the shower, this meant that from the removal to the re-installation of the shower we were washing in a bucket. At this point the central heating system hadn't been commissioned so we had no heat, save a few small electrical heaters which chewed up the electricity and gave very little by way of heat in return. Below is a the bathroom floor and some of the new pipe work. Sink to the left, radiator to the right and a nice big new shower tray! I'm not a small unit, none of the kids are small units either so a 1200mm x 800mm quadrant shower made the most amount of sense. As yu can see the floor was also a mix of original 1950's floorboards, 18mm marine ply and 4 mill ply! So we set about leveling everything in 2 sheets of ply so we wouldn't have any issue with our tiling down the road!
We were 6 weeks without a shower this was over the christmas period too so spirits were quite low. We wanted to have so much done by christmas (I don't know why we put so much pressure on ourselves to be "done" by christmas but we did). We soldiered on, every morning getting up at 6:30, boiling a kettle of water and trying to retain some form of dignity we wasked in a bucket in our bedroom!
But then something magical happened!
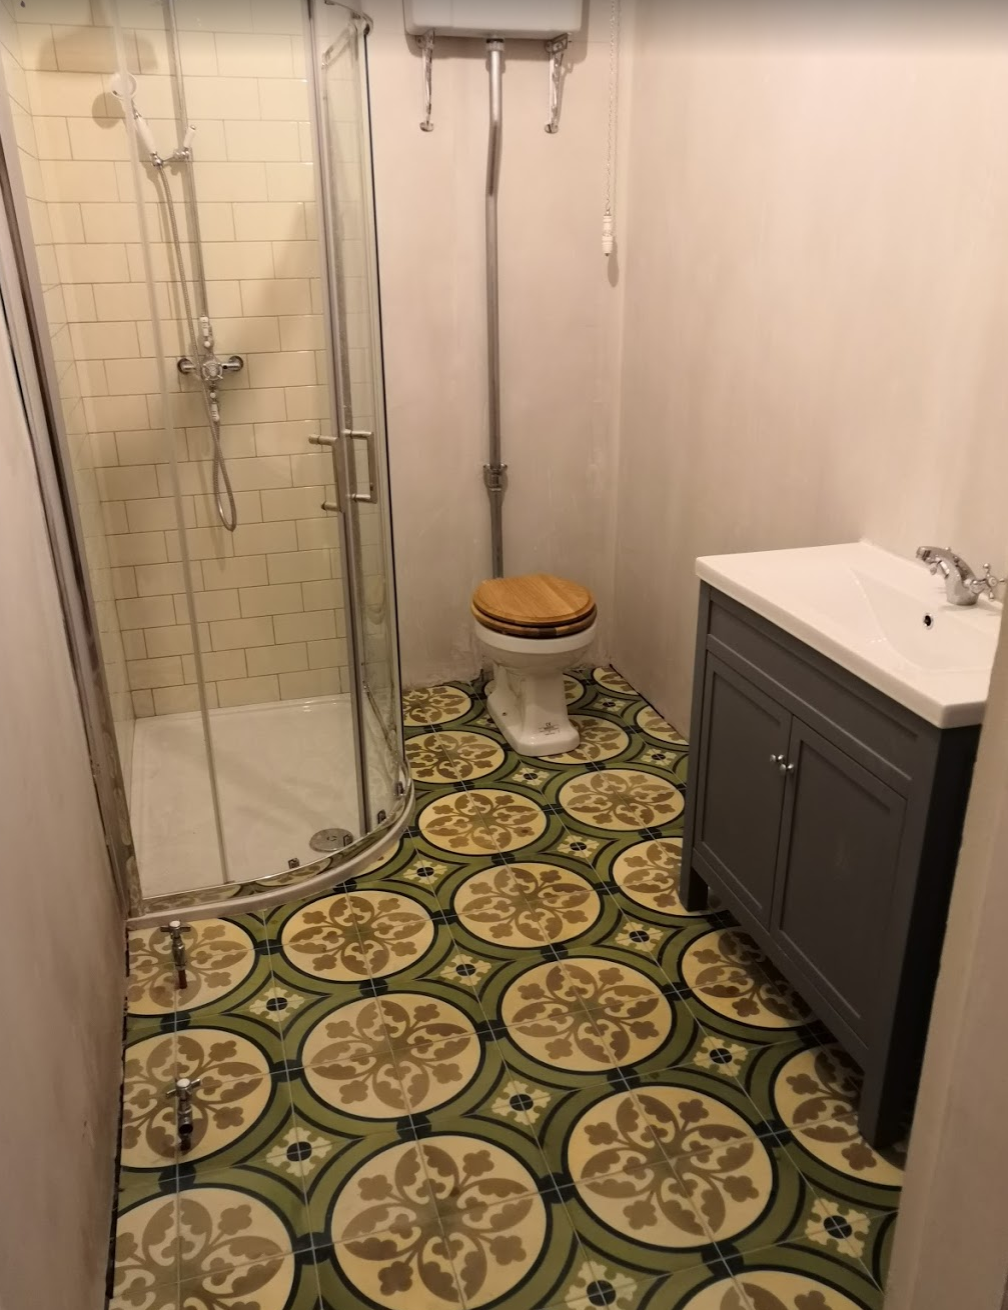
We had a shower and inside toilet again! I can not express how happy we were to have this luxury back again! We still had to decorate the bathroom and fit the radiator, but this was the major work done, we could sit a top our new throne and enjoy the fruits of our labour! I will follow up with how it looks shortly, but I can bet you can guess the style we are going for!
It all starts here!
See the journey so far by clicking on the links below.
Chapter 1
A brief history.
Chapter 2
Water works.
10% of the reward for this post goes back to @brofund account to grow the Man Cave initiative.

This is what I call a helluvajob ... And the style you and Mrs. Moon are going for is very much to my liking too.
Oh man, it was tough going, very hard to motivate yourself when its -2 C outside and you have to wash in a bucket!
Lots more to come!
WOW, @moonunit that was a massive DIY project. Brave souls are you two. I like the pattern you chose. Those are my favorite colors. Good luck, and much safety in finishing your project.
Just wait till you see the decoration and light fitting if they are your favourite colours!! You'll be very happy with them.
Will stay tuned.
Congratulations @moonunit! You have completed the following achievement on the Hive blockchain and have been rewarded with new badge(s) :
You can view your badges on your board And compare to others on the Ranking
If you no longer want to receive notifications, reply to this comment with the word
STOPTo support your work, I also upvoted your post!
Do not miss the last post from @hivebuzz:
So happy to see all this taking shape on here, that is some job indeed. I am well use to bucket washes, they really make you appreciate having a shower!!! Looking forward to seeing more and loving those tiles xxx
This was a real pain in the ass. Middle of winter was probably not the best time to do the job in hindsight but it needed to be done. We found a good bit of rotten timber, and a number of leaks so best to get that all sorted before we moved on to other parts of the house.
The tiles! Mrs Moon actually got a job in a tile and sanitary ware company so we get huge discounts on all that stuff. The tiles and suite for that room would have been in excess of 3.5k€ but we got them all for about1.2k€. Needles to say we are super happy about all that!