
¡Hola Chicos!
Tenía mucho tiempo que no hacía nada con tizas pasteles, en realidad cualquier cosa que tuviera que ver con el dibujo sobre papel.
Desde hace días me estaba rondando la idea de hacer algo y desempolvar esas tizas y crear algo, comenzando por un dibujo alusivo a la época que estamos pasando.
Si ven mi blog, la mayoría de las publicaciones desde hace un mes son con motivos navideños, así que esta no podía ser la excepción.
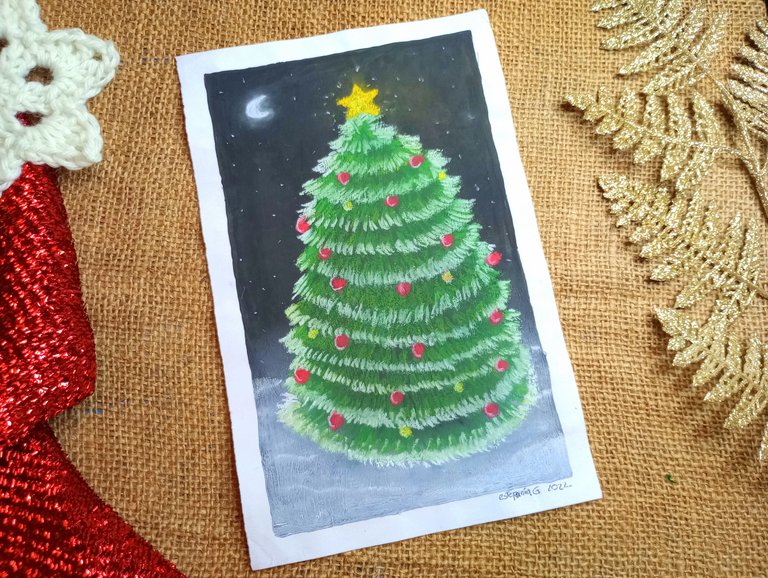
Hoy les comparto mi primera pintura con tizas pasteles, la cual disfruté mucho hacer y siento que quedó mejor de lo que esperaba, ya que al principio no tenía idea de como luciría porque, como les comenté, tengo mucho tiempo que no trabajo con este material.
No es lo mismo trabajar con pinturas que con tizas. Y es bien divertido llenarse los dedos de todos esos colores. Es algo que disfruto bastante mientras hago mi arte.
Ahora les voy a compartir como fue que cree este lindo arbolito. ♥
Hello Guys!
She hadn't done anything with pastels in a long time, actually anything that she had to do with drawing on paper.
For days the idea of doing something and dusting off those chalks and creating something, starting with a drawing alluding to the time we are going through, had been haunting me.
If you see my blog, most of the posts for a month have been for Christmas, so this could not be the exception.
Today I share with you my first painting with pastel chalks, which I really enjoyed doing and I feel that it turned out better than I expected, since at first I had no idea what it would look like because, as I told you, I haven't worked with this material for a long time. .
It is not the same to work with paints than with chalks. And it's really fun filling your fingers with all those colors. It's something I quite enjoy while doing my art.
Now I am going to share how it was that I created this beautiful little tree. ♥

Primero tomé una hoja de papel reciclado (esta rayada por el otro lado con tinta de impresora), hice un marco de un centímetro y luego pinté el centro con pintura al frío de color negro.
Por la pintura la hoja se arrugó un poco, obviamente ya sabía esto y tenía un plan. Coloqué la hoja sobre la mesa de planchar y pasé la plancha hasta aplanarla lo más que pude.
También saqué la vieja caja con tizas pasteles, las cuales estaban todas revueltas y se habían manchado unas con otras, pero esto no fue un impedimento, porque con solo hacer unos trazos sobre un trozo de papel bastaba para descubrir el tono exacto de cada una.
Estamos listos para comenzar.
First I took a sheet of recycled paper (it is lined on the other side with printer ink), I made a one centimeter frame and then I painted the center with black cold paint.
From the paint the sheet crumpled a bit, obviously he already knew this and had a plan. I placed the sheet on the ironing board and passed the iron until it was as flat as I could.
I also took out the old box with pastel chalks, which were all jumbled up and had smeared each other, but this was not an impediment, because just making a few lines on a piece of paper was enough to discover the exact tone of each one.
We are ready to start.
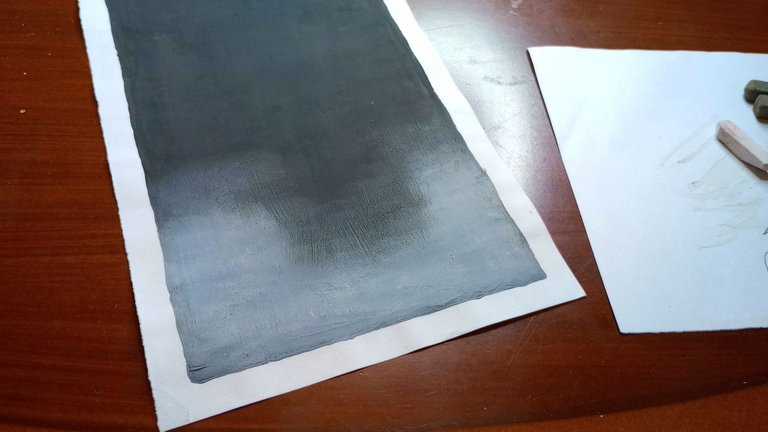
Comencé agregando tiza blanca en la parte inferior. Luego la difuminé con los dedos para que se viera suave como la nieve.
I started by adding white chalk to the bottom. Then I blended it out with my fingers to make it look smooth as snow.
En esta parte me salté algunos pasos porque estaba emocionada y con los dedos verdes. 😂
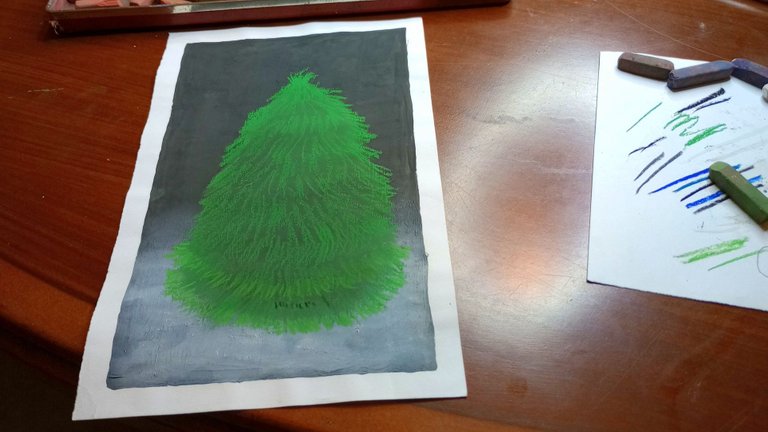
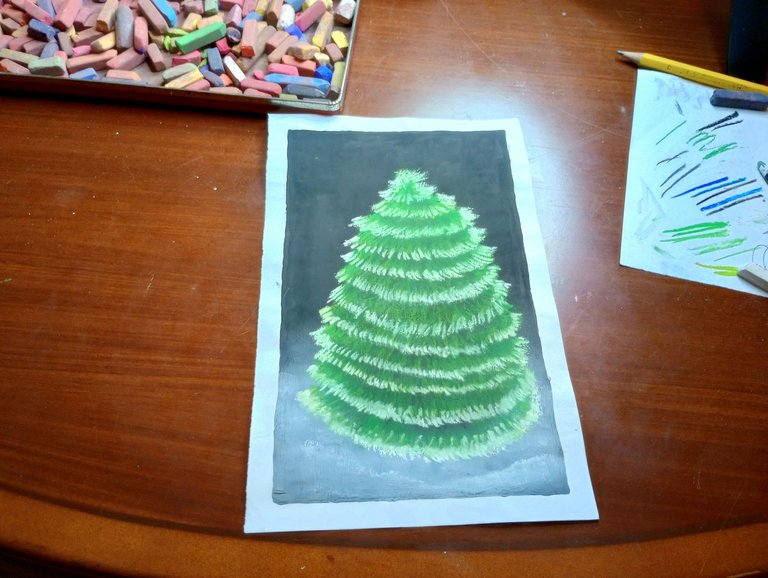
Les cuento: tracé primero muchas capas, yendo de grueso para la base a fino para la copa del árbol con la tiza verde oscuro. Hice lo mismo con la tiza negra pero haciendo menos trazos.
Difuminé todo el interior del árbol con el dedo y luego tracé nuevamente las líneas, esta vez solo serían las verdes. Así logré la profundidad y frondosidad del árbol.
In this part I skipped a few steps because I was excited and green fingers. 😂
Let me tell you: I traced many layers first, going from thick for the base to thin for the top of the tree with the dark green chalk. I did the same with the black chalk but making fewer lines.
I blurred all the inside of the tree with my finger and then I traced the lines again, this time it would only be the green ones. This is how I achieved the depth and leafiness of the tree.
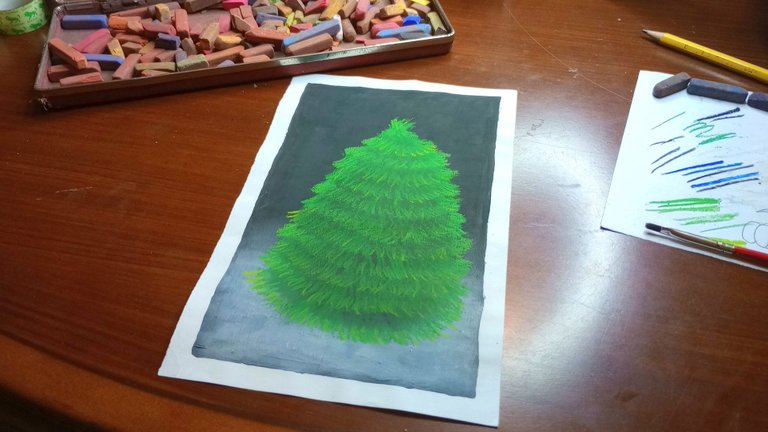
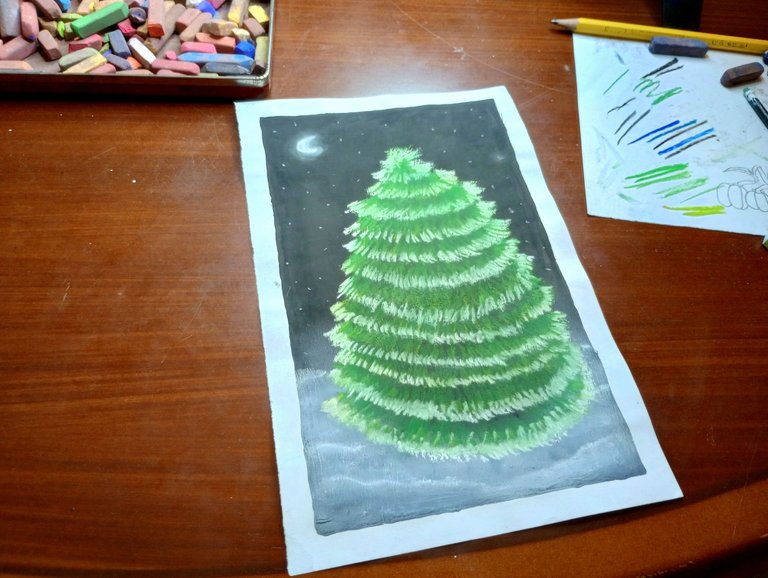
Con dos tonos de verde más claro hice las luces en cada una de las capas. Ya el árbol va tomando mucha más forma.
With two shades of lighter green I made the highlights in each of the layers. The tree is already taking much more shape.
Ahora viene la nieve. Con la tiza blanca pinté los extremos de cada una de las capas. También hice la luna, algunas estrellas y agregué detalles a la nieve del suelo.
Now comes the snow. With the white chalk I painted the ends of each of the layers. I also did the moon, some stars and added detail to the snow on the ground.
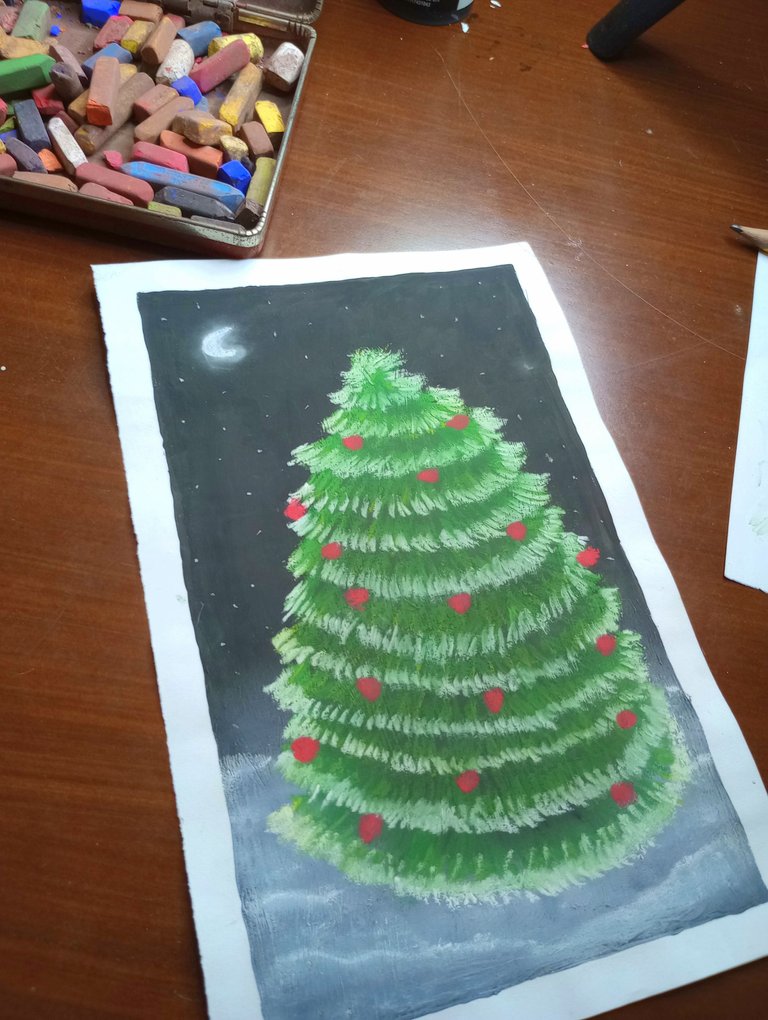
Con el color rojo hice algunas bambalinas distribuidas en todo el árbol y con el amarillo hice otras y también la estrella en la copa.
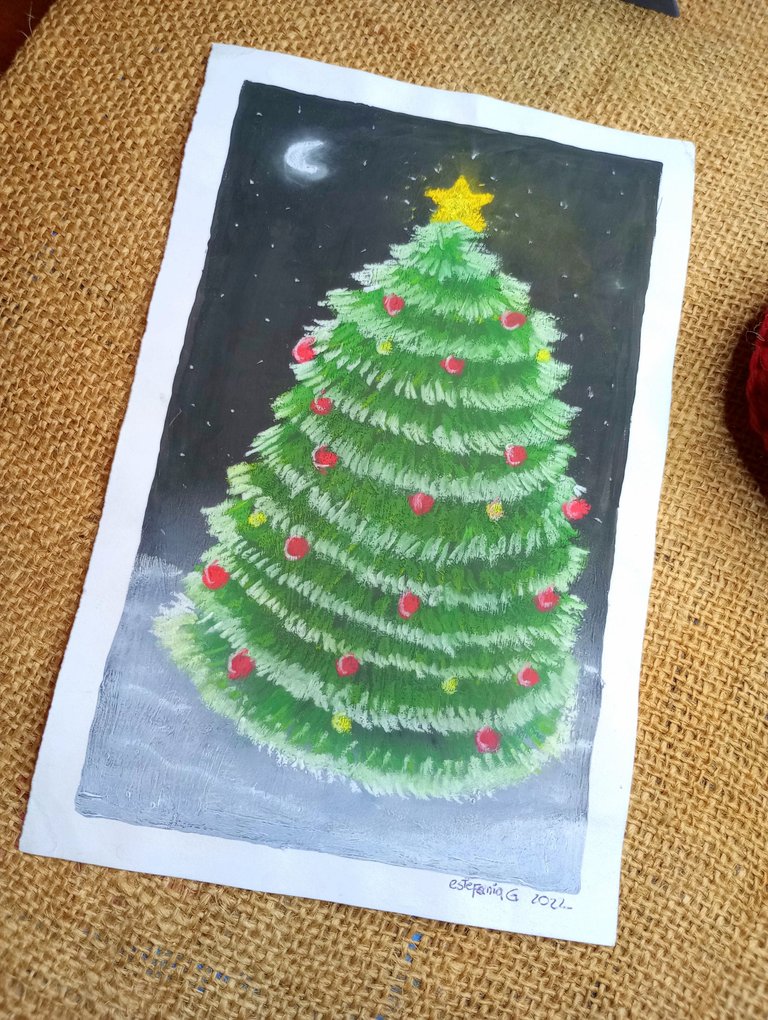
Como último detalle hice luces en cada una de las bambalinas con la tiza blanca.
Así quedó lista mi pintura con tizas pasteles de un árbol navideño en un escenario nocturno.
Espero les haya gustado tanto como a mí. ♥

With the red color I made some scenes distributed throughout the tree and with the yellow I made others and also the star on the top.
As a last detail I made lights on each of the scenes with white chalk.
This is how my pastel chalk painting of a Christmas tree in a night setting was ready.
I hope you liked it as much as I did. ♥

Espero haya sido de tu agrado y provecho.
Un gran abrazo a todos, y nos leemos en un próximo post
• Lakrearte en Hive •
Att: Estefania Garcia ♥

Imágenes y separadores de mi autoría
Fotografías tomadas con un Moto G31
Texto traducido en Google Translate v.14.31