.jpeg)

Español
Hola querida familia de Hive ❤️Este lindo día traigo para ustedes un divertido y muy útil tutorial dónde les mostrare como elaborar una increíble y original carátula para cuadernos, en este regreso a clases virtual, para esto, pueden utilizar una agenda que no estén usando y transformarla en un increíble cuaderno para anotar sus clases, o simplemente un cuaderno normal, pero siempre tengan presente reciclar cosas que tengan sin uso en casa, será totalmente más rentable, y por supuesto muy divertido.
English
Hello dear Hive family ❤️ This beautiful day I bring you a fun and very useful tutorial where I will show you how to make an incredible and original cover for notebooks, in this virtual back to school, for this, you can use an agenda that you are not using and transform it In an incredible notebook to record your classes, or just a normal notebook, but always keep in mind recycling things that you have unused at home, it will be totally more profitable, and of course a lot of fun.
¿Qué están esperando?
Utilizar estos hermosos y económicos materiales para transformarlos en una hermosa caratula para cuadernos es una idea muy original y económica para darle un toque de personalidad y creatividad a nuestras herramientas de estudios. Antes de comenzar no olvidemos lavarnos nuestras manos.
What are they waiting for?
Using these beautiful and inexpensive materials to transform them into a beautiful cover for notebooks is a very original and inexpensive idea to give a touch of personality and creativity to our study tools. Before we start, let's not forget to wash our hands.

[Materiales | Materials]
Para hacer esta hermosa caratula necesitaremos:
- Moldes.
- Foami o goma eva.
- Cuaderno o agenda en desuso.
- Plancha para cabello.
- Pinturas.
- Pinceles.
- Marcador.
- Tijera.
- Pegamento o silicón liquido.
To make this beautiful cover we will need:
- Molds.
- Foamy or EVa foam.
- Unused notebook or diary.
- Hair straightener.
- Paintings.
- Brushes.
- Bookmark.
- Scissors.
- Glue or liquid silicone.
Procedimiento (paso a paso)
Process (step by step)
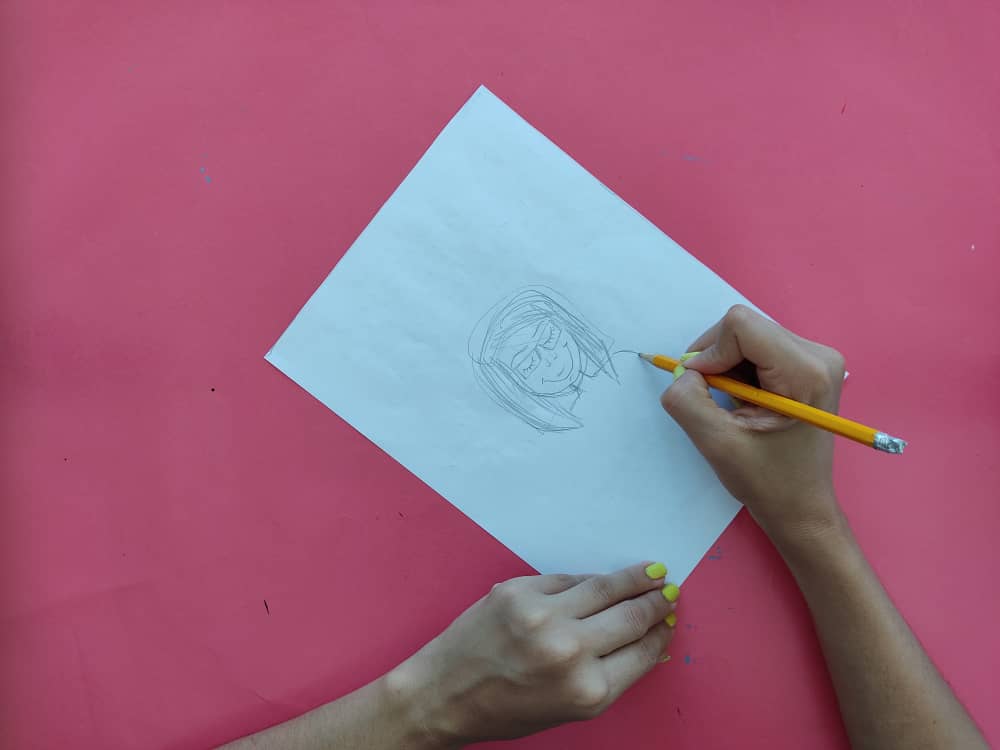
Primero que todo hacemos el dibujo o diseño que llevará la carátula de nuestro cuaderno, en este caso decidí elaborar a una maestra leyendo un libro sentada en su escritorio, también agregué pequeños detalles que le dan un excelente toque, como lo son el teléfono, carpeta, un portalápices, y una planta, es muy sencillo y fácil, solo hay que dejar volar nuestra imaginación y creatividad.
First of all, we make the drawing or design that will take the cover of our notebook, in this case, I decided to make a teacher reading a book sitting at her desk, I also added small details that give it an excellent touch, such as the telephone, folder, a pencil holder, and a plant, it is very simple and easy, we just have to let our imagination and creativity fly.
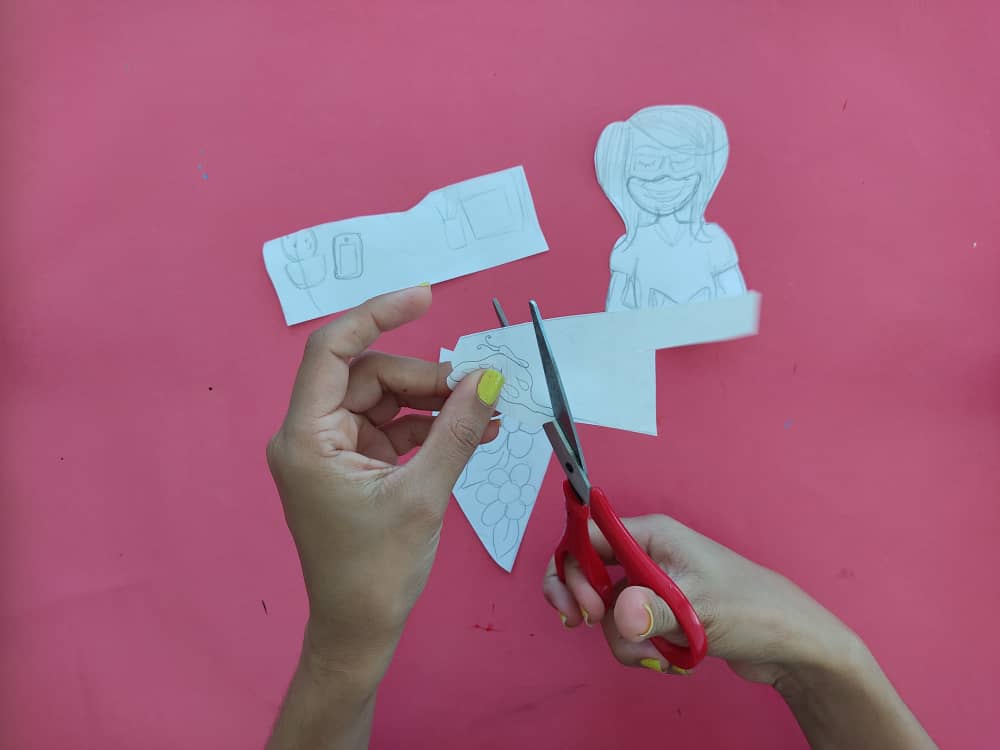
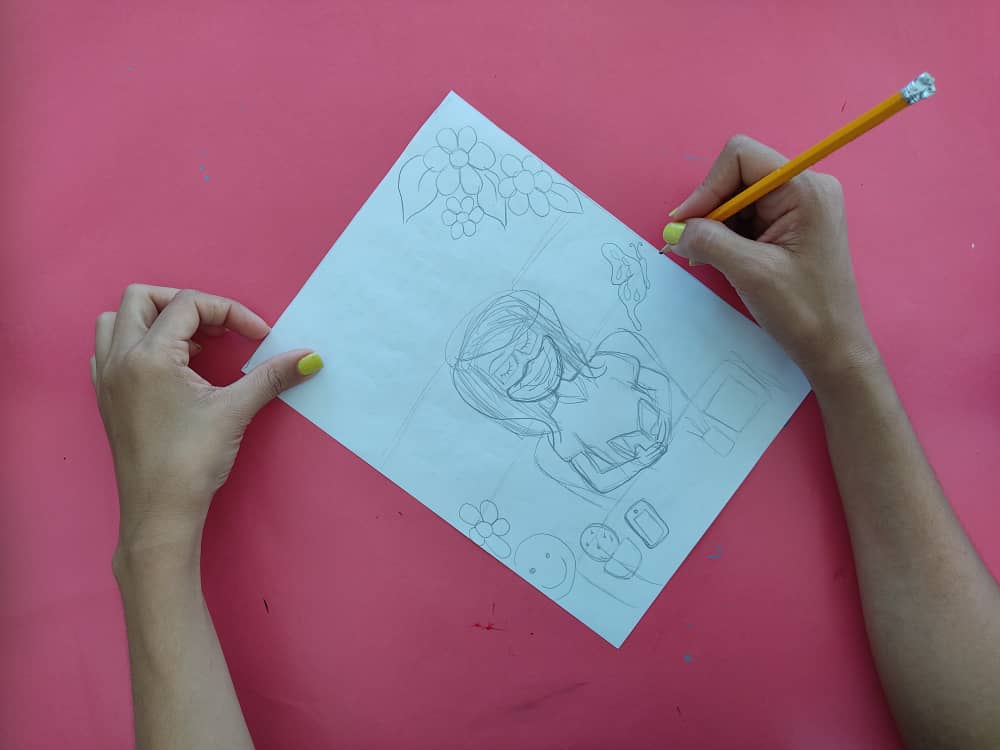
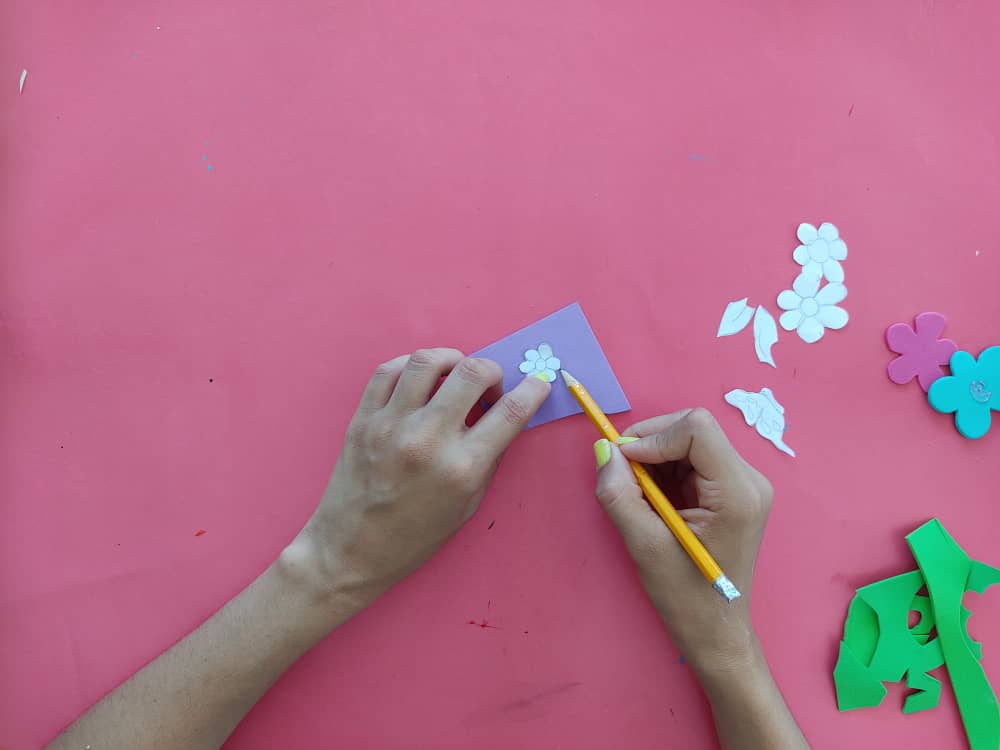
Luego de tener nuestro diseño finalizado, comenzamos a recortar las pequeñas piezas, separando el cabello de la maestra, la cabeza, ropa, luego las detalles de mesa, las flores y sus hojas decorarán un poco más nuestro lindo cuaderno.
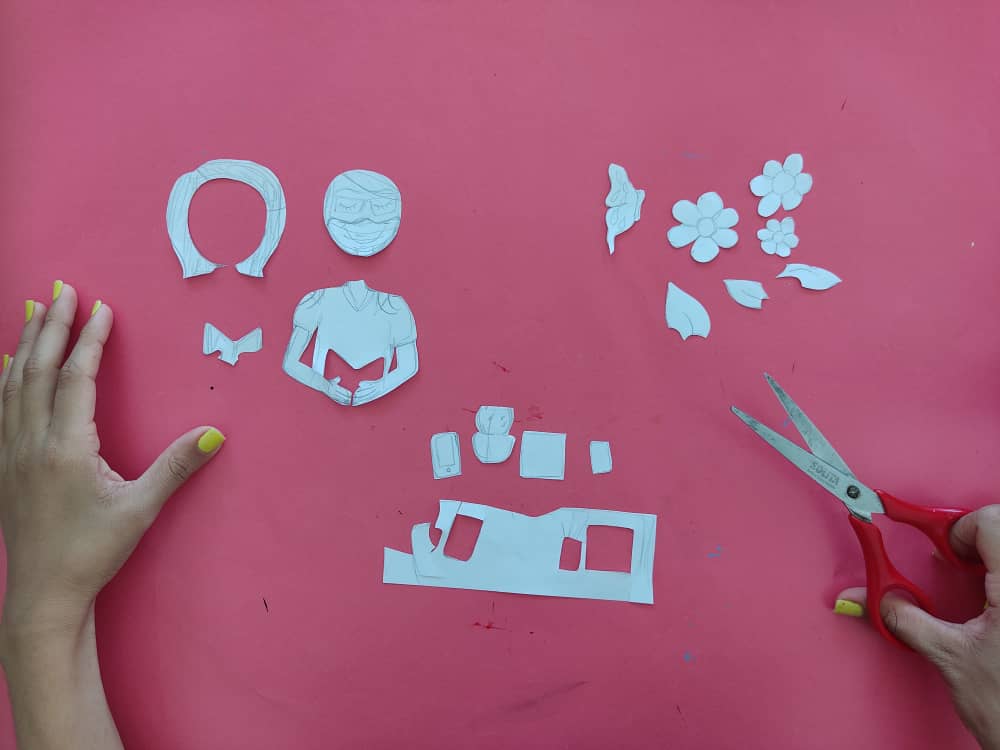
After having our finished design, we began to cut out the small pieces, separating the teacher's hair, the head, clothes, then the table details, the flowers, and their leaves will decorate our cute notebook a little more.
Ahora, transferimos las piezas obtenidas a los distintos trozos de foami, de los colores de nuestra preferencia, comenzando con las piezas de la maestra, debemos ser muy cuidadosos ya que son figuras muy pequeñas.
Now, we transfer the pieces obtained to the different pieces of foam, of the colors of our preference, starting with the teacher's pieces, we must be very careful since they are very small figures.
Seguidamente, transferimos las piezas del escritorio y los delicados accesorios, que le darán un toque muy original a este
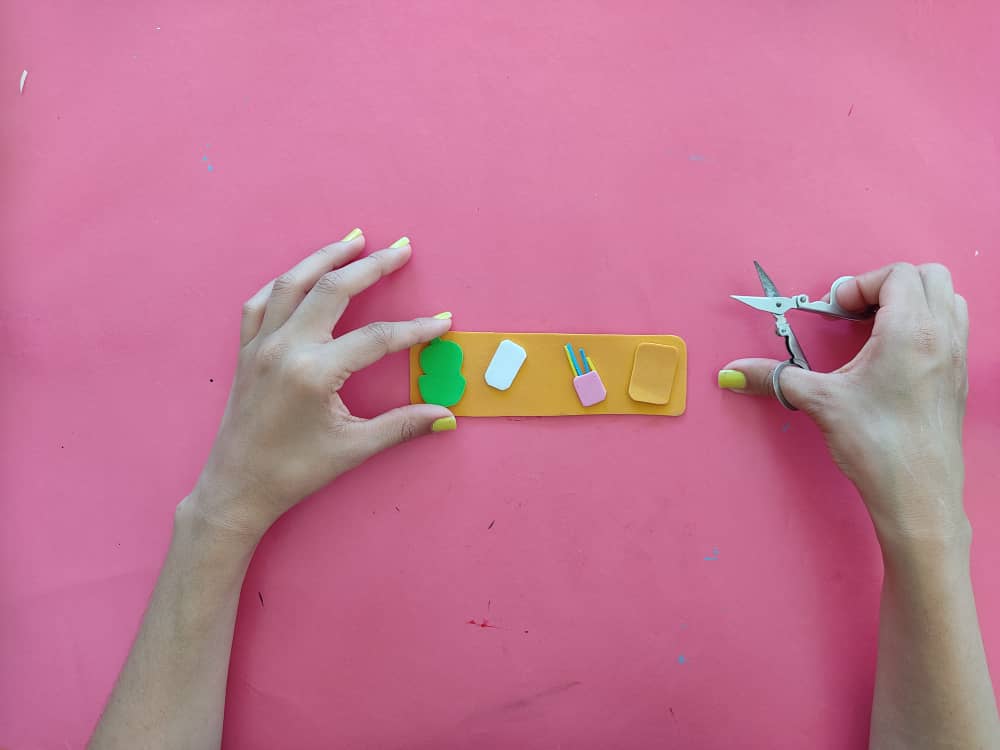
Next, we transfer the pieces of the desk and the delicate accessories, which will give a very original touch to this.
Luego, transferimos las flores, hojas, sus lindos centros y la mariposa, que le darán ese toque especial esta linda obra llena de hermosos colores.
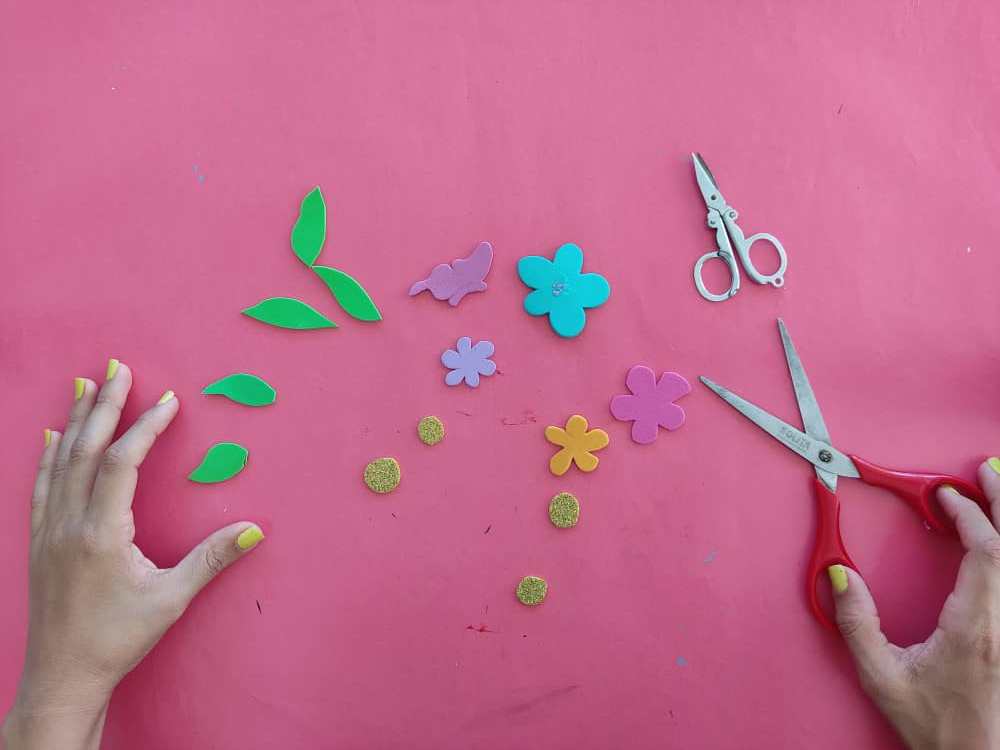
Then, we transfer the flowers, leaves, their beautiful centers, and the butterfly, which will give that special touch to this beautiful work full of beautiful colors.
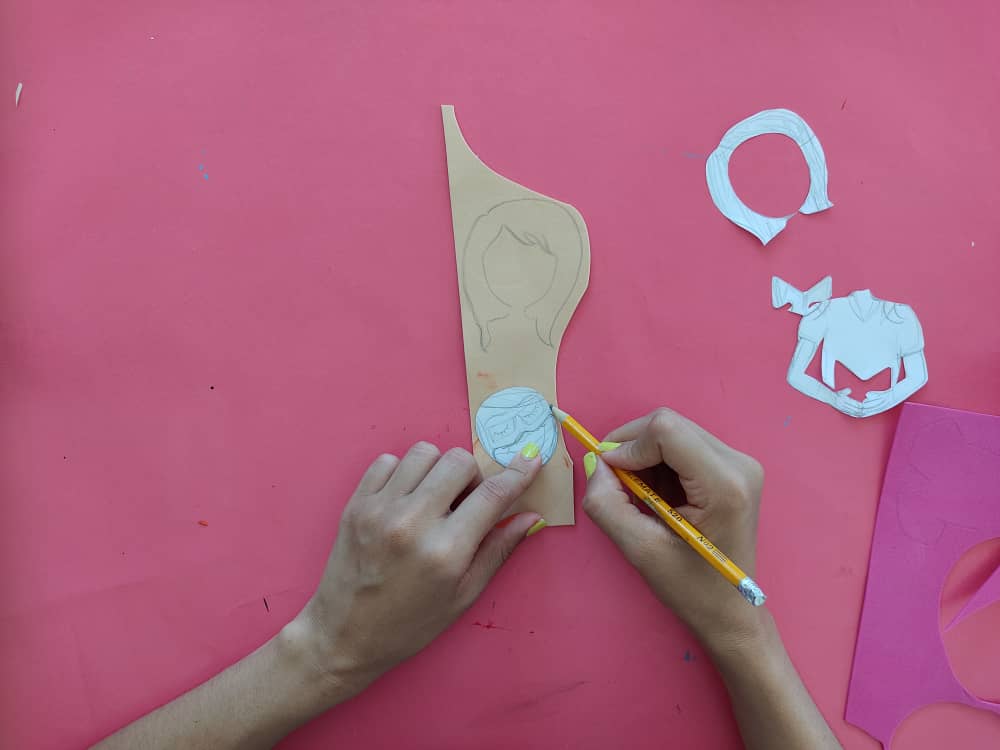
Ahora, comenzamos a darle hermosos toques de pintura a estas piezas llenándolas de vida y alegría, comenzamos pintando la cara de la maestra, su ropa y todas las piezas que la conforman, luego no olvidemos marcar sus pequeños bordes con el marcador negro de punta fina.
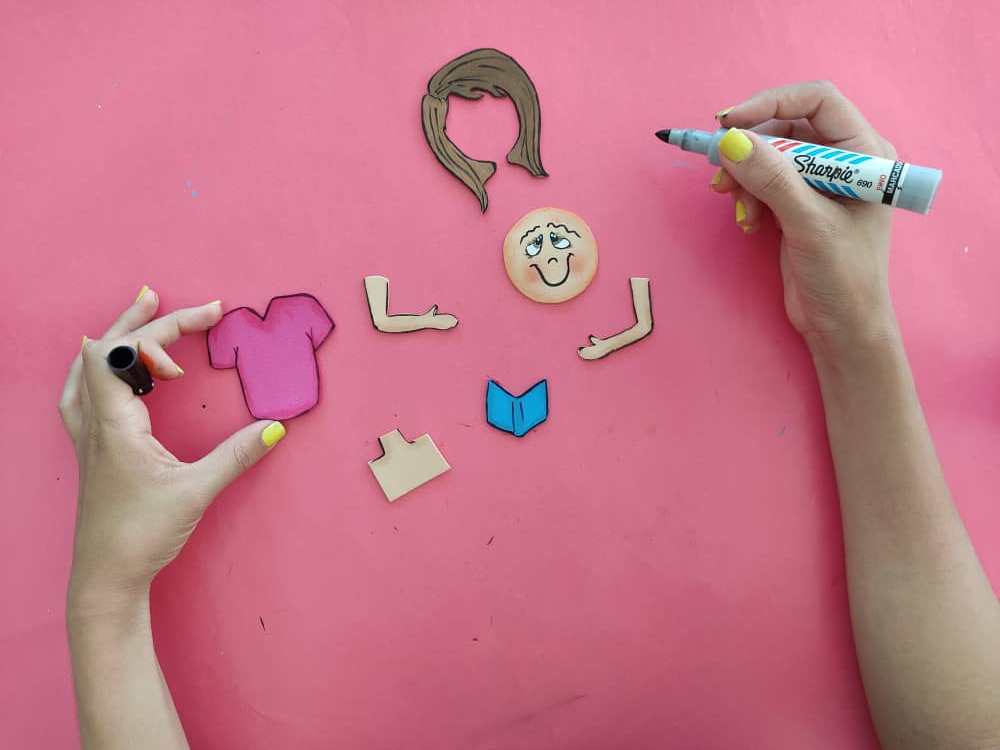
Now, we begin to give these pieces beautiful touches of paint filling them with life and joy, we begin by painting the face of the teacher, her clothes, and all the pieces that make her up, then let's not forget to mark their small edges with the black fine-tipped marker.
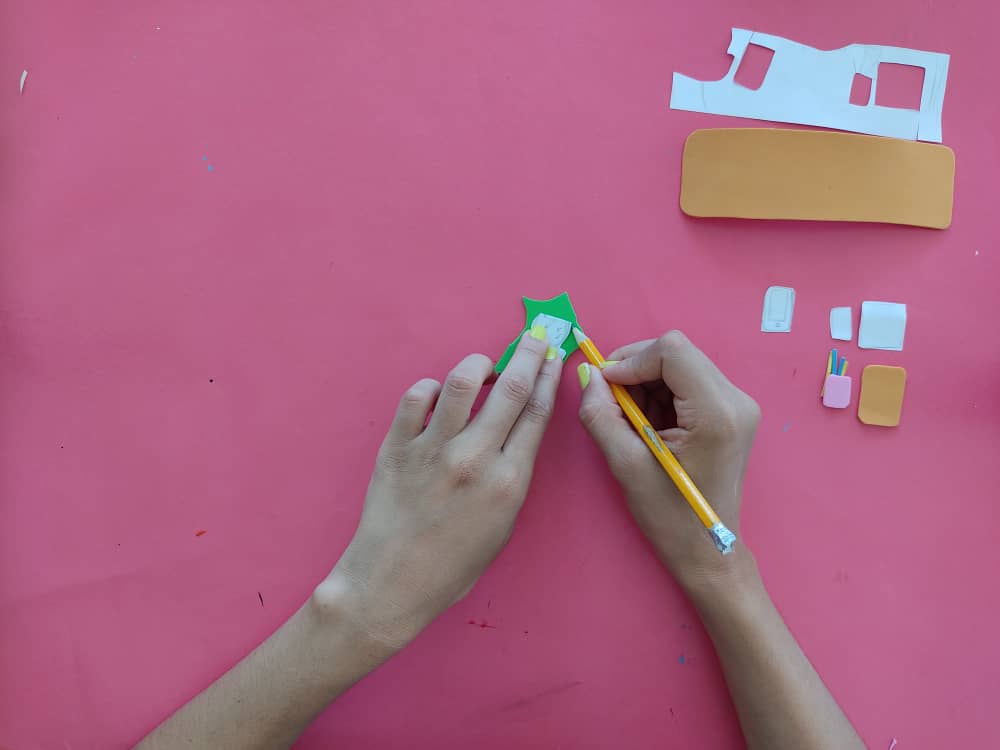
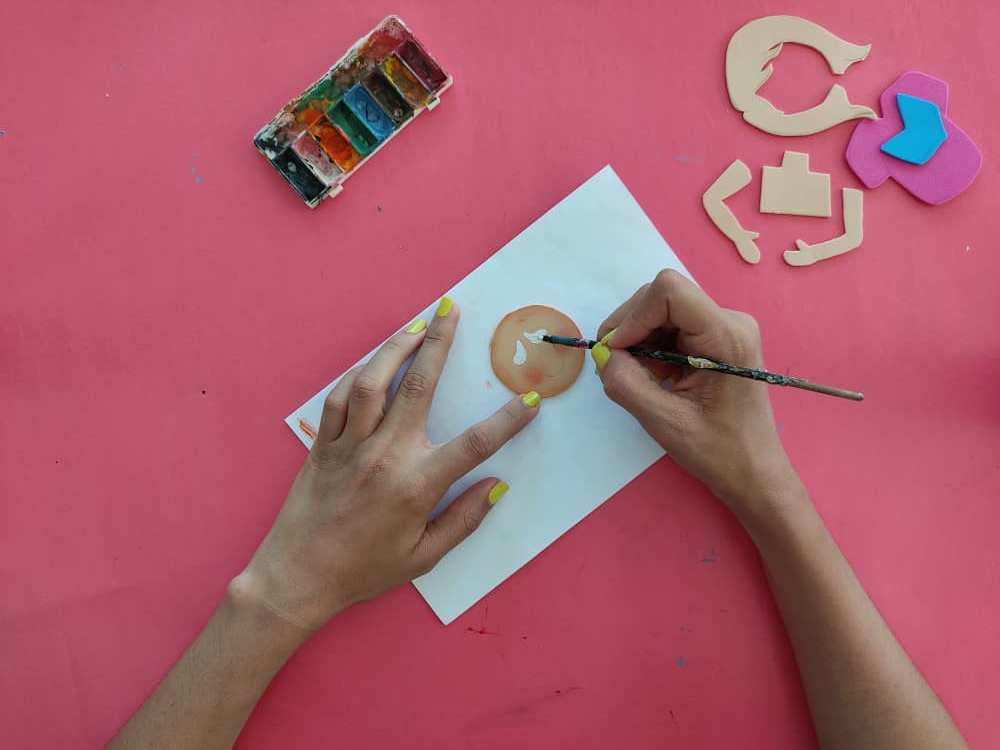
Luego, pintamos la mesa y sus accesorios, el cactus, el teléfono el portalápices y la carpeta, marcando sus bordes de negro para que todo luzca muy real, no dejemos de tener en cuenta que todo debe hacerse delicadamente para obtener los resultados deseados.
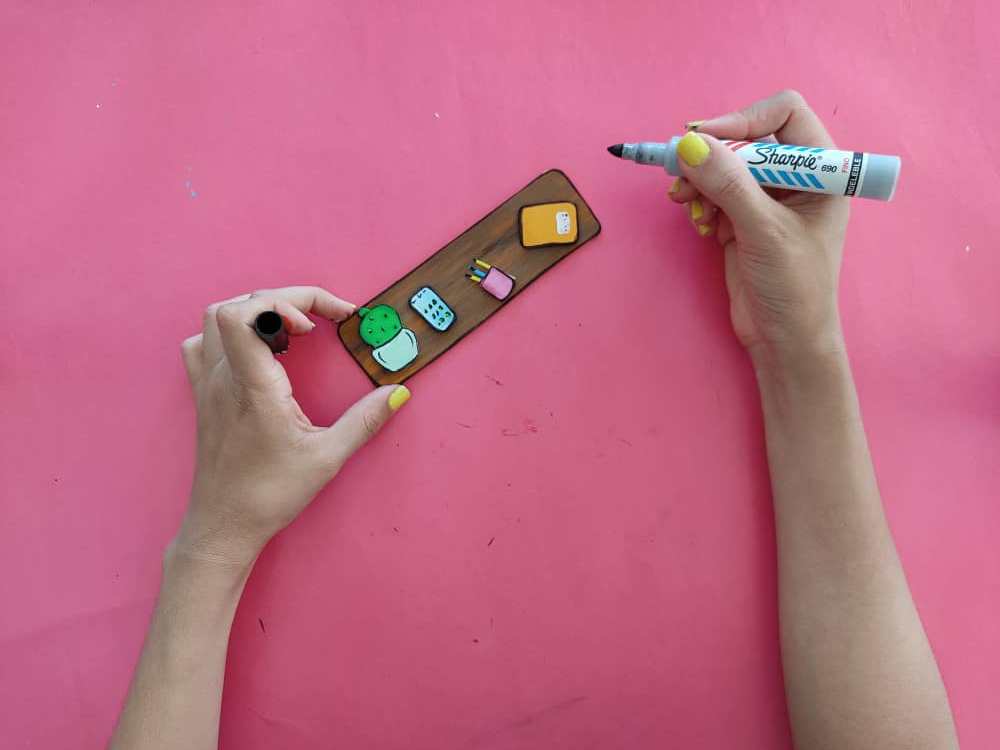
Then, we paint the table and its accessories, the cactus, the phone, the pencil holder, and the folder, marking their edges in black so that everything looks very real, we must bear in mind that everything must be done delicately to obtain the desired results.

Seguidamente hacemos lindos detalles a la mariposa, las hojas y flores, las sombreamos con un tono más oscuro que el color del foamy en las distintas piezas y marcamos sus bordes.
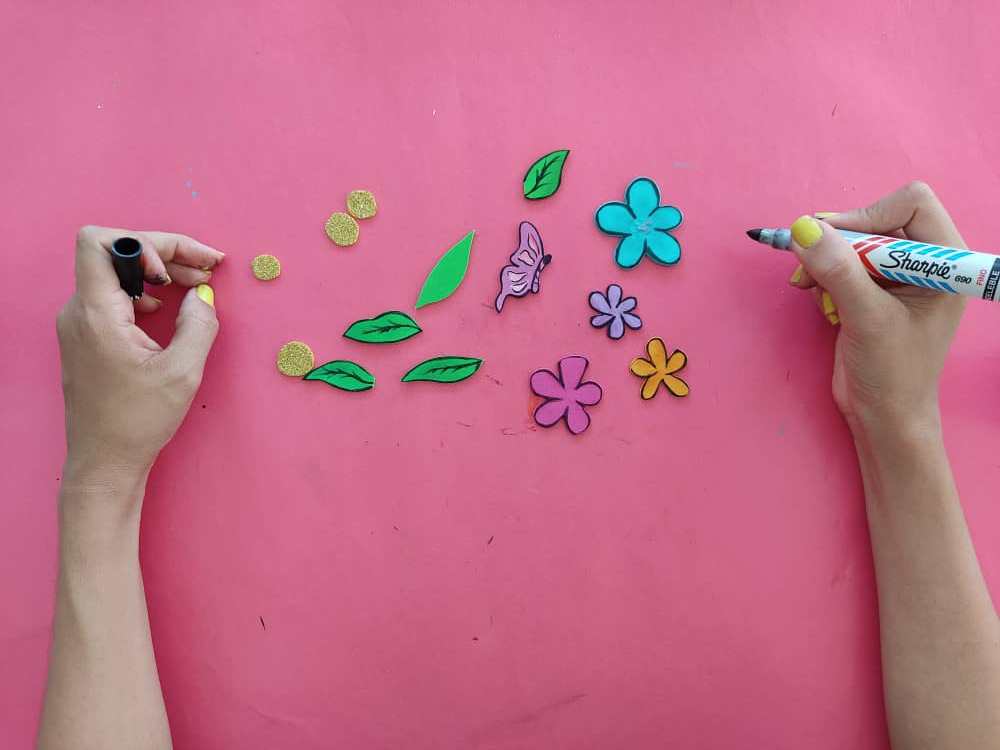
Next, we make beautiful details to the butterfly, the leaves, and flowers, we shade them with a darker tone than the color of the foamy in the different pieces and we mark their edges.
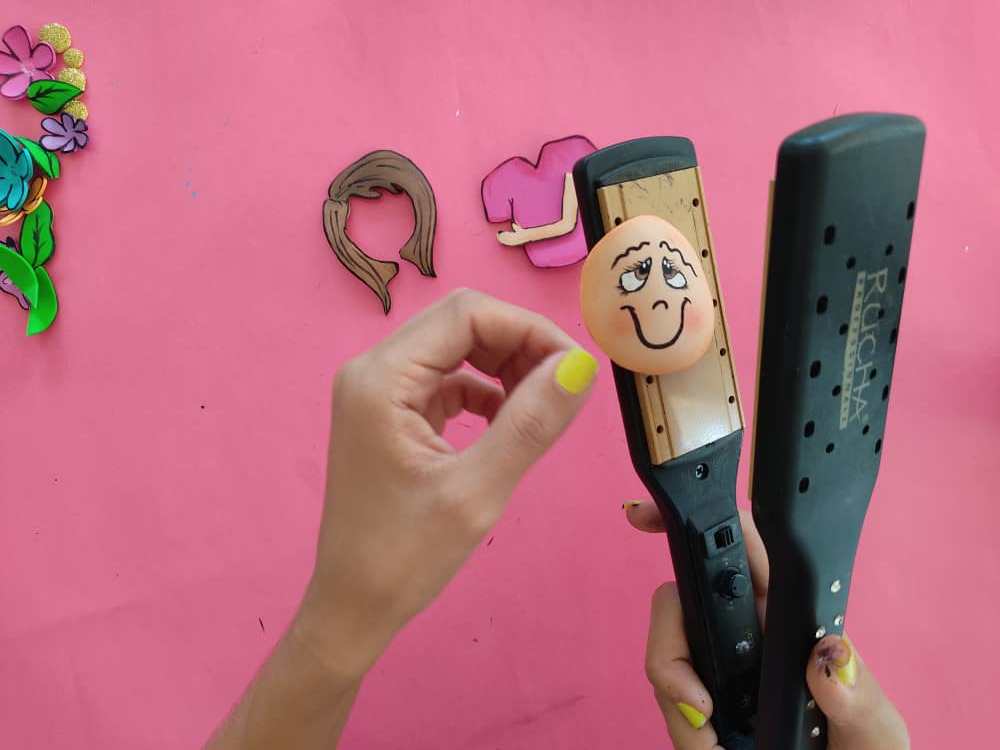
Ahora, aplicamos la técnica de termoformado utilizando la plancha para cabello, y así, dar un poco de volumen a nuestras piezas, en especial la cara de la maestra, el cabello, el libro, el cactus, las flores y las hojas. Entonces sencillamente colocamos las piezas a las que queremos darle algo de volumen por unos segundos sobre la plancha y listo. Retiramos cuando tengan el volumen que deseamos.
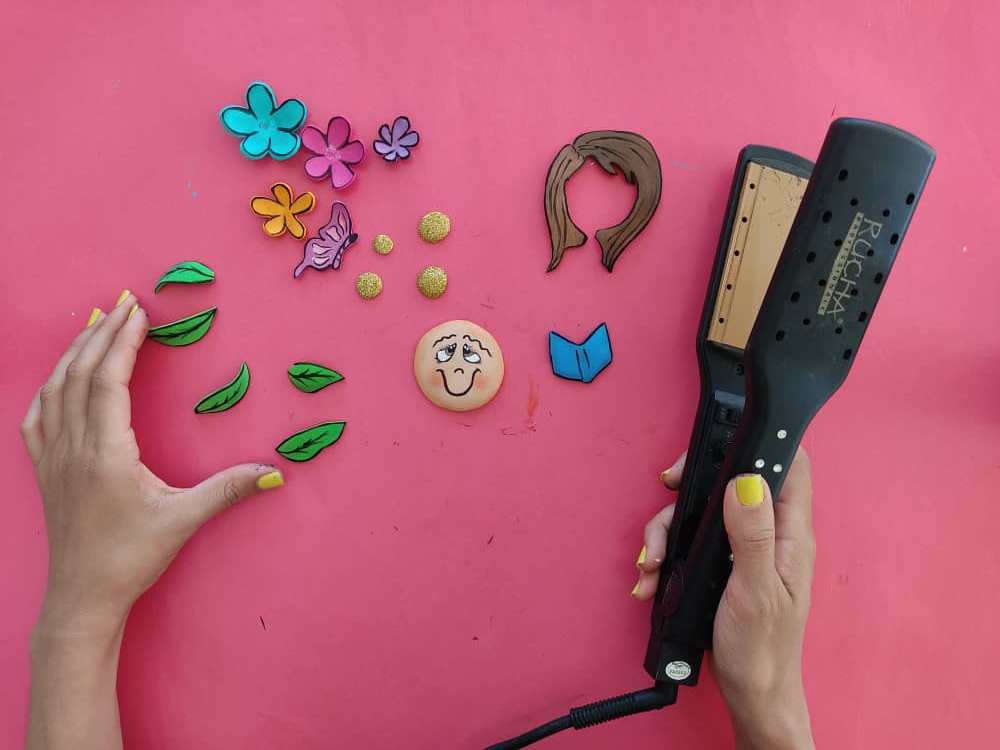
Now, we apply the thermoforming technique using the hair straightener, and thus, give a little volume to our pieces, especially the teacher's face, the hair, the book, the cactus, the flowers, and the leaves. Then we simply place the pieces that we want to give some volume to for a few seconds on the plate and that's it. We withdraw when they have the volume we want.
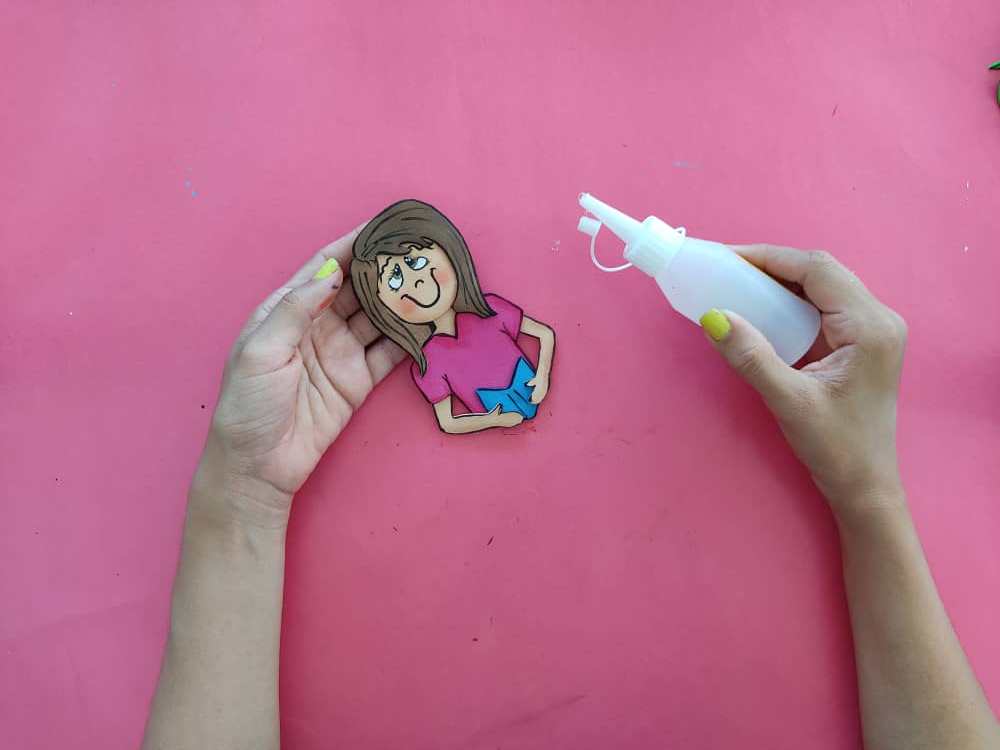
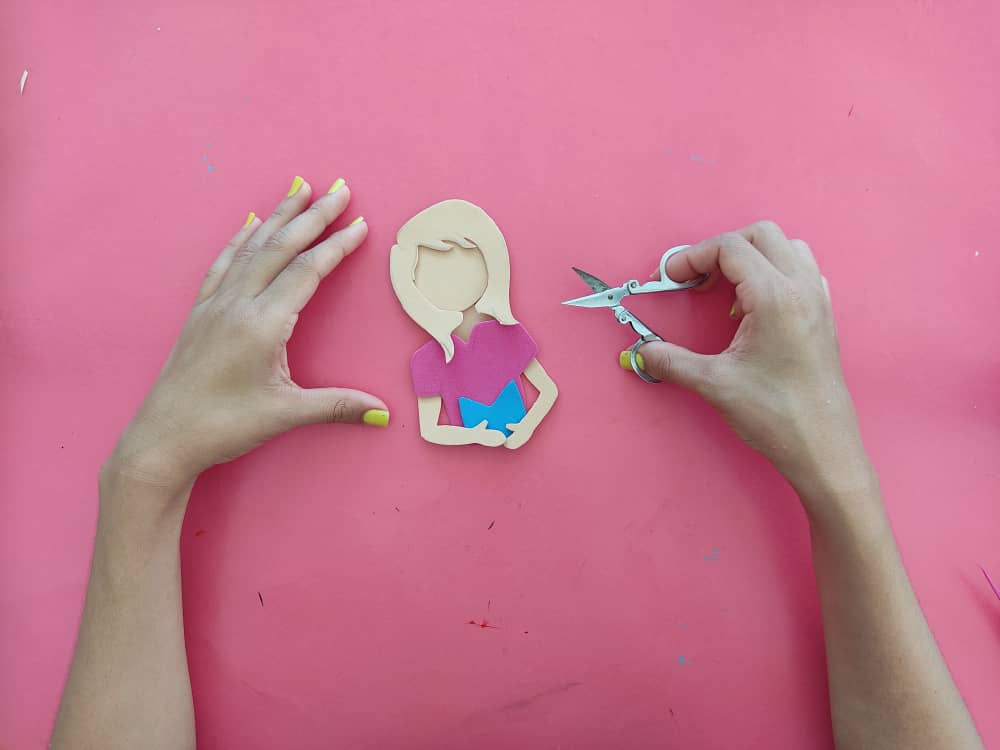
Luego, armamos las piezas que hemos elaborado utilizando pegamento o silicón líquido, comenzamos pegando la maestra, su cabello sobre su cara, el cuello, la ropa y así sucesivamente, armamos las flores, pegando los círculos en el centro de estás, y por último pegamos los accesorios del escritorio sobre este y listo.
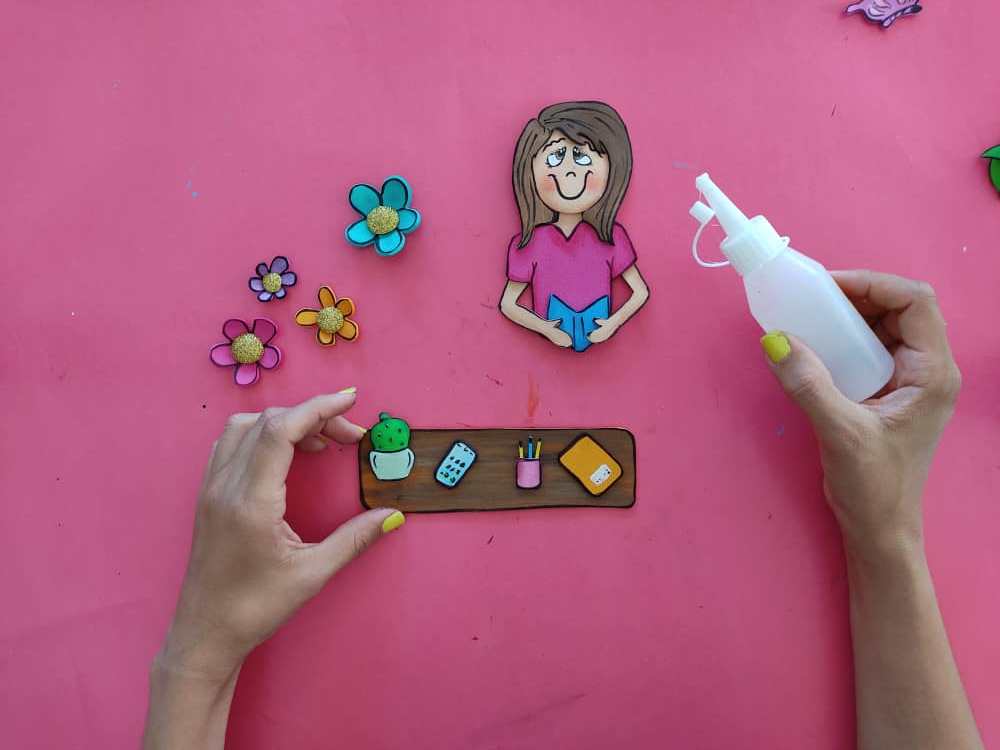
Then, we assemble the pieces that we have made using glue or liquid silicone, we begin by gluing the teacher, her hair on her face, neck, clothes, and so on, we assemble the flowers, gluing the circles in the center of these, and finally, We glue the desk accessories on it and that's it.
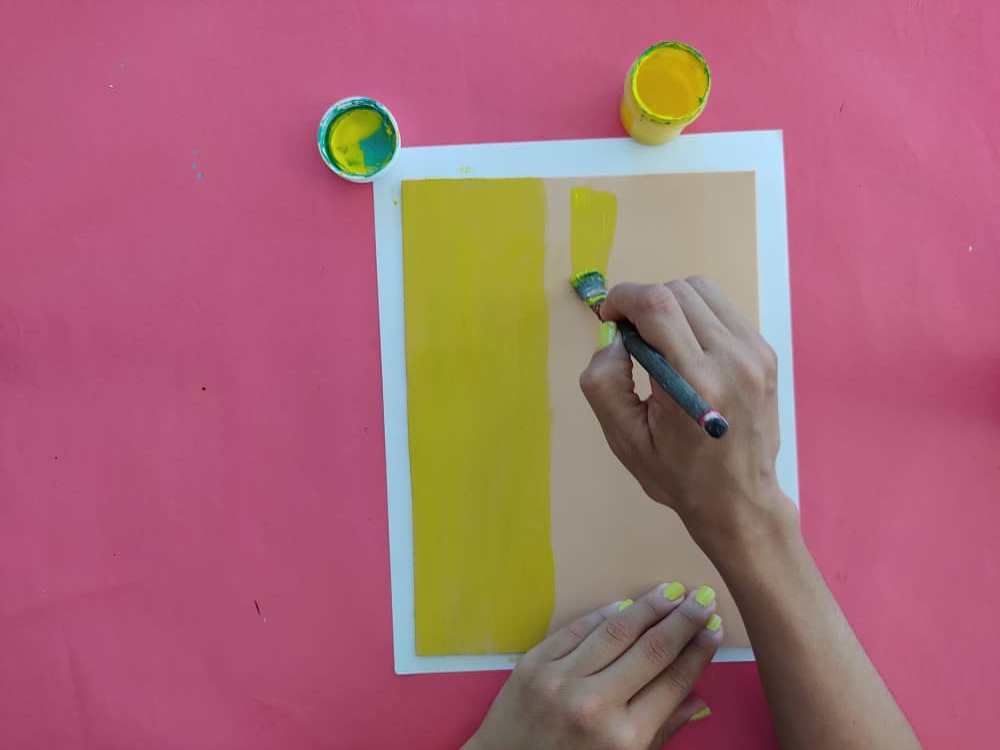
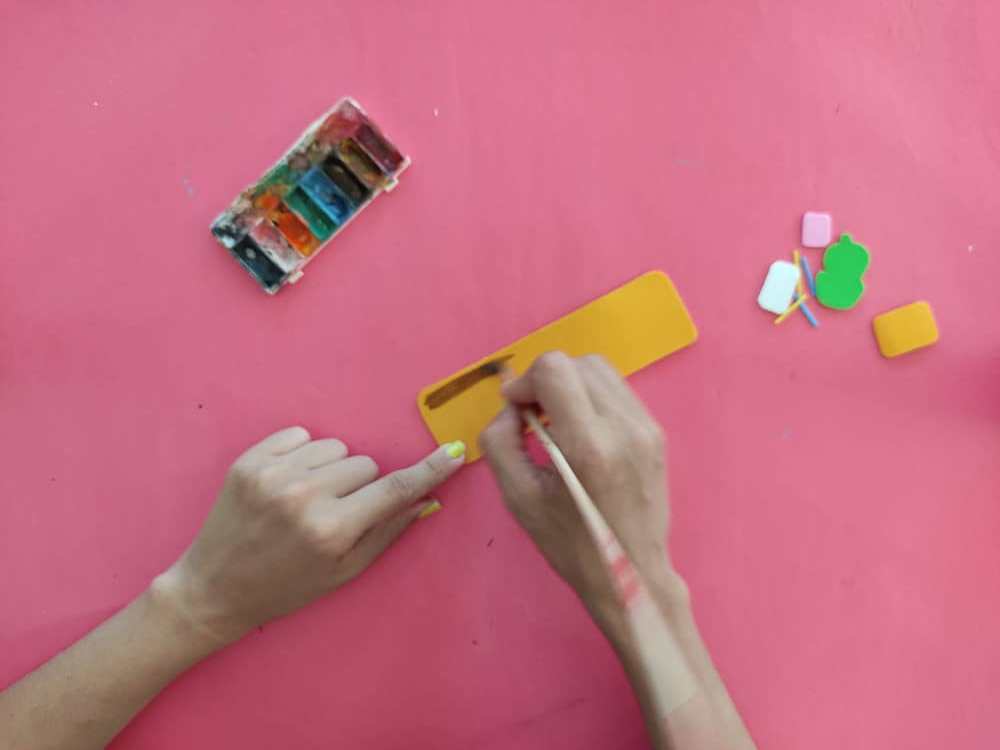
Ahora, elaboramos una base para la carátula del cuaderno con una lámina de foami de 20cm de largo por 17cm, y la pintamos de un hermoso color, en este caso decidí pintarla de amarillo, y dejamos secar por unos segundos.
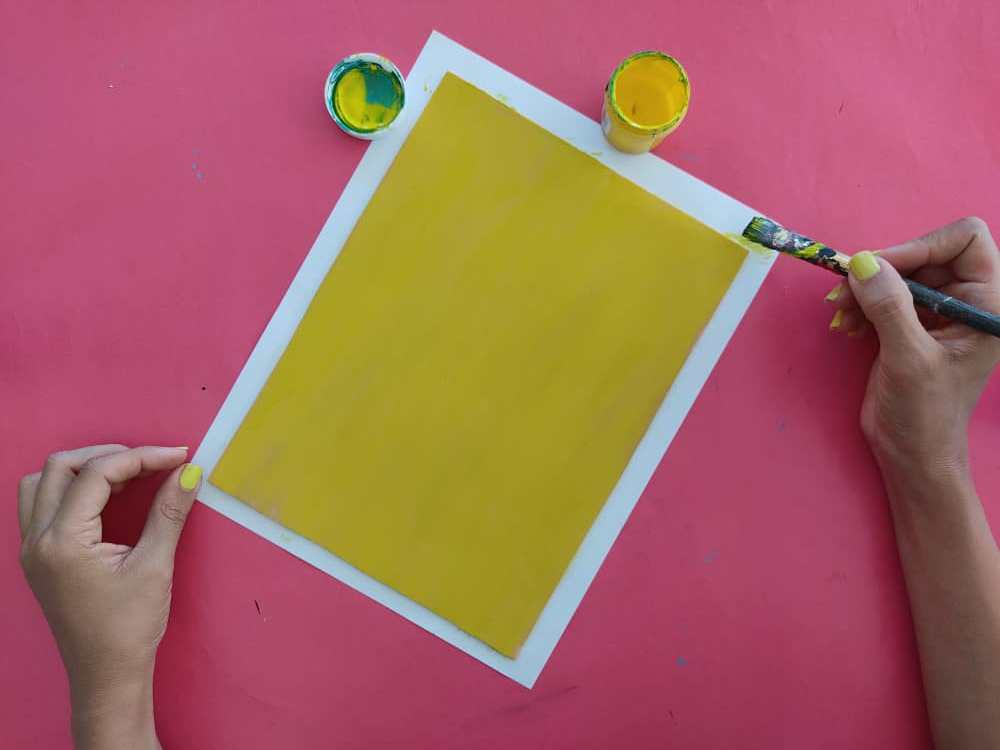
Now, we made a base for the cover of the notebook with a sheet of foamy 20cm long by 17cm, and we painted it a beautiful color, in this case, I decided to paint it yellow, and let it dry for a few seconds.
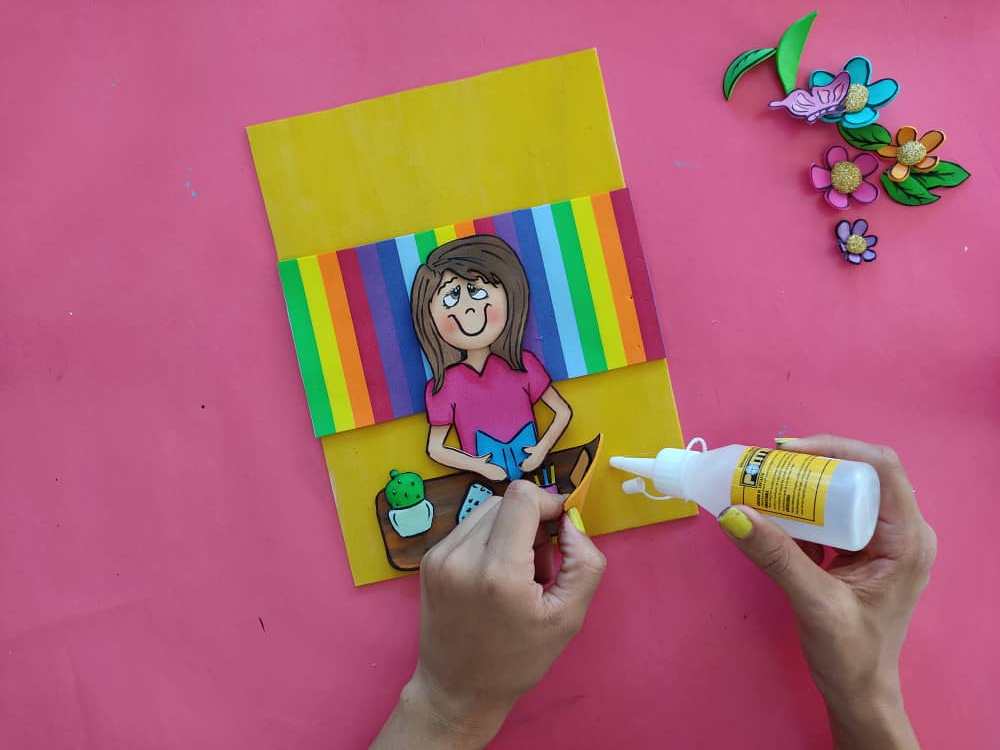
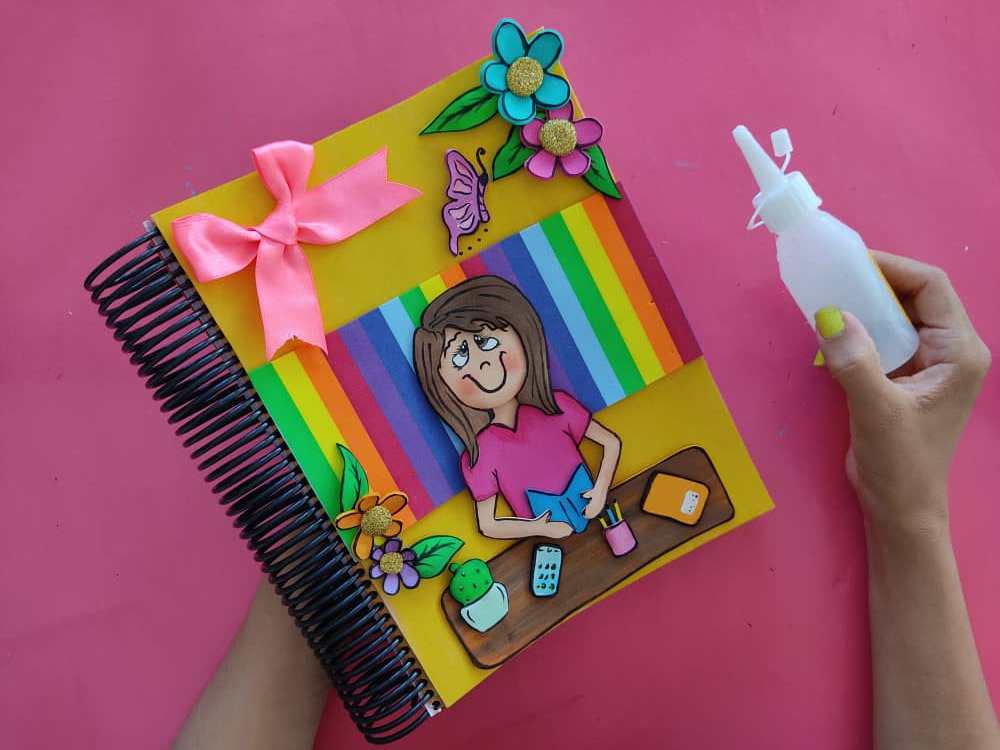
Seguidamente, pegamos las hermosa figuras que hemos armado a nuestra base ya seca, utilizando silicón líquido, en este caso decidí pegar un trozo de foamy en el medio de la agenda, para darle un hermoso y colorido toque, luego pegamos el resto de las piezas.
Next, we glue the beautiful figures that we have assembled to our already dry base, using liquid silicone, in this case, I decided to glue a piece of foamy in the middle of the agenda, to give it a beautiful and colorful touch, then we glued the rest of the pieces.
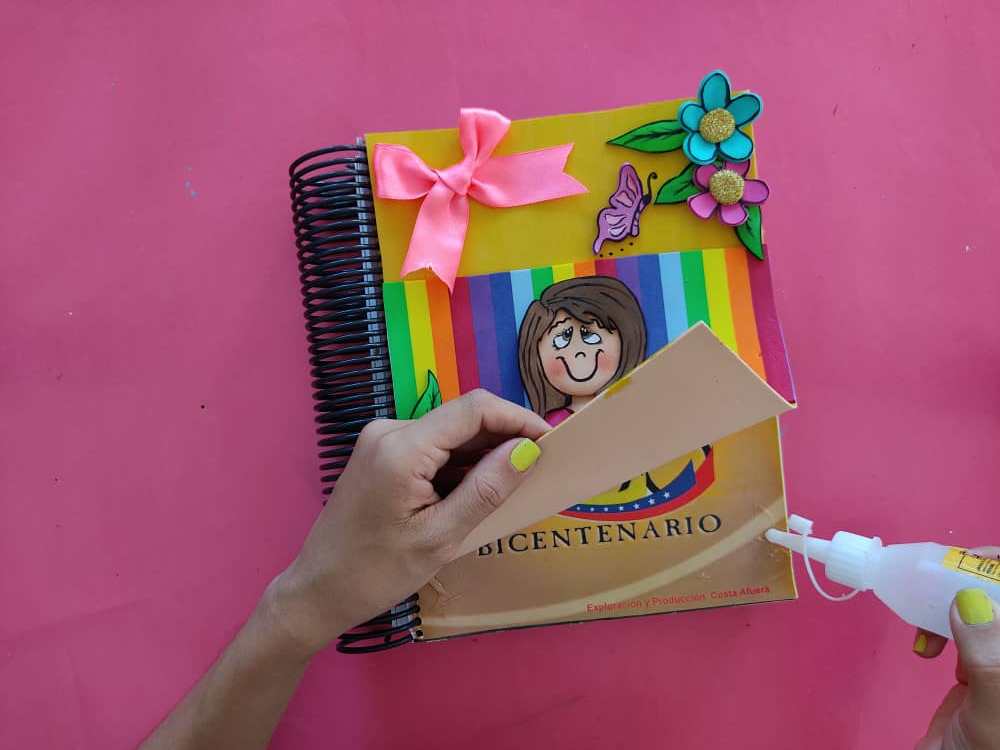
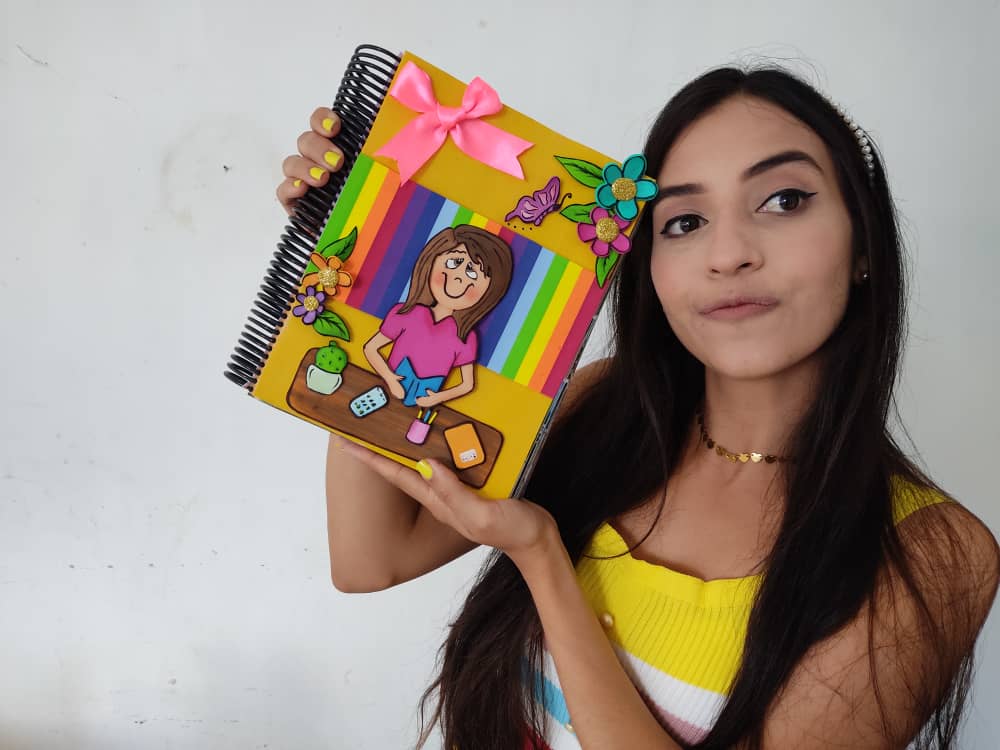
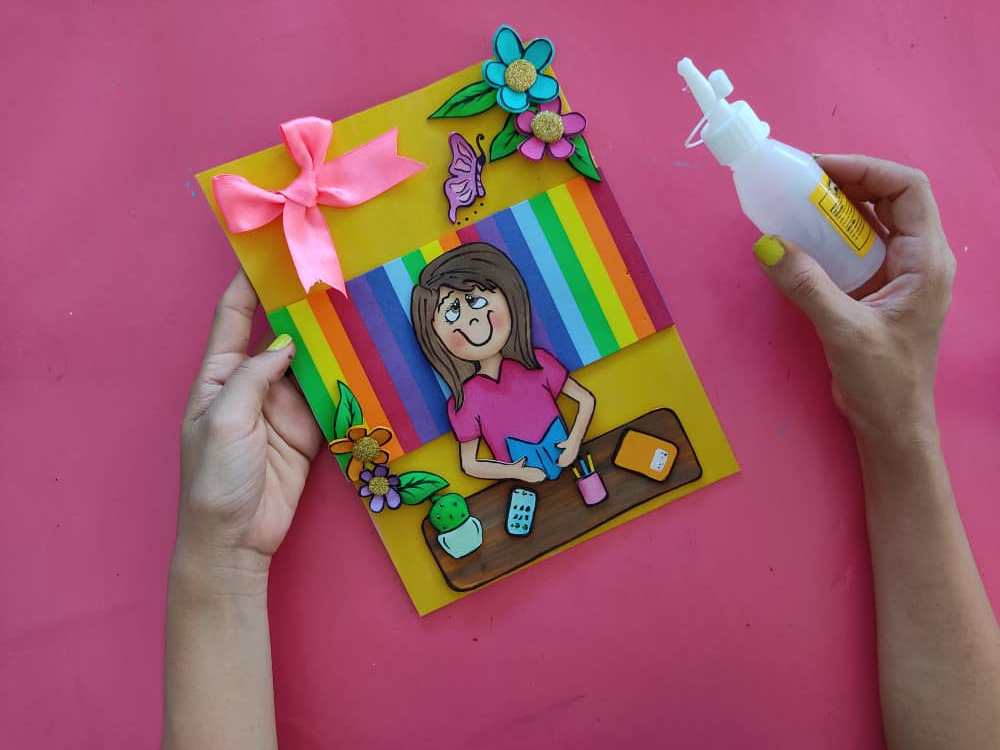
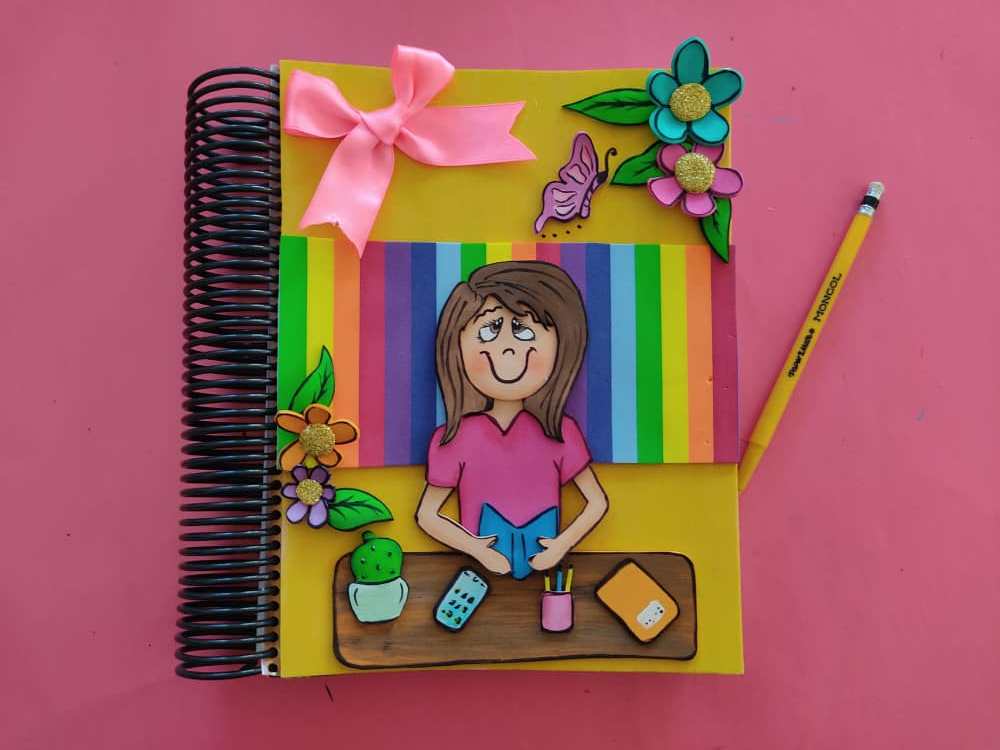
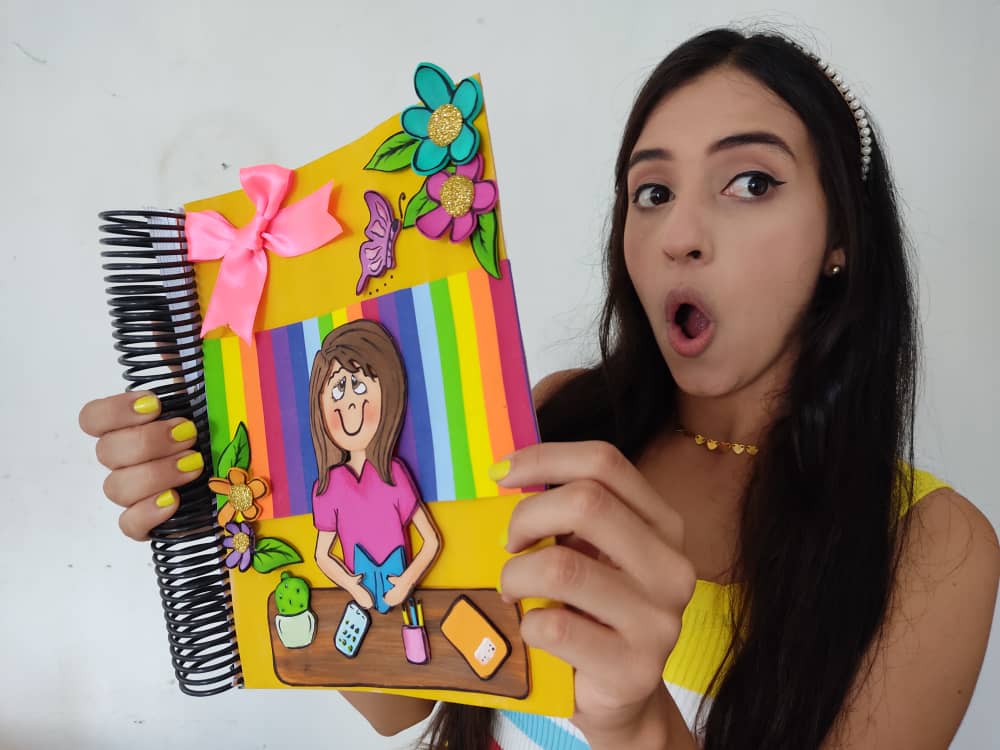
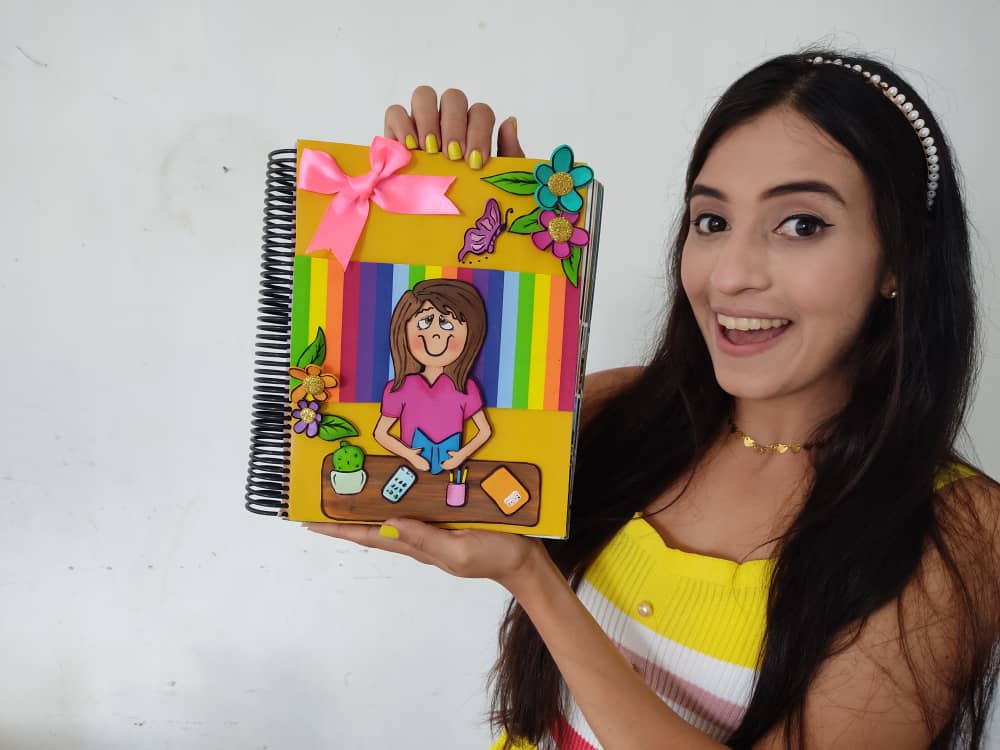
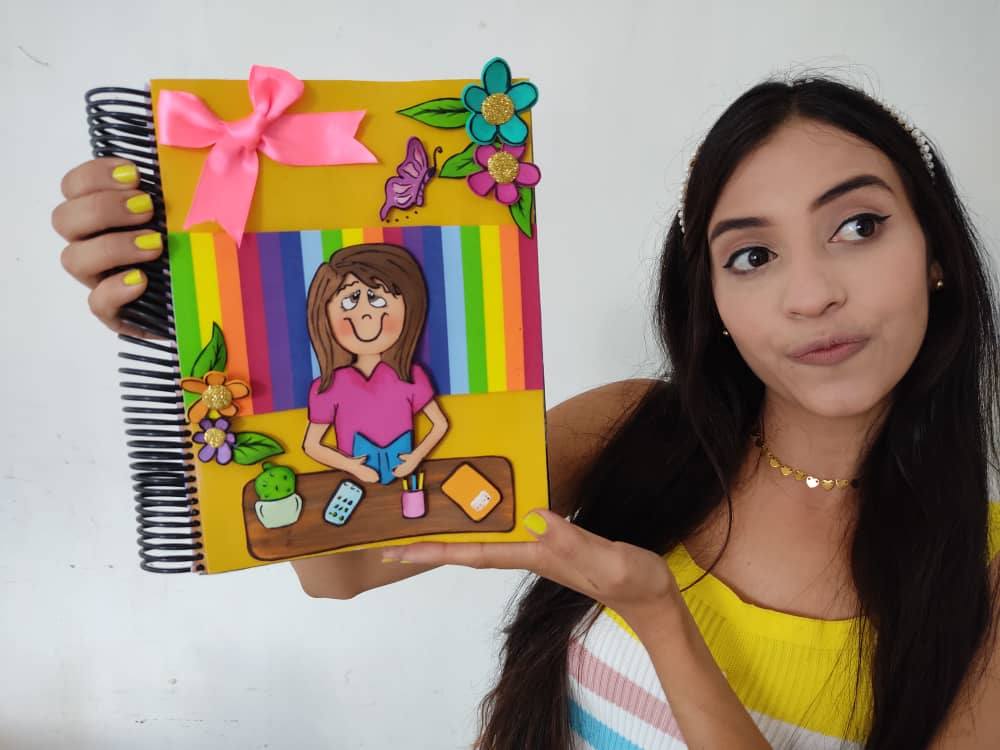
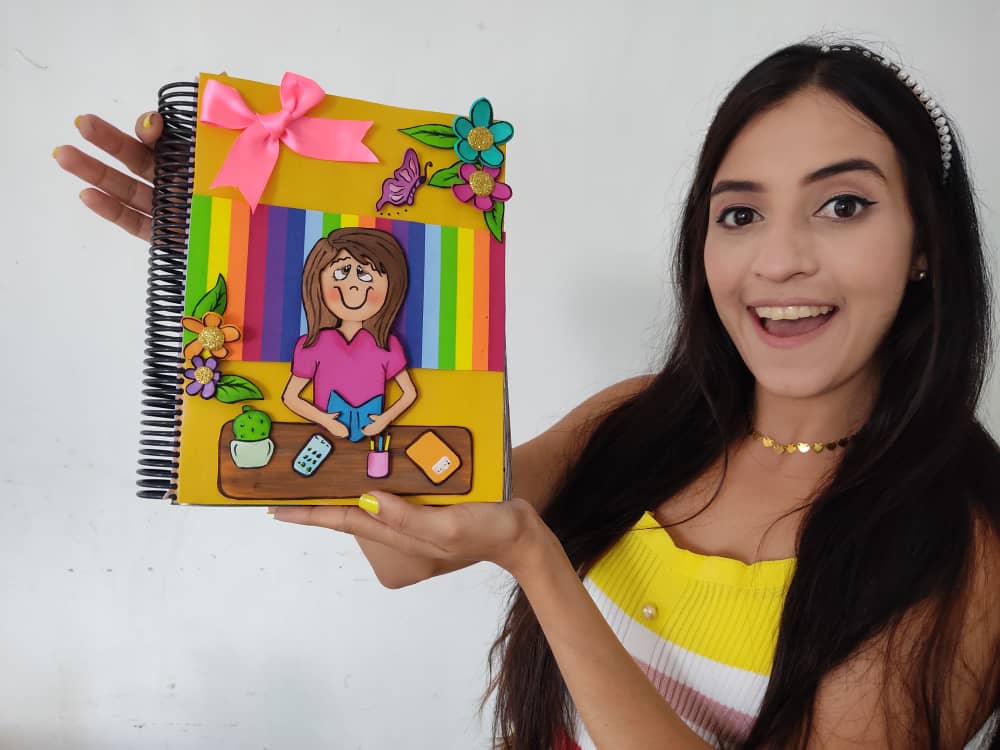
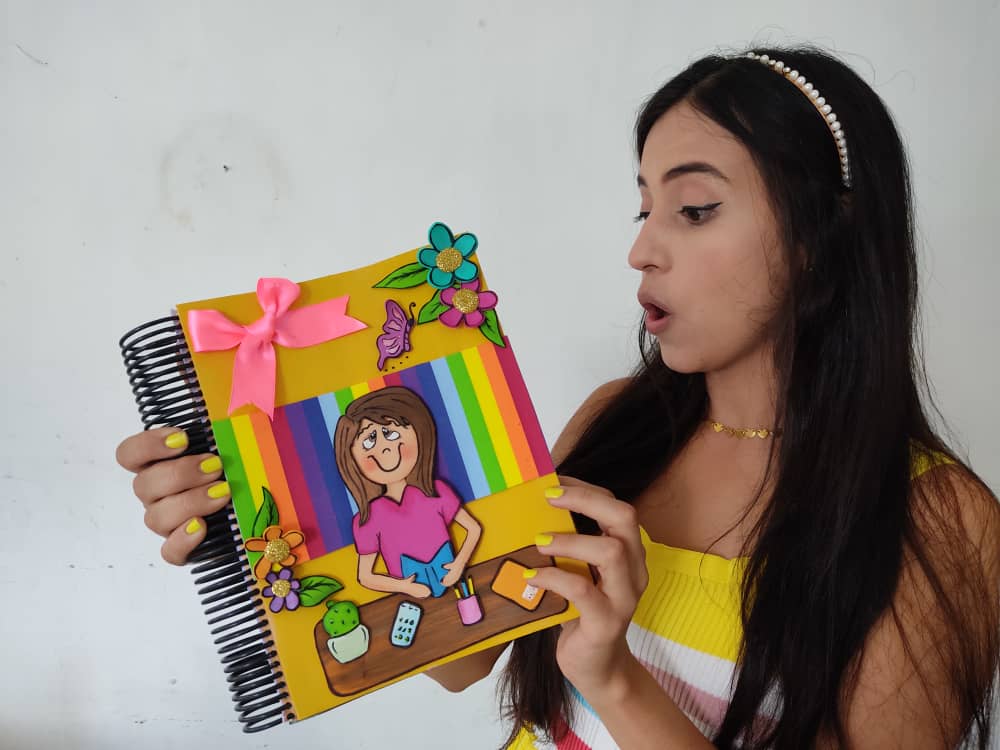
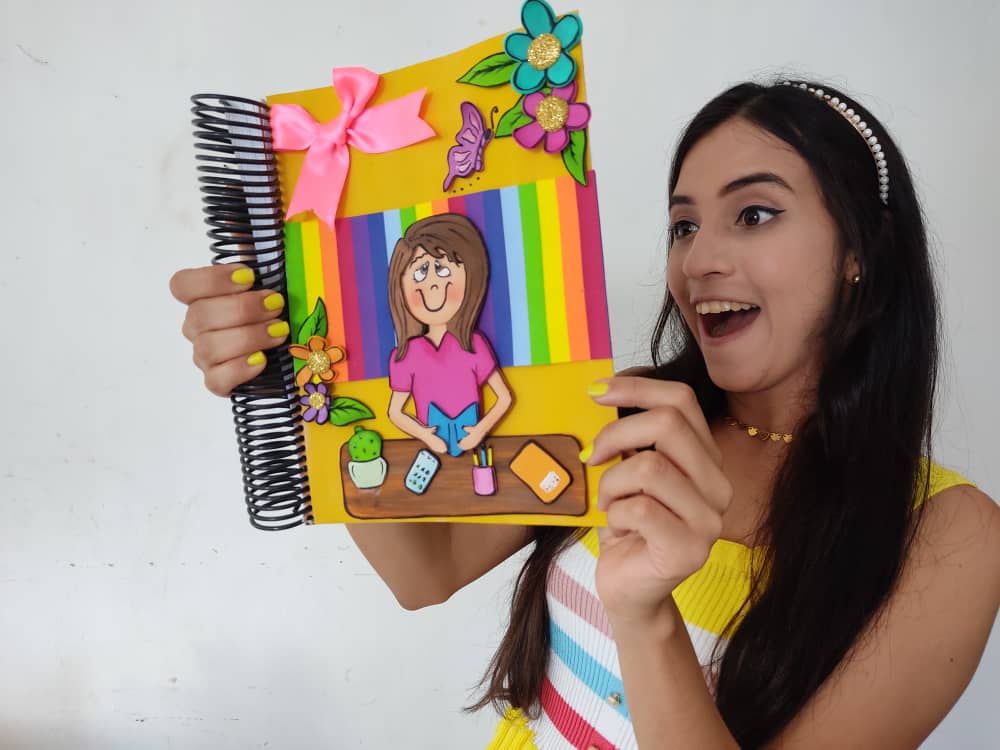
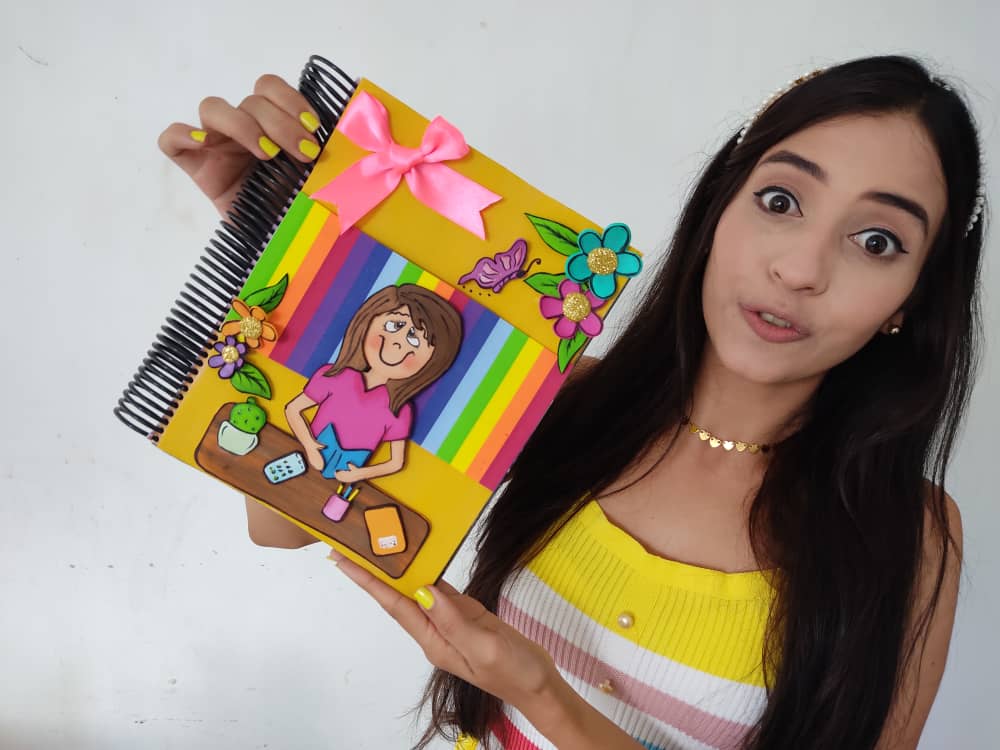
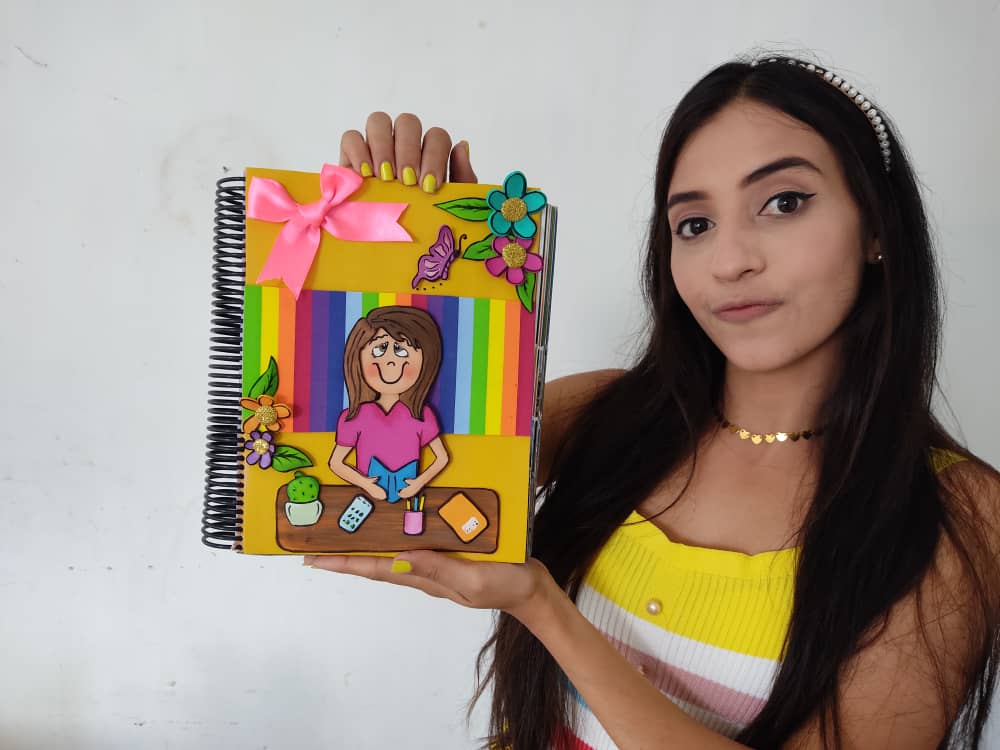
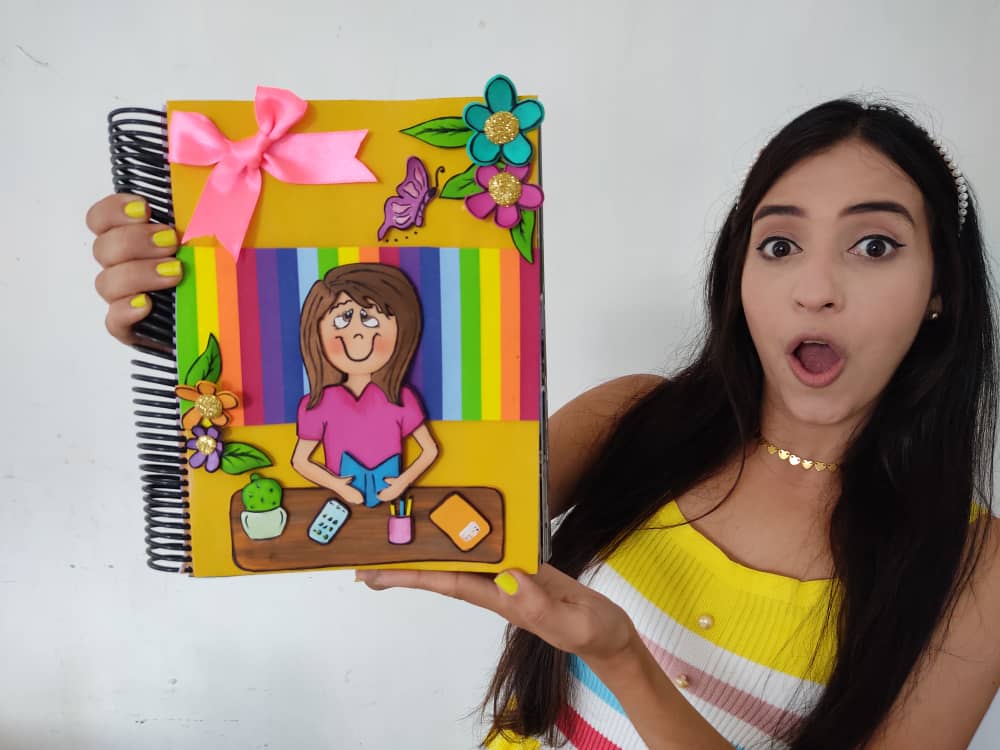
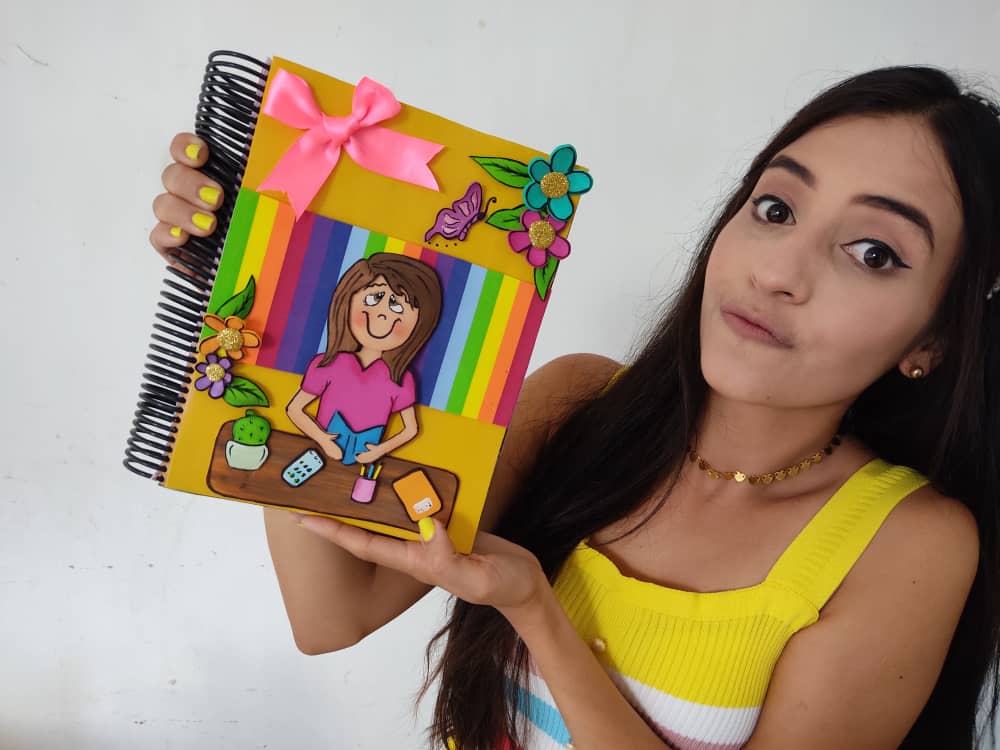
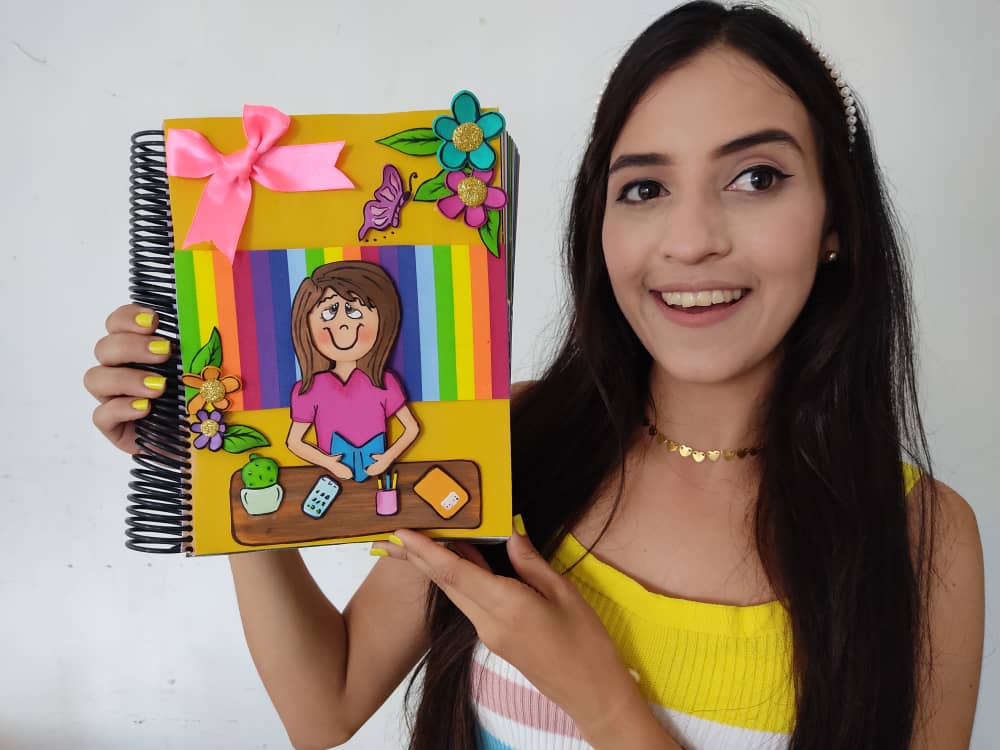
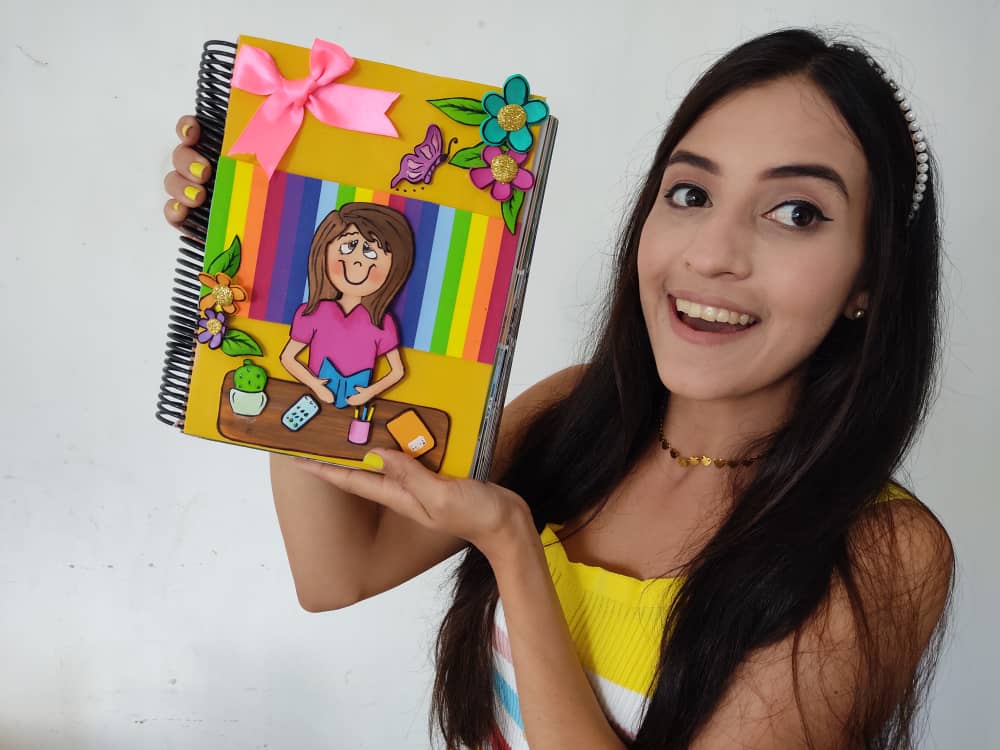
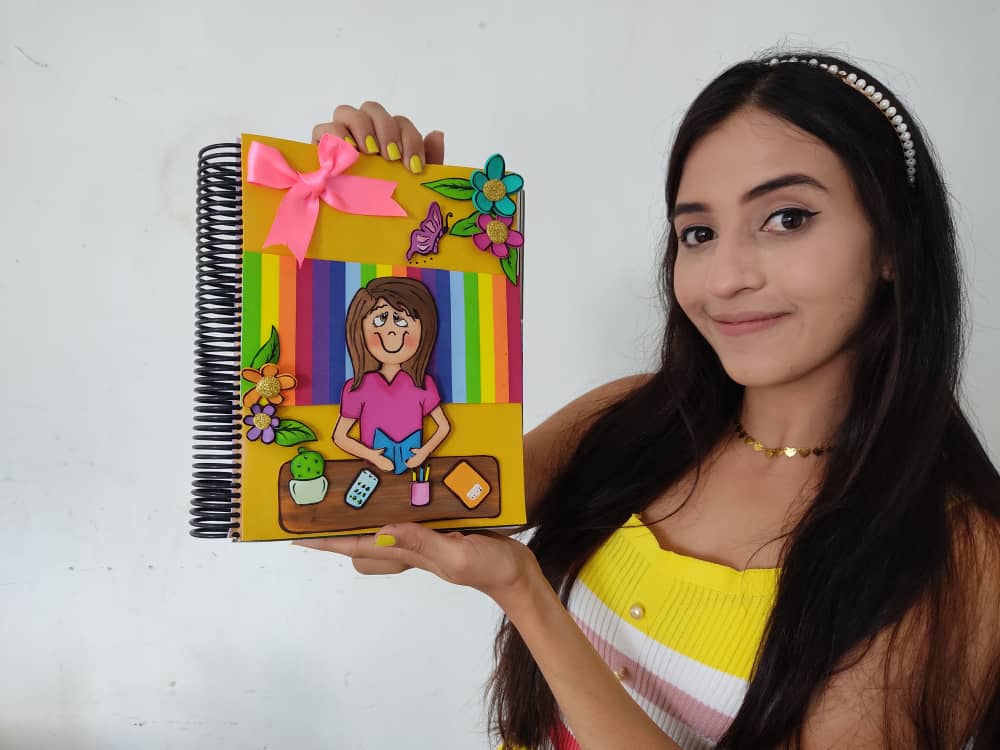
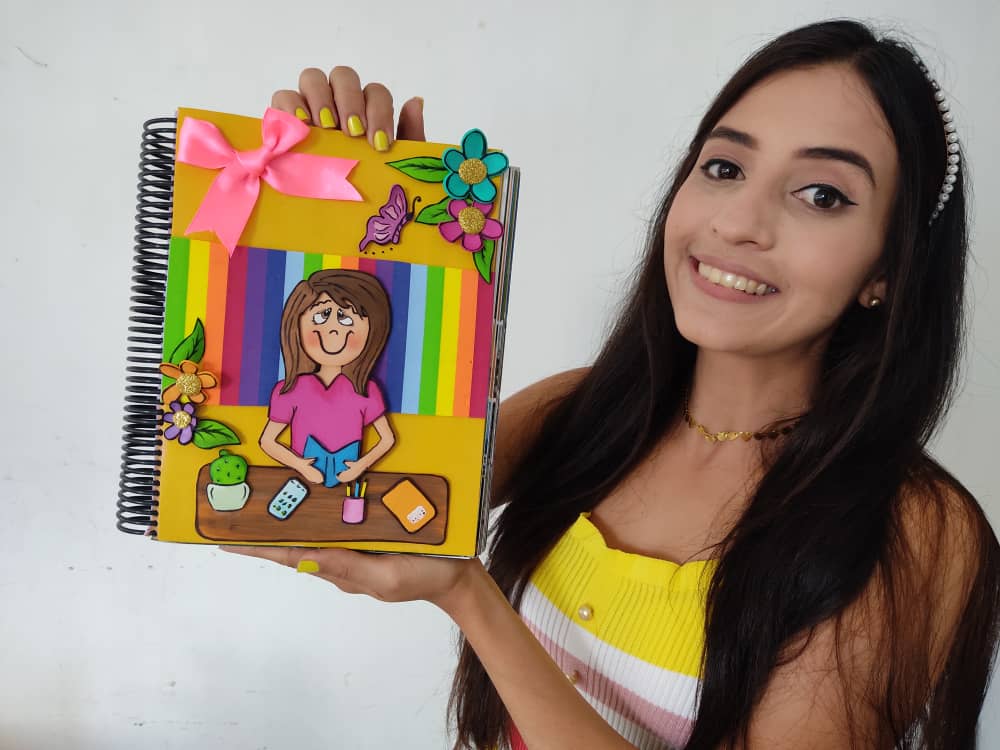
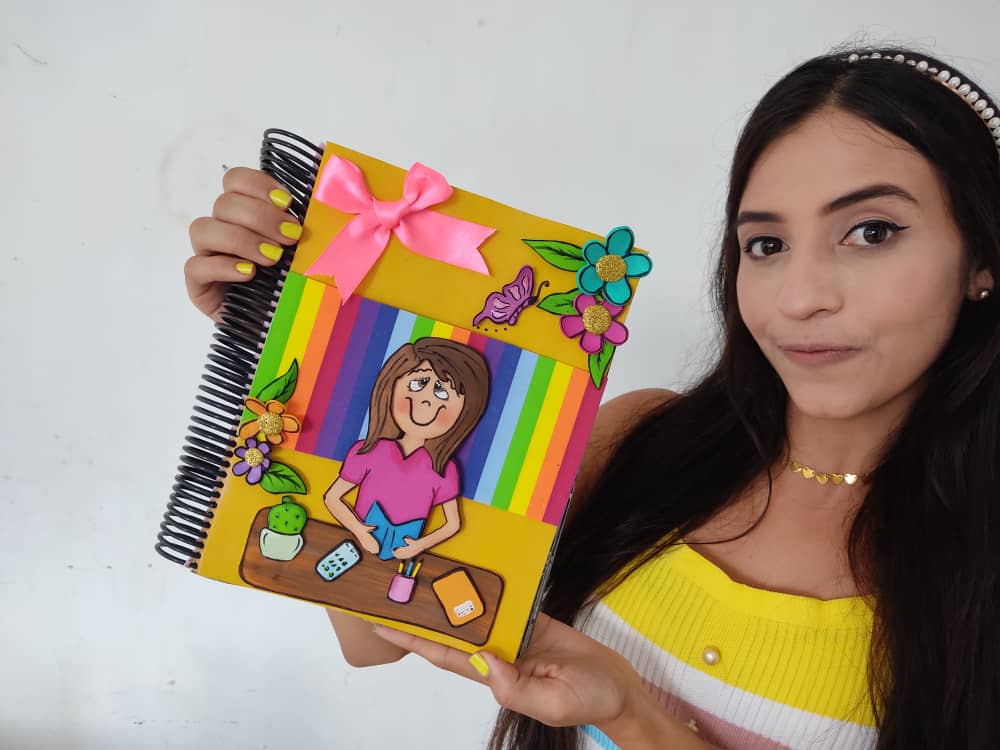
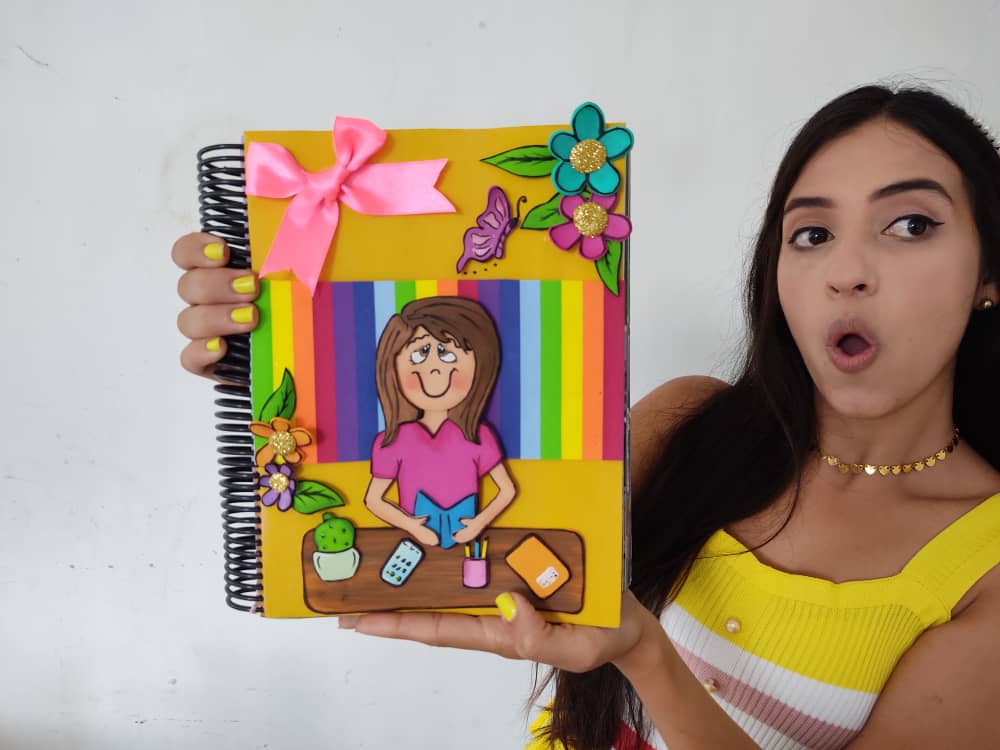
Finalmente, pegamos la hermosa obra a la antigua carátula de la agenda que estamos reciclando y listo. Preciosa no?
Finally, we glue the beautiful work to the old cover of the agenda that we are recycling and that's it. Precious no?
.jpeg)
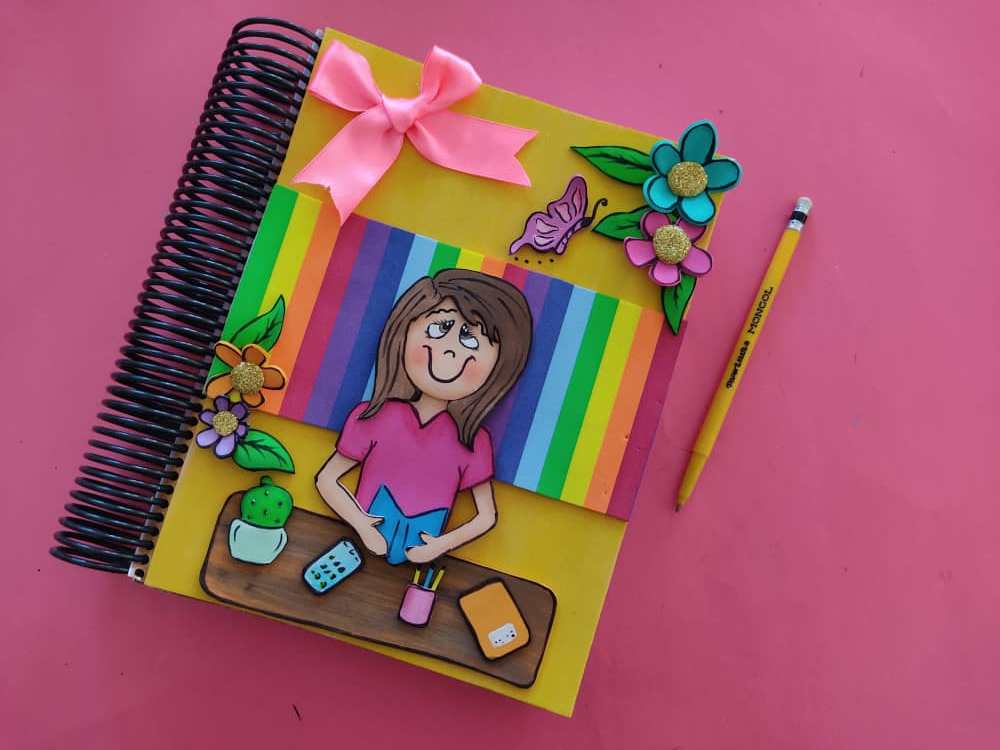
Gracias por acompañarme y espero que lo hayan disfrutado. ❤️
Thanks for joining and I hope you enjoyed it.❤️
.jpeg)
.jpeg)
.jpeg)
.jpeg)
.jpeg)
.jpeg)
.jpeg)
.jpeg)
.jpeg)
.jpeg)
.jpeg)
.jpeg)
.jpeg)
.jpeg)
.jpeg)
.jpeg)
.jpeg)
Clic para ver trabajos anteriores | Click to see previous works


So cute!
Thanks dear friend! XOXOX
que bonito,me encanto
Me encantó quedo hermoso
Tenía tiempo sin visitar tu blog, que caratula tan cuchi 😊
Feliz domingo, me encantó como quedó. Me hiciste recordar a mi sobrina, ella cada año seleccionaba un motivo y forraba sus cuadernos, es super original. Saludos
What a funny and creative work, Sara! Perfect! 🤗