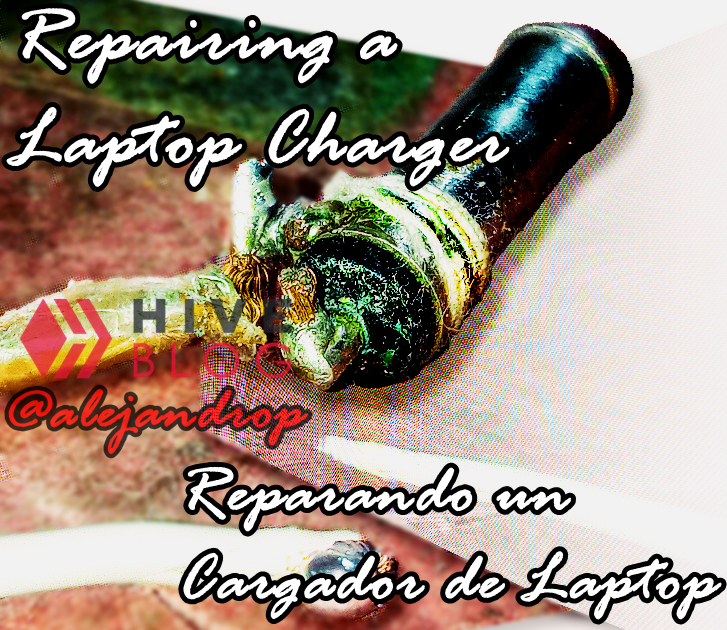


Hello dear #OCD community.
It has been a long time since the last time I was in these parts, and that coincidentally was with an electronic repair that I carried out, since I could not get where else to publish it, today I bring them exclusively for all of you :).
I put them a bit in context. First of all, I want you to know that this repair has already been done for weeks and I recently had time to share it with you. Weeks ago, a friend called me to inform me that the charger of her computer turned on (It has an LED indicator for it), but she did not want in any way to carry out the respective battery charge to the laptop, and of course not to turn it on, so I offered to review it and to be able to make some repair, well do it.

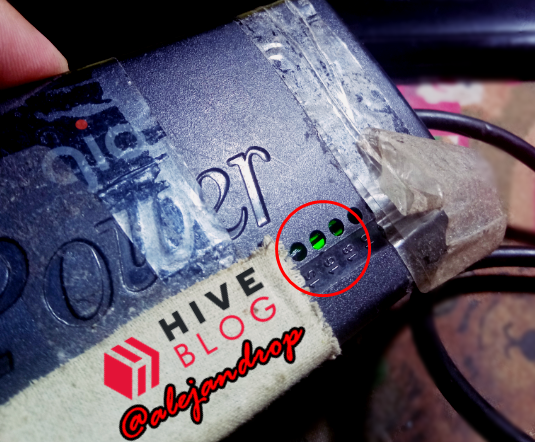
Indeed, when I perform the first test, the device turns on, currently showing the voltage with which it is working. This charger are of the "adjustable" type which you can modify the output voltage by means of a Swicht of several drops. In the photo it cannot be appreciated correctly because the charger took several blows and the lever with which the swicht is controlled came out of its place and everything inside was loose, but that is not an impediment for it to work.
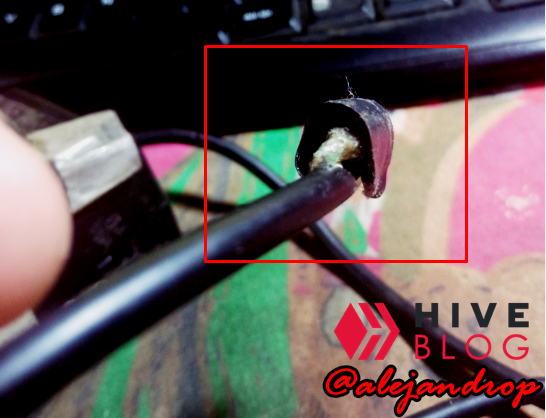
As I made preliminary measurements to verify that it is indeed not working, I began with a quick little visual check of the problem and detecting the problem before I could try to chip or break any cable or coating. In this case, the visibility was almost zero, and I couldn't see if there was a problem in the connector to begin with, since the fault could also be in the transformer module, which is the black box that I showed in the previous photo and I didn't want to disassemble it for no reason as it would be more tedious to repair in that segment. I proceeded to remove the electrical tape that covered the tip of the charger.
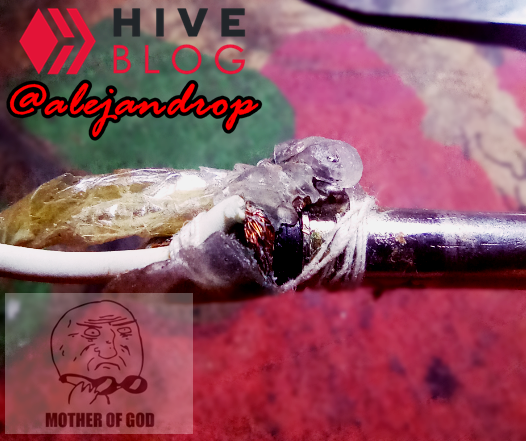
When removing the covering, I find this surprise: There was a white sewing thread, holding I don't know what, but there it was. My face when you see this is what you see in the photo: Mother of God, but what is this? But nothing, I proceeded to remove the thread and the silicone coating that apparently someone had already placed previously, trying to somehow repair the connector.
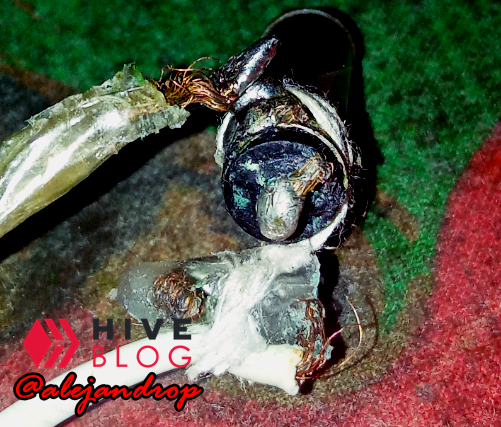
I already found out what the white thread was doing. Somehow, the one who tried to repair it tied a part of the white wire, which would be the positive (+), and then strategically placed it in the connector of the positive pole of the connector, and tried to hold it firmly using the white wire.
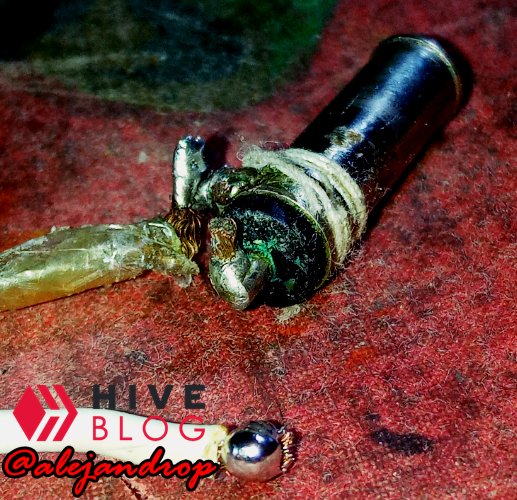
Continuing with the repair, I removed much of the thread that was getting in the way from the white wire. I removed the remains of silicone and proceeded to re-tin the tip of the white cable, as well as a little on the positive pole (+) of the connector, so that the solder would be as good as possible. It should be noted that my soldering iron is not very good, let's say, I must buy a new one, because the one I have presents a deficiency in power, causing problems when trying to melt tin and solder wire on some surface, above all it is a large surface where the Heat dissipates very fast, as in this connector. It was difficult but not impossible.
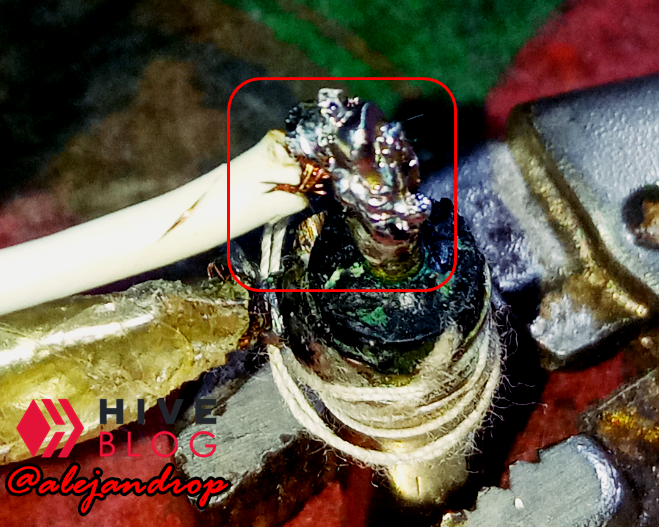
As you can see, the weld was deformed but firm and strong, is that what matters to us at this moment, aesthetics for later ... haha.
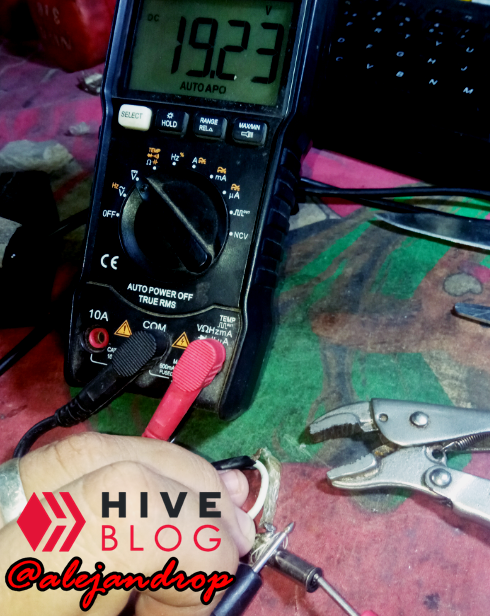
When we made the first measurement, we confirmed that our repair is ready, but now we are missing the second important step, which is to test what we have just done. To do this, we will simply plug it into the laptop and see what happens. Normally, I always apply a hot silicone coating to the exposed parts of the cable to avoid any accident when testing our charger, so we proceed to apply the silicone.

We fill in the first segment of the connector and then proceed to the adverse part.

Then we fill the bottom part to finish with the other side of the connector.
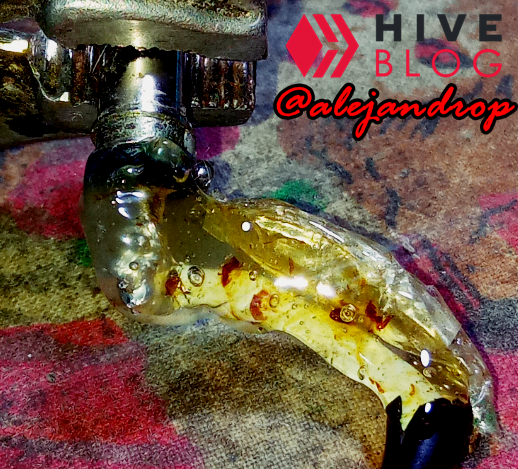
Finally, hot silicone on the adverse part that we were missing. Now for added safety, black electrical tape coating.
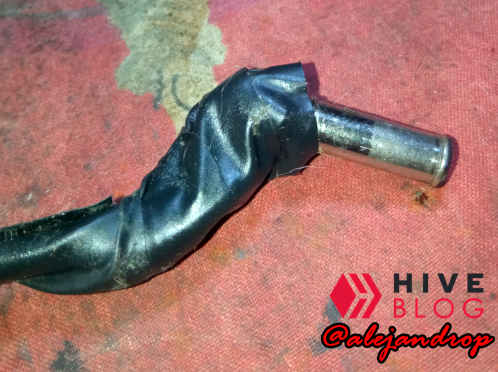
With the duct tape coating in place, we only have one last step left, which is to test the charger on the laptop.
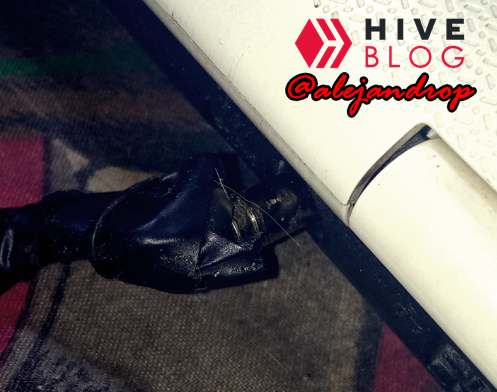
We plug the charger ...
... and apparently it works! Let's see now, if it really works, since the LED indicator does not completely mean that our charger works, since one thing is that the laptop is turned off and another when it is already on, especially with this one in particular since I did not mention them above but the battery is bad, no longer holding as much charge as before.

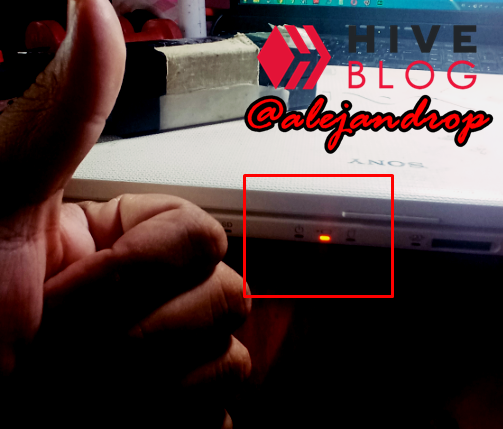
Apparently everything is going according to plan and there is no indication that the charger has a power deficiency, since if so, the repair would be greater, it would have to work directly in the module transformer, the one I showed you in the first photo of this post.
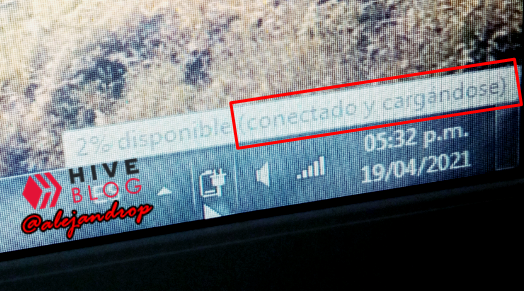
And indeed, our repair was a success, since what can be seen in the photo says "Connected and charging", which appears when the power and battery are working correctly, since if there is a power problem in this system, simply a message like "Connected and not charging" would appear and the% of the battery would not move, but as you can see, it is at 2% of its total charge, which means that the charger is working at 100% without problems.

Hola querida comunidad de #OCD.
Ha pasado mucho tiempo desde la última vez que estuve por estos lados, y que casualmente fue con una reparación electrónica que realicé, ya que no conseguí dónde más publicarlo, hoy se los traigo en exclusiva para todos ustedes :).
Los pongo un poco en contexto. Primero que nada, quiero que sepan que esta reparación ya tiene semanas que la hice y recientemente tuve tiempo para compartirla con ustedes. Hace semanas, una amiga me llamó para informarme que el cargador de su computadora encendía (Tiene un indicador LED para ello), pero no quería de ninguna manera realizar la respectiva carga de batería a la laptop, y por supuesto que tampoco encenderla, así que me ofrecí para revisárselo y de poder hacerle alguna reparación, pues hacerla.
Efectivamente, al momento de yo realizar la primera prueba, el aparato enciende mostrando actualmente el voltaje con el que está trabajando. Este cargador son del tipo "regulable" el cual puedes modificar el voltaje de salida mediante un Swicht de varias caídas. En la foto no se puede apreciar correctamente debido a que el cargador llevó varios golpes y la palanca con que se controla el swicht se salió de su lugar y todo por dentro quedó suelto, pero eso no es impedimento para que éste funcione.
Al yo realizar mediciones preliminares para corroborar que efectivamente no está funcionando, comencé con una pequeña y rápida revisión visual del problema y detectar el problema antes de poder intentar picar o romper algún cable o recubrimiento. En este caso, la visibilidad era casi nula, y no podía ver si había algún problema en el conector para empezar, ya que la falla también podría estar en el módulo transformador, que es el cajetín negro que mostré en la fotografía anterior y no quería desarmarlo sin ninguna razón ya que sería más tediosa la reparación en ese segmento. Procedí a retirar la cinta aislante que recubría la punta del cargador.
Al retirar el recubrimiento, me encuentro con esta sorpresa: Había un hilo de coser blanco, sosteniendo no sé qué, pero ahí estaba. Mi cara al ver esto es la que ven en la foto: Mother of God, ¿Pero qué es esto?. Pero nada, procedí a retirar el hilo y los recubrimiento de silicona que al parecer alguien ya había colocado con anterioridad, intentando de alguna manera reparar el conector.
Ya descubrí qué hacía el hilo blanco. De alguna manera, el que lo intentó reparar amarró una parte del cable blanco, que sería el positivo (+), para luego colocarlo estratégicamente en el conector del polo positivo del conector, e intentar sostenerlo fíjatemente usando el hilo blanco.
Prosiguiendo con la reparación, eliminé gran parte del hilo que me estorbaba del cable blanco. retiré los restos de silicona y procedí a re-estañar la punta del cable blanco, como también un poco en el polo positivo (+) del conector, para que la soldadura quedara lo mejor posible. Cabe resaltar que mi soldador no está muy bueno que digamos, ya debo comprar uno nuevo, pues el que tengo presenta deficiencia en la potencia, causando problemas al momento de intentar derretir estaño y soldar cable en alguna superficie, sobretodo es una superficie grande donde el calor se disipa muy rápido, como en este conector. Fue difícil pero no imposible.
Como ven, la soldadura quedó deformada pero firme y fuerte, es que lo que nos importa en este momento, la estética para después... jaja.
Al realizar la primera medición, corroboramos que nuestra reparación está lista, pero ahora nos falta el segundo paso importante, que es probar lo que acabamos de hacer. Para ello, simplemente lo enchufaremos en la laptop y veremos qué sucede. Normalmente, siempre le coloco un recubrimiento de silicona caliente a las partes descubiertas del cable para evitar algún accidente al momento de probar nuestro cargador, así que procedemos a colocarle la silicona.
Rellenamos el primer segmento del conector para luego proseguir a la parte adversa.
Luego rellenamos la parte inferior para finalizar con el otro lado del conector.
Finalmente, silicona caliente en la parte adversa que nos faltaba. Ahora, por mayor seguridad, recubrimiento de cinta aislante negra.
Con el recubrimiento de cinta aislante colocado, ya sólo nos queda un último paso que es probar el cargador en la laptop.
Enchufamos el cargador...
... y al parecer ¡Funciona!. Veamos ahora, si de verdad funciona, ya que el indicativo del LED no significa del todo que nuestro cargador funcione, ya que una cosa es que esté apagada la laptop y otra cuando ya está encendida, sobretodo con esta en especial ya que no les mencioné arriba pero la batería está deficiente, ya no retiene mucha carga como antes.
Al parecer todo marcha según el plan y no hay indicios de que el cargador tenga una deficiencia de potencia, ya que de ser así, ya la reparación sería mayor, tendría que trabajar directamente en el módulo transformador, el que les mostré en la primera foto de esta publicación.
Y efectivamente, nuestra reparación fue un éxito, ya que lo que puede apreciarse en la foto dice "Conectado y cargándose", que aparece cuando la alimentación y la batería están trabajando correctamente, ya que de haber algún problema de alimentación en este sistema, simplemente saliera un mensaje como "Conectado y sin cargarse" y el % de la batería no se movería, pero como ven, está a 2% de su carga total, lo que significa que el cargador está trabajando al 100% sin problemas.
Well friends of #ocd, this was it for today. I hope this publication has been useful to you and see you in the next publication, which will be very soon, because I have saved an LCD monitor that I suspect has capacitor problems, as well as the last one I uploaded.
Bueno amigos de #ocd, esto fue todo por el día de hoy. Espero les haya sido de utilidad esta publicación y nos vemos en la próxima publicación, la cual será muy pronto, pues tengo guardado un monitor LCD que presiento tiene problemas de capacitores, así así como el último que subí.

I wanted to personally thank this collective curators community from the #OCD team, as they have been very supportive of me in my posts and my life would not be the same without their support. To all of you, from the smallest voter to the largest whale, THANK YOU SO MUCH! It is my pleasure to bring content for you.
Quería agradecer personalmente a esta comunidad de curación colectiva del equipo de #OCD, ya que me han prestado mucho su apoyo en mis publicaciones y mi vida no sería igual sin su apoyo. A todos ustedes, desde el mínimo votante hasta la ballena más grande, ¡MUCHÍSIMAS GRACIAS! Es un placer para mí traer contenido para ustedes.
•¡Buenas noches y hasta pronto!•
•Goodnight and see you soon!•


Su post ha sido valorado por @goya