Hey guys! Sorry for the gap in this series, I've had lots going on and didn't really have the time to prepare the post. Today we'll be colourgrading a photo I shot at an arboretum with friends, it has lots of greens in it too which you'd see how I manipulated them.
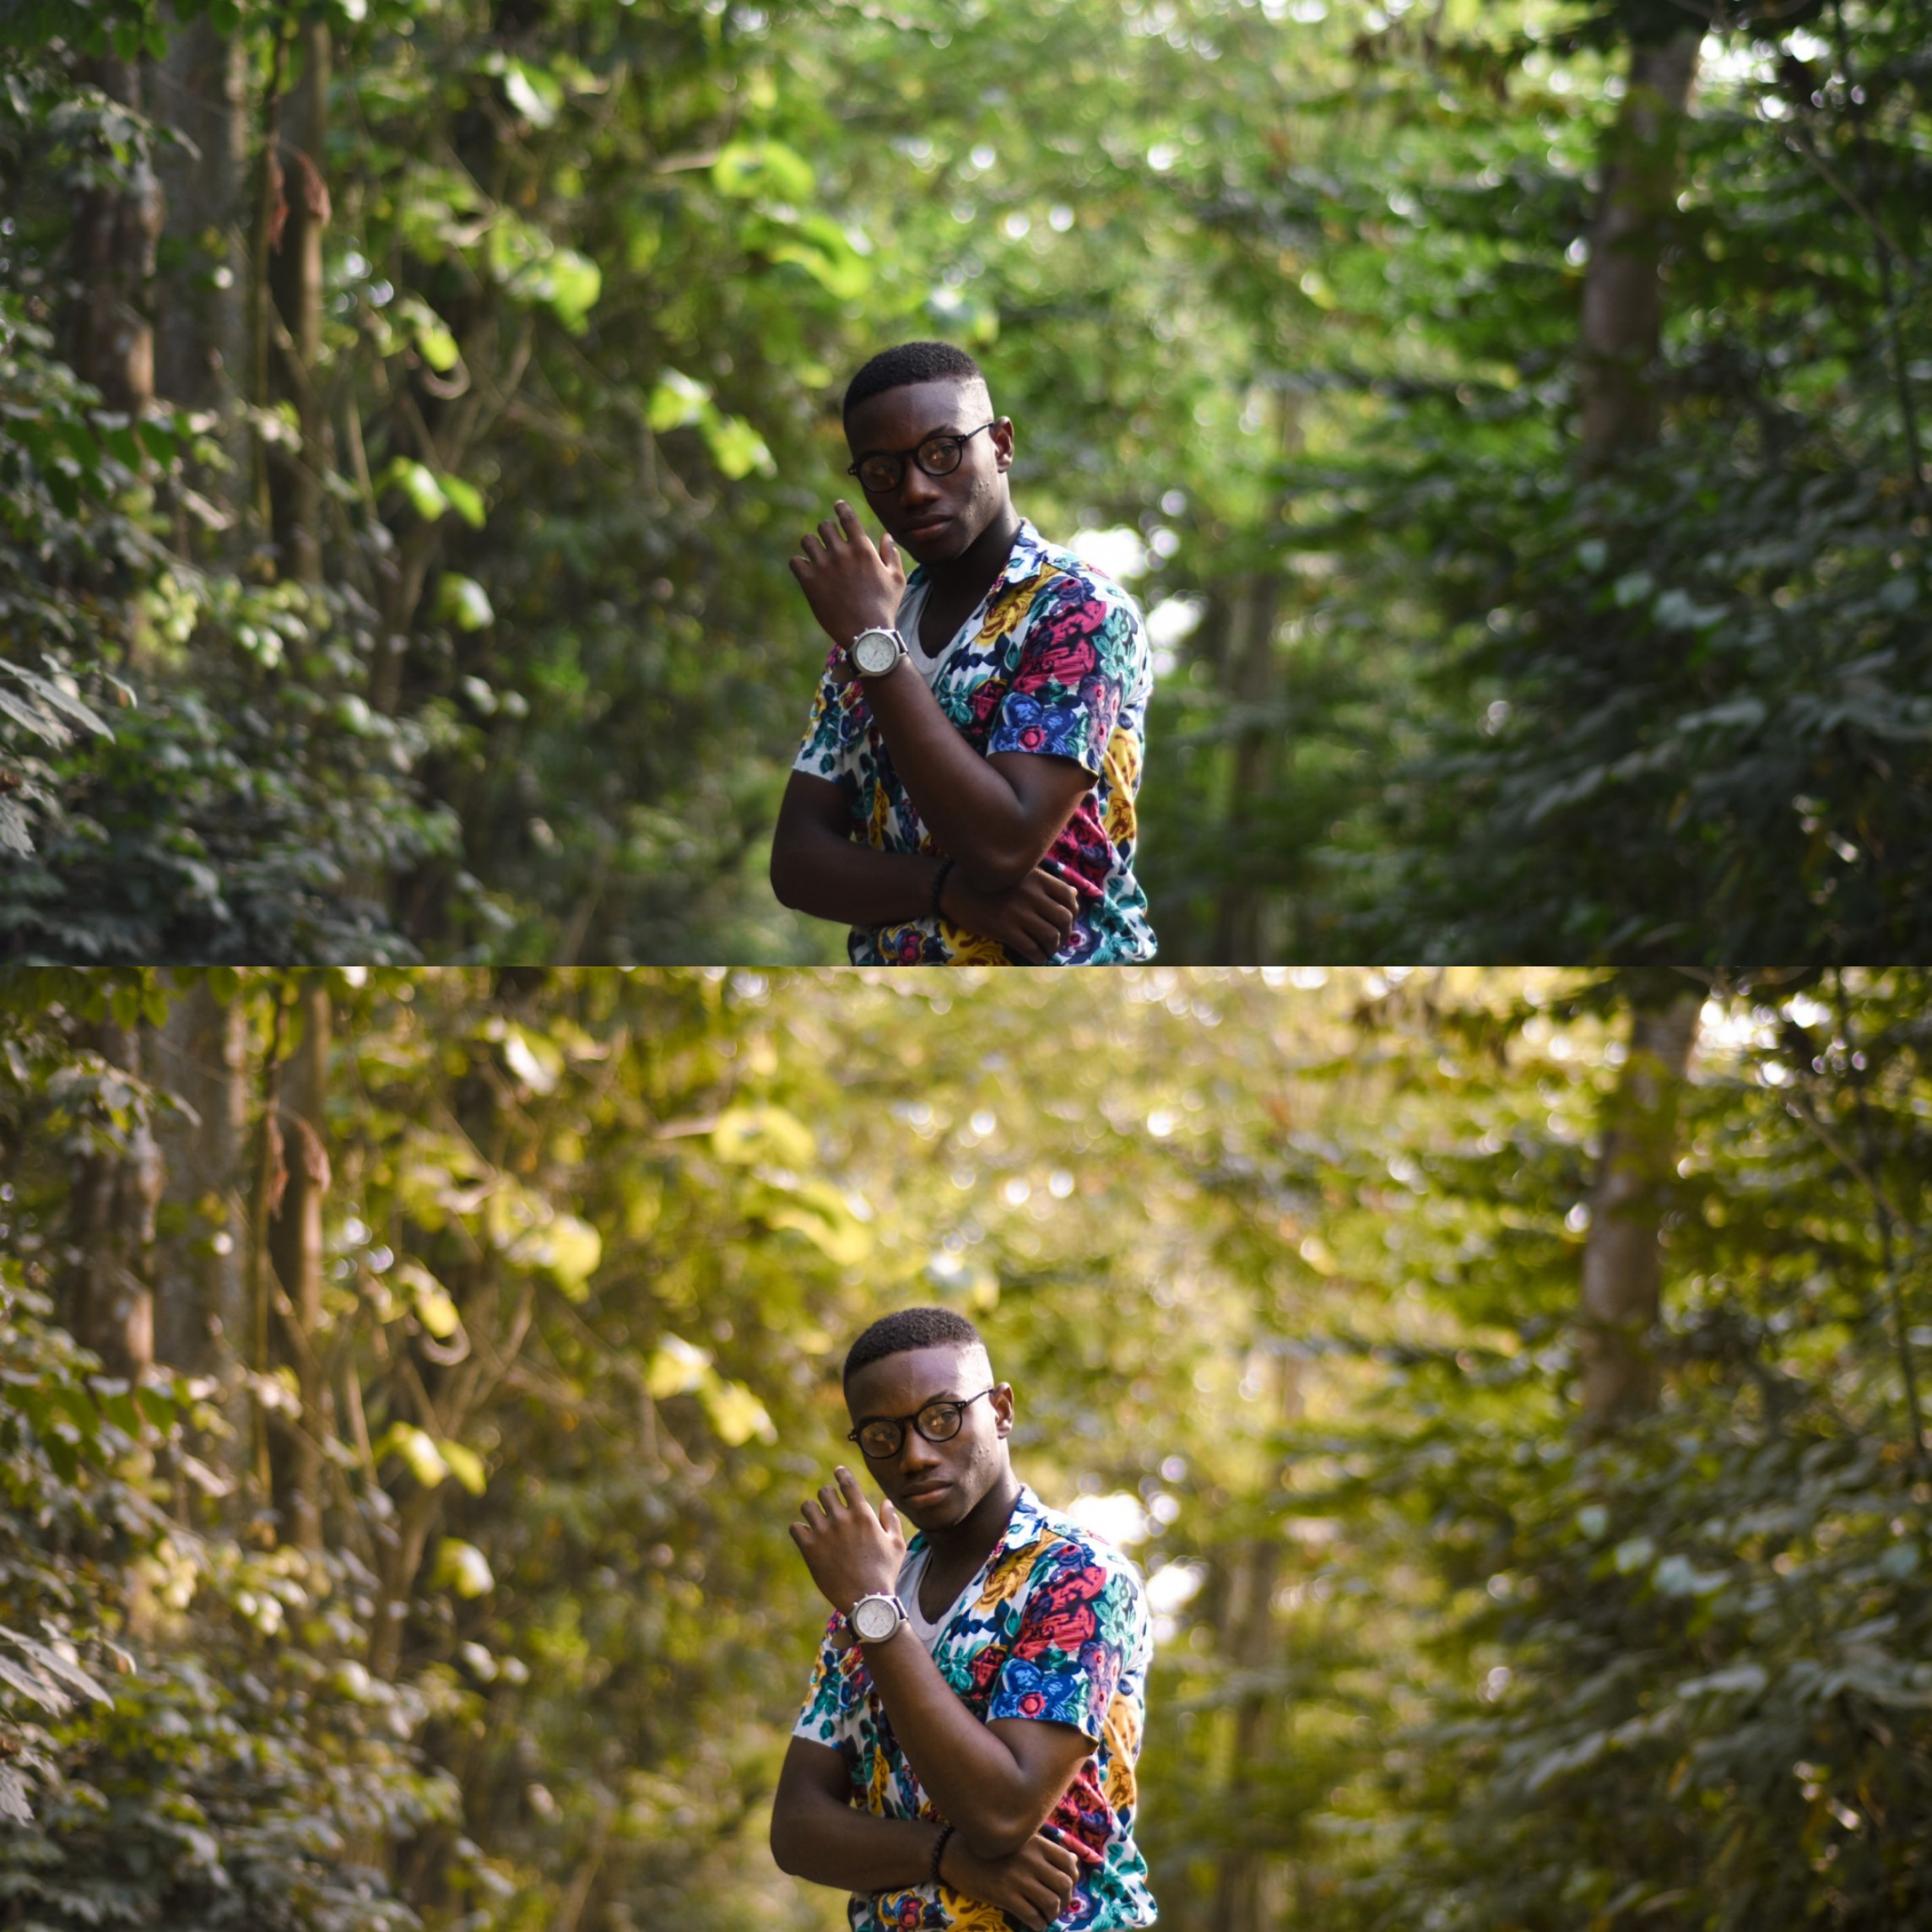
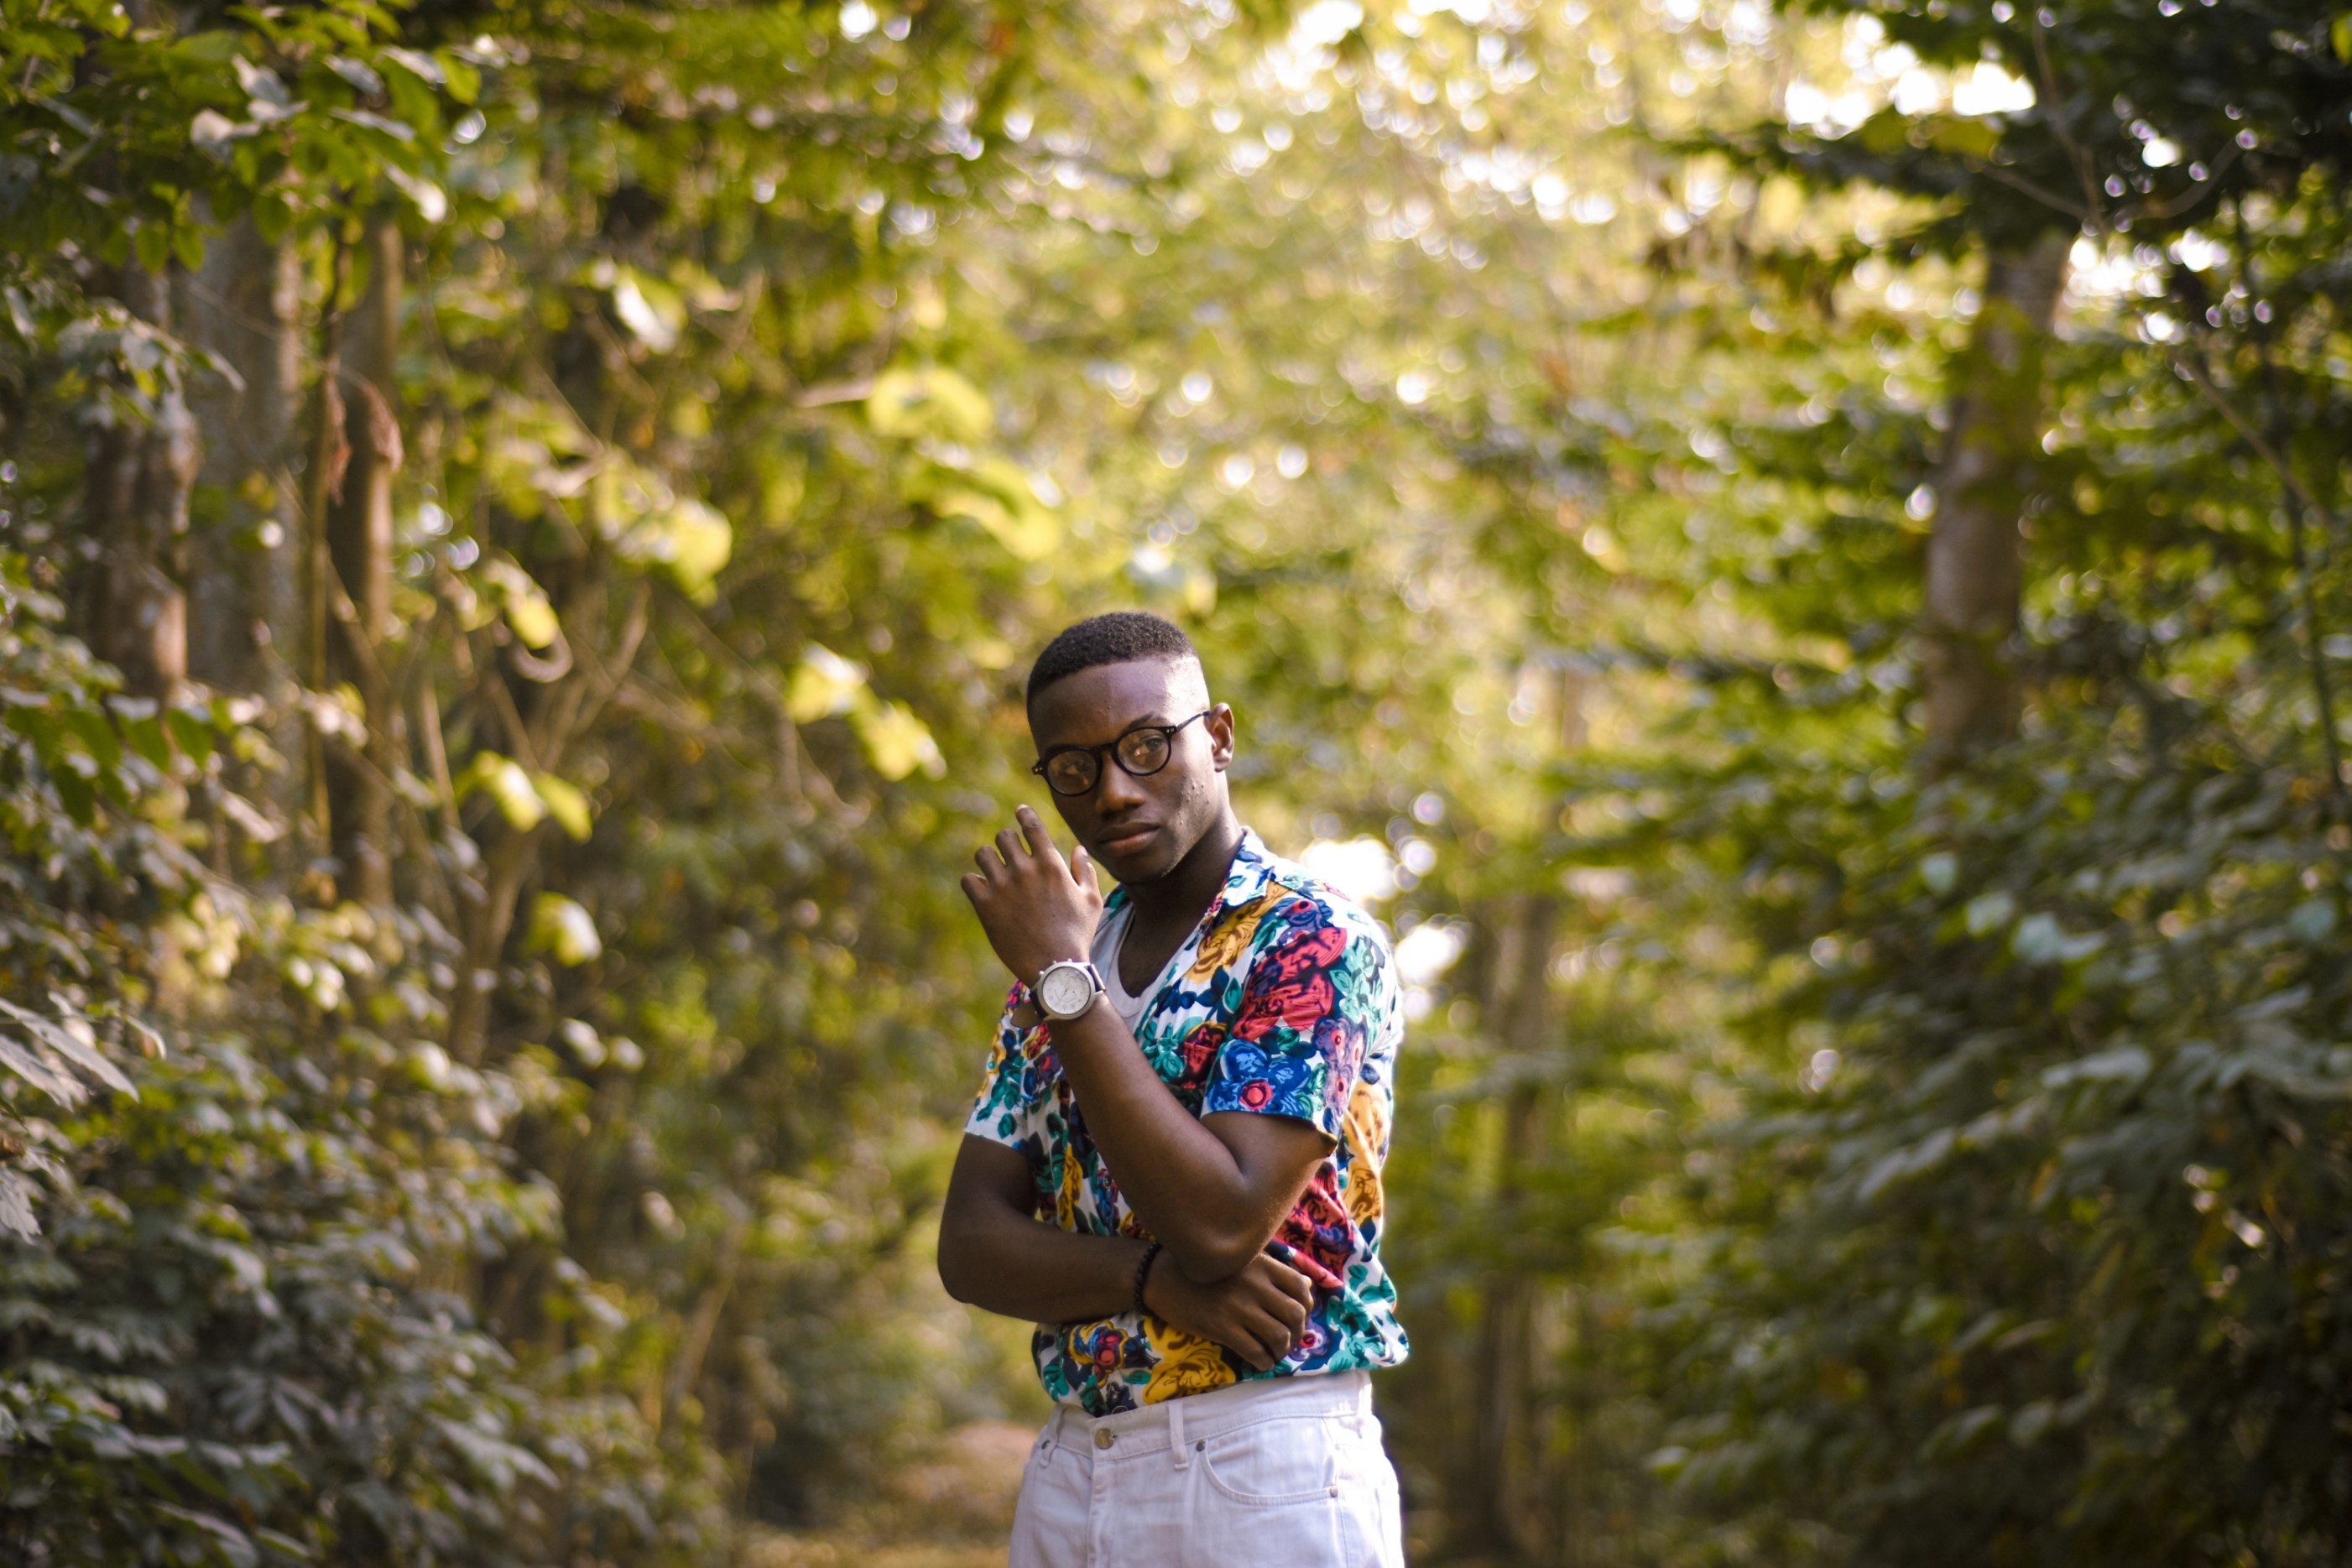
Here's what I achieved after editing the photo:
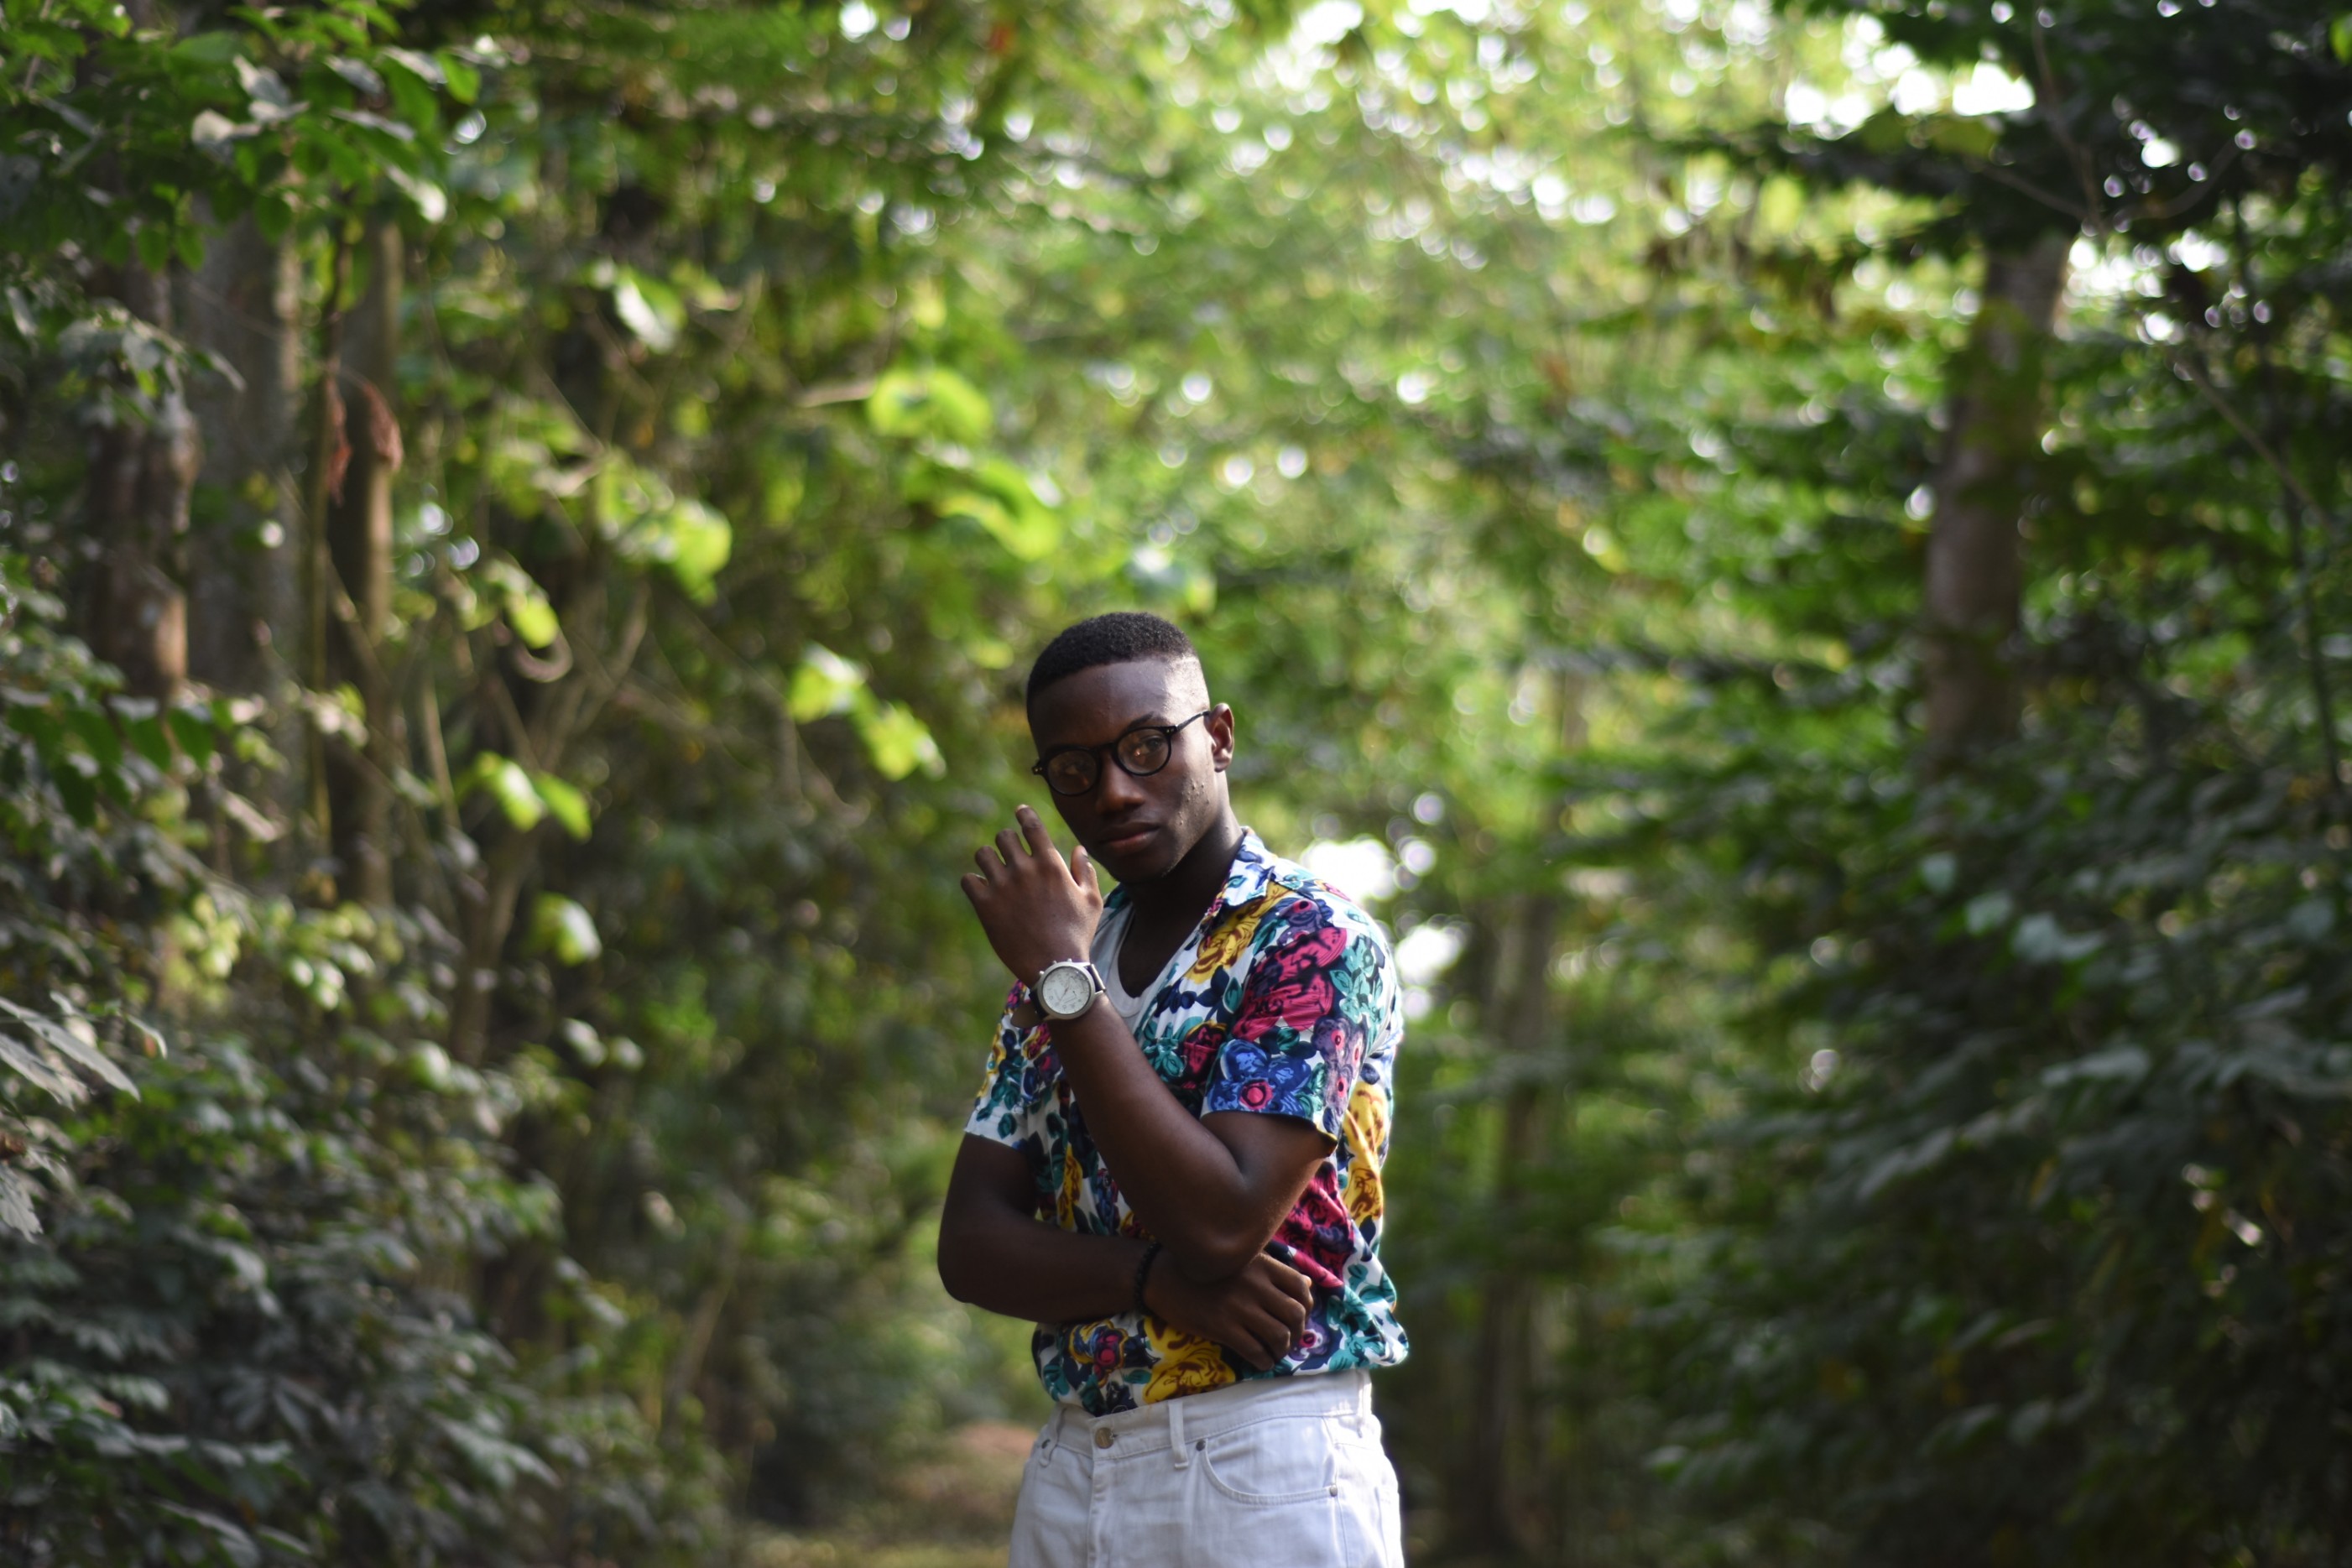
Now, here's the photo before it was edited. One could clearly see how the hue of the greens has been changed and how saturated the colours on the shirt have become.
Now, let's begin!
First of all, I imported the photo to the Adobe Lightroom Mobile app on my smartphone as seen below.
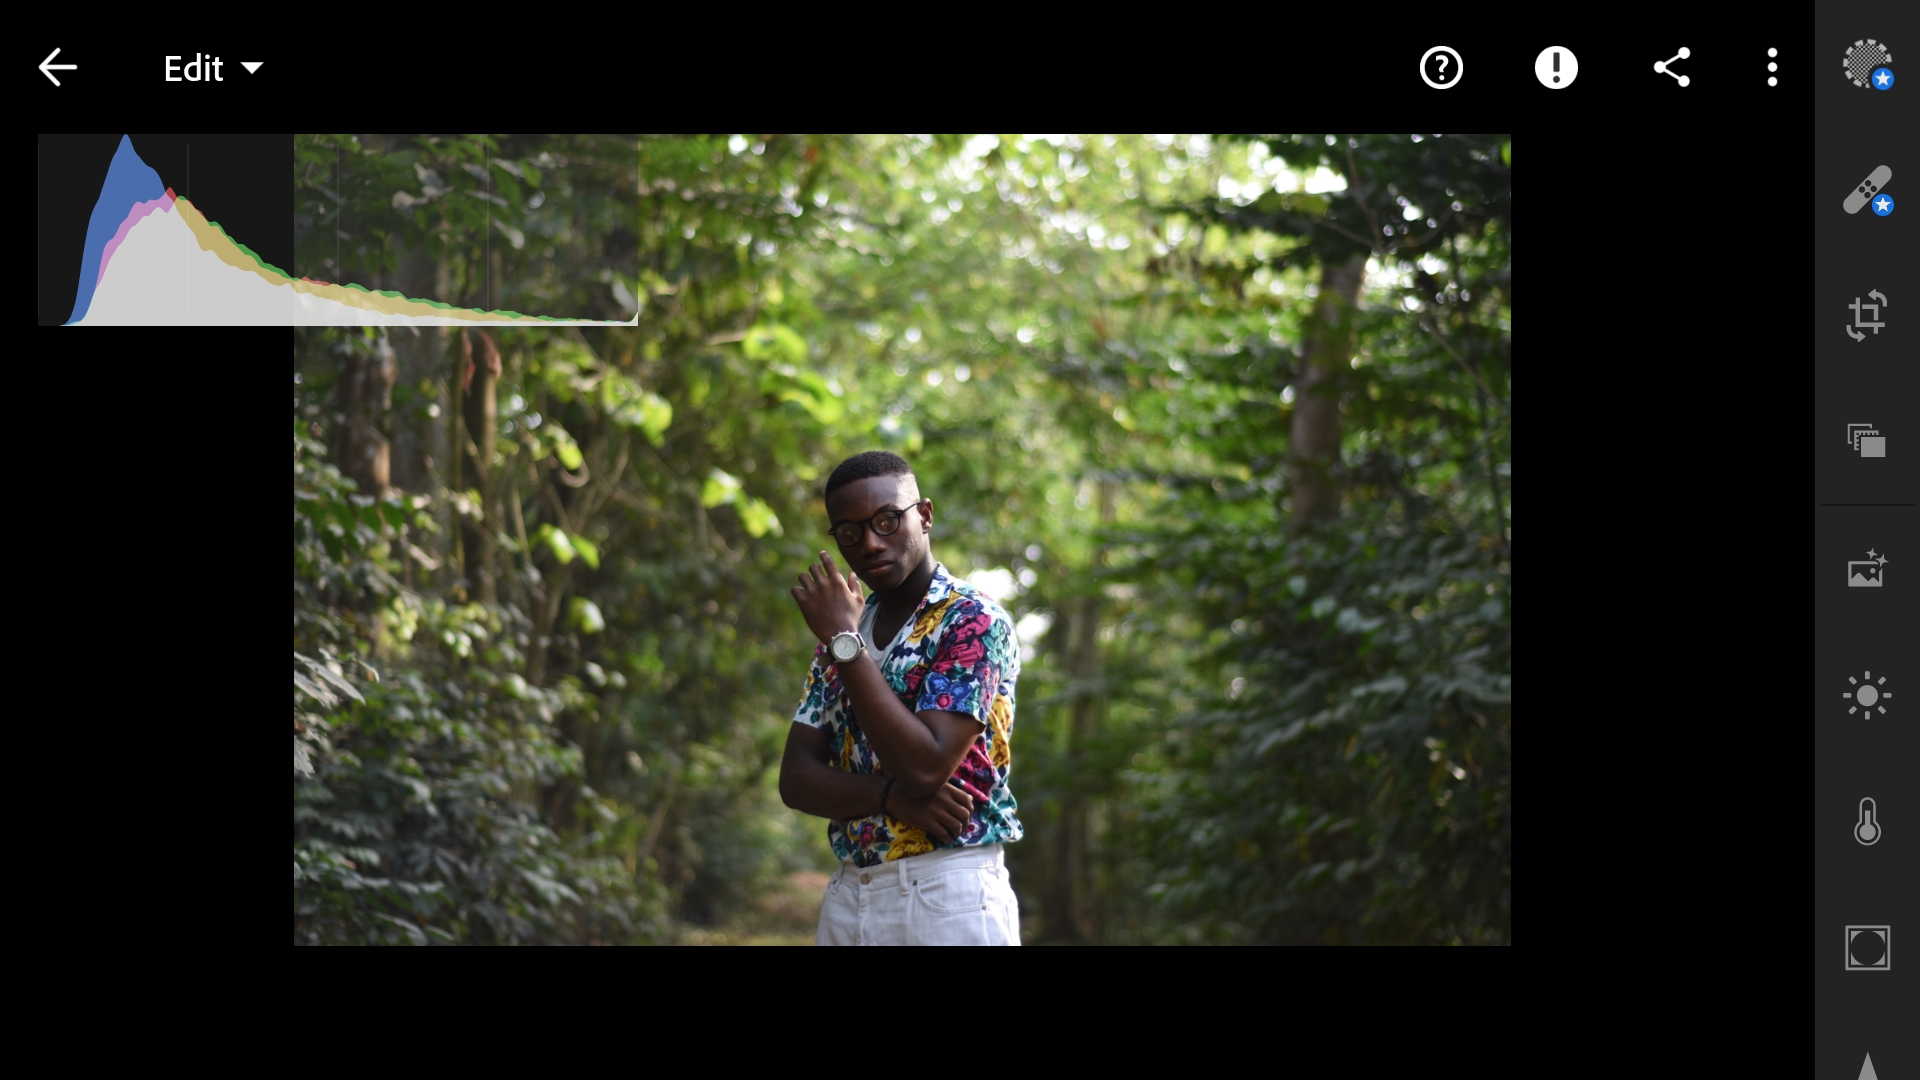
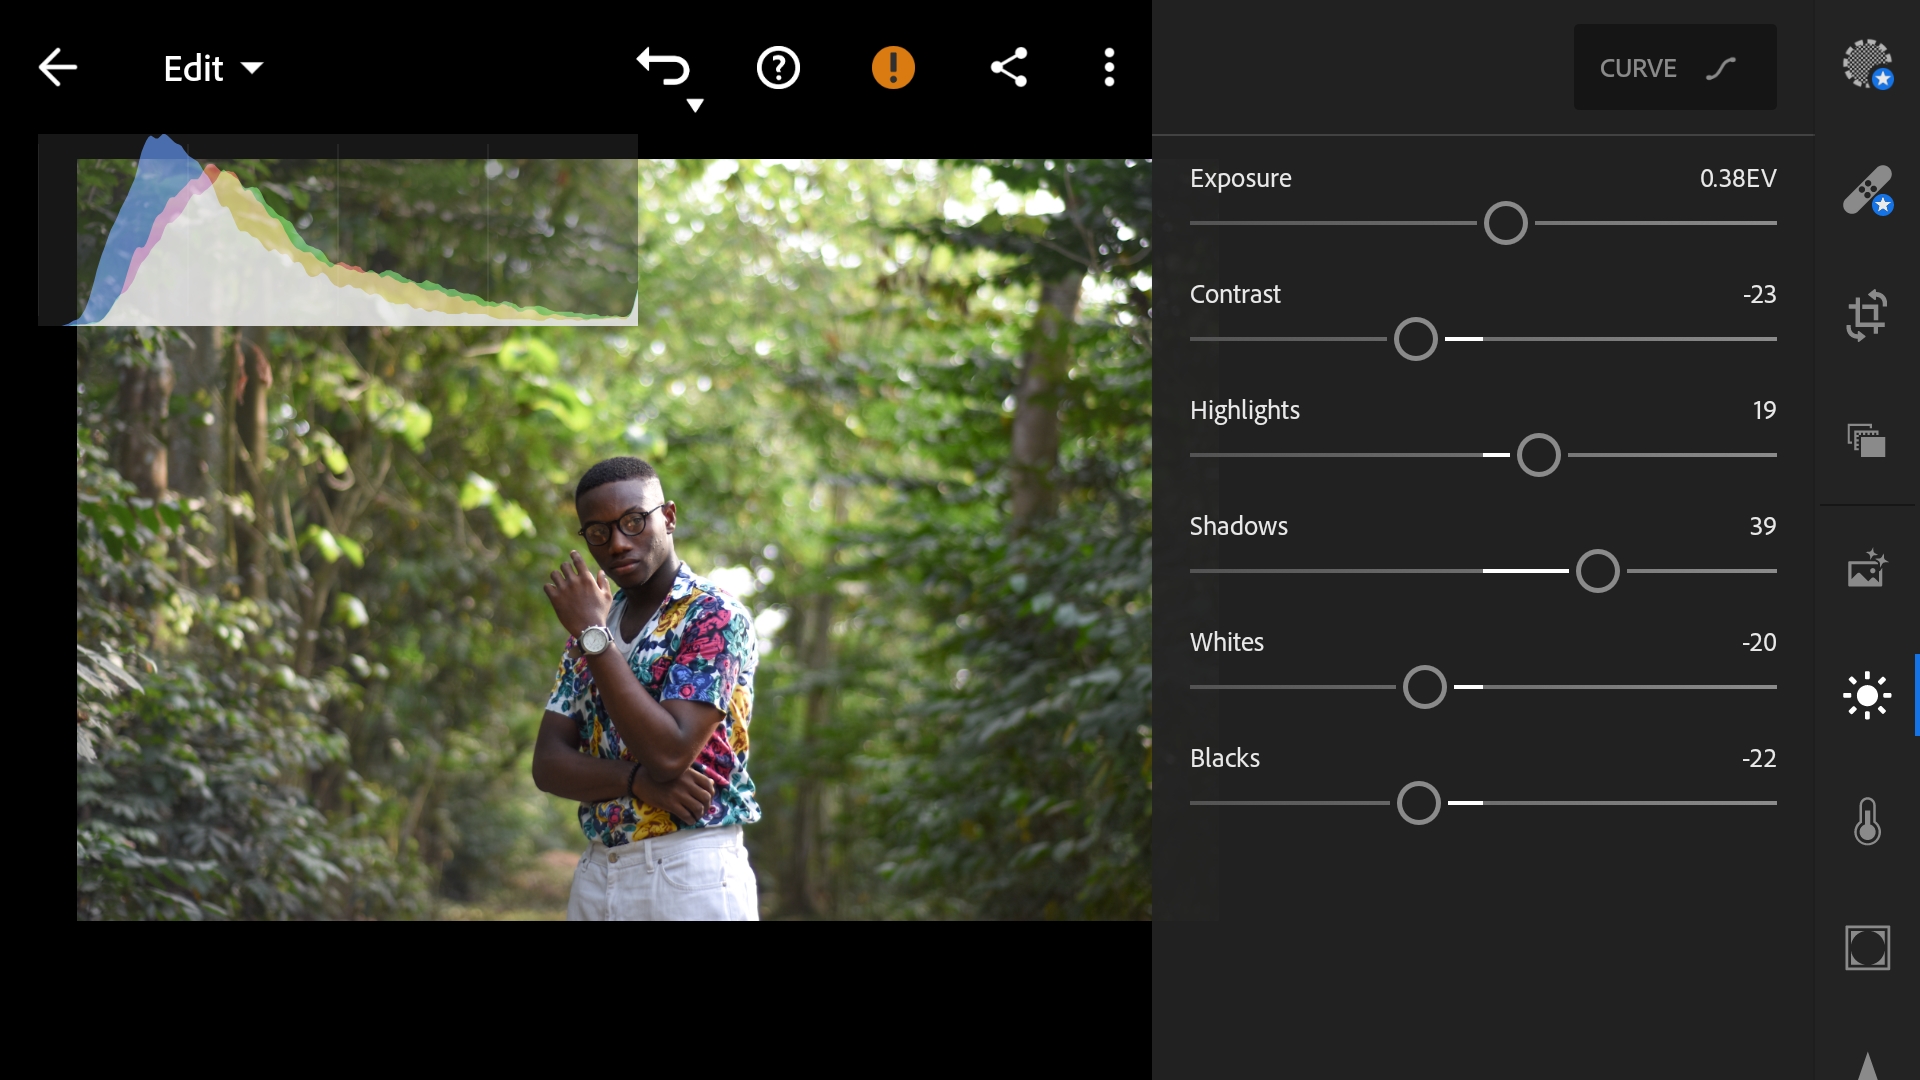
I did some basic tuning first where I increased the exposure a bit and lifted the shadows so more of the models face could be visible. Look at the photo below for more details.
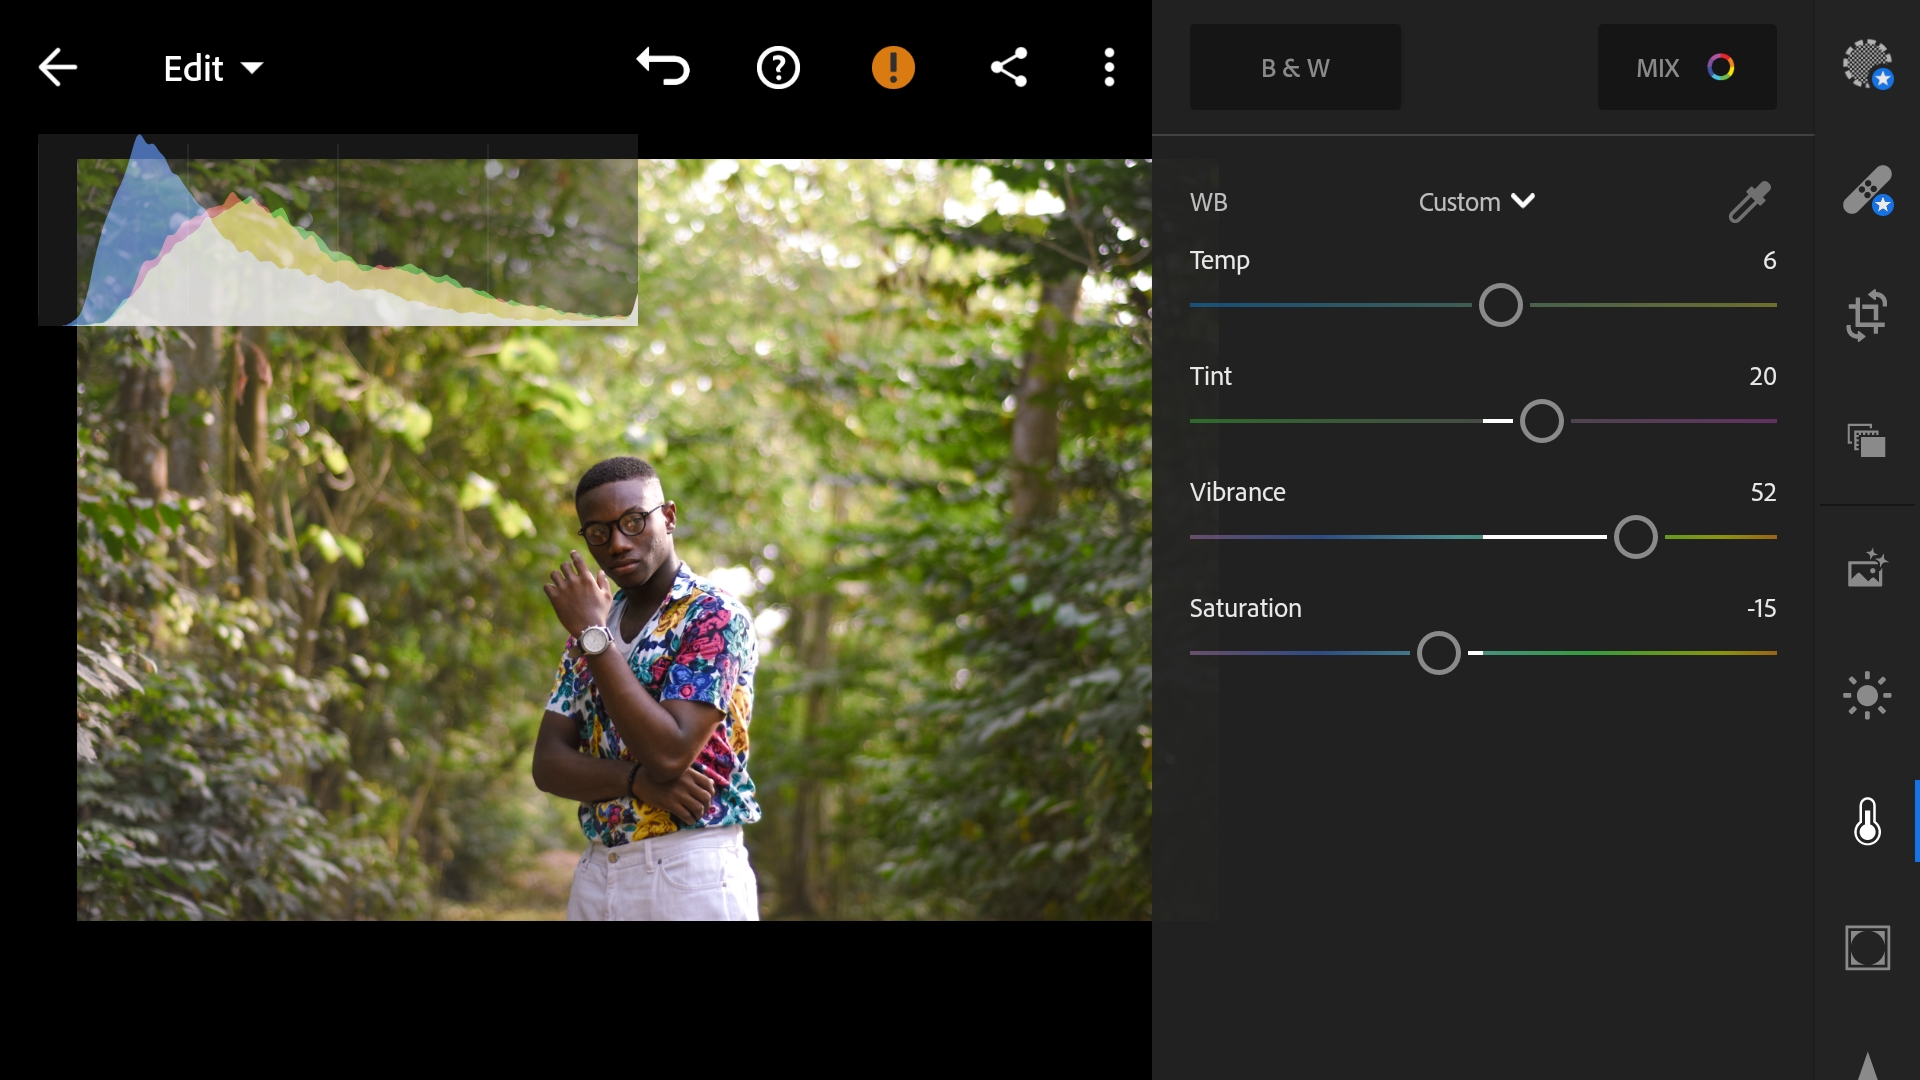
Then, I adjusted the photo's temperature to the warm side whilst increasing the vibrance and reducing the saturation as well. I didn't want the colours bleeding, cause that would look terrible.
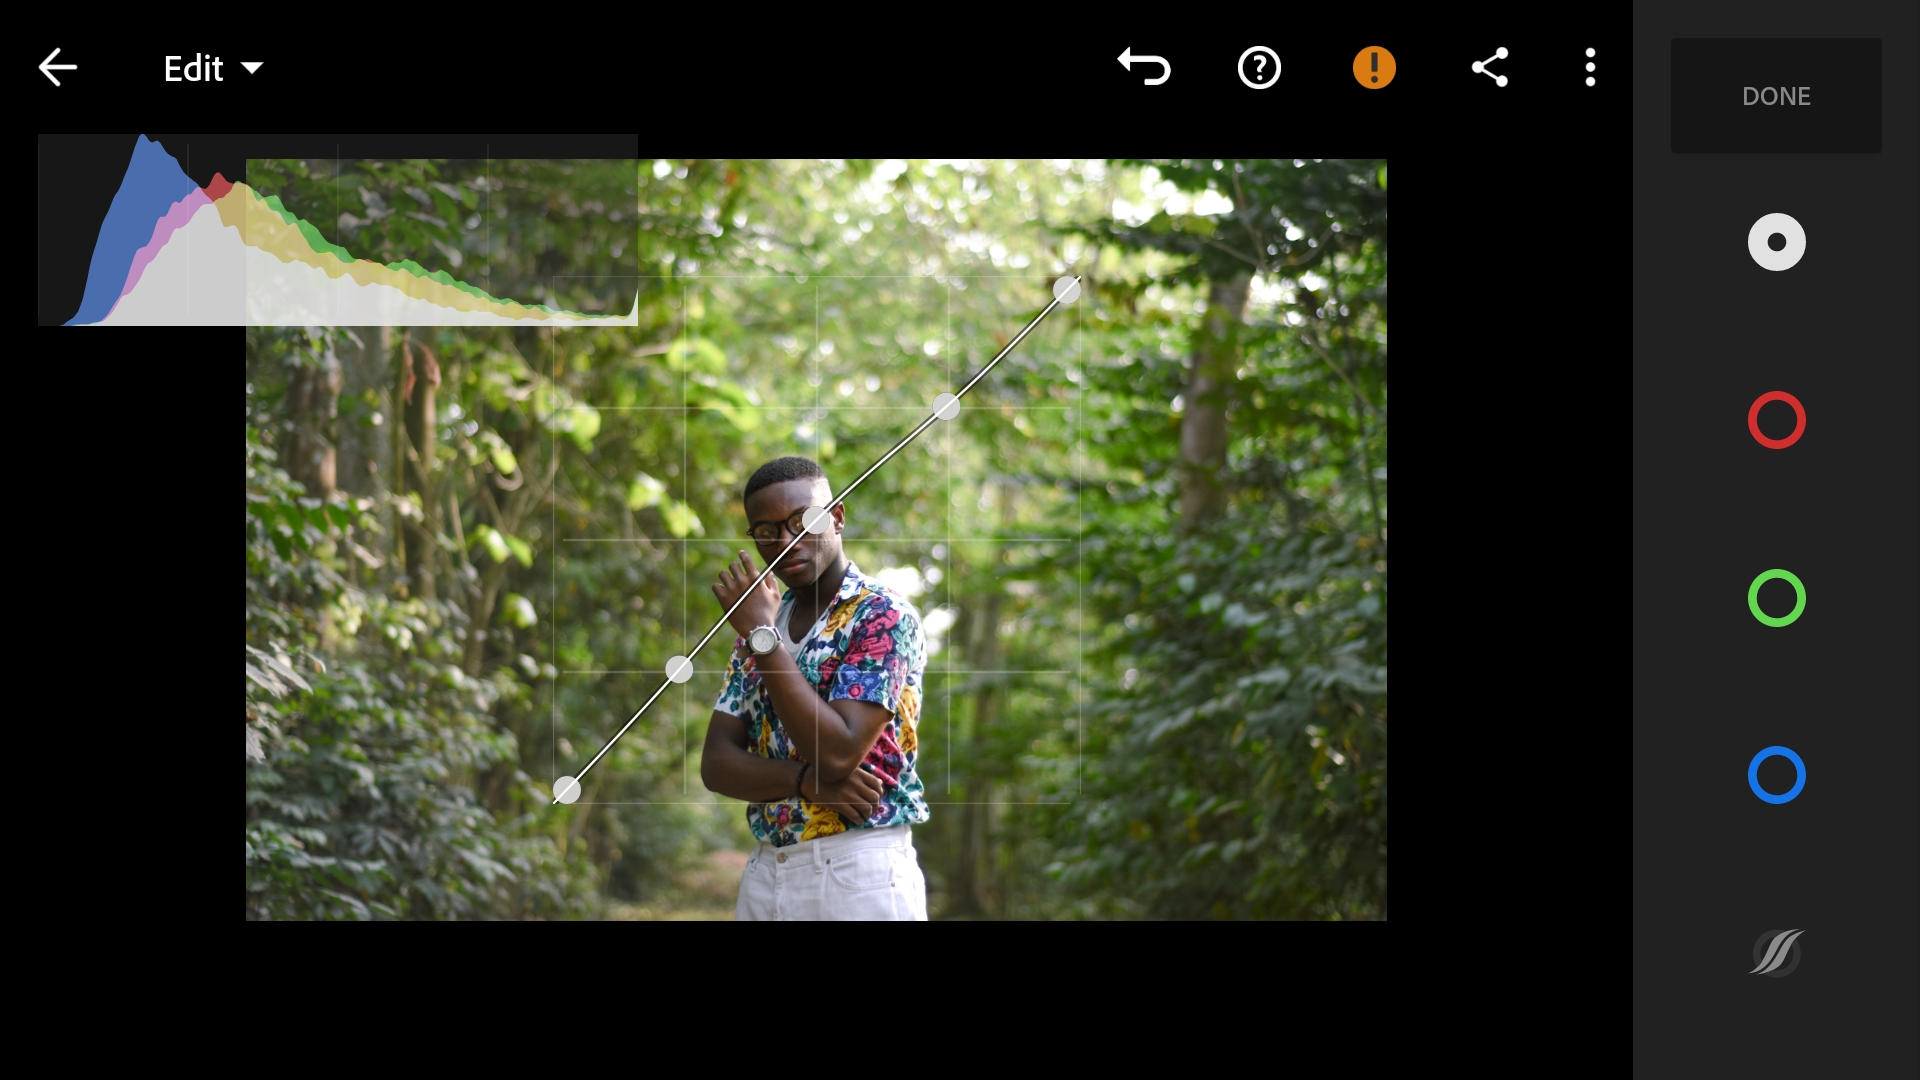
I gently manipulates the luminance curve to brighten the midtones a little bit. Very subtle adjustments were made here.
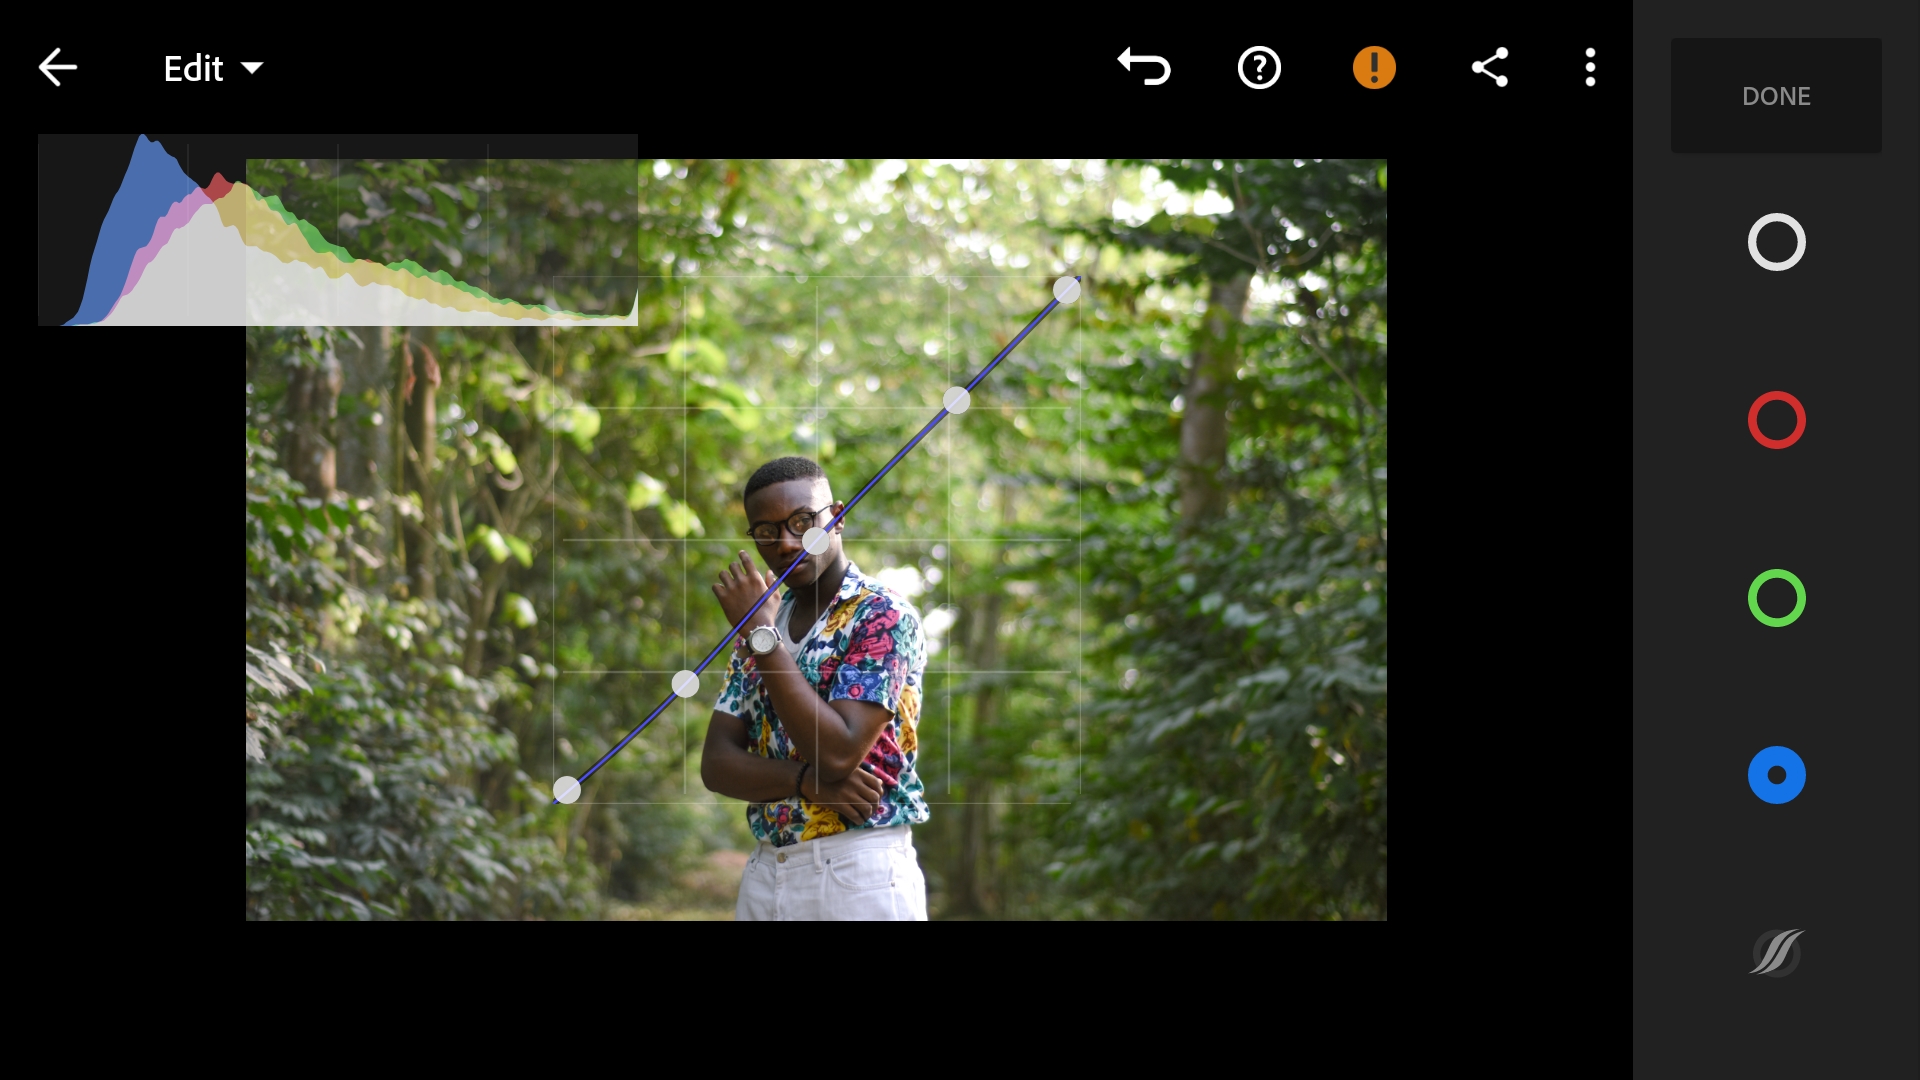
On the blue curve, I added a tiny bit of yellow to the midtones and shadows by dragging the curve gently to the downside.
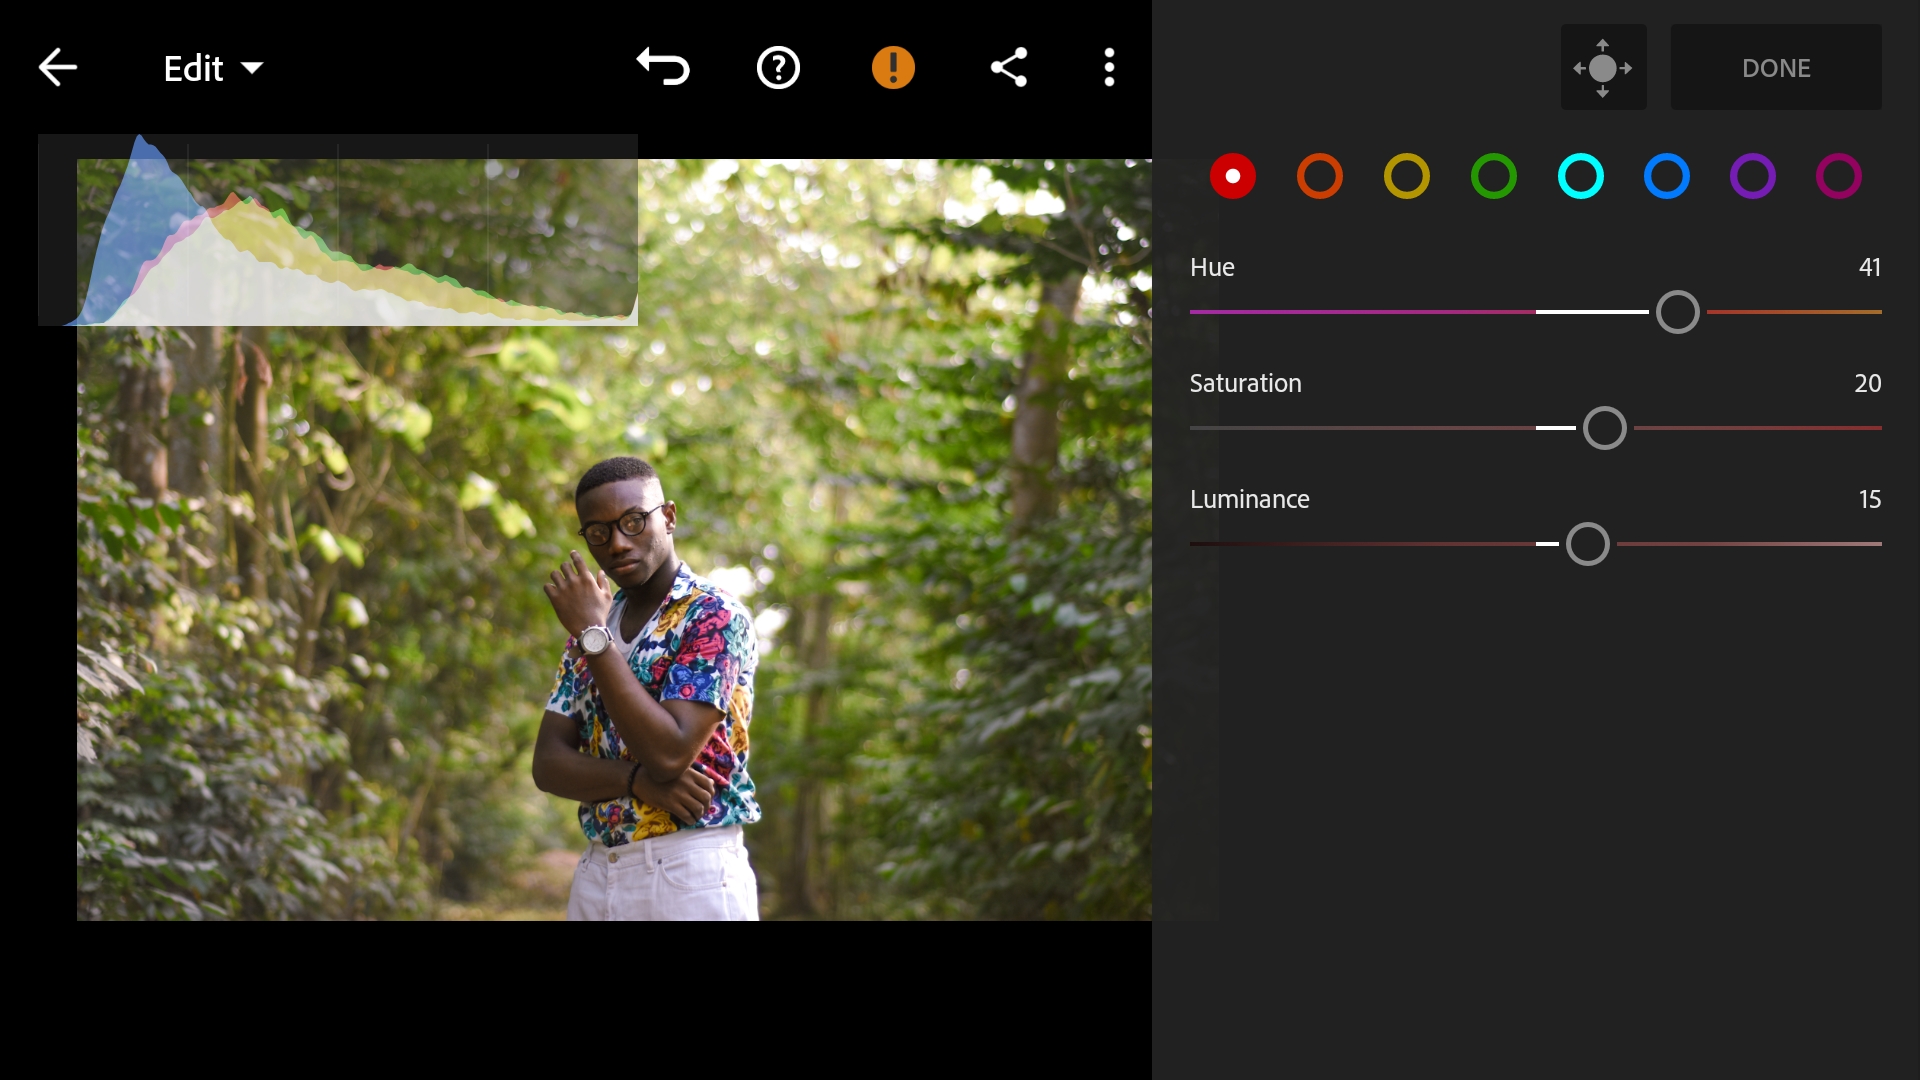
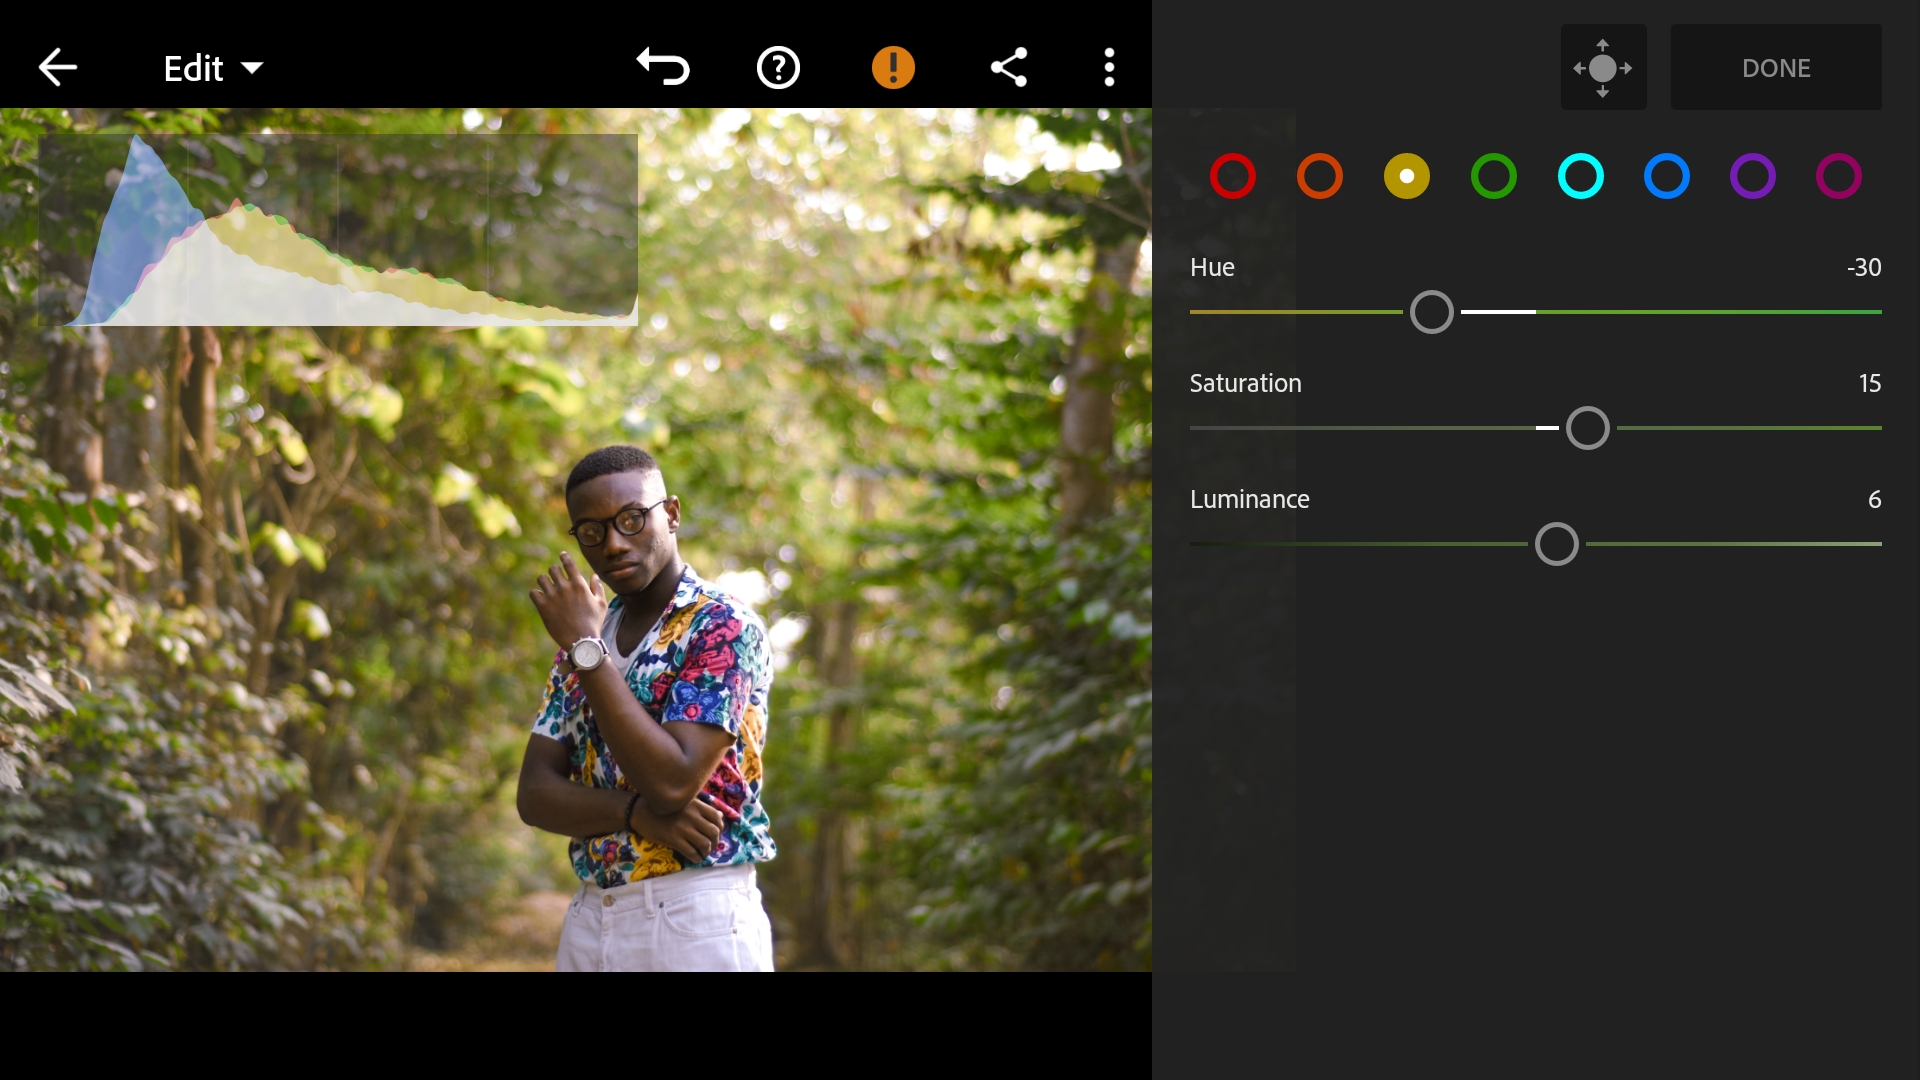
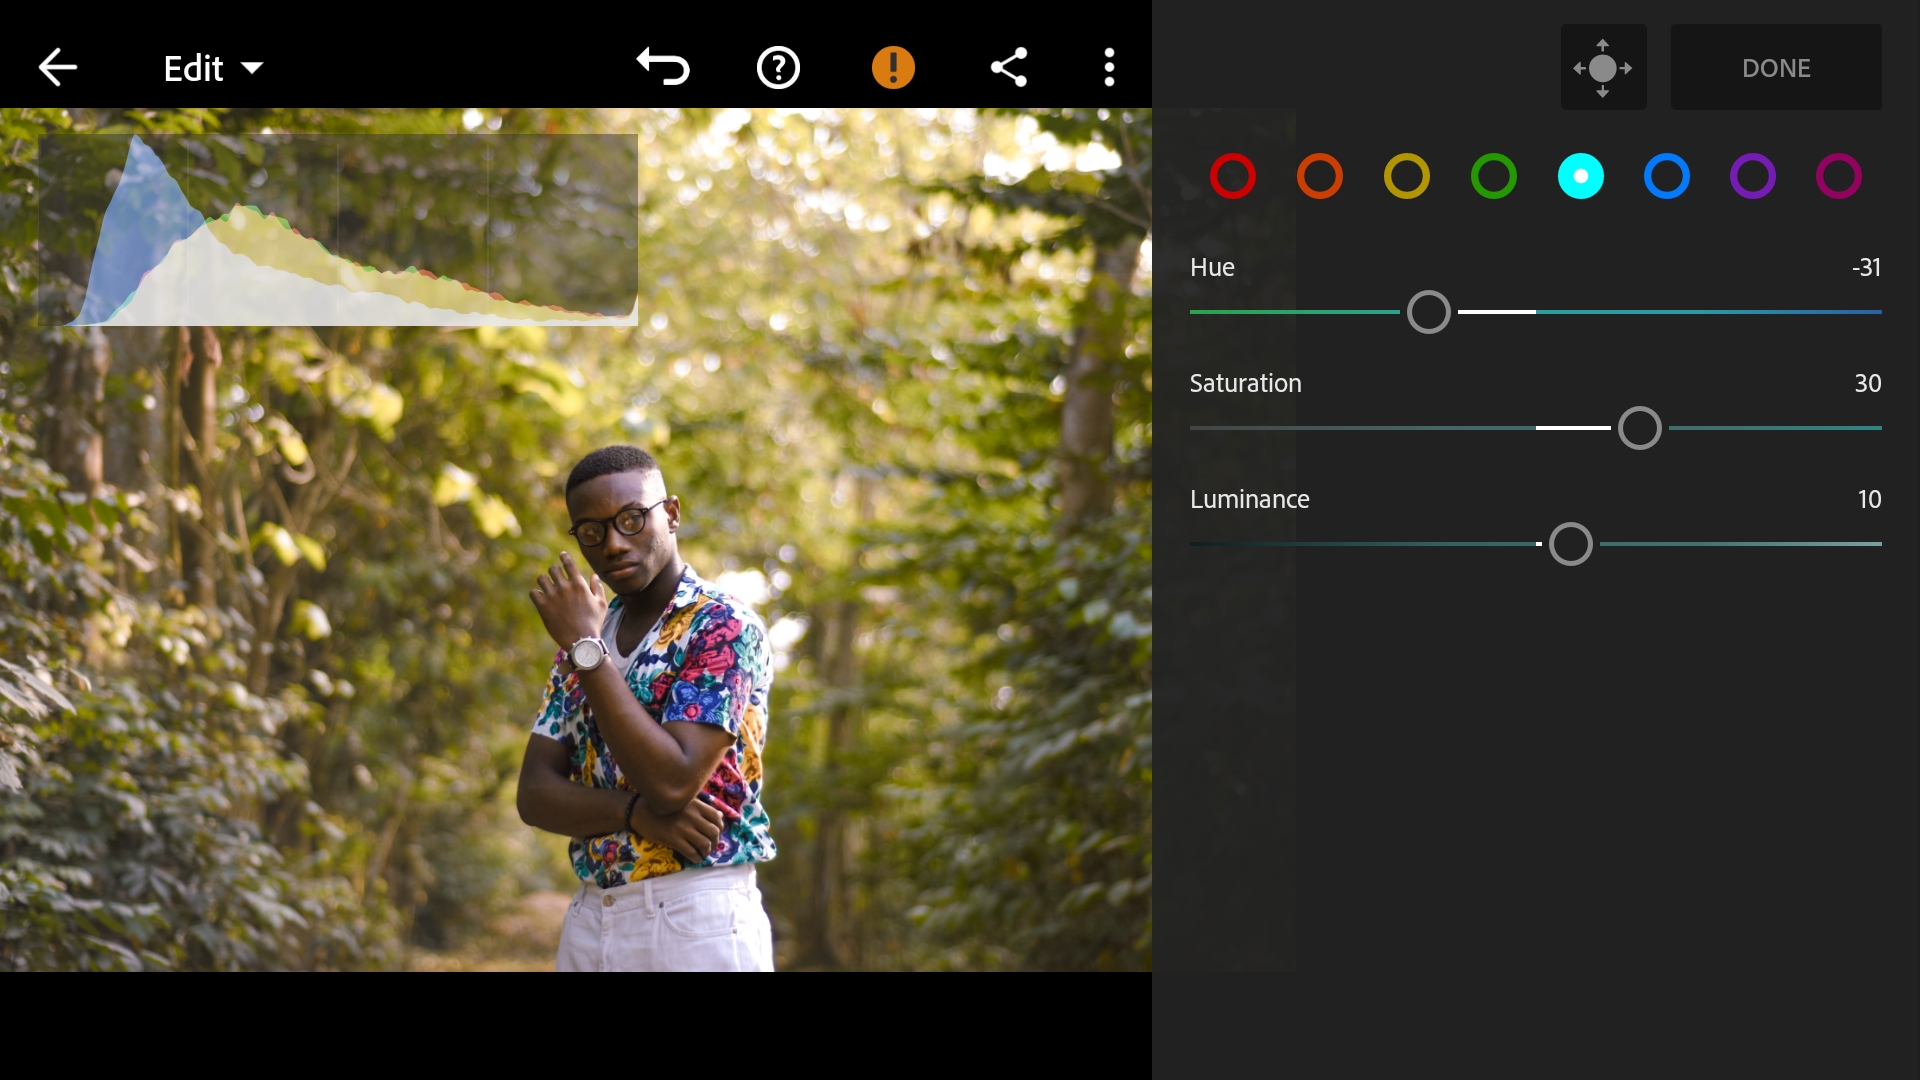
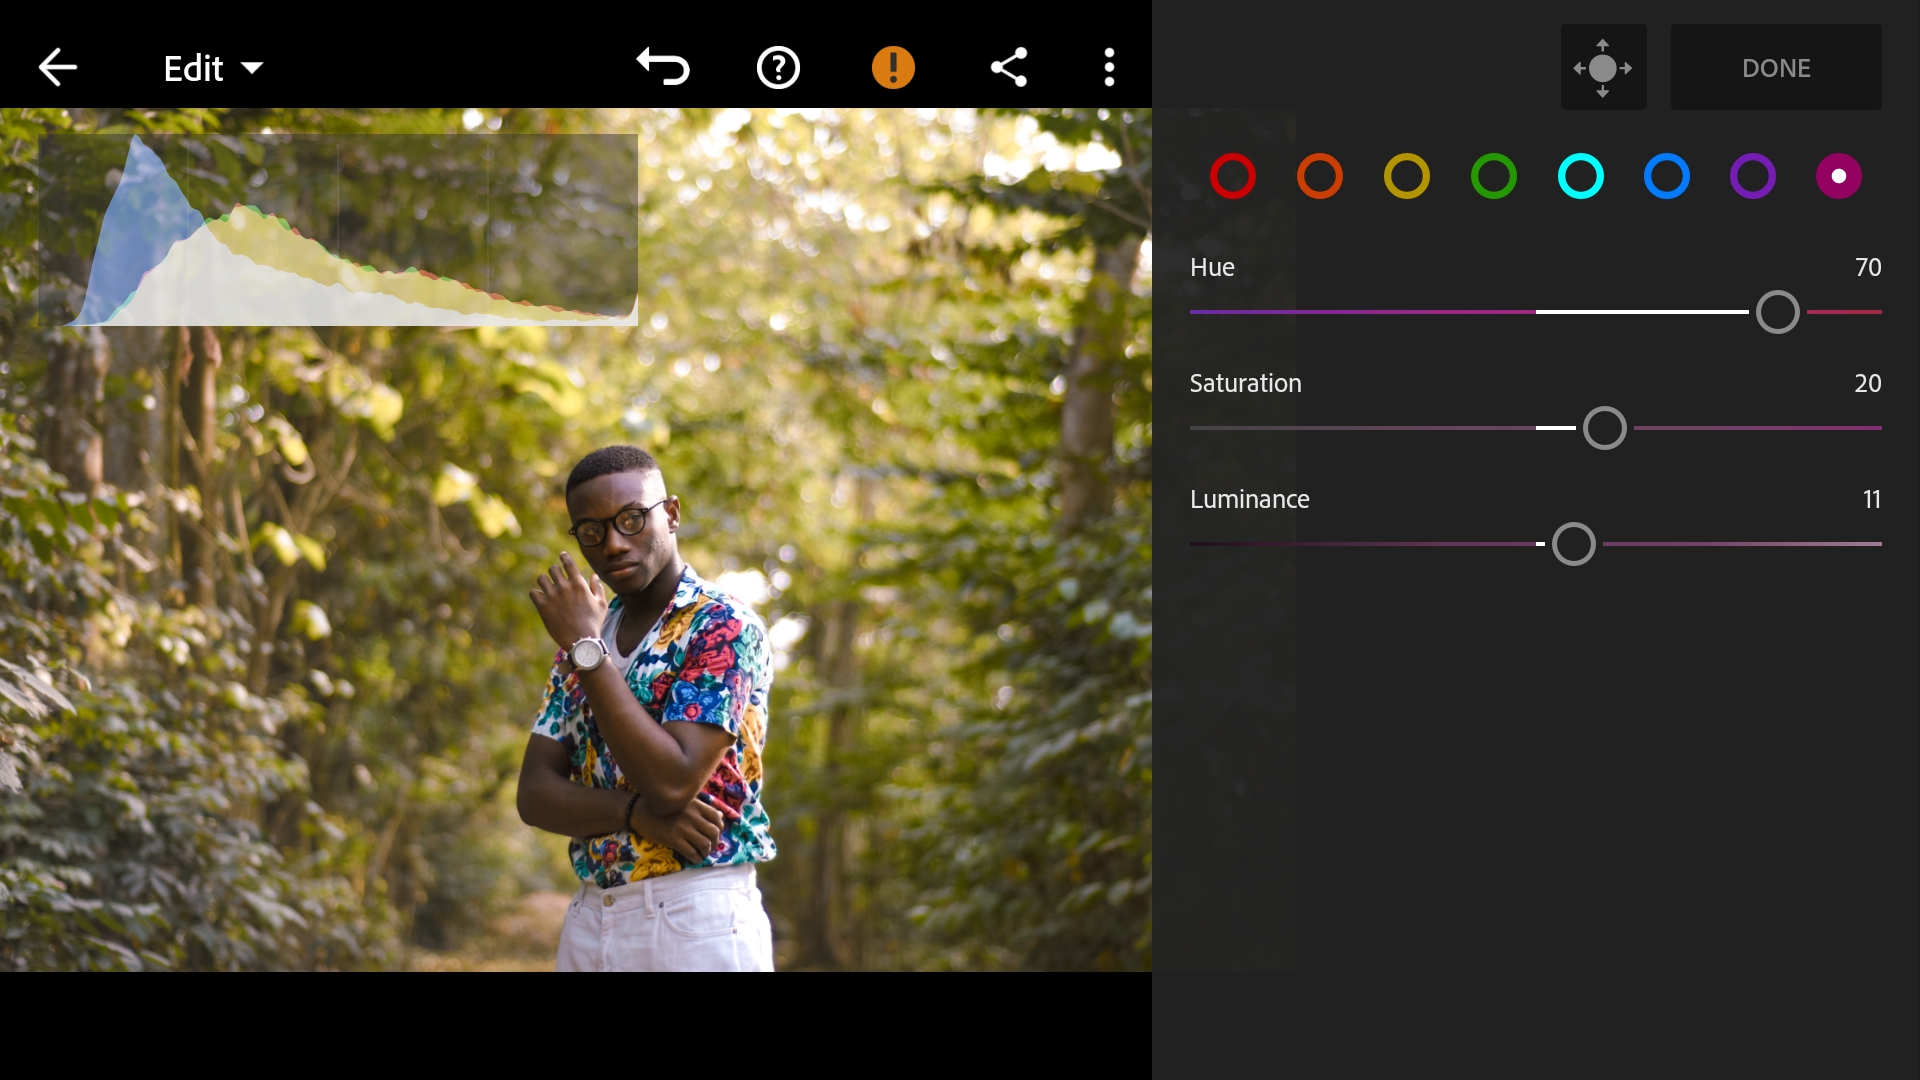
On the Hue-Saturation-Luminance sliders, I tweaked the colours ; Red, Orange, Yellow, Green, Cyan, Blue and Magenta respectively. The greens had the most change as they were changed to a yellow-is hue. The other colours were simply adjusted in ways that would enhance the way they look in the photo.
Here are the settings I applied:


Textures were slightly boosted and a subtle dark vignette was added to the photo.

Lastly, the photo got a bit of sharpening to top it off.
And that's it fellas!

Quick Before and After photo here once again for easy comparison. You could see how the changes we made affected the way the photo looked at the end. I like to keep my edits as simple as possible and only apply what is necessary to achieve the results I need.
Thanks for coming thus far, I hope today's episode was resourceful. I'd love to know what you think and I'd be answering any questions you may have for me in the comments.
Thanks for coming around, hope to see you again!
Master shifu. Be like I go stop my own tutorial. Let me learn from one of the greats.
Please don't do that. I need your posts to make mine sensei 😅
Scam oooo!!! 🤣🤣🤣
😂😂😂
Great tutorial. I love how the image turned out. I've reblogged this.
Thank you :)