Creating the Anguish map was, in fact, a bit of internal anguish on my end. I failed a couple of times to take the foggy vision I had in my mind and realize the creation of it. From a design standpoint, it is different than most of my other maps. This required a couple of failures before coming up with a process I wanted to create it.
I’m coming to a portion of my game where I’m moving away from the more standard building of using rooms and hallways with the more traditional walls, callings, and floor meshes to make them. These are more like my outdoor zones. Expect they are underground caves and the likes. As such some of the tricks, I’ve learned while creating outdoor zones will play out later on in how I went about some things.
Fail
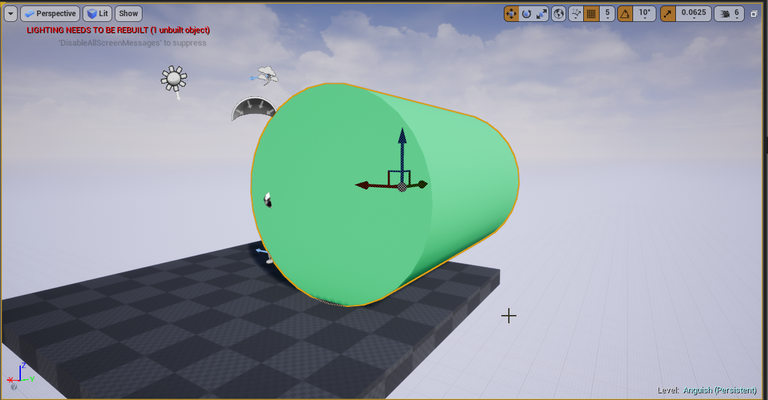
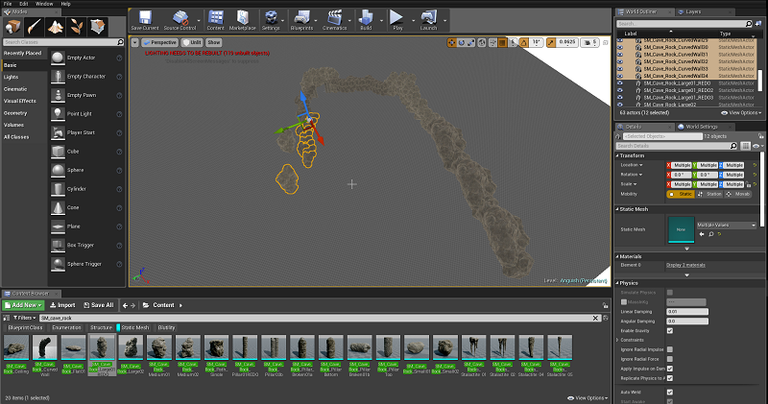
My first day of trying to create the Anguish map was rooted in failure and frustration. There is a really fun function in Unreal Engine 4 that could be used to create massive underground caves. So I had to do some research into a better understanding of how to use it. This also required me to create some assets.
The feature I’m talking about is called Splines and there is some decent documentation on it. In laymen terms, it allows you to reference a set mesh such as a cave and allows you to just drag it out with it creating as many of that cave mesh that fits within the ruleset created.
This is how people could create something simpler like rivers in a game. If you are good at it you could create a bunch of rulesets in it and then just go and drag it out to create a massive and interesting river.
When trying to work with a 3D object some things are required for it to work. Since it is connecting end to end those endpoints have to match each other. Otherwise, you end up with mismatching that could result in ugly seams, holes and impassable terrain.
I spent a decent amount of my day looking into how others have to implement Splines. This included trying to pick up on any tricks they could pass on to those wanting to know more about using them. In the instance, I want to use it for that tends is for more advanced users.
Creating the blueprint itself in Unreal Engine 4 can get a bit complex depending on how deep of a Spline system you want to create. I ended up not creating one as I just could not get the assets themselves to a place I was happy with it.
A lot of people in this space will use something like Autodesk Maya to create the 3D models they need. While I don’t have that exact program I was considering blender. Ultimately, I decided not to since these 3D models need to be perfect. When they are not you have to go in manually and place a lot of rocks and such to hide the imperfections.
You might notice in a lot of games that the outside of a cave, for instance, tends to have a lot of thought and effort put into it. Game developers tend to place a lot of rocks over the mouth of the cave, beams, and a long list of other objects. That’s more than likely to cover up the massive holes between that cave and any surrounding area. While mine would all be “underground” and I could skip that part. I’d still need to go in and fix all the issues from not having a really solid mesh to pull from.

I did make several attempts using the tools provided in Unreal Engine 4. I’ve had some attempts and failures in the past using BSP geometry which I was hoping could create what I wanted. They were however quite ugly and I was just not a fan of the look. Sure, I could have gone in and spent a lot more time trying to work on these assets. The biggest issue for me is I’d have to create maybe half a dozen of them so it does not look all uniform and just a massive cave that had one section duplicated.
As far as Splines go. I’m glad I have a little more understanding of them. One day I do have a possible use case for them. There are a lot of tricky yet fun things I think can be done in code with them. That, however, is not something I’m expecting to think about or do until 2022 or later. In which case I’m sure I’ll forget a few things.
Back To The Drawing Board
While I have set some ambitious deadlines for myself and truth be told I made a mistake in my timeline and have two zones with the exact date I wanted them to be done with phase one. I also know that pace is going to be challenged to keep up with. I’d rather spend the time now developing a better understanding and way to approach things than just rush everything. Even if I start missing dates that are expected to happen.
With Splines no longer holding what I am looking to do. I asked myself what did I need from this map? What tools do I have now to do so? What do I need to learn? Along with some other questions as I revisited my thought process on this one.
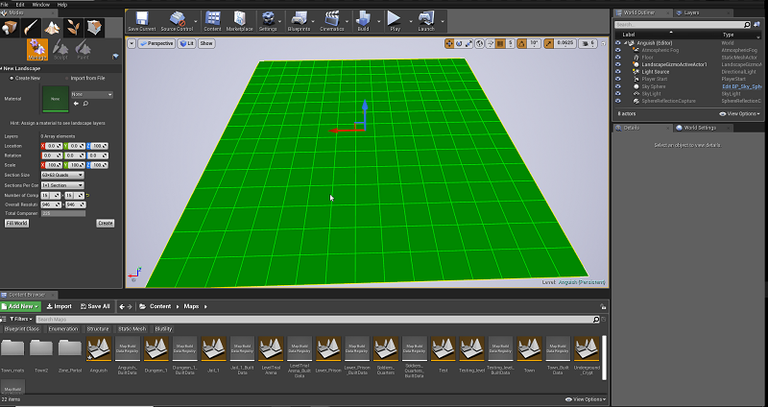
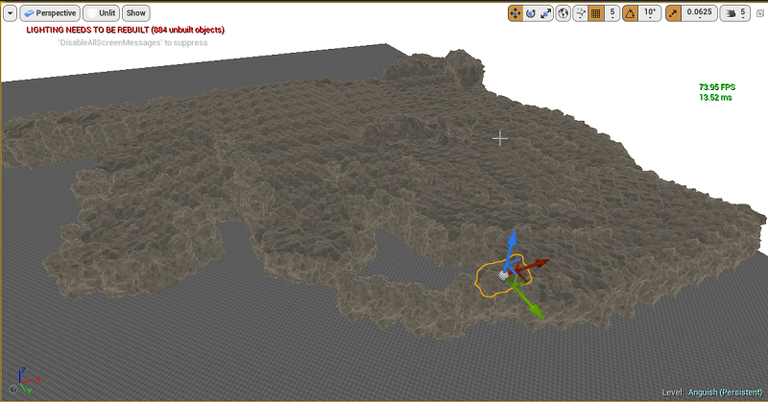
The zone itself was going to be more like an outdoor zone expect it would be encased by rocks. There are many functions within the landscaping tools in Unreal Engine 4 that I could use. The ground I got to thinking would be dirt and rock anyways. Why not have a landscape layer as the ground and make it far more unique than I could have to attempt to use Splines in the first place? Is what I ended up asking myself in the end.
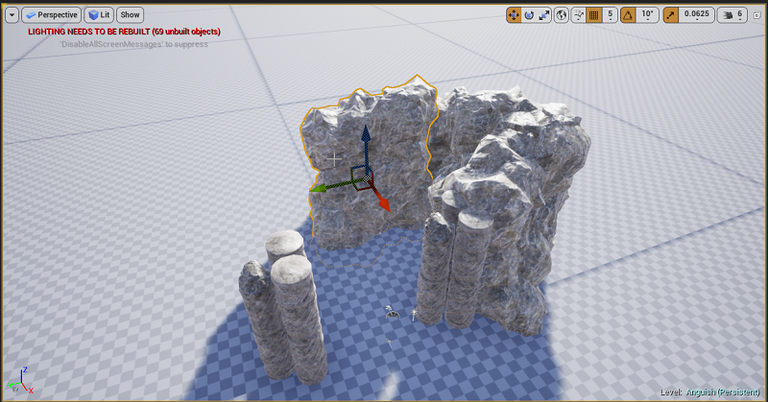
I took several rock meshes and enlarged them to meet my needs. I wanted things to be vast with a tall ceiling. So I took some time testing different heights and running around on my character for a better understanding of scale before I moved forward.
Creating Different Areas
I then started to lay out a general feel for one of the bigger sections of this map. Thankfully I went in and tested all the meshes before things got too big. One of them had some issues with mesh collision and some other things so I quickly replaced and stopped using it. While I could have fixed it I was not dead set anyways on using that particular mesh anyways.
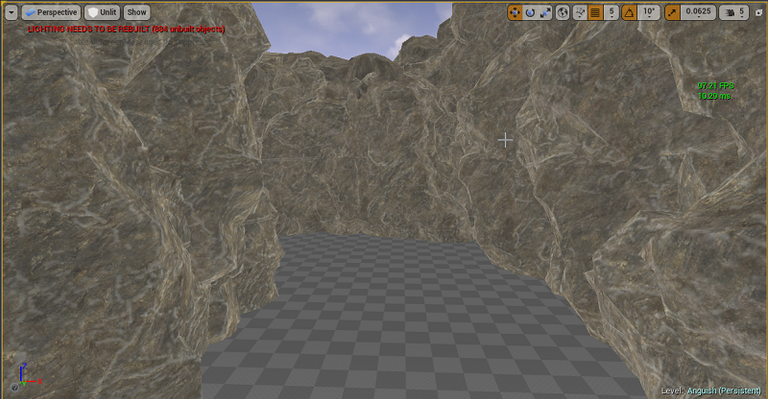
This is one such passageway I made between my different rooms on this map. Some of them I made a bit wider than others. They were also done freehand by placing and turning rock mesh to create it. So any imperfections outside of holes you could see to the outside world are just added character to that area.
Since I have an actual landscape ground layer which most of my maps do not. This means I get to paint the ground and do some other cool stuff. In my outdoor map I already had a blend space for using three different layers for grass, dirt, and rock. The dirt and rock were a perfect fit for this map so I just reused some work I’ve already done and applied it to this area.
I also went in with the sculpting tools and made some elevation changes. At first, I used some randomness from the Hydro Erosion and some other tools for my first pass-through. I then went in manually and smoothed out, increase, or even decreased some areas of ground.

With this being a cave I wanted some nasty water in it for the lower-lying areas where the water layer I added would be. Some passageways are flooded and you have to wade through them almost waist-deep in some areas. There are also a few ponds and little puddles here or there. I did not end up creating as many puddles as I wanted as it ending up conflicting with some other stuff I wanted to add-in.
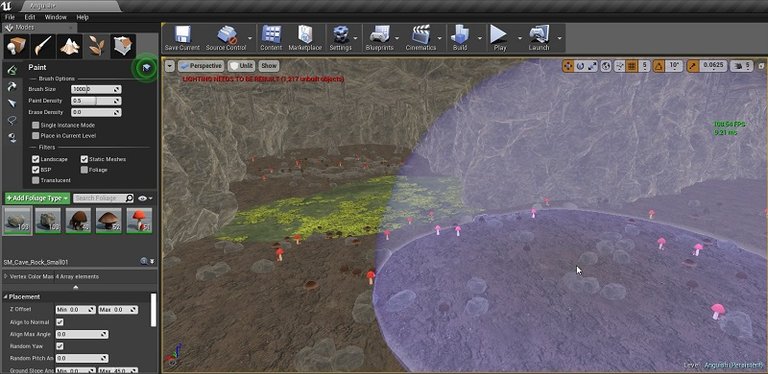
I then went in and created little areas of interest. This was done by populating the foliage tool with a couple of different types of mushrooms and even some areas with loose rocks on the ground. I then went in and manually placed several different objects including broken walls, towers, and anything else that felt like it fit this area.
Some of those choices were done with a bit of lore I have in my mind in why this place is called Anguish in the first place. That won’t be something I wish to expand out at this time. Naturally, it's all run down and those that inhabit this place are long gone overrun by something else.
While it would have been nice if I could have just copy and pasted a section of the ceiling and done that a couple of times to be done with the place. That ended up creating repetition that was hard to break up and not be noticed by the eye.
I found it interesting to keep in one area of the map itself. Everything else was done dragging into place each mesh ceiling rock. There were also some areas of the map I wanted a higher ceiling than others. Over 500 rocks are making up the ceiling alone. Which was not that bad.
Overall, I had a lot of fun creating little areas, passageways, and larger rooms. It was hard to not get lost in what I was doing and find out I was up way too late with things unfinished what I wanted to get done.
Lighting
With how large many of the areas and even wide passageways are lighting was a major concern in the back of my mind for quite a while. There were a couple of different ways I could have gone about resolving this issue. There was also some design limitation I placed myself which made this a bit harder than it needed to be.
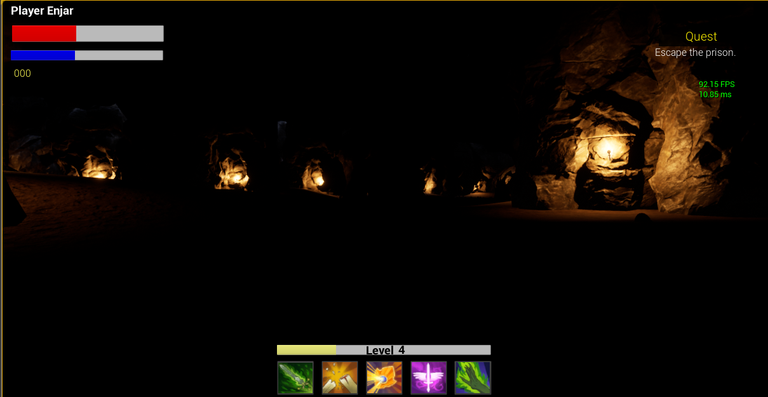
While I could have adjusted the range of light the torches I generally use give off that did not make much sense that a tiny torch could light up a massive cave. Heck even dozes of them are not enough to do the job. As s you can see in the screenshot above. The map had a couple hundred before I render the lighting to see what kind of monster I’d be dealing with.
This map is also deep underground. All the maps before this had the player take steps going down. Many of those maps even descended even further themselves. It would have been an “easy” solution for creating areas for sunlight to go through to help light up the place. It was not a route I wanted to take let alone from a visual standpoint it took away from the feel of this place.
I also felt it would take many thousands of lighting sources to resolve my issue if I wanted to go the route of more torches. There were already a couple of hundred torches along the cave walls. I even tried placing things like fireflies, spotlights over certain objects that could have had a glow and other things. Nothing in my short testing seemed to have fit the bill.
One rather dramatic option was to use Exponential Height Fog that would scatter my already existing lighting further out. The only downside was the lighting I had set up meant I had some options that would not work with this kind of fog. This just meant my scene would be rather foggy as seen in the screenshots.
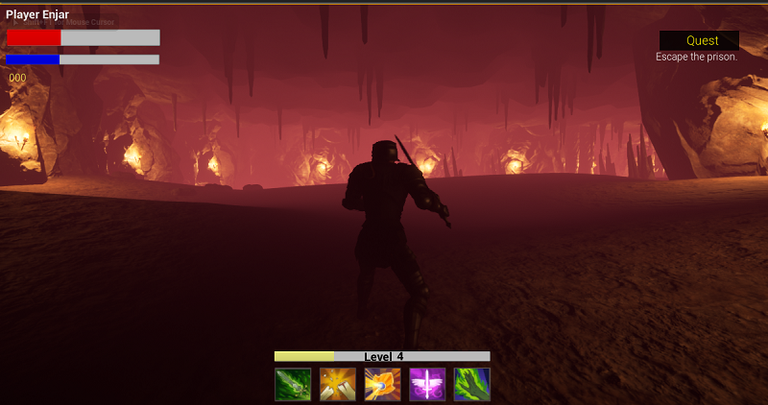
As a result, I used that to my advantage to give this map quite a darker feeling with color. I tested a couple of times between blue and red and ended up loving how red evaluates things to the next level.
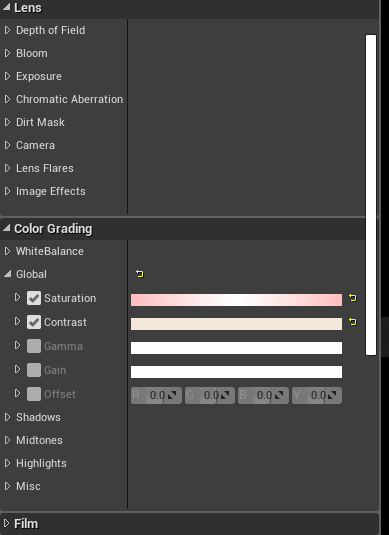
I even added a post-processing volume to the entire map to give it a slightly more saturated reddish color. That is not something I’ve used much and it has more options than could even guess what they did. It’s an area I need to play more with and do a lot of research in such as color grading.
I ended up rebuilding the lighting a couple of times for this map. The preview is never quite the same as the real thing. There were several other things I tested and failed at that are not going to make it into this post. Lighting is always something interesting to play around with at least for me. It takes a while to build so that slows things down while waiting on it.
Final thoughts
I’m glad I first failed and ended up going the route I did. I don’t think this would have turned out nearly as cool or interesting to run around in if I had not. It was tempting to take this map beyond an 8-minute run (going in, around, and out of all the rooms to test length time). I’m glad I did not go overboard.
Some of these rooms are quite tall and require a lot of lighting to be processed among other things. There are more than enough interesting areas in this one to keep it fun without dragging on for too long and giving the player of total anguish. Which was tempting to do.
Other Posts:
- 1. Unknown WIP
- 2. Getting In the Basics
- 3. First Level
- 4. Outdoor Level Attempt Number 1
- 5. Using BSP Method For Making A Zone In Unreal Engine 4
- 6. Structure, Enumerations, Data Table --Oh My
- 7. Creating A Trial Arena
- 8. Roadmap On My Game
- 9. Soldier Quarters Dungeon
- 10. Game Development | Underground Crypt
- 11. Basic Portal To Another Map
- 12. Shoestring Budget And Getting A Great Deal
- 13 Lower Prison Map
Information
Screenshots were taken and content was written by @Enjar. Screenshots are from Unreal Engine 4.


#Posh for anguish!
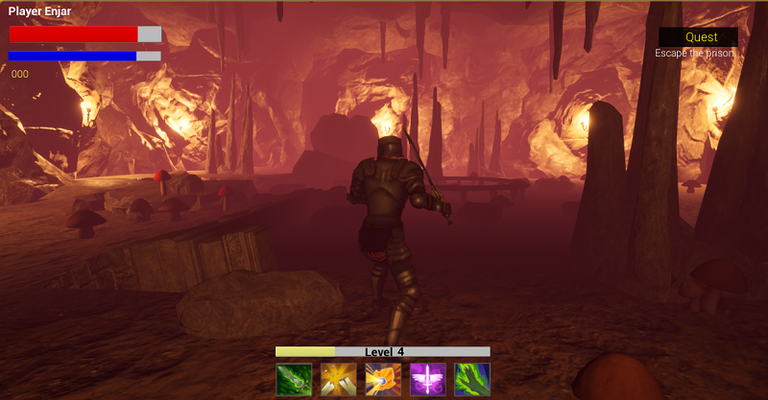
Looks much better with the rock building strategy.
I"m rather happy with how it turned out.
My next map is not looking so great and might not live up to this.