How I Made the Mountain / Jungle Scenes
I’m writing this post in response to people’s interest in knowing how I made the Godzilla vs. Kong stop-motion trailer remake. The video has over 20 unique scenes, so I’m splitting this into several posts to cover a few of the main sets that I built. Hopefully you’ll find it interesting.
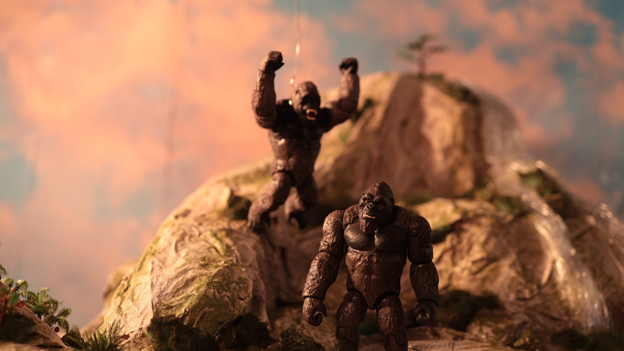
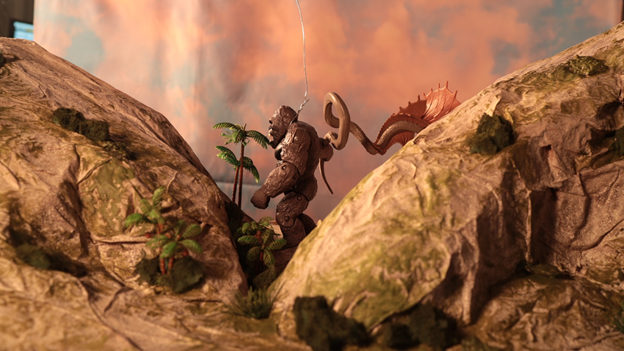
As you can see from the image above, I used 2 Kong figures to create the jumping scene. One with an open mouth, one with a closed mouth. I fixed the focus on the camera to the foreground Kong, since he stands there the longest. The jump was fast, so the unfocused hanging Kong on a wire didn’t look bad slightly soft focus.
I hung the Kong over my set with a boom tripod stand using soft wire. When he lands, I used the second shot for a pick up scene where he roars.
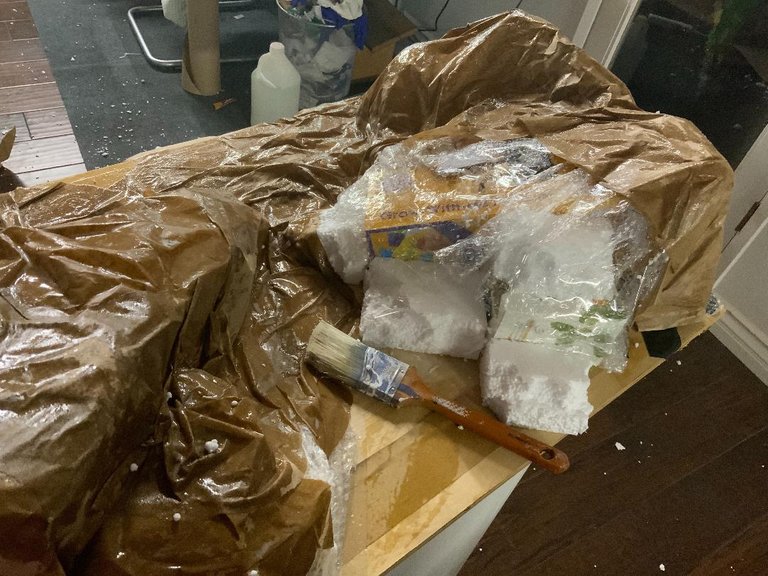
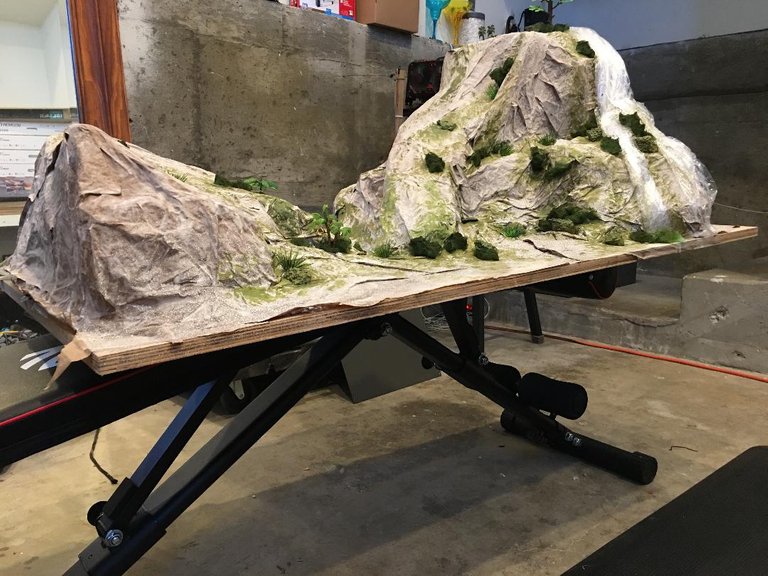
Basically, I had no money left for sets after spending it all on props and action figures. So I made this set mostly from trash. I reused this set for the above scene as well as Kong fighting the Hollow Earth Warbats. I’ll share links to all the figures and props I bought at the end of this post.
The set is built on a plywood base, which I taped discarded boxes and polystyrene packaging scraps to. After roughly taping these items into the basic shape of the ravine and precipice that I needed for my shots, I softened the shapes using old pieces of bubble wrap I had lying around. After forming more organic shapes, I tore pieces of parcel paper up and glued them on the structure using a flour/water mix. (50% water/50% flour – papier-mâché or school glue formula!)
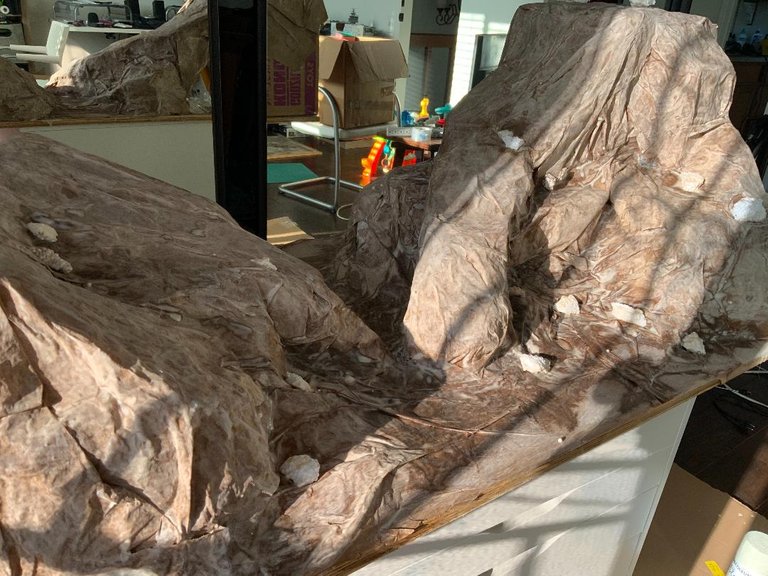
This structure took about 2 days to dry hard. Once completely dry, I sprayed it with a stone texture from Home Depot, which also sufficed for the coloring the structure, making it look like a rocky cliff and ravine. I stuck pieces of kitchen sponge and tiny bits of polystyrene on the surface for bushes and painted them green. I also used some miniature toy scenery palm trees I had from an old war-play miniature kit. I added plastic wrap for the waterfall.
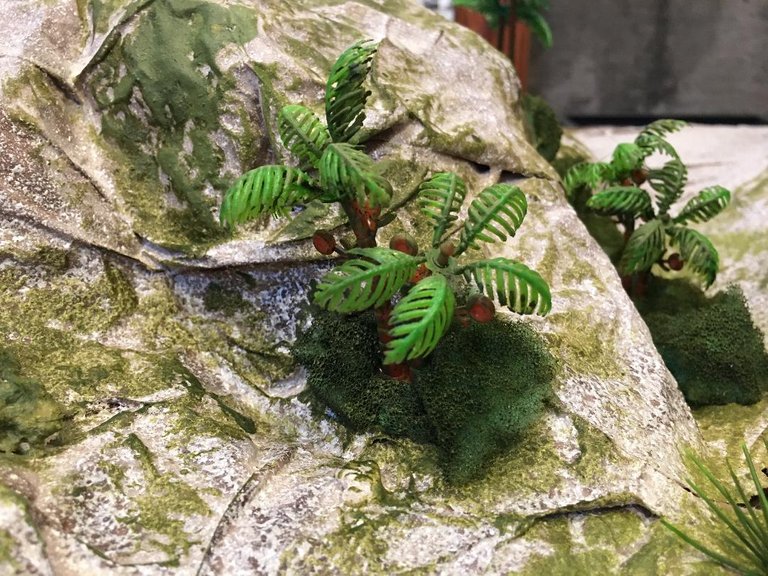
None of it looks especially great close up, but the scenes in the trailer were so fast, I didn’t need to add more details to achieve the feel of the scenes that were actually extremely detailed in the movie.
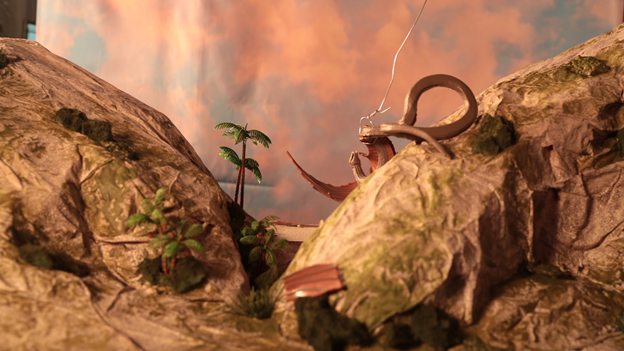
I only purchased 1 warbat, but there were 2 in this scene. Kong hits one warbat with another one. I achieved this by separately animating the same warbat playing both roles, then superimposing a layer of action over the other using Photoshop to cut out the action and Premiere to layer them.
I also used Photoshop to do things like painting out the wires and smoothing the creases in the sky background.
I bought the Warbat and Kongs from Walmart. Here are links for all figures:
Warbat
6” Kong with Fighter Jet (closed mouth)
6” Kong with Battle-Axe (open mouth)
For the sky I found an awesome pink/yellow clouds photography backdrop on amazon that I reuse for almost every outdoor shot in the video. With some different lighting setups, the sky worked very well and I expect I will reuse it for more shoots in the future, so well worth the $40.
Hopefully you found this post enjoyable. Let me know if you want to see more posts like this explaining the different sets. I’ll post another one next week on the city scenes and the ship/ocean scenes.
And of course, you can watch the complete trailer here:
You can also check it out in my introduction post. Feel free to ask me questions about any of it. I’ll try my best to answer!
Thanks for the extra views I am getting on YouTube!
Thats such a cool process. Its neat seeing behind the scenes and the overall works creation. Very cool
Thanks, I really enjoy the process or would for sure not do it. It's very time consuming, but a lot of fun once it all comes together.
Smart with the compositing XD
Seems you can make some pretty great sets from random stuff and imagination O_O
Thanks! Some of it is really easy to come up with, and other ideas seem like they are going to be great but end up being a real pain. In the end it all worked out great.
Sounds like anything to do with animation XD
Great work! Congratulations!
Wow very well detailed, I never watched the movie before but from your illustration it seems its gonna be really interesting, I would love to check it out. And I want to know how I can get you on YouTube