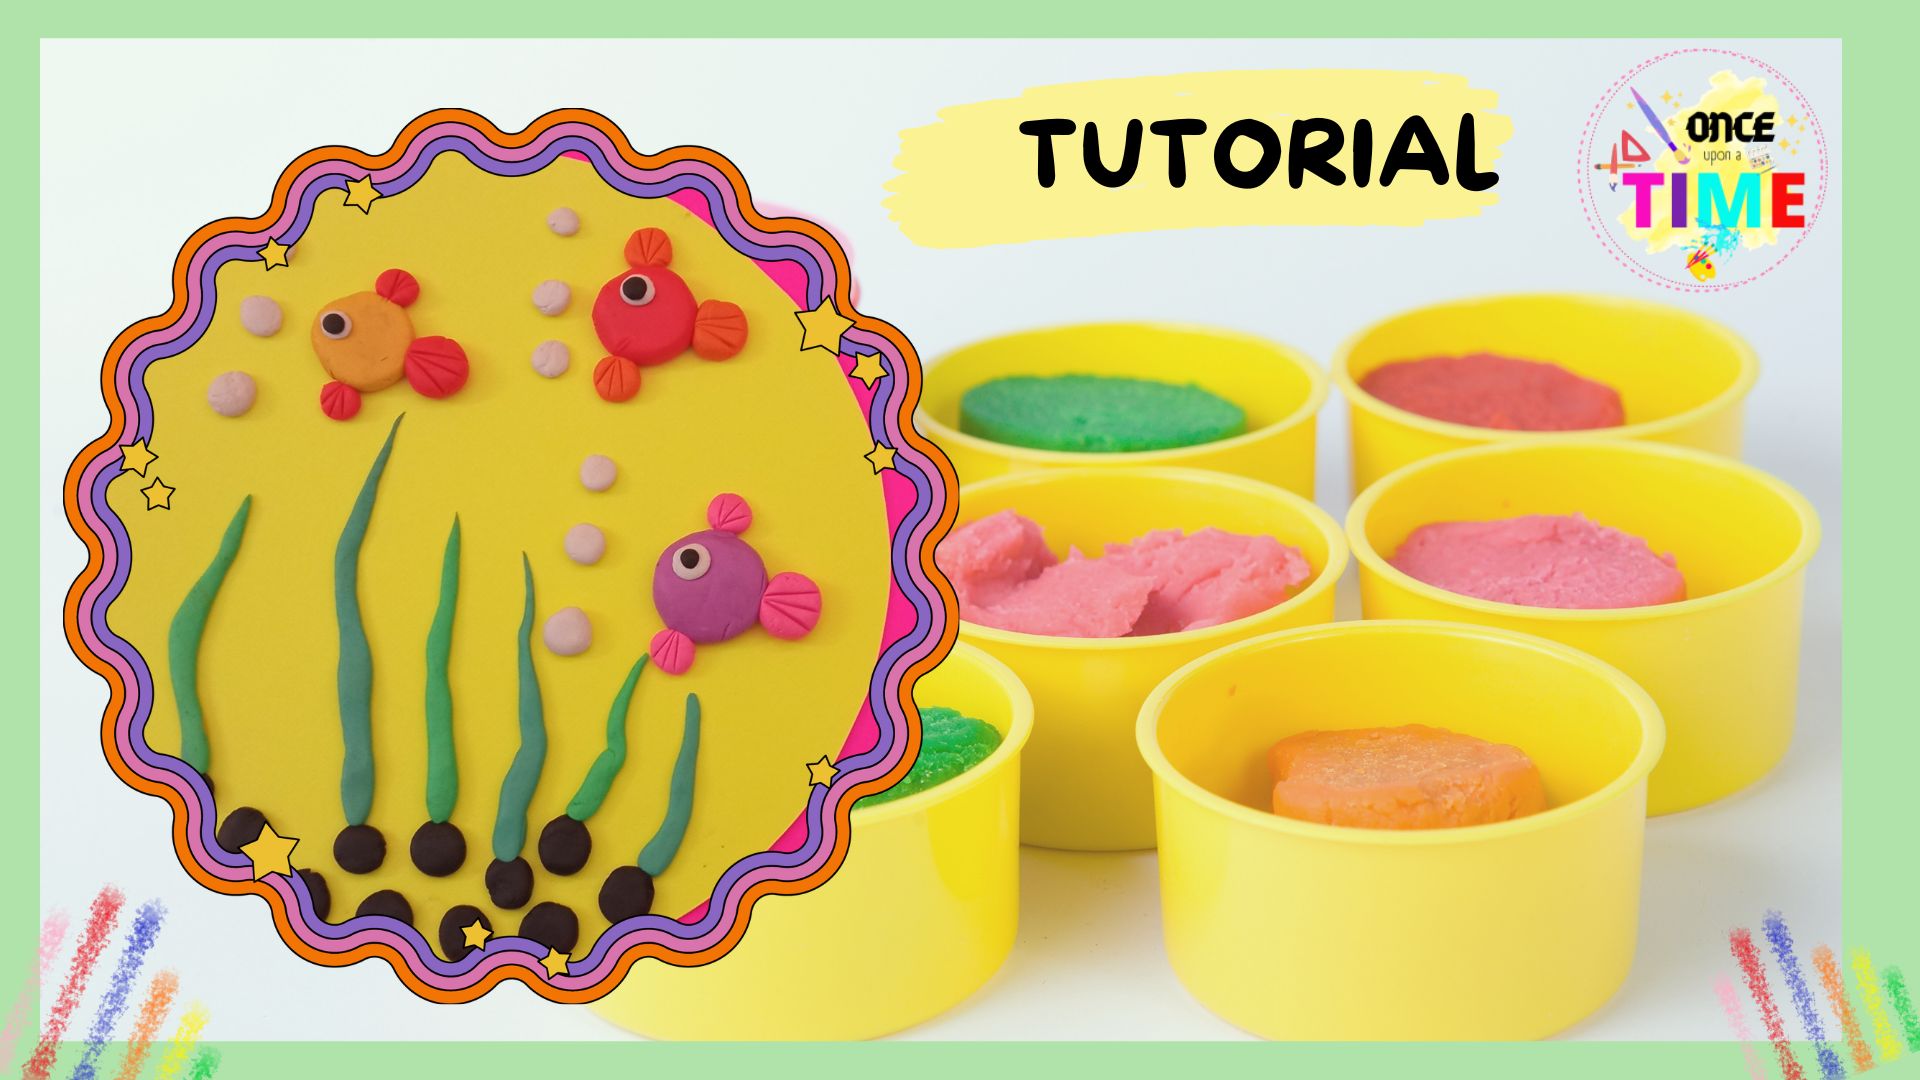
TUTORIAL CON PLASTILINA PARA FOMENTAR DEL DESARROLLO DE NIÑOS DE 2-4 AÑOS

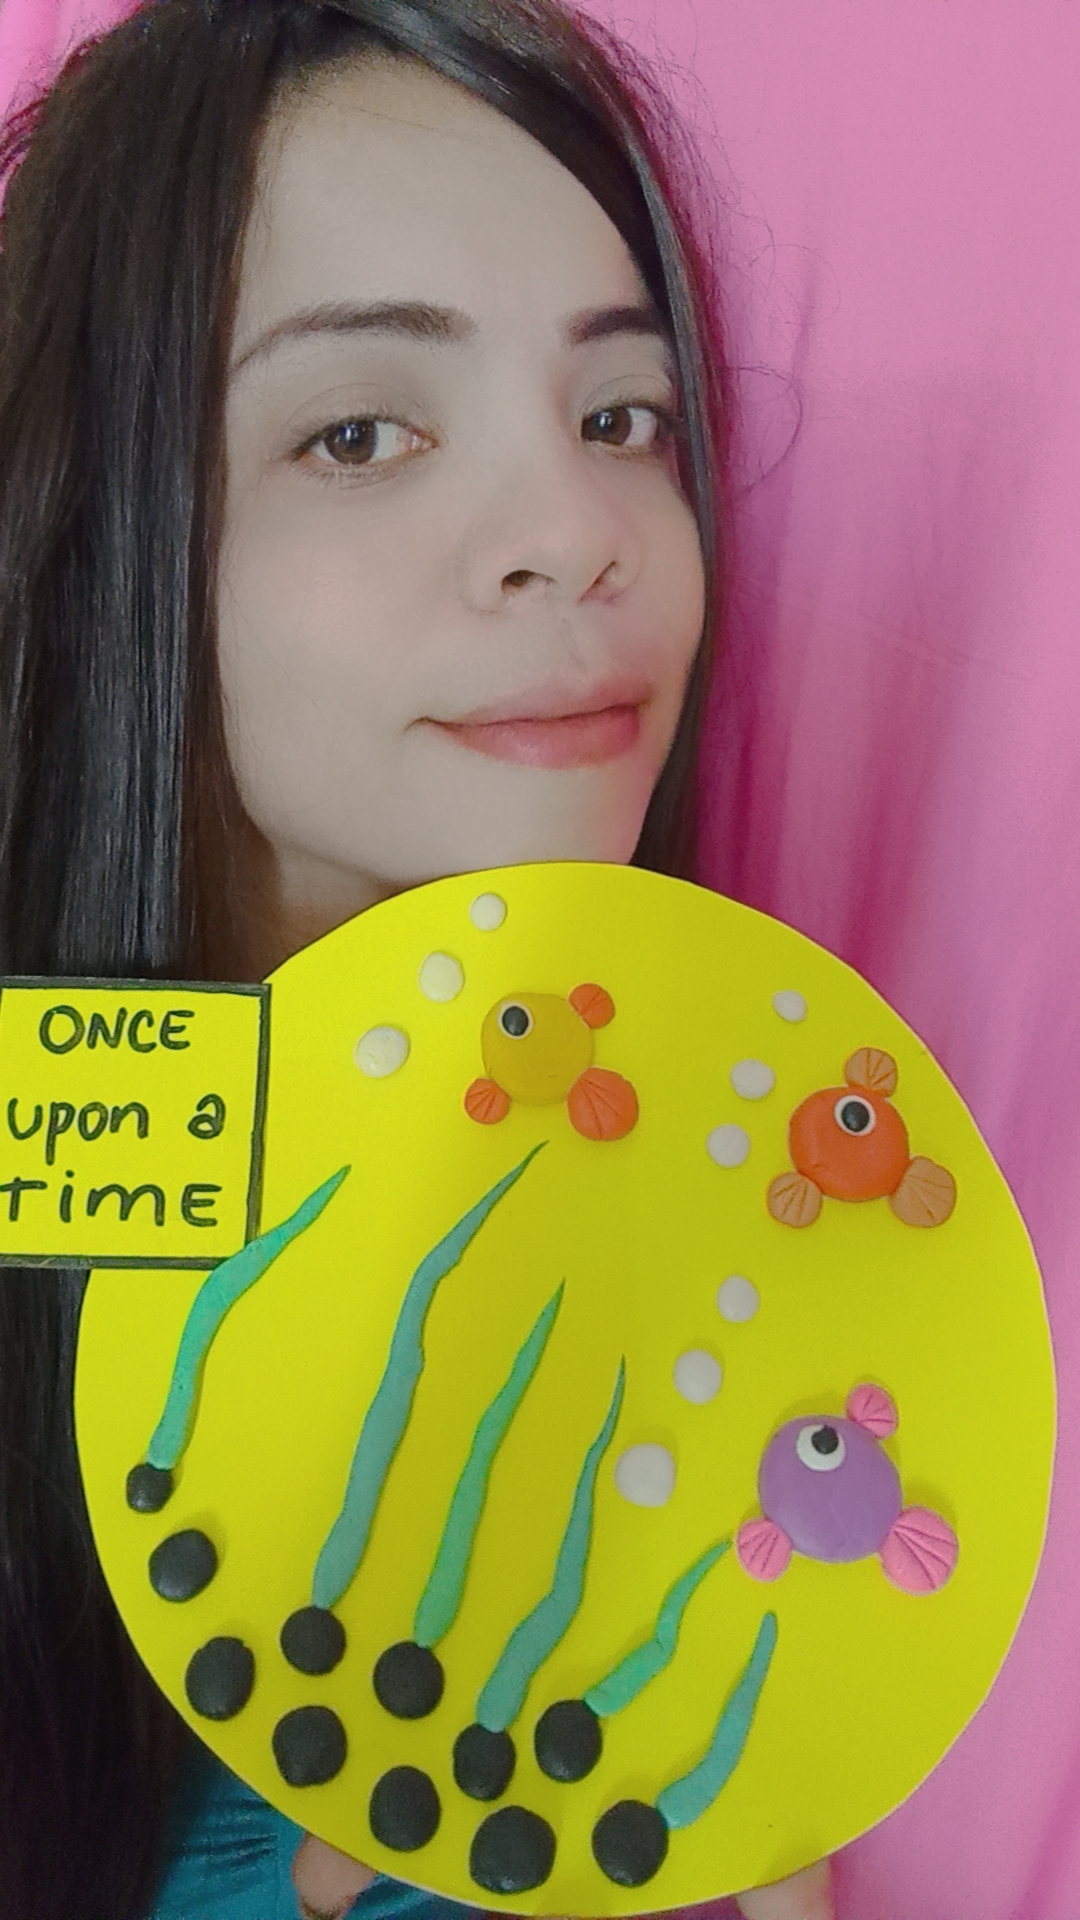
Sean todos bienvenidos a nuestra comunidad infantil ONCE UPON A TIME , una comunidad donde inician como un " CUENTO " los sueños más grandes de nuestros pequeños plasmados en el arte..
Dato Importante
Beneficios de la Plastilina:
la plastilina tiene muchos beneficios que favorecen el proceso de aprendizaje de los niños ya que con su uso el niño imagina, crea y a la vez face tangible los pensamientos que tienen en su mente.
La plastilina es utilizada como auxiliar de la educación infantil para estimular la creatividad y la motricidad infantil. Con esta practica el niño precisa su mirada en la actividad y mueve sus manos y dedos. Con el uso de la plastilina les facilita el aprendizaje de los colores, amasar, ablandar, separar y unir piezas, ademas les ayuda a estar al tanto de los tamaños y proporciones lo que los ayuda a experimentar y jugar con confianza y libertad.
Utilizar la plastilina ayuda a los niños impulsivos, inquietos y es muy beneficiosa pa aquellos que sufren de deficit de atención o hiperactividad.
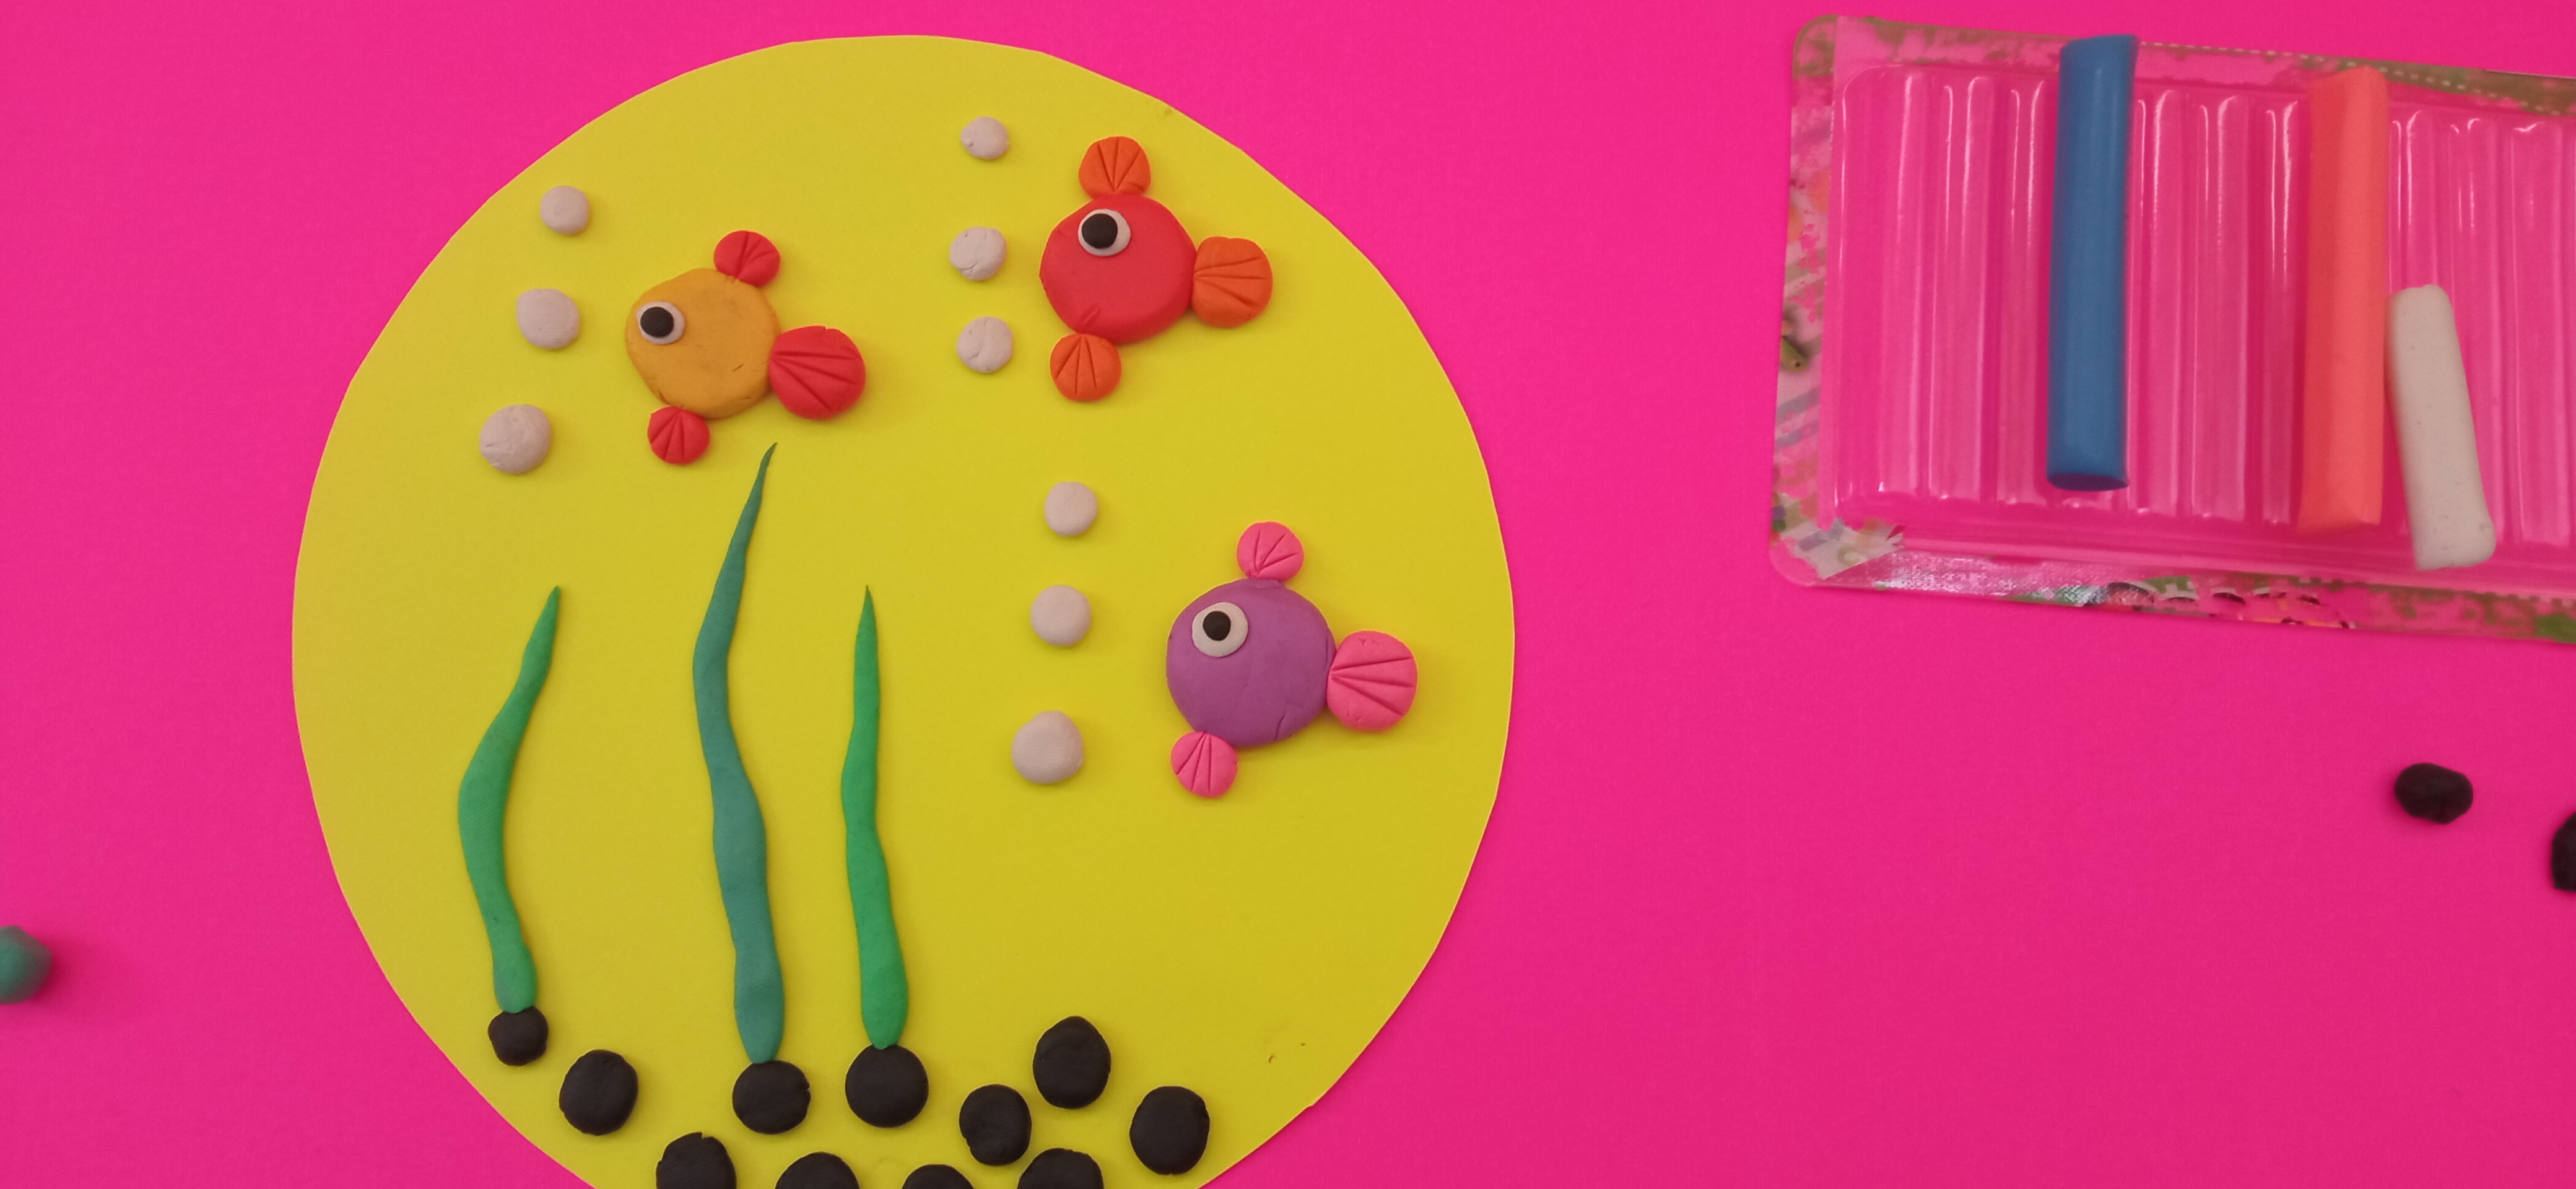
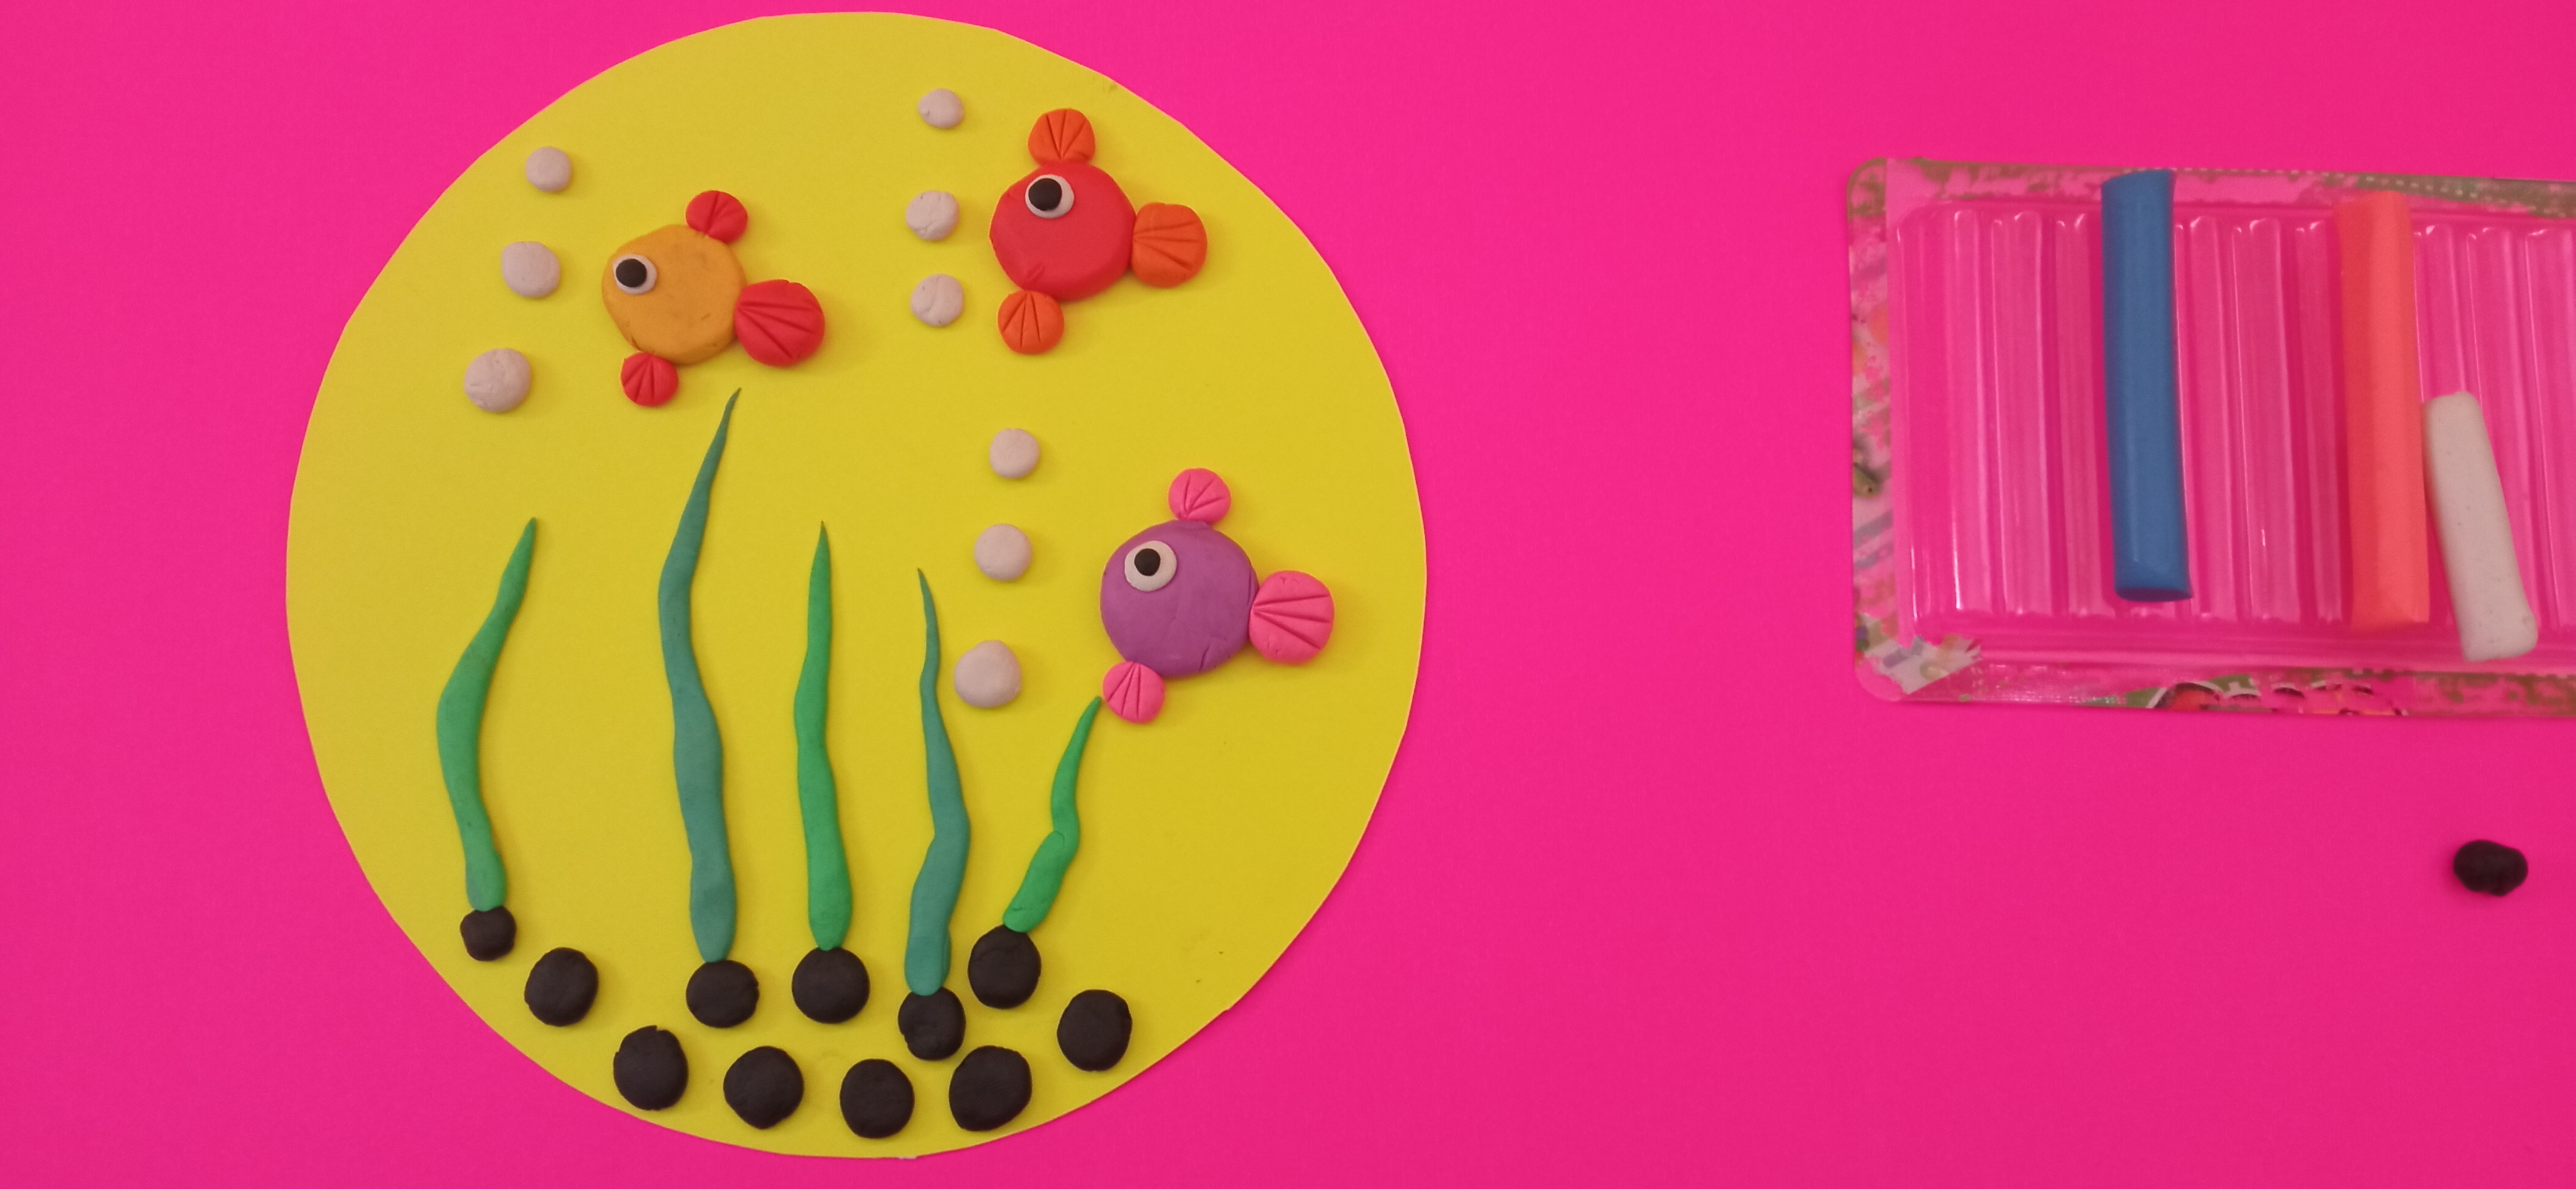
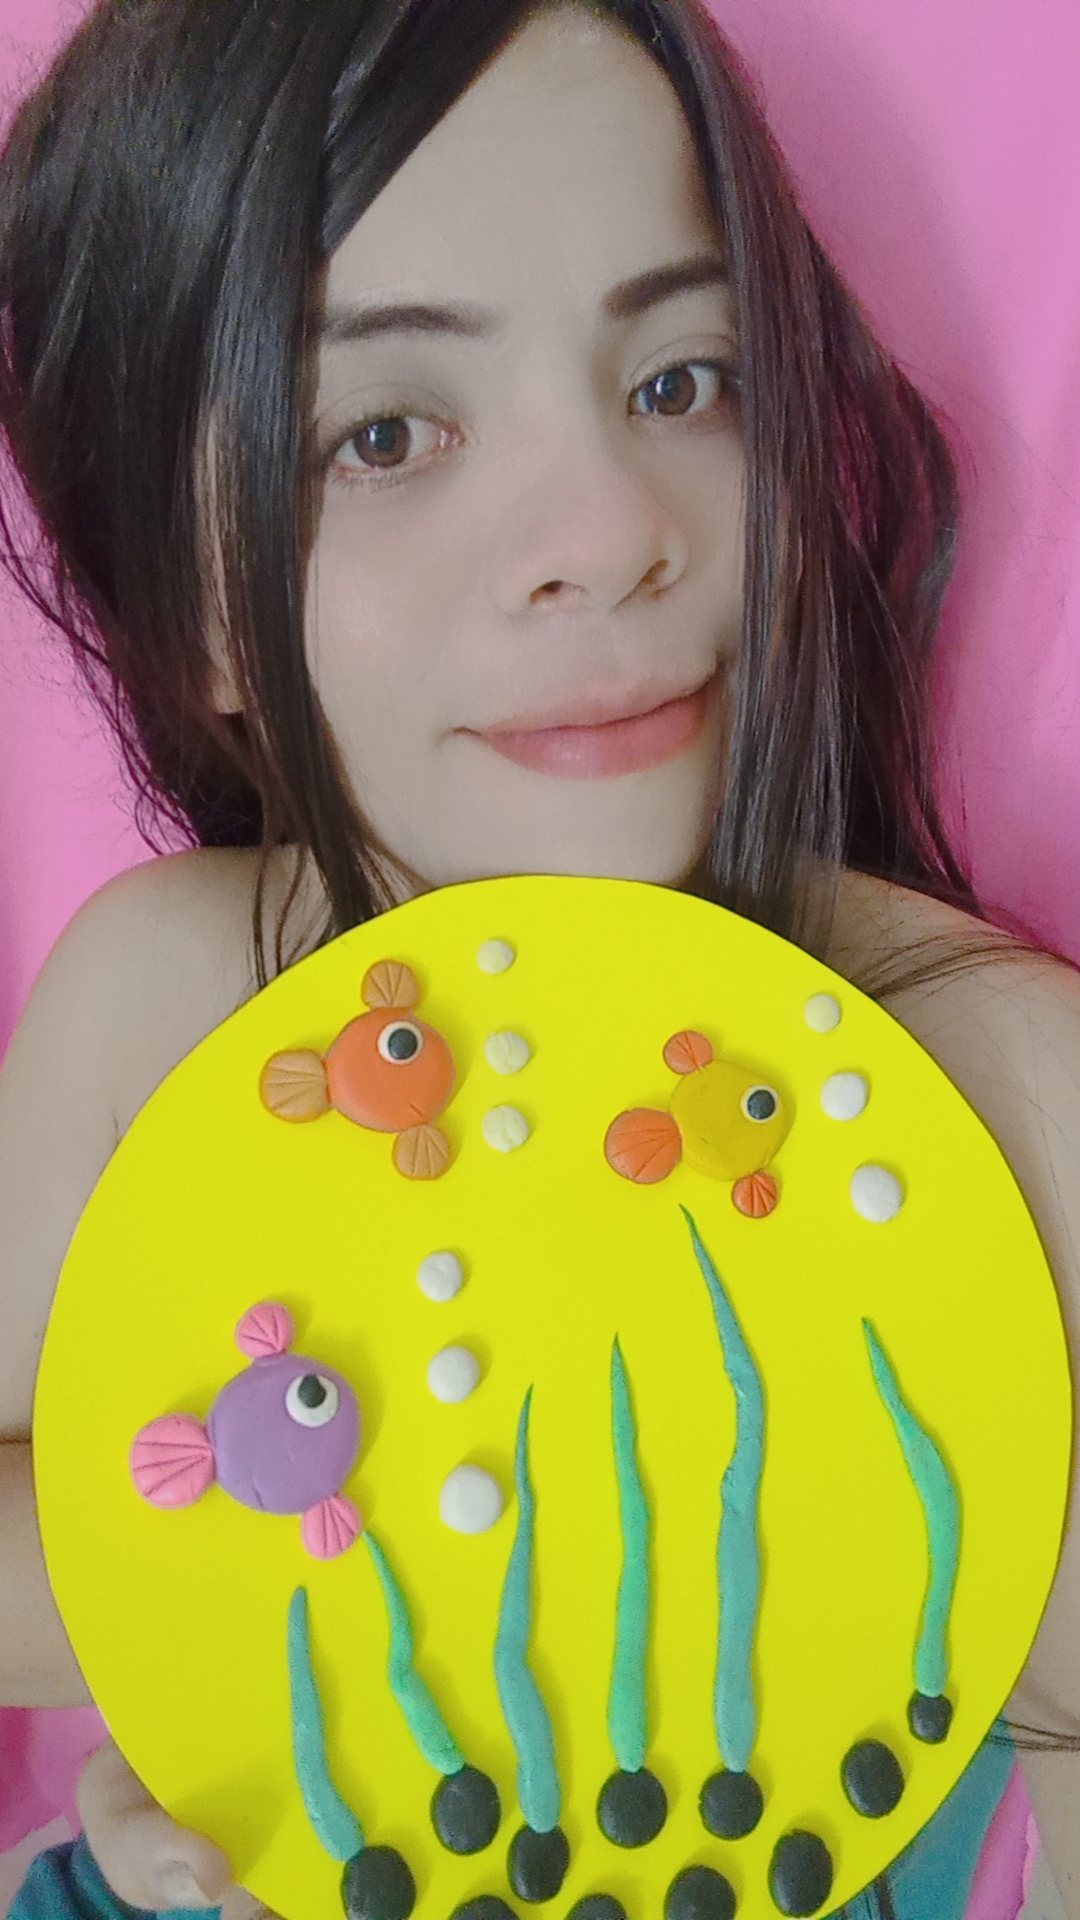
PECES DE COLORES
En esta oportunidad vamos aprender a elaborar peces de colores con algas marinas en plastilina.
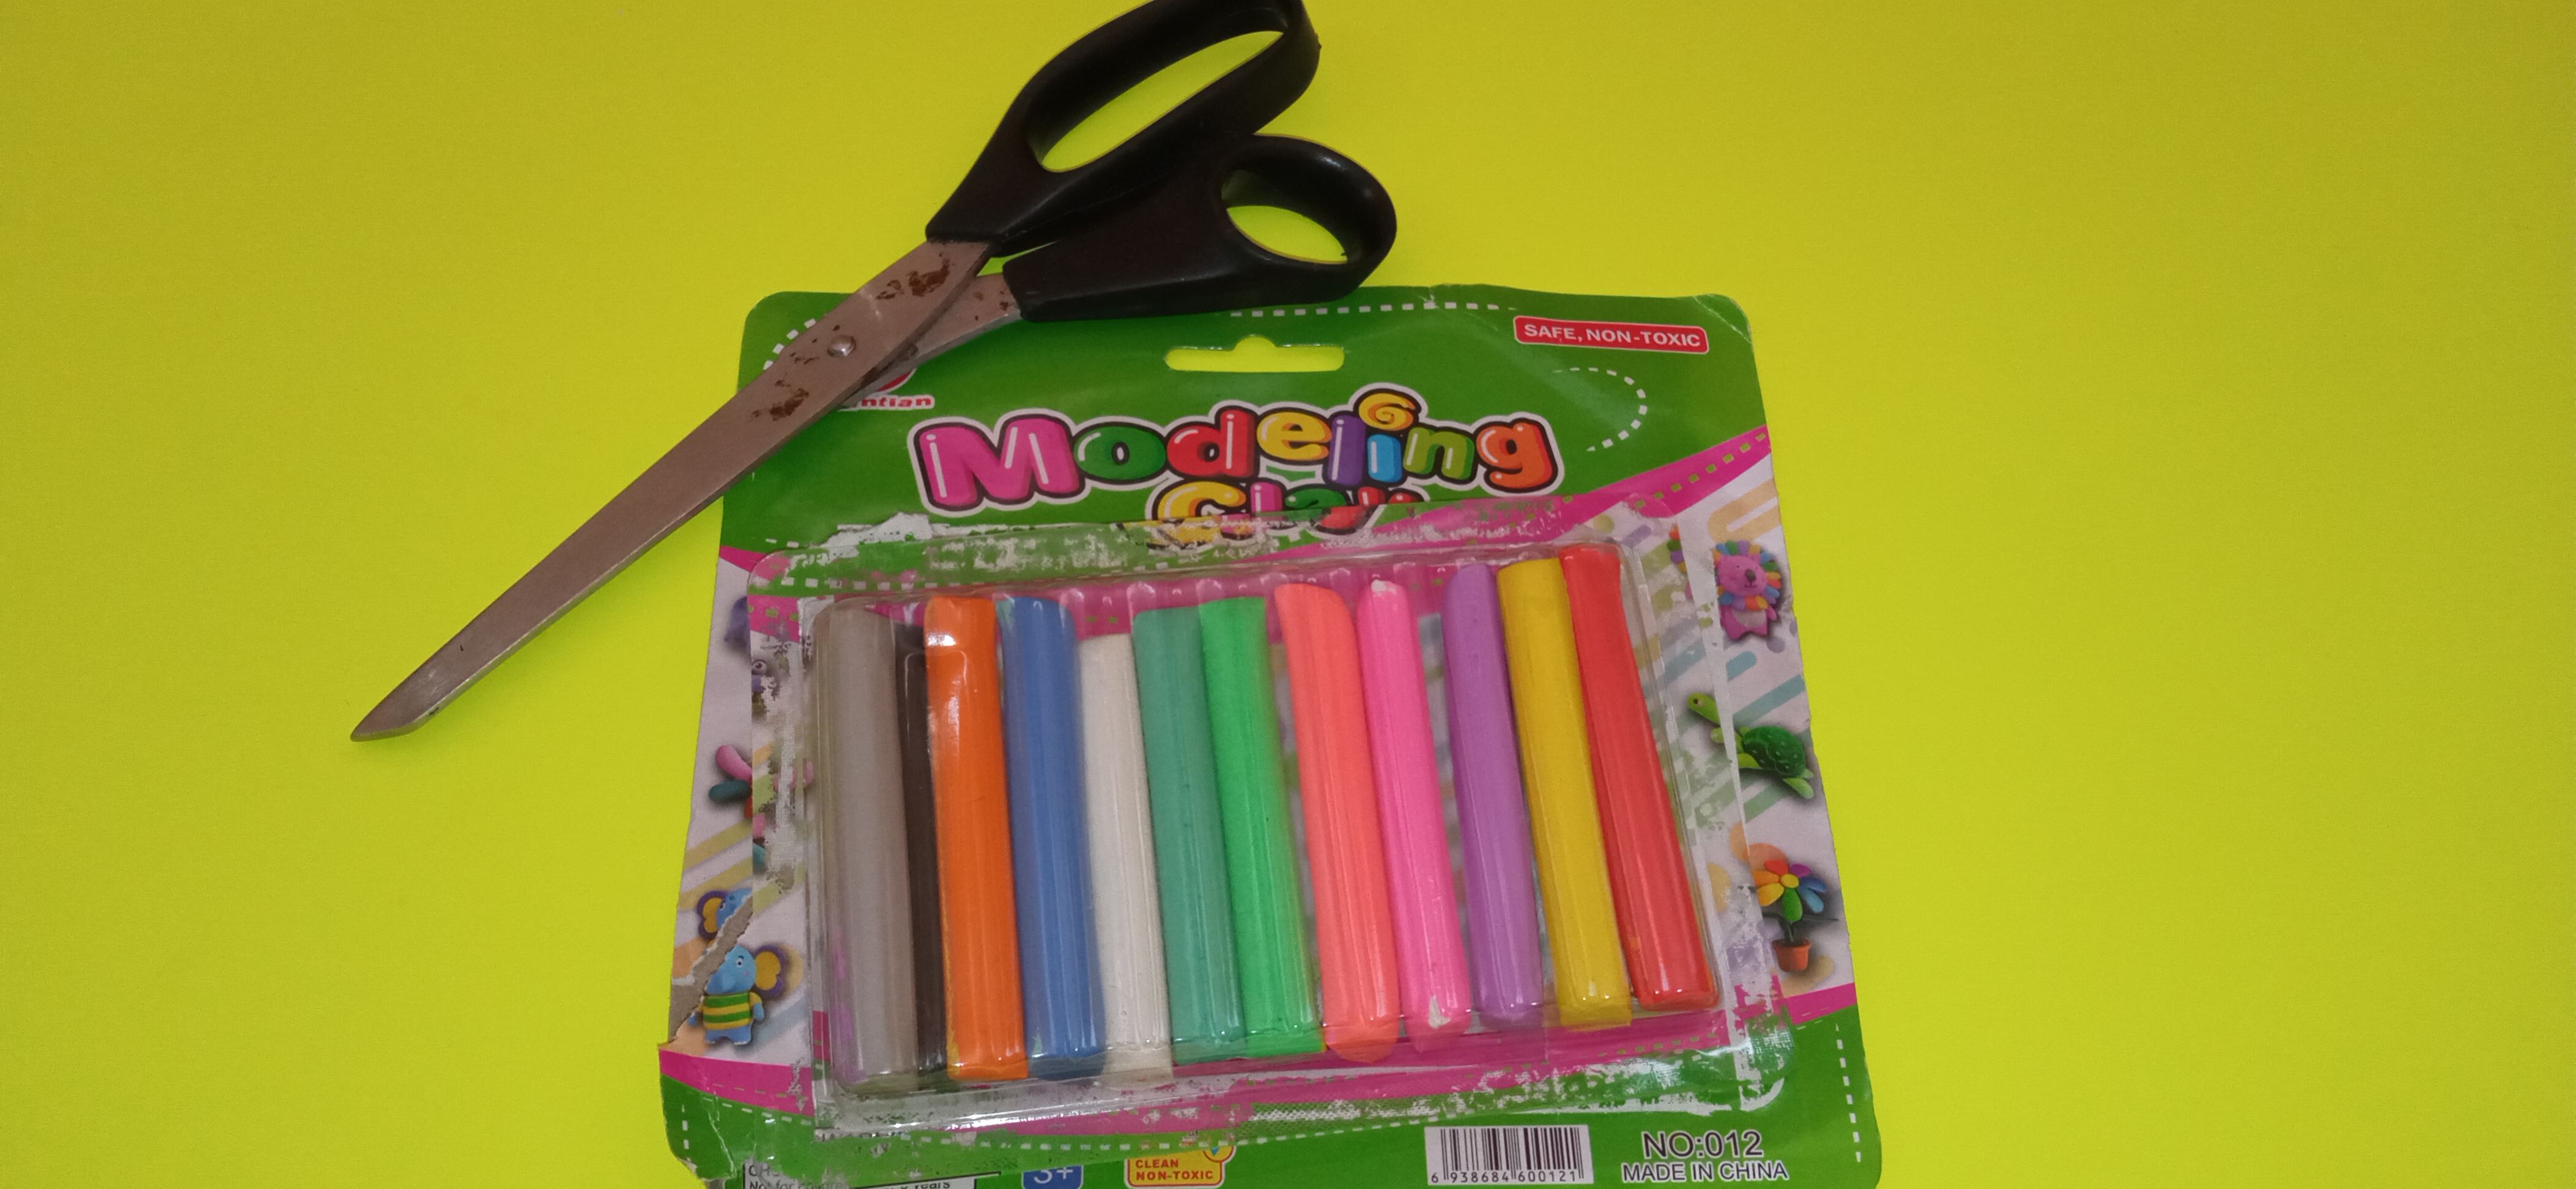
MATERIALES
- Plastilina de colores
- Catulina amarilla
- Paleta de madera
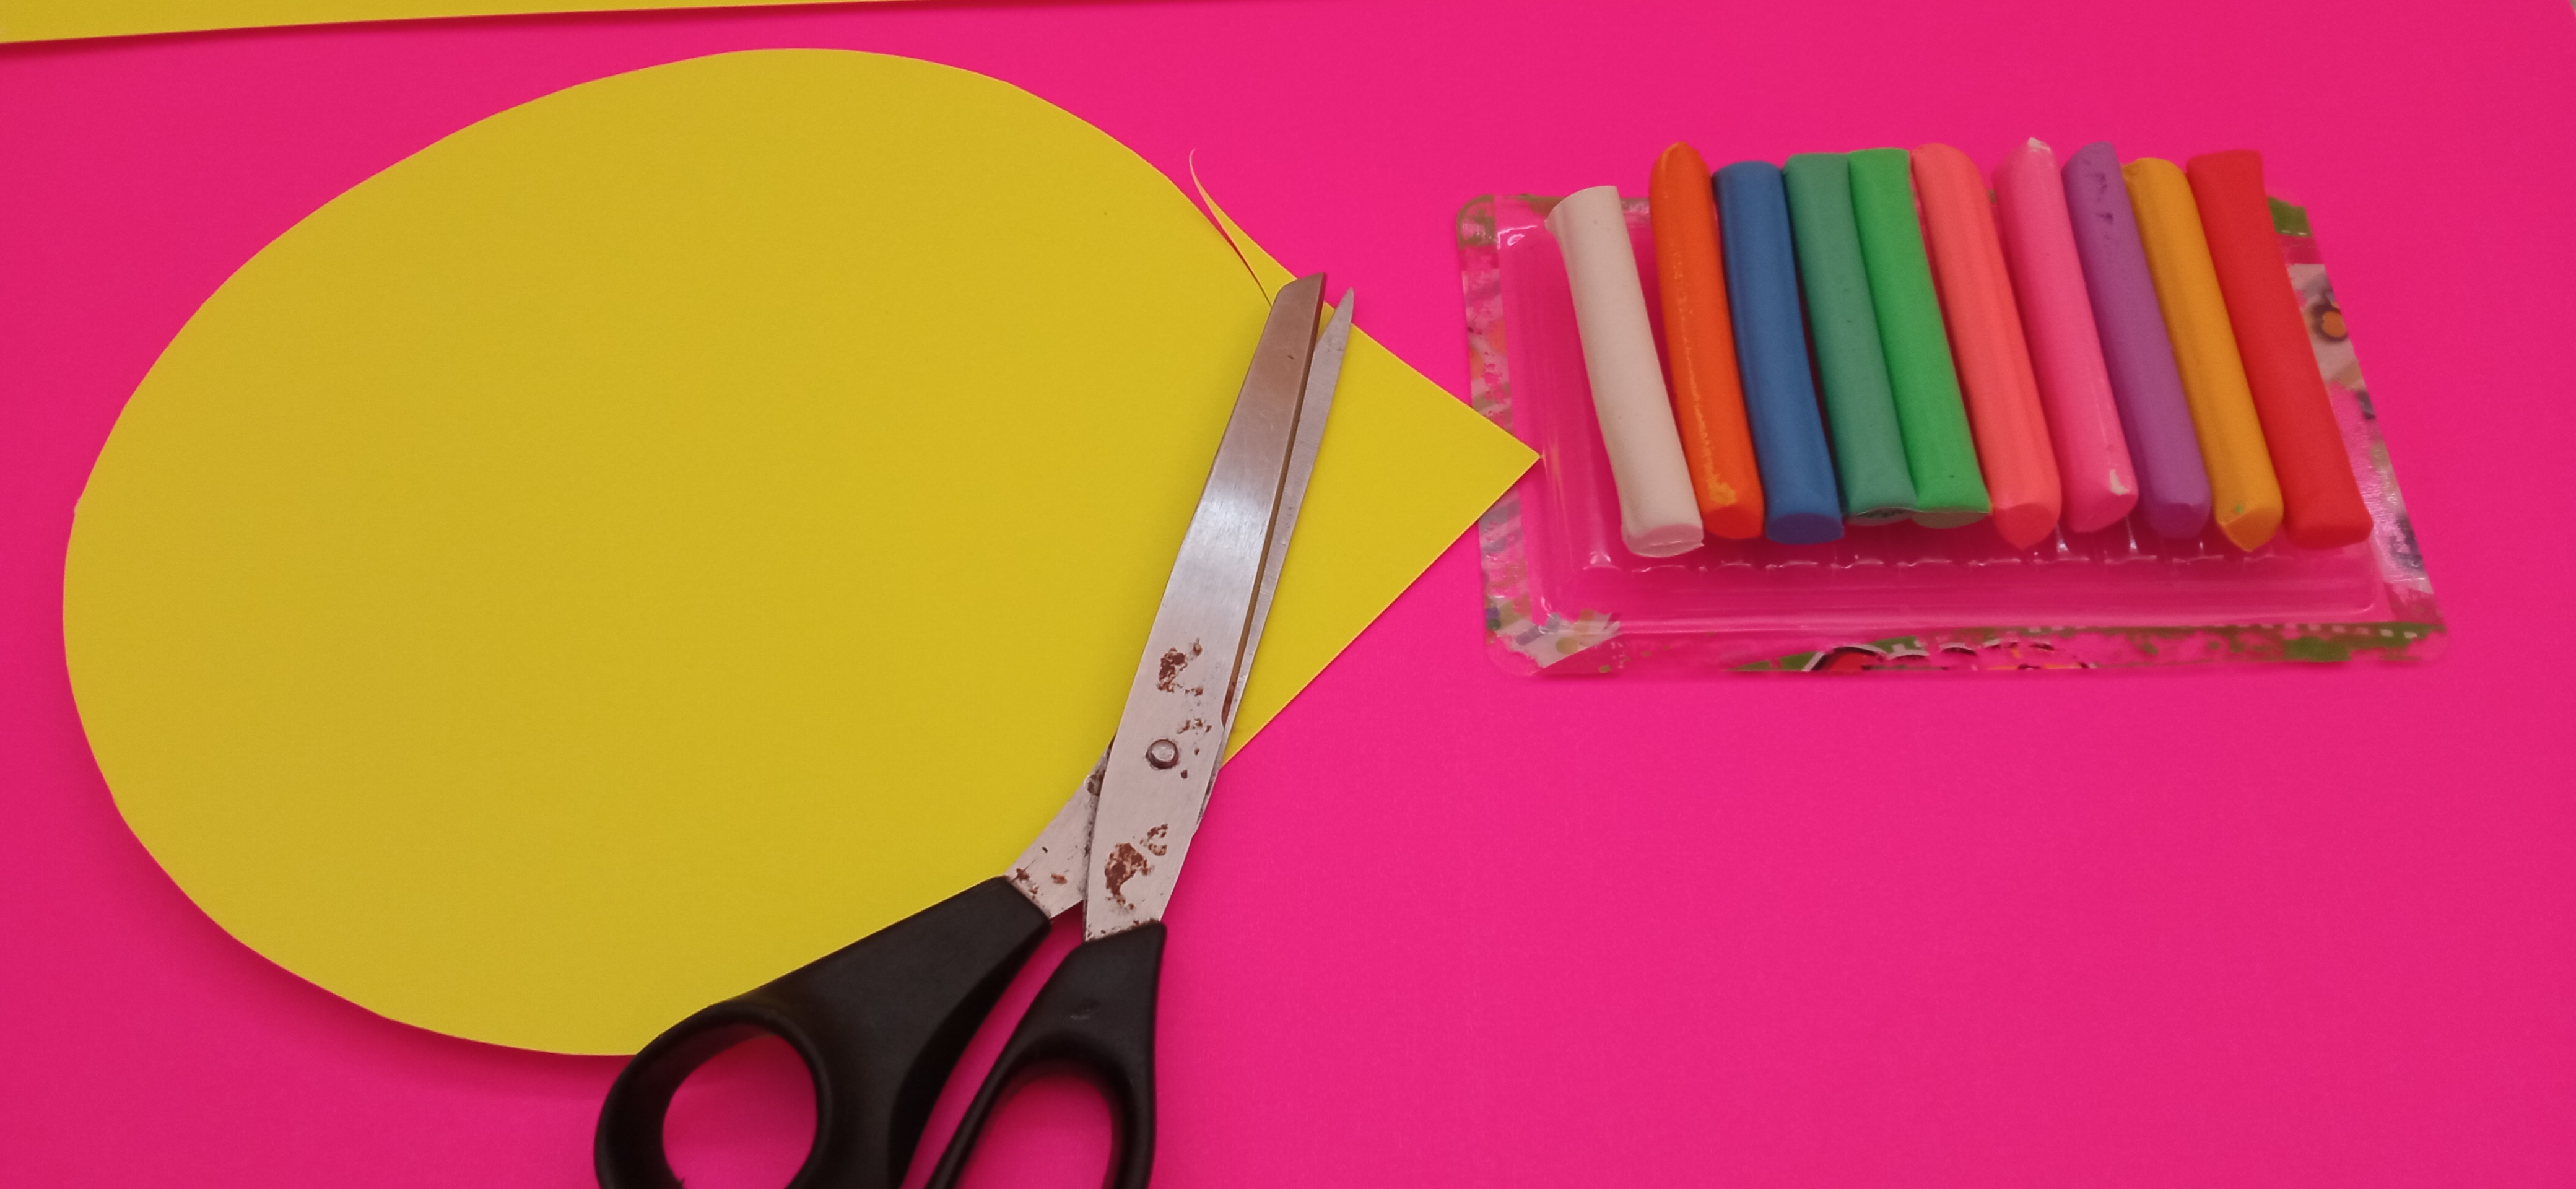
Paso 01:
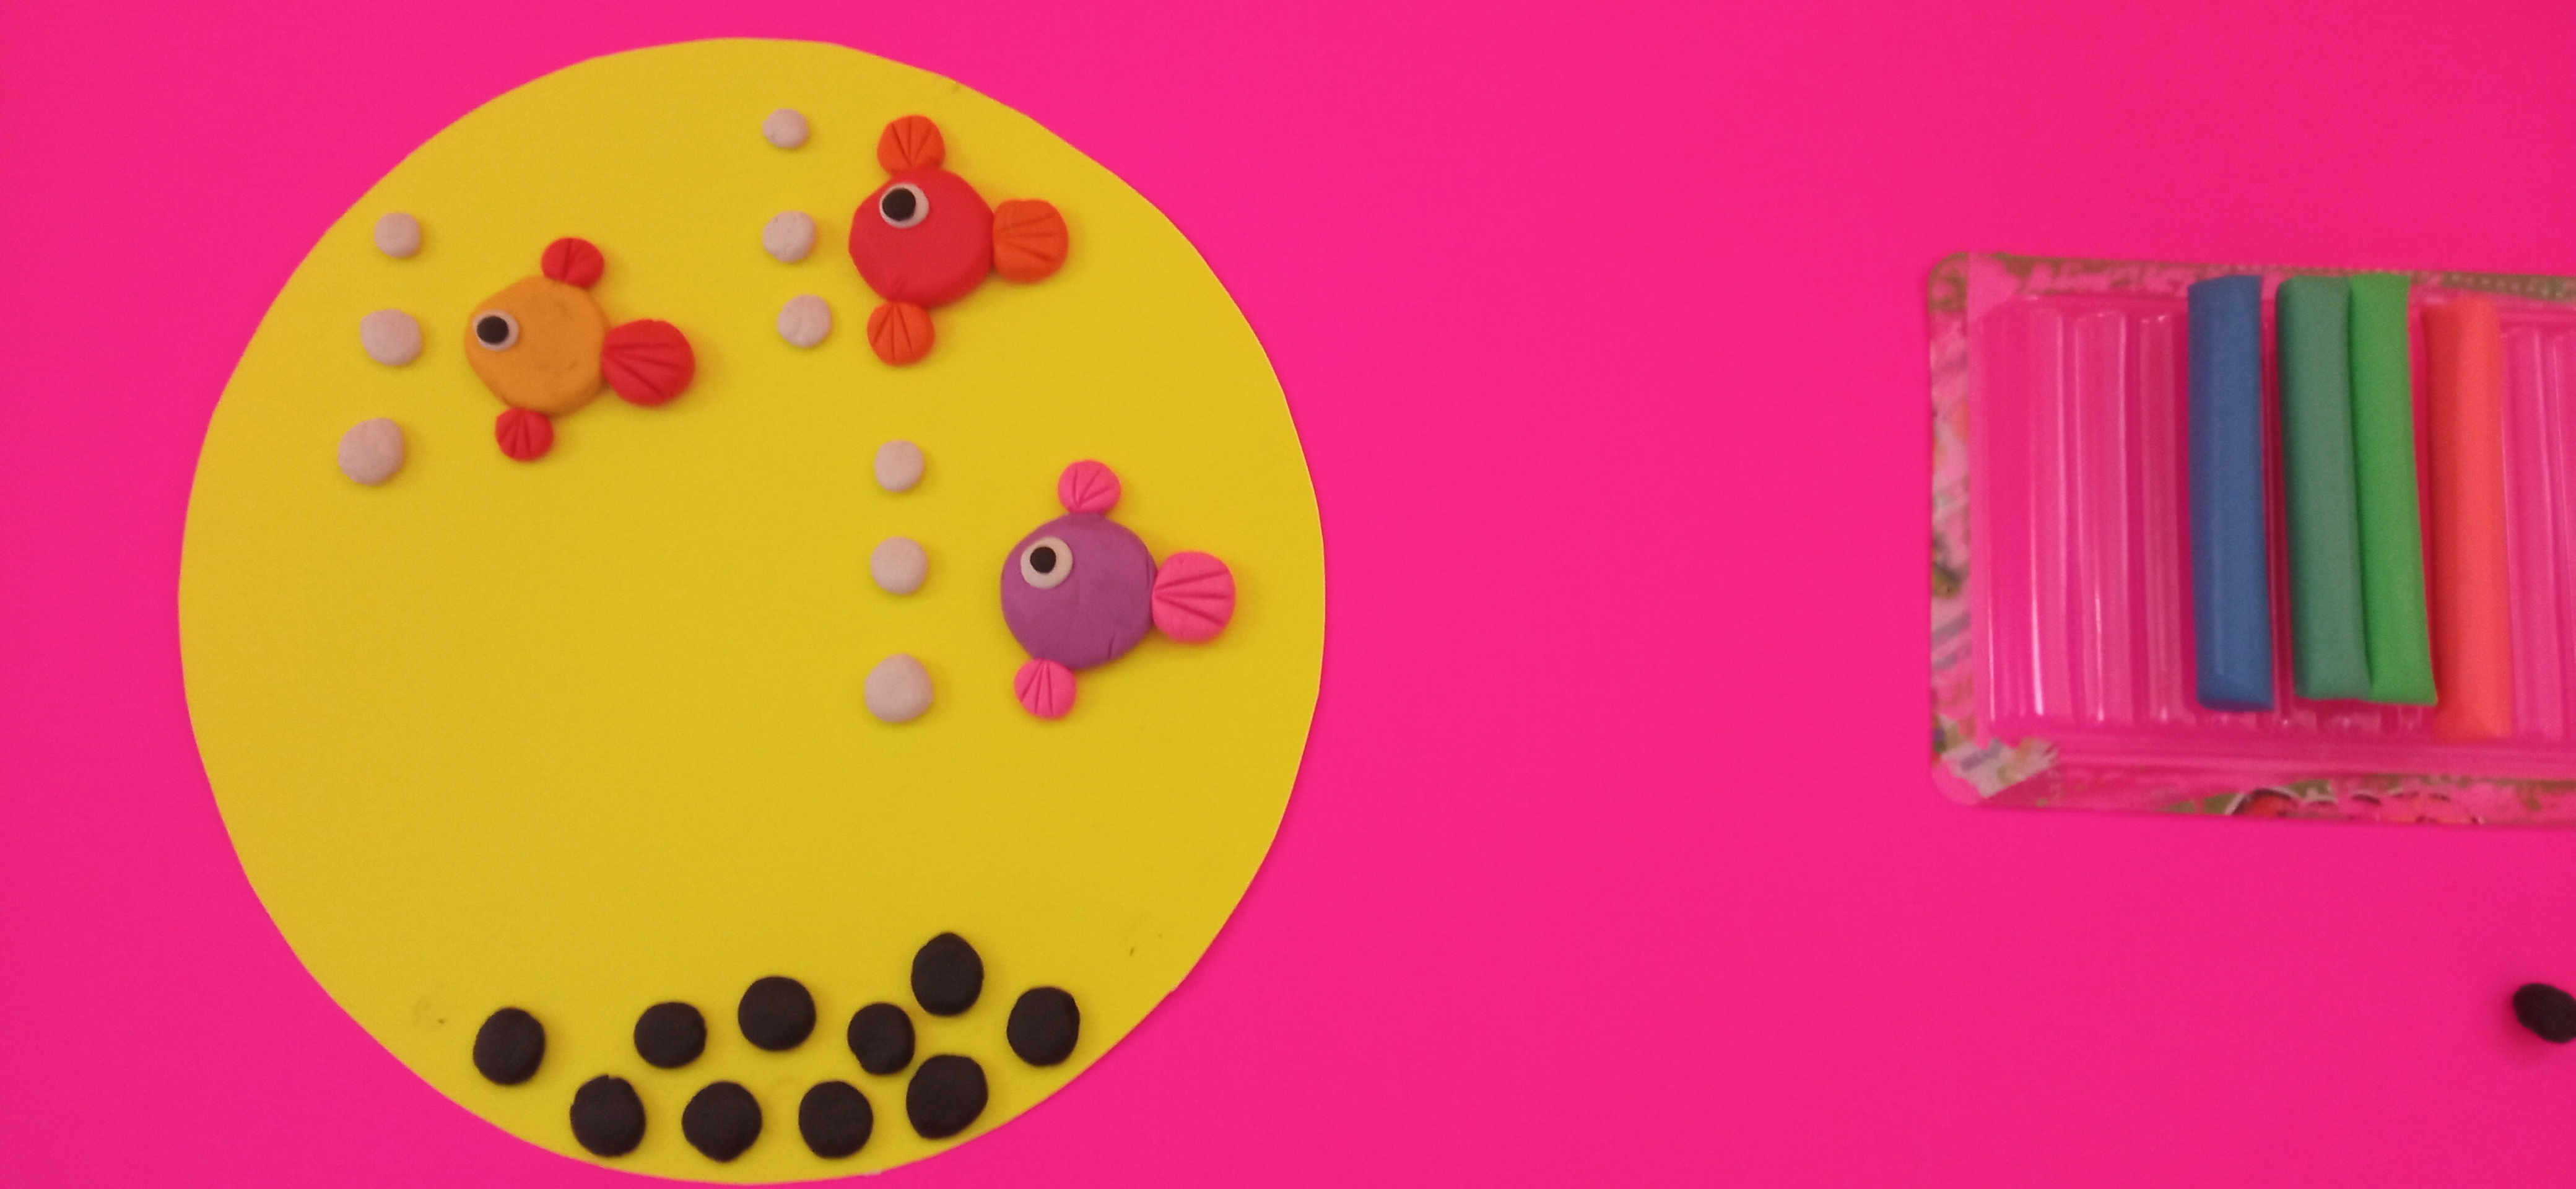
Marcamos un circulo grande y lo recortamos para que sea nuestra plantilla de trabajo.

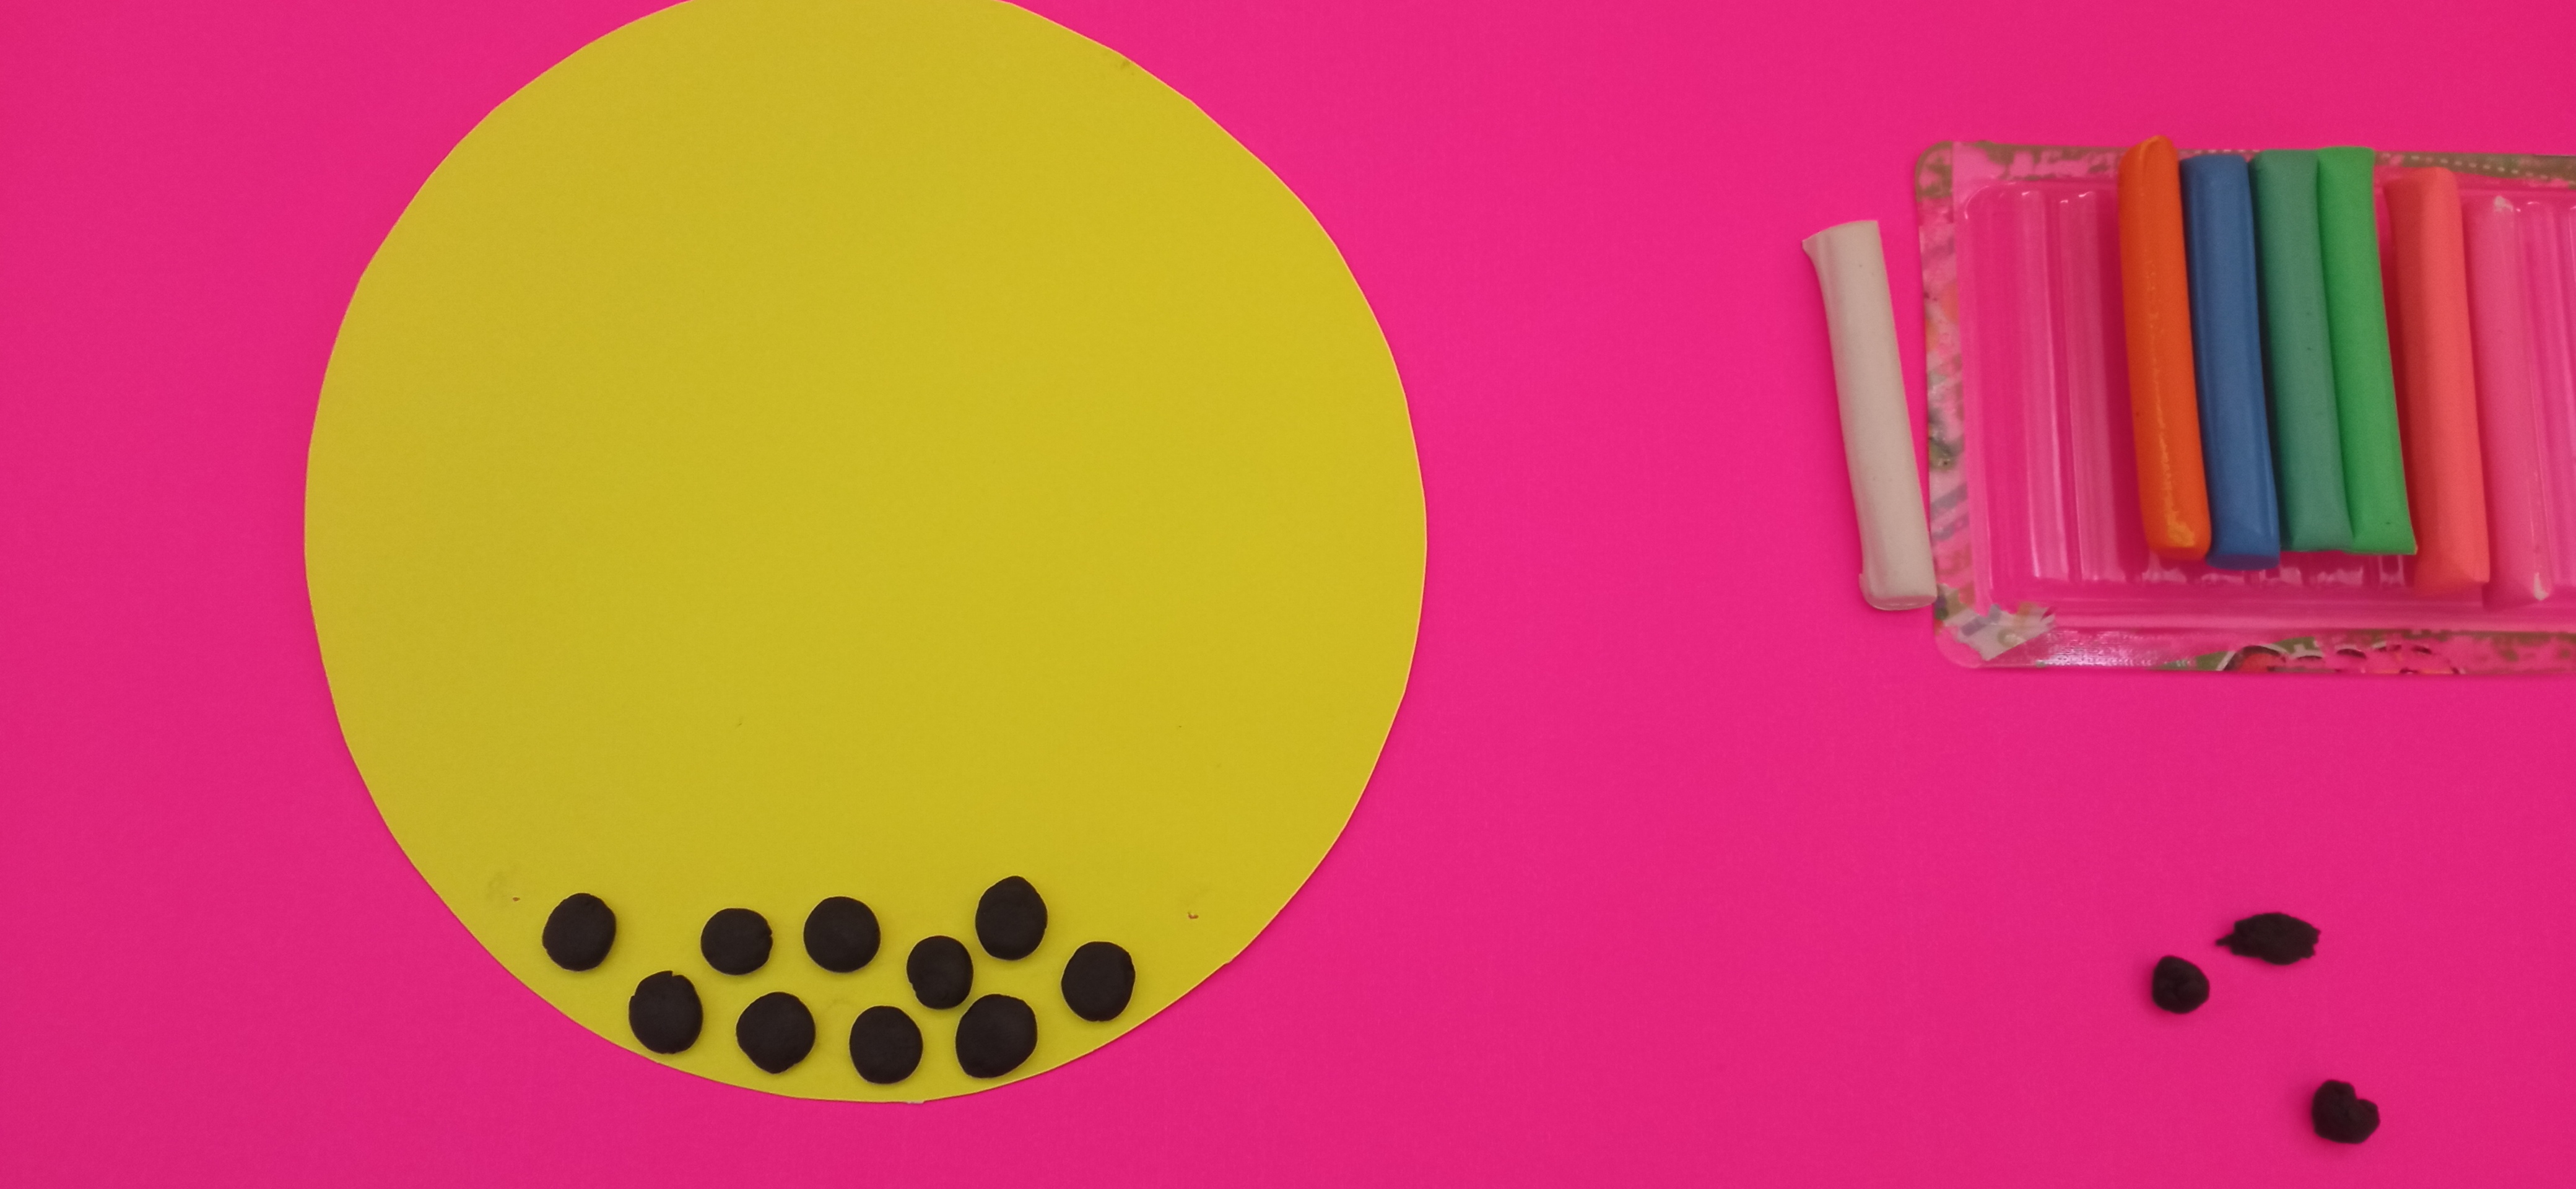
Paso 02:
Con pastilina negra tomaremos pequeños trozos y los haremos bolitas negras que seran las piedras de tamaño similar y las colocaremos en la parte inferior y las precionaremos hacia abajo para que se tornen mas planas.
Paso 03:
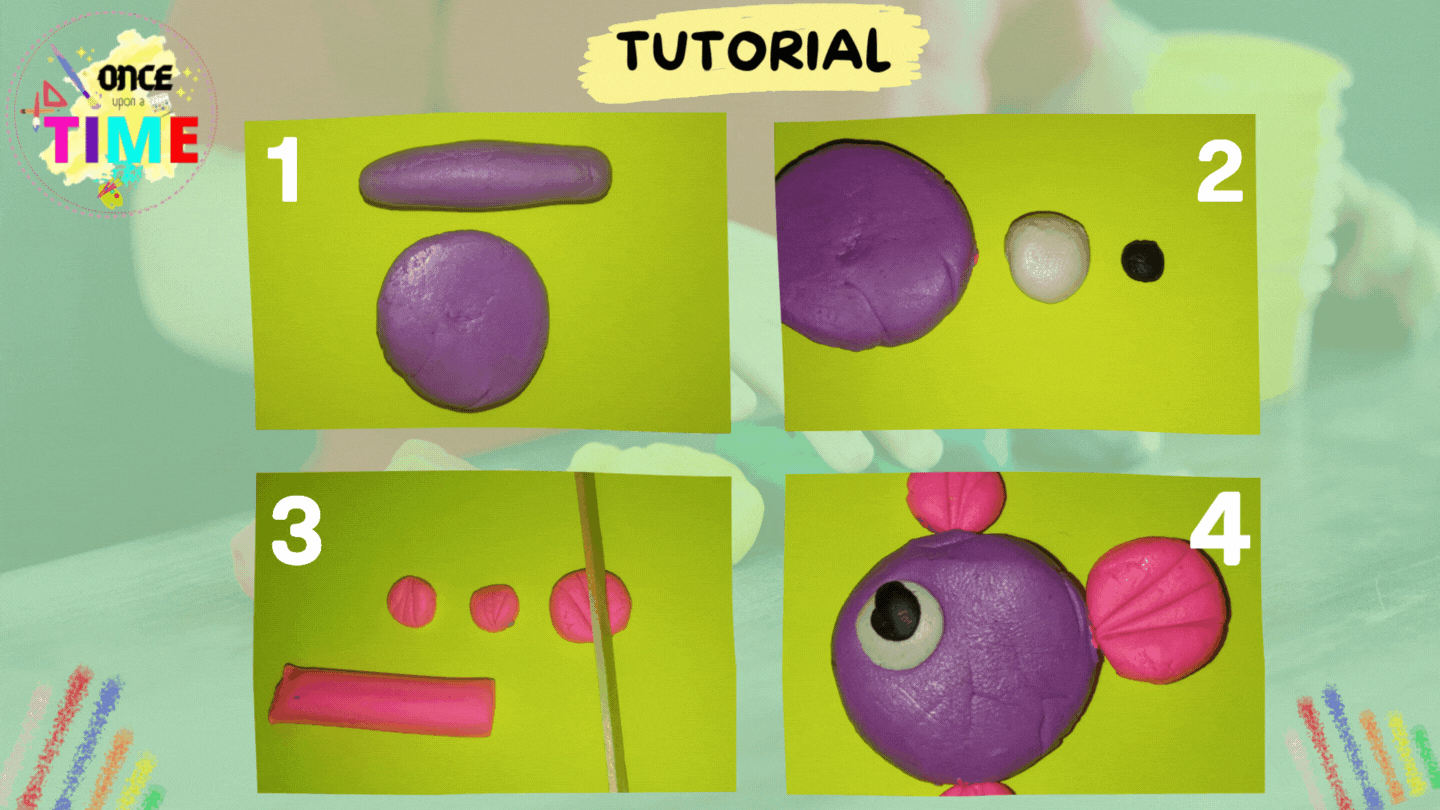
- Seleccionamos el color morado y haremos una bolita que precionaremos hasta aplastar.
- Seleccionamos un trozo más pequeño de color blanco y uno aun mas pequeño de color negro.
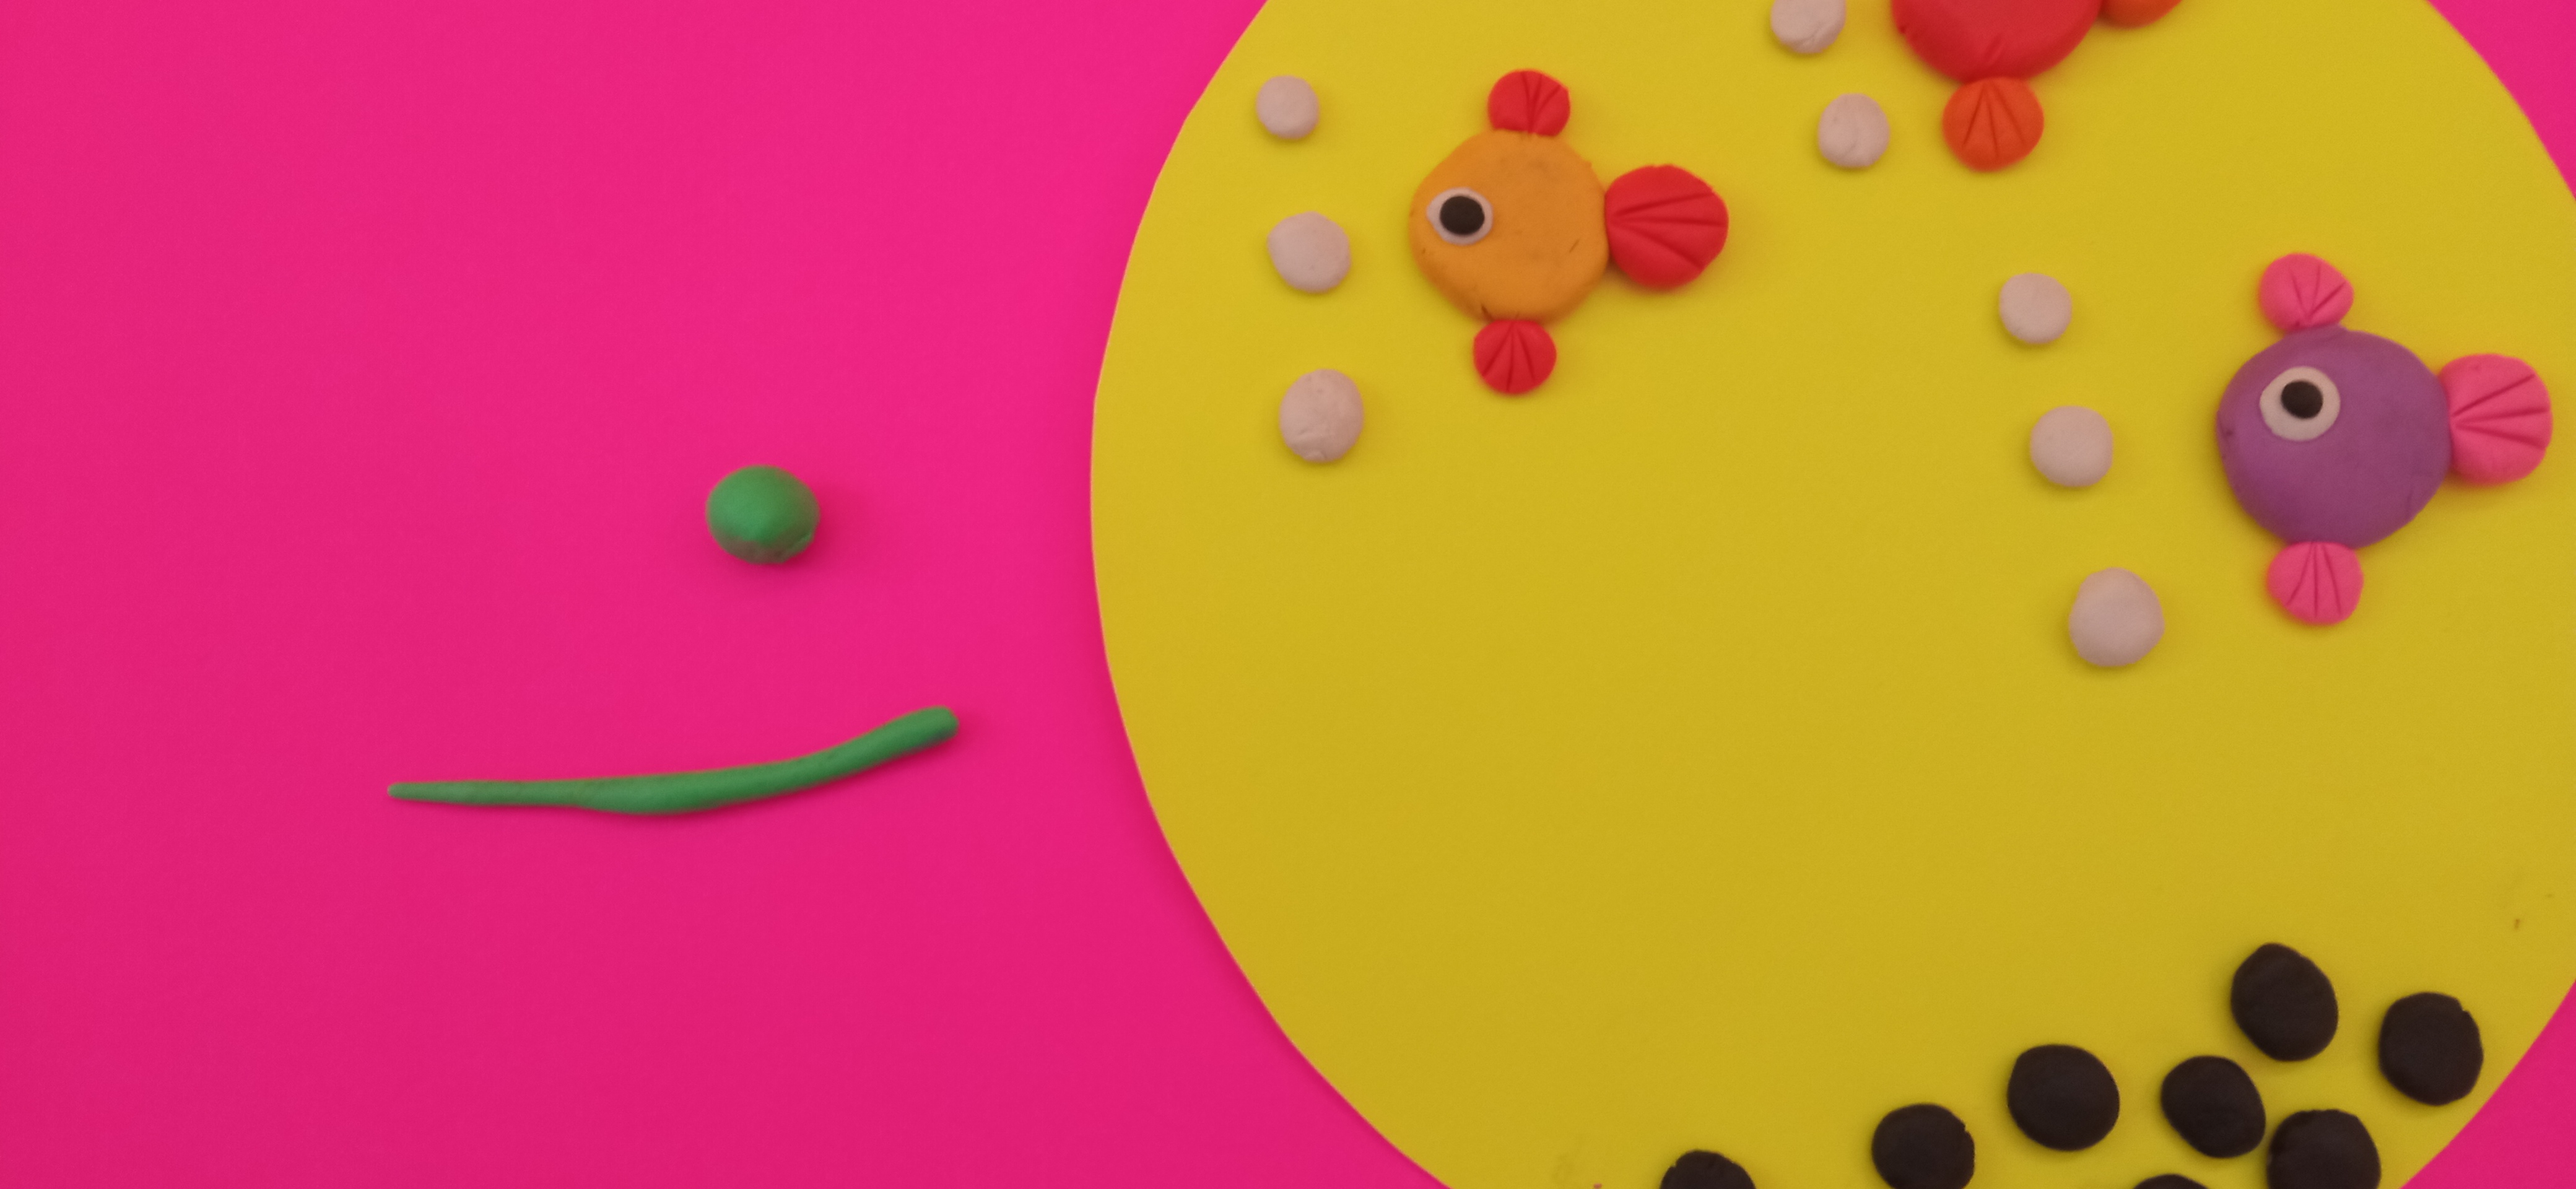
- Seleccionamos la plastilina rosada y haremos 3 bolitas de diferentes tamaños, dos de tamaño similar y una más grande; las aplastaremos y con una paleta de madera precionaremos haciendo 3 marcas que seran las escamas.
- Armaremos el pez colocando la modara grande que sera el cuerpo. la blanca sobre ella y la negra maás pequeña que será el ojo; Colocaremos las dos aletas rosadas una arriba y una debajo y la más grande sera la cola y la ubicaremos paralela a los ojos.
Paso 04:
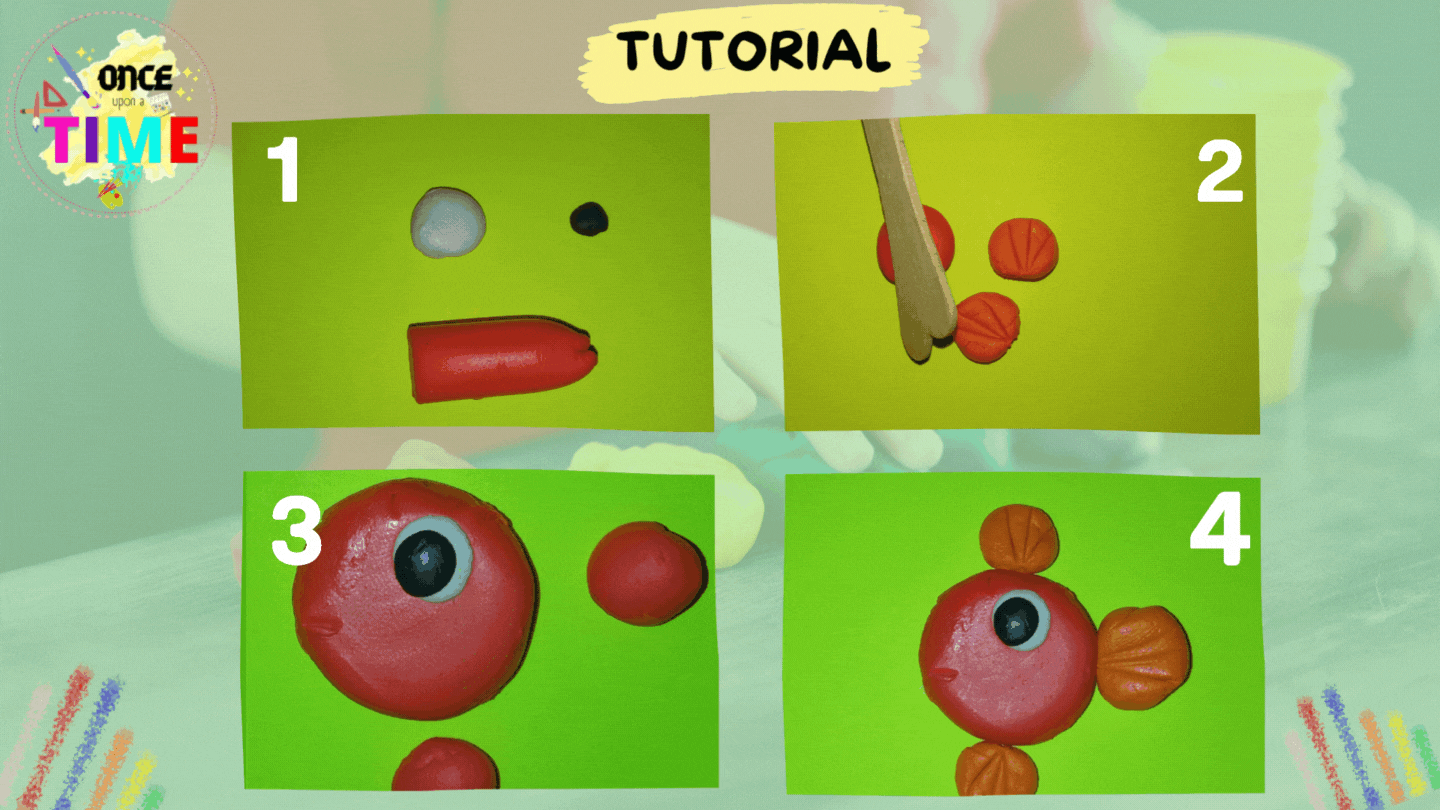
- Seleccionamos el color rojo y haremos una bolita que precionaremos hasta aplastar.
- Seleccionamos un trozo mas pequeño de color blanco y uno aún más pequeño de color negro.
- Seleccionamos la plastilina roja y haremos 3 bolitas de diferentes tamaños, dos de tamaño similar y una más grande; las aplastaremos y con una paleta de madera precionaremos haciendo 3 marcas que serán las escamas.
- Armaremos el pez colocando la roja grande que sera el cuerpo. la blanca sobre ella y la negra más pequeña que será el ojo; Colocaremos las dos aletas naranja una arriba y una debajo y la más grande sera la cola y la ubicaremos paralela a los ojos.
Paso 05:
Al igual que los dos pasos anteriores haremos el mismo procedimiento pero con colores diferentes.
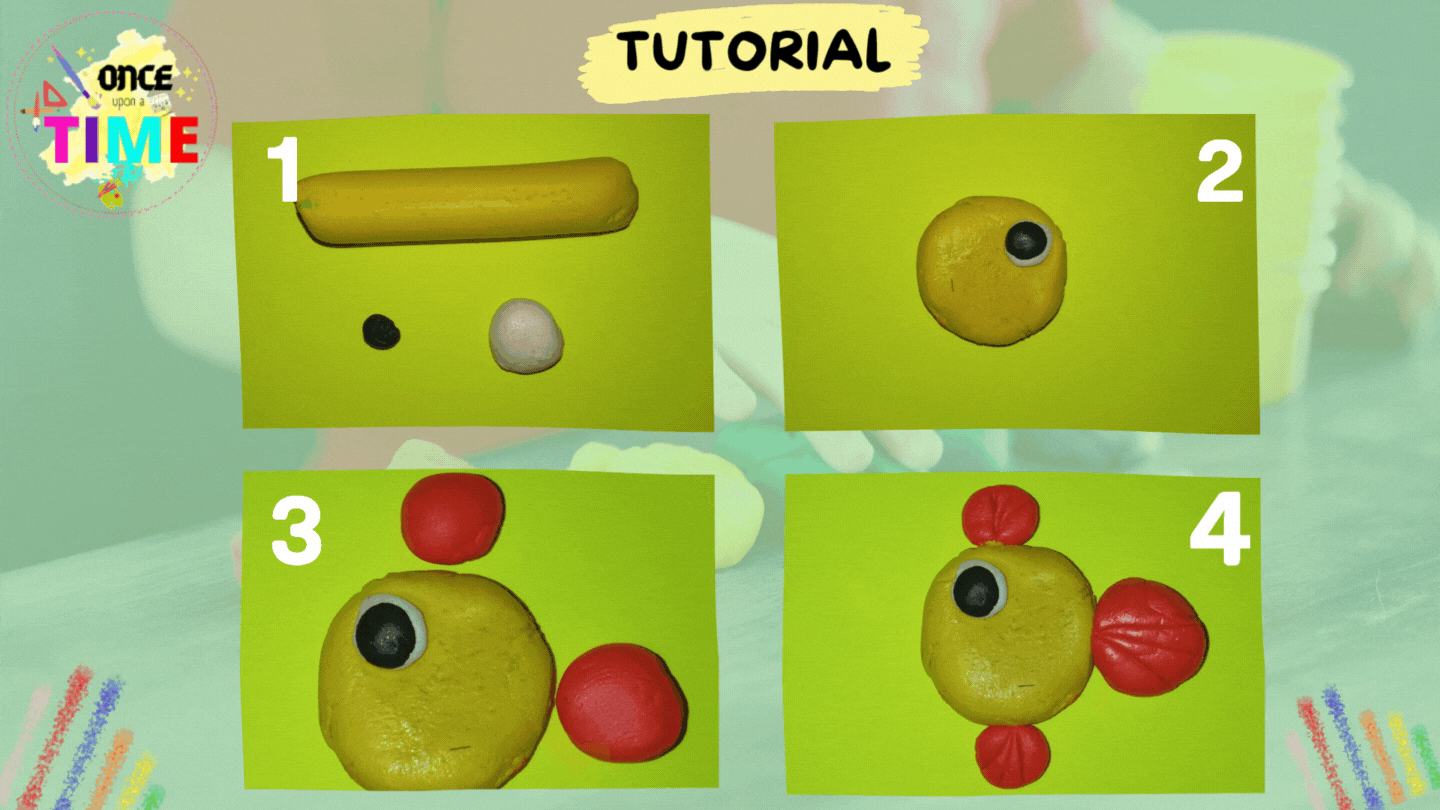
Seleccionamos el color amarillo y haremos una bolita que precionaremos hasta aplastar.
Seleccionamos un trozo más pequeño de color blanco y uno aún más pequeño de color negro.
Seleccionamos la plastilina naranja y haremos 3 bolitas de diferentes tamaños, dos de tamaño similar y una más grande; las aplastaremos y con una paleta de madera precionaremos haciendo 3 marcas que serán las escamas.
Armaremos el pez colocando la amarilla grande que será el cuerpo. la blanca sobre ella y la negra más pequeña que sera el ojo; Colocaremos las dos aletas naranja una arriba y una debajo y la más grande sera la cola y la ubicaremos paralela a los ojos.
Anexaremos bolitas blancas y las precionaremos hasta aplastar y las colocaremos en forma de burbujas.
Paso 06:
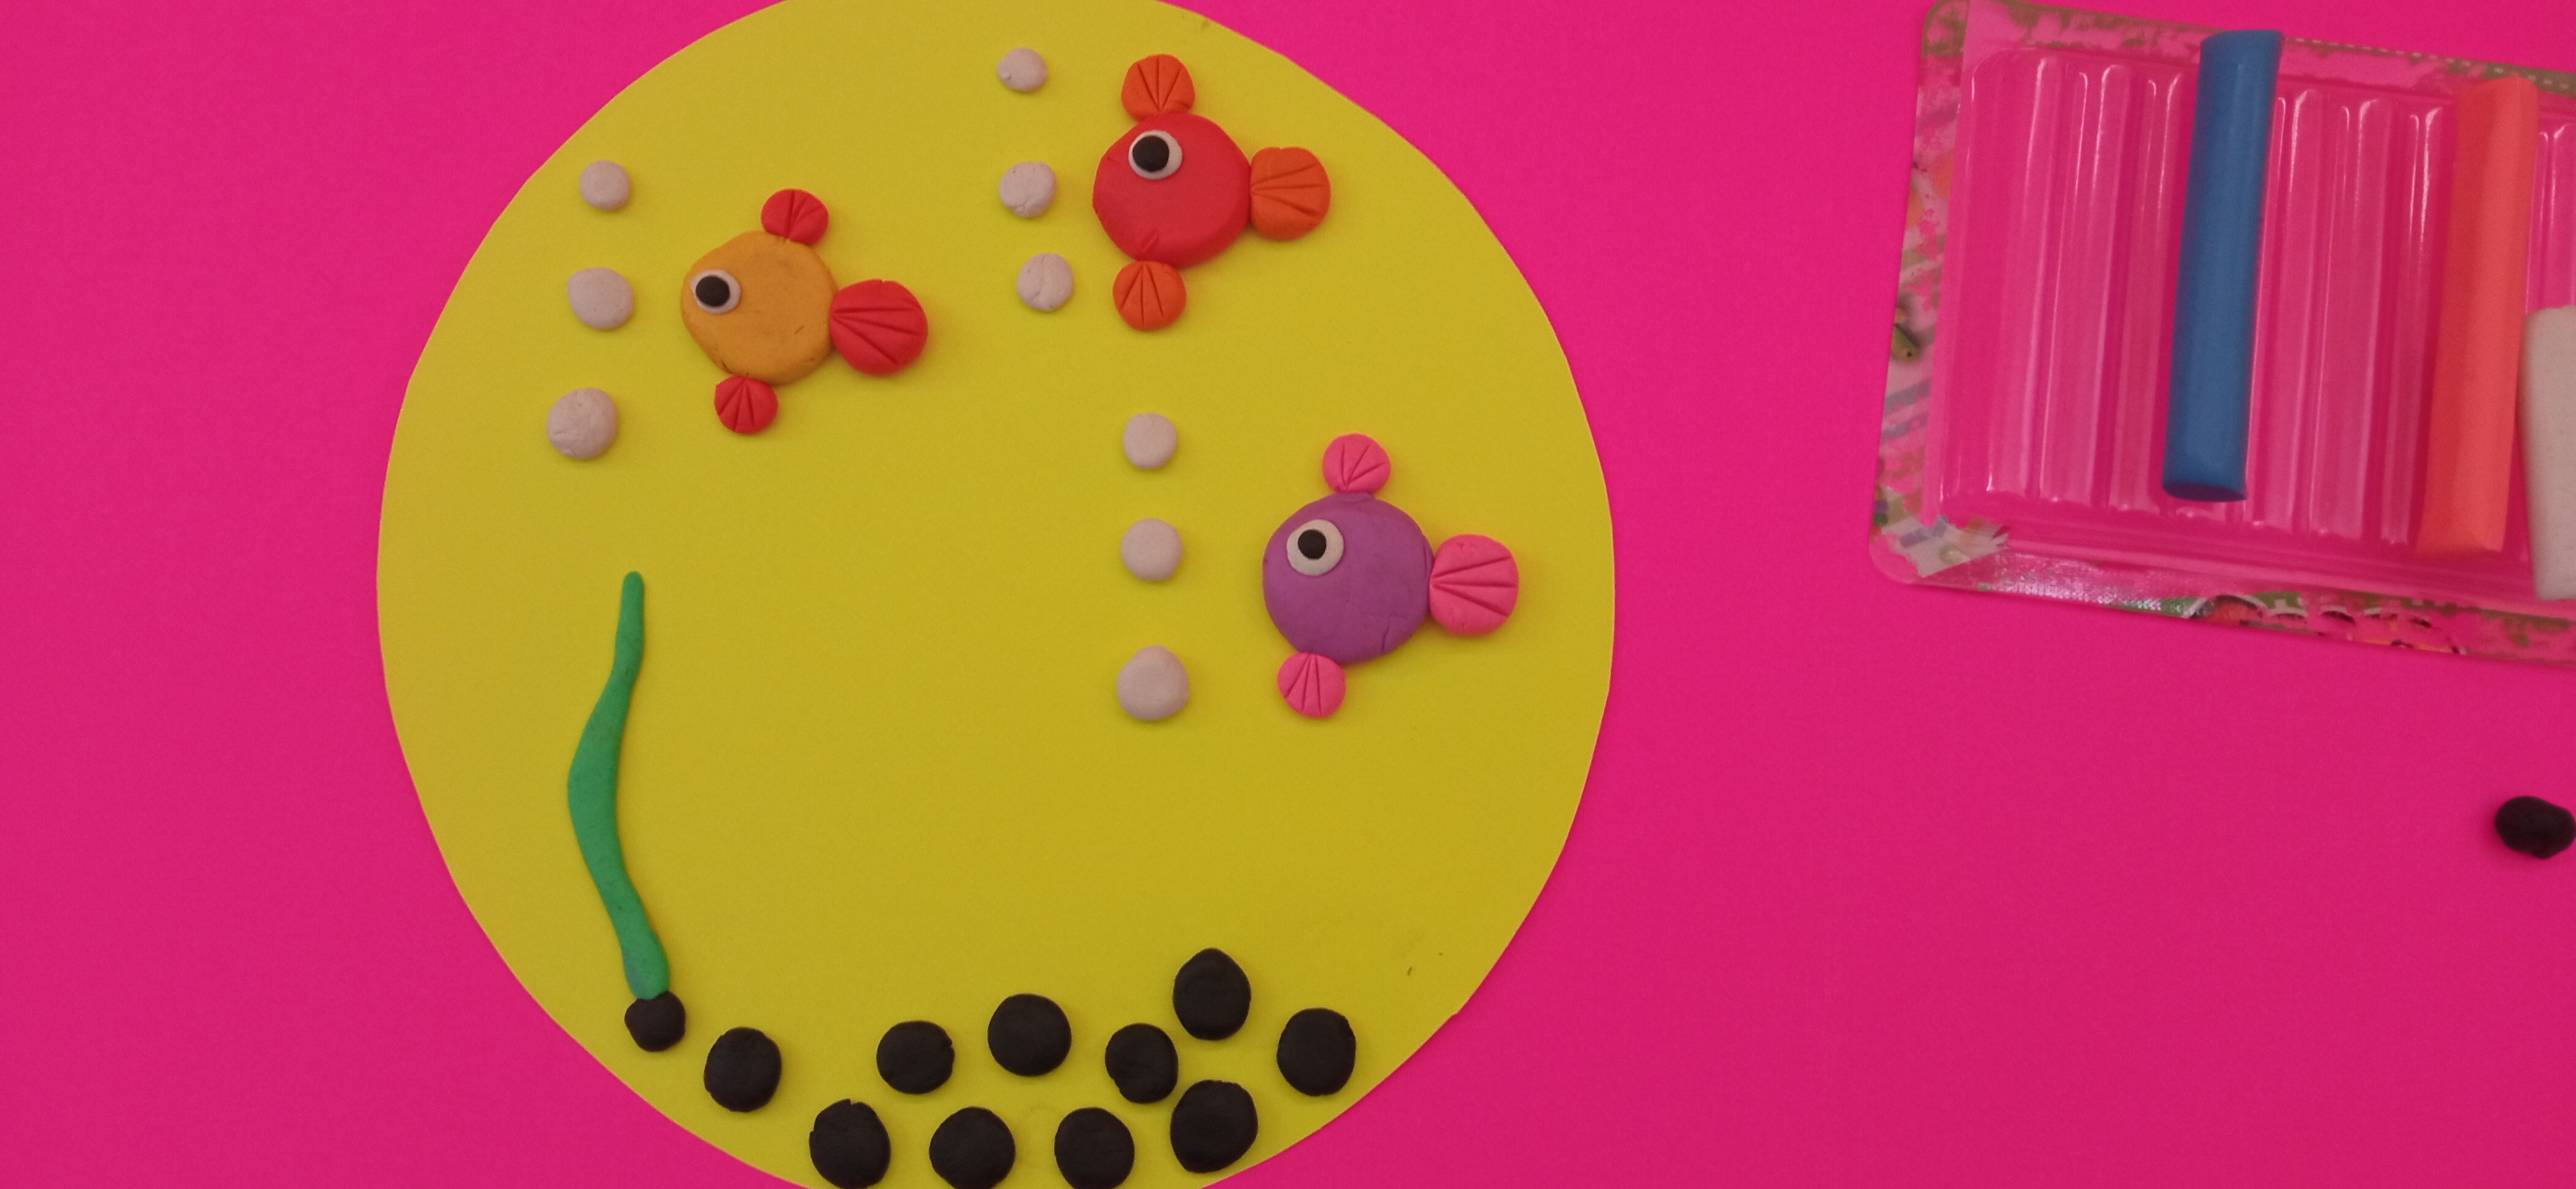
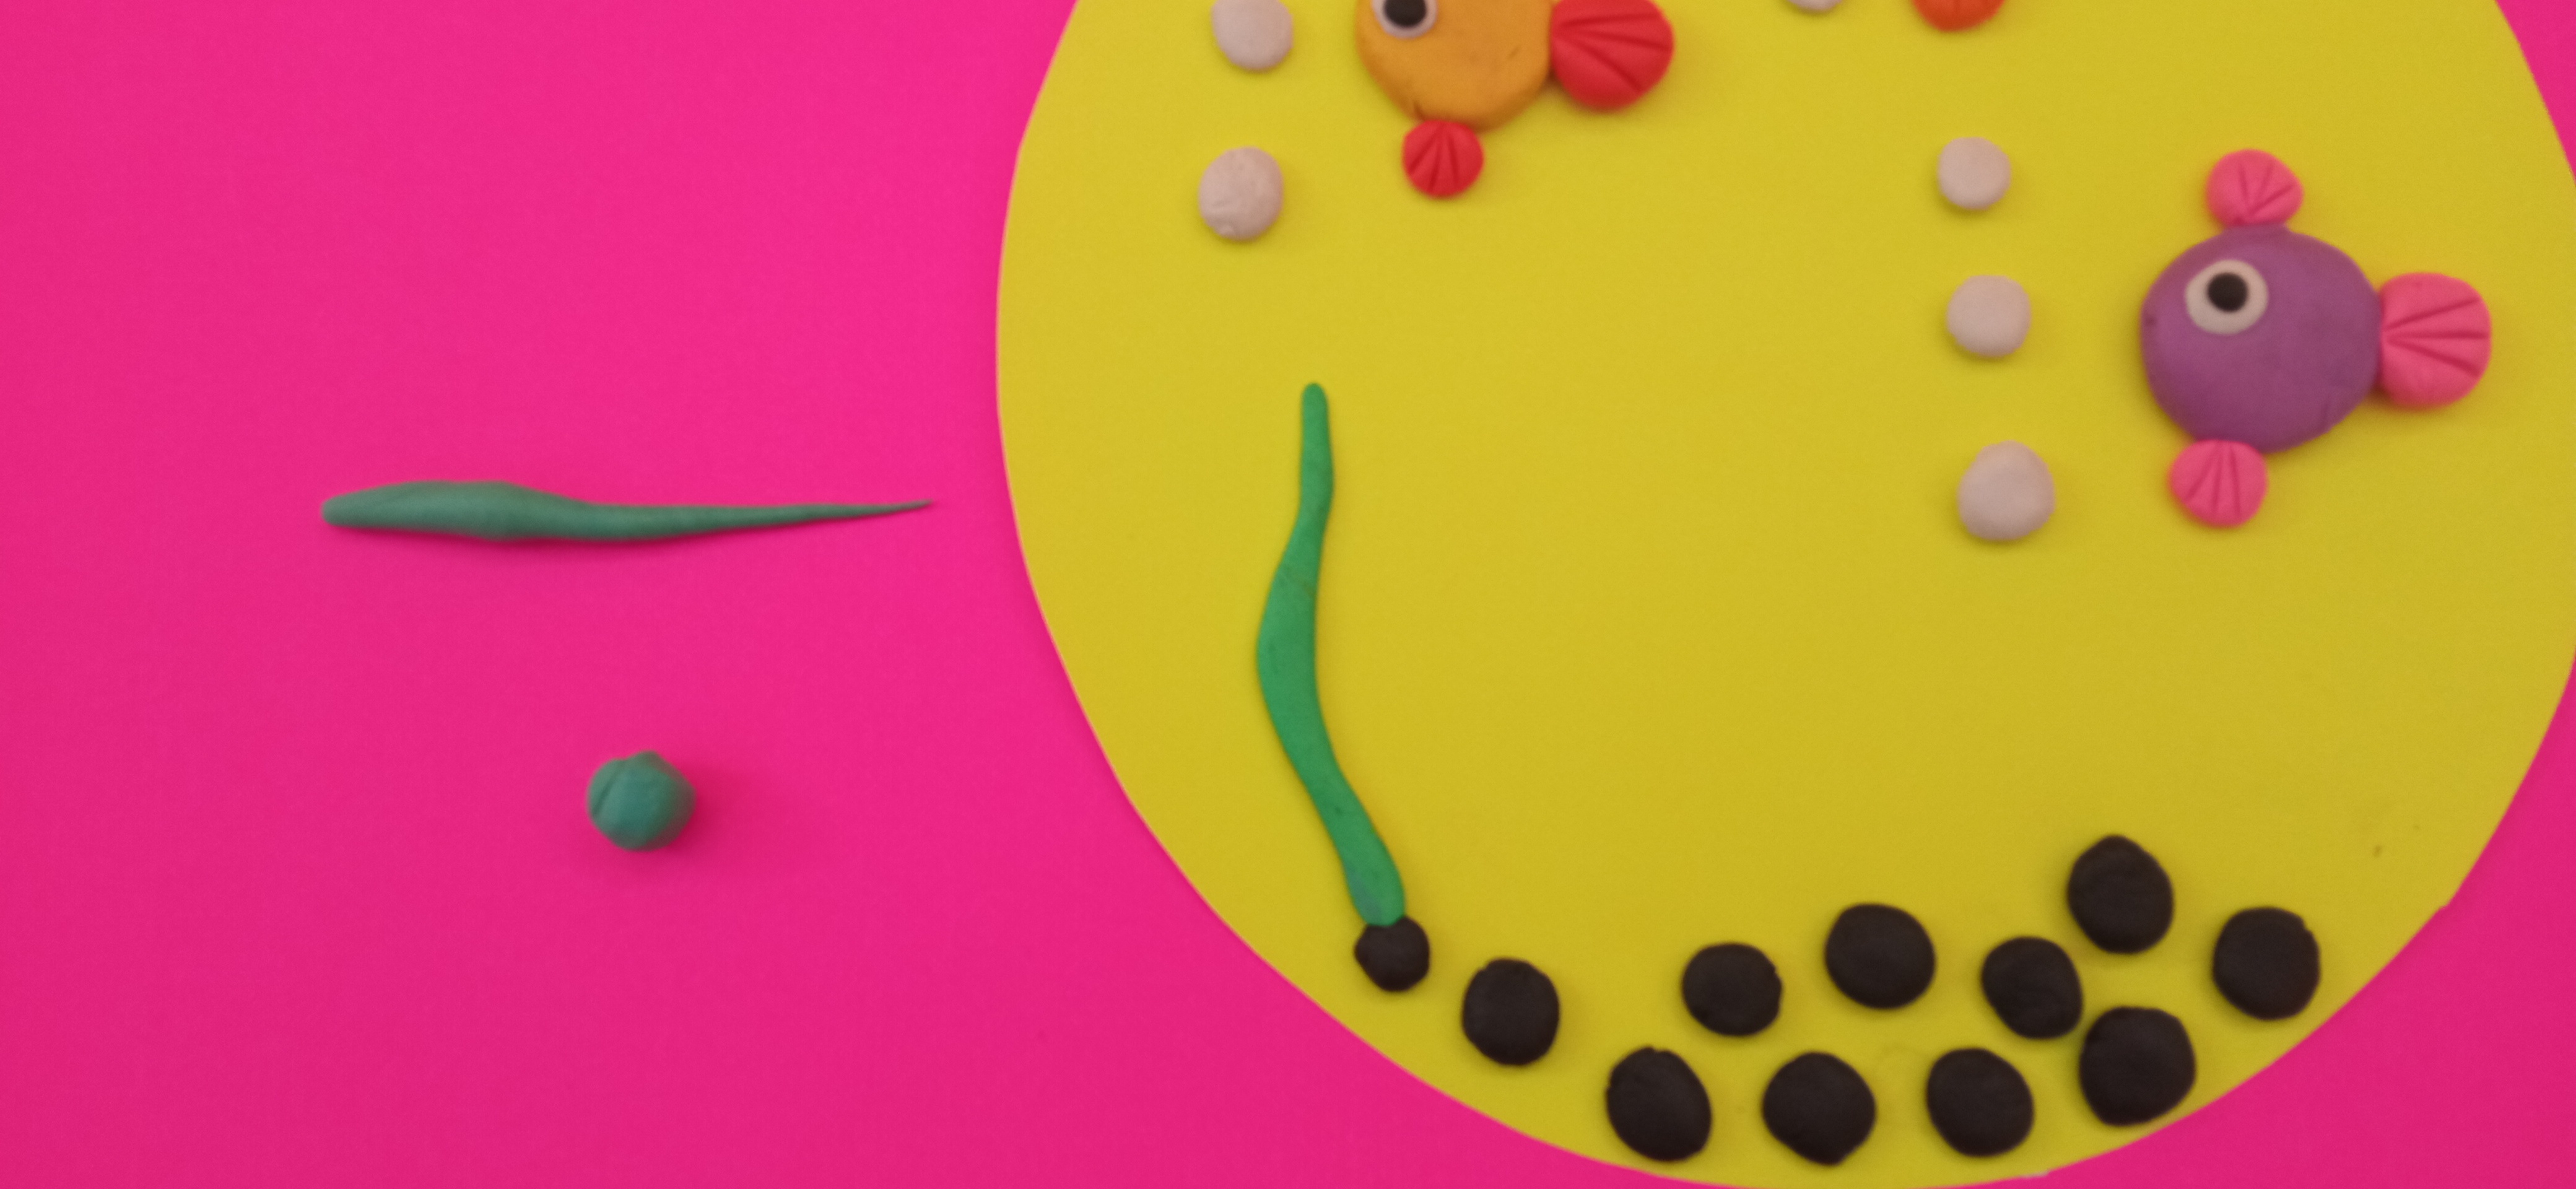
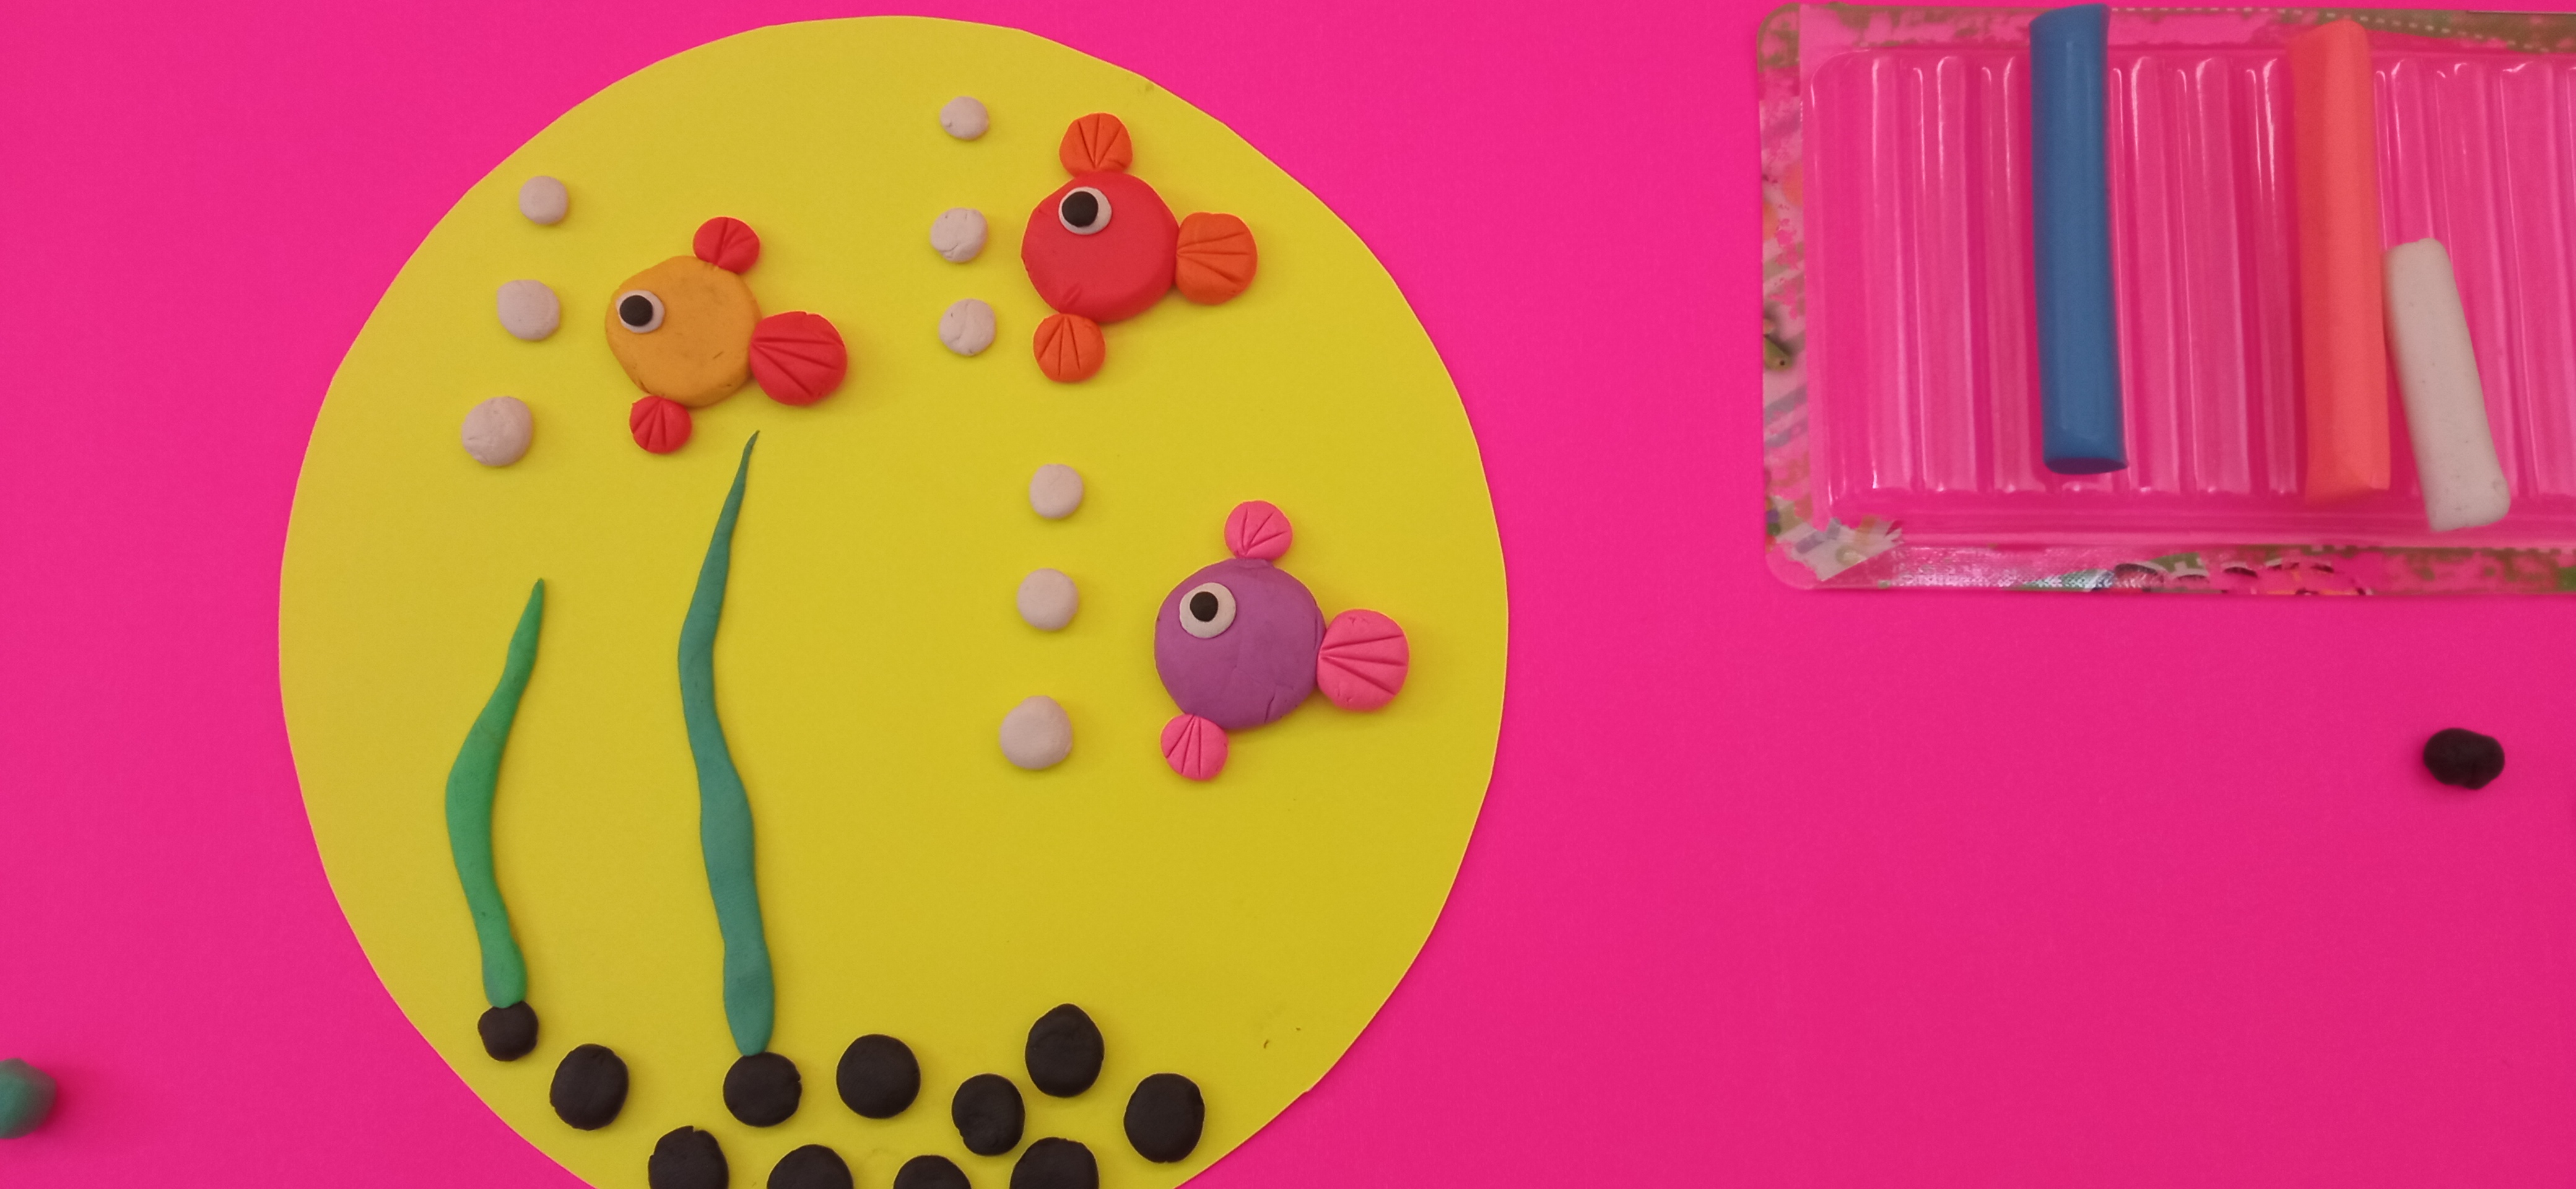
Para elaborar las algas nuestros niños seleccionaran la plastilina verde clara y verde oscura y elaboraremos tiras circularesy las presionaremos hasta aplastar y las moldearemos al gusto.
.jpg) | .jpg) |  |

REDES SOCIALES
Únete a nuestras redes sociales compartiendo de tu contenido; En nuestra cuenta de Discord podemos chatear de intereses y dudas entre usuarios... intégrate con nosotros.
Sean bienvenidos todos, pueden invitar personas a integrarse con nosostros y disfrutar de las actividades que traeremos aca en tu comunidad infantil.
Todas las imagenes son de mi propiedad y fueron creadas en canva.

TUTORIAL WITH PLASTILINE TO PROMOTE THE DEVELOPMENT OF CHILDREN AGED 2-4
Everyone is welcome to our children's community ONCE UPON A TIME , a community where the biggest dreams of our little ones embodied in art begin as a "STORY". .
Important Data
Benefits of Plasticine:
Plasticine has many benefits that favor the learning process of children since with its use the child imagines, creates and at the same time makes tangible the thoughts they have in their mind.
Plasticine is used as an aid to children's education to stimulate children's creativity and motor skills. With this practice, the child focuses his gaze on the activity and moves his hands and fingers. With the use of plasticine it makes it easier for them to learn colors, knead, soften, separate and join pieces, it also helps them to be aware of sizes and proportions which helps them to experiment and play with confidence and freedom.
Using playdough helps impulsive, restless children and is very beneficial for those who suffer from attention deficit or hyperactivity.
COLORFUL FISH
In this opportunity we are going to learn how to make colored fish with seaweed in plasticine.
MATERIALS
- colored plasticine
- Yellow Catulin
- Wooden pallet
Step 01:
We mark a large circle and cut it out to be our work template.
Step 02:
With black putty we will take small pieces and we will make them black balls that will be the stones of similar size and we will place them in the lower part and we will press them down so that they become flatter.
Step 03:
- We select the purple color and we will make a ball that we will press until it is crushed.
- We select a smaller piece of white and an even smaller piece of black.
- We select the pink plasticine and we will make 3 balls of different sizes, two of similar size and one larger; We will crush them and with a wooden palette we will press making 3 marks that will be the scales.
- We will assemble the fish by placing the large fashion that will be the body. the white one above it and the smaller black one that will be the eye; We will place the two pink fins one above and one below and the largest one will be the tail and we will place it parallel to the eyes.
Step 04:
- We select the red color and we will make a ball that we will press until it is crushed.
- We select a smaller piece of white and an even smaller piece of black.
- We select the red plasticine and we will make 3 balls of different sizes, two of similar size and one larger; We will crush them and with a wooden pallet we will press making 3 marks that will be the scales.
- We will assemble the fish by placing the big red one that will be the body. the white one above it and the smaller black one that will be the eye; We will place the two orange fins one above and one below and the largest one will be the tail and we will place it parallel to the eyes.
Step 05:
Like the previous two steps, we will do the same procedure but with different colors.
We select the yellow color and we will make a ball that we will press until it is crushed.
We select a smaller piece of white and an even smaller piece of black.
We select the orange plasticine and we will make 3 balls of different sizes, two of similar size and one larger; We will crush them and with a wooden pallet we will press making 3 marks that will be the scales.
We will assemble the fish by placing the large yellow one that will be the body. the white one above it and the smaller black one that will be the eye; We will place the two orange fins one above and one below and the largest one will be the tail and we will place it parallel to the eyes.
We will annex white balls and we will press them until they are crushed and we will place them in the form of bubbles.
Step 06:
To make the algae, our children will select the light green and dark green plasticine and we will make circular strips and we will press them until they are flattened and we will mold them to taste.
| | |
SOCIAL NETWORKS
Join our social networks sharing your content; In our Discord account we can chat about interests and doubts between users... integrate with us.
Everyone is welcome, you can invite people to join us and enjoy the activities that we will bring here in your children's community.
All images are my property and were created on canva.

Que bonito! quiero intentar hacerlo 😍😻
Hola pequeña, muchas gracias por postear en nuestra comunidad.
Congratulations @hive-182967! You have completed the following achievement on the Hive blockchain and have been rewarded with new badge(s):
Your next target is to reach 50 comments.
You can view your badges on your board and compare yourself to others in the Ranking
If you no longer want to receive notifications, reply to this comment with the word
STOPTo support your work, I also upvoted your post!
Check out the last post from @hivebuzz:
Support the HiveBuzz project. Vote for our proposal!
Hola amiga "Ger" gusto en poder saludarte por este medio
Que excelente publicación la que presentas, llena de colorido y muchas imágenes. Mantienes un orden específico con las fotos mientras das una correcta explicación del uso de la plastilina haciendo o dando forma a los peces que estan como en una especie de burbuja o pecera amarilla. ¡Qué lindo!
Detallando cada uno de los pasos a seguir para realizar este arte de manualidades. Voy a buscar quién de mis sobrinos tiene plastilina para ponerlo hacer manualidades.
Me gustaría aprender todos esos detalles gráficos que se mueven ¡son geniales! Ya te había dicho que soy cegatona pero muy detallistas (risas). Tan sólo pespero que tengas éxito en la promoción que haces.
Saludos @hive-182967
hola amiga, que linda, muchas gracias por tu lindo comentario, es muy importante, un abrazo.